Reading Time: 5 minutes
A broken tractor tire valve stem can put a damper on your day. We use our tractors in some pretty rough terrain, but I’ve found that dealing with brush and felled trees is my danger zone. Things get bent, broken, stabbed, and wrapped up when I’m in a mess of brush, which leaves me with some inconvenient breakdowns.
Most modern small farm tractors have tractor tire valve stems that include a metal body. You might think this makes them sturdy and resilient, but they’re not. Being a thin metal part, one well-placed piece of wood is all it takes to shear the stem off, whereas a rubber stem may give, bend, and return to position.
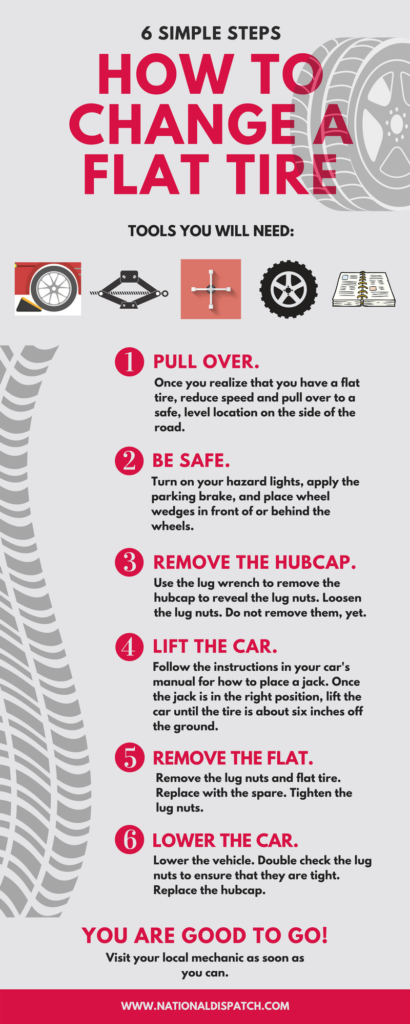
It’s never fun to have a flat tire on anything, let alone your tractor. What’s more, it seems that you’re almost guaranteed that you’ll get a flat tractor tire in the worst of spots and the worst of times. Be it mud, snow, or brush; it’ll be a challenge to your temperament and ingenuity at best.
If you have a bucket loader and a flat front tire, then you’re in luck! Using the edge of your bucket, it’s pretty easy to lift the entire front end of your tractor off the ground and out of whatever mess you’re mired in. Hydraulics do fade, and bucket loaders will leak, so be sure you put something under the tractor to act as a jack stand of sorts for safety. If you have a flat rear tire and you don’t have a backhoe attachment on at the time, then you may need to get creative with other farm implements or get a good old bottle jack. If all else fails, you may be able to avoid lifting your tractor completely.
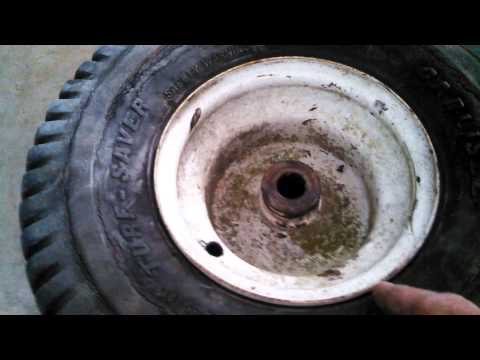
Where is the stem? Your tire is likely already partially popped off the rim, so rotate your tire either by driving on it, or spinning it if you manage to lift the tractor. Usually, the best position for the stem will be at the 3 o’clock position or the 9 o’clock position, but the environment may dictate the orientation for you. In either case, get the wheel turned so that you can access both the inside and outside of the stem hole at the same time.
Most OEM tractor tire valve stems include a nut on the outside of the rim. Because of the design of these stems, we need to remove this outer nut so we can knock the rest of the stem inward to remove it. For the sake of sanity, a cordless impact tool with an appropriately sized socket will do the trick, but if you don’t have one, you’ll likely need help.
I found that when trying to remove a stem with a ratchet wrench, the stem spins in the wheel. Be prepared to have someone hold the inside portion of the broken tractor tire valve stem with a set of vice grips or long reach pliers. Avoid dropping the broken stem in the tire; you don’t want to go fishing for it later. If you do have an impact wrench, I found that using a length of coat hanger wire to catch the remainder of the stem works out well. Just poke the end of the wire into the hole in the middle of the stem on the inside, unbolt the nut, and the stem should slide down the wire and into your hand.
For those of us using an off-the-shelf generic rubber stem, be sure you get the correct size stem for the hole in your wheel. Bring the old stem with you to the parts store, or measure before you go. Most valve stems are one of two standard hole sizes and any big box store with an automotive section or tractor equipment section should have them both. If you’re not sure which size it is, buy both and hold on to the other stem for another tire.
Thankfully, there are tools for pulling a tractor tire valve stem into a wheel. Stem puller tools come in various shapes and sizes, but the most common and cheapest tool is a simple steel cable with a fitting on one end to thread onto the stem and a handle on the other. If you thought ahead and bought a spare OEM tractor tire stem, then you may not need a pulling tool, just a wrench and socket. You may additionally need a spoonbill tire tool, a piece of steel rod, or a long breaker bar to manipulate the tire to gain access to the inside of the rim.
For a pull-through rubber tractor tire valve stem, feed the pulling tool into the wheel from the outside. Remove the threaded cap from your new stem and thread it onto the puller dangling inside the tire. Make sure the neck of the stem finds the hole in the rim and pull the stem out by the handle of the puller tool.
Pull until the tractor tire valve stem seats in the rim. If it’s too tight to pull, wrap the stem tool’s cable around the handle of a socket breaker bar and use it as a leverage multiplier. It should seat with a little tug. If you’re having a hard time pulling the stem through, try some dish detergent on the stem. Never use grease, WD-40, PB Blaster, or anything that may be deleterious to rubber. Those products may eat your valve stem over time.
Large tires, especially tall sidewall tires, are easy to manipulate on a wheel. Smaller tires like the ones on the front axle of this compact tractor may require an automotive type tire machine to remove from the rim.
Now that you’ve managed to install your stem, you have the challenge of airing a tire up with a broken bead. The “bead” is the edges of the tire that seal against the rim. First, use dish detergent or soapy water to slick up the beads of the tire and edges of the rim. If you were able to lift your tractor, put a ratchet strap around your tire and tighten it. This will compress the tire and help you get a seal. If you didn’t lift the tractor, you might have to roll a little on your flat tire to get a ratchet strap around your tire.
Once you have a ratchet strap in place, you may need to strike your tire with a mallet or dead blow hammer to finish seating the bead. Keep hitting the tire as you fill it with air to completely seal the bead. Once the tire holds air, spray the beads with soapy water and check for air bubbles. Strike the tire in the areas that show bubbles until they stop, which indicates that the bead sealed fully against the wheel.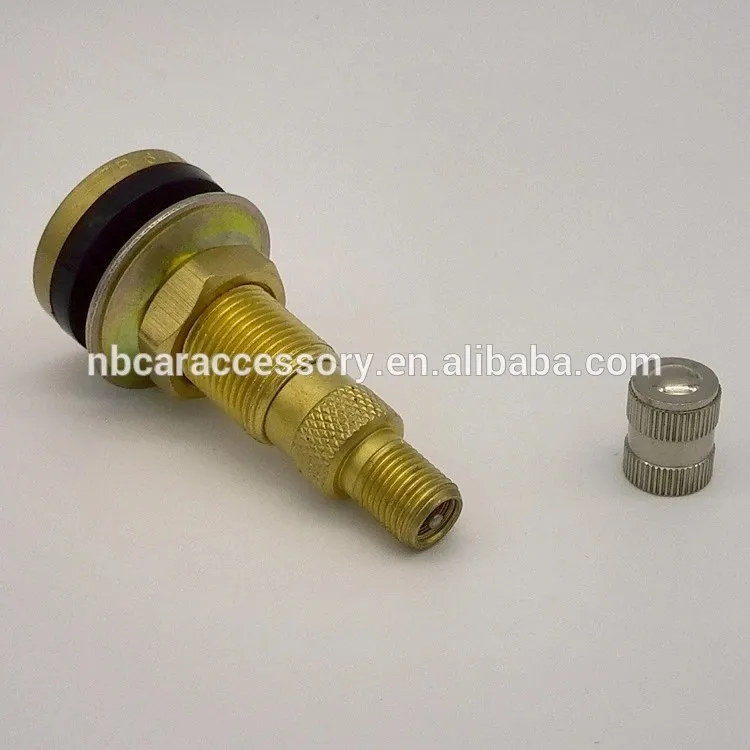
If you’re tired of flat tires and broken tractor tire valve stems, consider using tractor tire fluid, especially foam loading. Foam loading will turn your tire into solid foam core tire, which is difficult to replace once worn, but will never go flat on you.
Have you had to change a valve stem creatively? Let us know what challenges you overcame in the comments section below!
Yes there is an instruction sheet. Click here.
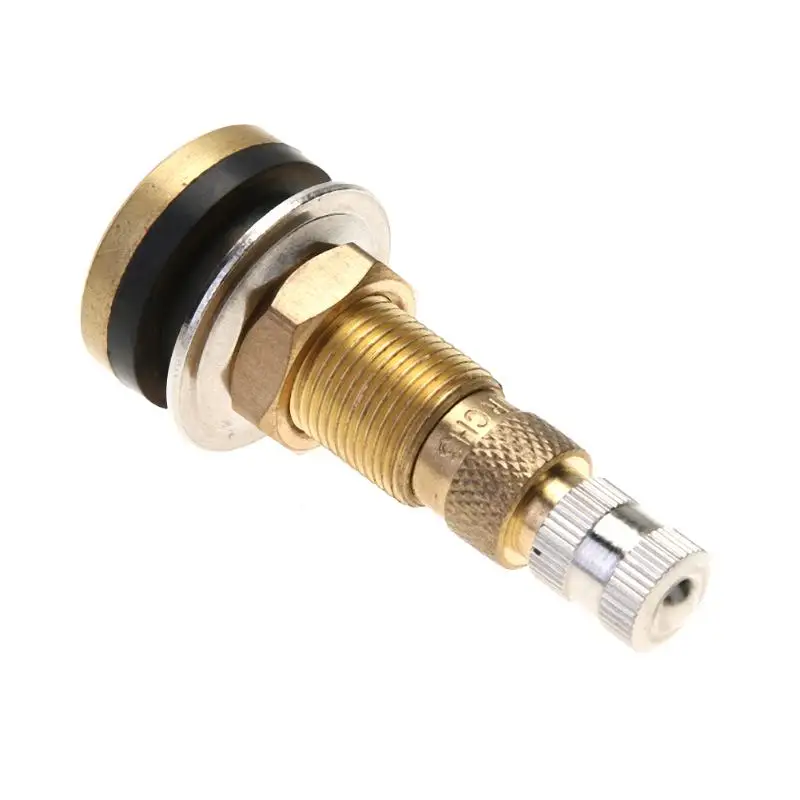
NO special tools are needed. The .625″ stem has a 9/16″ nut, so a deep walled 9/16″ socket works great. The .453″ stem has a 1/2″ nut (12mm works great, too.) Otherwise, any other pliers, wrenches, adjustable wrenches or channel locks will work just as well. Whatever the tool, about the most you will need to tighten is 3 to 4 revolutions of the nut. If you hear a squeak or feel the grommet turning, stop. You’re ready to roll.
A rubber snap in stem may be able to be removed in its entirety with a stem puller or stem hook, channel locks or vise grips. If not, cut it off at the rim. Any part of a stem that cannot be retrieved through the stem hole can be pushed into the tire. If you have a metal stem, remove the locking nut or collar and push the rest of the stem into the tire. Even Tire Pressure Monitor Sensors (TPMS) devices can be pushed into the tire. In on-highway vehicles, we do recommend you have that tire serviced at your earliest convenience – like maybe when you get home from vacation. In all but high-speed on-highway vehicles, the remaining piece of the stem can remain inside of the tire harmlessly forever.
NO. Do not lubricate QuikStem. If, for any reason, you find QuikStem wanting to spin in the hole as you begin snugging the nut, simply grasp the stem with a firm grip or a gentle squeeze of your pliers just until the nut starts to snug and the rubber seal takes hold of the inside of the rim.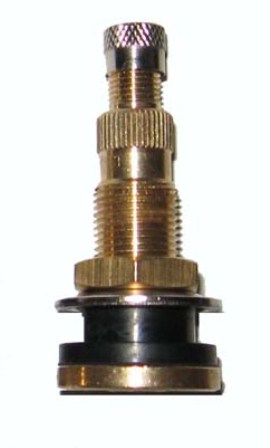
Just snug the nut down to the washer firmly finger tight. No more. Keeping the nut this snug will also keep it from backing off the threads in your toolbox or pocket. A quick wrap of electric tape around the barrel of your stem will also prevent any possibility of the nut coming off during long storage.
If the rim and hole are in serviceable condition, no. If there is excessive rust or any sharp burrs or gouges around the rim hole, those should be gently cleaned up with a wire brush or small file. Do only the minimum necessary to clean up the hole. It does not need to be perfect and you want to avoid enlarging the hole. In most cases, no prep is necessary. Install and go. QuikStem’s patented 3-Way seal works from the inside of the rim, the outside of the rim and expands within the rim hole itself to make a perfect seal even in imperfect rim holes.
BOTH tires that failed on QuikStem creator Todd Johnson’s 90hp John Deere tractor over the span of 3 days in early 2014 were inner tube tires that dry rotted and cracked at the stem.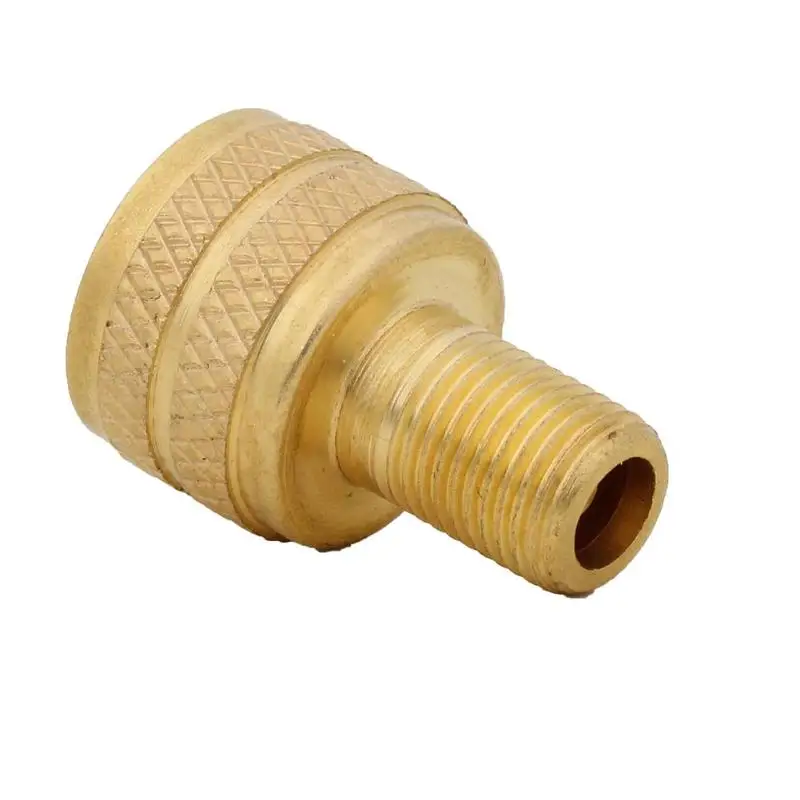 Just push the remainder of the stem into the hole, insert QuikStem, inflate and you’re back in business. One of QuikStem’s early prototypes – not nearly the quality of the version you can purchase now – has been performing flawlessly in an inner tube tire since early 2016.
QuikStem is the ideal fix to get a fluid filled tire back in service fast. At first sign of a leaky valve stem on a fluid filled tire, pull the vehicle forward or backward until the valve stem is at the top of the tire, and, if you can, jack the wheel to just a hair off of the ground. This will take the pressure off of the tire and its contents. In most cases, fluid filled tires are only filled to just below the top of the center of the rim.
The easiest and fastest way to install your QuikStem is to use your 9/16″ deep wall socket attached to its ratchet handle as your insertion tool. In some cases, if you’ve been leaking fluid out of your innertube into your tire for some time, some fluid may want to escape as soon as you push in the old stem. The fix is to remove any outer locking nuts from your old valve stem, and using your socket wrench as the insertion tool use your QuikStem to firmly push the old stem into the tire, and keep firm inward pressure on it as you start to snug your QuikStem’s locking nut. Your QuikStem will seal your rim hole and the grommet will begin to expand as soon as you start tightening. We recommend no more than 3 to 4 revolutions of the nut. If you’re using your ratchet in 1/4 circle arcs it could about 12-15 reps. Third or half circle arcs will be fewer. DO NOT OVER TIGHTEN! You are compressing rubber. It is not meant to lock down metal-to-metal tight. Just snug is plenty. A firm shake of the stem should produce just a slight wiggle. You’ve made a seal that will last for years!
QuikStem will seal your fluid filled tire indefinitely. Of course, some of your fluid will leak out of your inner tube into the main cavity of your tire, so if you or your mechanic are concerned with its long term effects on your rim, you can choose to service the tire later at a time that is convenient for you after you’ve finished your job – or your entire season.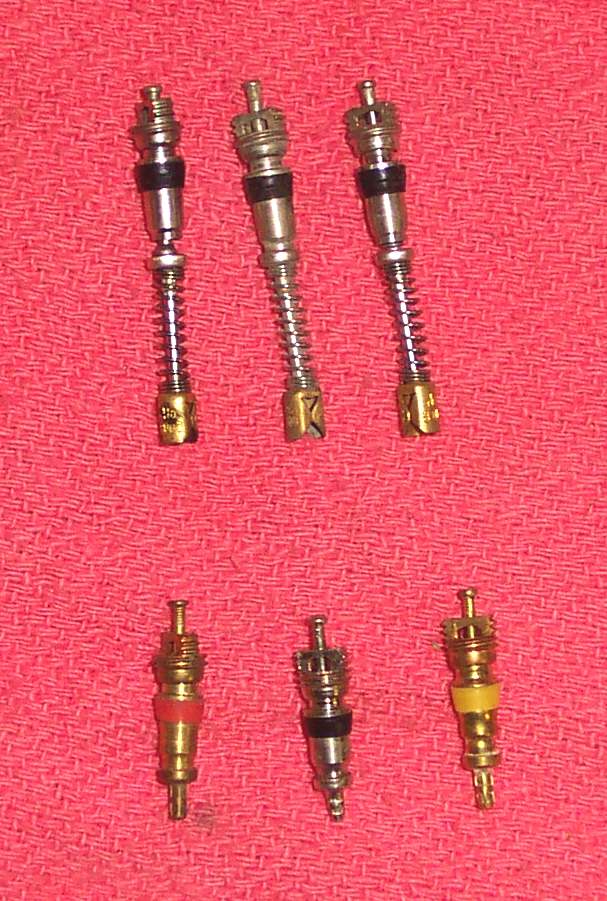 Until then, you can keep working with confidence. Remember, liquid and iron need oxygen to create rust. If it brings you peace of mind, at your next opportunity, if you simply remove the air at the top of your tire and have it replaced with nitrogen, you can dramatically slow, or halt, any inner rim corrosion.
Note: The inventor of QuikStem has been running QuikStems in his 90hp John Deere tractor for years. One of his rear fluid filled tires has been under heavy use with a QuikStem in it for more than 3 years now. Looks and works like the day it was installed.
Of the more than 70 tires on his ranch, 17 now run QuikStems. Some have been running for years.
Yes. QuikStems use a standard replaceable valve core that can be removed to install sealant. Especially with the .453″ stems, you can also just remove the whole stem, install your sealant and reinstall your QuikStem. I have found on some of my big tires that have had a .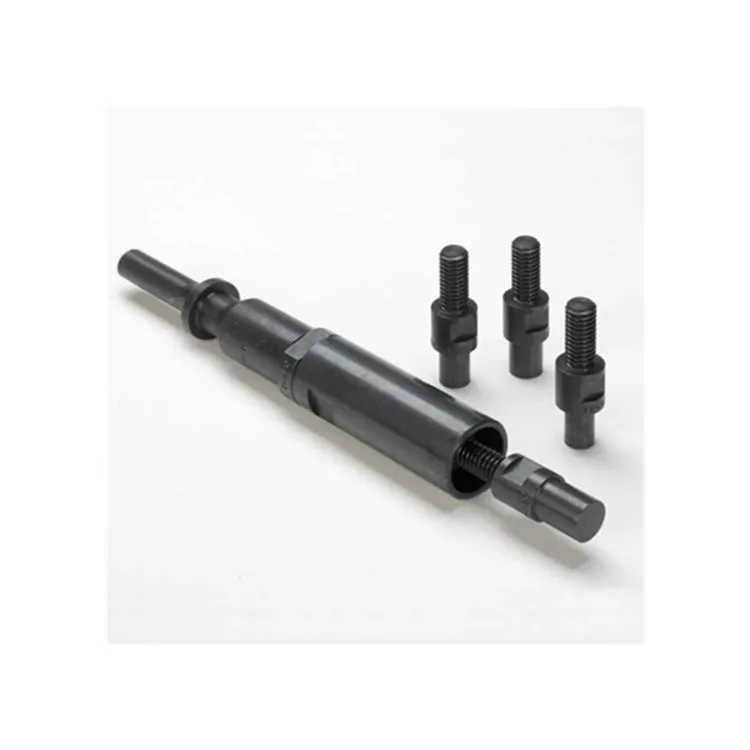 625″ QuikStem in them for years, the rubber takes a partial set in its expanded condition and may be difficult to remove. In that case, rather than risking damage to your grommet, just remove the core and install sealant through the stem. Of course that just goes to show just how rugged your QuikStem is.
QuikStem has been working flawlessly in off road applications for over 5 years without any issues, so you can feel confident that QuikStem will get you back to work and keep you working until/if you should choose to return your tire to factory condition. In most off road applications QuikStem can be considered a permanent fix. Of course, if you hit any stem hard enough, you can break it, so once you have your QuikStem installed in your tire, the only thing you really need is one more in the toolbox. That’s why they’re sold in pairs. Under normal use your QuikStem should last for years.
For On Highway Passenger Vehicle Applications, you can trust QuikStem to get you back on the road fast so that you may complete your journey.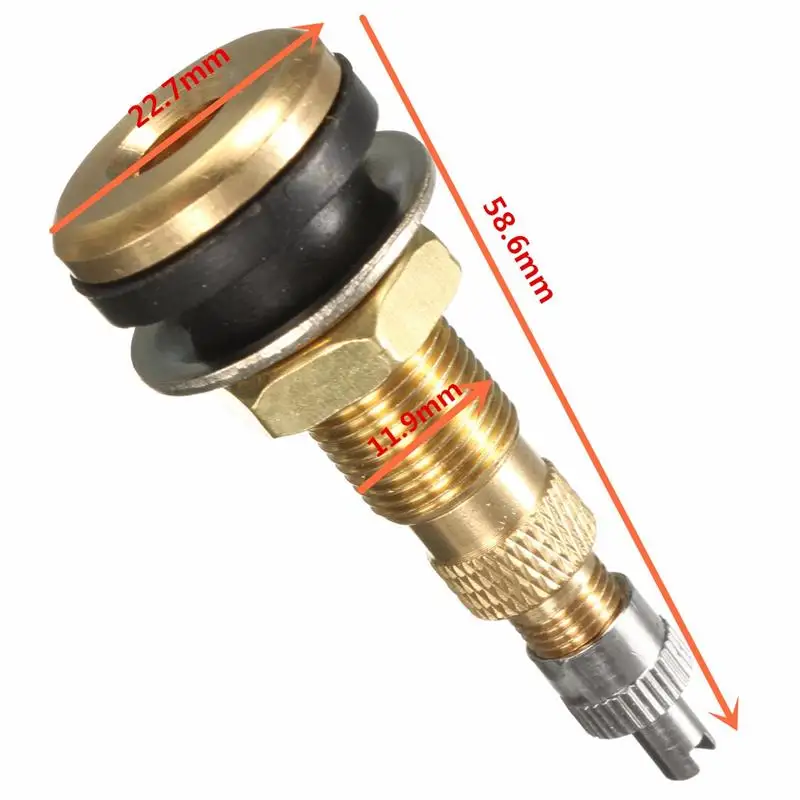 Only out of an abundance of caution, we do recommend having a certified tire mechanic service your tire to your manufacturer’s standard at your earliest convenience or within 1,000 miles.
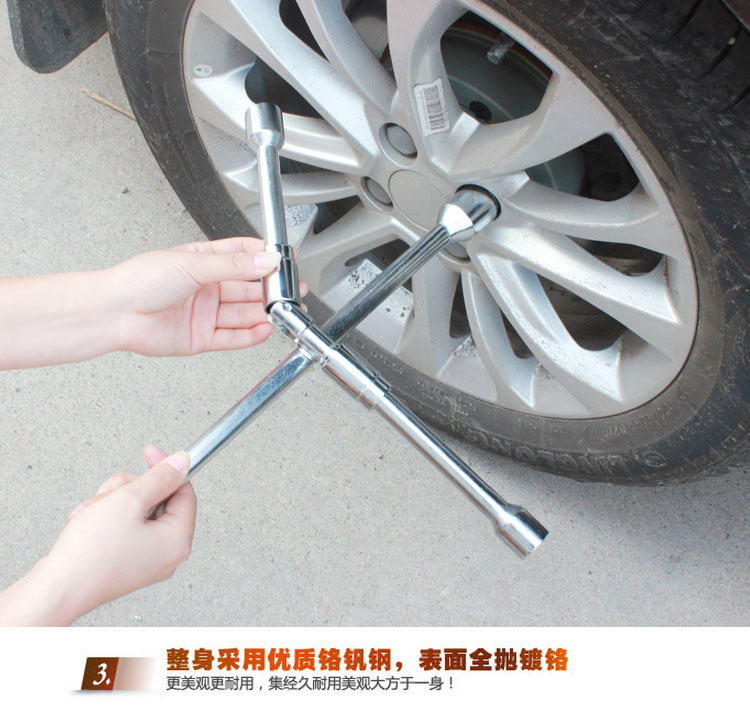
Mounting and dismantling of tractor wheels
Mount only serviceable tires, tubes and rims corresponding in size and type. The rims must not have mechanical damage, bends, crumpled edges, burrs and must be cleaned of rust and, if necessary, painted. Before mounting the tires and the camera must be powdered with talcum powder.
Mounting and dismounting is carried out by two workers using two mounting blades. The first blade is a lever, one end of which is made in the form of a fork and serves only for removing the tire beads from the rim landing shelves, and the other end (smooth curved profile) serves directly for mounting and dismounting the tire. The second blade is a lever, one end of which is made in the form of a flat profile and serves to remove the tire beads from the rim landing shelves paired with the fork end of the first blade, and the other end (curved profile with a special toe) ensures a secure grip of the rim flange during mounting and tire removal.
When mounting the tire on the rim, make sure that the direction of rotation of the wheel on the tractor matches the arrow on the tire. Mounting and dismounting is possible only when the diametrically opposite part of the tire relative to the bead being filled is sunk into the rim groove.
Mounting the tire on the rim is carried out in the following order.
Lay the tire on a flat surface and set the rim down on it with the rim closest to the mounting groove so that part of the tire bead enters the rim groove.
Insert the first paddle between the top bead and the rim so that the smooth curved end grips the bead securely. Acting as a lever, the mounted bead of the tire is brought over the edge of the rim. This operation is repeated several times until the installation of the mounted side does not cause difficulties.
To facilitate further installation, a second blade is used. Insert it between the tire bead and the rim and press the rim up. The first blade is moved closer to the wound bead of the tire and the previous operation is repeated.
Sequentially moving along the circumference, repeat this operation several times until the rim flange enters the tire cavity.
The last section of the rim is inserted into the tire by gently pressing both paddles simultaneously.
Place the tire at an angle to the wall. The rim is pressed against the wall so that the tire cavity is completely free, and, taking the chamber from the side of the valve, lead it into the tire cavity.
Insert the valve into the valve hole and fix it with a nut, while monitoring the correct position of the valve, avoiding its distortion. Put the camera completely on the rim.
Pull the rim towards you and inflate the inner tube to prevent the inner tube from being pinched between the tire beads and the rim.
Lay the tire on the floor. On the opposite side of the valve, both mounting blades are inserted at a distance of 250-300 mm from one another so that they securely grip the rim flange, and, pressing the blades down, push the tire bead over the rim flange.
Fig. 1. Mounting the bar
While holding the blade in this position, pull out the second blade and insert it at a distance of 50-100 mm from the first so that it captures the flange. By pressing the spatula down, the tire bead is pushed over the rim flange. Mounting is greatly facilitated if you press the tire with your foot at the same time. In order to facilitate the process of inserting the upper bead of the tire, it is necessary to sink the part of the tire opposite to the refueling bead into the rim stream.
Installation is completed with two blades at the valve.
Inflate the tire to normal pressure, then deflate the tire completely and inflate again to 2.5 kgf/cm2 (250 kPa). After the tire beads are seated on the rim shelves, air is released to the recommended tire pressure.
Remove the tire from the rim in the following order.
Completely deflate the tire. Remove the tire beads from both conical rim flanges using the fork end of the first blade and the straight flat end of the second blade. The boards are removed first from the shelf opposite the valve hole, in the following sequence:
1) insert the straight end of the second blade between the rim flange and the tire and press the tire bead down;
2) insert the fork end of the first blade into the formed gap between the rim flange and the tire so that the straight end of the second blade is in the groove of the fork blade;
3) press the tire bead down with the first mounting blade.
Fig. 2. Removing tire
The operations described in paragraphs 1, 2, 3 are repeated along the entire circumference of the rim until the tire beads are completely removed from the landing shelves.
Insert mounting blades on both sides of the valve hole at a distance of 100 mm and, pressing the opposite tire bead into the rim mounting groove with your feet, remove part of the tire bead beyond the rim flange.
Retreat from the removed part of the tire bead around the circumference to a distance where possible without.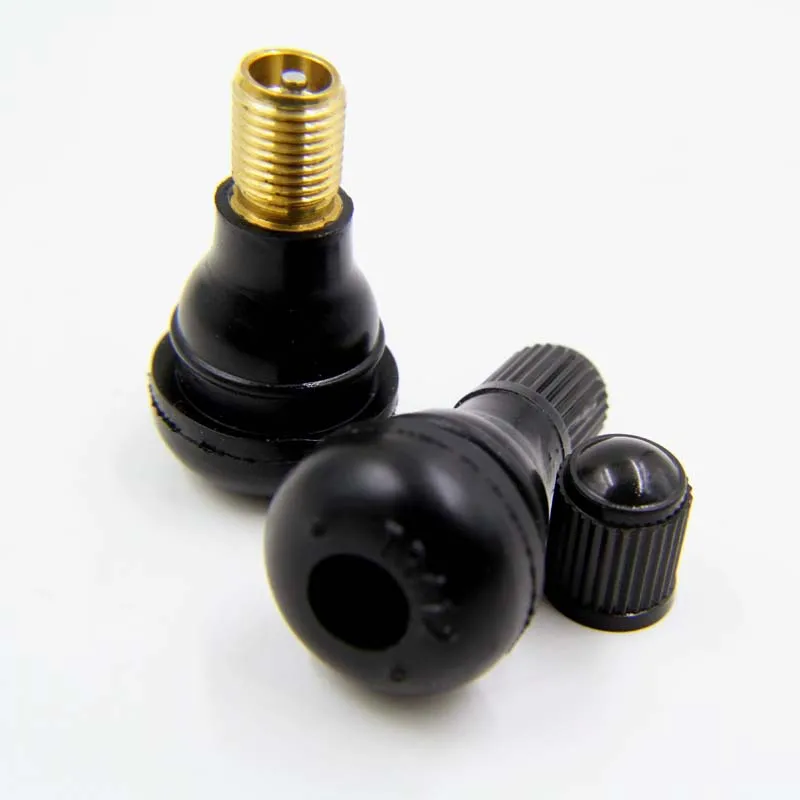 difficulties to get the second blade with a curved end between the rim flange and the tire bead, and again remove the tire bead 'by the rim flange. Repeating this operation, remove the upper bead of the tire. They put it obliquely against the wall and remove the camera.
Turn the wheel with the tire and remove the second tire bead from the rim.
To do this:
1) lift the rim up so that both blades can be inserted between the tire bead and the rim at a distance of 200-250 mm between the blades;
2) press the rim up first with one and then with the other blade;
3) insert the jack wrench next to the second mounting blade and release it, leaving the rim in the pressed state;
4) insert the bent end of the second mounting blade into the gap between the rim flange and the tire bead at a distance of 150-200 mm from the first blade or from the knob and, grasping the rim side flange, remove the rim from the tire.
The last operation is repeated several times until the rim is completely out of the tire.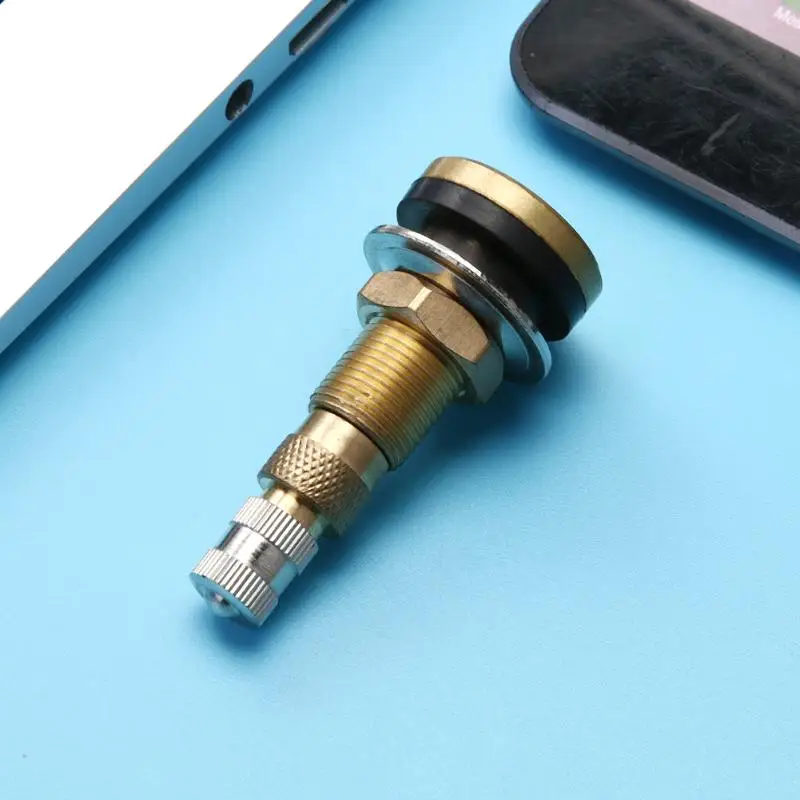
If a tubeless tire begins to deflate slowly, there may be more than one cause. This is both a puncture and an exit of air along the disk. Also often the reason lies in the wear of the nipple (valve). This little detail quickly fails, wears out, letting air through. Therefore, it must be changed periodically. You can do this without removing the wheel, without a jack, with four simple items in your hands and 20 seconds of time left.
The nipple replacement procedure itself takes very little time. But preparation for it involves the manufacture of suitable tools. Do not regret the time spent on them - they will come in handy more than once!
So, you will need:
 It must be made from a sheet of steel by welding a seam. The lower (wide) diameter of the tube is slightly larger than the cross section of the valve base. Upper (narrow) - according to the size of the hole into which the nipple is installed.
 The fourth item needed to change the valve in 20 seconds is a simple liquid soap - it will serve as a lubricant.
The machine must be parked so that the valve to be replaced is at the bottom.
Replacement steps:
 Then push it between the valve and the wheel so that the hook penetrates inside and catches on the base of the valve. By pulling, pull out the valve completely.
 That's it. After this procedure, you can (and should!) pump up the wheel and continue to operate the car without fear that it will go down at the wrong time.
Attention! When performing all manipulations, you must act carefully so as not to damage the parts and not get hurt.