There’s all sorts of information on bike tire sidewalls these days: Minimum and maximum pressure, rotating direction, bead type, casing type, rubber durometer, and on and on. Some of that is just for marketing and branding, but a lot of it is provided for more practical reasons. However, with tubeless tires becoming increasingly popular — and with more companies pushing the format — why are consumers still left to mostly fend for themselves when it comes to figuring out how much sealant to use?
I swap a lot of tubeless tires, and the tires span a wide range of sizes and widths that include nearly every possible variant between 700×25 mm and 26×4.6″. As a result, I admittedly might get a little more annoyed than most about how often I have to figure out much sealant to use in a particular tire: 30 mL here, 50 mL there, maybe several hundred mL elsewhere.
Most of the time, the amount of sealant required is dependent on the tire size, but as many of you already know, it also varies a lot on the tire model.
For example, something with a super supple and porous casing like from Rene Herse or Challenge might require more sealant than usual. On the other hand, I’ve found tires from Goodyear and American Classic require much less to stay reliably airtight. My fat bike tires? Those gobble up a whopping 200 mL each.
Yes, this hot stamp is already pretty darn busy. But I think there’s still one piece of information missing.While the tires change from day to day, one thing remains the same: the fact I need to look up, or at least verify, how much sealant I should ideally be using. But even that isn’t as straightforward as it should be since most sealant brands are frustratingly vague about how much of their product to use.
Take Stan’s NoTubes, for example. Without question, NoTubes is the most widely used sealant brand on the market, yet here’s what you’ll find on the company’s FAQ page:
“For a XC 29er tire (2.0-2.2”), we recommend 3-4 ounces (89-118 mL) of sealant as a starting point. The amount of sealant can be adjusted based on the volume of the tire. More sealant can also be added if a tire is particularly porous and difficult to seal. For road and cyclocross tires, we recommend 2 ounces (60 mL).”
So for a 700×25 mm road tire, the answer is 60 mL. A UCI-legal ‘cross tire? 60 mL. A 45 mm-wide gravel tire? Uh, apparently also 60 mL. And what if you’re running a 27.5×2.6″? Or a 650×42 mm? Your guess is as good as mine.
Orange Seal’s FAQ isn’t much better. It says to use “1-2 oz for 23–28c; 3 oz for 27.5; 4 oz for 29ers; and 6-8 oz for 3.0-5.0.”
Note there’s nothing listed for gravel tires, there’s a single recommendation for seemingly all 27.5″ and 29″ setups (2.0″? 2.6″?), diameter categories with no widths paired with them, and width categories with no associated diameters.
And Continental? There’s nothing I could find in text form, but this came from a video manual for its RevoSealant: “For a 2.0 or 2.1″ tire, squeeze 80-100 mL of Conti RevoSealant into the tire.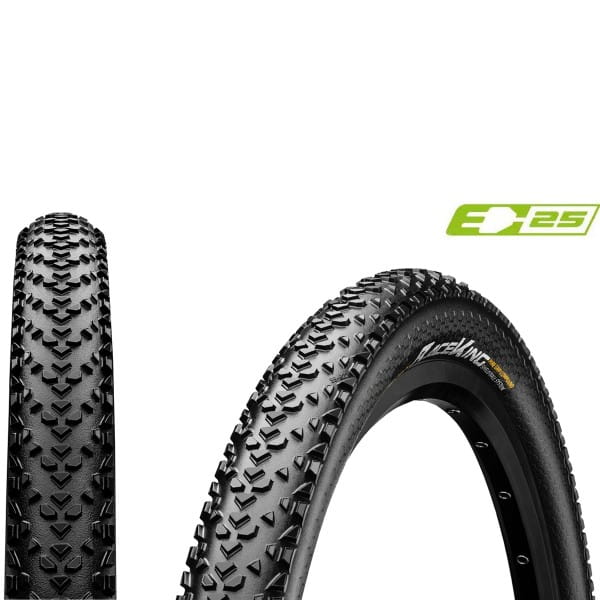 For a 2.2 or 2.3″ tire, the amount squeezed into the tire should be 100-120 mL. And for one 2.4 or 2.5″, 120-150 mL.”
Uh, what about road tires? Gravel tires? And no mention of tire diameter?
I think you see my point here.
From where I sit, it’s the tire brands that should have the best information on how much sealant should be used for their tires. They know what the actual casing surface area is for a given model, as well as how porous a particular casing may be. And yet almost none of the tire brands I spoke with provide that information to their consumers.
“As a tire brand, we can’t guarantee the quality and sealing effectiveness of a competitor’s sealant,” said WTB PR and product marketing manager Clayton Wangbichler. “Therefore, we can’t in good conscience tell somebody how much of a competitor’s sealant will be sufficient. I’ve used some sealants where an average amount of sealant works just fine, whereas others seem to require an ocean of sealant within the tire in order for me to feel confident in its ability to seal a puncture. Some sealant doesn’t seem to work at all, regardless of whether there is 2 oz or 20 oz of sealant in the tire. Other sealants are incredibly thick and therefore require more volume to fully coat the inside of the tire.”
“A tire is part of a system where only one component may be ours,” explained Goodyear president Luke Musselman. “Riders today can choose from a wide range of sealants available on the market, each of which may have different recommended volumes for a given tire size. Given that, we would point to the sealant manufacturer to provide the recommended volumes of their products for best results. ”
”
“Safe filling amounts are a feature of the sealant and need to be unambiguous,” said Specialized’s director of tires and tubes, Wolf Vorm Walde. “Different sealants may require different amounts. A tire brand cannot foresee what type of sealant riders fill into their tires. The sealant is a part of the wheel assembly. Mounting instructions have to come with any part of the assembly itself, especially when it is an alternative part as in tubeless ready tires.”
Does any of this seem a little silly to anyone else besides me?
Even NoTubes implies that its own somewhat broad guidelines are the result of variations in tire casings and dimensions.
“We keep thinking about trying to match specific tire width and diameter with sealant amount recommendations, but tire volumes and casing styles seem to vary so much that it’s tough to rely on that entirely — one of those cases where being too specific may be worse than offering general guidelines,” said Chris Currie, who handles brand and marketing for NoTubes. “We usually recommend 2 oz for road tires and 4 oz for 29″ mountain tires as a broad guideline. Personally, I use 2 oz in my 40 mm gravel tires and 4 oz in my 29×2.5″ Maxxis tires. I’ve had some tires (even the same brand) that seemed to be more porous and required a bit more initial sealant, though.”
It shouldn’t be this hard.
I agree that different sealants work differently, and that they may require somewhat different amounts for optimum performance. But in reality, most of them aren’t that different in terms of how much you need to use.I agree that there’s a fair bit of variation in how much sealant is needed for a reliably airtight setup, but in my experience, the major variable isn’t the brand of sealant you’ve got in your hand, but rather the size and porosity of the tire.
I also agree that some sealants are better than others (and some, like Finish Line’s thankfully discontinued first attempt, are positively awful). But most tire brands with their own sealants already recommend against using anything else, so I’m not sure why they have to further hedge by accommodating the lowest common denominator.
And yes, the tire is only one part of the whole tubeless equation. But it’s also the one that has the most influence on how much sealant should be used. “The sealant is a part of the wheel assembly”? Inner rim width might alter the total air volume, yes, but when you consider the main function of sealant is to plug up the interface between the tire and rim, and the casing itself, I hope you’ll agree that rim width really doesn’t matter here.
The one notable exception I found to all of this is Bontrager, which lists on the product page of every tubeless-compatible tire it sells a precise recommended sealant amount. A 700×25 mm R3 Hard-Case Lite gets 35 mL. The 28 mm version? 40 mL. And Bontrager recommends exactly 45 mL for the 32 mm size. And on the sealant side, Effetto Mariposa has a pleasantly precise online guide.
Wondering how much sealant to put into your Bontrager SE6 Team Issue TLR mountain bike tire? It’s right there, plain as day. Bravo, Trek. Bravo. Photo: Trek Bicycle Corporation.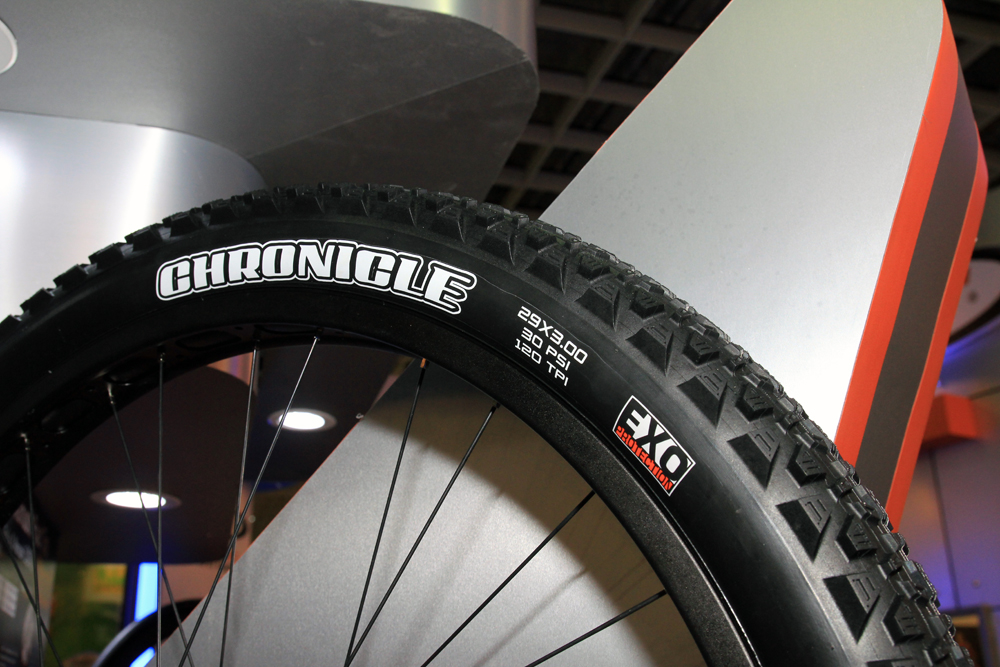
I get it. Although every one of the tire brands mentioned here makes its own sealant, none of them can guarantee that everyone will actually use that specific sealant. But in caving to that uncertainty, it seems that no one wants to be on the hook if a consumer doesn’t end up having a good experience with their product.
But that just seems like a cop-out.
Sure, the chances are good that someone will use something other than Bontrager sealant in their Bontrager tire. But the company’s verbiage is clear that Bontrager sealant is what’s recommended, and those volume specs at least provide users with a decent starting point. That person might end up having to add a little more if they live in a dry climate, or if their preferred brand of sealant just isn’t as efficient at plugging porosities in the casing. But isn’t that better than leaving people to guess?
Why should I be the one to learn on my own that my WTB gravel tires work best with slightly more of a higher-viscosity sealant than others? Can’t WTB tell me that since they presumably know their own tires best?
Perhaps there’s a little bit of light at the end of the tunnel, though.
When I suggested it, Bontrager marketing manager Alex Applegate sounded genuinely interested in the idea of printing these sealant recommendations right on the tire casing. After all, the company has already done the hard work of determining the proper sealant amounts for each of its tubeless-compatible tires, so how much more would be required to just put that number right on the tire’s hot patch?
“That is a great idea!,” Applegate said. “We are going to look into it.”
For sure, it’d be a design challenge to figure out how and where to incorporate a sealant volume recommendation directly on a tubeless tire. But it still seems like a worthwhile endeavor.And Vittoria? “I hear you,” said the company’s senior vice president of product development, Ken Avery. “I think there is certainly room to innovate on this topic.”
“Well, [the idea of labeling tires with recommended sealant amounts] has been discussed, but they always end up deferring to rider preference and to the sealant companies,” said Schwalbe North America brand manager Nathan Forbes.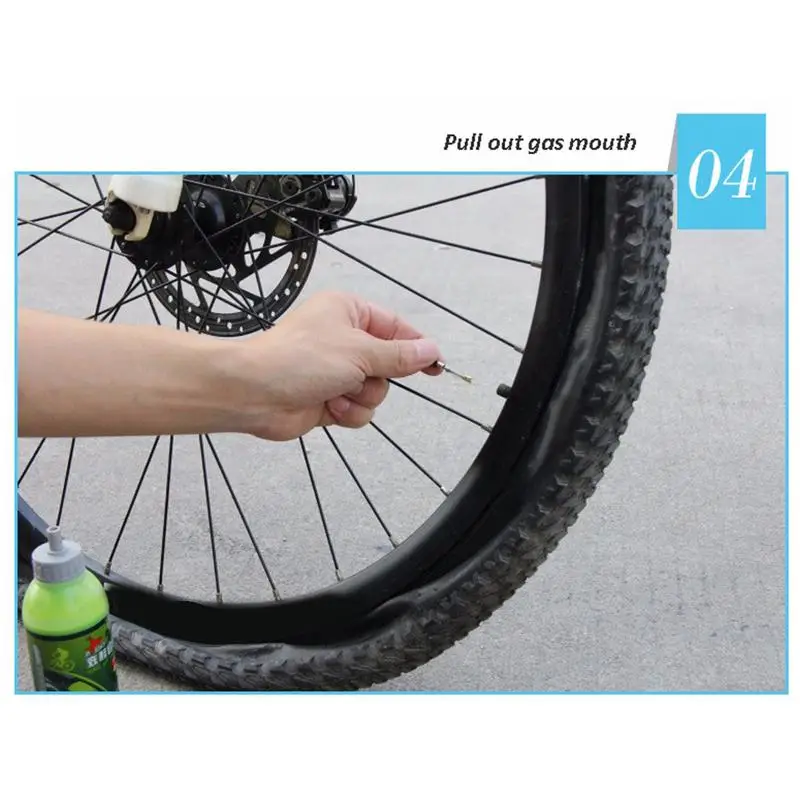 “The proponents of doing it say it would help simplify life for consumers. The people against say that it varies greatly depending on your type of riding and the type of sealant that you use.”
I’ll be the first to admit that tubeless bicycle tires are still far from perfect, especially for gravel and road. But now that legitimate tubeless rim standards have been established that tire brands can reliably design around, many of the problems we’ve been dealing with to date should progressively get better (and they already are).
It’s pretty obvious that tubeless is where the industry is headed across all performance categories. But given how many times the industry has shot itself in the foot on the topic — and how much it clearly wants tubeless to be widely adopted — shouldn’t tire companies want to make this as easy as possible for people?
JRA is an acronym well-known to bike shop employees, usually applied to customers submitting warranty claims that are clearly invalid (“I was just riding along when my top tube dented!“). It’s in part an homage to James Huang’s long tenure as a shop mechanic, but also the title we’ve given to the collection of random musings that are regularly published here on CyclingTips. Most — but not all — of them are tech-related, but either way, they reflect what’s been on his mind and what he’s been thinking about when he’s just riding along. Follow the link for other JRA posts.
JavaScript is disabled. For a better experience, please enable JavaScript in your browser before proceeding.
1 - 20 of 37 Posts
 ..
.. 1 - 20 of 37 Posts
 Please consider creating a new thread.
Top
5/5 - (4 votes)
Buying the best tubeless tire sealant means less time fixing flat tires and more time on trails. Find out everything you need to know to choose the right sealant for your ride
The best tubeless tire sealants seal punctures and cuts in your tires before you find them, which means more time to ride and less time to fight. dirty tires on the side of the trail. However, self-sealing punctures are not the only benefit of tubeless tyres. Tubeless tires allow you to use much lower tire pressures, which means more grip and control on rough descents without the risk of punctures or snake bites, meaning you can go faster.
While you often hear horror stories about trying to convert tubeless tires at home, fitting a tubeless tire to a tubeless rim is very easy these days, and there's no risk of accidentally pinching tubes when fighting on narrow tires.
We tested a range of the best tubeless tire sealants to see which ones work best and which ones you shouldn't mess with at all. Even the best mountain bike tires have punctures or blowouts, so don't delay installing tubeless tires or topping up sealant. Not sure where to start looking for tubeless sealant? Check out our guide on how to buy the best tubeless tire sealant.
Contents
Muc-Off is a great all-around investment - Expensive, but pink mix.
Type: Downhill / Enduro / Road | Maximum hole size: 6mm | Service life: 6 months | Price (1L): $39.99 / £29.99
Muc-Off Signature Pink Sealant is expensive, but well worth the investment as it works great in any situation. Both the price and the performance are not surprising when you know that the brand has been testing different recipes with every brand of tire and riding style for six years, and even built an oven to test compounds at different temperatures.
The result is a great combination of responsive agility, so it's great for commuting and even big sidewall splits on off-road bikes. We even managed to seal the crack and bulge of the carbon MTB rim so quickly that we rode it home without even topping up the pressure.
Sealant also glows under UV light (you get a UV Flashlight included with $14.99/£10.99 Sealant Kit and large 1L and 5L bottles) helping you find holes you might not have noticed at the time. moment, but you might want to plug for long term safety. It also shows micro-leaks in porous "tubeless" sidewalls so you know where to apply extra sealant. It lasts for a long time in all weather conditions, does not form boogers, pumps up CO2 perfectly and even smells good.
Reliably effective sealant at a very good price.
Type: Downhill / Enduro / Road | Maximum hole size: 6mm | Service life: 6+ months | Price (1L) : $48 / £18. 99
99
If this were a test of tire sealants for motorcyclists, farmers, truck drivers or diggers, OKO would be the most recognizable name here, but for most cyclists it's not even heard of . We even know some motorcyclists who use their tractor mix diluted for their bikes because they didn't know there were motorcycle versions. This is a little rough considering the British firm was one of the pioneers of liquid sealants for heavy duty tires back in the 70s. Even at full retail price, Magic Milk Sealer is half the price of some of the more established brands, and with online retailers regularly discounting heavily, it often makes for even better value.
Low price does not mean low efficiency. Magic Milk's standard formula is a non-allergic, ammonia-free synthetic latex blend that's great for covering porous tires and quickly fixing small to medium sized holes. It tolerates a wide range of temperatures well, and while it covers tires well, it doesn't "boil" so after a few months you'll just need to restock. As the name suggests, Magic Milk Hi-Fibre contains microfibers to close large holes faster, and costs the same as regular mix, so MTBers don't overpay.
A fast-acting, race-proven, environmentally friendly sealant that is low cost.
Type: Downhill / Enduro / Road | Maximum hole size: 6mm | Service life: Not specified | Price (1L): $25 / £18
Called the "white gold" of tire sealants by many testers, Squirt's SEAL Tire Compound is fast becoming a staple for mountain bikers around the world - especially those who tackle hostile and frequent impassable trails of marathon stage races and needs quick puncture protection.
Squirt's SEAL Sealant is not limited to mountain bikes, it can also be used on road and gravel tires. In addition, the sealant is compatible with both tubeless and tube tires and provides effective puncture sealing.
Available in three bottle sizes - 150ml, 1L and 5L - Squirt Sealant is suitable for all sports and ensures every product is sustainable and environmentally friendly. In particular, this sealant is characterized by minimal or no bioaccumulation.
Expensive, but this improved version of the original is one of the best.
Type: Downhill / Enduro / Road | Maximum hole size: 6.5mm | Service life: 6 months | Price (qt): $44 / £32
Stan's No Tubes can be credited with launching the entire tubeless system with their ingenious conversion kits at a time when most tubeless tire and rim systems were a heavy, numb headache . You can still get the original latex-based sealant, and if you only need to cover a tire to seal and quickly heal small holes—like on a road—then a light mix will do the job just fine. It also comes in smaller bottles. The Race compound contains larger crystals in the same base compound and works much better for filling large holes and cracks that occur when riding off-road.
Both mixtures are resistant to a wide range of temperatures, and it usually takes more than half a year before they begin to form “Stanimal” clumps. However, it does not tolerate CO2 cartridges very well, and the smell is a bit pungent.
Fast acting foam sealant at a good price.
Type: Downhill / Enduro / Road | Maximum hole size: 5mm | Service life: Not specified | Price (1L): $24.90 / £19.99
Effetto Mariposa takes a very Italian approach to puncture repair with Caffelatex sealant. Not only does it have a light coffee tint, but the very thin, light mixture begins to foam as it passes through the holes, creating a characteristic "foam" when embedded. Not only is it fun, but it closes small to medium holes quickly and holds high pressure fairly reliably. Add to that a reasonable lifespan and a decent price for large bottles, and it makes for a great vehicle for road use. However, the base mixture is difficult to plug large holes and hold them after a puncture, so Effetto releases the additive "Vitamina CL" to more effectively plug large holes.
An effective but expensive natural recipe enriched with nuts.
Type: Downhill / Enduro / Road | Maximum hole size: 6mm | Service life: 6 months | Price (1L): $TBC / £39.99
Japanese tire company Panaracer didn't get into sealants right away, but its 2019 presentation was downright insane. Okay, not really nuts, as the main carrier liquid is natural latex rubber, but the gritty, hole-blocking ingredient is crushed walnut shells. This makes it the most natural sealant in existence, and - assuming you're not allergic to nuts - it's one of the kindest leather and bike mixes to spill. It works well too: it quickly clogs small and medium holes and holds pressure well after the walnuts are fastened with cotton. If you tap the tire a little in a circle to fill in the area, it will cope with large holes and significant cuts.
Good value for road users but needs additives for aggressive use.
Type: Downhill / Enduro / Road | Maximum hole size: 1-2mm | Service life: Not specified | Price (120ml): $32.37 / £25.99
Hutchinson was one of the pioneers of tubeless and tubeless-ready tires and also got into sealants early on. It is a very thin, lightweight compound designed to quickly coat porous tubeless tires and is slippery enough to make installation easier. All of this makes it suitable for road and gravel/cyclocross use, especially since the price is really good for a product shipped to a store rather than bought directly. Where it struggles is in sealing and holding large holes and crevices securely, so you'll have to add a few nozzles or another thicker latex-based sealer if you want it to withstand more traumatic conditions.
Affordable, easy-to-use sealant for small holes.
Type: Downhill / Enduro / Road | Maximum hole size: 6.5mm | Service life: Not specified | Price (1L): $29. 99 / £26.99
Another early adopter of tubeless tire technology (TLR), also typical of early generation compounds. With the advent of tubeless road tires, it has found a second life, as it quickly gets to small holes and gaps and, as a rule, seals them well. It also covers the tires well and makes installation easy, which is especially helpful if you're using super-tight rims and Bontrager tires. It also remains mobile for a long time over a wide range of temperatures, does not contain ammonia, and is therefore relatively safe for leather, leather, and metal. The sealant represents a decent price compared to its competitors, although it only comes in a quart bottle.
If you want it to deal with more serious damage, you will need to add some glitter or something to the recipe, and Bontrager's recommended doses (for example, 60 ml for 29er) are clearly not enough for long-term and repeated puncture protection.
Works fast on small holes but less stable on larger wounds.
Type: Road | Maximum hole size: 6.5mm | Service life: Not specified | Price (250 ml): $13.05 / £10.99
Vittoria's Pit Stop TNT (or EVO version) is worth considering if you're prone to small holes that need to be patched quickly before you lose a lot of pressure. It is a very liquid mixture, so it spreads easily over the tire, helping with installation, sealing porous carcasses and quickly getting to any holes.
The latex compound also seals very quickly, so pressure loss and spatter on the frame is minimal, and the plug generally stays in place afterwards. However, it is not as effective at plugging large holes and cuts/holes in the knobs, so it is less suitable for aggressive off-road use. It's also more expensive than more stable and versatile blends like the original Stan's, and while the double-head bottle looks original, it's actually more awkward to use than a standalone scoop.
Great for large holes, but very expensive and requires regular refilling.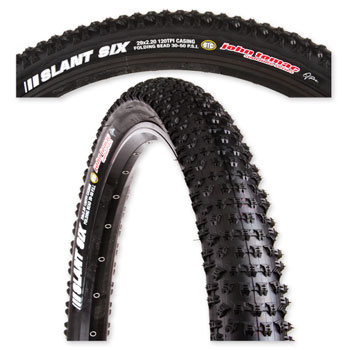
Type: Downhill / Enduro / Road | Maximum hole size: 6mm | Service life: 45 days | Price (8 oz): $20.99 / £16.99
Orange Seal may be pricey, but it has little equal when it comes to quickly plugging big holes. We've had good results seeing the compound fill holes a couple of mm over the advertised 6mm limit without losing pressure, and it also coats porous lightweight tires very well.
You'll be lucky if it lives up to the advertised 19mm, but the nanite-enriched mix works well with partially torn gaps on the handles and common roadside cuts, not on swords. The latex-based compound is also quite resistant to temperature extremes, unless you are going to be cycling on ice. The downside is that it degrades very quickly (4-6 weeks is Orange Seal's recommended refill time), making it an expensive refill.
Although the Endurance version doubles the life, it does not close medium to large holes as well. Even when it plugs large gaps, it struggles to withstand the higher pressure before bursting. It is still useful as a mix for road and gravel tires, especially for porous "tubeless ready" tires that need a good base coat of sealant.
Sealant is designed to do exactly what it says on the bottle: plug small holes in tires to stop air from escaping. The base fluid is usually water-based (glycol or propylene) with the addition of cellulose thickeners or a latex-based blend. They remain liquid in the tire, so they spill easily towards the puncture site, but solidify when pushed through a small pressure hole. The exact composition of a sealant determines how thin it is and how it reacts when it gets to a puncture, in terms of sealing speed and the size of the hole it can plug.
For example, Specialized's RapidAir is designed to quickly seal small holes in road riding, while Orange Seal's Endurance mix is slower moving but can block large holes, making it more suitable for MTB use.
While the base fluid mix is important, most sealants include extra "pieces" to help seal the hole faster. Depending on the brand, they can be called differently: particles, additives, crystals, polymers, fibers, etc., but, as a rule, the more particles, the larger the hole that the sealant can plug. However, thinner sealants get to the hole faster, so if you're low on air, it's best to use a thinner mixture.
Since tubeless sealant seems expensive and the weight of the bike increases, it's tempting not to add much. One thing to remember is that you are replacing an inner tube which can range from 100g (road) to 250g (large MTB) and cost around $20 / £12 depending on how astute your shopping is, so overall you win on weight and cost when using tubeless sealant. The bottom line is that the more sealant in the tire, the more you have to plug several holes or keep trying to plug one big one. Although different manufacturers offer different quantities, we believe that a relatively simple formula based on twice the amount of sealant per mm of tire width (e.g. 50 ml for a 25 mm tire, 80 ml for a 40 mm tire, 120 ml for a 60 mm / 2.4" tire), just enough to cover the tire and leave some for plugging holes. If you know you'll be driving regularly to cactus country or broken glass roads, use more. Also, larger diameter tires will require more than smaller diameter tires.
You will only get the desired mixture of lumps and liquid in your tires if you shake the bottle well before loading it into the tire. Otherwise, the contents will settle in storage, and the first tires you fill from a large bottle will only contain useless liquid. This means that you will be left with sediment at the bottom of the bottle and not in the tires where it should be.
More modern compounds tend to retain the solution better inside the tires, and sealants will always perform and perform better in regularly used installations than those left in storage.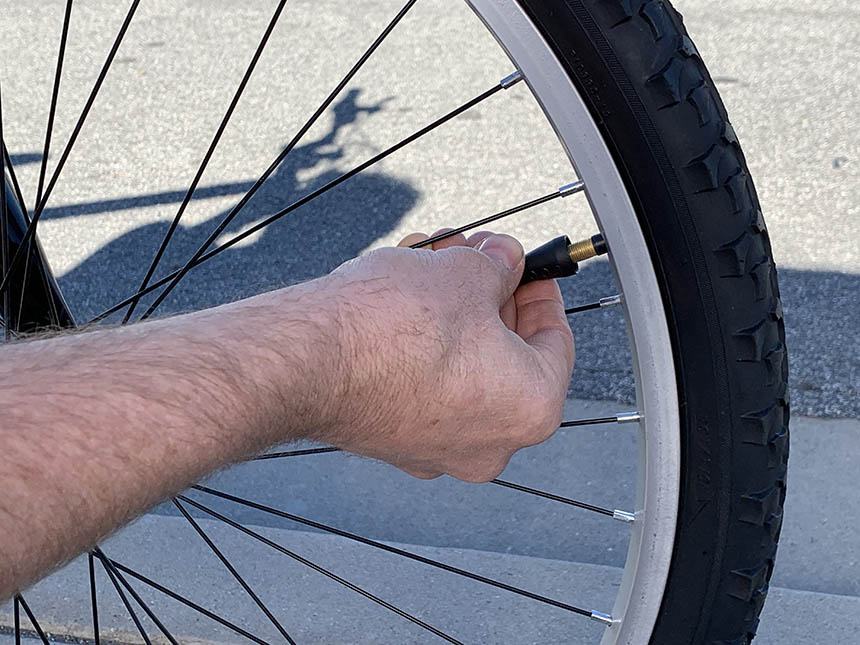 However, some recipes (especially older, simpler ones) can coagulate and clump together into boogers or stanimals, making the mixture much less effective at sealing holes. Very large lumps can even be felt when spinning light tires.
Various tire brands also list a wide range of tire life spans, from the optimistic OKO "lifetime" to "a little over a month" in Orange Seal butterfly style. Extreme temperatures can also affect different blends, so it's worth checking if you're heading to the Arctic or Arabia. Be careful when using CO2 canisters with some mixtures as the freezing point of the gas released can kill the mixture.
So, while annoying, taking the tires off to check the mixture is definitely a good idea if you want your tubeless system to work the way it should.
Although we listed various sealants in our puncture protection review, we actually used a few more in our search for the best. In the case of Schwalbe's Doc Blue, it's practically the same as Stan's original No Tubes sealant (made by Stan's), but more expensive. Continental's RevoSealant is very thin, so it's good for road tires, but it doesn't handle large holes and is expensive. We would actively avoid two brands, Finish Line and Peaty's, which are too thick to respond to road tire punctures until they completely deflate, and don't even plug medium to large holes very well.
Keep in mind that if you can't find your favorite, any of these recipes can be modified to suit your needs. Thick liquids can be thinned with more latex or a lighter solution, while thin liquids can be thinned with a thicker brand or DIY additives like glitter. Be sure to mix latex-based sealers with latex, and water-based sealers with water, though, or they won't work well together.
Finally, many cyclists make their own homemade sealants out of latex and glitter (art and craft stores sell both), and we even have a buddy who sprays sealant on OKO tractor tires for epic rides on plus tires. FYI, another buddy who tried the organic approach had bad luck with egg or milk based sealants and it's amazing how soon they start to really stink!
You may be interested:
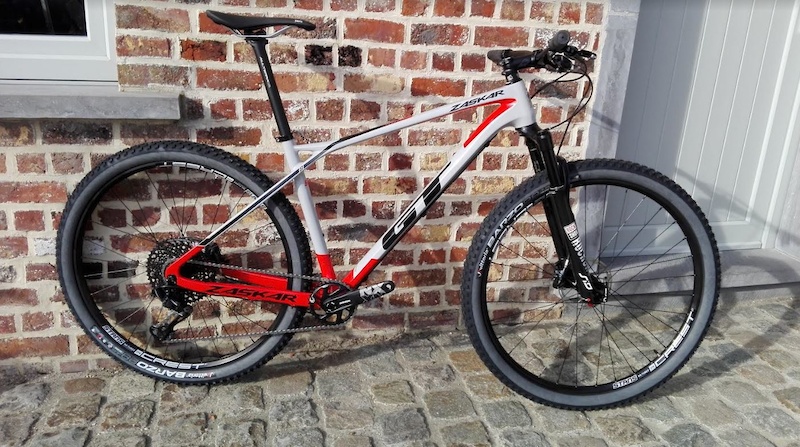 I myself got to tubeless only last year, along with a return to the MTB theme.
 Anyone who more or less seriously rides offroad and is still on cameras, I recommend that you carefully read the text below - only practice, only relevant info, no lyrics about UST wheels and ghetto tubeless. Perhaps I can convince you to look in that direction.
Well, the rest can also be found for development. This will only be about mountain bikes and hard off-road use, although there are also advances in this direction on the highway, but more on that another time.
Contents:
An advantage that is important for any rider, regardless of style and level of riding - you can forget about 95 percent of punctures. Any little thing, such as plant thorns, wire, small glasses, etc. sealed with sealant almost instantly. On chamber wheels, each such episode would turn into a seal / replacement of the camera.
Absolutely real picture
Ability to drive at low pressure.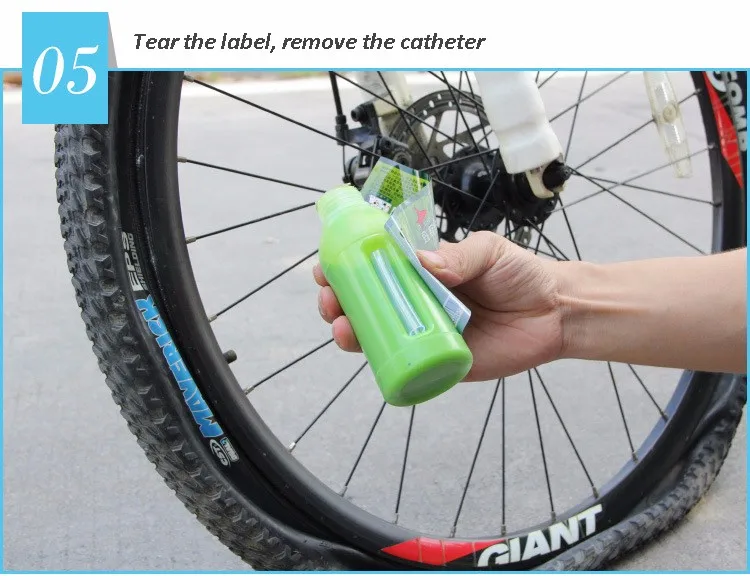 This point will be appreciated by cyclists who ride on a hard off-road, where there are a lot of stones, roots and loose dirt. A soft tire spreads over the surface, clinging to each tread cube, licks bumps, and it is extremely difficult to break it with a snake bite (but, of course, everything is possible if the pressure is too low - both the tire and the rim are crushed).
Therefore, to get the most out of tubeless, the tire pressure setting must be very precise. Let's take a conditional wheel weighing 80 kg and a 2.35 tire, with chambers it will have to fill at least 2 atmospheres, and with a tubeless wheel 1.5, or even less, will be enough. The difference in behavior on the ground will be enormous.
The next benefit is better cushioning, less vibration, more comfort. It is possible to have a bike with excellent suspension, but low-pressure tires, especially large-volume ones, are the best to eat small things. For example, I currently have a Schwalbe Nobby Nic 29×2.60 in front and a Maxxis Agressor DD 29×2. 50 in the back, my weight is within 100kg and I ride with 14psi/21psi (0.97/1.45atm) pressure - perfect. The grip is just crazy, the bike goes smoothly and rolls perfectly.
Tubeless wheels roll even better, and rolling resistance measurements do show some improvement over tubeless ones. Subjectively, it is difficult to feel, but in any case, the best roll forward, albeit a little bit, is not bad.
Well, the weight, where without it. Even with the sealant, on average, you can save up to 100g per wheel by eliminating tubes.
Let's start with the fact that tubeless tires are initially more trouble - to install them, you need special rims and tubeless ready tires, you need a special sealant, you need rim tape and nipples. And the installation process itself is not always simple and sometimes requires a compressor or booster.
Unrepairable outside the walls of the house or workshop. If you cut the tire badly and need to glue it from the inside, or it was torn off the rim due to too low pressure, then with a portable pump you will never put it back. There are two solutions to the problem: a CO2 cartridge with you, the pressure in which allows you to put a tubeless on a rim or a spare tube. Both options are good, I stick with the second.
It's expensive. If you have a simple bike or an old model, then its rims do not support the installation of tubeless, you need to buy new ones. The tubeless ready rubber itself is more expensive than the tubeless one, although lately almost all MTB tires in the most popular price range of 40-60 euros have been produced only in the tubeless version. Well, rim tape, nipples and sealant also cost money.
The sealant tends to dry inside the tire and coat the inside of the tire with a thin adhesive layer. Because of this, about once every six months, you need to remove the tire and scrape out all the muck. You can not do this, but simply add new sealant slowly as it dries, but then a layer of dried sealant will grow (nothing to worry about).
An important factor is that the rim must fit the width of the tire. Here are the options if the dimensions don't match:
Narrow: pear-shaped profile, poor steering, increased rolling resistance, tire feels rolled (floats)
Correct contact patch, tread cubes in place. Minimum rolling resistance with maximum grip.
Wide: Vibration absorption deteriorates, side studs catch on the road in a straight line, poor steering
First, make sure your rims are ready for conversion. To do this, you can google the description of the rim model, it should be labeled tubeless ready, TR, TLR. You can make it easier - look at the profile of the rim, it should have small indentations near the walls that keep the tire from falling off at low pressure in a turn. When installing the tire, as it were, snaps into these grooves and holds firmly there.
Rim tubeless ready
Unfortunately, stock bikes have only recently been fitted with such rims, and we are talking about models in the middle price segment and above.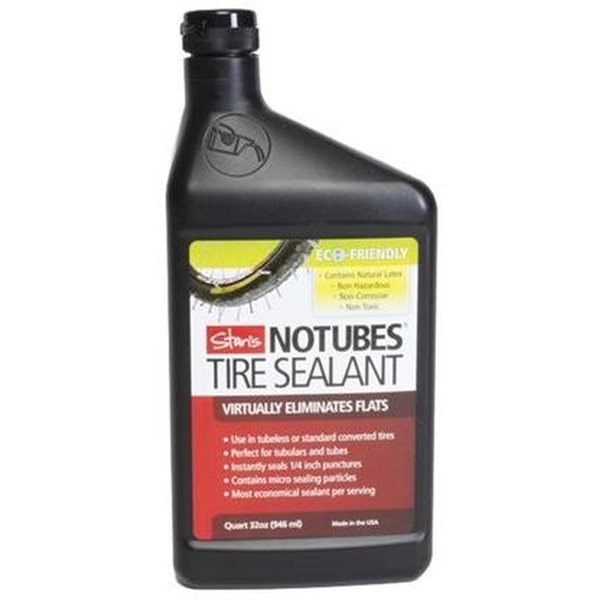
You can fit tires tubeless and on a regular rim, but the lack of these seats will not allow you to take advantage of low-pressure riding - the tire will simply rip off with a strong side load. On the other hand, even one such important plus as puncture resistance is worth it to switch to tubeless and on a regular rim.
So, to install tubeless tires, you need to buy these nipples, sealant and rim tape .
The size of the tape should be taken a little less than the inner width of the rim, let's say the rim is 25i, so the tape will be 23mm, give or take.
But here is a nuance, it is usually recommended the other way round, so that the tape is slightly wider than the rim, then due to the concave profile it will completely cover its entire width. At first I did this, but it turned out that when removed, the tire tore off the tape, jumping out of its seats. I bought tape already on the rim, to seal only the place where the spokes, and everything was fine.
Approximately 60 ml of sealant for one tire size 27.5x2.25, 473 ml cans will last for two seasons.
To put a tire on a rim, you must have either access to a compressor or a good floor pump (the latter does not guarantee success).
So, having prayed to the bicycle gods, we begin. We clean and degrease the inner surface of the rim, then glue the rim tape. You need to glue carefully, but with an interference fit, completely, the entire circumference, even with an overlap. One layer is enough. They pasted it, smoothed it with their fingers, made sure that the tape stood up evenly, without bubbles.
Now with something sharp, make a small cross cut at the hole for the nipple. We very carefully insert the nipple for tubeless tires into this cut and slowly push it through, put it in its place. We tighten the nut, confidently, but without fanaticism, it is not necessary that the sealing gum is deformed.
The job is almost done, it remains only to put the tire on the rim, but this is just the biggest problem if you do not have a compressor or booster. We do everything, as usual, first one side, then the second, preferably with bare hands, without the use of montages. If it doesn't fit, try my recommendation on how to put a stubborn tire on a rim.
If you have a compressor, then everything is simple - blow into the nipple, the tire will click into place and it's done. But if there is only a floor pump, then the chances of pumping up a tubeless wheel are 50/50. First you need to unscrew the core of the nipple (spool), with a special key or pliers, so that air enters the tire without resistance.
We turn on the pump, once again ask the mercy of heaven and begin to pump furiously. The harder you pump, the more air comes in, expanding the tire. With any luck, this will be enough and the bead cord of the tire will jump into its grooves on the rim. If not, then you swear and try to swing even more furiously. Most often, if the tire does not rise immediately, then it will not rise.
When I got tired of these exercises, I bought myself a booster - figuratively speaking, a bottle with a hose into which you can pump a lot of air by creating a pressure of 8-10 atmospheres. Then you connect this bottle to the nipple, open the valve, and watch with joy how the tire jumps into the right place.
Schwalbe booster is a useful item
An extremely useful booster item in the tubeless inventory. You can buy it, it costs between 40-50 euros. You can make it yourself, even from an old fire extinguisher, even from a 1.5l plastic bottle (google DIY tire booster). Also, if you do not already have a floor pump, you can buy a pump with an integrated booster, but it is quite expensive (like a regular floor stand and a booster separately).
Now that the tire is in place, screw in the spool and inflate the wheel to its maximum pressure to see if it deflates. Usually, at this stage, if there is an air leak, it is because the rim tape has not adhered well or is torn in the area where the nipple is attached. Then you have to disassemble everything and re-glue the tape. But most often the pressure holds, you can fill in the sealant.
Unscrew the spool again, and pour "milk" directly through the nipple, as much as necessary (about 50 to 100 ml is needed, depending on the volume of the tire). There are measuring bottles, but you can fill it with a syringe.
Schwalbe Doc Blue Sealant - actually it's a regular Stan's Notubes, so you can safely buy
When the sealant is poured, it is necessary that it spreads on the inner surface of the tire, for this, spin the wheel on the axle, tap it on the floor. Sometimes you can immediately see that in some places the tires had micro holes, sealant begins to ooze out of them. It's all right, nothing to worry about. Screw in the spool, clog the working pressure and go for a ride - this is the best way to get the sealant to the right place.
If what you read seems like a complex operation, it is actually very simple, taking about half an hour if for the first time. For visualization, here is a video for you on how to put a tubeless tire on a bicycle:
I deliberately did not touch on the topic of ghetto tubeless, this is when ordinary rubber is put on a regular rim. This topic itself is dubious, but if you have such a need, just google this phrase.
Sealants are different, at least four or five well-known brands make "milk", they have slightly different properties. Two main requirements: to quickly seal the punctures and not dry out for a long time.
I read somewhere a comparison of all the main sealants and there I came to the conclusion that these two claims are poorly compatible: either it does not dry, or it glues well. Therefore, most tubeless bikers use the old, trusted Stan's Notubes (or Schwalbe Doc Blue, which is the same). It dries up and every two or three months you need to add a little, but these are the costs of technology.
He glues all the little things instantly, cuts, of course, are worse, but also not bad. There is also a recipe for adding decorative glitter to the sealant to thicken the consistency and improve the sealing speed, but for me personally, what I have is enough.
How many atmospheres to fill is determined empirically. I take a small gauge with me on the trail and start riding, gradually reducing the pressure until I feel good in terms of smoothness, and in terms of grip, and in terms of overrunning. As soon as the roll has fallen and the tire has begun to "float" - stop, return to the previous level. It's simple, experiment once and then stick to these values.
Before I started using tubeless bikes, my bike had some average pressure for all roads. Now, before I leave the house, I inflate tires for a specific style of the current ride. Since I ride aggressively on hard rocky trails most of the time, I have an MTB setup, as I wrote earlier - 14/21psi, but if I'm going to roll far on asphalt, I stuff 20/28psi. Already very different behavior of tires at different pressures, I want to squeeze the maximum.
While riding a bike, you get pierced by something small, and on the go it is not even noticeable, you are driving, but it is just stuck. When something is more serious, and you can hear the “milk” hissing and splashing, it’s better to stop. First you need to lower the puncture site down so that the sealant penetrates well into the hole, and then start rotating the wheel.
The gluing process is similar to clot formation, contacting with air, the sealant particles become thick, new particles are deposited on them and a layer of hardened sealant grows at the puncture site from the inside. When the air has stopped oozing, you can pump up the wheel to restore pressure and drive on. The whole operation usually takes a minute or two. Compare how much it takes to change a camera.
In 95% of cases, self-sealing a tire is quick and painless, but sometimes there is a large cut or tear, then the sealant simply cannot cope. In the field, such a nuisance is difficult to eliminate. There are special patches that look like fungi for car tubes, but I have not personally used them and have heard mixed reviews.
If you find yourself in the described situation, then you need to be prepared for this. Some carry the usual camera patches and CO2 cartridges. They seal the cut from the inside, then use a spray can to bead the tire, pump it up to working pressure and move on. This option is so-so, because on rocky trails you can tear the sidewall of the tire and most likely no fungus will help. You need to darn with a needle and thread, and then glue the patch from the inside.
Therefore, I get by with a spare tube, if such a misfortune happens, then I simply disassemble the tire, unscrew the tubeless nipple, and put the tube, having previously poured out the sealant. There is only one caveat - the tire, most likely, already carries a lot of small thorns, wires and other muck, which is enough on the roads. If you immediately put the camera, then most likely it will immediately pierce from the inside. Therefore, you must first carefully probe the inner surface with your hands and pull out all the sharp rubbish sticking out.
Based on this, the conventional wisdom that tubeless is not good for travel is a myth. Firstly, it is not so easy to ruin the tire so much, and secondly, you can temporarily roll back to the camera without any problems. But you get an almost complete absence of trouble with punctures.
I've driven tubeless for almost 7000km, mostly offroad, and I'm still delighted, both in terms of performance and low-pressure rolling/coupling. And here, in Spain, it’s also just a problem with thorns - in some places there are a lot of them, sometimes after a ride I pull two dozen out of tires. Just a quick hiss and a couple of drops of "milk", that's all. And be on the cameras, and each time you would have to glue / change .., no, I won’t go back.
Phew, I spent a lot of time writing this instruction, my eye was blurry, I probably forgot to mention something - remind me if anything. And yes, post a repost in your social network or a link to some cycling forum if necessary - it will be pleasant for me, and useful for cyclists. 🙂
I wonder how local MTB bikers feel about tubeless wheels on a bike - write in the comments what you think about it.