Tubeless tires are much, much better than the alternative, but that’s not to say they’re perfect. Sometimes, just getting a tubeless tire to hold air can be a challenge, and diagnosing the problem — let alone fixing it — can be frustrating. If you find yourself staring at a flat tire in the garage and muttering “why” over and over again, here are some tips for getting rolling again.
This article won’t cover mounting tubeless tires; we’ll assume the tire has been mounted successfully, but that it won’t hold air for more than a day or so.
No, we’re not celebrating yet, but this will get us closer to our goal by allowing us to zero in on the part that’s leaking.
Fill a spray bottle with water and some dish soap, or really any soap that forms bubbles. Next, inflate the tire to 30psi or so. Spray or just pour the soapy water all around the tire and rim, one section at a time. Note any places where air bubbles appear.
If there is a puncture in the tire itself that is leaking, this is generally an easy fix. Make sure you have plenty of sealant in the tire and move it around until the sealant pools at the puncture. Larger punctures may benefit from a tire plug.
With a sidewall leak, you’re usually better off replacing the tire. It might be possible to patch it, or if you’re really lucky, plug it, but in my experience sidewall repairs rarely last very long.
While rare, some tires have been known to absorb or even weep sealant. Tiny pores in the tire compound fill with sealant when it’s initially added, so you may need to add a bit more liquid to replace what’s been lost. If a tire still leaks through the tread or sidewall in multiple locations despite having good sealant coverage and no punctures, you may want to check with your local bike shop or tire manufacturer to see if the tire should be replaced.
Check to make sure the rim wall isn’t dented. If it is, your tire won’t be able to seal. If you find your rim is slightly bent or dented, it might be possible to get things straightened out enough to hold air. According to Gerow, “a couple of small planks of wood, a vice, and a hammer will get you started.”
Even if the rim wall isn’t visibly dented or misshapen, there could be a small gap between the tire bead and the rim that’s leaking air. Make sure you have plenty of sealant in the tire, and hold it horizontally and tilted to allow the liquid to pool around the part of the rim where you saw the bubbles forming. Shake the wheel gently for a minute or so to let the sealant do its work.
In some cases, the tire-rim connection may not be tight due to buildup of old sealant. “Older tires can have a buildup of dry and hardened sealant at their bead that will create space between the rim and the rubber, causing air leaks,” says Gerow. “When mounting a tire that has already been mounted previously, be sure to remove as much dried sealant from the bead as possible. ”
”
Sometimes a tire bead may not be fully seated in the rim. Try pumping the tire up to maximum pressure. The loud popping sound you’ll hear is the bead popping into place. If you didn’t hear that noise the first time you mounted the tire, chances are that is the issue.
After running through the checks above, try soaping the tire again and checking the same spot to see if the fix was a success.
In my experience a leaky valve is often the cause of air pressure losses over time. If the soapy water reveals bubbles at the valve, it’s time to investigate further.
Tubeless valve parts with a valve core remover tool (red, right).First, check the easy stuff: Is the core screwed in tightly? Is the inlet screw loose or bent? A dedicated valve core tool is helpful for proper tightening, and if your fingers aren’t getting the inlet plunger tight enough, needle nose pliers can do the job. Just make sure you don’t over tighten and break the valve, or get it so tight you can’t add air later. If any part of the valve is bent or broken, don’t try to fix it; it’s time to replace it.
If soapy bubbles are forming around the base of the valve, it may not be attached to the rim properly. Most valves have a nut at the base that tightens the valve to the rim. Get this as tight as possible with your fingers, and if necessary give it a slight turn with a wrench. Just be sure to avoid tightening too much because you could damage your rim, especially if it’s carbon fiber, and you may need to be able to remove the nut on the trail in the case of a puncture.
Check the gasket at the base of the valve to ensure that it’s properly seated, and that it sits flush in the rim channel. Add a bit of plumber’s/PTFE tape to seal things if the gasket is particularly troublesome.Next, investigate the valve from the other end, which means taking the tire off the rim. Most valves have a soft rubber gasket that forms a seal around the valve hole in the rim, so check to make sure the valve is seated properly in the rim channel.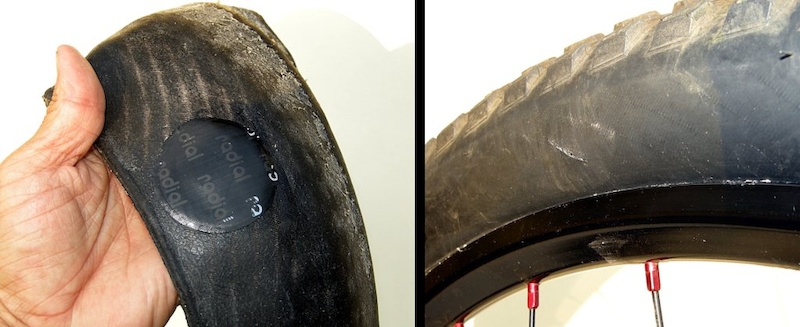 You can also add a bit of teflon tape around the base of the valve to seal things up.
Sometimes sealant can fill in small gaps around the valve. If you notice air leaking while on the trail, try rotating and shaking the tire so the liquid sealant can get to the valve.
If bubbles form around the spoke nipples, the good news is you’ve found your leak! The bad news is, there isn’t a quick fix. This generally means the rim needs to be re-taped, or at the very least the tape needs to be patched over. If the tape appears wrinkled, ripped, or punctured that’s probably what’s causing the leak. Tire levers can often puncture the tape while installing the bead, causing the tape to leak air through the rim.
There are many tutorials online for taping a tubeless rim, but in general, the idea is to get the rim as clean and as dry as possible before taping all the way around in one go. Be mindful of any gaps where air might be able to leak, keeping the tape flat and taut to avoid blisters or pockets.
Sometimes, tires can be sneaky leakers. Pump them up and they’ll stay rock solid in the garage for weeks, but as soon as you roll in the parking lot, or take a turn, they go soft. You soap ’em up, and there’s not a bubble in sight. In fact, this has happened to me a couple times in just the past few months.
This is usually due to a small cut that only opens up when there’s weight on the tire, or if the tire is pumped up to a higher pressure. In your garage, you can try to simulate the effect of riding by adding pressure above what you normally ride, or by deforming the tire with your hands and looking for air bubbles as the tire squirms.
Gerow notes, “Some tires need to be ridden immediately after setup in order to hold air properly. A new tire that won’t hold air in the garage might be good to go after a short romp on the trail.”
Once you find the sneaky leak, getting sealant to the right spot can do the trick, though a plug may work even better.
Ultimately, tubeless mountain bike tire systems are pretty straightforward and there are only so many spots where air can escape. Imagine that you’re the air inside the tire, and you’re looking for a way out. How would you do it? That’s exactly the mindset you need to solve this mystery.
Tubeless tires paired with sealant are the best setup to prevent flat tires from both punctures and pinch flats. That setup loses its magic when the sealant dries up, though. The number one mechanical that happens on our rides is a flat tubless tire as a result of dried up sealant – and it’s easily preventable. Although it varies greatly depending on sealant type and riding climate, average tire sealants have a lifespan of about 60–90 days. After that they dry up and lose all their sealing properties.
STEP ONE
Remove your wheel from the bike and unseat ONE bead of the tire. We have done this without removing the wheel but it’s typically cleaner and easer with it off of the bike. We have also used sealant injectors to refresh sealant through the valve stem. Depending on the sealant used injectors can work well but many sealant types have suspended crystal or fiber-like substances that like to clog the hose. For this technique we will focus on the partial tire removal method.
Many riders insist that you can simply add more sealant, and you can, but we prefer to remove the old stuff first. Adding sealant to what’s remaining can water down the mix since much of the sealing latex has dried to the tire. We pour out any remainging liquid and remove any “tire boogers”. We also pull any large dried sealant chunks off the inside of the tire since they can add weight. You can also wipe down the inside of the tire but we often skip this step.
STEP THREEThere are many good sealants to choose from. We have had great luck with WTB, Orange Seal, Stan’s, and Maxima’s sealants. This time we’re going to use some Monkey Goo from RedMonkey. It comes in a handy bottle that measures the sealant for you. Most MTB tires should use between 60–100 milliliters (2–3 ounces) of sealant but this varries slightly between brands. Always check your particular sealant’s manufacturer reccondations and follow that. Bigger tires like 29ers will require more, and lightweight XC tires will require less. Unless we are setting up lightweight cross country race tires, we often add a splash extra because when it comes to sealant, a little more is always better than a little less.
Since one of the tire beads is still seated and not removed, seating this tire with a floor pump should be no problem at all. If both beads are removed, or if the tire is particularly loose, a compressor may be necessary to give it a blast of air to seat the beads.
STEP FIVESet your tire pressure, reinstall your wheel and go ride! It’s best to remove one tire bead every few months to check the sealant. If it’s dried up, it’s time to replace it. Over time you will discover the proper replacement interval for the specific brand and type of sealant you are currently using.
Mountain Bike Action is a monthly magazine devoted to all things mountain biking (yes, that’s 12 times a year because we never take a month off of mountain biking). It has been around since 1986 and we’re still having fun.
485best tubeless tire sealantgarage fileshow often to replace tubeless tire sealanthow tohow to take care of my mountain bikemountain bike maintenance tipsmountain bike tubeless tire sealant
Ron Koch 313 posts 0 comments
Prev Post
THE BEST PLACES TO RIDE MOUNTAIN BIKES AROUND THE WORLD
Next Post
GIANT FACTORY OFF-ROAD TEAM UNVEILS ITS 2022 ROSTER, BIKES AND TECHNICAL PARTNERS
5/5 - (2 votes)
Once you get the hang of fitting tubeless tires, you can change them almost as easily as tube tires.
Tires are one of the most important factors in determining how a bike feels and behaves. Not only do they make a huge difference when it comes to performance, but they are also an inexpensive way to upgrade. The right tires can provide more comfort, more speed, and more puncture protection, and tubeless tires take this concept even further. Switching to better tubeless road tires can result in lower rolling resistance, fewer punctures, and the ability to use lower pressures for more comfort. It also means learning a new skill and understanding how to install tubeless tires.
With the right tools and an understanding of what to expect, installing tubeless tires shouldn't be difficult. Keep reading for tips and tricks for fitting tubeless tires. Very soon, you will be changing tires as easily as traditional inner tube tires.
Contents
Everything you need to install tubeless tires
When it comes to installing tubeless tires, you'll need supplies and tools.
When it comes to tools, there is good news and bad news. The good news is that you may not need all of the tools we have listed below; with the passage of time and the spread of tubeless tires, they are getting better and easier to install. Higher quality wheels, along with better tubeless road tires, are often immediately inflated with a track pump, while others may require something more powerful.
The bad news, however, is that you won't know until you try a particular tire and rim combination, so it's good to have the right tools on hand.
Tubeless tires have a very tight bead that does not stretch, making it difficult to fit on the rim in some cases. When buying levers, you need to be sure that you are getting something thin yet strong enough to work with the tire/rim interface. Look for rounded edges that will prevent damage to the rim. Some tire levers are reinforced with a steel core for added strength.
You need a way to get enough air into the tire quickly so that it sits on the rim properly.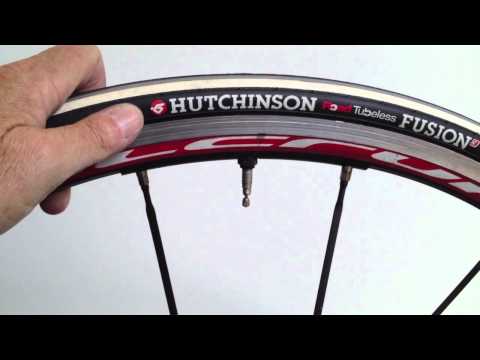 If you win, the pressure will rise and the tire will sit correctly. To facilitate this task, you can use a floor pump, which has a built-in reservoir for charging tubeless tires. First, before inflating, you will close the charging tank, which will compress the air in the tank. You will then immediately release all the pressurized air into the tire.
If you are buying a new pump, get one that combines the pump and reservoir. If you already have a favorite pump, it is possible to purchase the tanks separately. Another option is an air compressor, which is the most convenient way when you need to use it, but be aware that most inexpensive tankless electric pumps won't work as they don't move air fast enough.
Most new wheels come already sealed, but this is not always the case. If you're having issues with a tubeless setup, it's almost always due to a tape issue. To solve this problem, we recommend re-gluing the inner rim from scratch.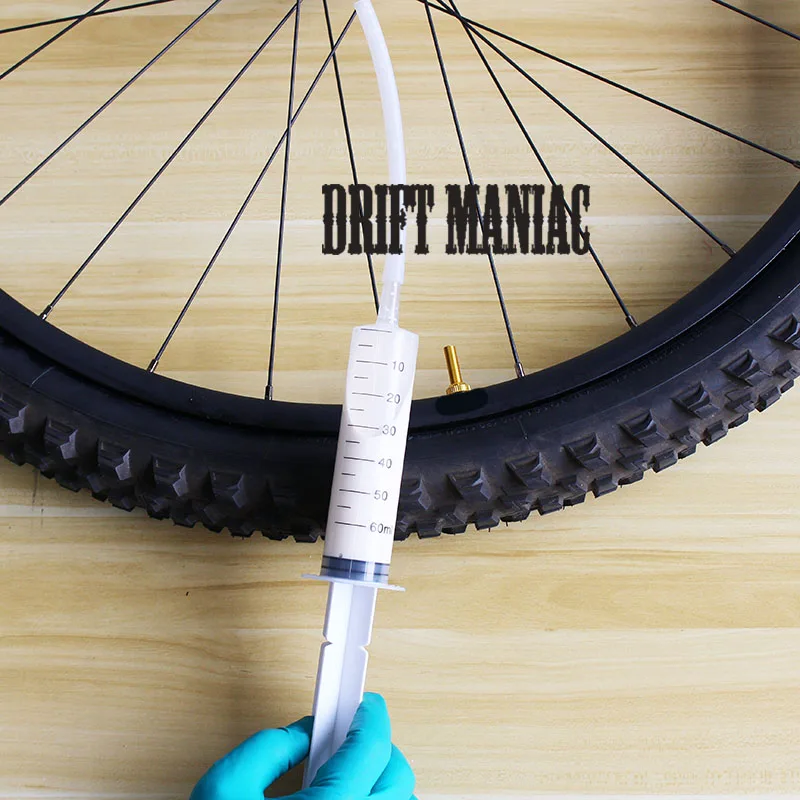
Also be aware that the tape comes in different widths, so make sure you order the correct one - it's always best to use the right size rim tape, as doubling a smaller width tape isn't always smart. The translucent tape will make it easier to find the valve hole in the right place.
Again, these often come with new wheels, but not always. Make sure you buy something long enough to go through the rim and leave room for the pump mount. A little extra length won't hurt, so if you can't find the perfect length, don't be afraid to go longer.
You can get by with a pair of pliers, but it's not worth the hassle. The right tool is inexpensive and makes life a lot easier. It's a good idea to have an extra tool in your emergency kit, as valve cores can get clogged over time and you may need to fix one that's leaking slowly during your trip.
Again, you can do without it, but it's much easier if you have the right tool.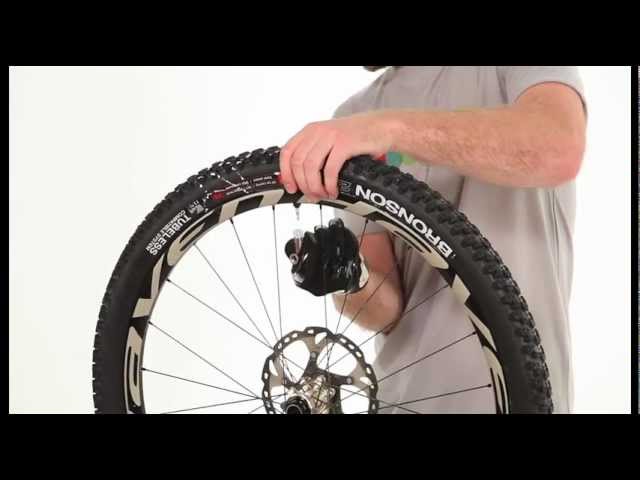 You can see instructions for pouring sealant into a tire and then trying to install, which might work, but it can be incredibly messy. Instead, use a syringe and inject the sealant through the valve stem. Some sealants come with a tube, but if you don't have one, we recommend adding one to your toolbox. The syringe is usually supplied with a valve tool and additional spools. It's also a convenient way to use just the right amount of sealant.
You probably already have these tools, but it's a good idea to prepare them. You will need scissors to cut the rim tape. A small towel will come in handy when sealing the rim. A soapy solution in a spray bottle will make life easier during installation. A small screwdriver or pen will come in handy to poke a hole in the rim tape to push the valve stem through.
A properly installed rim tape should be smooth and fill the channel.
The first thing you need to do is seal the rim. If the rim is already sealed, you don't need to seal it, but if you find you're having trouble sealing the tire, don't waste hours looking for it - just seal it.
Every time you rearrange things, there is a chance that you will open a leak in the tubeless belt. It also often happens that you seal the wheel perfectly and then make a subtle mistake when installing the valve core through the tape. If in doubt, reseal it.
Start tape about an inch before the valve hole in the wheel. You want to have enough space so that there is a good seal between the rim and the band up to the valve opening. Press the band against the rim with one hand, then pull the band out a little. Advance only as far as you feel comfortable holding the band, then gently lower it to the surface of the rim. You need to stretch the tape, and it's better to do it little by little, rather than trying to work the entire rim in one fell swoop.
After bringing the tape to the surface of the rim, hold it there. The tape is not very strong, so it will come off the rim if you don't hold on to it. Use a cloth or gloves so that the hand that you held the beginning of the tape with can slide over the rim tape. Press firmly on the rim to help the adhesive stick and move air bubbles to the end of the glued area.
When the two hands are together, repeat what you did from the beginning. Holding the tape against the rim with one hand, you are about to pull more tape from the roll. Stretch it out to the sides of the rim, then gently pull it back and repeat the process again. Continue these two steps until you have gone all the way around the wheel. When you get back to where you started, you should put tape over the vent hole by about the same amount as you started with. Then just cut the tape.
Some people and most bike shops make two layers of tape. If the tape is not wide enough, it is necessary to completely seal the space between the tire beads. Even if the band is wide enough, this needs to be done to increase the circumference of the wheel and create a tighter seal between tire and rim, but modern tires and rims are made to tighter tolerances so this is often not necessary. It can also make it difficult to fit the tire as it is very tight. It's one of those things you can't know until you try it. If you prefer to play it safe, then do so.
Push the valve stem through the band.
Start by locating the valve hole in the rim. This will be easier if you can see through the rim tape, but it's possible otherwise if you find a hole in the inside edge of the rim. Once you know where it is, press down on it with your fingers and you can make a small mark outlining the edge of the hole.
Once you know where it is, poke a small hole in the tape. You can use whatever you have. Hex keys, small screwdrivers, knobs, even the sharp end of a valve stem.
Remember that you want this hole to be as central and as small as possible and you don't want to damage the wheel. Any sharp object you use can cause damage, so be careful. This is coupled with the fact that you don't try to open the hole completely, you just open it for the valve stem, and when the hole is ready, let the valve stem stretch it.
Once the hole is punched, push the valve stem back into place. There should be some kind of rubber seal at the base of the valve stem that presses against the hole you just pierced and with enough pressure it will seal. On the inner edge of the rim, where the valve now protrudes, you need to install a rubber seal, and then the nut that is attached to the valve stem. You don't need to tighten everything all at once, as you may need to push the rubber seal inside the tire away from the rim to get the tire into place.
The extremely tight fit means you will likely need to use spudgers to fit each side of the tire to the rim.
The process is the same as for the tube tire. Don't forget to check the direction of rotation of the tire, and remember that it's fashionable to line up the logo and name so that the valve is in the middle (this also helps to find the valve when you need to inflate the tire).
Start at the valve and insert the washer into the space between the valve and the wheel sidewall. First on one side, then on the other. When you get to the other side, opposite the vent, things get more complicated.
The difference between a tubeless tire and a tubed tire is that the tubeless tire and the rim are closer together. Grabbing each side of a tire on a wheel is often a difficult task and the use of tire levers will most likely be necessary. To facilitate landing, moisten the edges of the tire with soapy water.
Soapy water helps everything slide. The tire will slide more easily over the tire arm and the tire arm will slide more easily between the tire and rim. Once the tire is in place, the soap solution will also help create a seal for the first inflation.
The tire should be in the center of the rim cavity but at the edges next to the valve.
The idea is to put the tire in the center of the rim. The less the tire will rise and fall from the edges, the better. However, it should be on the edges near the valve stem.
In reality, there is little you can do at this stage. Just look for obvious problems and do your best to fix them. A good way to get everything in proper condition is to roll an uninflated wheel with a tire on a carpeted floor, applying pressure on it. The pressure will help the tire sit properly in the channel.
Once you have the tire in place, make sure the valve stem nut is tight and the valve stem is in place.
If you are using a tubeless tire pump, it's time to pressurize the reservoir.
If you are using a standard pump, you need to pump quickly. If you are using a tubeless pump, then pressurize the tank before releasing the air in one shot. It's a good idea to inflate the tire, but be careful with the amount as tubeless tires and carbon wheels often have a lower maximum pressure than you'd expect.
You may or may not hear a pop as the sidewall snaps into place. This helps if the sidewall is wet and slips easily, but even then you may not hear anything. It's a nice sound when the bead snaps into place, but if you can't hear it, it doesn't mean it didn't work.
For initial inflation it may be useful to remove the spool. However, this is not always possible because depending on the pump you have, they do not always secure effectively if there is no valve core.
Using a sealant injector is the easiest way to add sealant to a tire.
If you have time to let the tire sit, this is a good idea. Sealant should not be needed to keep air in the tire. If you have time to let the tire sit with air, you can determine if it is losing air at a reasonable rate. If you left a tubeless tire inflated overnight and returned to a flat tire the next morning, then you need to troubleshoot. This almost always means new rim tape, and it's much easier and cleaner when there's no sealant. You can also check the tightness with a soap solution.
Once you've made sure the tire is installed correctly, it's time to add sealant.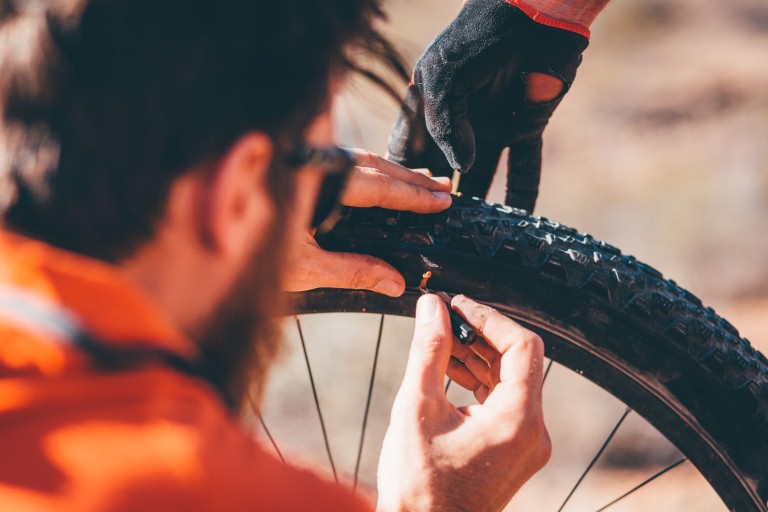 Release the air from the tire, and then unscrew the valve core.
Put some sealant into the injector and turn the tire so that the valve is not at the very bottom and not at the very top of the wheel. At the top, it can leak out of the valve, and at the bottom, the flattened tire leaves no room for sealant. Inject the sealant and install the valve core in place. Inflate the tire to the desired pressure and remove the pump. Spin the tire and give it a shake so that the sealant coats as much of the inner surface of the tire as possible.
Congratulations, you now have a tubeless tyre.
You might be interested:
5/5 - (4 votes) and more time to overcome the tracks. Find out everything you need to know to choose the right sealant for your riding
The best tubeless tire sealants seal punctures and cuts in your tires before you find them, which means more time to ride and less time to deal with dirty tires on the side of the trail. However, self-sealing punctures are not the only benefit of tubeless tyres. Tubeless tires allow you to use much lower tire pressures, which means more grip and control on rough descents without the risk of punctures or snake bites, meaning you can go faster.
While you often hear horror stories about trying to convert tubeless tires at home, fitting a tubeless tire to a tubeless rim is very easy these days, and there's no risk of accidentally pinching tubes when fighting on narrow tires.
We tested a range of the best tubeless tire sealants to see which ones work best and which ones you shouldn't mess with at all. Even the best mountain bike tires have punctures or blowouts, so don't delay installing tubeless tires or topping up sealant. Not sure where to start looking for tubeless sealant? Check out our guide on how to buy the best tubeless tire sealant.
Contents
Muc-Off is a great all-around investment - Expensive, but pink is a great investment.
Type: Downhill / Enduro / Road | Maximum hole size: 6mm | Service life: 6 months | Price (1L): $39.99 / £29.99
Muc-Off Signature Pink Sealant is expensive, but well worth the investment as it works great in any situation. Both the price and the performance are not surprising when you know that the brand has been testing different recipes with every brand of tire and riding style for six years, and even built an oven to test compounds at different temperatures.
The result is a great combination of responsive agility, so it's great for commuting and even big sidewall splits on off-road bikes. We even managed to seal the crack and bulge of the carbon MTB rim so quickly that we rode it home without even topping up the pressure.
Sealant also glows under UV light (you get a UV Flashlight included with $14.99/£10.99 Sealant Kit and large 1L and 5L bottles) helping you find holes you might not have noticed at the time. moment, but you might want to plug for long term safety.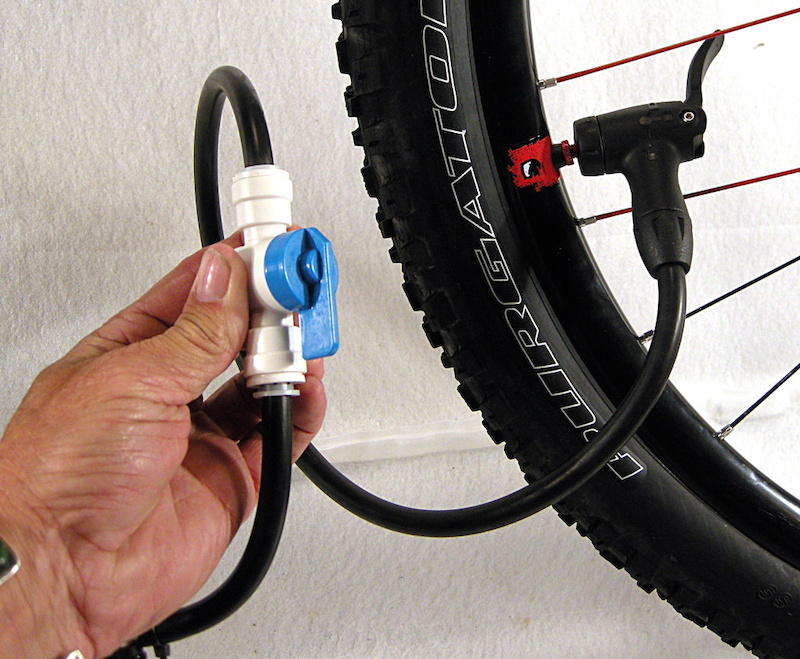 It also shows micro-leaks in porous "tubeless" sidewalls so you know where to apply extra sealant. It lasts for a long time in all weather conditions, does not form boogers, pumps up CO2 perfectly and even smells good.
Reliably effective sealant at a very good price.
Type: Downhill / Enduro / Road | Maximum hole size: 6mm | Service life: 6+ months | Price (1L) : $48 / £18.99
If this were a test of tire sealants for motorcyclists, farmers, truck drivers or diggers, OKO would be the most recognizable name here, but for most cyclists it's not even heard of . We even know some motorcyclists who use their tractor mix diluted for their bikes because they didn't know there were motorcycle versions. This is a little rough considering the British firm was one of the pioneers of liquid sealants for heavy duty tires back in the 70s. Even at full retail price, Magic Milk Sealer is half the price of some of the more established brands, and with online retailers regularly discounting heavily, it often makes for even better value.
Low price does not mean low efficiency. Magic Milk's standard formula is a non-allergic, ammonia-free synthetic latex blend that's great for covering porous tires and quickly fixing small to medium sized holes. It tolerates a wide range of temperatures well, and while it covers tires well, it doesn't "boil" so after a few months you'll just need to restock. As the name suggests, Magic Milk Hi-Fibre contains microfibers to close large holes faster, and costs the same as regular mix, so MTBers don't overpay.
A fast acting, race proven, environmentally friendly sealant that is low cost.
Type: Downhill / Enduro / Road | Maximum hole size: 6mm | Service life: Not specified | Price (1L): $25 / £18
Called the "white gold" of tire sealants by many testers, Squirt's SEAL Tire Compound is fast becoming a staple for mountain bikers around the world - especially those who tackle hostile and frequent impassable trails of marathon stage races and needs quick puncture protection.
Squirt's SEAL Sealant is not limited to mountain bikes, it can also be used on road and gravel tires. In addition, the sealant is compatible with both tubeless and tube tires and provides effective puncture sealing.
Available in three bottle sizes - 150ml, 1L and 5L - Squirt Sealant is suitable for all sports and ensures every product is sustainable and environmentally friendly. In particular, this sealant is characterized by minimal or no bioaccumulation.
Expensive, but this improved version of the original is one of the best.
Type: Downhill / Enduro / Road | Maximum hole size: 6.5mm | Service life: 6 months | Price (qt): $44 / £32
Stan's No Tubes can be credited with launching the entire tubeless system with their ingenious conversion kits at a time when most tubeless tire and rim systems were a heavy, numb headache . You can still get the original latex-based sealant, and if you only need to cover a tire to seal and quickly heal small holes—like on a road—then a light mix will do the job just fine. It also comes in smaller bottles. The Race compound contains larger crystals in the same base compound and works much better for filling large holes and cracks that occur when riding off-road.
Both mixtures are resistant to a wide range of temperatures, and it usually takes more than half a year before they begin to form “Stanimal” clumps. However, it does not tolerate CO2 cartridges very well, and the smell is a bit pungent.
Fast acting foam sealant at a good price.
Type: Downhill / Enduro / Road | Maximum hole size: 5mm | Service life: Not specified | Price (1L): $24.90 / £19.99
Effetto Mariposa takes a very Italian approach to puncture repair with Caffelatex sealant. Not only does it have a light coffee tint, but the very thin, light mixture begins to foam as it passes through the holes, creating a characteristic "foam" when embedded. Not only is it fun, but it closes small to medium holes quickly and holds high pressure fairly reliably. Add to that a reasonable lifespan and a decent price for large bottles, and it makes for a great vehicle for road use. However, the base mixture is difficult to plug large holes and hold them after a puncture, so Effetto releases the additive "Vitamina CL" to more effectively plug large holes.
An effective but expensive natural recipe enriched with nuts.
Type: Downhill / Enduro / Road | Maximum hole size: 6mm | Service life: 6 months | Price (1L): $TBC / £39.99
Japanese tire company Panaracer didn't get into sealants right away, but its 2019 presentation was downright insane. Okay, not really nuts, as the main carrier liquid is natural latex rubber, but the gritty, hole-blocking ingredient is crushed walnut shells. This makes it the most natural sealant in existence, and - assuming you're not allergic to nuts - it's one of the kindest leather and bike mixes to spill. It works well too: it quickly clogs small and medium holes and holds pressure well after the walnuts are fastened with cotton.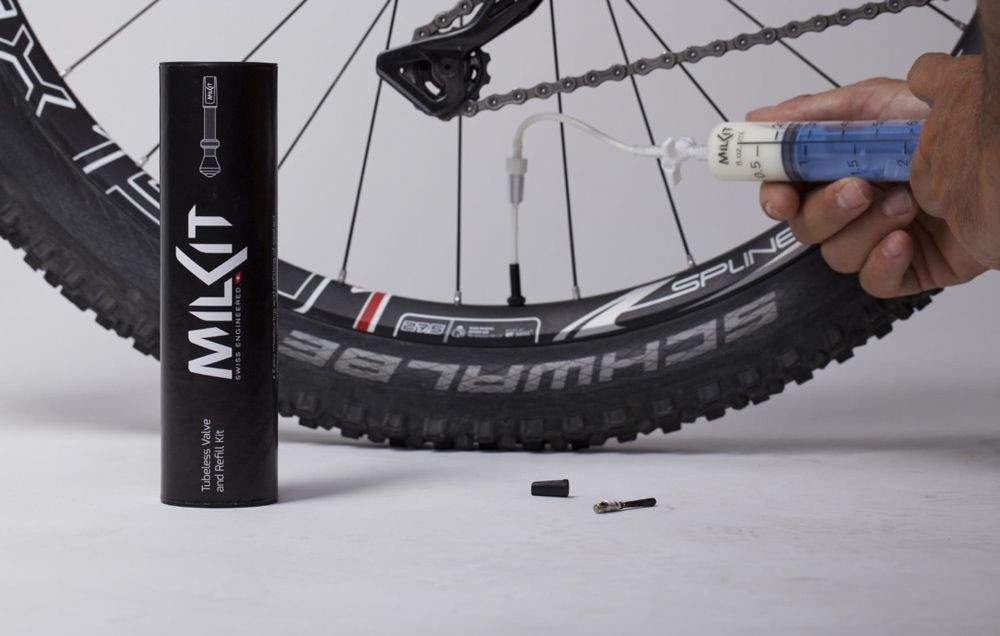 If you tap the tire a little in a circle to fill in the area, it will cope with large holes and significant cuts.
Good price for road users but needs additives for aggressive use.
Type: Downhill / Enduro / Road | Maximum hole size: 1-2mm | Service life: Not specified | Price (120ml): $32.37 / £25.99
Hutchinson was one of the pioneers of tubeless and tubeless-ready tires and also got into sealants early on. It is a very thin, lightweight compound designed to quickly coat porous tubeless tires and is slippery enough to make installation easier. All of this makes it suitable for road and gravel/cyclocross use, especially since the price is really good for a product shipped to a store rather than bought directly. Where it struggles is in sealing and holding large holes and crevices securely, so you'll have to add a few nozzles or another thicker latex-based sealer if you want it to withstand more traumatic conditions.
Affordable, easy-to-use sealant for small holes.
Type: Downhill / Enduro / Road | Maximum hole size: 6.5mm | Service life: Not specified | Price (1L): $29.99 / £26.99
Another early adopter of tubeless tire technology (TLR), also typical of early generation compounds. With the advent of tubeless road tires, it has found a second life, as it quickly gets to small holes and gaps and, as a rule, seals them well. It also covers the tires well and makes installation easy, which is especially helpful if you're using super-tight rims and Bontrager tires. It also remains mobile for a long time over a wide range of temperatures, does not contain ammonia, and is therefore relatively safe for leather, leather, and metal. The sealant represents a decent price compared to its competitors, although it only comes in a quart bottle.
If you want it to deal with more serious damage, you will need to add some glitter or something to the recipe, and Bontrager's recommended doses (for example, 60 ml for 29er) are clearly not enough for long-term and repeated puncture protection.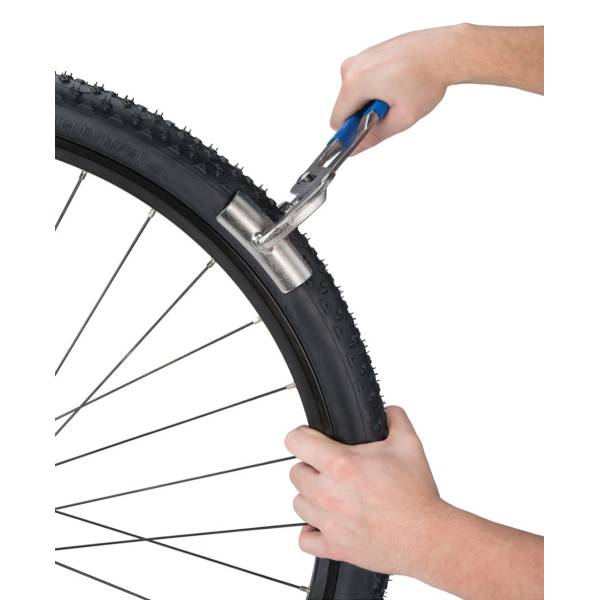
Works fast on small holes but less stable on larger wounds.
Type: Road | Maximum hole size: 6.5mm | Service life: Not specified | Price (250 ml): $13.05 / £10.99
Vittoria's Pit Stop TNT (or EVO version) is worth considering if you're prone to small holes that need to be patched quickly before you lose a lot of pressure. It is a very liquid mixture, so it spreads easily over the tire, helping with installation, sealing porous carcasses and quickly getting to any holes.
The latex compound also seals very quickly, so pressure loss and spatter on the frame is minimal, and the plug generally stays in place afterwards. However, it is not as effective at plugging large holes and cuts/holes in the knobs, so it is less suitable for aggressive off-road use. It's also more expensive than more stable and versatile blends like the original Stan's, and while the double-head bottle looks original, it's actually more awkward to use than a standalone scoop.
Great for large holes, but very expensive and requires regular refilling.
Type: Downhill / Enduro / Road | Maximum hole size: 6mm | Service life: 45 days | Price (8 oz): $20.99 / £16.99
Orange Seal may be pricey, but it has little equal when it comes to quickly plugging big holes. We've had good results seeing the compound fill holes a couple of mm over the advertised 6mm limit without losing pressure, and it also coats porous lightweight tires very well.
You'll be lucky if it lives up to the advertised 19mm, but the nanite-enriched mix works well with partially torn gaps on the handles and common roadside cuts, not on swords. The latex-based compound is also quite resistant to temperature extremes, unless you are going to be cycling on ice. The downside is that it degrades very quickly (4-6 weeks is Orange Seal's recommended refill time), making it an expensive refill.
Although the Endurance version doubles the life, it does not close medium to large holes as well. Even when it plugs large gaps, it struggles to withstand the higher pressure before bursting. It is still useful as a mix for road and gravel tires, especially for porous "tubeless ready" tires that need a good base coat of sealant.
Sealant is designed to do exactly what it says on the bottle: plug small holes in tires to stop air from escaping. The base fluid is usually water-based (glycol or propylene) with the addition of cellulose thickeners or a latex-based blend. They remain liquid in the tire, so they spill easily towards the puncture site, but solidify when pushed through a small pressure hole. The exact composition of a sealant determines how thin it is and how it reacts when it gets to a puncture, in terms of sealing speed and the size of the hole it can plug.
For example, Specialized's RapidAir is designed to quickly seal small holes in road riding, while Orange Seal's Endurance mix is slower moving but can block large holes, making it more suitable for MTB use.
While the base fluid mix is important, most sealants include extra "pieces" to help seal the hole faster. Depending on the brand, they can be called differently: particles, additives, crystals, polymers, fibers, etc., but, as a rule, the more particles, the larger the hole that the sealant can plug. However, thinner sealants get to the hole faster, so if you're low on air, it's best to use a thinner mixture.
Since tubeless sealant seems expensive and the weight of the bike increases, it's tempting not to add much. One thing to remember is that you are replacing an inner tube which can range from 100g (road) to 250g (large MTB) and cost around $20 / £12 depending on how astute your shopping is, so overall you win on weight and cost when using tubeless sealant. The bottom line is that the more sealant in the tire, the more you have to plug several holes or keep trying to plug one big one. Although different manufacturers offer different quantities, we believe that a relatively simple formula based on twice the amount of sealant per mm of tire width (e.g. 50 ml for a 25 mm tire, 80 ml for a 40 mm tire, 120 ml for a 60 mm / 2.4" tire), just enough to cover the tire and leave some for plugging holes. If you know you'll be driving regularly to cactus country or broken glass roads, use more. Also, larger diameter tires will require more than smaller diameter tires.
You will only get the desired mixture of lumps and liquid in your tires if you shake the bottle well before loading it into the tire. Otherwise, the contents will settle in storage, and the first tires you fill from a large bottle will only contain useless liquid. This means that you will be left with sediment at the bottom of the bottle and not in the tires where it should be.
More modern compounds tend to retain the solution better inside the tires, and sealants will always perform and perform better in regularly used installations than those left in storage.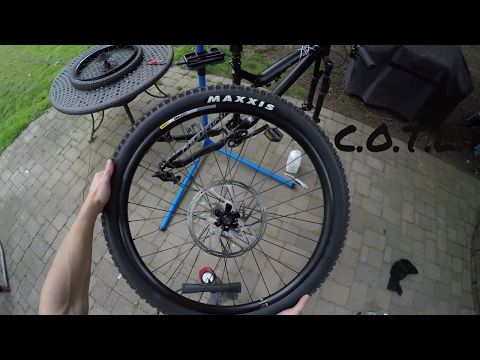 However, some recipes (especially older, simpler ones) can coagulate and clump together into boogers or stanimals, making the mixture much less effective at sealing holes. Very large lumps can even be felt when spinning light tires.
Various tire brands also list a wide range of tire life spans, from the optimistic OKO "lifetime" to "a little over a month" in Orange Seal butterfly style. Extreme temperatures can also affect different blends, so it's worth checking if you're heading to the Arctic or Arabia. Be careful when using CO2 canisters with some mixtures as the freezing point of the gas released can kill the mixture.
So, while annoying, taking the tires off to check the mixture is definitely a good idea if you want your tubeless system to work the way it should.
Although we listed various sealants in our puncture protection review, we actually used a few more in our search for the best. In the case of Schwalbe's Doc Blue, it's practically the same as Stan's original No Tubes sealant (made by Stan's), but more expensive.