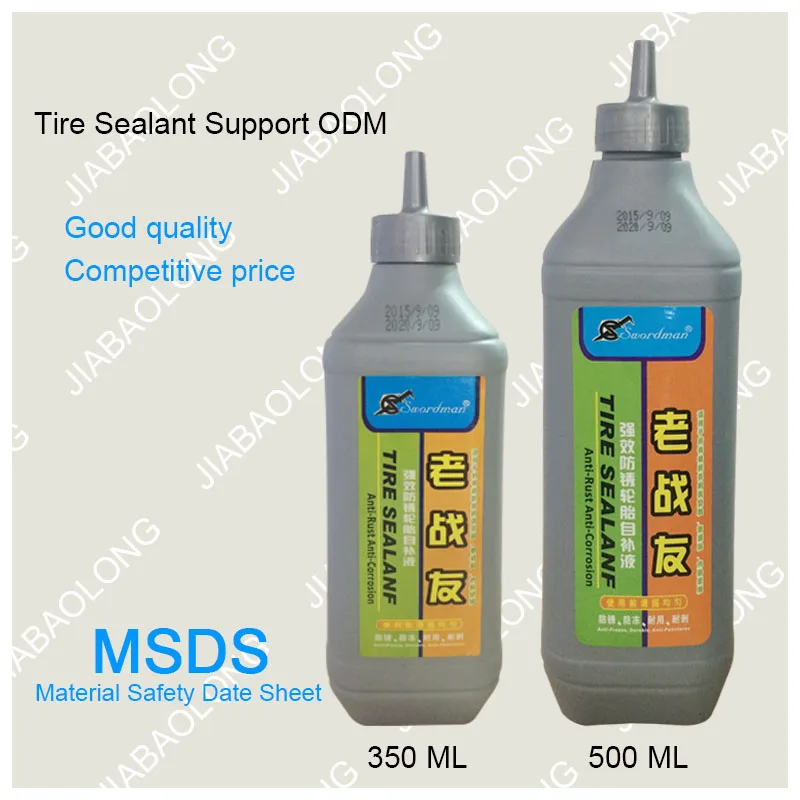
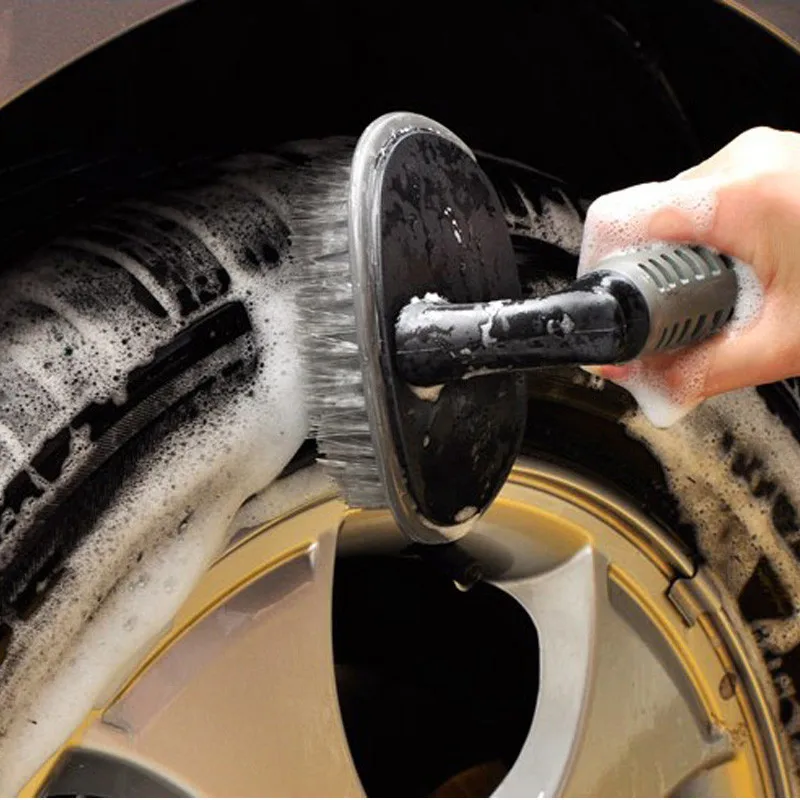
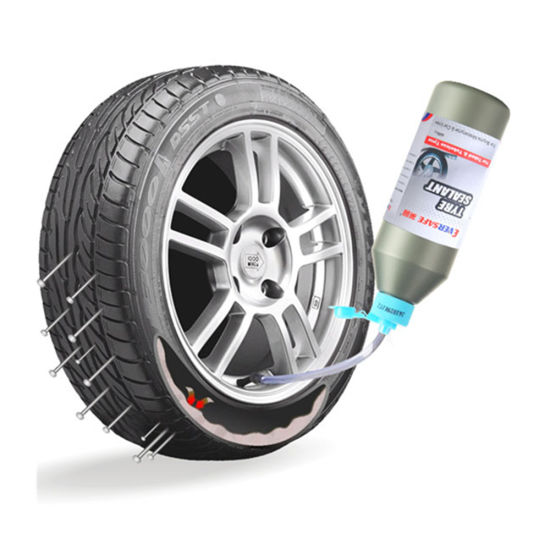
Run lower pressures and increase grip and braking power on loose surfaces, Serfas® Tire RX Sealant is formulated to keep you going in even the most extreme conditions. Seal tread punctures up to 1/4 inch (6.35mm) in diameter fast with our perfectly balanced blend of dependable sealing power and long lasting sealant life.
Since 2017, Serfas® Tire RX has been available as a universal conversion kit, the only of its kind to fit a multitude of rim widths. Our universal conversion kits are easy to apply and ready to meet your performance needs.
Universal Tubeless Conversion Kits
Convenient one-size-fits-all tubeless conversion kits.
Instantly Seal 1/4 Inch Tire Tread Punctures
Ride for longer with increased dependability and confidence in your tires.
Tubeless Accessories
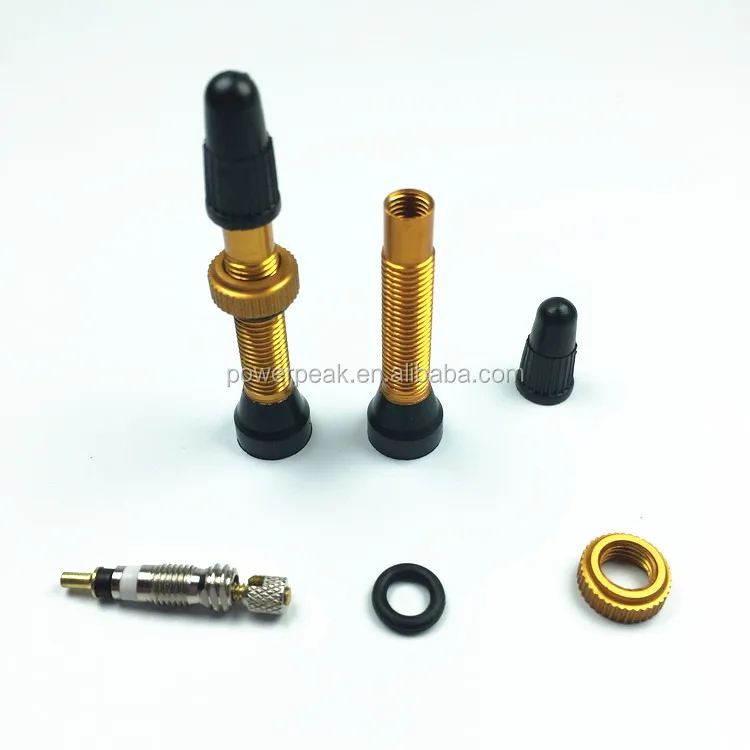
Replacement valves, cores, rim tape, and valve adapters.
Removable Cores
Serfas® Tire RX Valves are made using removable cores for fast, clean, and easy sealant applications.
Grid view List view
Show :
Features: Flat Protection Seals Up To 1/4 Inch Punctures Can Be Used In Tubeless, Tubular & Tubed Applications Contains Micro-Sealing…
Available For Dealer Purchase Only. Features: Flat Protection Seals Up To 1/4 Inch Punctures Can Be Used In Tubeless, Tubular…
Features: Flat Protection Seals Up To 1/4 Inch Punctures Can Be Used In Tubeless, Tubular & Tubed Applications Contains Micro-Sealing…
 00
00Available For Dealer Purchase Only. Features: Flat Protection Seals Up To 1/4 Inch Punctures Can Be Used In Tubeless, Tubular…
–
$29.00Available Presta Valve Colors: 32mm: Standard 44mm, Anodized: Black, Blue, Green, Orange, Pink, Purple, Red, Yellow 60mm, Anodized: Black, Blue,…
Serfas® Yellow Rim Tape - Enough For 2 Wheels At 2 Layers (9m long x 21mm wide) Prevent Air and…
–
$35.00Dealer Purchase Only Keeps Tubes Protected From Spoke Hooks 10 Rolls Per Box - Cotton Rim Tape With Adhesive Backing…
Grid view List view
Show :
As a car owner, you need properly working tires for a seamless driving experience; however, your tires could still develop problems despite the introduction of the more advanced tubeless tires.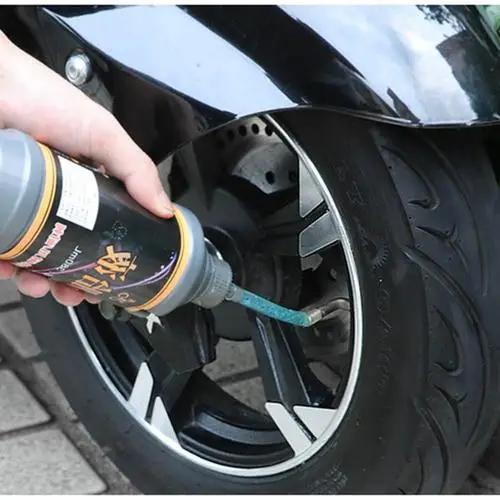
Tire leakage is one of the most common issues for most drivers because it happens unexpectedly. If your tire has a leak around the rim, how do you fix it? Here’s all you need to know!
Tires leak air around the rim because of punctures, tire bead damage, ripped tires, rim problems, or deteriorating valve systems. To fix the leak, drivers have to remove the tire to reseat the bead and reseal, which can be done at home if you have the appropriate equipment or with the help of a mechanic if the inner-tube tires need fixing.
For more information about what causes the tire to leak around the rim, how to fix and prevent it, and how much it will cost to repair your tires, read on!
Identifying a rim tire leak can be difficult to notice at first if your car has a slow leak; however, if your vehicle has a built-in tire-pressure monitor system or TPMS, you’ll get a low-pressure notification because the leak causes the PSI )pounds per square inch) to decrease.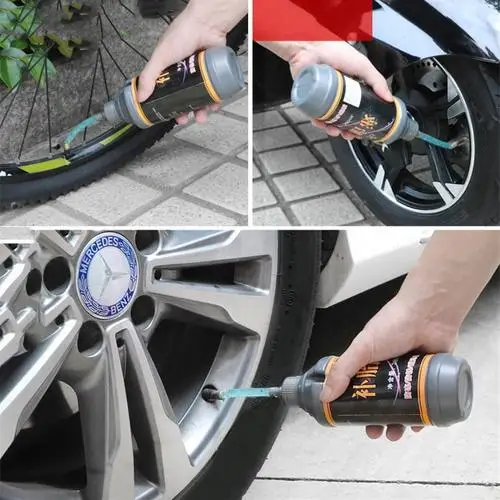
If your tire is leaking, here are the reasons why this could be happening.
Tire Puncture
Once you run over a sharp object, you could puncture your tire. While most drivers assume that the puncture will cause the tire to go flat immediately, this is not usually the case, and the hole might cause a slow two-to-three PSI leak per week.
In some cases, the sharp object like a nail can remain lodged in the tire, which prevents the air from leaking out quickly.
Whether it’s a minor damage or not, you shouldn’t ignore the leak as this may lead to extensive tears and tire damage.
According to The Inflator, approximately seven tire punctures occur every second in the U.S. alone; therefore, this is the first thing you should check for when there’s a leak.
Valve Stem Damage
Valve stems are critical parts of the tire system, and they come in different forms and sizes depending on the tire.
These stems are the tiny protrusions on your tire that you unscrew during inflation; therefore, they need to be in good shape, without any damages or dirt-clogged.
Additionally, when valve stems get exposed to elements over time, they become worn out or corroded, which can cause the air to leak around the rim.
Bead Leak
Tire leaks can also result from bead damage, where the tire seals itself to the rim.
To know whether the bead is the problem, you’ll need to determine how old the tire is because if your tire has dry rot or is older, it may no longer seal properly and have reduced elasticity.
Additionally, beads also get damaged because of a corroded rim or when the tire is mounted or removed using a tire lube.
Your entire wheel gets this type of damage if you regularly hit potholes or bumps at high speed, deforming the wheel’s metal surface, which may cause the tire to pull away.
Keep in mind that if the bead is damaged and you can’t seal the tire to the rim, you have to replace the tire.
Rim Issues
If you are using aluminum or magnesium alloy wheels, your wheels are more susceptible to corrosion, which affects the part where the rim meets the tire bead.
Rim damage can be caused by several causes, especially if you are constantly driving on bad roads with many potholes.
Before installing new tires, ensure your technician checks the bead seal and wheel correctly to confirm that the rims are not corroded.
Furthermore, check for wheel porosity that causes air to leak from the rim due to corrosion, incorrect wheel weights, or poor casting. To fix the leaking issue, avoid injecting a tire sealant and fix the rim first.
Once you discover that your tire is leaking air around the rim, what next? Here are some steps to guide you.
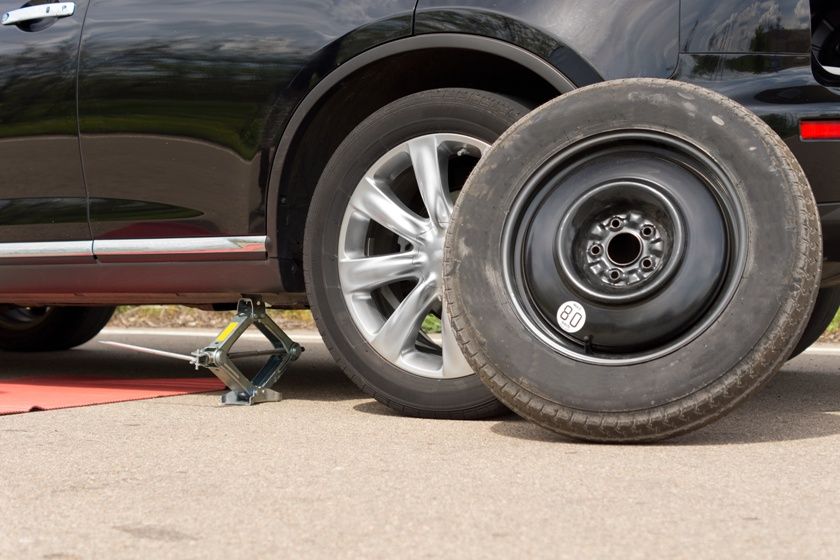
1. Remove The Tire
To identify the cause of the leak, you’ll need to remove the tire and place it on a flat surface with the valve stems facing up.
2. Fill The Tire And Rim With Soapy Water
Add soapy water to your tire; around the outer edge of the rim, the area of the leak will be identifiable through bubbles from the leaking air.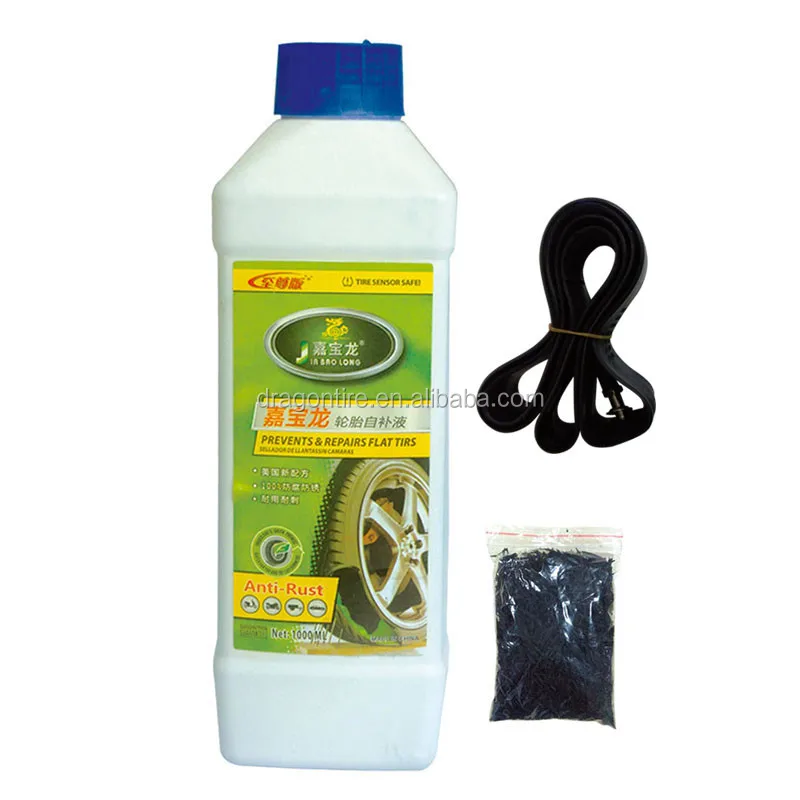 Mark the area and move to the next step.
3. Release Air From The Valve Stem
After you’ve marked the area, empty the air from your tire by pressing inward on the valve system using the valve removing kit in your car or unscrewing it from the stem.
4. Separate The Tire and Rim
Since the tire and the rim are attached with a seal, you’ll need something heavy like a wood board to separate them.
Use a hammer to hit the wooden plank until the tire’s bead breaks free from the rim.
5. Clean The Tire and Repair
Once the two parts separate, you can stop the leak around the rim by cleaning the tire’s edges with a cloth to remove loose debris and dirt.
After the cleaning is done, you can add some repairing solution to the leakage and start filling the air.
Once you fill the tire with the desired air pressure, you can check again for any leakages using the same process with soapy water.
Fixing a tire rim leak can be expensive or affordable, depending on the leak’s cause and where you get the service done.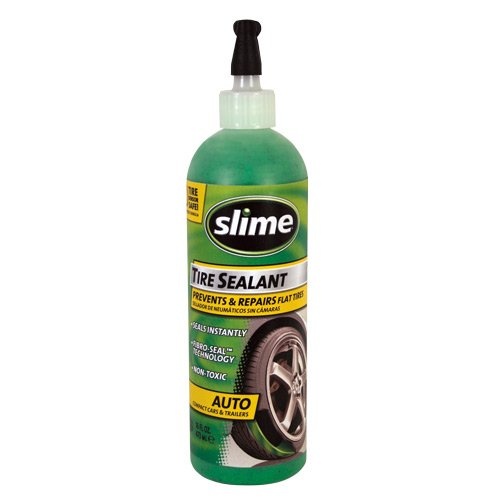
According to customer reviews, if you get the leak repaired at the shop you bought the tire from, you are more likely to get this service for free, but if you go to a different dealer, expect to pay $10-$20.
However, if the leak is because of a damaged rim, you’ll incur more costs which vary greatly depending on the brand.
If you check popular online sites, rims’ prices range from under $25 to $200; therefore, it will cost you more to repair the leakage if you have to replace the rim or entire tire.
To avoid this tire leak, there are some preventive measures that you can take.
Regular Maintenance
As mentioned above, tire leakage can result from valve stems or rims that are dirt clogged; therefore, you need to check your tires regularly.
With more accidents connected to tire blowouts and issues, it’s safer to have your tires checked for any potential problems to prevent leaking around the rim.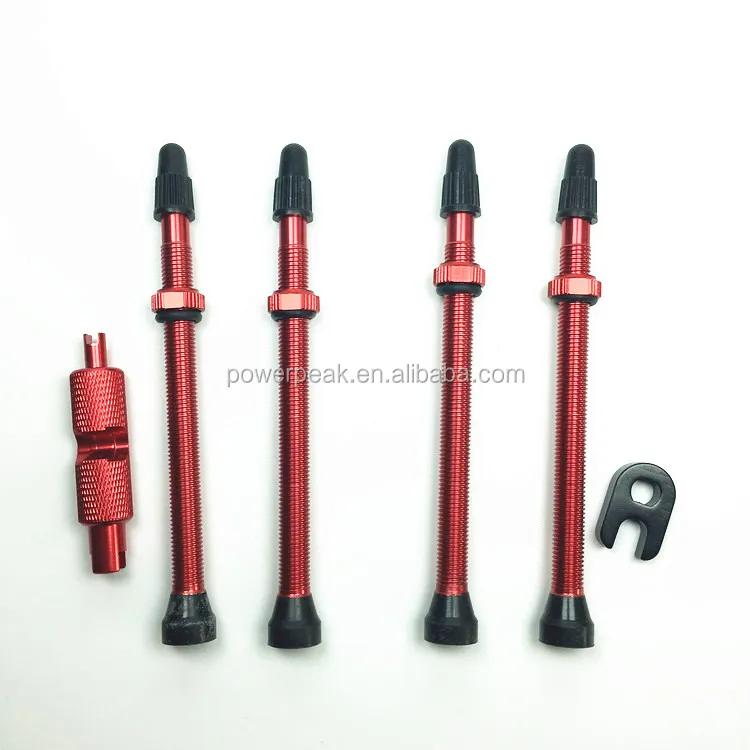
Drive Carefully
We have already established that punctures are the number one cause of tire leakage; therefore, if you can, it’s best to avoid situations that could cause punctures.
To achieve this, you should drive more carefully and at recommended speeds, especially on roads with potholes or speed bumps.
Avoid Overinflating Tires
Overinflating tires doesn’t solve a tire leakage problem. Once you identify that air is leaking around the rim, follow the above steps I shared to fix the issue.
However, if you choose to overinflate, the tires will become unstable, rigid, and lose traction when you are driving.
Use A Professional Mechanic
According to the U.S. Tire Manufacturers Association, drivers should supplement their monthly inspections with regular professional tire care.
The check should include wheel balancing, alignment, and tire inspection to protect your tires from leaking air.
To find out more, you can also read our posts on how common are flat tires, underinflated tires, and how long will tires last with bad alignment.
Tires leak air around the rim for several reasons, but luckily this problem can be fixed and prevented.
While it’s possible to fix a leak at home using the kit from your car, you can also enlist the services of a professional mechanic if you spot extensive damage.
I have shared some simple steps that you can take to fix the leak, especially if you are doing it at home.
To avoid these tire problems, regularly check your tires for air pressure and damages at least once a month, consult professional mechanics, and drive carefully to avoid incurring extra repair costs.
Hello my readers, today I will explain what tubeless tire sealant is, its varieties and how to use it. A flat tire on the road is not a pleasant surprise. And if it is broken, it will no longer be possible to pump it up. This is where sealant can help to solve a similar problem. You need to take with you on the road, along with a set of tools and a first aid kit, a sealant for repairing tubeless tires. It takes up little space, but it will help to patch the hole. It is better to have a pump for it (manual, electric - it doesn’t matter) so that you can then pump up a flat tire.
Content
This is a sealant of hoarse tires, helps to cut off the extensed wheels of the car, both lightweight and cargo vehicles, and a carbon fist . They reliably seal a hole up to 5 millimeters in size. When ejected through a puncture with air, it forms a strong plug of vulcanized rubber, stopping the leak completely.
The balance of the wheel is not disturbed, inside the wheel it remains active for a long time, preventing new leaks in the future.
This sealant is suitable for repairing tubeless or tube tyres, whether they are used with aluminum, steel or magnesium rims. Does not cause corrosion of the internal surfaces of any discs, easy to use, within a minute tightens most punctures. Provides long-term express sealing.
After application, a special composition of the substance will create a pressure of 0.6 atmospheres in the wheel, which allows you to drive at low speed. After driving about 10 kilometers, you can pump up the wheels and move on at medium speed.
Puncture repair sealants are divided into liquid and aerosol. In fact, the aerosol is also liquid, only released in the form of a spray can, where the composition is pushed out under the pressure of gases when a button is pressed. The aerosol type allows the sealant to be injected into the tire through a hose with a nozzle valve, without reducing the tire's internal pressure to zero.
Little useful information can be gleaned from the tire sealant instructions themselves. They do an excellent job with different penetrations in the tread area. Side cracks and cuts stick poorly, because in motion the substance is smeared by centrifugal force mainly on the tread side, little gets into the sidewalls.
For a better result, you need to take breaks in movement and stops during side cuts so that the substance flows to the punched places better, but this also does not guarantee a hundred percent result. In addition, the tire cannot be sealed with this composition when it is disassembled. The substance should be squeezed out with air through the damage, gradually overgrowing the hole, and when disassembling the air has already escaped, then the hole will not be sealed, because the substance is not squeezed out through it.
Before using a sealant that has been sitting in the glove box or trunk for a long time, and it is not yet known how long it has been on the store shelf, you need to shake the can well.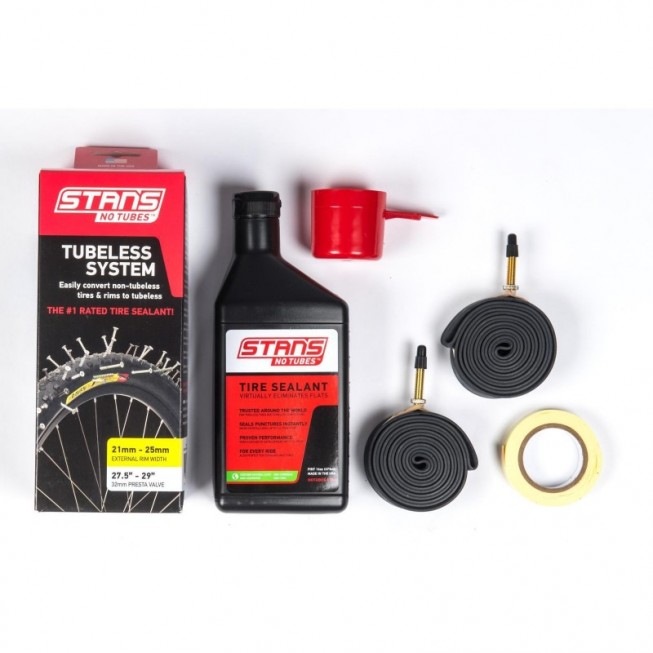
When the temperature outside is below zero, you need to slightly warm the can, without the use of open flame.
After you have injected the composition into the chamber, you need to drive several kilometers at low speed. Usually, both speed and distance are indicated in the instructions for the sealant. With this movement, there is a uniform distribution over the entire inner surface of the tire, while unbalancing the wheel is excluded.
For a quality patch, it is important to remove the object that caused the hole (a nail or other sharp object). If this is not done, it will interfere with the full vulcanization of the hole with sealant. When rolling, the object staggers, destroying the cork that has not yet hardened properly.
When filling with sealant, the stopcock on a flat tire must be below the center of the wheel itself.
When buying, carefully look at the dimension of the wheel indicated in the instructions, which can be repaired. One spray is suitable for one, maximum two tires, so it is worth using the product only for extreme cases.
Tubeless Bead Sealant is used to seal the gap between the tire bead and the rim to prevent air leaks where they meet. The main properties of this type of sealant are:
Operation steps:
One question remains, how to replace such sealants when they are not at hand.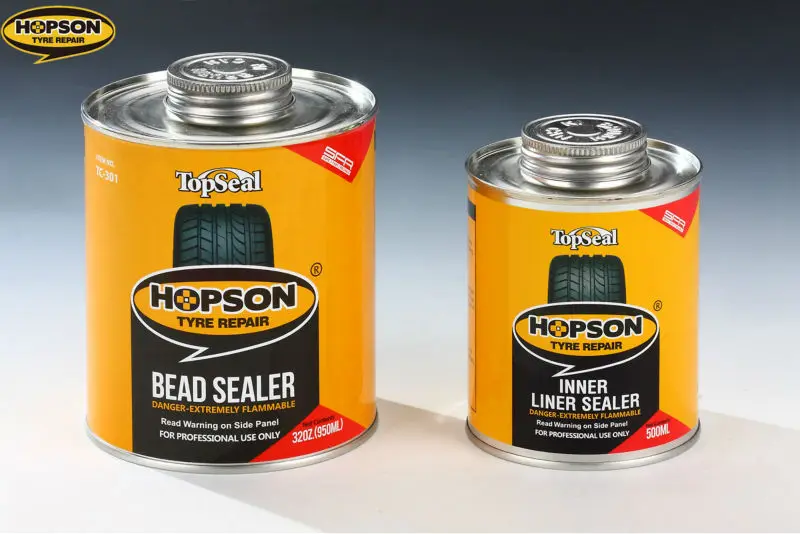 The emergency sealant can be replaced with a tire curing repair kit. However, it will take longer to fiddle with the tire and for this you will need to disassemble the wheel and remove the tire.
The bead sealant can be replaced with plain silicone, but with large gaps it can be difficult to achieve a full seal and the durability is not great. Therefore, it can only be used when we have nothing else.
That's all, friends, see you on the pages of the site, subscribe to friends' updates, subscribe yourself, and do not forget to share links, it is also useful for friends to know this, goodbye.
Please enable JavaScript in your browser to display pages properly.
8 (800) 707-65-40
Request a call
Remind password
Personal account
New customer
6 + 6 = I hereby confirm that I have read and agree to the terms of the privacy policy and consent to the processing of my personal data. Learn more
Request a call
Leave your phone number and a convenient time to call, and we will call you back
Shopul. Komsomolskoye highway, 3b st. Business, 7st. Vaneeva, 209Aul. Golubeva, 7 st. Karl Marx, 60 vul. Comintern, 39, room 1st. Generala Ivlieva, house 24Aul. Fuchik, 36, Perekhodnikova st., 28/1 st. Dyakonova, 2 r. Gaugelya 2A/2pr. Gagarina, 37b 5+3=I hereby confirm that I have read and agree to the terms of the privacy policy and consent to the processing of my personal data. Learn more
The KOLOBOX disc sealant treatment service is performed with care for the client's time and at a favorable price!
What is the function of the sealant?
Let's analyze the main tasks that the sealant performs:
 e. does not allow air or liquid to enter between them.
 What is the procedure for applying sealant to a motorcycle rim?
The process of applying this agent to the surface of the disc goes through the following steps:
What causes depressurization of the space between the rim and the tire?
After carrying out the procedure for coating the disc with sealant, many motorcycle drivers are interested in the question of how to avoid a depressurization situation in the future? Consider the main reasons that cause loss of tightness: