Published: · Modified: by Allison · This post may contain affiliate links · This blog generates income via ads
So, it’s that time of the year when every nook and cranny is covered with snow, to create a path for yourself, you need a snowplow, in this article I have compiled a list of 20 homemade snow plow projects completed by various persons.
Here you will find homemade snow plow plans for SUVs, tractors, bicycles, and more. At the end of this guide, your snowplow needs would most likely be met.
Click for more details
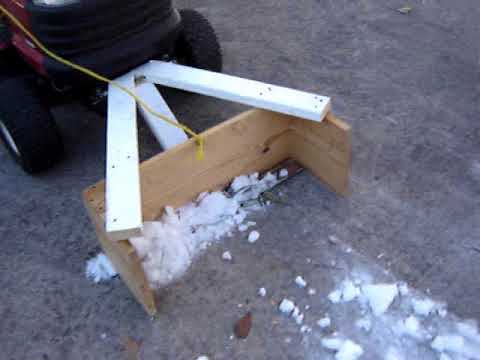
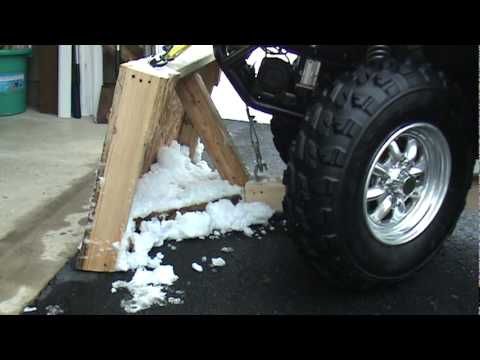
If you have a tractor I would highly recommend making this homemade snow plow. The plow is wide enough to get a good amount of snow out of the way. In this DIY guide, you will learn how to make this low-budget snowplow, it is way cheaper than spending 500 dollars on a snowplow. For the making process, you are going to need wood, a rod, and a couple of other tools.
Click for more details
While doing my research, I found yet another amazing homemade snow plow, the making process involves the use of welding tools. This snow is made of metal, the making process will require you to build the blade frame and thereafter attach the plate. This homemade snow plow can be used for years without getting bad.
Click for more details
Here’s another snowplow I found, this one is ideal for a 4-wheel drive car. In this DIY tutorial, you will learn how to make a homemade snow plow and attach it to your 4-wheel drive car. Although this tutorial doesn’t go in-depth in explaining the process of putting this plow together, if you are a handyman, you would not have a hard time understanding the instructions.
Click for more details
I found this cute idea and thought I’d share it. It is a great hack for people that live in areas where the snow is unbearable. With this plow, you can walk with your heels or shoes and create a path for yourself. After reading this DIY guide, you should be able to make a toe plow for your shoes. The making process is quite easy to understand.
Click for more details
Here’s another homemade wooden snow plow I was able to find in the course of my research. With this wooden snowplow, you will be plowing backward, so you will need a vehicle with a Class III back hitch. The vehicle also needs to have a backup camera. This tutorial would not require using a pickup truck.
Click for more details
This guide is for people who own tractors and are looking for tips on how to have a homemade snow plow. The tips in the guide will show you all you need to know to have a homemade snow plow, from mounting the blade to tightening the parts.
Click for more details
I love the build of this DIY snow plow, the plow is built narrowly to save weight and keep it from taking up a lot of snow when lifted.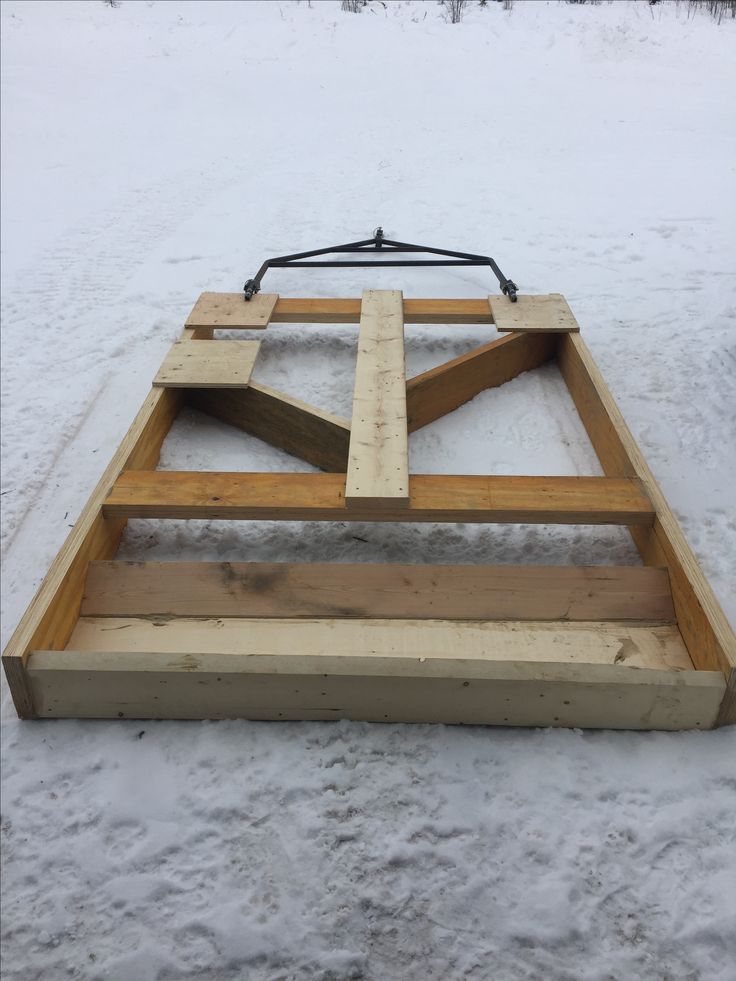 This guide is ideal for people who are looking at building a snow plow for their tractor. This is one that would cost less than $10 to build. If you are a handyman, building this shouldn’t be a difficult task.
Click for more details
This is ideal for people who have amazingly outstanding reverse driving skills. You should make this homemade snow plow if your reverse driving isn’t up to par. For the making, you will need an old bench press, roof sheets, old planks, and a few other materials.
Click for more details
I found this ideal to be pretty fantastic. You do not need to have a tractor or car to make a homemade snow plow. This guide will show you how to make a homemade snow plow using a bicycle and a few other materials. The making process will take a while to complete but it will be worth it in the end.
Click for more details
While doing my research, I also stumbled upon this remote-controlled snowplow.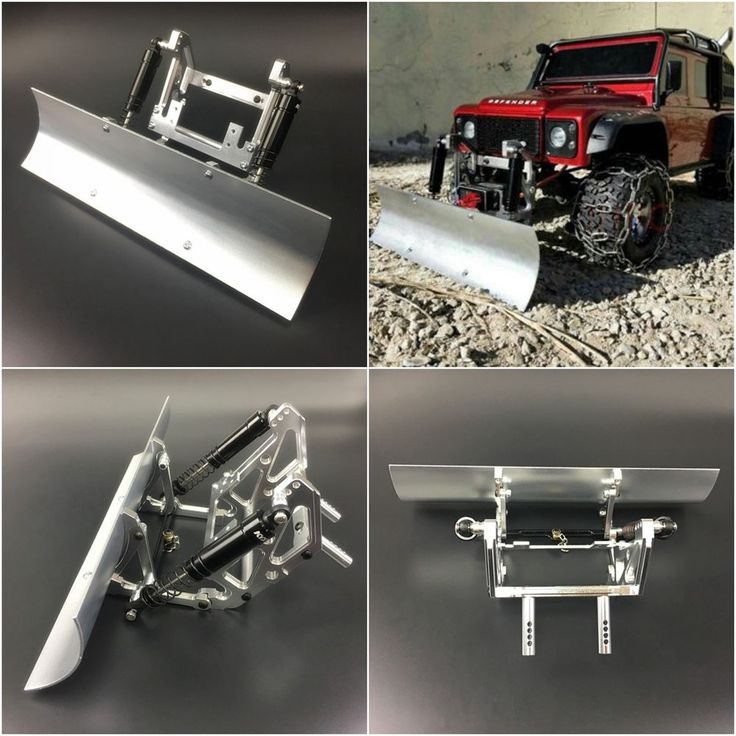 The cost of making this mini snow plow is about $389. This is ideal for people who do not want to go through the stress of using a shovel to clear the sidewalk. The making process is not so easy, it is time consuming but will most definitely be worth it in the end.
Do you have a Toyota corolla 4x4? Then this guide is for you. Here, you will see how the creator was able to build a wooden snow plow on his Toyota Corolla. This is one strong snowplow, however, the process will require you to take off the bumper of your car.
Here the creator was able to make a $12 homemade snow plow for his lawnmower using wood. Unfortunately, he doesn’t show the whole making process, however, if you are into woodworking, you’ll get the hang of how he was able to make this low-budget homemade snow plow using wood.
Source: laughingsquid.com
You can create this idea from items that are probably in your home right now. I know this homemade snow plow looks funny, but it works. For the making process, you will need to get an old LED TV case, and then attach it to the front of your tractor. It works like magic. This idea is ideal for people who are looking for a cost-saving snowplow.
Source: 9gag.com
Another thing you can do is to attach wood to your bicycle as seen in the image above. If you are into woodworking, making this shouldn’t be a difficult task to accomplish. It might not get as much snow out of the way as an ATV would but it works, however.
One unique feature that I love about this snowplow is that it can be rotated left/right. The snowplow is made of metal. In this DIY guide, the creator takes time to explain how he was able to put this snowplow together. It might take a while to complete, but it will be worth it in the end. You shouldn’t have a hard time making this if your handyman skills are top-notch snow plow Homemade Snowplow
Source: carthrottle.com
While this isn’t the best homemade snow plow in the world, it still gets the job done. If you are not planning on ripping apart the bumper of your car, you can consider this homemade snow plow idea. Somehow the creator was able to use a board and some rope to piece this together. I think this is a pretty cool idea.
Source: pinterest.com
This is a homemade snow plow made from a TPO roofing membrane and some wood. I love how the creator used the roofing membrane to cover up the wood. This is a great idea for those looking at having a “one of a kind” snowplow.
Save yourself from the trouble of building a snow plow from the scratch by getting one of these for your snow plowing needs. This machine is easy to use and also quite affordable if you ask me. I recommend this for people who have zero skill in crafting stuff.
Check Current Price on Amazon
If the previous snow thrower seems a bit too expensive for you, here’s one that would fit your budget. This is a snowplow that would require effort from you, it is not a machine, it is like a shovel that can be used to get snow out of the way.
Check Current Price on Amazon
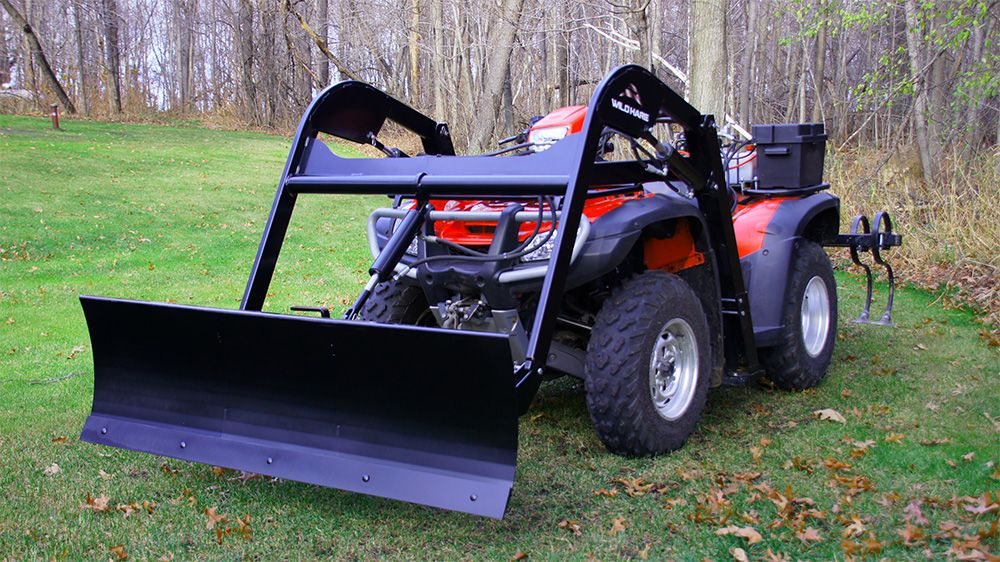
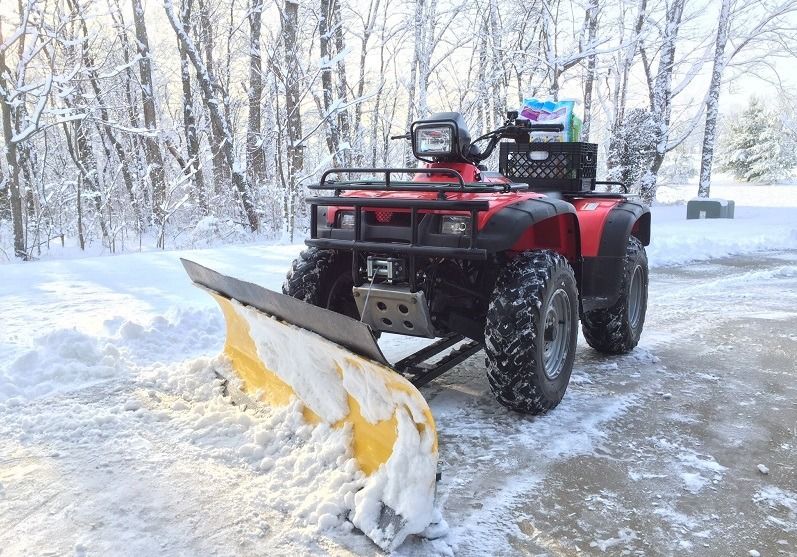
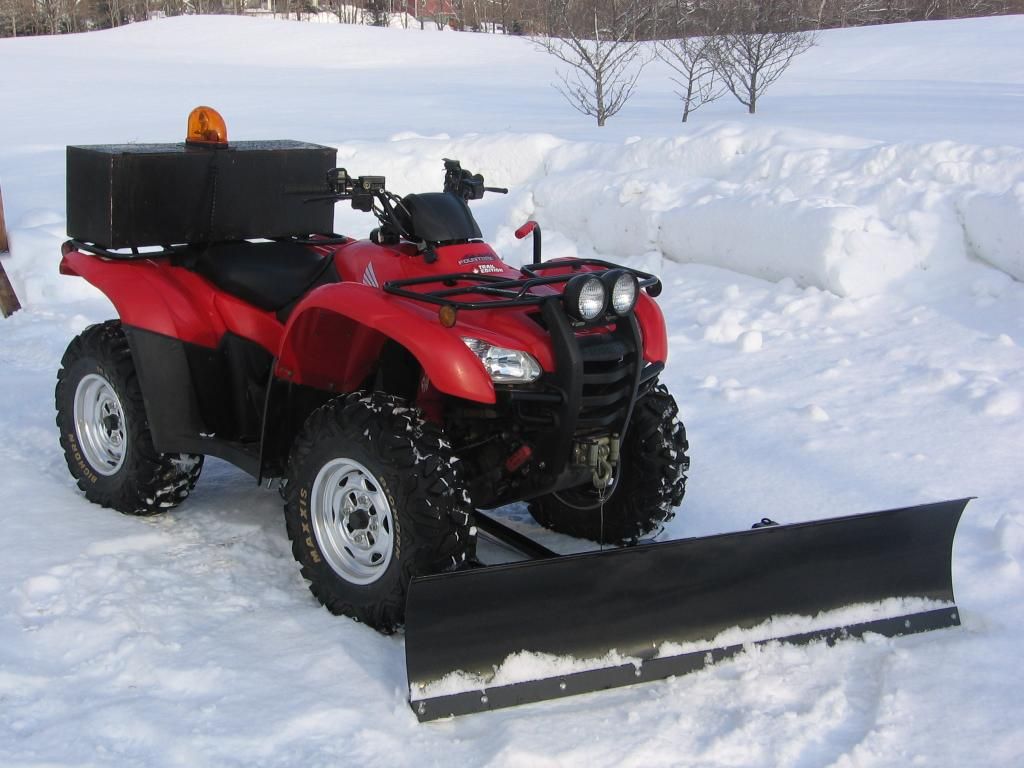
No, you are not buying the complete ATV, what you will be buying is the plow blade attached to the front of this ATV. I decided to include this for people who want to attach a plow to their ATV but do not know how to build one from scratch. This standard ATV plow is quite affordable.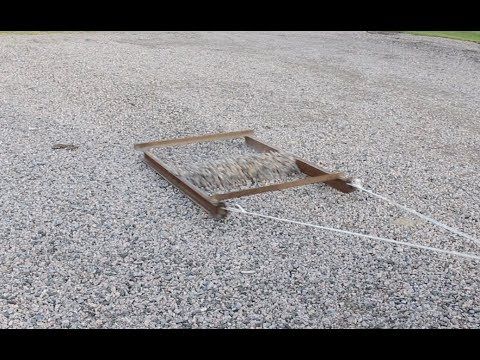 The blade comes in three different sizes. Make your pick!
Check Current Price on Amazon
Share this article
By: Steve Smith
●
01 September, 2010
John Howard/Lifesize/Getty Images
Designing and making your own homemade snow plow requires knowledge of steel-working and metal-shaping. It also requires welding capabilities. The project will yield a durable, useful machine that clears snow and debris from your driveway. If you attempt this project, give yourself plenty of time. It could take several days to complete all the necessary steps. The snowplow can be made in any size to fit a four-wheel-drive vehicle or ATV.
Locate six, heavy 2-by-8-inch boards at least four feet wide or longer with enough weight and durability to withstand heavy use. Do not use cracked or splintered boards for your homemade snowplow.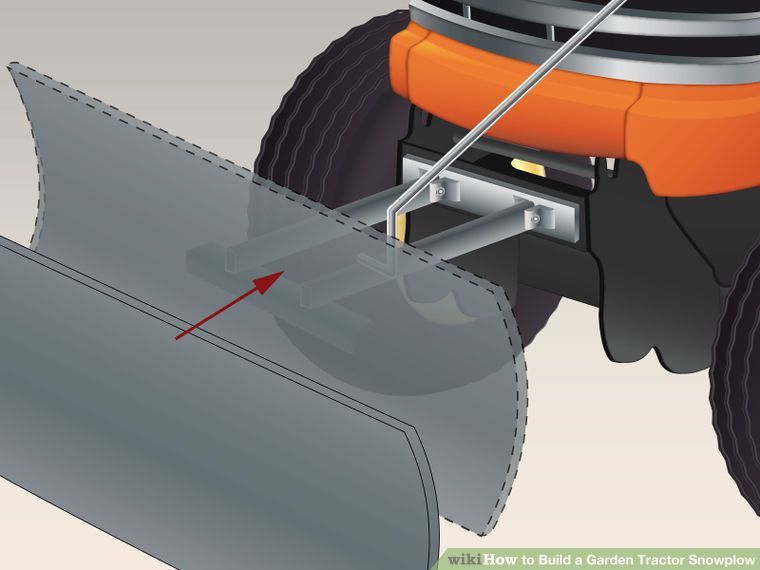 Even 8-inch-wide strips of plywood will work in this case. Just fasten together with nails to create boards that are at least 2-inches wide.
This makes a medium-size plow to tow behind an ATV or truck. For larger, heavier plows, simply use more boards.
Fasten the boards together to form a beamlike structure. Nail two boards together with galvanized nails and hammer. Then nail on subsequent boards to them until you have a thick, heavy beam to use as a snowplow.
Attach a weight to the homemade snowplow by threading a chain through the hole in the weight and then wrapping the chain around the snowplow beam. This provides additional packing power for your plow.
Wrap another chain around the snowplow and fasten the chains to the back of the tractor, four-wheel-drive vehicle or ATV. Drag the homemade snowplow behind the vehicle at a slow speed to pack and plow the snow.
Building your own ATV plow can save you money. This is a personal preference and won’t affect the steps listed below. Purchase thick metal sheeting. This usually needs to be about 4 feet in length and able to withstand heavy use. This is the sheet that will be used as the primary plow in front of the ATV. To bend the metal, you will need a metal bending fabrication tool. Build a mounting system that can attach to your ATV. The mounting system can be built to hook or hang onto the front metal bars of the ATV or you can use a chain to temporarily attach the mounting system. Once this metal mounting system is built, weld the mounting system to the curved metal plow.
References
Resources
Writer Bio
Steve Smith has published articles on a wide range of topics including cars, travel, lifestyle, business, golf, weddings and careers. His articles, features and news stories have appeared in newspapers, consumer magazines and on various websites. Smith holds a Bachelor of Arts in English and journalism from University of New Hampshire Durham.
Removing snow with a shovel is a rather laborious process. To facilitate it, a homemade snow blower can come to the rescue. Having made it, you will not only free yourself from the hard work of clearing the snow, but also save a lot of money by not spending money on expensive models of units in the factory.
Contents
The main task of a snow blower is to capture and throw snow masses from the place of their accumulation, for example, from the sidewalk. Snow blowers made by craftsmen have a different design. But according to the type of snow capture, the models differ in screw and rotary.
The main part of the snow plow unit is the auger, which resembles a meat grinder screw.
There are two types of screw units.
 When moving the mechanism with a bucket, a layer of snow is cut, which immediately falls under the rotating knives. The latter crush the snow and move it to the central part of the hull. Since the blades are located in the center of the auger, they capture the crushed snow and throw it into the nozzle installed at the back of the bucket. The higher the speed of rotation of the shaft with the blades, the further the snow is thrown. Auger knives can be either with a smooth edge or with a serrated one. Blades with a smooth edge are used for clearing fresh snow, and are often made from a conveyor belt. A toothed auger is used when it is required to remove icy and packed snow.
 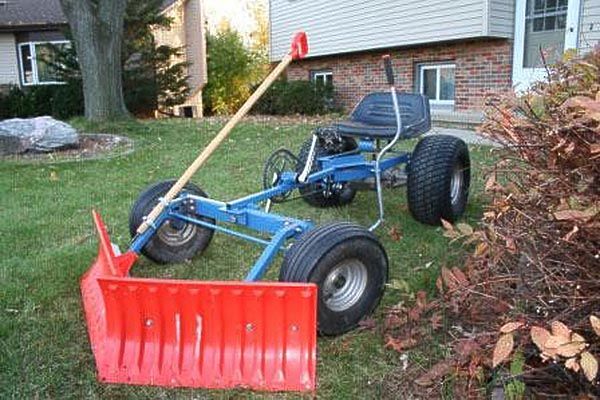 The following figure shows the structure of a two-stage type snow blower.
The rotary type snow blower is the simplest design and consists of a round volute body and guide vanes . In the upper part of the body there is a sleeve through which snow is thrown out.
Rotor with blades is installed in the central part of the volute. This impeller is driven by an engine (petrol or electric). The rotor, rotating at high speeds, captures the snow, crushes it in the body of the snail and throws it out through the sleeve.
Homemade snow throwers can be of two types.
Before you make a manual snow blower, you need to understand what type of engine is better to choose - electric or gasoline.
Electric units are quiet and very easy to maintain . They also do not require any consumables. The only inconvenience of electric devices is the electric cable that constantly interferes with movement. Of course, you can use the engine running from batteries, but the operating time of such a cleaner will be limited by the battery charge level. Therefore, if you are going to make an electric snow blower, be aware that it can only work within the yard, that is, the range of movement of the unit will be limited by the length of the power cable.
Petrol snow blowers are powerful and rather noisy units. They cope with thick snow covers, including icy ones. Gasoline devices have an advantage over electric ones, not only in terms of power, but also in mobility, since they do not depend on the electrical network.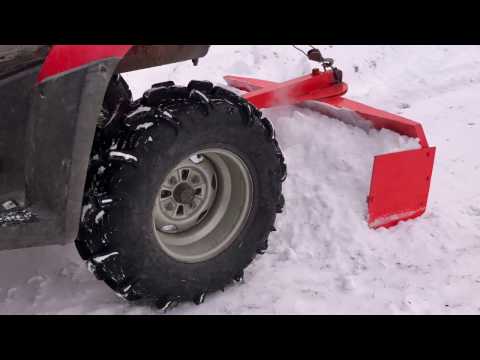 Due to this, the units can be used for cleaning snow drifts in large areas, for example, near private sector yards, in high-rise building yards, on sidewalks, on separate sections of the road, etc. But despite the listed advantages of gasoline devices, they also have disadvantages:
Based on the above, you can understand that if you need to clear the yard of a summer house or a small private property from drifts, then it is better to stop at the manufacture of an electric snow blower. If you intend to regularly clear large areas of snow, then a gasoline drive will cope with this task better than an electric one.
To make a snow blower with your own hands, you will need to choose an engine that will rotate either the auger or the rotor of the unit. If you are going to make an apparatus with an electric motor, then any asynchronous type electric motor with a power of at least 2 kW and a rotation speed of 1500 to 3000 rpm is suitable as a drive component. If you take an engine with less power, then it will not cope with thick layers of snow and will stop all the time. In this case, cleaning drifts with a shovel will be much more effective.
As a drive component, some craftsmen use motors from electric trimmers and chain saws. It is not uncommon to find homemade snow plows made from a lawn mower. But the power of these units is only enough for cleaning freshly fallen and loose snow.
A more powerful variant of the driving part for the snow thrower is the Internal Combustion Engine (ICE). It can be taken from a chainsaw or petrol trimmer. Also, a snow removal unit can be made from a motor cultivator or a motor block.
The snow blower auger is the main moving part of the machine and is easy to manufacture. It is best to use a rubber belt from a conveyor 10 mm thick and 1.5 m long for the manufacture of the auger . From the rubber strip, it is necessary to cut out rings in the amount of 4 pieces with a diameter of 28 cm. The details are easily cut using an electric jigsaw.
Tip! To cut rings from the tape, you can do without a jigsaw. Screw 2 sharp screws into a small board and use this device as a compass. After a few full turns of the cutter, the ring will be cut.
Below are drawings of all auger parts.
Shaft is taken as metal pipe with a diameter of 27 mm . Adapters are fixed to its ends, on which bearings are installed. A cut 120 mm long is made in the central part of the pipe, into which a central plate will be installed, designed to throw snow. Also, 4 plates are put on and welded onto the pipe. Rubber rings will be attached to them and to the central plate. How this is done can be clearly seen in the next photo.
Metal strip can also be used to make the auger. But it is preferable to use rubber, because it does not scratch the paving slabs and is not damaged when it comes into contact with a hard obstacle, such as a curb or a fence.
It's also easy to make a bucket that will serve as a housing for the auger. For this purpose, roofing iron is usually used. The drawing below shows the dimensions of the bucket.
For bucket sides, plywood or 10 mm thick OSB can be used. The latter option is more suitable for this purpose, since it is more moisture resistant than plywood. Bearings are installed on the sidewalls of the housing (you can use the 205th, closed), and the screw shaft is already inserted into them. Bearings must be closed with glasses.
Important! When assembling the snowplow assembly, it is necessary to make a small gap, about 2 mm, between the bucket and the auger so that the latter does not touch the body.
To remove snow from the bucket, a hole is cut in its upper part. As a drain, you can use sewer plastic pipe with a diameter of 150 mm or another. The main thing is that the diameter of the chute exceeds the width of the folding blades of the auger.
In order to direct the snow ejected by the shovel to the side, a plastic bend can be put on the pipe.
The bucket with auger is mounted on a pre-made of metal corners (50 x 50 mm) frame (see drawing above). To fix the engine on it, corners of 25 x 25 mm are used.
Tip! If you attach a slightly curved sled to the frame, as shown in the following figures, then working with a snow thrower becomes much more convenient, since it becomes possible to tilt the mechanism for better gripping of snow.
But this unit can be further improved. The modification of the snow blower is to add small wheels to the rear of the skid . In this case, the snow blower will be more convenient to pull back and transport.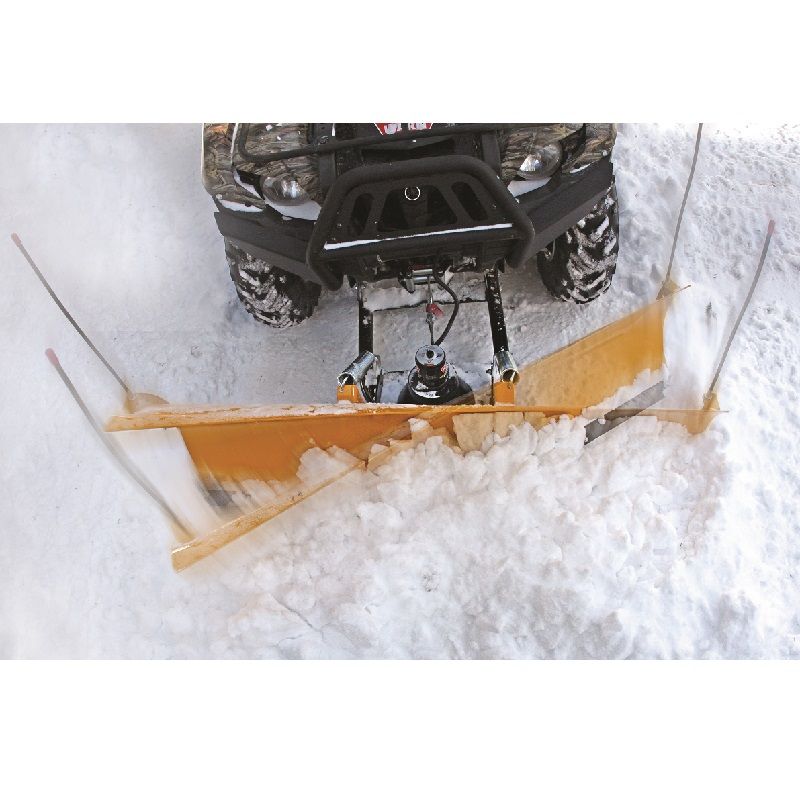
Snow blowers based on the auger are the most powerful and capable of handling even icy snow. In addition, the auger is most often used in self-propelled snowplows.
This snowplow is made by hand quite simply. Since it will be powered by a chainsaw engine, a few additional parts for the chain drive will be required. For these purposes, you can use front and rear sprockets from a motorcycle, as well as a chain from it.
How the frame and auger are made has been described above. A long handle is attached to the frame. A large sprocket from a motorcycle is installed on the auger shaft on the right side, and a small sprocket is installed on the chainsaw engine shaft. Next, the chainsaw is mounted on the frame, after which the chain is put on and pulled on the sprockets. To control the engine, the gas cable is brought to the handle attached to the frame.
Below are homemade drawings on a chassis, where a chainsaw is used as the main part of the drive.
To make an auger snow blower from an electric trimmer or a lawn mower, you will need to install a gearbox: it will serve to transfer rotational motion from the trimmer shaft to the auger shaft.
But there is one caveat. The gearbox for this type of unit is quite expensive, and it is not advisable to buy it for the manufacture of attachments to the trimmer. Therefore, on the basis of the latter, rotary-type snow blowers are made, which will be discussed later.
The simplest addition to the motoblock is snow plow.
A self-made snow plow attachment (shovel) on a walk-behind tractor is screwed to the frame of the unit, after which it turns into a small bulldozer.
Tip! Instead of a blade, an auger can be attached to the front of the frame of a walk-behind tractor or a motor-cultivator, as a result of which you will get a self-propelled snowplow. This attachment for a walk-behind tractor, if not needed, can be easily disconnected from the main unit.
Below is a diagram that clearly shows the design of a snow blower based on a cultivator.
The scheme is decoded as follows.
The self-propelled snow blower makes clearing snow much easier, especially in large areas where the use of a device on skis, pushed by the operator, requires a lot of the latter's physical strength.
You can use the drawings below to make a snow blower.
The material for the manufacture of the rotor and its blades is sheet steel 2 mm thick. Rotor housing is made of roof iron or sheet steel thinner than 2 mm. All dimensions of parts are indicated on the drawing.
The power transmission from the motor to the rotor shaft can be done using the belt or the chain. It is also possible to connect the gearbox shaft of an electric trimmer or lawn mower to the rotor shaft. Fortunately, these units already have an angular gearbox. The whole structure is mounted on a frame with a chassis. The result is a lightweight handheld snow blower on wheels.
Remember that the electric snowblower based on the trimmer should not be subjected to heavy loads, as its gearbox may fail. The same recommendation applies to the lawn mower if you decide to assemble a snow thrower on its base.
A simpler design of the unit mounted on a frame with skids can be assembled according to the diagram from an old magazine.
Thanks to the above drawings, the assembly of a snow blower cannot be difficult for any home craftsman.
Often there are situations when you need to remove snow at night: in this case, the snow blower headlight will be a useful addition to . If installing a headlight on an electric snow blower is quite simple, then with units powered by internal combustion engines, things are more complicated: you need to connect to the electrical circuit of the device using special relays and electronic boards. But still there is a way out of this situation. You can buy regular diode lamp and screw it to the unit.
Contents:
The principle of operation of the auger snow blower
Which engine can be used for the snow blower
DIY snow blower: making the auger and frame
DIY snow blower : useful tips
Homemade snow blower from walk-behind tractor
Screw snow removal units are divided into two types according to the principle of operation:
In single-stage, snow intake and ejection is carried out due to the rotation of the auger, which is similar in shape to the shaft of a mechanical meat grinder. The auger with a smooth edge copes with the cleaning of freshly fallen snow. For cleaning already stale and dense, an auger with serrated edges is needed.
Smooth-edged auger for snow blower
In two-stage models, a rotor assists the auger in snow intake. It is attached to the drive shaft. The rotor blades protrude slightly forward, thereby facilitating the capture of snow. For the manufacture of rotor blades, either metal or durable plastic is used.
When assembling a snow blower with your own hands, it is easiest to make it a single-stage one, as this is the easiest unit to manufacture. Its ejection of snow reaches 10-12 meters.
If you are going to make a snowplow from a walk-behind tractor, you can skip the engine selection procedure, as the unit resource will be used. In this case, you can proceed to the next step.
Snow blower with petrol engine
To make a snow blower, you will need an internal combustion engine or an electric motor. For the latter, an extension cord will be needed, which will determine the range of our snow blower. If the action takes place near the house, then it is better to use an electric drive, but you need to remember that the electric motor is afraid of moisture and it needs high-quality waterproofing.
Snow blower drive shaft
If you need to work in a country house or a remote area where there is not always electricity, then an internal combustion engine running on gasoline will do. It can be taken from a walk-behind tractor with low power (6.5 l / s is enough). The motor will be mounted on a quick-detachable platform, which will make it easier to repair and service in the future.
Auger and bucket homemade snow blower
The snowblower consists of a welded metal body, inside of which there is an auger ─ this is the main working element.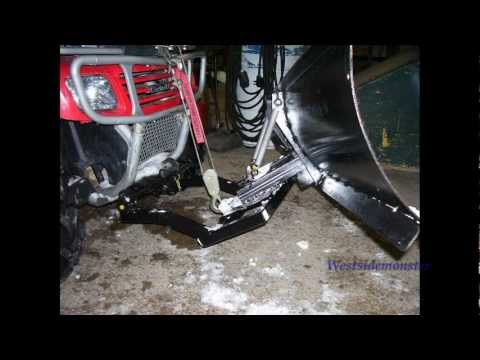 It is a spiral profile welded onto a shaft that rotates on bearings. It is necessary to fix the engine on the frame and transfer the rotation of the engine shaft to the auger. A small gap between the auger and the box provides excellent removal of the collected snow.
In order to make an auger, we need an old box or sheets of iron, which must be bent into the shape of an auger.
Schematic diagram of auger mechanism for snow blower
Manufacturing consists of the following steps:
Any bearing can be used, as long as their inner diameter matches the diameter of the pipe. Cups are welded into the sidewalls of the snow bucket for installing bearings.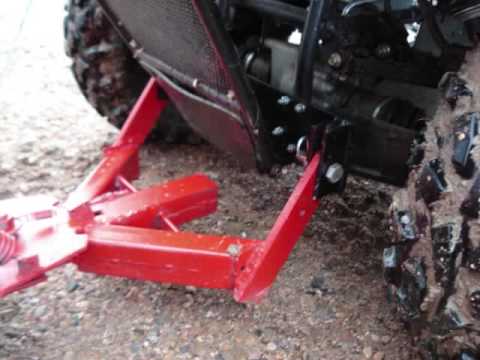
Diagram of the frame, chassis and working equipment of a homemade snowplow
A frame for a homemade snow blower is obtained by welding 50 mm corners, to the cross members of which strips for a quick-detachable engine platform are mounted. Skids or wheels must be attached to the frame to move the snow blower. If the surface to be cleaned is perfectly flat, then wheels are enough. With uneven surfaces and deep snow, skids will be appropriate.
Do-it-yourself auger snow blower assembly diagram
The controls are attached to the frame with M8 bolts. Next, an easily removable platform is screwed onto which the engine is installed.
The unit is equipped as follows:
Snowblower with chainsaw engine
In order to study the assembly process in detail, pay attention to the video instruction.
In order for the snow blower to work for a long time and be a reliable assistant for a long time, it is recommended to follow the advice of professionals: