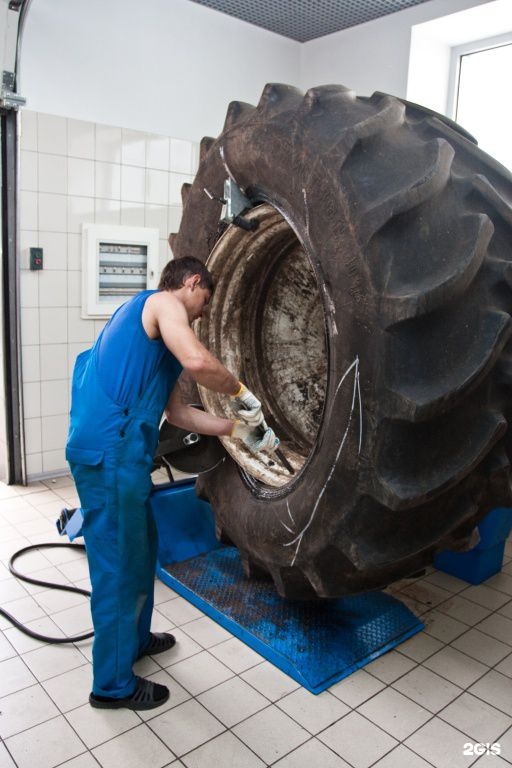
Prevention is better than a cure, everyone knows that, but sometimes things simply happen. In the world of off-roading, tyre punctures are a definite possibility. You might be the most vigilant driver around – checking your tyres' condition, inspecting them for wear and tear, cracks, splits, cuts but your tyres may still cop an errant nail, screw or stick in the tread or sidewall; and that's puncture time.
Your tyres are your points of contact with the ground, so never drive for any great distance when you know one or more of your vehicle's tyres are punctured. The simple solution is to fix the puncture, so you can drive the, hopefully, short distance to reach a tyre professional who will then properly fix the tyre or replace it.
Be prepared with a good tyre-puncture repair kit, know how to use it and then you'll be ready for action when the time comes.
Note: Only use a tyre-puncture repair kit on tubeless-type tyres. Also, and this is a great tip from aftermarket supplier ARB: "Never attempt a repair on a tyre that shows signs of internal or external structural damage such as exposed belts, sidewall bulging, ply separation, cracks etc. "
A tyre-puncture repair kit.
A tyre-puncture repair kit should include a carry case and all of the gear you need to achieve a temporary fix of a puncture, which will give you enough leeway on that repaired tyre to safely reach a tyre-repair professional in order to have it properly fixed.
As with any gear, you get what you pay for so when it comes time to buy a tyre-puncture repair kit, spend as much as you can afford because that way you'll ensure you have the best quality equipment onboard. In this yarn, we're using an ARB Speedy Seal Mk2 kit ($49).
The tools and materials in a tyre-puncture repair kit include:
A pair of pliers: Use these to remove the cause of the puncture (i.e. the nail, stick etc).
Lubricant: Use this on the reamer to ease its way into the hole.
The reamer: It looks like a cross between a short ice pick and a drill bit with a handle. The reamer is used to probe the puncture, clear away any remaining debris and temporarily separate the tyre's steel belts without damage, helping to smooth the way for the repair cords/plugs.
The cord-insertion tool: Looks like a cross between a sewing needle and an ice pick. You use this to, you guessed it, insert the repair cord into the puncture.
Repair cords: Thick strings of spongy cord that you insert into the puncture to fill the hole and make the tyre temporarily safe to drive on.
Some kits, like this one, include valve accessories, a blade (to trim the repair cords) and more.
Make sure your vehicle is on as flat ground as possible, is switched off, in gear and the handbrake is engaged. If possible, do all of your repair work while the tyre is still on the vehicle, that way its weight will help you maintain a stable working area while you fix the puncture.
Find the punctured spot, and pull the offending object (stick, nail etc) out of the hole with a pair of pliers, as provided in the ARB Speedy Seal Mk2 kit.
Use the reamer tool to clear out the puncture hole.
Then you need to clean the hole as best you can so no left-over material can cause any further problems and your repair cord has a clear hole in which to adhere.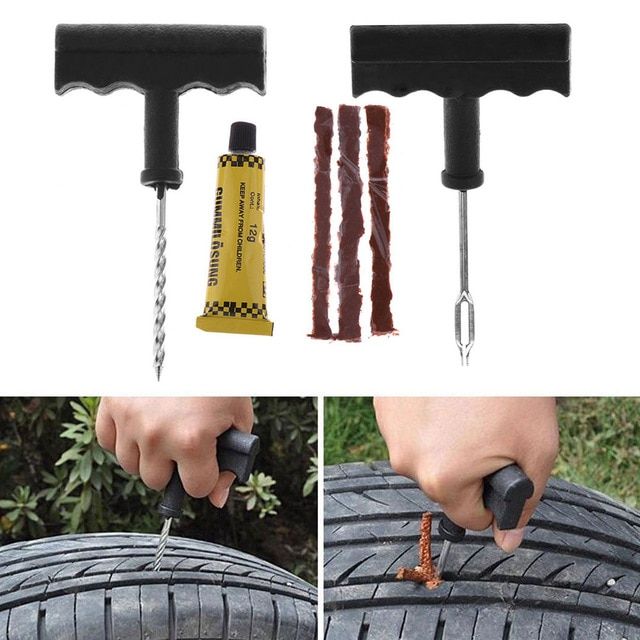
Smear the kit's lubricant on the reamer – this is the tool with the spiral, drill-bit-like shaft – then insert the reamer into the puncture to clear the hole. Move the reamer around in the hole, in circles, in order to make the hole a bit bigger, separate the steel belts, then pull the reamer out. Now's the time to reinflate the damaged tyre to help wth insertion of the cord.
Thread a length of repair cord through the eye of your insertion tool.
Next, thread a length of repair cord through the eye of the insertion tool so there are equal lengths of cord protruding from either side of the tool. Then smear a bit of lubricant on the insertion tool if necessary and push it into the hole until only a little bit of the repair cord is visible.
Hold the tool's metal hilt against the tyre, and pull the insertion tool out.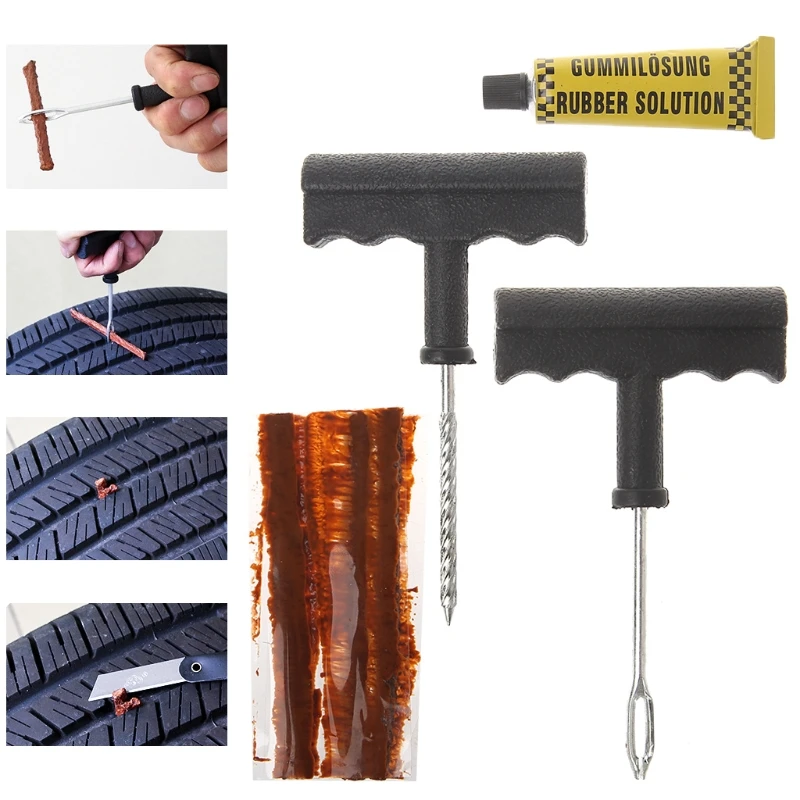 Do not twist the insertion tool's handle. Trim the ends of the repair cord so they aren't protruding too much, inflate your tyre back to the suitable pressure and away you go.
Make sure you have the fixed tyre repaired by a professional as soon as you possibly can.
I've been on desert trips where some fellow travellers have been forced to drive for hundreds of kilometres over sand dunes and corrugated dirt tracks on tyres repaired with a kit such as this, but it's better if you avoid doing that if you can.
Our recommendation is to have the fixed tyre repaired by a professional as soon as you possibly can.
The sealant used in a tubeless tyre setup is designed to quickly plug small holes, often without you even realising.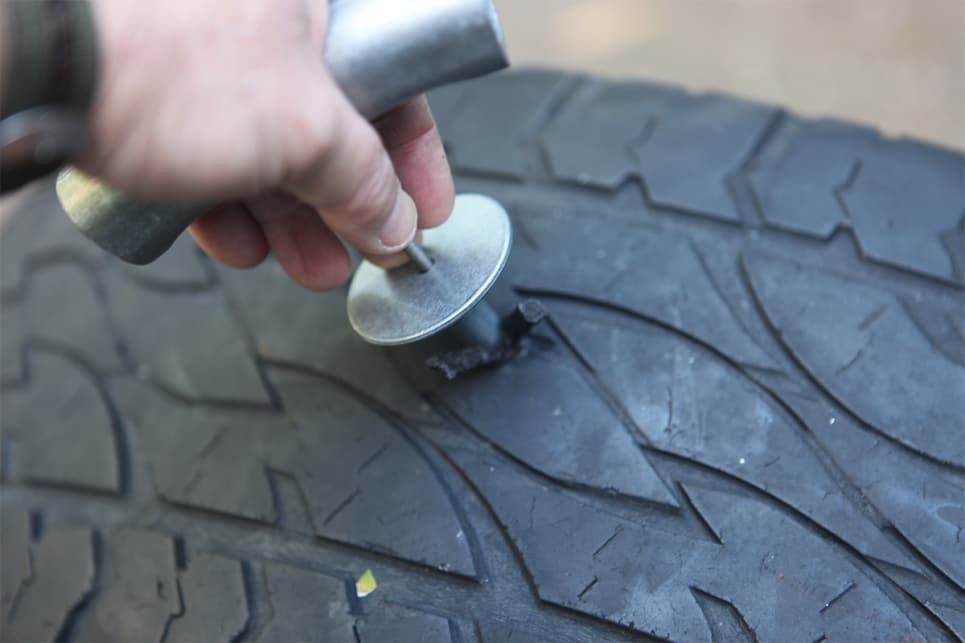
However, sometimes the size or the location of the puncture will require more than sealant to fix it.
Here’s how to repair a punctured tubeless tyre using tubeless plugs, patches or sewing.
Tubeless punctures are often easy to find: look for tell-tale sealant or listen for the hissing of lost air pressure.Immediate Media
These days, a tubeless plug kit is a key part of any rider’s tool kit.Steve Behr
To repair a tubeless tyre puncture, you will require
For a more serious or stubborn puncture, you may need a tyre patch and/or a needle and thread.
If your sealant has dried out, you might need to refresh it.Russel Burton
You may also require:
Tubeless puncture plugs are a quick and effective solution. With these, there is no need to take off the tyre – just plug, re-inflate and go.
While there are a number of tubeless repair kits out there, most work in a similar way, using a rubber plug to fill the hole.
Once you’ve found the puncture, remove any offending items (a pick or a small pair of pliers are a useful addition to your tool bag for this very purpose).
Next, use your tubeless plug tool to make sure there’s a sufficiently large hole for the plug to enter – carefully insert the spike into the tyre to avoid damaging the rim tape, and twist to give a clean, round hole.
Thread a tubeless plug through the head of the tubeless plug tool. Most tools will come with a choice of different plug sizes to suit the size of the hole.
With the plug in the centre of the tool, insert it into the tyre, making sure you don’t push through fully.
Then twist carefully to slowly remove the tool, leaving the two ends of the plug on the outside of the tyre.
Inflate the tyre to your desired pressure, taking additional caution with high-pressure road tyres, and rotate the wheel so that the plug is at the ground for a few minutes before you get going again.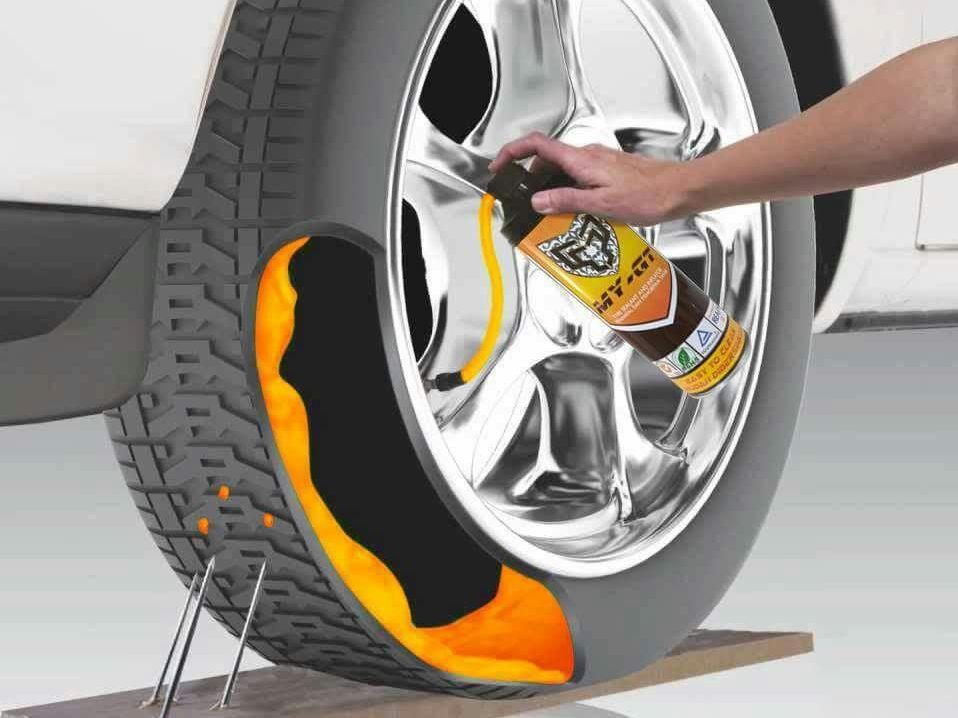 This will allow some sealant to flow into the repair and fully seal things.
You may need to trim the tails of the plug that are left behind, but take care not to cut it too close to the tyre.
For more stubborn tubeless tyre punctures that can’t be fixed with a plug, it may be necessary to patch the tyre internally. The process for this is very similar to patching an inner tube.
First, you’ll need to roughen the surface that you want your patch to adhere to, using a little sandpaper, making sure there’s no debris left from the puncture. Cleanliness is key when it comes to gluing patches.
Add some vulcanising rubber solution to the area where you want to add the patch, waiting for it to become tacky as per the kit instructions.
Add the tubeless tyre patch and press down firmly. Try to avoid touching the surface that is to be glued because this can contaminate the adhesive.
Depending on the patch type, these may need minutes or hours to dry, before setting the tyre up tubeless as normal.
If successful, a patched tubeless tyre can last for many rides, often to the end of the tyre’s life.
A torn tyre can be a rider’s worst nightmare. These repair options should be viewed as a way to help you limp home before fitting a new tyre, rather than a long term solution.
A tyre boot can be placed on the interior of the tyre without any adhesive, held in place by the addition of an inner tube.
This flat boot keeps a flush internal surface to prevent the inner tube from bulging out of the slashed tyre. You can buy pre-made boots or make one out of a number of materials: toothpaste tubes, a section of inner tube or cash notes all work surprisingly well.
You’ll need a strong thread and needle to sew a tyre, such as this thick nylon or tooth floss.Immediate Media
If you don’t have a boot but you do happen to have tooth floss and a needle, you can actually sew up a torn tubeless tyre.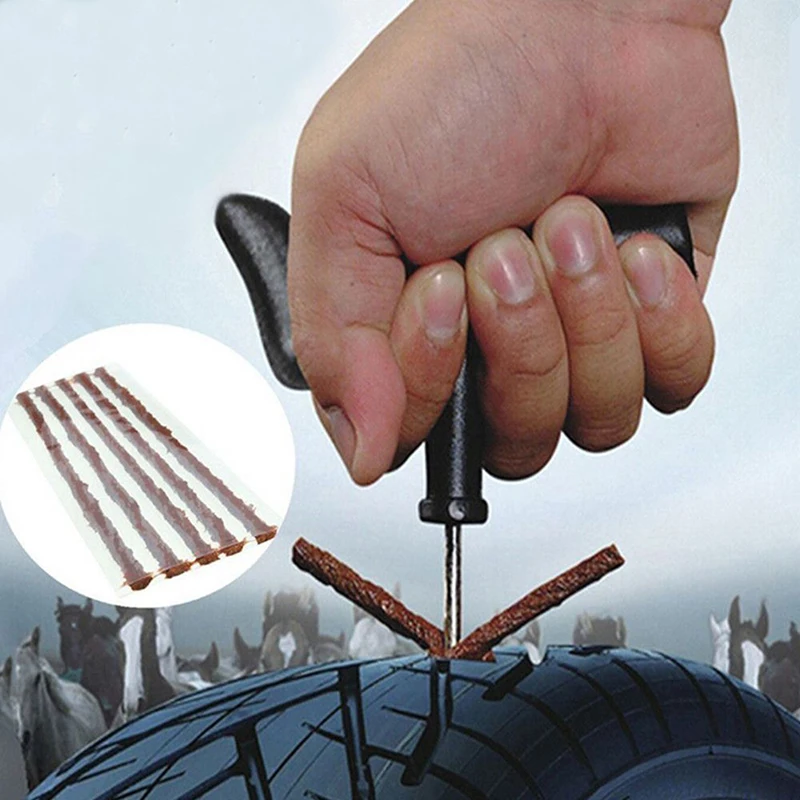
Using stitches perpendicular to the direction of the slash can help hold the casing of the tyre together before you insert an inner tube.
If you do use this method, it’s a good idea to add something between the sewn rubber and inner tube, such as a strip of strong tape.
If you are heading to the hills for an extended bikepacking or touring trip, packing a needle and thread is a good idea for this and any other fabric repairs.
No matter how hard you try, there’s always the chance a tubeless tyre might not be fixable on the road or trailside. Inserting an inner tube can be a mucky business with sealant already in the tyre, so it’s generally a last resort.
Before fitting an inner tube, thoroughly check the tyre for any punctures or offending items such as thorns. Just because you’ve found one, doesn’t mean there won’t be more embedded in the rubber waiting to puncture your inner tube too!
You can still get snakebite punctures with tubeless too, so make sure you’re running adequate pressures in your tyres, especially over harsh or rocky terrain to avoid a nasty double puncture from an impact on the rim. These are notoriously tricky to fix, with holes often too close to the tyre bead.
Besides punctured tyres, there are other things that need careful maintenance to keep your tubeless set up running smoothly, including the rim tape, tubeless valves and sealant.
It can be pretty hard to sort these on the go, so that’s when you might need to pop in a tube and leave the closer inspection until you’re home.
Katherine Moore is Bristol-based gravel and bikepacking expert who judges her rides by stoke level, rather than speed. When she’s not scouting out the best long-distance and local off-road routes in the UK, Katherine works as a freelance writer, bike tester, presenter and guide. Katherine is the former editor of advntr.cc and has also worked as a presenter on the Global Cycling Network. As well as being a regular contributor to BikeRadar.com and the BikeRadar Podcast, Katherine has also written for Cycling Weekly, Bikepacking.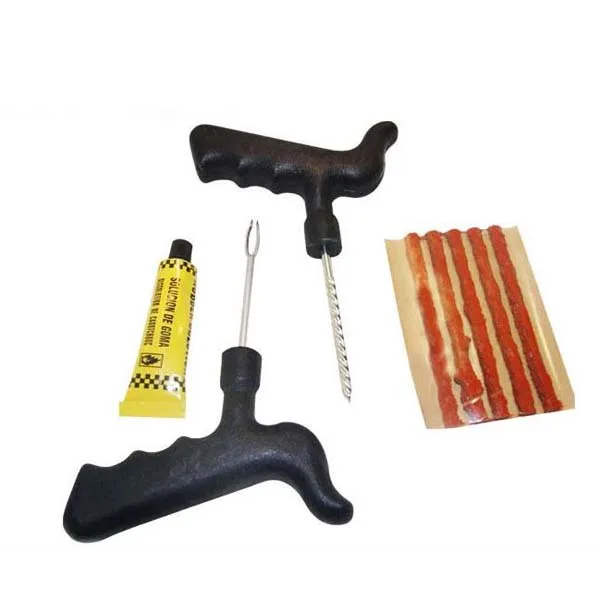 com and hosts the Unpaved Podcast. If you’re out on the trail you’ll likely see her from a mile off, thanks to her rather bright colour palette!
adv.rbc.ru
adv.rbc.ru
adv.rbc.ru
Autonews
TV channel
Pro
Investments
Events
+
New economy
Trends
Real estate
Sport
Style
National projects
City
Crypto
Debating Club
Research
Credit ratings
Franchises
Newspaper
Special projects St.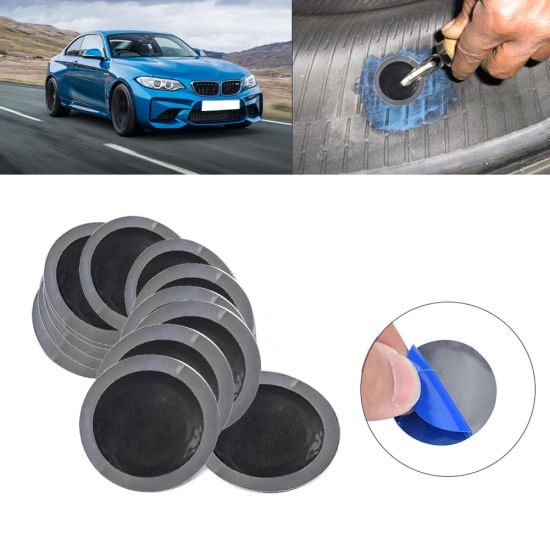 Petersburg
Conferences St. Petersburg
Special projects
Checking counterparties
Library
Podcasts
ESG index
Politics
Economy
Business
Technology and media
Finance
RBC CompanyRBC Life
adv.rbc.ru
Photo: Mikhail Tereshchenko / TASS
adv.rbc.ru
See also
Nail, rebar or sharp stone - sometimes you can damage a tire almost from scratch. First of all, the scale of damage is important, and often rubber can still be repaired.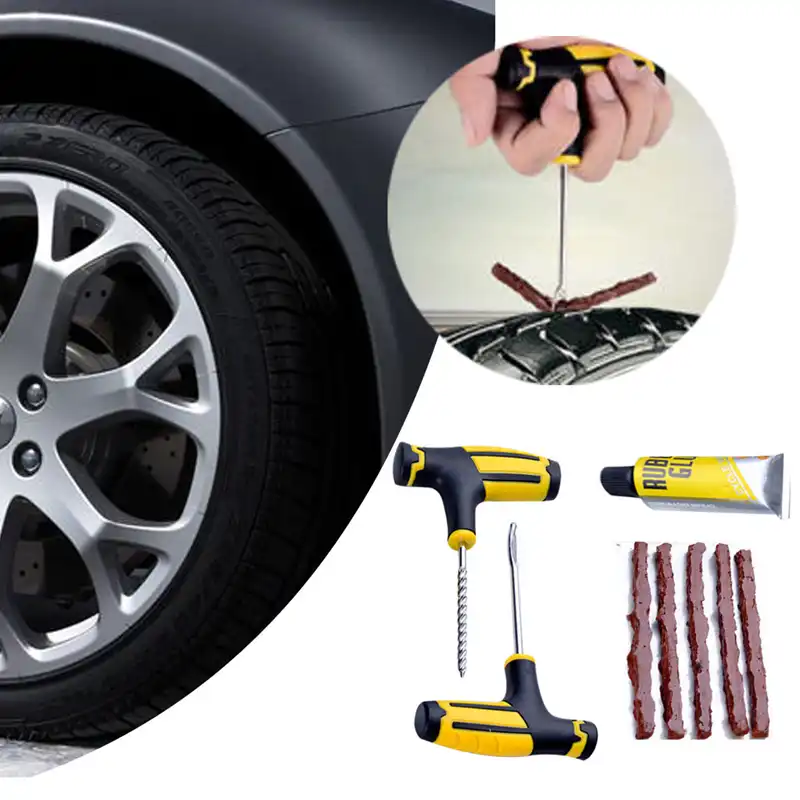 Most often, motorists turn to tire shops for repairs in the middle of autumn or spring - just in the season of replacing summer tires with winter tires and vice versa. In order not to stand in lines, it is worth knowing exactly when to go to the tire shop and when to go to the store.
The most common "injury" to rubber is a puncture, and it can most often be repaired. Professionals in the nearest service will do it much faster, and your hands will remain clean. But if the puncture caught you in a deserted place, and there is a pump and a tire repair kit with harnesses in the trunk, you can patch up the tire yourself. Most often, when repairing the front tires, the wheel can not even be removed, it is enough to turn the steering wheel in the right direction and find the puncture site.
First, the hole is cleaned with a helical awl, the repair harness is smeared with glue and tucked into the eye of the awl, after which it is inserted into the tire hole. With a sharp movement, the tool is removed, and the tourniquet remains inside and securely clogs the hole. The tails are cut with a knife, but it is recommended to leave about 20 mm. After that, the tire can be inflated and the pressure checked.
Repair with tourniquets is not considered long-term, because after some time they dry out and begin to let air through. A more advanced puncture repair method is vulcanization. The hole is sealed with an elastic patch, and the funnel at the puncture site is filled with a special compound. A vulcanizer is put on top, which heats the patch and solders the excess.
Under service conditions, the puncture is also repaired with cord fungus. The puncture site is processed and drilled to roughen. Everything is smeared with glue, after which a fungus is introduced from the inside of the tire, its cap is rolled, and the excess legs are cut off from the outside.
Photo: PA Images / TASS
A puncture can also be repaired with sealant. Many car manufacturers with run flat tubeless tires put compressor repair kits in the car instead of a spare tire - a bottle of pressurized sealant.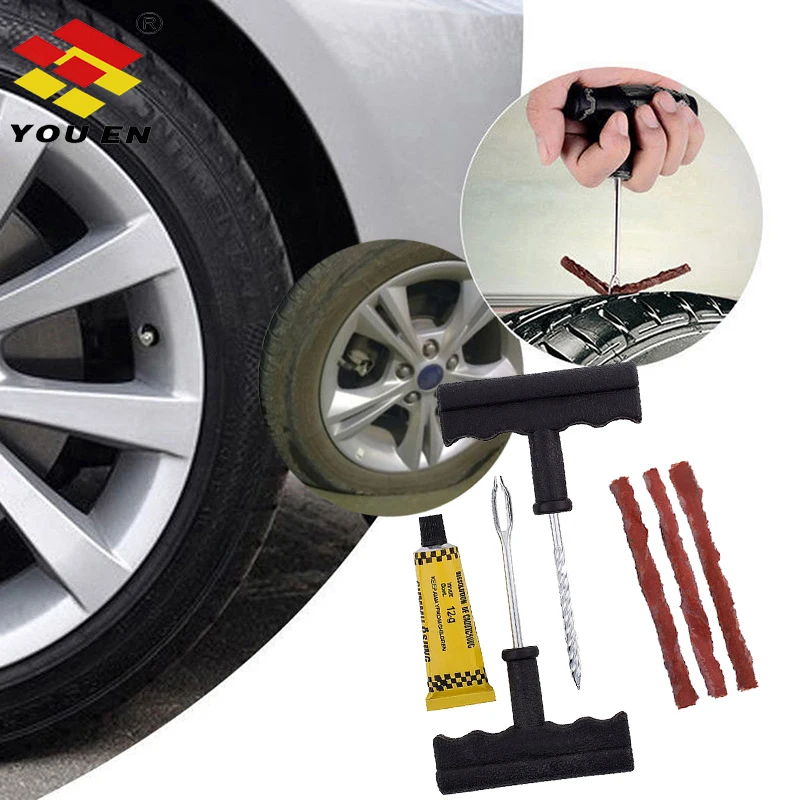 The car is raised on a jack, after which the sealant is pumped into the damaged wheel through the nipple. Next, you need to spin the wheel and pump it up. After repair, the car should be driven a couple of hundred meters to check the tightness of the tire. If it has not recovered, the procedure is repeated.
It happens that a self-tapping screw or a nail closes the hole in the tire, remaining inside. Do not rush to pull it out - until the pressure drops, you can safely get to the service for vulcanization. Sometimes the wheel begins to blow off a few weeks after the self-tapping screw got into it. Therefore, it is better to check tire pressure periodically, and if the pressure sensor lights up, you should at least visually inspect the tire for a nail head.
A bump or bulge most often occurs on the side of a tire after hitting an obstacle or hitting a hole at speed. From the impact, the sidewall carcass threads are damaged, the tire ceases to hold the load and pressure, swelling appears. Any small bump eventually turns into a larger one, and with such a defect, the wheel can burst at any time. This is a direct safety hazard because a sudden flat tire can cause loss of control and a road accident.
Some bulges can be repaired, but no patch will ever restore a tire to factory stiffness. The ideal option in this case is to replace the tire. If a hernia has appeared on the tread, then you can extend the life of the tire with the help of cord patches - ready-to-use patches with an adhesive layer. But if swelling is found on the sidewall, the likelihood of repair is minimal, the wheel is easier to change. Blisters on low profile tires are generally not repairable.
Only car service professionals can repair a side cut. Cord patches will be needed to repair the damage, but after some time the wheel will still have to be changed. This method will work only if the gap is not in the shoulder area of the tire, then no one will repair it.
In general, cuts or punctures, unlike punctures, are considered non-repairable, since the integrity of the frame is violated.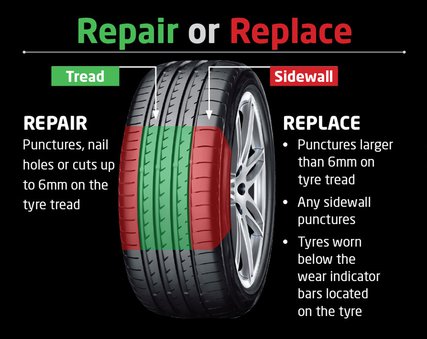 And breakdowns do occur on the go, when the tire abruptly loses pressure and has time to make only a few turns “on the rims” before it comes to a complete stop. In this situation, the cord breaks and the layers of the tire are destroyed. Even if it is possible to close the hole, it is not recommended to use such a weakened tire.
Photo: Mikhail Pletsky / Russian Look
Cracks, sidewall abrasions and unprofessional tire fitting can also lead to tire problems. Cracks can occur as a result of improper storage of tires. Their danger is that moisture begins to flow to the cord, and this already renders the frame unusable. Air can also escape through cracks. Cracks cannot be repaired and tires will not last long. A tire with cracks is deformed, blistered, and may even break while driving.
Rubbing against curbs or driving on uneven roadsides can damage the tire sidewall. When driving like this, it is worth inspecting the tires for damage regularly. If a slight wear is found, the wheels can be swapped, which will slightly extend their service life and allow you to delay the purchase of new ones.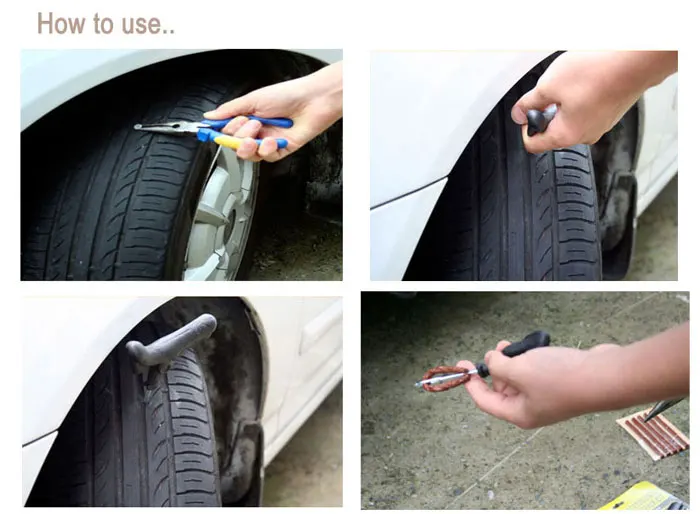
Improper fitting can damage the tire bead. In this case, the tire will lose its geometry and sit on a disc with a bevel, “eights” will be visible during rotation, and the driver will feel vibration while driving. It is impossible to repair this defect, the wheel must be changed as soon as possible, otherwise there is a risk of damage to the suspension.
How to Tires
adv.rbc.ru
adv.rbc.ru
Another season of changing shoes is approaching. And you may remember that on one of the tires after the last winter/summer there is a jamb - a small bump. I don’t want to run to the store for the sake of one new tire. We understand. Or maybe it looks even better if repaired?
Yes, not every wheel that encounters a nail, rebar sticking out of the ground or a sharp stone off-road is considered damaged. Everything, of course, depends on the scale of the damage and its location on the tire itself. Some are easily repaired, while others are simply impossible to do - the tire can only be sent to the trash.
A bulge on a wheel, referred to by drivers as a bump or bulge, is the most common tire sidewall defect. It appears due to a collision with an obstacle or after falling into a pit, more often at high speed. The threads of the sidewall carcass are easily damaged by impact, and the tire at this point can no longer hold the load and air pressure - swelling appears. A small bump sooner or later turns into a big one, and driving with such a defect is dangerous - the wheel can shoot at any moment. At high speed, this is fraught with loss of control, departure from the road and a rollover.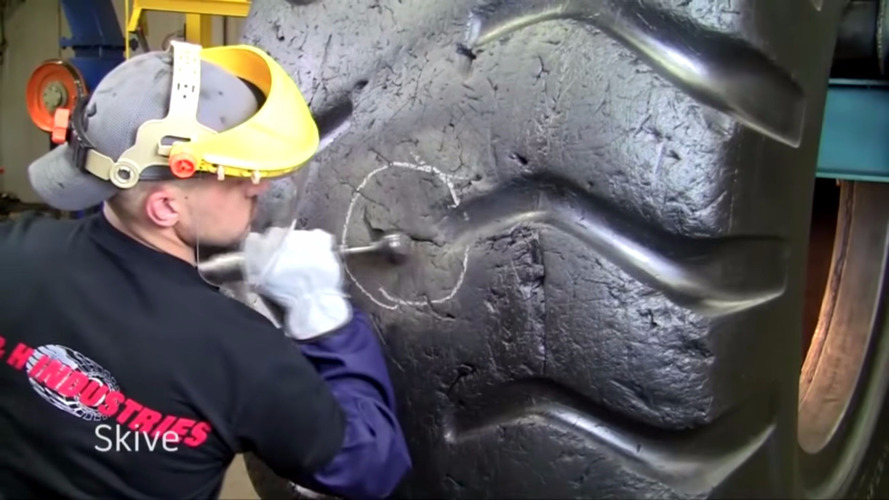
The quality of roads in Kazakhstan contributes to the appearance of bulges on tires
Some types of bulges are repairable, although this is a temporary measure. Not a single patch can restore the factory rigidity. Ideally, change the tire.
Special cord patches can extend the life of a tire with a herniation, even if the swelling has appeared on the tread. The sidewall is a different story. If the swelling appeared at a distance of more than 40 mm from the side, it can be repaired. If not, then the wheel needs to be replaced. Blisters on low profile tires are most often non-repairable.
For maximum safety when riding with a repaired bump, insert the tube. This is an inexpensive and reliable solution. On our market, you can find cameras made in China and Russia, the latter are slightly more expensive, but also of better quality.
The elimination of a side cut is a serious operation, therefore, as in the case of a bump, you will have to go to the professionals.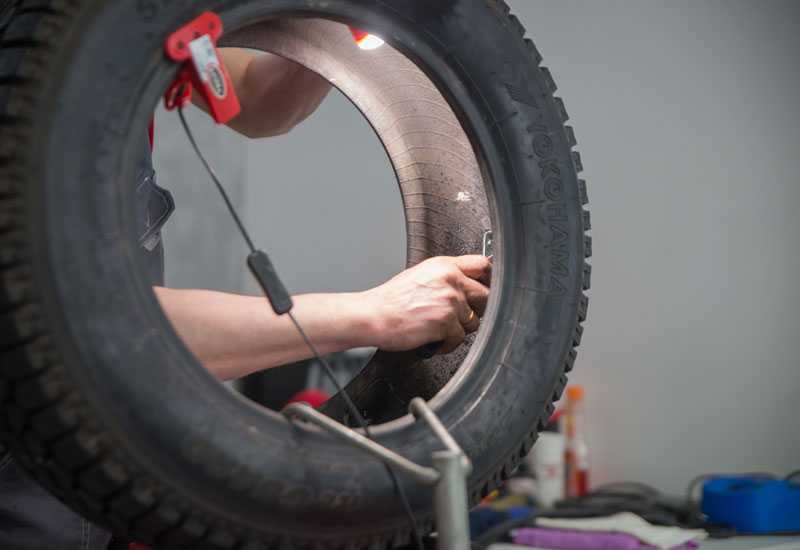 We need cord patches, fortunately in our time they are of different sizes and with a different number of layers. And if you do it wisely, then you can't do without special tools and vulcanization.
A cut, by the way, cannot be healed in all cases. If the gap is in the shoulder area of the tire, it is unlikely that anyone will undertake to repair it, since no guarantees can be given here. However, our Kulibins take on even the most difficult cases, cutting out parts of the sidewalls from the tires and even weaving the cord on their own.
Tire overhaul. We would not put such a wheel on ourselves
Low profile tires can be repaired, but more difficult. A tear in the sidewall is easier to seal on tires with a medium or high profile.
Sometimes a cut is confused with a pluck. This is when the outer layer of the sidewall caught on something sharp, a tear formed, but the frame itself remained intact. There is nothing wrong with that, although the drivers at the tire fitting company successfully repair the cut, for which they take it accordingly.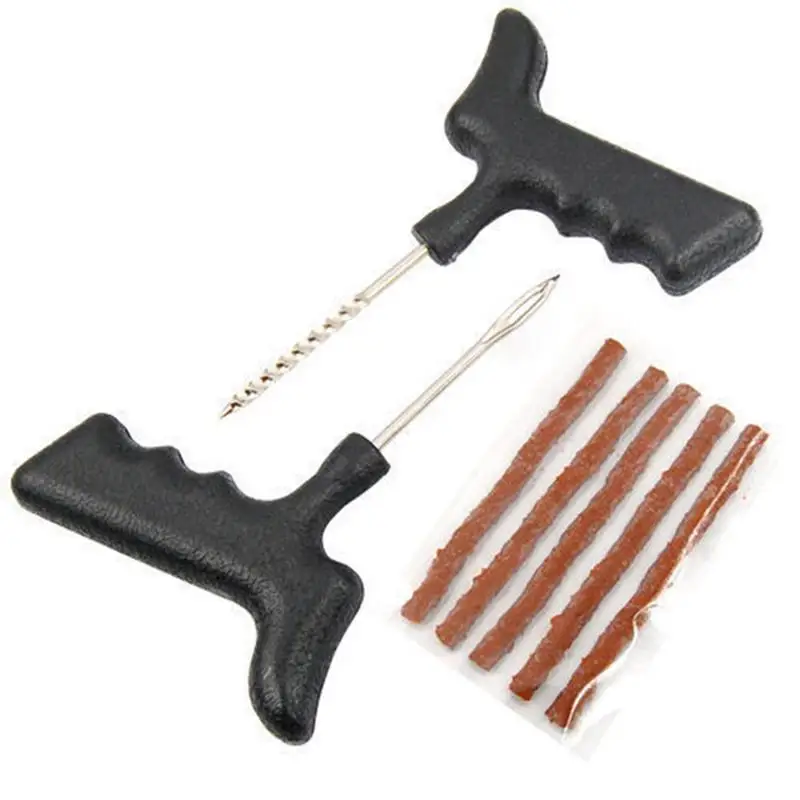
If a piece of rubber remains on the sidewall, then glue it with ordinary superglue (101st). If it came off, then it is better to cover it with raw rubber and vulcanize. Leaving the pluck bare is not recommended, because the tire carcass, often consisting of a metal cord, will quickly corrode.
In Europe, defective or used tires are perforated before being sent for scrap to prevent their resale and possible operation. But they don’t know that we have such holes on the sidewall patched once or twice
Cuts and hernias are not the only possible damage to the side of the tire. You can also spoil the side ring, in the process of changing shoes, for example. If it’s for garlic, then such a tire is already dangerous. Sooner or later, the tire pressure and the load in motion will start to squeeze the rubber off the rim - a wheel explosion can occur.
This ailment is repaired if the wire ring - the base - is intact.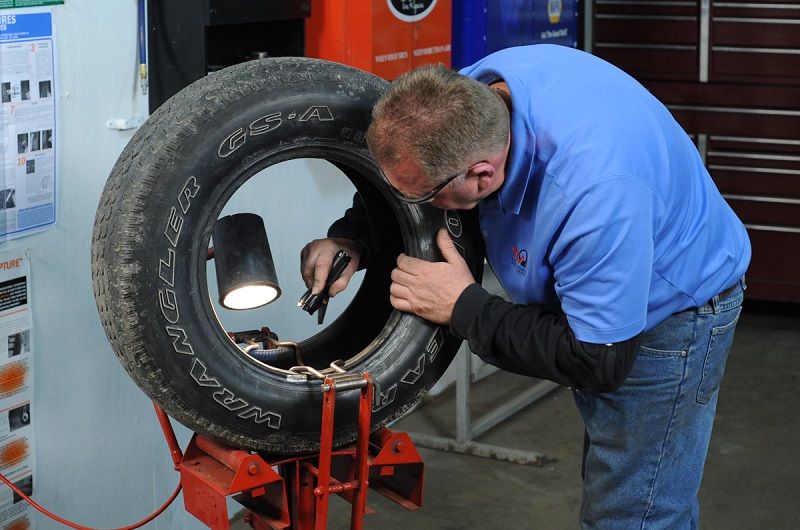 There are no special technologies and materials to correct this particular problem, but most often craftsmen use a two-component composition for chemical (also called cold) vulcanization. After mixing, the mass is pressed into a fat-free damage. Compound manufacturers recommend waiting 72 hours before mounting a tire. Of course, our masters do not pay attention to this condition - they put the tire right away. And it’s good if the wheel is flat because of this at night in the parking lot, and not on the road.
If the side ring tears are barely noticeable, but the wheel still deflates, then you can use a special liquid - a bead seal designed to seal a tubeless tire.
These seals have been used in motorsport for some time. In particular, in the American Formula D Drift Series, drivers used compounds to keep the tire on the rim even with minimal tire pressure. Now they are banned.
Pay attention to the left rear wheel of the Nissan Silvia S13. Due to too low pressure, it was literally taken off the disk under load
Every schoolboy has faced this problem when patching his bike tube after hitting something sharp.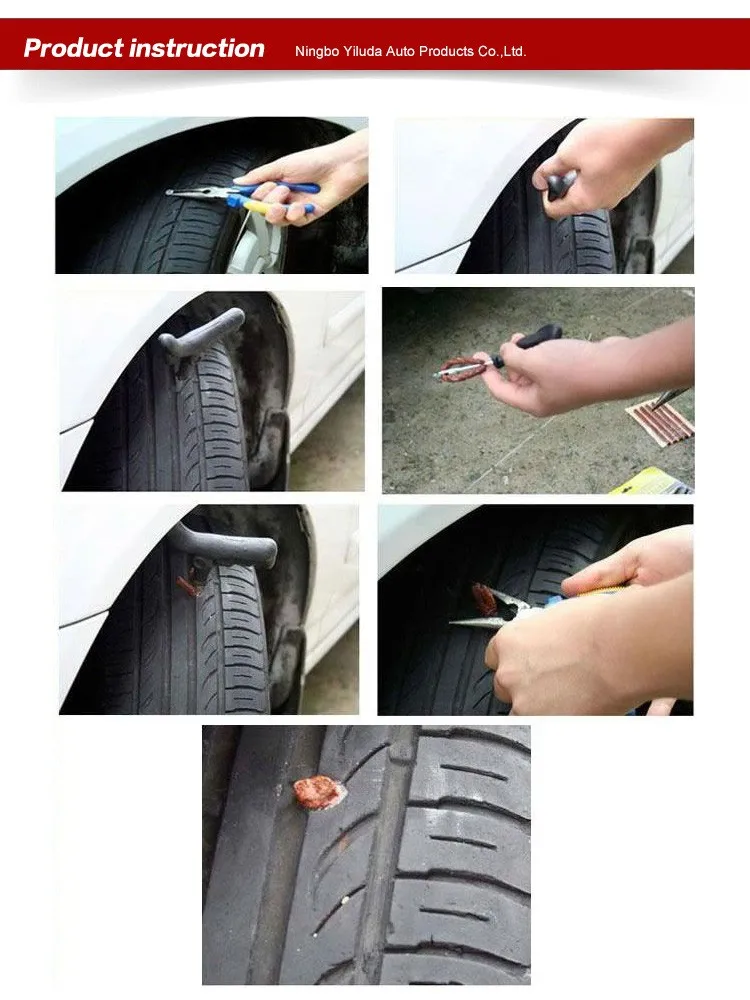 Repairing a car tire puncture with your own hands will also not be difficult even on the road. But for this you will need a pump (or compressor) and a universal tire repair kit with harnesses. All this is sold at any car market or gas station.
Repairing a tire on the side of the road with harnesses
The process is simple. If we are talking about the front wheels, then in most cases the wheel can not even be removed, it is enough to turn the steering wheel in the right direction, find the puncture site and carry out repairs. First, the hole is cleaned with a helical awl from the set. The tourniquet itself is smeared with glue and tucked into the eye of the awl, after which it is inserted into the tire hole. With a sharp movement, the tool is removed, and the tourniquet remains in place and clogs the hole. The tails are cut with a knife, but not at the root, it is recommended to leave about 20 mm. The tire is inflated and checked.
Sometimes a nail or self-tapping screw clogs the hole by itself, remaining in it.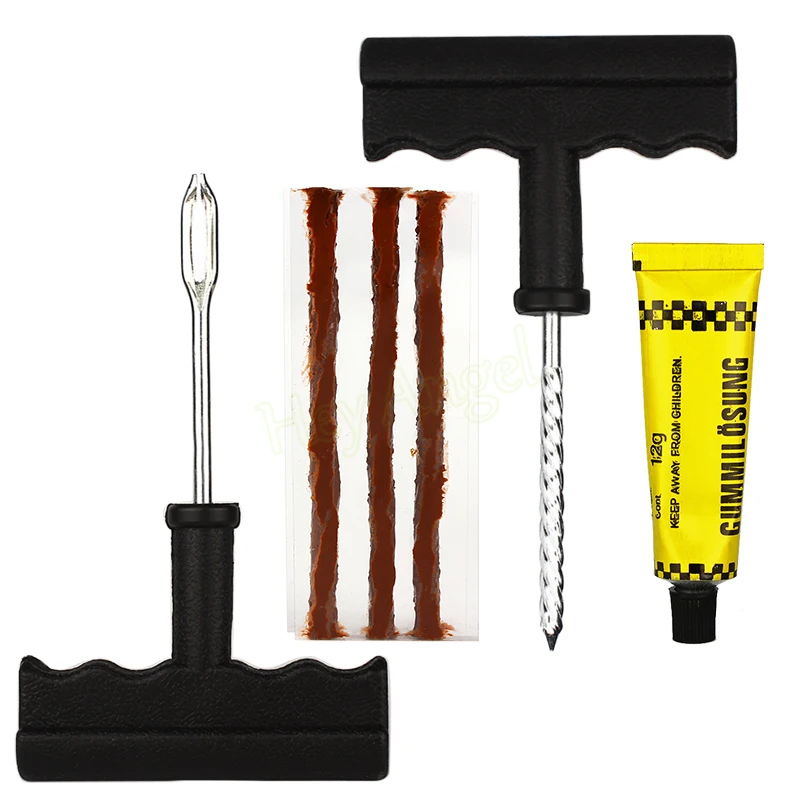 If you see a hat in a tread, do not rush to pull it out. While the pressure is holding, move to vulcanize. And sometimes they drive with a screw in a tire for weeks.
Repair of a puncture at a tire shop
Punctures are also repaired with harnesses at a specialized service, although among professionals such repairs are not considered long-term. After a few months, the flagella dry out and can let air through. There are more advanced methods like cold and hot vulcanization. The latter is more reliable. In this case, the hole is sealed with an elastic patch, and the funnel from a foreign object is filled with a special compound. After that, a vulcanizer is put on the tire, it heats up the rubber and solders it.
In addition to the plaster, the puncture is also repaired with special cord fungi. Craftsmen process the puncture site: drill it and treat the surface with a tool to roughen it. Then the repair area is lubricated with glue (it is also called cement) and a fungus is introduced.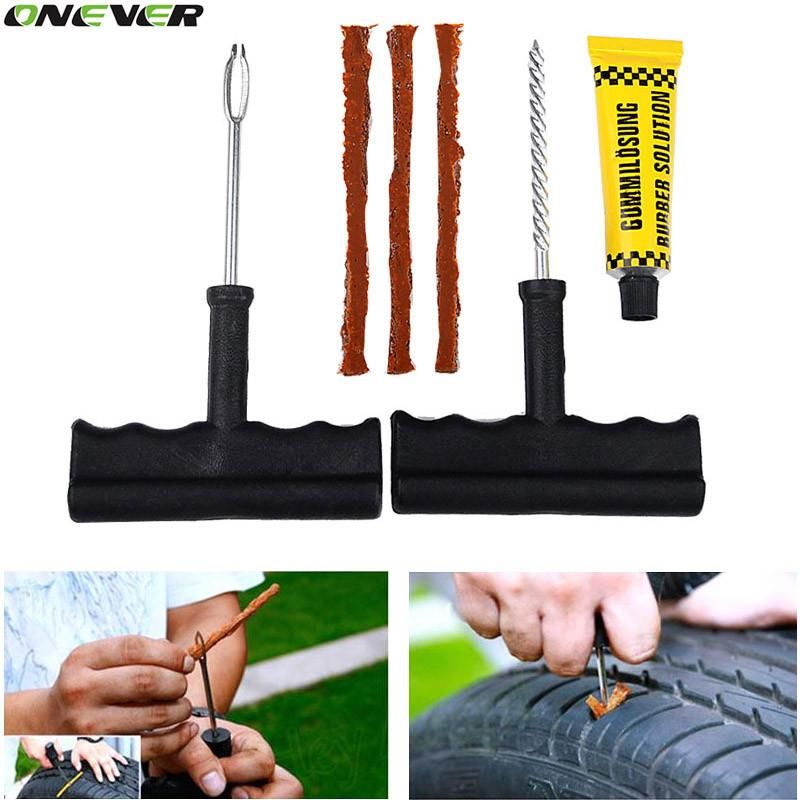 This is done from the inside of the tire. The cap of the fungus is rolled, and the excess legs are simply cut off from the outside.
Puncture repair with sealant
With the advent of tubeless wheels, and later run flat tires, many automakers began to abandon spare wheels. Instead, repair kits with compressors are supplied with the machines. A repair kit is essentially a bottle of pressurized sealant. Later, such spray cans began to appear on the shelves of ordinary car dealerships.
This method has not taken root in the CIS, because the condition of the roads makes it necessary to have at least a stowaway in the kit, but it can also be considered as a method of repair on the road.
The car must be jacked up and sealant must be pumped into the damaged wheel through the nipple. Next, you should spin the wheel, then pump it up, lower the car and drive a few hundred meters. If the tire tightness has not been restored, repeat the procedure.
For commercial vehicles, cutting the tread with a special device (regrower) is a common thing. Moreover, such tire retreading is provided by the factory (marked REGROOVABLE on the sidewall) to increase the service life. But there are entrepreneurs who undertake to deepen the grooves in tires for passenger cars. But they are not intended for such an operation. Often used tires for sale are “refreshed” in this way. Be careful!
What is the threat?
The worst option is that the retreaded tire will shoot out on the road, as the master can damage the undertread layer when deepening the grooves. Such a tire will not be able to hold pressure at some point. There will be a boom! At best, the tire will indeed last a little longer, but is the game worth the candle? We think it's not worth it.
How is cutting done?
A regrower is used to cut the tread. Roughly speaking, this is a large soldering iron with interchangeable tips of various shapes. It goes through rubber like a knife through butter.
If the tire is for passenger cars, then it is worth taking on a regrower only in one case - when part of the tread pattern was welded with "new" rubber during repair. This is where threading comes in handy in order to restore the grooves and symmetry of the tread.
Vehicle operation is prohibited if:
- tires have a residual tread height of less than 1.6 mm;
- tires have punctures, cuts, ruptures that expose the cord, as well as delamination of the carcass, delamination of the tread and sidewall;
- tires in size or load capacity do not match the car model;
- tires of various sizes, designs (radial, diagonal, chamber, tubeless), models, with different tread patterns, winter and summer, studded and non-studded, new and restored, are installed on one axle of the car;
— Tires retreaded according to the second repair class are installed on the front axle.