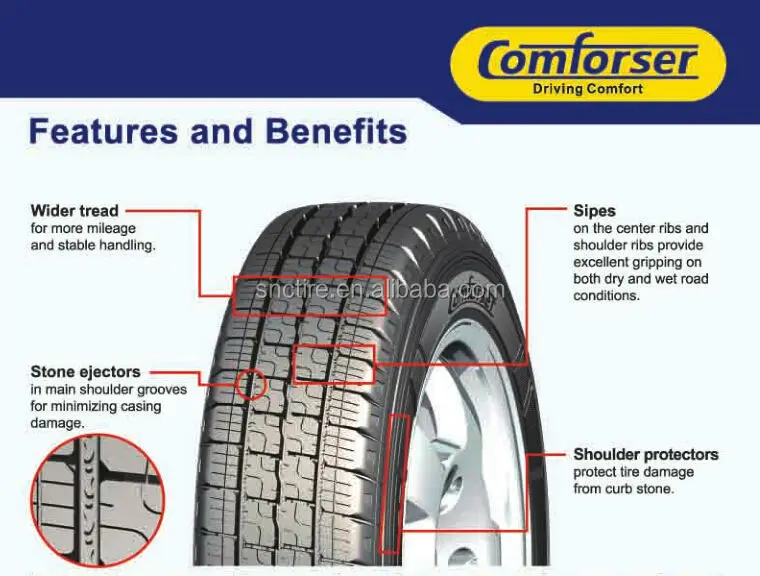
It’s never a good day when a tractor or combine tire goes down. Maybe a sharp piece of metal has speared it and left you completely flat. Or, maybe you’ve discovered a chipped lug, bead damage—or you’re staring at your tire’s cords through a nasty gash. If you find yourself in this situation, there’s actually good news: the tire may be repairable.
How Vulcanized Repairs Can Save You MoneyA damaged bank account is the first thing most farmers think about when they spot a damaged tire. Or how the search for a decent used tire is going to waste time you don’t have. Don’t worry: NTS Tire Supply can help you with both these problems.
In reality, your damaged tire may still be good thanks to vulcanizing technology. Vulcanizing repairs can save your operation hundreds or thousands of dollars in tire replacement costs.
If for some reason a vulcanized repair isn’t a good fit for your tire (we cover the reasons below), we have a pretty good idea where you can find a quality used tire from a reputable seller. But first, let’s take a look at the 3 types of vulcanized repairs.
These repairs involve the most severe type of tire damage—cuts through the tire’s cords. Section repairs include sidewall, tread face, and shoulder reinforcement. To perform this repair, our vulcanizer grounds or bevels out the damaged area. The inside of the cut is then layered with new ply. Next, the cavity is filled with new rubber from the outside. Then, a high-pressure heat cure forces the rubber tightly into the cavity to complete the repair. Our success rate for section repairs is about 95%.
Spot repairs address external tire damage that does not involve the tire’s cords. Examples include sidewall cuts, chipped lugs, shoulder cracks, and bead damage. During a spot repair, our vulcanizer grounds or bevels out the damaged area and fills the outside of the cavity with new rubber. A high-pressure heat cure then forces the rubber into the casing and repairs the tire. Our success rate for spot repairs is over 99%.
We recommend using Orange Armor tire sealant to completely guard against future leaks.
3. StrippingUnder the demands of agricultural use, the inner lining of a tire can thin to the point where the cords become exposed.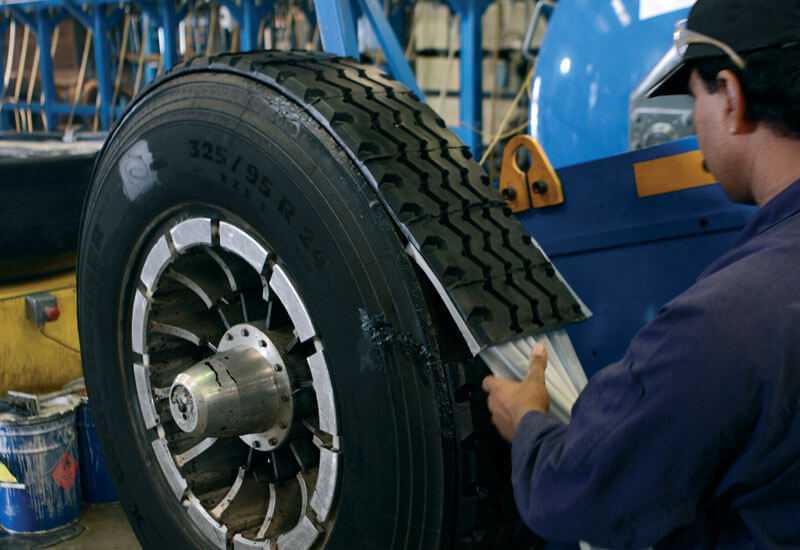 During the stripping process, our vulcanizer applies a layer of new rubber to the inside of the tire, then bonds the new rubber to the casing with a high-pressure heat cure. Our success rate for stripping repairs is nearly 100%.
You should choose your tire repair person the same way you would choose a mechanic—go with who you trust based on the company’s experience and reputation. We’re fortunate to have Gary, our vulcanizer, who performs hundreds of tire repairs each year.
If you have a damaged tire, your first step is to contact us to see if we can fix your tire. Even though we can repair some of the nastiest-looking gashes, not every tire is repairable. A tire is unrepairable if:
Once you contact us about your repair, we’ll let you know what the next steps are. For example, we might need some pictures of the tire to determine if a fix is possible.
If we determine that vulcanizing can’t save your tire, your next step is a used tire. NTS Tire Supply has thousands of used tires in stock at any given time, so check if we can source a suitable used replacement before you look at a new one. We have everything from like-new tires with factory blemishes (that don’t affect performance) down to low-tread tires that you could mount for one more season before you invest in a whole new set.
Every used tire we sell undergoes a complete inspection, inside and out. We look for anything that could impact the performance of the tire—weathering, casing issues, odd tread wear, etc. Can you say the same for a tire you might find on Craigslist or another online retailer?
Every tire we sell (or repair) is covered by our Black Gold Warranty. Bringing in a tire for a vulcanized repair? You’re covered. NTS Tire Supply stands behind every repair job with a full 2-year warranty. In the rare case that a repair fails, we’ll redo the job free of charge or refund the full cost of the repair.
We also stand behind every tire (or track) we sell: a practice that has attracted loyal customers since the 1980s, when we first started selling used tires. If a product fails within the first 30 days after installation or 6 months after purchase (whichever comes first), NTS Tire Supply will offer free replacement, repair, or the full purchase price back including labor.
Read More: NTS Tire Supply covers every used tire we sell with our Black Gold Warranty.
Have a damaged tire? Contact us today and we’ll discuss your repair options. And if you need a used tire or want to upgrade the performance of a machine on your farm with a set of new rubber, our tire experts will work to find the best options for your operation. We’re here to help drive your farm forward.
NTS Tire Supply Team
Repair
Repairing the tyre is obviously an economic and logical solution for punctures and may also be a solution for more serious damages.
There are different types of hot or cold repairs which correspond to very precise damages. However, you must bear in mind that in certain cases repairing the tyre is not the solution, because the repair will not last long and your tractor will be immobilised again with further damages. In other cases, unsuitable repairs may place you in danger and lead to an accident on the road, especially if your tractor is loaded.
In this article, we will look in detail at the best repair solutions and the cases in which they are most effective.
Hot repairs are suitable for all wounds or cuts situated on the tread or upper part of the sidewall of your tractor tyres.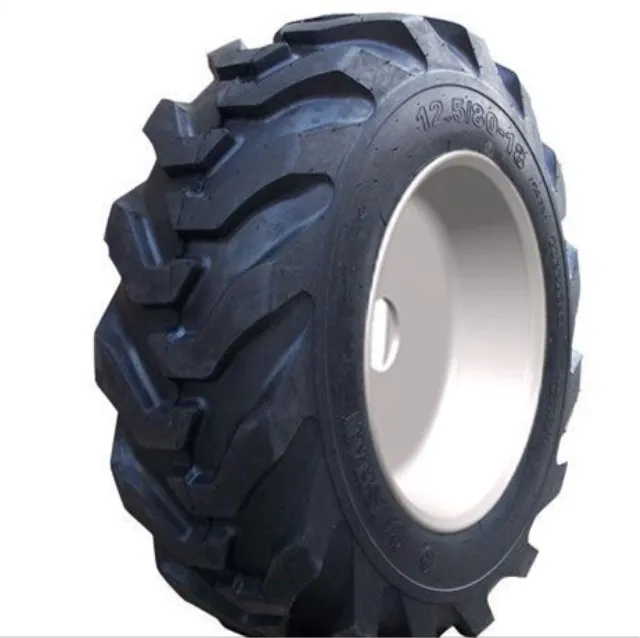 Your tyres must keep their suppleness and flexibility to allow tyre pressure to be adjusted depending on the type of ground you are driving on or the load you are carrying.
If the damaged area is too big, preference should be given to hot repairs, because a cold repair will not be sufficiently uniform with the original rubber to last and resist the regular solicitations faced by your tyres or the constant flexion movement.
Hot repairs to tractor tyres must be carried out in a very clean workshop to avoid impurities which could slip into the repair work.
After having completely deflated the tyre, you may go ahead and dismount it, beginning by unseating the tyre from the rim using levers, if you have no other equipment.
For the repairs, begin by enlarging the tyre cut and removing all the damaged or blemished parts, with adapted tools. All the parts of the casing that are cut must be removed, to prevent the cut from getting bigger.
Creating chamfers around the cut is important to ensure that the repair fits perfectly into the space created and to obtain complete adhesion of the old and new rubber.
When the cut is perfectly prepared, you can begin the repair process which must be carried out on the interior and on the exterior of the tyre simultaneously.
On the exterior part, crude rubber must be used and applied to the tyre using an extruder which heats the rubber to 80°.
The rubber is then compressed with a roller to eliminate any air bubbles.
The interior and exterior of the tyre must be repaired simultaneously
You begin by scratching the liner to remove it from the area to be repaired, then apply a specific patch for tractor tyres, which is larger than the dimension of the cut.
To ensure perfect adhesion, the patch must then be heated. Silicon membrane is used, which can be heated from 120° to 140°. It will be covered by a protective layer and compressed for the duration of the heating process.
Once the external rubber has been applied, the finishing process involves sanding and smoothing to make the tyre look new again at the level of the repair area.
Be careful, the most dangerous step is reinflation after the mounting process that allows you to position the beads. It is during this step that problems may arise, so do not stand in front of the tyre during inflation, but in line with the tyre on the other side of the tractor.
There are several possibilities, but generally this type of repair must be used only for simple punctures with tubeless tyres or tyres with innerliners.
Cold repairs are not adapted to cuts on the sidewalls or tread, because in general they will not last due to the numerous flexions and defection in these areas of the tyre. For larger cuts and perforations than punctures, hot repairs will be much more effective.
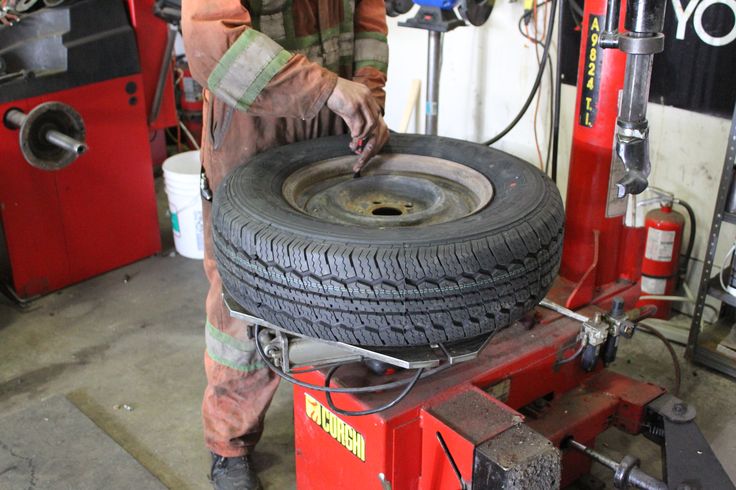
The easiest solution is to dismount the punctured tyre, leave it on its rim and take it directly to your usual tyre dealer to have the repair job done for you.
Your tyre dealer should have all the equipment necessary to carry out this type of repair in the space of fifteen minutes, of course without counting the dismounting, remounting and transport time that you require yourself.
If your tyre has an innerliner, it’s simpler overall to change the innerliner, which does not cost much. It’s better to do this than to have completed the repair job only to discover a few days later that there was another less visible leak elsewhere and have to start the whole operation again. With a new innerliner, you are sure that the problem is completely resolved.
Internal repair using a patch on the innerliner
It is perfectly feasible to repair the innerliner with a standard patch, which costs practically nothing, but this will take a few hours if you do it yourself.
The tyre must be dismounted and taken off the rim in order to remove the innerliner, find the leak and repair it using a patch and a liquid vulcanising solution to ensure perfect cohesion between the components of the patch and the innerliner.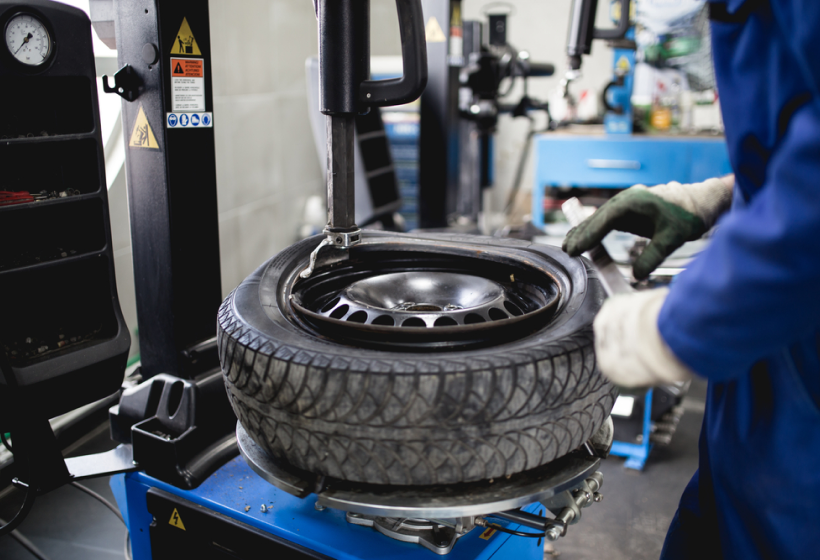
Repairing tubeless tyres from the outside or inside
This type of repair is only possible when you have no innerliner: tubeless tyre.
You can carry out the repair without dismounting the tyre if the puncture area is small and has been clearly located:
Repair using an internal mushroom plug having first dismounted the tyre
For this type of repair, you must buy a "Mushroom plug repair kit" to plug the punture hole with a rubber mushroom plug adapted to the size of the hole.
Begin by removing the foreign body completely.
Then use the tools supplied in the kit to make the hole slighlty bigger: drill through the hole so that you can insert the mushroom plug from the inside.
There are several mushroom plug sizes so that you can adapt to the precise dimension of the cleaned hole.
You should have a cold vulcanisation solution in the kit to ensure the musrhoom plug is airtight. You will need to sand the innerliner to ensure perfect contact with the base of the mushroom patch. You can insert it from the inside then pull it from the outside of the tyre and plane down the excess surface rubber.
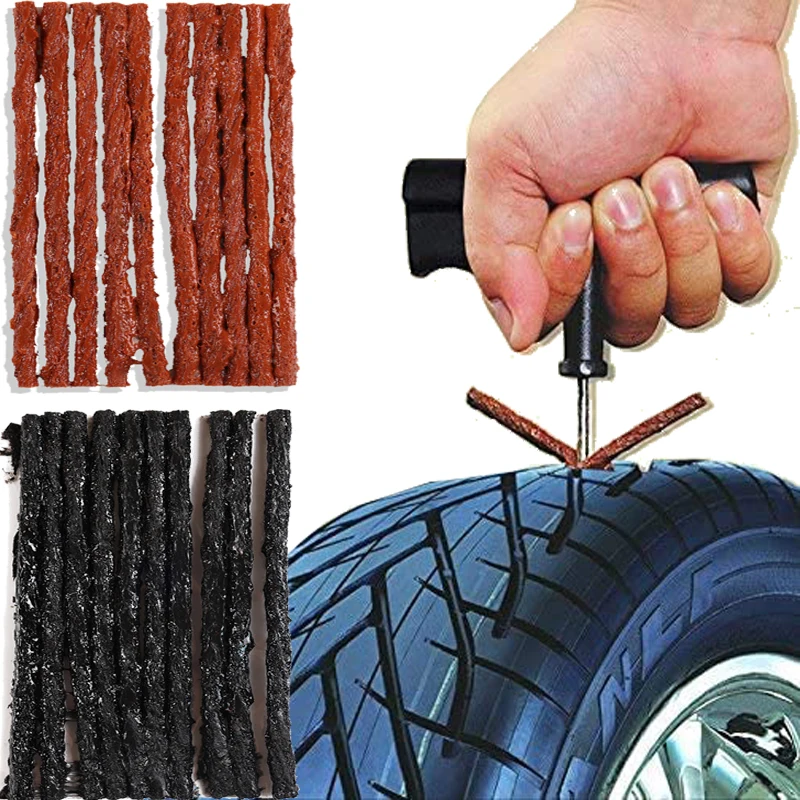
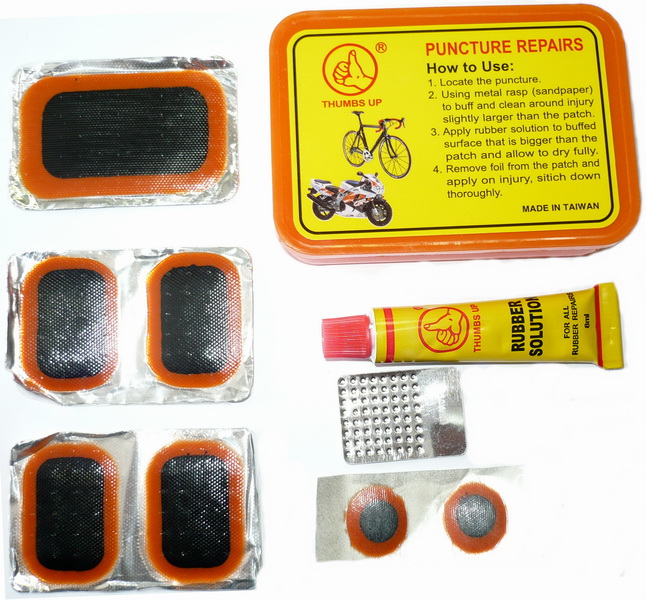
Temporary external repair without removing the tyre
You can use an "External wick repair kit": for a temporary repair carried out directly on-site, if you can accurately locate the hole in the tyre.
Remove the object stuck in the tyre and enlarge the hole slightly so that you can insert the wick. You have the tools necessary in the kit, a reamer to clean and enlarge the hole, an insertion tool for the wick which will let you thread the mesh through the hole.
This type of repair will not last, but will allow you to finish the job or return to the farm after repairs which should take about 15 minutes.
Repairing the tyre is not always recommended, sometimes even strongly discouraged because in certain cases it will not be sufficiently efficient to guarantee your safety. Here are a few examples of irreparable damages:
This type of cut on the sidewall is irreparable, because it is too close to the bead area. It is only reparable if it is clearly located in the centre of the sidewall between the shoulder and the bead turn-up, in which case repairs will be possible.
For effective repair work, the hot vulcanisation process should be used with a patch applied internally.
This type of tear is often linked to frequent driving at too low an inflation pressure or with too heavy a load. As the casing is weakened over the entire circumference of the tyre, you should not attempt repairs, which would only last a few days. The tyre must be replaced.
Whatever the repairs required, it is always best to entrust the job to a specialist who has the right equipment to carry large tyres, to dismount and remount them on the rim, but also for the hot vulcanisation process necessary to do a decent job which complies with applicable regulations.
Even for small punctures, it’s often wiser to take your tyre off and bring it to your usual tyre dealer’s workshop where the repair job can be done in fifteen minutes rather than you spending hours without any guarantee of an impeccable result.
To learn more about ways to increase your farm’s productivity, bridgestone-agriculture has created a comprehensive eBook on the topic which is available for you to download for free:
Bridgestone-agriculture Blog is written and administered by tractor tyre experts who are available to provide you with advice on agricultural tyres. They will help you to maximise your productivity with information on all things relating to tyres: inexpensive tractor tyres, technical data for agricultural tyres, solutions for avoiding soil compaction, sprayer tyre pressure, why and how to ballast your tractor tyres, when to use dual-wheels, the mechanical causes for abnormal wear, discounted agricultural tyres, etc. ..
..
Most people who read this article have also read some of the following articles:
This method is mainly used to repair tire side cuts or to repair serious damage to the tread of a truck tire.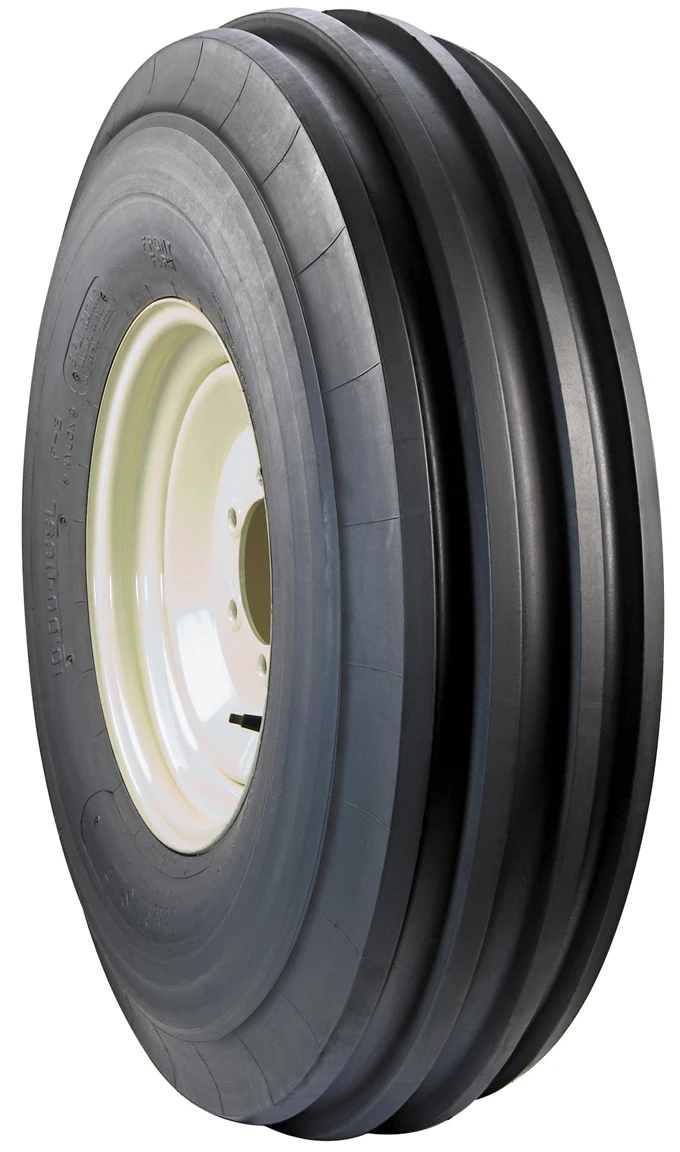 Any motorist or professional driver knows the moments when, during a collision with a sharp object, a curb or a pothole at high speed, mechanical damage to the tire structure occurs. It can be a tear, a side cut, a tread cut or a hernia, as drivers call it. If this happens to you, do not rush to get rid of damaged tires. The company is ready to help you restore your tires to working condition using hot vulcanization. What is this process? To bond damaged rubber material, high temperature is used. To do this, you must pre-process the fastened part. After that, a plastic mixture is used, which is applied to damaged areas. Hot vulcanization is carried out using an electric vulcanizing press. When heated to + 200 ° degrees, the adhesion of the masses into one whole occurs. The duration of the vulcanization process depends on two factors: the temperature regime and the thickness of the surfaces to be joined. After connection, cooling is a prerequisite. The most reliable and effective way to repair tires is hot vulcanization, since this achieves the strongest joint formed, which prolongs the performance of the tires.
 0005
0005
 After that, instead of a cutter, a brush is put on, and finalized to remove all roughness. After roughening, the tire must be vacuumed to remove crumb rubber.
  Particular attention should be paid to the fact that after vulcanization it is impossible to immediately remove the tire. It should cool naturally. Only then will you get the highest quality of the work done.
 As you can see, in our tire center we do everything right and according to technology. Not many tire shops offer a guarantee on their work. We give a guarantee for any repairs performed by our masters.
If everything is done according to technology, according to all the rules, then the connection is strong and reliable. However, there are also drawbacks to this method. Deficiencies can result in delamination of patches, bulging or serious damage to the tire. Therefore, before starting tire repair, it is necessary to assess the complexity of the damage and the location. It is better to immediately turn to real masters than to throw away the exfoliated tire later.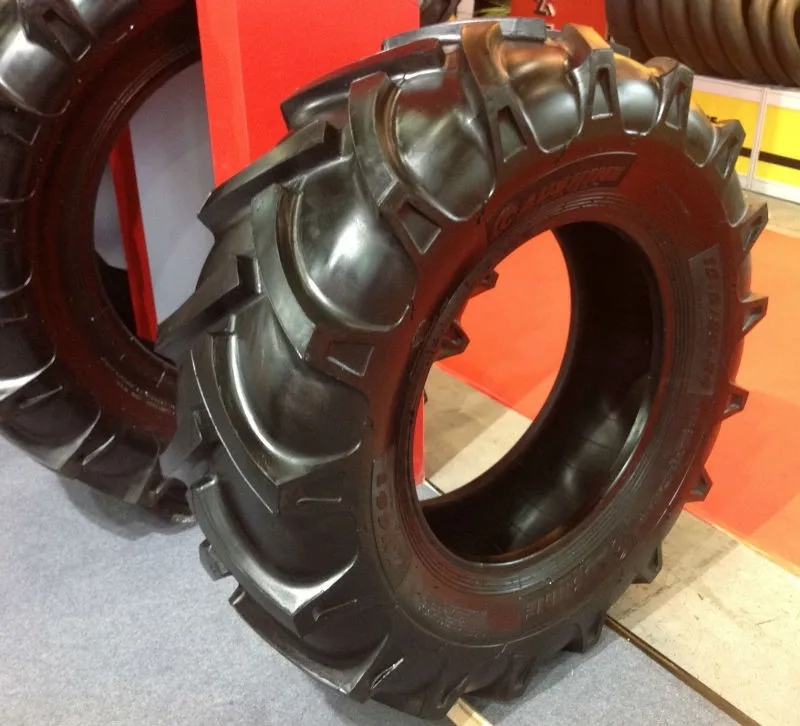
Hot vulcanizing is not only used for repairing tire side cuts. This is the most optimal way for enterprises that have conveyor belts in stock. The hot vulcanization process itself is as close as possible to the conveyor belt manufacturing technology and the strength of the joint during this process practically corresponds to the strength of the belt.
The price is highly dependent on the size of the lateral cut or hernia. In our tire workshop, the price for this service starts from 1200 rubles (hot vulcanization itself). In addition to it, you must pay for the installation of the patch. Prices for the installation of patches and patches can be found here.
Many people ask the question: “What should I do if a hernia appears on the wheel? Can you drive with a herniated tire? Why is this hernia dangerous? The best answer is to turn to the hot vulcanization method and remove the hernia from the tire.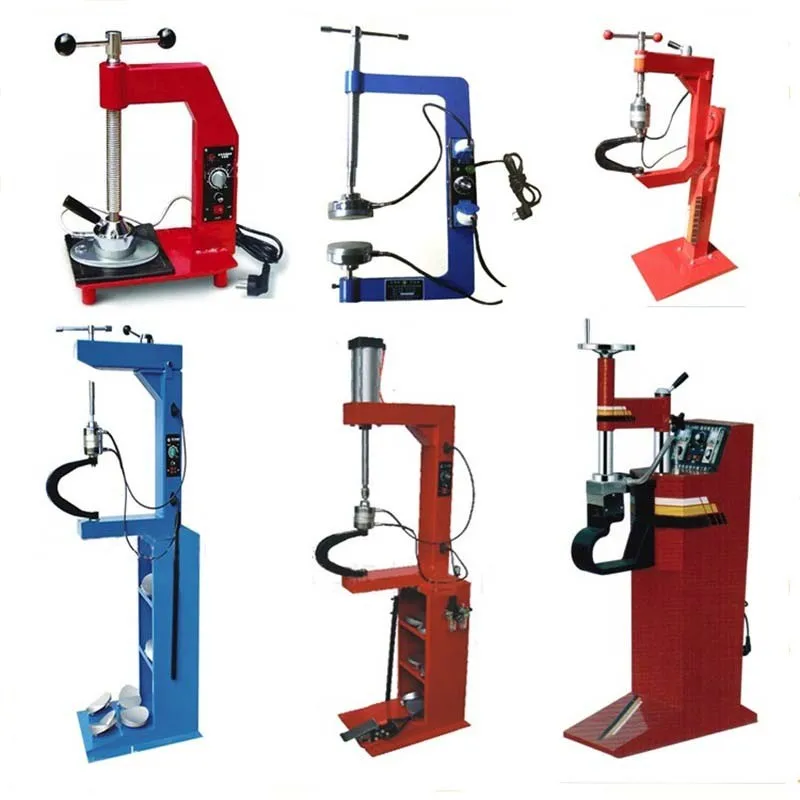 But let's go in order.
1. What causes a hernia on a wheel?
Hernia occurs in two cases. First: when the layers of rubber are delaminated, and air enters between the layers. From this case, you can easily insure yourself by buying high-quality rubber. Manufacturers of cheap rubber save on everything they can, so it's not surprising that the layers of this rubber delaminate. It happens the same way when a tire hits a bump or edge of a pit. The second case is when a cord breaks inside the tire. Such a hernia also appears from hitting a bump, the edge of a pit, or something similar. At the moment of impact, the cord inside the tire bursts, and the rubber stretches. After that, the cord no longer holds back the stretched rubber and it is not able to independently maintain pressure inside the tire. The rubber begins to swell, and, as a result, we see this swelling on the tire, which is called a hernia in the common people.
2. Can I drive with a herniated tire?
Of course not. The fact is that a hernia can burst at any time. Even if the wheel is just standing still, the pressure inside the tire is constantly acting on the hernia of the wheel and gradually inflates it. If you are moving at speed, then any pits and impacts on the wheel lead to sharp compressions, and this increases the pressure. You are in danger of flying into a ditch or into oncoming traffic if a wheel bursts. If you have a spare tire, it is better to put it on right away, and take the swollen wheel for repair. If there is no spare tire, drive at a minimum speed to the nearest tire shop, where there is a hot curing unit.
3. Can a hernia be removed from a tire?
Of course you can. For this, there is a method of hot vulcanization. The process of hernia removal is identical to the repair of side cuts. First, the hernia is cut out with a margin of several centimeters. It must be cut to an intact cord and not stretched rubber without delamination. This is followed by all the same points as when repairing side cuts: the same thorough cleaning, roughening, processing and cleaning, choosing a patch and attaching it from the inside of the tire, applying a layer of raw rubber on top, and the process itself on the machine. In general, with the correct observance of all the technique of the process, the removal of hernias is not only possible, but also carried out with the guarantee that a hernia will not occur again. In our tire service, we do all the work with high quality and give a guarantee for all types of repairs, both side cuts and hernia repair.
The most durable docking and recovery method.
Service life after refurbishment is directly related to working conditions.
After restoration, the product has almost the same service life as before repair.
The butt joint is very flexible and close to the original in flexibility.
Hot vulcanization of materials is possible at any time of the year, even at negative temperatures, which is very typical for our regions.
Using hot technology, a uniform product thickness can be achieved.
Possibility to work in conditions of increased pollution.
Low cost compared to cold vulcanization.
Use of expensive, bulky and heavy specialized equipment.
Working on such a press requires certain skills and a high degree of qualification of the operating personnel.
Availability of an industrial network from 220 V to 380 V.
You can order a hot vulcanization service by contacting our company. Experienced craftsmen are ready to provide prompt assistance in retreading truck tires using hot working methods, repair side cuts, and repair the edges of the conveyor belt directly at your enterprise. By ordering a hot vulcanization service on site, you save your money. You will not have to stop production for a long time and buy a new conveyor belt. We will restore the old tape, as soon as possible. This means that you will keep your clientele and will not suffer a big loss. Trust the professionals! Highly qualified specialists have been working in this direction for many years and are familiar with all the difficulties that arise. Therefore, the price you pay for hot working will more than pay off with the reliability and durability of the conveyor belt. High quality performance on modern equipment, low price for services and prompt execution is the key to the success of your company and easy movement on the roads.
Repair of Radial and Bias Tires
This manual introduces the repair work on the sidewall. The treadmill and tire shoulder are repaired in the same way.
1. When accepting tires for repair, carefully check their general condition. Examine all tires for hidden defects. Preliminarily determine the maintainability of the tire, for this, measure the size of the damage, and preliminarily select the patch number from the table. Measure the distance from the edge of the damage to the edge of the tire bead. The size must be greater than or equal to the value indicated in the patch selection table. If the size of the damage exceeds the allowable limits, then the tire cannot be repaired.
2. The tire must be thoroughly dried before repair. It is recommended to dry tires in a dry, heated room. To speed up, it is allowed to dry the damaged area with a lamp or a jet of heated air using a fan heater, while the rubber must not be heated above 80 ° C.
3. Cut out the damaged rubber with a knife or cap cutter. Remove damaged cord ends. When repairing the treadmill, remove loose, damaged, or rusty breaker wire with wire cutters.
4. Finish the damage funnel so that a cup-shaped funnel is obtained.
5. Measure the damage. Select the desired plaster in accordance with the current tables.
To calculate the curing time, measure the maximum wall thickness at the point of damage and make a mark on the surface of the tire.
6. For correct installation of the thermal patch, draw auxiliary lines on the inner side of the tire in the center of the repair site in the radial and axial directions. When repairing the sidewall of diagonal tires, it is necessary to use special side patches with the index "B", which allow you to install them closer to the edge of the bead. For convenience, spread the tire beads with a bead expander.
7. Draw guide lines in the center of each side of the patch.
8. Install the thermal patch (arrow towards the edge of the bead) on the inside of the tire at the point of damage so that the guide lines on the tire and the patch match.
9. On the inner surface of the tire at the repair site, carefully apply the cleaner to an area larger than the selected thermal patch, carefully remove the dirt with a scraper, and let dry for 10-15 minutes.
10. Work the tire inside the marked area. When repairing tubeless tires, it is necessary to completely remove the loose sealed layer to the dense rubber layer.
ATTENTION! Handle very carefully so as not to damage the cord.
11. Remove dust and crumb rubber inside and outside the tire at the repair site with a vacuum cleaner. Do not clean with compressed air containing oil or moisture.
12. Check the quality of the rubber layer on the treated area. Completely remove soft rubber particles that roll off when they are peeled off.
ATTENTION! The finished rubber surface must be rough (never smooth). During processing, do not allow the rubber to burn; for this, make the final roughening at low tool speeds (up to 750 rpm).
13. Evenly apply the first layer of thermal solution to the surface of the tire prepared for the installation of the thermal patch. Drying time - 60 minutes (test with the back of a finger - there should be no sticking).
14. After the first coat of thermal solution has dried on the surface of the tire, apply a second coat. Drying time of the second layer is 15-20 minutes (slight adhesion should be felt with the back of the finger).
15. Remove the protective film on the side of the adhesive rubber from the middle about 5-7 cm in both directions (the protective film on the top side of the thermal patch must be left).
16. Remove the side extension. Apply the patch with the released middle zone to the repair site, aligning the auxiliary lines on the patch and the tire. Roll the middle of the patch with roller
17. Remove both parts of the protective film from the patch one by one. With force and without gaps, roll the entire surface of the patch with a rolling roller.
18. When repairing tubeless tires, the sealed layer inside the tire around the thermal patch removed during roughening must be restored. To do this, cut strips of raw rubber (1 mm) and roll them with a roller around the perimeter of the patch in such a way as to cover the buffed surface of the tire around the patch.
19. Apply two layers of thermal solution to the surface of the funnel. Drying time - 60 minutes (test with the back of a finger - there should be no sticking). After the first layer has dried, apply the second layer. Drying time of the second layer is 15-20 minutes (slight adhesion should be felt with the back of the finger).
ATTENTION! To reduce the time, it is allowed to apply the first layer of thermal solution simultaneously on the surface under the patch and on the damage funnel.
20. To fill the tire damage funnel, cut strips of raw rubber (3 mm) 10-15 mm wide and heat them on a special stove.
21. Sequentially fill the funnel with raw rubber strips (3mm), carefully rolling them together with a pressure roller, avoiding the formation of air bubbles.
22. Trim the bumps with a knife, ensuring that the level of raw rubber filling the funnel is at least 3 mm above the overall surface level of the tire for L/A tyres, and 5 mm for H/A tyres.
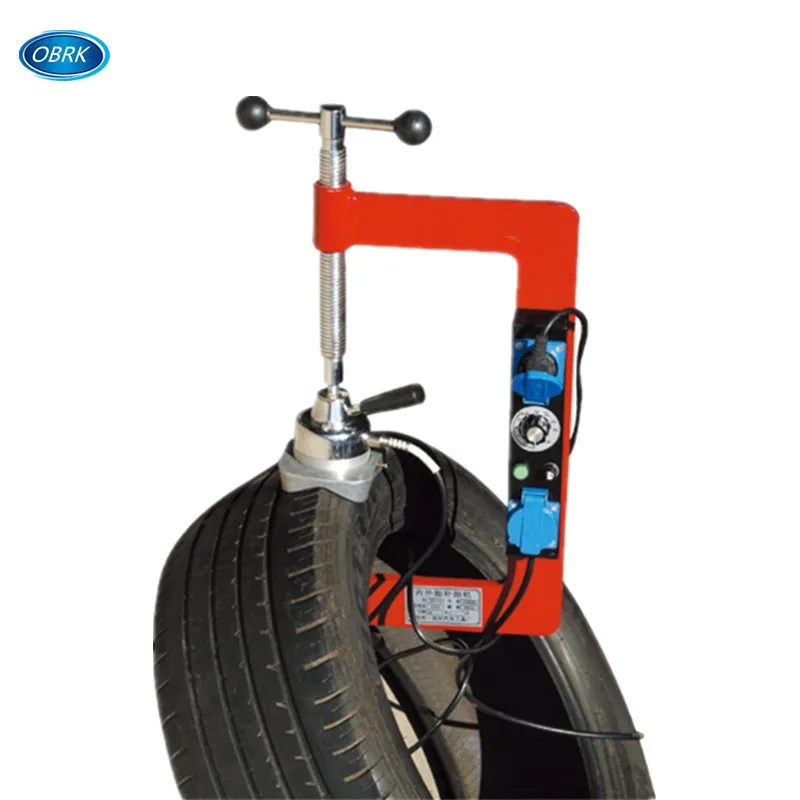
23. Vulcanize the repair site using the "Complex-1", "Complex-2" or "Complex-3" vulcanizers, providing the mode of simultaneous vulcanization of the patch and damage funnel.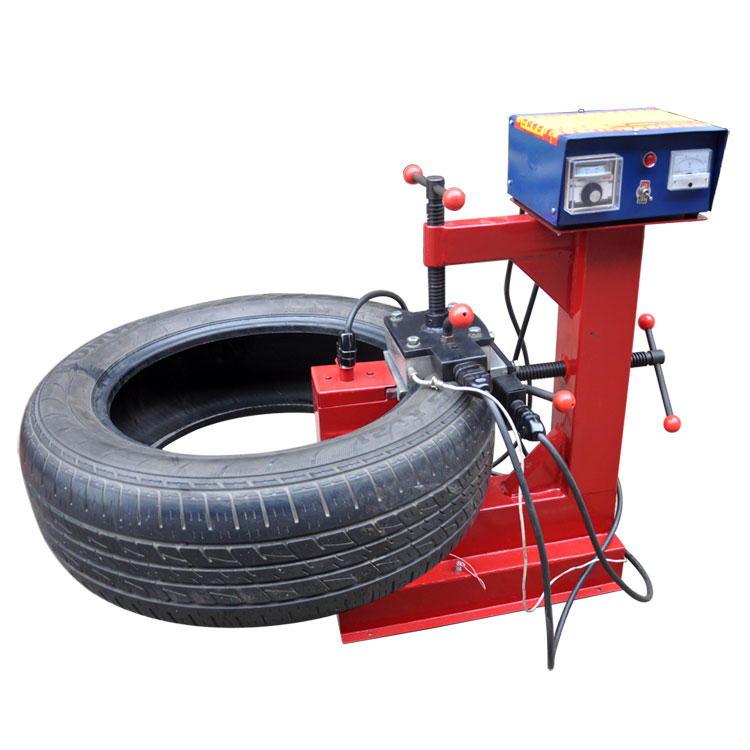 Observe the operating instructions for the vulcanizers! Tire vulcanization time at a vulcanization temperature of 140°C consists of: - 30 minutes to warm up the heaters - 5 minutes for each millimeter of tire thickness, taking into account the thickness of the patch. - when repairing tractor and all-terrain tires with a deep profile, it is necessary to increase the vulcanization time by 50%.
24. After the vulcanization mode, the tire must cool under pressure to t = 90°C.
25. Remove the repaired tire from the vulcanizer.
26. After curing, check the quality of the repaired surface. The surface of the rubber in the place of repair must be dense, without air pores. The presence of air pores indicates insufficient pressure during the vulcanization process.
27. Sand the outer side of the repair area to the level of the main surface of the tire. Use a grinding tool. When grinding, the rubber should not stretch and roll into lumps - this happens when the rubber is not sufficiently vulcanized.