Almost a third of new vehicles don't come with a spare tire, but that's no reason to pick up this problem-causing goo.
BY:
SEAN FLYNN
DealNews Contributing Writer
You might get it because a tow feels too expensive. You might get it because it seems easier than changing a tire. You might get it because you don't have a spare. But no matter why you're picking up that can of tire sealant, our advice is: don't!
If you're tempted to replace your spare tire with a can of Fix-a-Flat, Slime, or some other tire sealant, read on to see why stop-leak solutions are a terrible idea for tire repair.
These products inject a sealant into your flat tire to seal the leak, and a gas to fill the rest of the tire. But sealants leave goo inside the tire, and it's a real hassle for tire shop employees to get all of it off the wheel when they do a tire repair — especially if it's dried on. That could cost you when it's time to replace the tire; worse, the substance could even damage an otherwise repairable tire.
Tire sealants can potentially damage an otherwise repairable tire.
Sure, Fix-a-Flat's FAQ says its product "will not cause harm to most tires when used as directed." But which tires aren't included in that "most tires" caveat? Are your tires the wrong ones? Who knows! It's better to carry a spare tire — or opt for roadside assistance, which will cover more than just flat tire issues.
Tire sealant can freeze, making it unsuitable for most winters in the U.S. If it freezes in the can, you'll have a heck of a time defrosting it — time you could be waiting for a tow truck instead. Even if you thaw the tire goo out, it could still refreeze inside your tire, knocking your wheel out of balance.
Run-flat tires exist. According to research from AAA, 28% of 2017 model year vehicles didn't come with a spare. If you drive one of those cars, you can bet dollars to doughnuts there are run-flat tires either on or available for your car. Depending on the tire type, they can allow you to drive cautiously on a flat tire for up to 100 miles without damaging your wheel. Nearly every new BMW, many Cadillacs, plenty of Mercedes, and even some Toyotas come with run-flats — just to name a few.
SEE ALSO: Which Motor Oil Is Best for YOUR Car?
Tire sealant is only useful if you've got a slow leak in the tire or a small hole. If you suffer a more serious encounter — say, with construction debris — the tire goo will not save you. But you won't know if your tire is beyond repair until it's spewing slime all over itself on the side of the road — and maybe all over you.
Every new car sold in the U.S. in the last decade or so has had a tire pressure monitoring system, which can alert you to a leaking tire before it becomes a critical issue. Tire sealants can clog your TPMS. If it's not cleaned promptly, this could ruin a sensor.
Tire sealants can clog your tire pressure monitoring system. If it's not cleaned promptly, this could ruin a sensor.
A clog isn't the only thing to worry about. If you leave some sealants in the flat tire for too long, this could also damage a sensor. Still, some tire sealant companies insist their product is TPMS-safe — and some car manufacturers specifically say not to use tire sealants.
If you're a motorcycle rider, tire sealants definitely aren't for you. Tire sealants like Fix-a-Flat and Slime are intended for use in the tubeless tires found on cars and trucks. Some motorcycle tires still have tubes, and the goo won't even seal a tube leak, much less keep it closed. Further, throwing the wheel balance out of whack is more dangerous on a motorcycle than a car.
Even sealant brands such as Fix-A-Flat warn against using their products on motorcycles.
If you're too busy to deal with and fix a flat tire properly, you're definitely too busy to deal with a costly car repair.
When you fill a tire with goo, you're supposed to proceed directly to a tire repair professional. But sometimes it's Sunday, the shop is closed, and you can't get there until Monday evening because you still have to go to work. But then you have just one more errand to run, and then it's time for dinner.
SEE ALSO: 5 Ways to Prepare Your Car for Winter
Whatever the reasoning, if the sealant sits for too long, it can harden and corrode your wheels. Maybe it'll freeze, or dry funny, and now your tire is severely out of balance. Maybe it takes out your TPMS sensor. Suddenly that cheap repair costs hundreds of dollars.
Manufacturers once used dimethyl ether for the gas in Fix-A-Flat, which is highly flammable.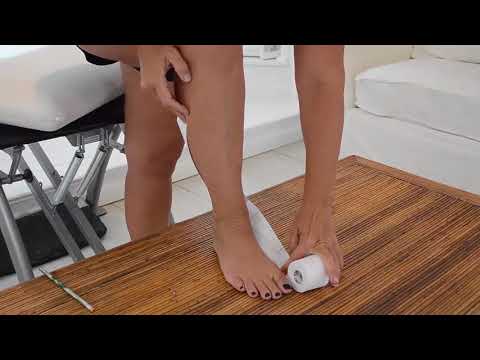 Road debris stuck in your tire could create sparks, potentially igniting that compressed gas. Luckily, this isn't the case anymore.
Any canned compressed gas is dangerous if you throw it into a fire. But manufacturers have generally switched to using HFC-134a (or a comparable propellant) in tire sealants, which is nonflammable. If you've got an ancient can of sealant lying around, dispose of it carefully. But if your tire sealant uses a nonflammable gas like HFC-134a, there's no need to worry about explosions.
You still shouldn't use it, though.
Readers, do you carry a can of tire sealant in your car? Or do you opt for a spare tire and/or roadside assistance? Let us know how you fix a flat tire in the comments below.
Sean Flynn
DealNews Contributing Writer
Sean is a freelance writer and photojournalist working in the Hampton Roads region. He has been a writer, adventure motorcyclist, drag racer, data nerd, shade-tree mechanic, and tornado chaser. Recommend good beers to him on Twitter at @wxgeek.
DealNews may be compensated by companies mentioned in this article. Please note that, although prices sometimes fluctuate or expire unexpectedly, all products and deals mentioned in this feature were available at the lowest total price we could find at the time of publication (unless otherwise specified).
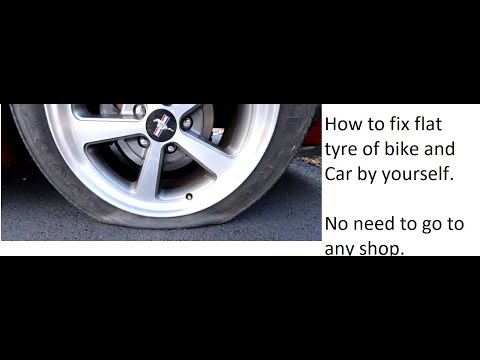
If you’re armed with the right tools and knowledge, a flat tire is more of a minor setback than a day-ruining disaster. Our step-by-step guide teaches you how to fix a flat tire using a repair kit, and how to replace one with a spare.
Contents
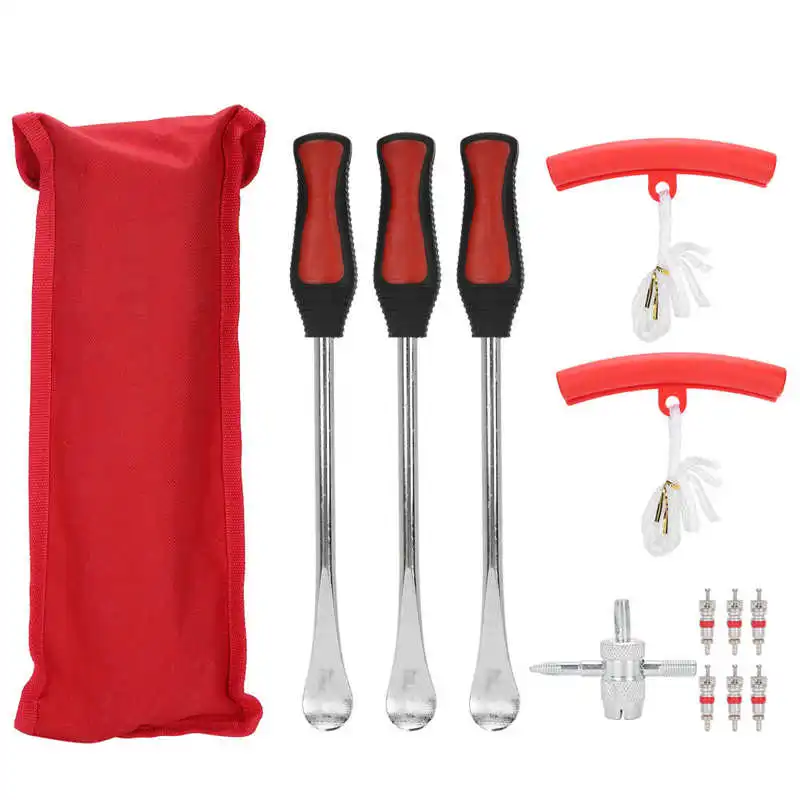
That wheel isn’t going to come off on its own, is it? You’ll need — at the very least — a jack and a lug wrench. We recommend using a for added stability, though you might not have access to one if you get a puncture 5 miles from the middle of nowhere. Jack stands and a torque wrench can make your life a lot easier. If your car doesn’t come with a spare tire, you’ll need a repair kit with tire plugs, a probe tool, pliers, and an air compressor. Alternatively, you can use an inflator like to get you to the nearest tire shop. You may also want to pick up a tire pressure gauge if you don’t already have one.
Normally, one would fix a flat by removing the punctured tire and replacing it with a spare so you can drive to a shop and get a proper replacement.
But let’s say the hole in your tire isn’t very big, and you’re lacking a spare tire. Provided you’ve got the right tools, a patch kit, and can safely remove a tire — and the tire isn’t severely damaged, of course — this is a viable short-term solution like fixing a hole in a wall. Note that this is a short-term remedy, as patched tires are generally only safe to drive on for about 100 miles, or three days, whichever comes first. Much like using a spare tire, this isn’t going to solve the issue either. The best solution is to take your car to a professional shop to get it replaced.
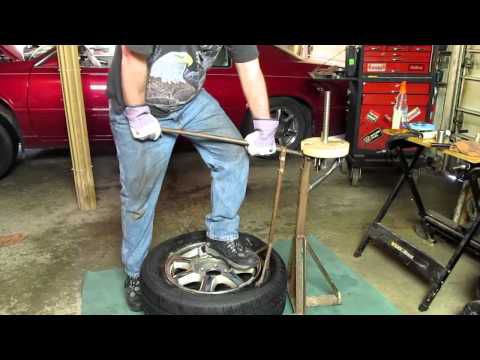
First, you’ll need to pop off that flat tire. Use a wrench to loosen the lug nuts, but don’t remove them from the bolts quite yet. Next, after loosening the nuts, put the jack under (or into) the proper jacking point and make sure to do this on level ground, with the car in park or in gear if it’s a stick-shift, and the parking brake engaged to prevent it from rolling. Jacking the car on an incline can be extremely dangerous. When it’s jacked up, you can remove the lug nuts and take off the tire.
Once you’ve removed the tire, it’s time to find the leak. If you can visibly identify the object that’s punctured the tire — it could be a nail, a piece of metal, or something else entirely — carefully pull it out. A pair of pliers comes in handy here. If you don’t know where the leak is coming from, you’ll need to find it. You can do this by inflating the tire and feeling or listening around the surface of the tire for an opening or escaping air.
Another strategy is to inflate the tire and spray it with soapy water. The escaping air will cause bubbles to rapidly form at the point of the puncture.
Step 3: Plug the holeOnce you’ve found the hole, ream it out to make sure the plug will fit. Usually, a tool for doing so is provided with your patch kit. Next, it’s time to plug the hole. Apply any necessary adhesives from the kit onto the plug, then insert it into the hole until roughly 2 inches of material is sticking out from the tire. Afterward, let the adhesive dry and cut off the protruding excess of the plug before discarding it.
Now, it’s time to test the plug’s seal. Inflate the tire and check for escaping air using either the feeling or listening method mentioned above. Again, you can also use soap and water if you’re in need of an alternative method.
Reattach the tire and lug nuts, but only tighten them enough so the tire will stay on. Do not tighten them all the way just yet. Lower the car to the ground and remove the jack. Once the car is safely stable on all four wheels, finalize the process by tightening the lug nuts in a star pattern, or an “X” pattern if you’re dealing with a four-bolt model. Make sure to follow the torque requirements in your car’s manual. This is when a torque wrench can come in handy.
Now, if done correctly, you should be able to get your car to a shop to have your tire replaced. Again, this is not a long-term solution, and you will need to replace your tire within either 100 miles or three days.
Replacing a flat Step 1: Remove the wheel with the flat tireFirst, you need to remove the flat tire. Before raising the car with a jack, use a wrench to loosen the lug nuts, but don’t remove them just yet. Put the jack under (or into) your car’s jacking point, lift the car off the ground, and remove the lug nuts when the wheel is no longer in contact with the asphalt. This needs to be done on level ground, with the car in park (or, if it’s a stick, in gear), and the emergency brake engaged. Trust us; it’s much safer this way.
Before replacing the flat tire, take a minute to ensure the wheel you’re about to put on is in acceptable condition. It’s not uncommon for cars to have their original, 20-year-old spare still in the trunk, and driving on it will likely land you back in flat-tire territory. If it’s good, install it and put the lug nuts back on but don’t fully tighten them yet. Wait until you’ve lowered the jack and made sure the full weight of the car is back on the tire.
With the spare in place, you can now drive your car again. Be careful, however, as spare tires are not built to be driven on for very long, and you should never exceed 50 mph when driving with a temporary, donut-style spare. Get the tire replaced by a professional, and consider getting your tires rotated at the same time.
Clipchamp - Free online video editor Try it for free
Share this post
On this page
Lack of lighting can ruin your videos. Capturing the perfect video in low light can be extremely challenging without the right tips and tricks. Typically, the result is grainy, undersaturated, low contrast, and fuzzy footage.
Luckily, we've come up with some powerful ways to shoot your videos in low light without losing quality. This article will cover the following methods:
Try adding additional light
Use the dark
Use the largest aperture 9000 9000 9000 9000
9000If you are having trouble shooting in dark or low light conditions, try moving your subject closer to the ambient light source. Getting your subject close to as much additional light as possible will help your video quality a lot.
If you simply don't have another light source, invest in additional lighting. This light is attached to your camera and illuminates directly the subject you are trying to capture.
Genaray LED-7100T 312 LED Variable-Color is great for helping your video become less grainy and richer in color. People usually think that when shooting in low light, increasing the ISO is enough. While this is a good technique to gradually increase the exposure of the footage when there is little real light on the subject, it does make the footage flat.
Increasing your camcorder's light sensitivity will add noise to the shadows in your video. It distracts the audience. Avoiding increasing ISO is the best option if you have extra light available.
Other options include turning on overhead lights or lamps, using a reflective panel or mirror to move and reflect the light on the subject, or even purchasing a portable lighting kit.
The Boling 3x 2220P Portable LED Video/Still Lighting Kit is likely to be the most expensive investment yet will provide the most light no matter what environment you shoot in. In addition, this set is battery operated, meaning you can take it with you wherever you want to shoot.
The second tip for improving quality when shooting in low light is to use the surrounding darkness to your advantage. Essentially, this means that the subject you are shooting does not always have to be in the center of the frame.
The object can always be seen through the silhouette when there is enough atmosphere to interest the viewer in the clip. Although adding additional lighting to the subject will help improve visibility and quality, this technique does not need to be used every time you shoot in low light.
If the background or atmosphere surrounding the subject is aesthetically pleasing to the audience, it is sometimes better to leave the main focus on the scenery and keep the subject in the dark. Exposing the background and a semi-dark or completely dark subject can effectively draw the viewer in creating the effect of a creative approach. Seeing the subject's face, expression, or details will not affect the viewers' attention.
Using Clipchamp Create, you can change the exposure, saturation, temperature, and contrast of your clip in the video editor to make the background brighter and the subject darker.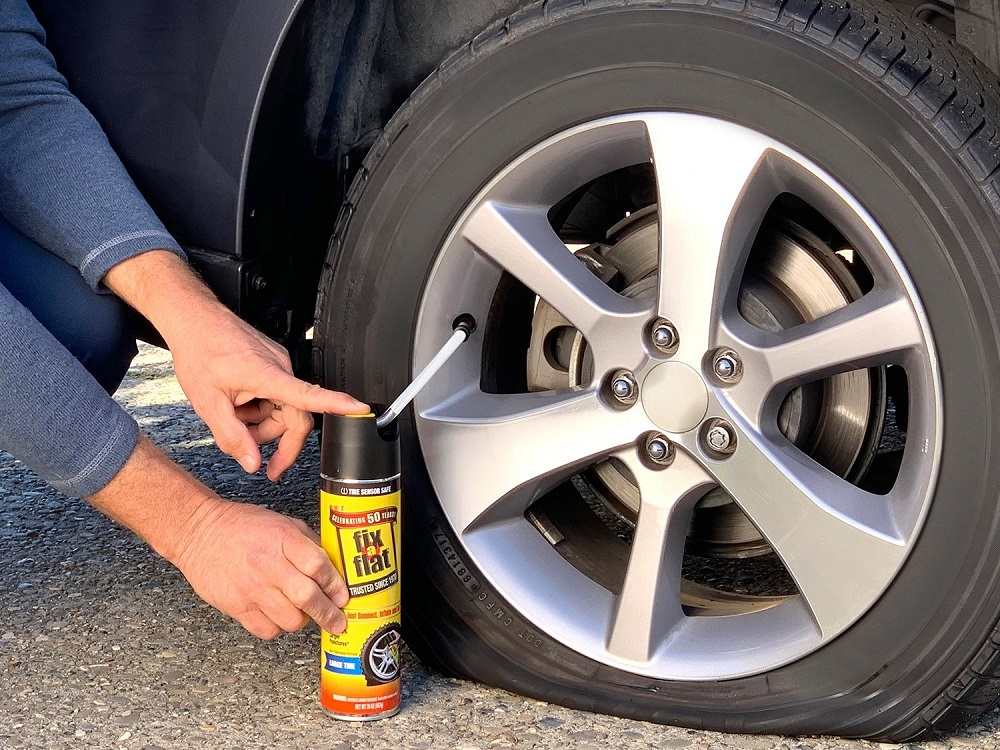
Depending on the camcorder you are using to record, you can change the camera settings to improve the video quality. If your camcorder has an aperture setting, change this setting to the smallest possible value. Aperture 1.4 is amazing. By lowering the aperture number on the camera, you thereby increase it. With a larger aperture, more light enters the camera, producing a brighter image.
This is a great feature to know when shooting in low light. Note that when using a zoom lens, the minimum available aperture increases as the subject gets closer. The more you zoom in, the less opportunity you have to make the picture brighter.
By holding the camera lens at wide angle, you get more light than zoom. If you want to shoot in low light without getting grainy, faded shots when you zoom in on your subject, just move closer to it. Try not to use the camera zoom and just physically get closer to the subject.
If your camera model allows you, try changing the frame rate.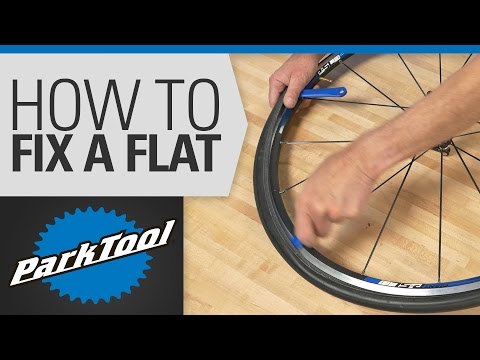 Typically all cameras are set to 30fps, although 24fps will capture clearer video when shooting in low light. A lower frame rate brings more light into the camera, resulting in a brighter image.
Off
As people switch from DSLRs and mirrorless cameras to professional video cameras, the question of illiterate exposure is becoming more and more common. People shoot in LOG and RAW simply because they can, without really understanding how these formats work and what they require in terms of exposure. Many of the concepts that have come down to us from brother photographers lose their relevance or become simply incorrect when it comes to shooting video. One such concept is the digital camera ISO.
ISO makes the picture brighter, right? Like yes, but actually no. ISO is an amazingly complex topic that took me a lot of time and effort to understand in depth. And some things I've learned are completely counter-intuitive, like using a lower ISO in low light.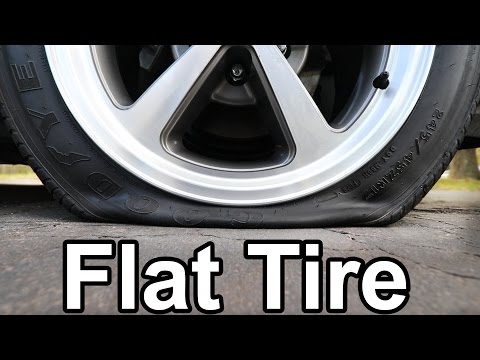 Wait, what? Yes, we'll get to that. This article is for those who just know which button on the camera is responsible for what is not enough. If you prefer to understand what is happening “under the hood”, then read on.
In the first part we will understand:
Where did ISO come from;
What is special about the ISO of digital cameras;
What is gain and how does it relate to ISO;
What does native ISO really mean and what does it look like.
In the second part, we will completely get into the jungle and analyze how ISO behaves when shooting in LOG and RAW and summarize for lovers of TL;DR.
First of all, let's dispel some myths. You probably heard about the exposure triangle in the early days of video making that ISO is responsible for the sensitivity of your camera. Now, this is complete nonsense. ISO does not change sensitivity and is not an exposure tool at all. Let's figure it out.
I won't bore you with history, but it's important to understand that ISO came to us in modern digital cameras from film cinematography. ISO (also known as ASA) is a measure of a film's sensitivity to light, which is determined by the size of the silver halide grains in the emulsion applied to the film. Larger grains absorb more light, pretty simple arithmetic.
ISO also has an important function when shooting on film. This is the number you need to enter into the exposure meter to get the correct aperture for a neutral exposure because there is no way on a film camera to preview the exposure. You must use a light meter. Well, or train the eye for thirty years.
Thus, early in the digital era, ISO was used as an easy way to communicate comparative sensor sensitivity to people who were used to shooting on film. In terms of exposure, ISO 100 on a digital camera should be equal to ASA 100 film. And that's where comparisons of film and digital lose much of their usefulness.
ISO for film is an exact science. When it comes to numbers, the ISO number you see in your camera's settings is made up by the manufacturer and is not an accurate indication of your camera's sensitivity. That's why, for example, Sony's ISO 800 and Canon's ISO 800 are not exactly the same thing, the difference can reach a whole exposure step, depending on the sensor design features. And on some cheaper cameras, the ISO values are simply taken from the ceiling.
But that's not all. Film analogies were initially misleading. Because you can't change the sensor in your camera the way you can change a roll of film. You're stuck with the sensitivity your camera had when it left the factory (we'll talk about double ISO later). Conversely, you cannot change the ISO of a photographic film, but you can change the ISO in a digital camera.
Then what does ISO mean in a digital camera? If you can't change the sensitivity of your camera's sensor, what does changing the ISO do? Well, it reflects the change in gain.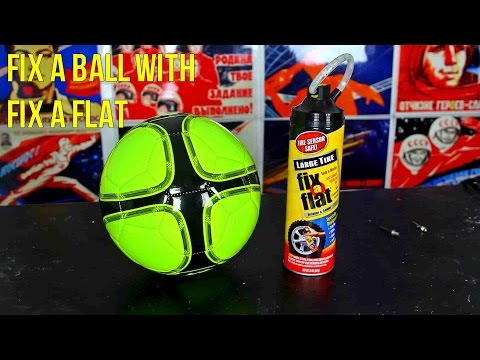 Increasing ISO amplifies the signal received from the sensor. And the difference between ISO and amplification is not only in semantics, it's not about terms. Understanding how amplification works has some pretty serious implications for how we should exposure when shooting with digital cameras. And the exposition is the main thing in the camera business.
To understand gain, let's quickly recap how a digital image sensor works. It consists of photosensitive diodes arranged in a grid of pixels. Any light falling on the sensor is registered as a signal. The more light, the stronger the signal. But if there is not enough light, the signal is drowned in noise. After all, the sensor produces some stable level of noise as a side effect of its normal operation. You've probably heard of the signal-to-noise ratio. So, if most of your signal is above the noise level, you have high signal/noise, the image is clean. And vice versa, if the signal is mired in noise, the image is irrevocably damaged.
And that's where the amplification comes in. You can increase the voltage applied to the sensor to increase the signal level. This is literally the same as turning the gain knob on a guitar amp. Gain is measured in decibels, and every 6 decibels of gain equals one exposure stop or doubling the ISO. Some professional camcorders, like my Sony FX6, can be switched to show gain instead of ISO, but even if yours can't, it's best to start thinking about ISO in terms of gain.
When the signal is amplified, the picture on the monitor becomes brighter, but there is one catch. And such a huge snag - the noise level rises proportionally. If you double the signal, you double the noise too. This is very important to understand, and if you take just one thought from this article, then here it is: it is impossible to increase exposure using ISO. Your camera does not become more sensitive. Image brightness is not the same as exposure. Increasing the gain doesn't give you more light.
So if you're shooting a scene in low key, where the lion's share of the information is in the shadows, increasing the ISO actually kills the image quality. Your stage is already in contact with the noise floor, and now you raise it - it's bad. On the contrary, you need to lower the noise level by lowering the ISO value below the original one, which means applying a negative gain.
Negative gain is the exact opposite of gain gain. The signal gets weaker, you lose dynamic range in the highlights, but the noise floor goes down. Thus, the dynamic range is now distributed towards the shadows - this is where your image lives if you are shooting a dark scene. Of course, you will need to compensate for the loss of exposure with aperture, shutter speed, or light. But remember: lower ISO produces clean shadows. I know that this is confusing and completely contrary to the usual understanding of ISO, but just believe it, or better, check it out for yourself on the tests.
By the way, what gives the ARRI Alexa its legendary 14 stops (actual) dynamic range is the use of bi-amping. The sensor is read simultaneously at zero gain (to preserve color reproduction in the highlights) and negative gain (for the sake of low noise in the shadows). The two datasets are then merged into a single high dynamic range image. A similar DGO (dual gain output) technology is implemented in the Canon C300 mk.III and Canon C70 cameras.
You must have heard about native ISO from every iron. Like, you need to shoot in native ISO - there is the cleanest image and the highest dynamic range of your camera, right? Yes, but why? What is a native ISO? Every digital camera has it. Native ISO means only one thing - 0 dB gain on the sensor. This is the voltage level at which the sensor is calibrated by the manufacturer to capture the highest dynamic range it is capable of. Different cameras may have different native ISO values, but they are all 0 dB gain.
Some sensors are equipped with two sets of gain circuits, which gives us the ability to switch between low and high values without increasing the gain and therefore without additional noise. It's called dual native ISO and it's a killer feature.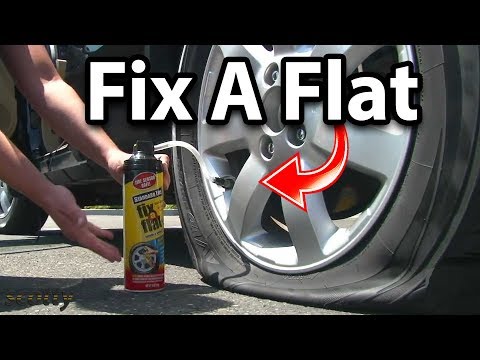 It's like having two sensors in one camera. By the way, this is one of the main reasons why Sony Venice is gaining popularity among top opera posts and stepping on the heels of ARRI Alexa a little bit.
If you start thinking of ISO as a gain, your life becomes much easier because you always know that 0 dB gain means native ISO. This does not matter which image profile or dual ISO mode you are in. You don't have to do arithmetic on the shoot or memorize sets of ISO values. You always know how far from native ISO your gain is. For example, for my camera at low base ISO, 6 dB of gain is perfectly acceptable, 12 dB is the edge, and if I need 3 or more stops of boost, I'd better switch to a higher ISO base level and lower the exposure with an ND filter.
You may have noticed that different image profiles have different native ISO. For example, I have native ISO 800 on FX6. But this is only for S-Log3. If I'm shooting S-Cinetone (what you see is what you get profile), the original ISO is 320. Why 320? As usual with ISO numbers, they don't mean what you think. Changing the native ISO from 800 to 320 does not mean that the camera has applied negative gain. It doesn't mean that S-Cinetone is 1.3 stops darker than LOG. The sensitivity has not changed, it is still 0 dB. ISO 320 is just a number that you would need to enter into a light meter to get the correct gray card exposure for that particular picture profile. LOG is a flat profile, but S-Cinetone is not, so the neutral gray color falls on different values on the waveform. If you want to equalize the exposure of S-Log3 with S-Cinetone according to the exposure meter, then you need to use the appropriate ISO values. But the camera sensitivity has not changed. The sensor still has 0 dB of gain.
I realize that this all sounds very confusing, and therein lies the problem.