Gone are the days of simply pumping up your road bike tyres to the maximum pressure permitted and hoping for the best. Not only are excessively high pressures uncomfortable, they’ve also been proven to slow you down.
Optimising the tyre pressure on your road bike is, therefore, one of the simplest – and cheapest – ways to improve the performance and comfort of your bike.
Equally, for beginner cyclists, it’s not always clear what pressure you should pump your tyres up to. While most tyres have a recommended pressure range printed on the sidewall, there’s rarely any more guidance than that.
Ultimately, the pressure you need to run will vary depending on the rider, bike and road conditions, but it’s fairly easy to get into the right ballpark. Whether you’re just starting out or you’re an experienced rider looking to optimise performance, we’re here to help.
So, how can you find the right tyre pressure for your bike? In essence, it’s all about finding a balance.
You need your tyre pressure high enough to minimise energy losses from the deformation of the tyre and to offer predictable handling through corners. But you also need it low enough to absorb, rather than bounce over, imperfections in the road.
In this article, we’ll run through why tyre pressure is so important, what factors influence finding your optimum pressure, and how you can find a pressure that works best for you.
If you’re just starting out, we’ve also got an explainer on how to pump up a bike tyre, as well as a guide to inner tubes, with everything you need to know about tube sizes, valve types, materials and so on.
We’ve also got a guide to tubeless setup, if you’re considering making the switch, and buyer’s guides to the best road bike tyres and best tubeless tyres if you’re looking for new rubber.
Before we get stuck into the details, here are four key things to consider when it comes to road bike tyre pressure.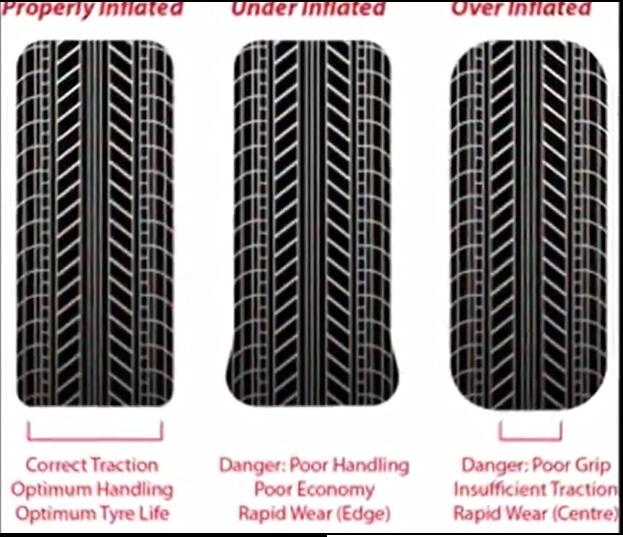
If your tyre pressure is too low, you could pinch the tyre against the rim, causing a puncture or damaging the wheel.Russell Burton / Immediate Media
On a basic level, getting your tyre pressure right will make your rides easier, more comfortable and lower your chances of punctures.
From a performance standpoint, optimising tyre pressure is critical to reducing rolling resistance and improving comfort. Rolling resistance is the force resisting the motion of your tyres rolling on the ground.
If your tyre pressure is too low, more energy will be lost in the deformation of the tyre casing and friction between the tyre and the road. It also increases the chance of pinch flat punctures.
If your tyre pressure is too high, the tyre will be so stiff your bike will begin to vibrate over imperfections in the road surface, negatively affecting comfort and wasting energy.
Very high tyre pressures might feel fast, but they’re not.
Once you go past a certain point, adding more air to your tyres actually decreases grip, increases high-frequency vibrations and causes extra muscular fatigue. All of these things slow you down.
Getting your tyre pressure right is both faster and more comfortable.
In order to set the right tyre pressure on your road bike, you’ll ideally have access to a track or floor pump with an in-built pressure gauge. You don’t need to spend loads, but given how much you’ll use it in the long term, getting something high-quality makes sense.
If you really want to fine-tune your tyre pressures, one of the best tyre pressure gauges is a worthwhile investment, too.
When it comes to road bike tyre pressure, err on the side of ‘too low’ rather than ‘too high’.
According to testing by Silca, performance decreases rapidly once you go past the optimum pressure for a given setup. Being a little too low only brings a relatively small speed penalty, but should be noticeably more comfortable on rough roads.
BikeRadar’s technical writer, Simon von Bromley, puts around 65psi in his 28mm tyres.Russell Burton / Immediate Media
Helpfully, some tyre manufacturers offer pressure recommendations or pressure calculators for their range of road bike tyres, and we can take these as general starting points for dry days on smooth tarmac.
As we’ll come on to, you should pay close attention to the actual size of your tyres when inflated because this can change optimum pressure for any given rim and tyre combination.
If the actual inflated tyre width is larger than the labelled width, the tyre will need slightly less pressure than recommended by these tables and vice versa.
Likewise, the optimum tyre pressure will be higher for heavier riders, or for riders carrying loads on their bikes, and lower for lighter riders.
As a final caveat, it’s important to adhere to the pressure limitations set by the manufacturers of both your rims and tyres, particularly with regards to the upper limits. These are typically printed on the tyre or rim sidewalls.
If you have a set of wheels with hookless rims, the maximum permitted tyre pressure may also be much lower than with hooked rims.
| Rider weight | Recommended pressure | Rider weight | Recommended pressure | ||
| ≤ 50kg / ≤ 110lb | 84psi / 5.8bar | ≤ 50kg / ≤ 110lb | 73psi / 5bar | ||
| 51-57kg / 112-126lb | 90psi / 6.2bar | 51-57kg / 112-126lb | 78psi / 5.4bar | ||
| 58-65kg / 128-143lb | 96psi / 6.6bar | 58-65kg / 128-143lb | 83psi / 5. 7bar 7bar | ||
| 66-73kg / 145-161lb | 102psi / 7bar | 66-73kg / 145-161lb | 88psi / 6.1bar | ||
| 74-81kg / 163-179lb | 106psi / 7.3bar | 74-81kg / 163-179lb | 93psi / 6.4bar | ||
| 82-88kg / 181-194lb | 110psi / 7.6bar | 82-88kg / 181-194lb | 98psi / 6.8bar | ||
| ≥ 89kg / ≤ 196lb | 115psi / 7.9bar | ≥ 89kg / ≤ 196lb | 103psi / 7.1bar | ||
| ≥ 96kg / ≤ 212lb | Use 700x25c tyre | ≥ 96kg / ≤ 212lb | 108psi / 7.4bar | ||
| On a 19mm rim: lower pressure by 0.4bar / 6psi | On a 21mm rim: lower pressure by 0.3bar / 5psi | ||||
The following recommendations are from Pirelli for its TLR tubeless road tyres, but are good starting points regardless of the brand of tyres you’re using, providing you take the various factors we’ll run through later into account when going on to fine-tune tyre pressure.
| Rider weight | Recommended Pressure | Rider weight | Recommended Pressure | ||
| ≤ 50kg / ≤ 110lb | 65 psi / 4.5bar | ≤ 50kg / ≤ 110lb | 58psi / 4bar | ||
| 51-57kg / 112-126lb | 70psi / 4.8bar | 51-57kg / 112-126lb | 61psi / 4.2bar | ||
| 58-65kg / 128-143lb | 75psi / 5.2bar | 58-65kg / 128-143lb | 65psi / 4.5bar | ||
| 66-73kg / 145-161lb | 80psi / 5.5bar | 66-73kg / 145-161lb | 70psi / 4.8bar | ||
| 74-81kg / 163-179lb | 85psi / 5. 9bar 9bar | 74-81kg / 163-179lb | 74psi / 5.1bar | ||
| 82-88kg / 181-194lb | 90psi / 6.2bar | 82-88kg / 181-194lb | 78psi / 5.4bar | ||
| ≥ 89kg / ≤ 196lb | 95psi / 6.6bar | ≥ 89kg / ≤ 196lb | 83psi / 5.7bar | ||
| ≥ 96kg / ≤ 212lb | 100psi / 6.9bar | ≥ 96kg / ≤ 212lb | 87psi / 6bar | ||
| On a 21mm rim: lower pressure by 0.3bar / 5psi | On a 21mm rim: lower pressure by 0.3bar / 5psi – On a 23mm rim: lower pressure by 0.4bar / 6psi | ||||
Advice from other brands may vary, but Pirelli recommends riders who weigh over 96kg / 212lb should use 700 x 25c tyres or larger because the recommended tyre pressure for a rider of this mass would exceed the maximum permitted pressure for a 700 x 23c tyre.
As always, it’s vital not to exceed the maximum pressures indicated on your tyres or rims.
How do Pirelli’s recommendations stack up against what tyre pressures I personally use? Let’s have a look at some examples.
To give these pressures some context, I weigh around 63 to 64kg.
Time trials are a personal favourite of mine. On my time trial bike, I use 23mm tyres on 19mm rims, but their actual inflated width is closer to 25mm.
Given most time trials tend to take place on fairly good roads without too many potholes, I run around 90psi front and rear.
However, on my Giant TCR Advanced Pro 2, I’d typically be running 28mm tyres on 19mm rims. For this, I’d normally use pressures of around 65psi because the roads I ride on most often tend to have rough or broken surfaces.
Getting your tyre pressure right on a road bike is very different to a mountain bike, where tyres (and wheel rims) are significantly wider, the terrain is looser and you have trail obstacles to contend with.
If you ride off-road, we’ve got a separate guide to mountain bike tyre pressure.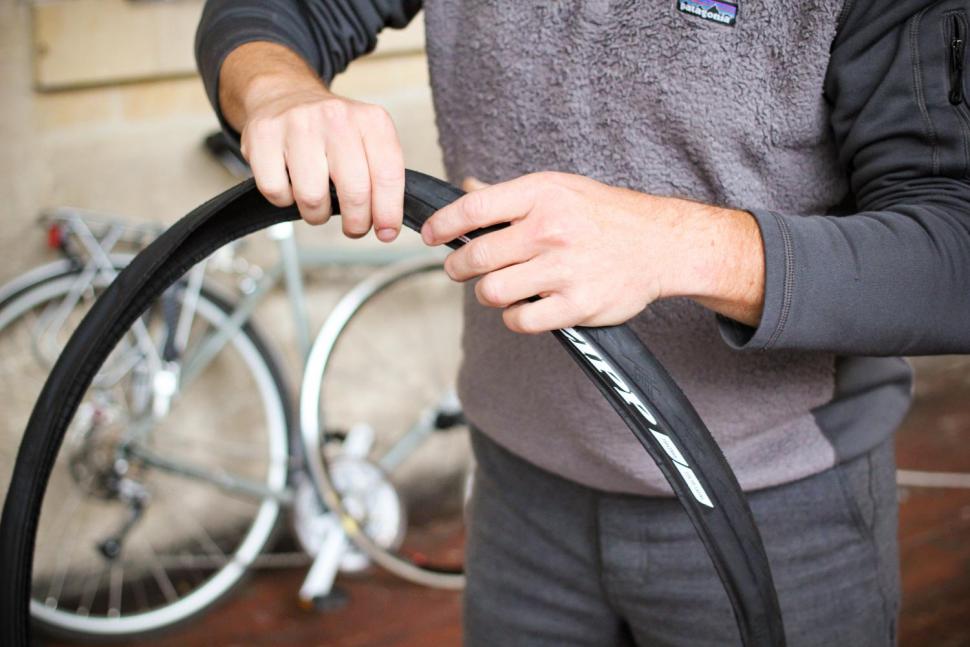
Russell Burton / Immediate Media
As already noted, the above recommendations are intended as general starting points. They’ll get you in the right ballpark, but there are a number of factors beyond tyre and rim size and rider weight that affect your personal optimum road bike tyre pressure.
A tyre can inflate wider – or narrower – than its nominal size, depending on the internal rim width of the wheel it’s mounted on.Russell Burton / Immediate Media
Accurately determining your tyre size is crucial to calculating optimum pressure.
Despite most bicycle tyres being labelled with a specific size, such as 700 x 25c, the actual inflated size of any given tyre will depend on both the design of the tyre and the internal rim width of the wheel.
Most new road tyres are designed around a 19mm internal rim width. A wheel with a wider internal rim width, as pictured here, will likely increase the measured width of a tyre when inflated. Russell Burton / Immediate Media
Most new tyres are now designed around the latest 2020 ETRTO (European Tyre and Rim Technical Organisation) standards with a 19mm internal width, so wheels with an internal rim width wider than this will likely increase the measured width of a tyre when inflated to a given pressure (and vice versa).
The optimum pressure is, therefore, likely to be lower than if you were running the same tyre on a narrower rim.
Riding a lightweight, go-fast road bike? Your tyre pressure will need to be lower than a heavily laden touring bike, assuming all other variables are the same.Russell Burton / Immediate Media
While the rider makes up the vast majority of the total system weight – and, as we’ve already covered, a heavier rider will generally need to run higher pressures than a lighter rider – the weight of your bike and any kit you’re carrying also count.
If you’re riding a sub-4kg weight weenie optimised road bike and don’t have it loaded up with heavy gear, then you might need to lower your tyre pressure by a few psi.
The opposite is also true. If you’re riding a heavy touring bike or a road bike loaded with bikepacking bags, you may need to add more air to your tyres.
With road bikes, the rider’s weight is generally not evenly distributed across both wheels. The exact split will be different for every rider, depending on riding position and bike, but it’s usually the case that the rear wheel takes slightly more of the load than the front.
As a rule of thumb, it’s worth putting a few psi less in the front tyre than in the rear.
The condition of the roads you ride will have an impact on the ideal pressure of your tyres.Russell Burton / Immediate Media
If you’re riding on a perfectly smooth velodrome, higher pressures are faster. However, on imperfect surfaces, such as roads, very high pressures simply increase vibrations and can slow you down.
As roads get rougher, with bigger holes and bumps, the optimum tyre pressure decreases further.
When roads get very rough, smaller tyres (anything 25mm or smaller) running at a relatively low pressure may not be able to provide enough protection for the rim or inner tube – especially for heavier riders – which can lead to pinch flats or even rim damage.
If you ride on rough roads, or roads with a generous coating of gravel, dropping your tyre pressure can help improve comfort and reduce the likelihood of pinch flats.Russell Burton / Immediate Media
Switching to larger tyres will give you a greater amount of tyre volume to play with, so you can fine-tune the pressure to account for both rolling resistance and comfort on rough roads.
This is why the pros switch to 28mm+ tyres for cobbled races such as the Tour of Flanders and Paris-Roubaix.
Dropping your tyre pressure a little in wet conditions might give you more grip.Russell Burton / Immediate Media
When road surfaces are wet, or if it looks like it might rain during your ride, it’s worth dropping pressure by around 5psi on both tyres.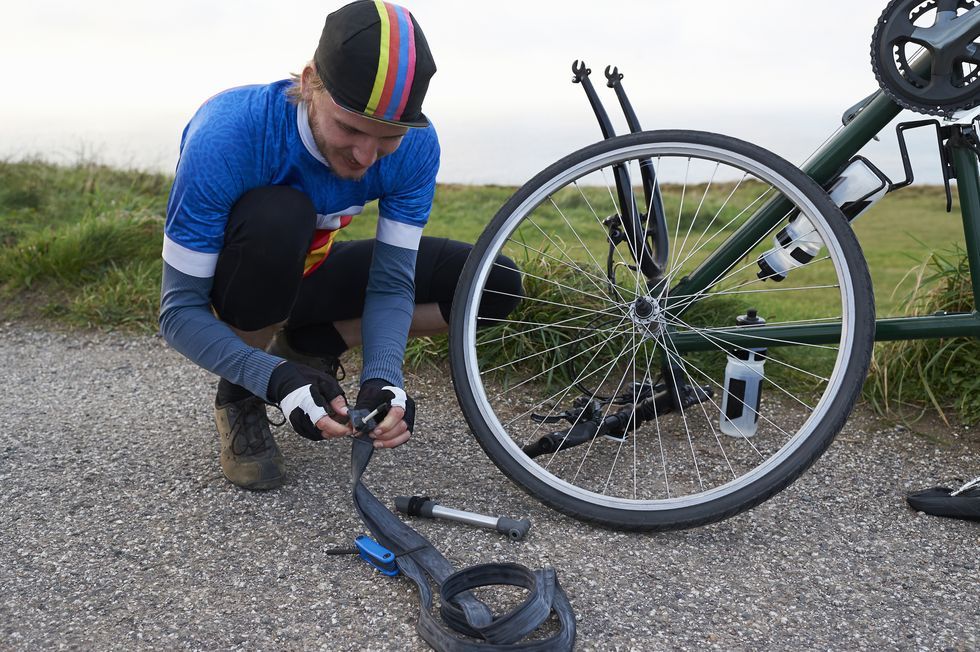 This helps increase the amount of rubber in contact with the road, which should improve grip.
Higher temperatures, whether ambient or induced by rim braking, can also increase tyre pressure.
If you’re riding long descents on hot summer days on a bike with rim brakes (particularly one with carbon clincher wheels or latex inner tubes), be careful to not over-inflate your bike’s tyres. Doing so could lead to dangerously high pressures building up inside the inner tubes or tubeless tyres, if too much excess heat is introduced to the system.
The materials and construction of a tyre can also affect the optimum pressure.Russell Burton / Immediate Media
The materials and construction methods a road bike tyre manufacturer uses can also affect the optimum pressure, to a small degree.
Road bike tyres designed for racing or summer use tend to have casings that use a higher number of thinner nylon or cotton threads (this is what the Threads Per Inch or TPI number of a tyre refers to), and only a thin layer of rubber tread on top. This makes them easier to deform under pressure, making for a smoother and faster ride.
Conversely, winter road bike tyres typically have stiffer, more durable casings with fewer, thicker nylon threads. The rubber tread on top also tends to be thicker for improved mileage and puncture protection.
Given this, you may need to drop your road bike tyre pressure slightly when moving across to winter tyres because the optimum pressure for comfort and grip is likely to be a few psi lower.
Running tubeless tyres removes the risk of pinch flats.Russell Burton / Immediate Media
If you’re using tubeless tyres, it’s worth remembering that the absence of an inner tube means you can safely run lower pressures without the risk of pinch flatting the tube.
Because lower tyre pressures can improve off-road grip, running tubeless tyres can be particularly useful if you’re riding a road bike with relatively large tyres and looking to take in some light off-road or gravel riding.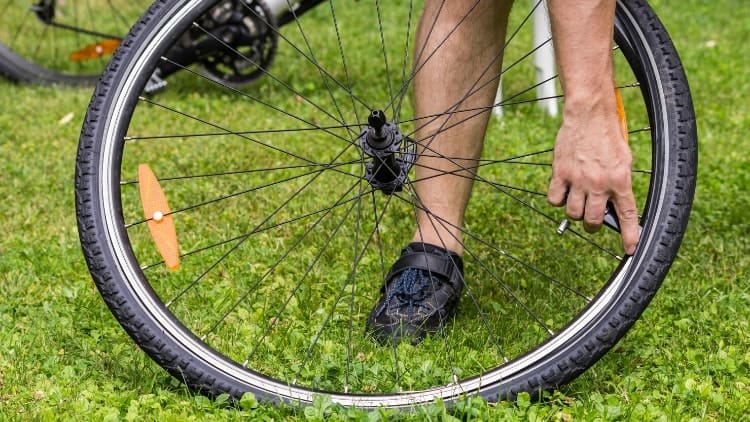
No one likes to be stuck at the side of the road fixing a puncture.Russell Burton / Immediate Media
So, you have all the information at your fingertips, but how do you actually go about fine-tuning tyre pressure? The simple answer is experimentation.
Start with the recommendations above and then consider what the road conditions are like where you ride. Do you have miles and miles of freshly laid tarmac? If so, the above recommendations are probably close to optimal.
If you don’t – perhaps because you live somewhere such as the UK – start with the above recommendations and experiment with taking a little pressure out of the tyres each time you go for a ride.
Start with small steps in pressure of around 5psi, and, if you pay attention, you should eventually be able to determine a sweet spot for speed and comfort.
You’re looking for a pressure that feels smooth, without feeling like the tyre is collapsing underneath you when cornering.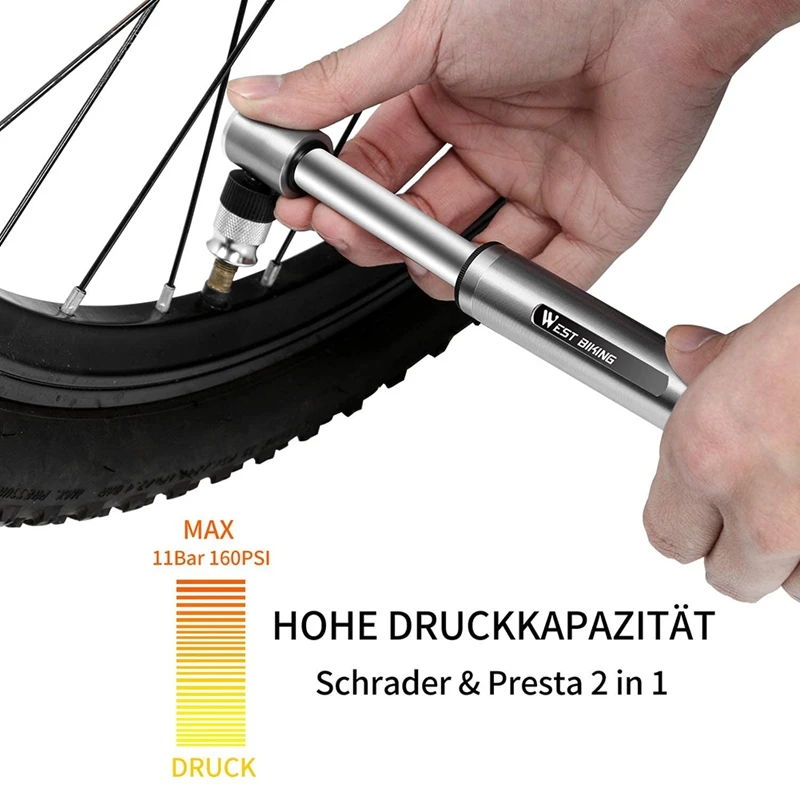 And, as already mentioned, erring on the side of too low rather than too high is a good thing to keep in mind.
If you’re really serious, you could conduct some basic field testing with a power meter to try to find your optimal pressure.Simon Bromley / Immediate Media
Alternatively, if you have an accurate and reliable power meter, you could do some basic field testing yourself.
Find a long, steady climb with an average gradient of over 5 per cent, and see how different tyre pressures affect the power required to ride at a certain speed, or how fast you travel for a set power output.
The data you acquire should enable you to hone in on an optimum tyre pressure for the setup and road conditions you’re using when testing.
You’re looking for the tyre pressure that requires the least power for a set speed, or enables you to travel fastest for a set power.
As with any testing, it’s important to keep all other variables (e. g. system weight, riding position, traffic, weather, etc) the same for each test run, otherwise, you can muddy the results.
Simon von Bromley is a senior technical writer for BikeRadar.com. Simon joined BikeRadar in 2020, but has been riding bikes all his life, and racing road and time trial bikes for over a decade. As a person of little physical talent, he has a keen interest in any tech which can help him ride faster and is obsessed with the tiniest details. Simon writes reviews and features on power meters, smart trainers, aerodynamic bikes and kit, and nerdy topics like chain lubricants, tyres and pro bike tech. Simon also makes regular appearances on the BikeRadar Podcast and BikeRadar’s YouTube channel. Before joining BikeRadar, Simon was a freelance writer and photographer, with work published on BikeRadar.com, Cyclingnews.com and in CyclingPlus magazine. You can follow Simon on Twitter or Instagram.
❚ The products mentioned in this article are selected or reviewed independently by our journalists.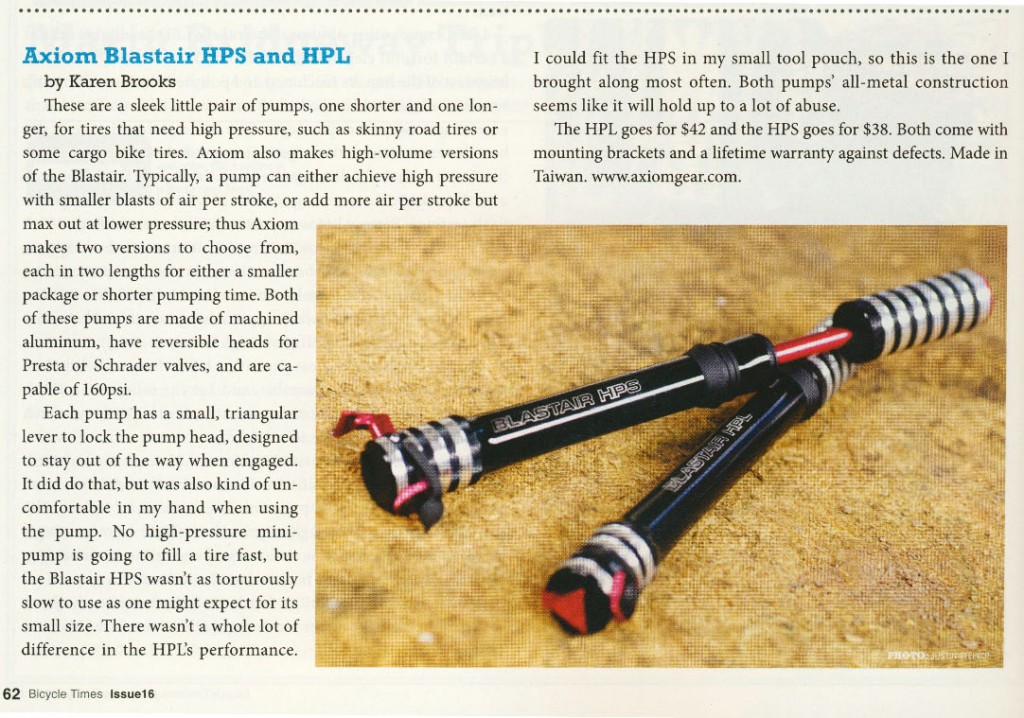 When you buy through links on our site we may earn an affiliate commission, but this never influences our opinion.
Tweaking tyre pressures can produce significant changes to a bike’s handling, and the true fettlers out there are often obsessive about getting the exact amount of air in each tyre.
With the gauges usually found on a hand pump or track pump often proving inaccurate or difficult to read with precision, some riders turn to dedicated pressure gauges such as the ones tested here.
If you’re trying to work out optimum pressures for your tyres, you’ll want repeatable consistency, so a pressure gauge could be a sound investment for tyre fettling.
But what pressure should you be aiming for? We’ve got guides to mountain bike tyre pressure and road bike tyre pressure, to help you find the perfect PSI for your ride.
And make sure you check out our guide to the best bike pumps to get your tyres inflated in the first place.
4. 5 out of 5 star rating
The LifeLine digital pressure gauge fits both Schrader and Presta valves securely, with no air leaks.Andy Lloyd
Not only is it low-priced, the LifeLine Digital pressure gauge feels robust. It fits both Schrader and Presta valves securely, with no air leaks.
The twisting head adds versatility and the pressure-release button is easy to use, with no mode selection needed.
It beeps to confirm when it’s at the correct pressure. The light function is neat, both illuminating the screen and activating a small LED so you can see your valves in the dark.
It would be improved by the display being a little bigger though, and while it’ll fit in a pack, the device is a bit bulky to be pocket-friendly.
4.5 out of 5 star rating
The Topeak Smartgauge D2X is a high-end and high-tech option.Our Media
The Topeak Smartguage D2X is the successor to the D2 featured below. This new gauge weighs just 56g and is slimmer than the previous model, although it’s a little longer, which actually makes it easier to use and stow in your pack.
Toggling between the different unit readouts (psi, bar or kg/cm²) is easy and, thanks to the illuminated LED screen, readings are clear and easy to see.
Features include an air-release button for fine-tuning, automatic switch-off, compatibility with both Presta and Schrader valves, and – something that’s really handy – a valve head that rotates through 360 degrees, which makes attaching it far less awkward than on some gauges.
Using the old Topeak gauge and the D2X back-to-back has given us almost identical read-outs, so accuracy seems good, too. This is a pricey option, though.
The following pressure gauges scored fewer than four stars out of five in our testing but are still worth considering.
3. 5 out of 5 star rating
You can choose between psi, bar, kg/cm² and kPa, and it beeps to confirm a reading.Andy Lloyd
The BMP-90 tyre pressure gauge is small, light and pocket-friendly. The push-on design is secure, and it doesn’t lose any air when pressed on or removed. Neither does it leak when in use.
It measures psi, bar, kg/cm² and kPa, and it beeps when your desired pressure is reached.
It’s disappointing that there’s no pressure-release button for minor adjustments and the valve adaptor is removable, so there’s the potential to lose it. Also, without a swivel head, it’s awkward to use if you’re left-handed, it doesn’t feel that robust and its display isn’t backlit either.
3.5 out of 5 star rating
The large, backlit display of the SKS Airchecker is easy to read, and the gauge beeps to confirm a pressure measurement.Andy Lloyd
The second-generation SKS Airchecker has a sleek design and feels well built. Its slim form means it should fit comfortably in any pack.
The twisting head adds versatility, and there’s a pressure-release button for fine adjustment. It fits both valve types securely. It’s simple to read the display and the gauge beeps to confirm a pressure reading.
This is one of the more expensive tyre pressure gauges and you have to change modes in order to use the pressure-release button, which itself is a little stiff to press.
It’s scored down because the battery requires a bit of awkward fiddling to access.
3.5 out of 5 star rating
The 250psi maximum pressure means you can use it on forks and shocks as well as tyres.Andy Lloyd
Topeak’s SmartGauge D2 has been superseded by the D2X but remains in the range.
It feels well built and the large display is easy to read. You can swap between Schrader and Presta valves at the flick of a switch, and the swivel head improves usability.
There’s a pressure-release button and a pressure beep. You can measure forks and shocks besides tyres because of the 250psi limit.
It gives readings in full psi units only and you have to select the pressure-release mode, making fine-tuning trickier.
Pressing it onto the valve and taking it off requires precision to minimise air loss. The screen isn’t illuminated either. Both these faults are disappointing for the price.
3.0 out of 5 star rating
The screw-on design provides a secure fit on both Schrader and Presta valves.Andy Lloyd
The Fabric Accubar can be used in-line with a pump, so you can get the pressure right while inflating, rather than adjusting it later. It fits both Schrader and Presta valves.
Despite being a very expensive gauge, it’s not digital, which makes fine adjustments difficult.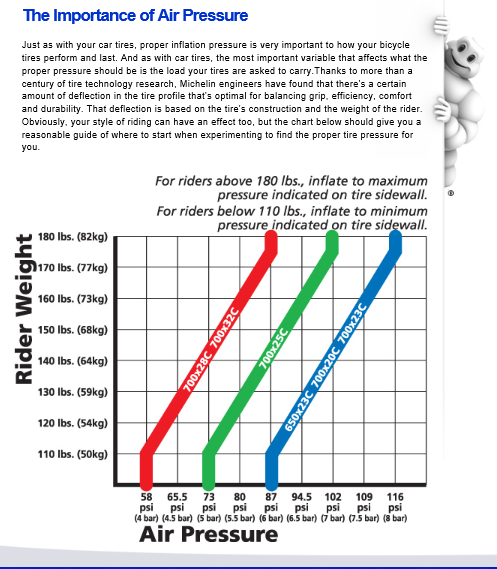
The Accubar also requires great care not to let out air when fitting or removing it from the valve, and is fiddly. Being big and heavy, it’s best suited to a toolbox rather than a pocket or pack.
3.0 out of 5 star rating
PRO’s gauge is light enough to throw in a pocket for trail use.Andy Lloyd
PRO Pressure Checker Digital’s small gauge covers the basics well. It fits both Schrader and Presta valves, albeit using a removable adaptor.
The display is easy to read, and there’s a pressure-release button so you can make minor adjustments. You can carry it in a pocket on the trail.
The head is prone to leaking and it’s a little tough to pull off the valve too.
The lack of a swivel head makes it less practical than some if you’re left-handed and it measures in psi and bar only.
Its plastic body has a slightly cheap, brittle feel and the screen isn’t illuminated.
Luke Marshall is a technical writer for BikeRadar and MBUK magazine. He's been working for both titles since 2018 and has over 20 years of mountain biking experience. Luke is a gravity-focused rider with a history of racing downhill, previously competing in the UCI Downhill World Cup. Educated to a degree level in engineering and with a penchant for full-throttle speed, Luke is more than qualified to put every bike and product through its paces to bring you informative and independent reviews. You'll most likely find him on a trail, enduro or downhill bike riding the off-piste tracks around south Wales and the south west of England. He often makes an appearance on BikeRadar's podcast and YouTube channel.
Edited: 01/25/2018
You came in the morning to your iron horse and you see - the wheel has flattened. How to download it? Correct pump. And how to pump up correctly ? How many atmospheres Do beginners often think about it. Previously, as they did. I pumped up the wheel, tried it with my fingers - it is pressed through or not. He sat down and looked at the wheels - sold through or not. Sold - pumped up, not sold - went. It was called - to check "for a bulging naval eye."
It turns out that not everything is so simple.
With a properly inflated tire, the ride is pleasant and easy. It provides good rolling, speed, tire wear resistance and, in the end, the safety of the cyclist.
You need to understand that pressure is not kept by the chamber, but by the tire.
The pressure for which the tire is designed is indicated by the manufacturer directly on it.
The inscription in English " Inflate to ... " literally translates as "Inflate to ..." ("Inflate to", "Pressure from ... to ...").
For example, the figure indicates that the pressure should be from 36 to 60 PSI (from 250 to 420 kPa) or 2.5 atmospheres to 4.2 atmospheres, respectively.
The relationship between BAR, PSI and Pa is: , but with the translation of Bar to PSI, everything is a little more complicated, so here is table for quickly converting pressure in bicycle tires from Bar to PSI and vice versa :
Let's mention another pressure designation, which is called "kilogram force per square centimeter" or "technical atmosphere" and is denoted as " kgf / cm² " or " kgf/cm² ". It is quite rare, but it does happen. We will dwell on the technical nuances, there are a lot of articles on this topic on the Internet, let's just say that for bicycle pressure it can be considered equal to 1 Bar or one atmosphere.
And for fans of exact mathematics, here are the conversion factors:
1 kgf / cm² = 1 atmosphere = 0.98 Bar = 98.07 kPa = 14.22 PSI
When inflating a tire, you need to clearly understand that the pressure in it should not be lower than the minimum specified and higher maximum. It is worth noting here that it is better to leave a small margin of 0.2-0.5 atmospheres without inflating the tire to the maximum value so that it does not burst, especially in hot weather.
About what else the manufacturer writes on bicycle tires, as well as what other numbers mean on it, there is a separate article on our website, which is called "What do the numbers on bicycle tires mean".
To be honest, without a pressure gauge, nothing. So you need a bicycle pump with a pressure gauge, a separate pressure gauge connected to the nipple, or you will have to inflate tires at a service station - they always have something to measure the pressure in the wheels. You have to be careful with STO. There are times when a valiant worker, forgetting about pressure, hits the wheel with everything he can and the camera, together with the tire, explodes in a matter of seconds.
There is one piece of advice. When you know exactly what pressure is now - try to squeeze the tire with your fingers. So gradually you will learn to determine the approximate pressure in the chamber by tactile sensations. Remember that already from two bars (atmospheres) the tire feels rather tight to the touch.
If the pressure is low, the tire can easily puncture. In addition, under-inflated wheels extinguish a large percentage of the cyclist's efforts to accelerate and actually ride. The tire "spreads out" on the asphalt and, moreover, wears out very quickly from high friction on it.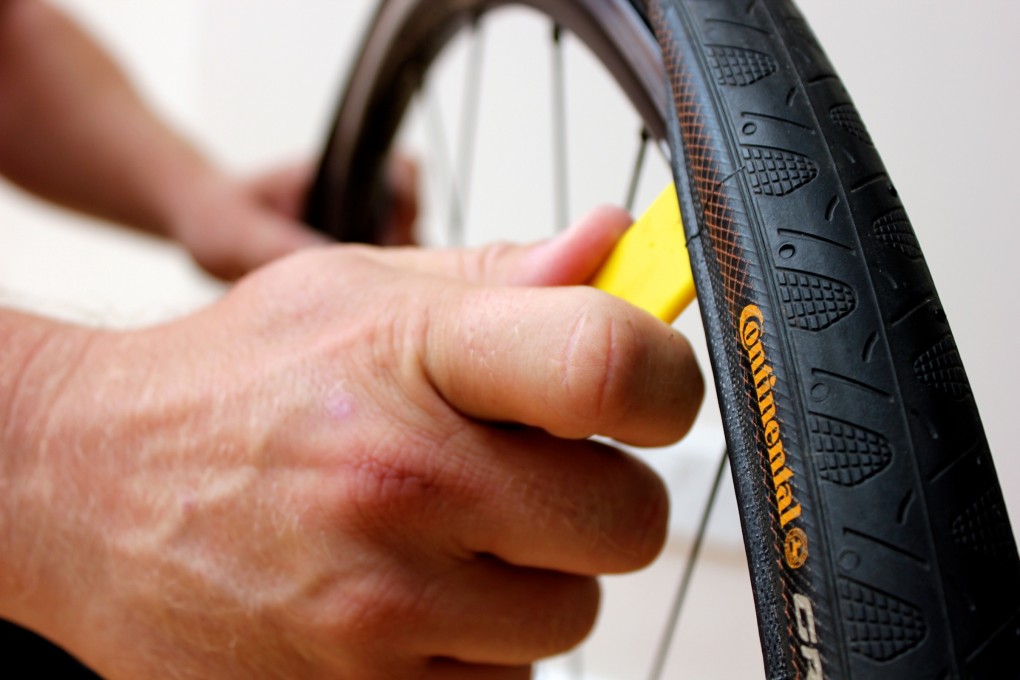
This also leads to the so-called "snake bites" - two adjacent breakdowns. Occurs when a sharp collision with a curb, stone or bump. In this case, the tire is pressed against the rim, the chamber is clamped between the rim and the object that the wheel has run into, and breaks through in two places at once.
Riding at low pressure can be dangerous for the rims, you can easily get an "eight" on the wheel. At low pressure, frequent punctures are possible, and when cornering, the tire can generally fly off the wheel, which is already life-threatening.
In this case, if the wheel is heavily pumped, it can easily pierce the rim (on the side of the spokes). To protect the camera from this, a special rim tape is used. This is a rubber or polymer strip that fits over the rim to keep the ends of the spokes and the sharp edges of the spoke holes from piercing the tube. So a middle ground is needed. An example of such a tape is shown in the figure on the right.
It is generally recommended to check the pressure before each ride (at least by feel). Remember that it is not only the nipple that poisons. The air is also slightly etched through the rubber itself, albeit slowly. Because of this, every month, an inflated tire itself loses an average of one bar of pressure.
I would like to note one more thing. When driving, the main load falls on the rear wheel, while the front is not so heavily loaded. Based on this, it is possible to do a little more pressure in the rear tire than in the front . On average, somewhere around 10%.
For driving on asphalt and well-packed dirt roads, you need to pump up the maximum pressure.
The easiest way to inflate wheels for road and city bikes - slicks. Due to the fact that they have a small volume of wheels, the pressure must be high. The more pressure, the better the roll and the higher the speed. So feel free to pump a little bit by 0.2 - 0.4 without pumping up to the maximum pressure indicated by the manufacturer on the tire, especially in hot weather.
For semi-slicks, it is important to choose the right pressure for the exact surface on which the bike rides.
Driving on hard surfaces - asphalt and packed dirt. At low pressure, all the advantages of these tires are lost. A properly inflated semi slick should roll on a hard surface with the smooth part of the tread. And on soft ground, the side lugs come into play. At low pressure, the tire will flatten and cling to a hard surface with its side lugs, creating additional resistance and wearing out faster.
When driving on soft ground, it is better to reduce the pressure. The low pressure absorbs bumps in the road and makes off-road driving more comfortable. At the same time, the area of contact between the wheel and the road increases, which, accordingly, leads to an improvement in grip. This is especially felt on the descents and sharp turns.
When riding on sand or snow, it is better to increase the pressure - the grip will improve and the bike's handling will increase.
All toothy tires designed for travel on soft ground, sand, snow are best used with high pressure. In this case, the adhesion will be maximum.
If the temperature is high, it is better to reduce the pressure a little. Be aware that the wheel may overheat. The hot asphalt itself and the friction of the tires on it heat the chamber and the air inside it, which accordingly increases the pressure. So a tire inflated to its maximum value in a hot summer can suddenly explode.
More details about the effect of air temperature on tire pressure are described in a separate article "Tyre pressure versus temperature". There are also calculation formulas.
Here, for example, we give a table for determining the pressure in the bicycle wheel from the air temperature, if it is inflated at a temperature of +20°C.
At low temperatures and in winter, things are a little more complicated.
When riding on loose snow, keep the pressure at or slightly below the average value indicated on the tire. If the bike has a tread with large spikes, then it is better to increase the pressure almost to the maximum when there is not much snow on the road and it is not wet - then the rubber will give maximum grip. The spikes will "bite" into the surface.
In other cases, it is better to keep the pressure low - the tire will "spread out" on the road surface and have better grip.
Precise recommendations for winter skiing are not easy to give. A lot depends on the type of tread, road condition, actual air temperature (-20, 0 and +5 are different things), snow moisture, weight and experience of the cyclist. In addition, winter roads do not always have one type of coverage, especially in the city. In some places, the road has been cleared to asphalt, in others there is a dense crust of compacted snow and ice, ice, and in some areas there is just an ordinary snow cover of 10-20 centimeters.
The answer to the question "How much pressure to keep in the tires in winter" will come to you gradually, with the experience of travel. And it will not necessarily be exactly the same as that of cyclists in the north or south of the country. Indeed, in the north, the temperature rarely rises above -5, and in the south it jumps from minus to plus. And it happens that in the morning -10, and in the afternoon zero or even positive temperature, and the pressure in the wheel has already changed, and the snow on the road is not the same as in the morning. It is best to have a small pump and pressure gauge with you at all times.
Often on Internet forums, cyclists argue about how much pressure to keep in the tires in winter, but in their assessments they do not always mention the specific nuances indicated above, which confuses beginners.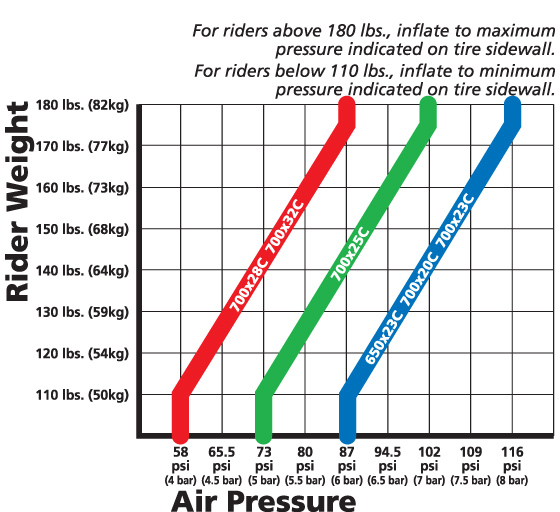
Another small nuance for the cold season. If the wheels rock in a warm room (at home, in a garage), then do not forget that outside, where the temperature is lower, the pressure will drop a little. How much it will fall depends on the specific temperature and can be seen in the table above.
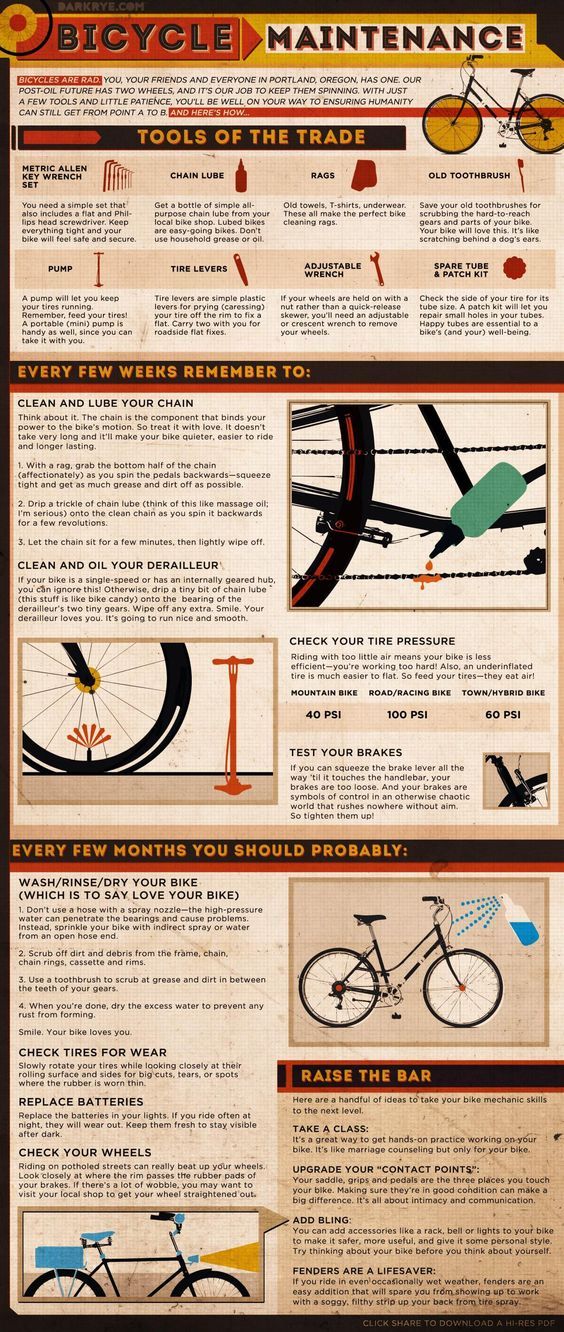
This needs to be clear right away. The tire pressure of the road bike always varies between 6.5-9 BAR (up to 130 PSI) and does not depend very much on the weight of the cyclist.
The pressure in mountain bikes is always lower.
Here is a table showing the pressure in the tires of a mountain bike and a city bike as a function of the biker's weight:
You can focus on the following - for each additional kilogram of weight, the pressure should be increased by 1%.
Tire pressure directly affects tire life. Riding on poorly inflated tires wears them out quickly.
First of all, you need to look at the limits that are written on the tire and certainly the pressure should not be less than the minimum indicated. Further, the bulk of children weigh up to 50 kg., Therefore, for them, the pressure in the wheels of children's bicycles must be maintained at a level of approximately 2 - 2.5 atmospheres. To the touch, this is a rather tight wheel and it is rather problematic for an ordinary person to squeeze it with their fingers. It is not worth pumping children's wheels, otherwise the ride will be very tough.
If your child weighs more than 50 kg, the tire pressure must be taken from the table above.
When riding a mountain bike in the city and on a rolled primer, this is 3-3.5 atmospheres. For movement on the ground - 2.5-3 atmospheres
At the same time, if your weight is more than 80-100 kg, feel free to add another 0. 5 atmospheres to the wheels (be careful not to go beyond the maximum pressure).
If you have a road bike - feel free to inflate 3.5-4 atmospheres, looking at the limit values indicated on the tire.
The general principle is: The narrower the tire width, the higher the tire pressure .
Another point from the experience of cyclists. If you are using puncture protection tape, try to keep the tire pressure slightly higher. Everything is simple here: the higher the pressure, the denser the tape lies between the chamber and the tire, it does not “fidget” and does not move during sudden braking and cornering, and performs its function better.
Remember, you can find the optimal pressure for yourself only by riding a bike for a while. Every cyclist has their own weight and riding style. In this case, the same pressure for one will be optimal, and for someone too low or high.
Download, ride and enjoy!
Properly set tire pressure is a very important point that can hardly be overestimated.
Tire pressure greatly influences tire behavior. Depends on it:
The larger the contact area of the tire with the surface on which it rolls, the better the grip - that's obvious. And this means that an over-inflated tire that touches the ground with only the center of the tread and bounces over all obstacles will have pretty poor grip.
Rolling resistance is determined by the friction between tire and surface; the greater this friction, the greater, respectively, the resistance.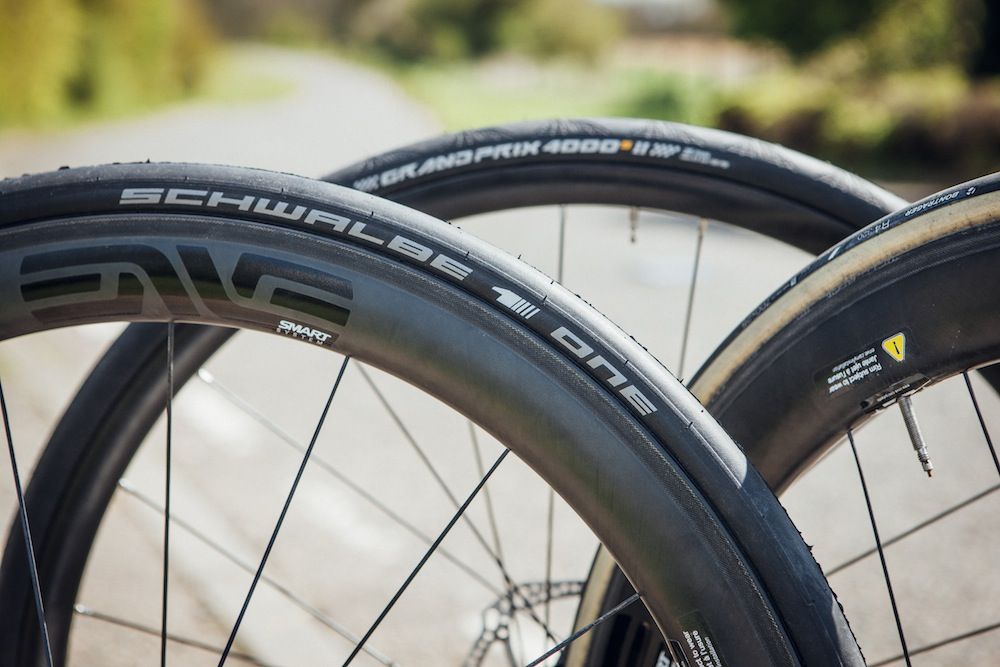 Thus, the area of contact of an underinflated tire with the surface is clearly too large, and therefore the rolling resistance in this case will be large. But, oddly enough, an over-inflated tire will also have a lot of rolling resistance, since it bounces over all the bumps and constantly breaks off the surface.
Therefore, in order to achieve a balance between optimal grip and good rolling, it is important to determine the tire pressure you need.
Before we talk about tire pressure any further, you need to know if your bike has tube or tubeless tires.
The "snake bite" thing can happen to tubes, especially if you ride with low tire pressure. The essence of this phenomenon is that with a sufficiently strong impact on an obstacle, the chamber is clamped by the tire cord and breaks through. This does not happen with tubeless tires, since there are no chambers in them, and therefore there is nothing to punch through.
Because of this, chambered tires are sometimes over-inflated to avoid snake bites.
The optimum tire pressure for your bike depends on what bike it is, what tires it has, and factors such as your weight, terrain, surface quality, and weather conditions.
Mountain bike tires are usually inflated less than road bike tires to help the tire roll better over bumps and for better traction.
The increased volume of these tires means that, despite the lower pressure, there is less chance of snake bites than with tubed road tires.
Below is the optimal mountain bike tire pressure for riders weighing around 70kg.
Tube tires:
Tubeless:
 9 atmospheres)
 If rider weighs over 70kg, add 1psi for every additional 5kg of body weight.
Road bike tires are more inflated than mountain bike tires. This is done to further improve rolling performance and, in the case of tubed tires, to reduce the chance of snake bites.
Below is the optimal tire pressure for a road bike (25mm wide) for riders weighing about 70kg:
Tubeless:
If rider weighs over 70kg, add 2psi for every additional 5kg of body weight. If the rider is lighter than 70kg, remove 2psi for every -5kg.
Cyclocross/gravel tires pump more than mountain bike tires but less than narrow road clinchers. Everything to achieve the best balance between rolling and grip.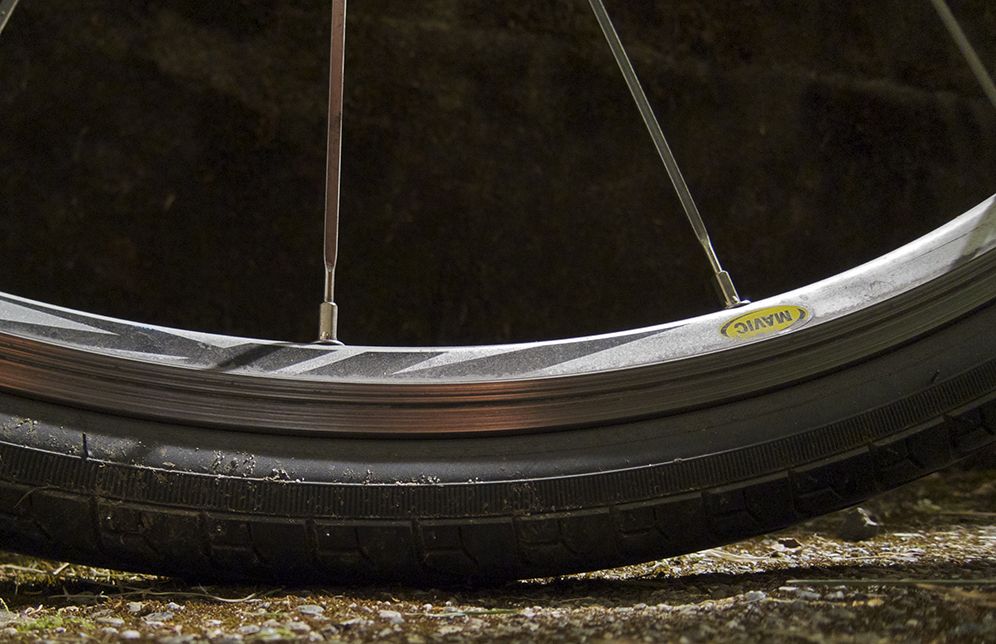
Below is a small guide to tire pressure selection for cyclocross riders. The table is suitable for tires with a width of 35mm and riders weighing about 70kg.
Tube tires:
Tubeless:
If rider weighs over 70kg, add 1psi for every additional 5kg of body weight.
The volume of hybrid tires is about the same as that of cyclocross tires, so the optimal pressure here will be about the same.
So, in the case of hybrid and city bike tires with a width of 35mm, the optimal pressure with tires for a rider weighing about 70kg would be:
Tubeless:
 6 atmospheres)
 If the rider weighs over 70kg, add 1psi for every additional 5kg of body weight.
In the case of a bike machine, there is usually no need to lower the pressure in the tires - there are no advantages in this. It may be advisable to reduce the pressure only in rare cases, and even then this decrease can affect the readings of the computer on the machine.
In general, the standard pressure in this case is 100psi. In case the tire constantly spins or slips, the pressure can be reduced by 10psi.
As we know, many riders advise reducing tire pressure when riding on wet surfaces.
In reality, this does not give much if the initial pressure was optimal for dry conditions. And in the end, most riders (including professional racers) will never stop and lower their tires when it rains.