Your ATV is a beast of the outdoors, seldom spending much of its life inside. The plastic body of ATVs becomes faded from the sun’s rays, and thrashing around in dirt, mud, snow, and water doesn’t help. Plastics get scuffed by boots or passing debris, and cracks can appear in the body or windshield.
There are a few options for restoring your ATV’s faded plastic so it looks like a showroom model again. These options vary in cost and difficulty. In this guide, we’ll look at all the common ways to restore the luster of your ATV’s plastic body.
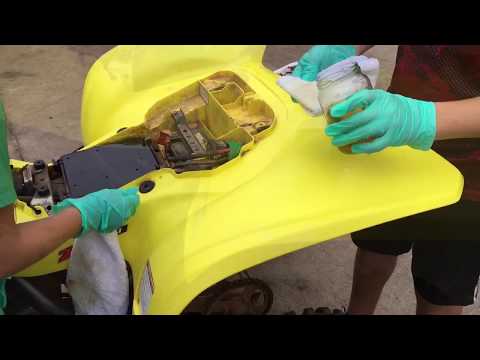
Image from www.can-amtalk.com
Linseed oil can restore faded plastic, but it takes ages to dry. You want boiled linseed oil, instead. Note—this doesn’t mean you boil the linseed oil yourself! It means that the linseed oil has been pre-treated to dry faster.
To speed things along, choose boiled linseed oil and mix it with paint thinner. We recommend a 40/60 ratio of linseed oil and paint thinner.
Start by cleaning your ATV thoroughly. For best results, you’ll want to remove the rack and any other parts of the machine that are covering the plastics.
Apply the mixture to your plastics using a dry cloth. You’ll notice the linseed oil will remove the oxidization that’s causing fading. After you’ve applied the mixture to all the plastic, allow it a full day to dry.
If you keep your ATV covered and don’t use it every day, this fix will last for a few months. If you constantly use your ATV outdoors, this treatment may be required to be performed again in 4-6 weeks.
ATV are the core piece of riding gear for off-road riders
Find out the best look for you
You’ll need good access to your ATV’s plastics, so remove the skid plates and racks. If they are severely damaged in any way, you may want to replace them completely. To complement your better-looking new plastics, you may want to strip or sand your racks and paint them with a spray-on bedliner.
Next up, give the ATV a good clean overall. A mixture of dishwashing liquid and water will remove all the grease and oils from the surfaces.
Now it’s time to prepare the plastic for waxing. This means sanding the plastic with fine sandpaper, working your way up from the lowest number of sandpaper up to the highest. You can use an oscillating tool to speed up the process. Make sure you’re wearing safe gloves, and finish up by sanding with steel wool.
Apply a vinyl floor liquid wax to the plastic using a car wax applicator. Using thin coats, you can work on one section of the plastic while another section dries. You will need to apply several coats, buffing out the plastic after each application.
After the final coat is complete and bone dry, finish up with an automotive wax for an extra layer of sheen.
This process is more involved than the linseed oil and paint thinner fix, but it typically has a longer-lasting result.
Image from www. atvhonda.com
Instead of a linseed oil and paint thinner mixture or vinyl liquid wax, you can use a dedicated plastic restorer product. While most of these products work very well, they are basically just variations of our above options with slightly different chemical compositions.
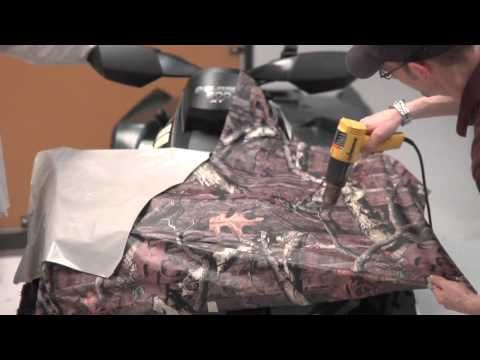
Image from Lea Arnold YouTube channel
Using a heat gun does work to make plastics look new, but it has downsides.
To perform the procedure, you use a heat gun set to a low setting and blow it from a few inches above the problem plastic. Voila—the plastic looks as good as new.
But it’s not really an option that we recommend. It works by melting the top layer of the plastic, which in turn makes the plastic more brittle. Every time you perform a heat gun restoration, your plastics lose some strength.
Where we would suggest using a heat gun is to work out small cracks in the plastic. Severe cracks necessitate replacement, though.
These are the top ways to restore your ATV plastic. Another option is to cover your faded plastic with a new lick of paint from a spray paint that’s specifically suitable for plastic. Whatever option you choose, with just a little bit of elbow grease you can have your ATV back in showroom condition.
SPORTSMAN
36 EUR
ENDURO
the most durable
577 EUR
AQUAMASTER-ZIP LIGHT
with central zipper
568 EUR
ENDURO LIGHT
the most durable
378 EUR
AQUAMASTER LIGHT
reliability & comfort
438 EUR
NEODRY
16 EUR
ENDURO
the most durable
229 EUR
AQUAMASTER
reliability & comfort
567 EUR
-30%
HIT
AQUAMASTER
reliability & comfort
259 EUR
181. 30 EUR
BELT
8 EUR
ENDURO BF
bootfoot waders
468 EUR
ENDURO BF
bootfoot waders
289 EUR
ENDURO
29 EUR
NEOSENSOR
14 EUR
9.80 EUR
MUDWAY
179 EUR
TARGET 20L
32 EUR
22.40 EUR
MUDRIDER
299 EUR
209.30 EUR
WADEMAN
lightweight waders
159 EUR
MUDWAY NEW
199 EUR
URBAN
79 EUR
Explore all
Contents
No matter how much you love dashing across the toughest of terrains on your All-Terrain Vehicle (ATV), the damaged plastic may leave you disappointed in the end.![]() Not only it deteriorates the aesthetic appeal of the bike; it can affect its performance too.
Not only it deteriorates the aesthetic appeal of the bike; it can affect its performance too.
Therefore, we will discuss how to repair and refinish your dirt bike plastics for riding across the valley as you were meant to in this article.
Before proceeding towards the techniques to refinish the ATV plastics, you should understand the reasons why they fade and crack. Since plastic is a product of crude oil, it is prone to reactions when exposed to the sun. One such reaction is the evaporation of pigmenting oils which causes the plastic to fade and dry out. If your bike sits under the sun for too long, the plastic can dry out to the extent that it will crackdown.
Fading occurs in different fashions in light and dull colors. While the darker shades develop a white layer on top which can be scraped off. But it leaves a dull plastic beneath. On the other hand, the lighter colors develop a yellowing on top, which looks terrible.
Well, it is always wiser to prevent the damage rather than spending hours into repairing it later. Therefore, we would advise you to follow the given techniques to bring an ample amount of oils back into your dirt bike plastic.
Out of a multitude of products that promise to refinish your ATV plastic and make it as good as new, here are a couple those caught our eye for actually being effective.
 So, if you are not satisfied with how it looks after use, you can return it.
Another technique to restore the faded plastic surfaces of ATV is to bring the oils back on top. Certainly, this is not the easiest of all methods and requires a lot of skill, you will never have to rely on outside solutions once you master this technique.
For using heat to bring back the sheen on your ATV plastic, you can use a heat gun and direct focused heat towards the faded regions. Make sure that there is no direct contact between the flame and the plastic, and you target small patches every time you bring heat close to the plastic.
Even though it is difficult to get a uniform sheen with this method, here are the steps which will help make this process easier for you.
 Keep the heat focused on the area until you do not see shine and color coming back on the surface. This will almost look like the plastic is melting, but it isn’t.
If you are of the opinion that more heat will expedite the process, then you are not meant to use this technique. Higher heat will only melt the plastic, damage that you cannot possibly fix without investing more.
While no product claims to be the mixture of the two, millions of dirt-biking enthusiasts swear by the use of paint thinner and linseed oil to bring back the dirt-bike plastics to life.
Even though it is a quite readily available technique, you need to be very careful and tactful while using it. This is because if the vehicle is not cleaned properly before application, the dirt will get trapped in the sticky liquid. Then again, the shine you get after the application is worth the pain.
For those looking for a permanent solution for your ATV plastic, then it is to sand and buff the surface to bring the high-quality plastic on top. However, this technique will require you to invest a lot of time and efforts. So, we would advise you to indulge in it only if you have hours to invest in your dirt bike.
Here are the steps for sanding and buffing you can follow to restore the ATV plastic:
 After this, the application of 1200 grit sandpaper should follow for smoothing out the scratches on the plastic.
Apart from the hazing, it would help if you got rid of stickers with clear sections too so that the faded surface is not visible through them after you have restored the plastic.
Heavy exposure to sunlight or rigorous use of restoring techniques like sanding can also lead to cracked or broken plastic. While this damage seems irreversible, you can, in fact, make some amends to the plastic to join it again. This technique will save a fortune in replacing the panel altogether.
For those wondering what we are going to suggest welding the plastic, you’re mistaken. We have a better solution which will leave no seams on your plastic panels. Yes, we are recommending the use of metal mesh while welding the plastic panels so that they can hold up against the toughest of weathers.
For welding, clean both the surfaces. Plugin the welder and keep the wire mesh in hand so that it can be fixed when needed. Now, melt the less visible edges of the plastic with the welder while fixing the mesh along its length. Overlap half an inch of plastic and press it on the mesh to cover it and hold firmly. Repaint the plastic with a high-build primer to strengthen the bond.
We understand that your ATV means a lot to you and you don’t mind going the extra mile to make it look the best. Hence, we have brought the above tips and techniques for you to keep your dirt bike plastic in top shape always.
Plastic polishing on ATVs
We know from advertising: “if your TV screen has lost its former brightness, just wipe the dust off the screen.” Something similar can be done with the details of the ATV.
If the plastic lining of your ATV has a lot of small scratches (this method is not suitable for deep scratches) and began to look unpresentable, do not rush to run to the store, you can try to polish it. This process is long, tedious and painstaking, if done correctly, the place of cloudy abrasions will be taken by an even gloss. Similar technologies are used to remove scratches from mobile phones and laptops, polishing car headlights. The plastic of the vast majority of ATVs acquires its color already at the stage of its production, and not during painting, thus it is an ideal candidate for "resurrection".
Before starting work, the plastic element must be degreased and removed as much as possible from stickers and fasteners. It is important to maintain cleanliness during all stages of restoration and to prevent dirt from entering the restored area.
Estimate the depth and nature of the scratches by eye, you will need this when choosing the appropriate sanding paper (the deeper the scratches, the “angrier” the sanding paper should be).
The sanding process takes place in several iterations with a gradual change in the grain size of the sandpaper according to the principle from larger to smaller. For the best effect, water the "sandpaper" and plastic with water. The last few approaches are performed with a gentle "zero". The surface of the plastic will become smooth, but still cloudy.
This is where polish comes into play. A specialized polish for motorcycles on the domestic market cannot be found in the afternoon with fire. The loss is not great - automobile and other analogues are no worse and much cheaper. Apply polish to a soft non-abrasive rag, sponge, napkin or piece of felt (all this can be found in an ordinary car shop), rub the substance over the surface of the plastic in a circular motion with light pressure. After 10-15 minutes (the polish should dry and absorb), apply another layer. The procedure must be repeated until an even gloss appears on the entire surface of the part.
Sanding and polishing can be done both manually and with the use of a special tool (polishing machine or nozzle on a drill), this will significantly speed up the execution, but it is important not to overdo it - when overheated, dull areas and bubbles may appear on the surface. At the exit, after 4–5 hours of work, the old and worn ATV linings will acquire an almost pristine factory shine, while your wallet will not be empty for an amount equivalent to the cost of the original part in the salon of an authorized dealer.
Ice Redoubt > 26 February 2013 10:09 Mikhail Pimus
Share:
December 18, 2020
Even the most careful driver can face the problem of damage to the plastic parts of the car.
Inside the cabin, the “weak” point is the dashboard and doors. Knowing how to remove scratches from plastic in a car, the car owner returns the parts to their original appearance, saves on expensive repairs or replacement of plastic components.
The slightest plastic defects and chips on the dashboard visually "age" the interior of the car and give it a careless look. Few manage to avoid injury. They accidentally dropped the keys - there is a scratch, they pressed a little harder - a chip. You can just open or close the door unsuccessfully. There are several ways to repair plastic.
Remember that corrugated surfaces cannot be repaired, much less polished or heat treated. They are completely replaced.
It is very easy to remove mechanical damage to plastic parts with a repair pencil, special wipes, as well as towels and microfiber cloths.
 The use of inexpensive analogues will not help to remove the defect in a quality manner.
 Before proceeding with heating the plastic, it is necessary to carefully clean the damaged area from contamination using fine-grained sandpaper. Then treat this place with an automotive degreaser. After that, we direct a working hair dryer to the defect (at maximum power). The distortion should disappear. In this way, only minor damage to the plastic can be removed. By melting plastic with deep defects in this way, you can achieve the opposite effect: the scratched place can deform even more.
The lighter is brought as close as possible to the damaged area of \u200b\u200bplastic. The fire must cover its entire surface. Remove soot from the cooled surface with a swab dipped in alcohol.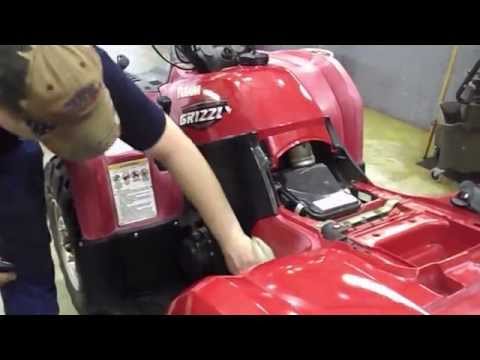 With the right actions, the plastic should recover. This method is also only suitable for removing small scratches.
Remember to take precautions when handling fire.
Restorers are polishes and gels. Means remove damage after repair and give the product its original appearance. The polishing process is especially important when repairing glossy surfaces. The polish is applied with an abrasive paper or a grinder.
Make sure that the tool runs at low speeds. This will allow you to control the process of polishing the plastic. Eliminate minor scratches in this way is not worth it, the measure is excessive.
The method is suitable for removing small scratches on a glossy plastic surface.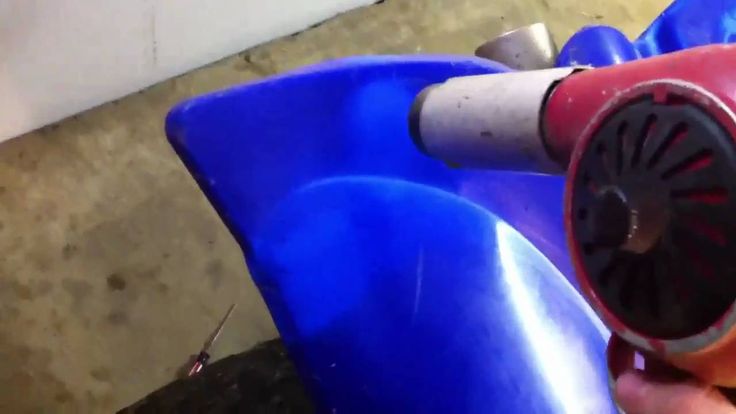


.png)