As ATV owners know, there is no shortage of parts, accessories, and gear to spend additional money on. When it comes to drivetrains, winches, and suspension systems, there are hundreds of knowledgeable resources to provide guidance.
Unfortunately, there is a shortage of accurate, reliable information about ATV speakers and waterproof ATV speakers. Most of the guides you can find are written by people that haven’t ever sat on an ATV – and don’t know much about sound systems, either.
On this topic, we have you covered!
Keep reading for a discussion of waterproof ATV speakers, DIY ATV speaker audio tubes, and ATV soundbars . In other words, we will provide a summary of every option available for listening to tunes while riding a four wheeler.
Quick Overview: Waterproof ATV SpeakersUnless you somehow managed to find a four wheeler with a ready-made sound system, you will need to find an aftermarket solution if you want to listen to music while riding.
The first question you need to answer, really, is whether or not you have a need for a sound system on your ATV.
Depending on the trails you ride, etiquette may dictate that you should avoid blasting music that is loud enough for others to hear. On the other hand, some of us ride on private trails and land, and we can crank the volume without another soul hearing our music.
Next, you need to decide between three options, each of which has its own advantages and disadvantages (which we will cover in detail):
These speakers are our specialty here at Swift Moves, so we could talk about them for days. For ATV riders, the key here is that you need a speaker with sufficient power to be audible when you are riding.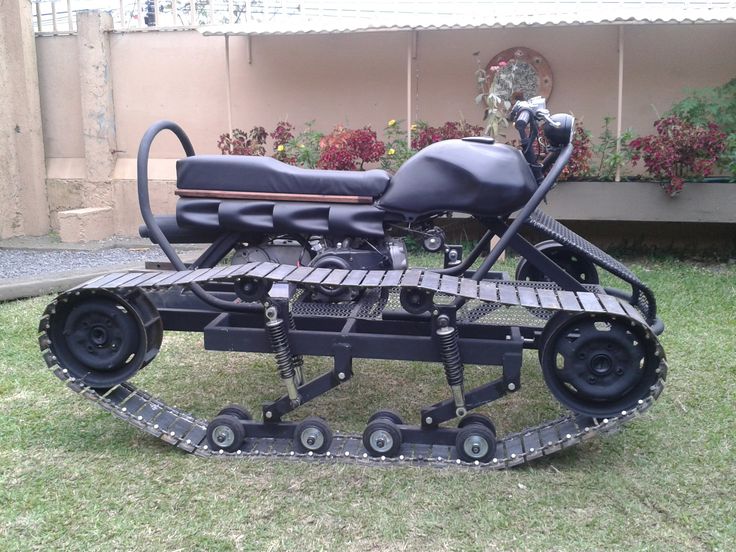
We recommend something like a high-end JBL portable (the Xtreme series and Boombox series are a safe choice).
The upsides to this option are obvious. Without any customization or installation, you can just click the buy button and have a portable speaker to use when you are out riding. No complicated installation, wiring, or custom-fitting is necessary – just plug and play.
More importantly, for the outdoor-minded person there are a thousand uses for a portable bluetooth speaker. You can take it with you on the boat or kayak, play tunes in the shop or garage, and sit it next to you when you are grilling.
For almost 100% of four wheeler riders, you spend plenty of time outdoors besides the time you spend riding an ATV. For many of these times, a JBL Xtreme or JBL Boombox would be a handy product to own.
Because these speakers have a built-in battery, you don’t need to wire them into your ATV or use your ATV’s battery. So you can have the speaker running all day without any concerns of a dead battery on your four wheeler.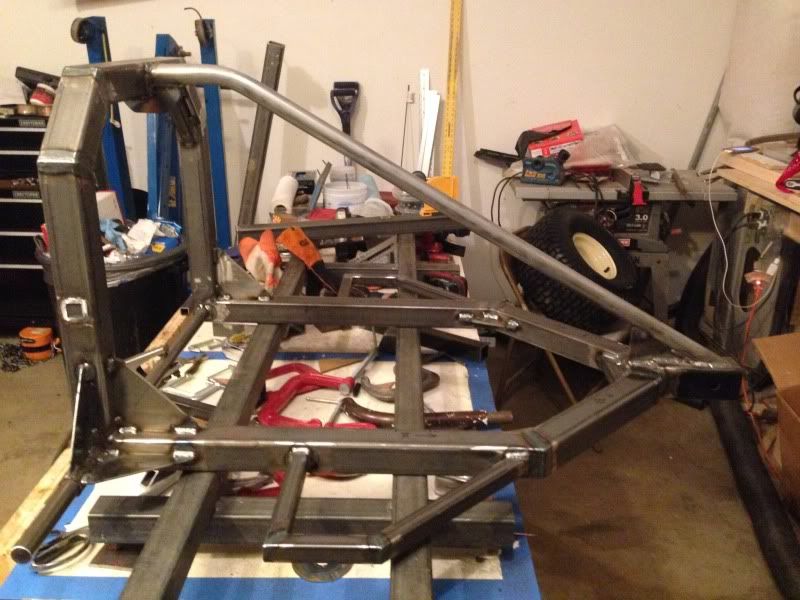
The obvious downside is the lack of volume output. Simply put, budget bluetooth speakers aren’t going to be audible over engine noise. And even the high-quality options are going to be drowned out at high speeds.
JBL Xtreme 3For anyone on a budget, choosing the older-model Xtreme 2 can save you $100+. You lose the dust-proof rating, USB-C charging, and a little bit of sound quality. Otherwise, the speakers are nearly identical except for cosmetic improvements. (For a full side-by-side comparison between the two, and to help you decide whether it is worth saving the money, click here).
The JBL Xtreme 3 is an excellent portable bluetooth speaker for anybody that is willing to spend some money for sound quality and volume output.
There are some phenomenal bluetooth speakers under $150, but our top picks such as the
JBL Flip 6 and Bose SoundLink Flex just won’t bring enough volume for use as an ATV speaker.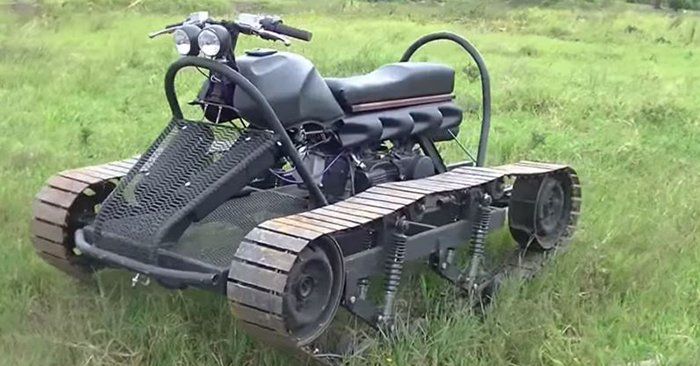 This is why we put the Xtreme 3 on the list instead.
Xtreme 3 provides a number of features that make it ideal for ATV use — great sound quality, excellent durability (including an IP67 waterproof rating), and ~15 hours of battery life from a single charge.
If that’s not enough, you also get the power bank feature, which allows you to use the speaker’s built-in battery to charge your cell phone or other portable device. So instead of a stereo which could run your ATV’s battery empty, the Xtreme 3 has a built-in battery that can actually help you recharge your phone.
In addition to bluetooth capability, the Xtreme 3 has the trusty 3.5 mm aux input to connect to an audio source. And the speaker has built-in hooks and comes with an included carrying strap — features which could be very useful when riding a four wheeler.
Having said all of the above, there is still a clear downside with the Xtreme 3. Although sound quality is excellent and maximum volume is great for a portable speaker, it is nonetheless a portable speaker. This means that the volume is still going to be overpowered by engine noise when you are riding at high speeds.
Still, for a quick and easy ATV speaker solution, you can’t do much better than the JBL Xtreme 3.
JBL Boombox 2If you want to spend big money on one of the best portable speakers that money can buy, consider the Boombox 2.
With an MSRP of just under $500, it isn’t what I would consider budget-friendly. But if you want a plug and play sound system without any wiring or complex installation, the Boombox 2 is a great choice. At 13 pounds and 80 watts RMS output, this is large and heavy for a “portable” speaker — making it a wise choice for ATV use.
The battery is rated for 24 hours of use, and it has the power bank function like the above-mentioned Xtreme 3. Also similar to the Xtreme 3, you can connect via bluetooth or a 3.5 mm aux cable. The Boombox 2 doesn’t have a carrying strap, but it has a large “boombox” style handle which should help you mount or affix it to your ATV.
The IPX7 rating of Boombox 2 means that it isn’t officially considered “dust-proof.” However, we haven’t had any trouble when exposing this speaker to sand, dirt, or dust. But it is nonetheless something to be mindful of.
For a full write-up of the Boombox 2, and how it compares to the original JBL Boombox, see here.
These are the products that pop up whenever you search for an “ATV speaker.”
The benefit of these products is that they are built specifically for durability, waterproofing, and maximum volume. All of these are conducive to ATV use.
A big downside is that you need to do plenty of due diligence before purchasing. First, there are a lot of garbage, overpriced products in this category. Just like ATV accessories, you can spend a few hundred dollars on something that is only worth twenty.
Often these systems are marketed as one-size-fits-all, so there is no guarantee it has the size or specs to be useful to you. Installing a speaker on a jet ski is different than installing a speaker on an ATV – but these products try to market themselves as both. For that matter, installing a speaker on a side by side is different from installing a speaker on a quad.
If you purchase one of these products, be sure to do plenty of research. Make sure the size and output are acceptable for your ATV. And also consider the battery drain that will occur if the speaker is being powered by your ATV’s battery.
These sound systems are available as an audio tube or soundbar. Minimal wiring is required with these products, and they are designed to provide sufficient volume. However, sound quality is usually unspectacular. Some of the big players in this space (like Boss Audio) have poor sound quality.
Installation can be a challenge, since these products are marketed as one-size-fits-all systems to be used with ATVs, UTVs, jet skis, etc. Be sure that you check the dimensions of the product before ordering. Additionally, try to find real reviews from people that have installed the product on their ATV.
For larger budgets, the Wet Sounds Stealth 6 is certainly worthy of consideration. It has a soundbar design and brings 400 watts RMS of total output.
The soundbar is just under 21″ in length and includes a remote. The design is simple but sleek, and Wet Sounds provides a 2 year warranty.
With an IP67 rating, waterproofing and dustproofing shouldn’t be a concern. And the product includes a mounting kit.
Because this soundbar doesn’t include a built-in battery, you will need to use your ATV’s battery as a power source.
The Wet Sounds Stealth-10 provides even higher output for a similar price, so it might belong on this list as well. But at nearly 3 feet in length, it may be too large for some setups.
ECOXGEAR SoundExtreme SE26This speaker has an MSRP under $500 and provides quite a bit of volume (500 watts RMS max output) and solid sound quality. It can be connected via bluetooth or aux input, so you have the versatility that you need in an ATV speaker.
The soundbar is pretty well-sized for an ATV at 26″. This is a popular soundbar for installation on side-by-sides (UTVs), but the mounting options and size make it a solid choice for ATVs as well.
SoundExtreme SE26 has some features which sound good in the marketing material yet are largely unnecessary.
The party mode gives you the ability to pair up to 50 compatible speakers. While I would love to see 50 ATVs blasting music in unison from soundbars paired in party mode, I doubt this feature gets used too often.
It also has four RGB party lights, which look cool but are a great way to drain battery quickly for no reason.
The speaker system is powered by your ATV’s battery, so again you run the risk of draining your battery when the engine is off but music is on.
With an IP66 rating, this soundbar is less waterproof than many of the speakers on our list. However, we really don’t anticipate device failure due to an IP66 (rather than an IP67) rating.
The SoundExtreme SE26 isn’t the perfect product. But if you want to find the right balance between budget-friendly and high-performance, this is a good option with a sub-$500 price tag.
Rockville XBAR-24If the above Wet Sounds and ECOXGEAR soundbars are beyond your budget, the Rockville XBAR-24 is worthy of consideration.
Like the other soundbars on our list, it requires a power source from your ATV’s battery.
With an IPX6 rating, it is less waterproof than some of the other options, and isn’t rated for dustproofing at all.
But the price makes it a good choice, since it occupies a “sweet spot” between the $500+ premium products and the low quality sub-$150 products that dominate the market.
The 24″ soundbar is a great size for an ATV speaker, and it also provides LED lighting for anybody that wants that feature. The mounting hardware isn’t perfect, but it is pretty versatile and it comes included with the soundbar.
With an MSRP below $300, this is a competitor of the Rockville product above. But instead of being a soundbar like the previously-mentioned speakers, the PATV85 features the “audio tube” design.
Basically, the audio tube is just a self-contained speaker system that is well-suited for mounting and also able to direct the sound towards the rider. This design makes it perfect for ATVs, UTVs, and jet skis.
This Planet Audio system can’t compete with premium products, but there is a lot to love about it, especially considering the price.
The device has a storage compartment built in, which also allows for USB charging of another device. This works similarly to the “power bank” function on the JBL products that were discussed above.
It also has a control panel with a wired connection to the speaker, rather than being built into the speaker like most other products. For rear speakers, it is incredibly inconvenient to have controls built into your speaker.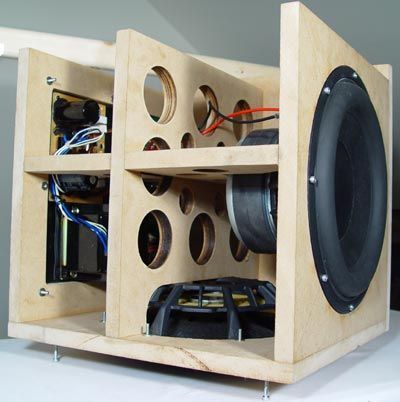 So, if you are planning on a rear-mounted speaker system, this is a worthwhile option to consider.
The PATV85 has an LED light, but it isn’t color-changing or customizable like some other products.
The IPX5 rating leaves a bit to be desired, so this speaker is less waterproof than other options on the list. But the 3 year manufacturer warranty is tops among any of the products we have discussed.
Pyle Marine ATV SpeakersWith a sub-$200 price tag, these aren’t premium speakers. The IP44 waterproof rating is the lowest rating of any product that made our list. And sound quality is decent but not exactly impressive.
However, for anyone shopping in this price range, you get a lot better quality with the Pyle speakers than some of the budget-friendly products that populate “Best Of” lists.
The included controller is a nice touch for the price range, as is the ability to use a cigarette outlet for power rather than just a 12V battery. 4 fastening straps are included, which should make installation simple. However, we still recommend finding a more permanent installation solution.
Multicolored lighting is also included, which again is a nice touch considering the budget price tag.
Overall, we recommend looking at other options if your budget allows. But if you can’t exceed $200, this Pyle system (or perhaps the above-mentioned JBL Xtreme 2) may be your best option.
In vehicle sound systems, you can get as elaborate and high-powered as your budget allows. There are installers and companies that can design a system to meet your exact specifications and the specifications of your ATV – but it will cost you.
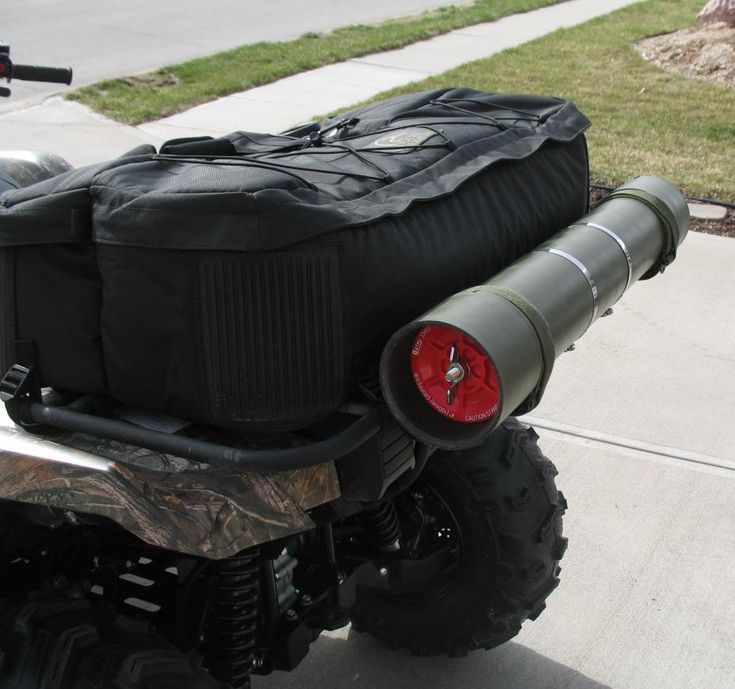
For the DIY minded, keep in mind that “marine-grade ATV sound system” usually just means “waterproof speaker inside of a PVC pipe.” There are guides and videos online, and anyone with DIY skills can save some money, gain some performance, and design a custom sound system for their ATV.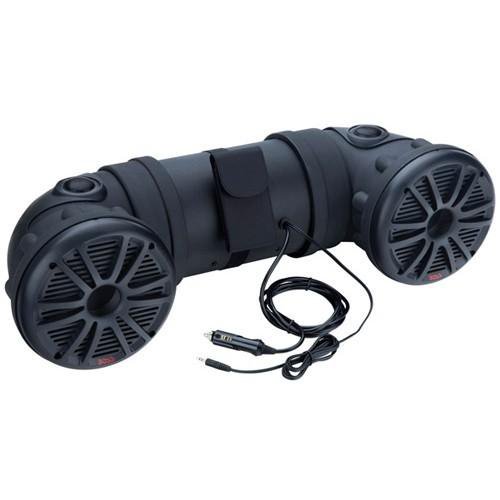
If you are interested in going the DIY audio tube route, see here for a great video guide to get you started.
If you want a little bit of customization without going fully DIY, you can also “build” a speaker system individually. Whereas the options that have been discussed above (portable speakers and marine grade audio tubes/soundbars) are all-in-one solutions that allow for plug and play usage, you can also buy “wakeboard speakers” and connect them to an amplifier.
If you choose wakeboard speakers, the most important thing is to know what components are needed for your system to function. Don’t get a set of speakers without an amp or head unit, since the speakers won’t do you any good. This seems obvious, but it is probably the #1 reason that these products get returned.
For a decent set of wakeboard speakers, we like the Pyle 5.25″ Off-Road Speakers since they include the amplifier. This means you can make one purchase and have everything you need to add music to your ATV.
Rockville 8″ Wakeboard Tower Speakers are a decent budget-friendly option, as well, but you need to find an amp to run it. So even though these will look “cheaper” from the price tag, the cost of the system probably won’t be less than the above-mentioned Pyle system.
Detailed Buying Guide & Features that MatterAs discussed above, you can choose a marine-grade speaker that will require a moderate amount of installation or a portable bluetooth speaker that will require no installation. On the other hand, you can spend a good chunk of change on a custom sound system or build a DIY sound system.
With a portable bluetooth speaker, you can take it with you on the boat or in the shop, so the versatility of this option can’t be beat. However, the maximum volume will be limited, and it probably won’t be good enough at high speeds.
With a ready-made marine-grade speaker system, you should get plenty of volume. But there will be some installation required, and this may require some creativity since these are “one-size-fits-all” systems that are also used on jet skis and side by sides. You also need to choose between the audio tube design and the soundbar design.
And you run the risk of draining your ATV battery with these systems, also. High wattage is good – until it runs your battery empty.
Going the custom route will require some DIY skills or else a large budget. But obviously you can design these to your exact specs while also ensuring a good fit, user-friendly design, and high performance.
Audio tubes can be installed on the front of your ATV near your handlebars or near the back of your ATV on the rack. Depending on the model of ATV you ride, and the add-ons that you already have, one orientation may be better than the other.
Because every ATV model is different, installation never goes as smoothly as you would hope. Be sure to plan for this ahead of time. And remember to consider the position of the buttons/control panel when you are planning your install.
Most speakers that are marketed for ATV use are waterproof. But you still want to be sure that the speakers you are considering have an IP waterproof rating.
We like the IP67 (or higher) rating, which means that the speaker has enough waterproofing and dustproofing to withstand muds and trail rides.
There isn’t much to say here, other than the obvious. A custom installation is going to give you better functionality, higher performance, and a sturdier fit than using a prefabricated setup. It also gives you more options – like higher output speakers and placement of controls in a usable spot.
However, a custom install will cost you, either in time or money.
A pre-fabricated stereo system will be easier to install. But it can be challenging to research these products and know whether they are a good fit for your ATV. And sometimes the straps and mounting brackets don’t fit as well as you would hope. But the upside is that it is easier to purchase, and usually cheaper to get started.
If you want to choose the easiest route possible, just purchase a waterproof bluetooth speaker and hook it or strap it to your ATV. Engine noise will probably overpower your audio at high speeds, but it is hard to beat the convenience of a bluetooth speaker.
Unfortunately, most of the products that you find on “Best Of” lists actually have poor sound quality.
Brands like Boss Audio are always among the first ATV speakers to show up, despite the fact that they are lacking both in durability and sound quality. And brands like Bose and JBL largely avoid the marine-grade audio category, since the market is much smaller.
The best advice here is to avoid low-quality, budget brands, and choose a product from a mid-range manufacturer such as Pyle.
Generally, decent ATV speakers will start at $150+ and increase quickly from there. For a few hundred dollars, you can get a decent bluetooth speaker or a mid-range marine-grade audio tube setup.
Anything cheaper than this will mean compromising on build quality, volume output, or both.
A custom install is likely to cost significantly more, unless you can DIY the whole setup. For anybody with DIY skills, a speaker system and some PVC pipe can be modified into a pretty nice ATV speaker setup.
Many waterproof ATV speakers also incorporate LED lights. Honestly, these lights look pretty cool.
However, lights are going to drain the battery quicker. And most riding gets done during daylight hours, anyway. Ultimately, this is just a personal preference. But bypassing this feature might be a good way to save a few bucks and reduce the risk of a dead battery.
Further ConsiderationsAs mentioned previously, some purists argue that adding a speaker to your ATV is improper. Admittedly, part of the outdoor experience gets lost when we have a device plugged in. But again, this is just personal preference.
The biggest consideration here is that you should be aware of proper etiquette while on the trails. On public trails, nobody wants to hear your loud music blasting (especially if you have a cheap, rattling speaker). Remember to be considerate of other riders.
One final point to mention is the topic of bluetooth headsets and earbuds. We won’t get too deep into this discussion, since it could be an entirely separate article.
If you want to consider a helmet communication device or headset, there are many guides available. For further reading, search for bluetooth headsets for motorcycles – since these headsets will be made to fit inside a helmet.
And if you prefer earbuds, there are many slimline earbuds that could fit under a helmet.
With the headset and earbud option, the noise of your ATV will likely drown out your audio. Some helmet comms will be sufficiently loud to allow for music and talking while riding.
With all of these devices, you need to keep safety in mind.
My personal feeling is that a headset or earbud is too sound-isolating, which can be dangerous while riding.
When you are operating a high-powered ATV, this detachment from your surroundings isn’t safe for yourself or other riders. For this reason, I would recommend steering clear of any in-ear audio system or headset.
Final ThoughtsUnfortunately, most of the guides about waterproof ATV speakers are not useful.
Because we write about speakers full-time, we feel uniquely qualified to discuss this topic.
Depending on your budget, DIY skills, and priorities, you can choose between a soundbar, audio tube, custom install, or bluetooth speaker. Each ATV speaker setup has its own advantages and disadvantages.
But no matter what you do, spend some time researching before you buy, and be sure that the speaker you choose is a good fit with your four wheeler.
Whether it's two wheels, four, off-road or on, we make it sound better!
PowerBars
Tough, powerful - and independent!
Media Centers/Radios
Reliable, flexible, powerful – and full of features!
LED Speaker Rings
6.5" pair, 8" pair, 10" single, 12" single
CompRT Subwoofers
Slim DVC subs to fit anywhere
TB Enclosures
Great bass from a tiny space!
Mini Speakers
Durable chromed enclosures attaches to your handlebars
PS Coaxials
For bikes, quads, side x sides, or any other install
Empty Enclosures
Durable weatherproof speaker enclosures
PX Amps
Tremendous power in a tiny, weatherproof footprint
Powersports Controllers
No radio? No problem! For anything that needs a source unit
Speaker/RGB Wire
Marine-grade protection and power!
All-in-One Audio Kits
A full sound system, custom-made for Polaris General™
About Powersports
Kicker’s well-known bass and sound quality help fuel your adrenaline whether you're off-roading on your ATV or ripping the streets on your motorcycle. Our motorcycle speakers, amps and subs are designed to provide high-powered sound that is not only loud, but clear enough to be heard over the noise from the wind and the road. Our motorcycle speakers are built with materials that are resistant to water, fog and UV rays, in order to prevent rust and wear and tear. We also provide motorcycle fit kits to ensure that you select the audio solutions that are specific to the make and model of your bike.
Our ATV speakers, amps, and subwoofers allow you to bring your music with you through almost any terrain. With a compact design that doesn’t sacrifice sound or performance, you can fit them in your ride while they counter extreme vibration and handle extreme power. Our weatherproof CompRT Subwoofers, for example, handle those rough and rugged rides in the elements and still deliver big bass and sound. Take your music to the extreme today and enjoy free shipping on all orders over $25.
WARNING
FIRE HAZARD.
Prolonged, continuous operation of an amplifier, speaker, or subwoofer In an over-powered, distorted, or clipped manner may cause your audio system to overheat and catch fire. To prevent property damage :
HEARING LOSS HAZARD.
Your KICKER product can produce sound levels that can permanently damage hearing! To prevent possible permanent hearing loss :

Refer to Owner's Manual for additional safety information.
Privacy Policy | Return and Refund
© , Stillwater Designs. All rights reserved. Copyright and Trademark Notice.
We use cookies to personalize content and ads, to provide social media features and to analyze our traffic. We also share information about your use of our site with our social media, advertising and analytics partners who may combine it with other information that you've provided to them or that they've collected from your use of their services. You consent to our cookies if you continue to use this website. Check out our Privacy Policy.
Articles
20 Feb
At first glance, it may seem that assembling a homemade ATV is not an easy task.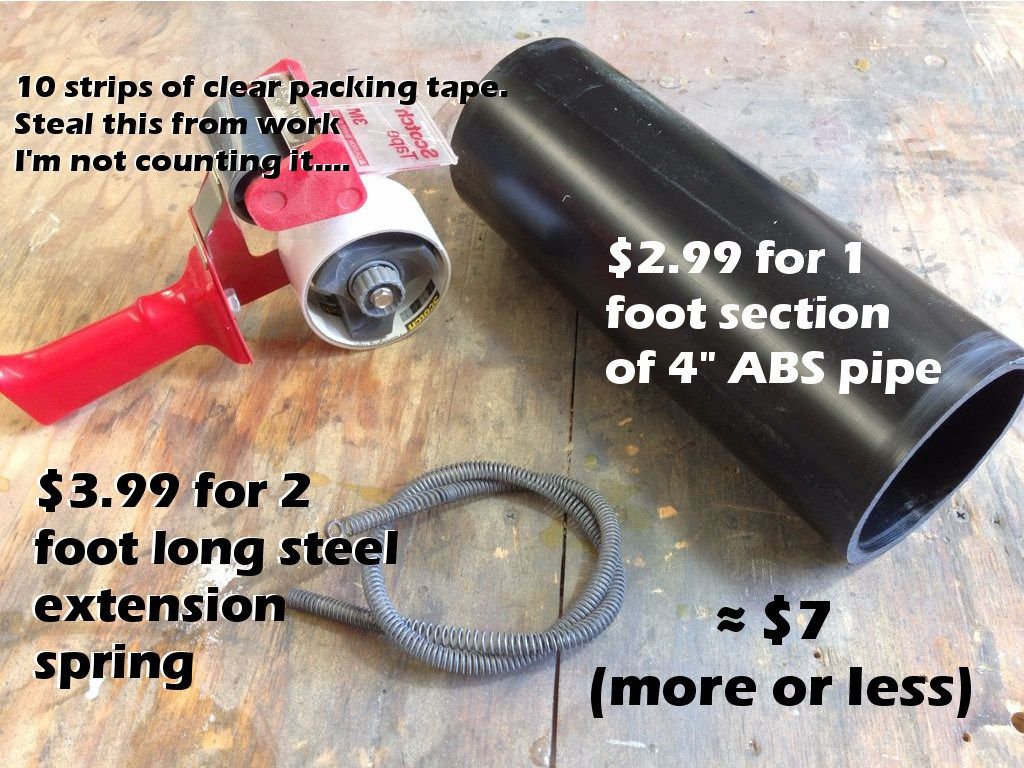 In fact, everything is much simpler than it seems, with the necessary parts and tools. An all-terrain vehicle of this type is usually constructed from parts that can be found on any unused motorcycle that is in decent working order.
To assemble the machine yourself, you may need the following tools:
• Welding machine.
• Bulgarian.
• Good set of ring and socket wrenches.
• Other small tools such as pliers and screwdrivers.
To assemble the ATV, you will need a small room with good lighting and heating. If you assemble in the summer, you can sit under a canopy.
As a power unit for a homemade all-terrain vehicle, engines from Soviet-made motorcycles such as the Ural or Dnepr are suitable. For lighter and more maneuverable equipment, you can use units from motorcycles such as "Java" or "IZH", which were equipped with single-cylinder two-stroke engines.
To simplify the design of the future ATV, together with the engine it is better to use the same transmission and drive with which they were originally equipped.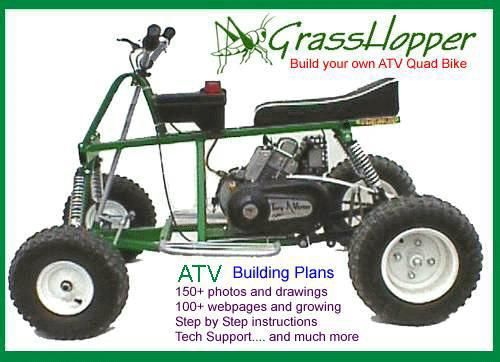 To design a machine with all-wheel drive, you will need to install an additional gearbox. This is extremely rarely used in home-made devices, since it will be difficult to implement an additional node without a sharp increase in weight at home.
The frame for a homemade machine is usually made by yourself from scratch. As a material for the frame, you can use blanks from an old motorcycle. The pipes from which they are made are light in weight and have the necessary strength and flexibility. In extreme cases, you can choose the material yourself. Here the main parameter will be weight. Excessively thick pipes or profiles will make the ATV very heavy and unbearable for fast and maneuverable riding.
Shock absorbers with springs from the same motorcycles can be used as suspension. The suspension itself is made in the form of the letter "A", and is movably fixed on the frame. Shock absorbers and springs should be selected in such a way that they can withstand the weight of the future car, and provide a smooth ride with good handling on bumps and pits.
Partially motorcycle steering can be used, with the addition of two-wheel drive. The drive is carried out by adding levers and ball joints to the design, which can be borrowed from the car. The main task of steering is precise and comfortable steering.
ATV wheels are best used from inside the vehicle, as they are wider and will allow for more cross-country ability. The diameter of the wheels must be calculated in such a way that a home-made ATV can develop sufficient speed, and also have a harmonious appearance.
Attachments, gas tank and controls can be mounted on a motorcycle frame that is structurally connected to an ATV frame. In this case, special attention should be paid to the stability of the all-terrain vehicle, its appearance and the convenience of the driver.
Do not forget about installing all the necessary lighting and outdoor signaling devices on a homemade ATV. The headlights, taillights and direction indicators can be used from the same motorcycle from which everything else was taken.
Look how homemade ATV is in action!
Articles
08 Jan
The popularity of four-wheeled motorcycles has been growing rapidly in recent years, and many amateur engineers are trying to make a quad bike with their own hands, mainly based on old technology. The network has a lot of instructions, drawings and tips on this topic, so if you want to make an all-terrain vehicle will not be difficult. It is unlikely that an enthusiast will be able to achieve the characteristics of a modern ATV, but having certain skills, it is quite possible to turn a two-wheeled motorcycle into a four-wheeled one with your own hands. In some cases, small cars of domestic production or three-wheeled mopeds of the "Ant" type are used.
Motor vehicles must be durable and withstand all loads during operation. Therefore, before you start making do-it-yourself ATV , you need to think through its design as much as possible, make a list of all materials, assemblies and assemblies that will be needed. It is necessary to select drawings in accordance with the existing motor transport, which will serve as the basis for the new ATV. You should also think about engine cooling and ATV braking system. It is not particularly necessary to invent here, but it is enough to take suitable systems and install them with your own hands.
An existing motorcycle frame with welded round or shaped tubes will be quite reliable. One of the most important stages in the creation of do-it-yourself ATV , since the strength characteristics of the future structure proportionally depend on the correctness of the welding work. If you do not have enough work experience, it is better to entrust it to a professional welder.
To the surprise of many, the old Ural has a good four-stroke engine, but an engine from any motorcycle, and even an OKI, is suitable for an ATV. When installing the power unit with your own hands, you need to take into account many nuances if the engine and frame are from different motorcycles. Therefore, reworking an old bike will be much easier and cheaper. The main thing is that the units are securely fixed on the upgraded frame. If no significant changes were made to the frame structure, then there will be no problems with backlash and the drive system.
ATV's handling and off-road performance must be matched to the rider's requirements, and the chassis will require work to achieve the desired result. Usually creating an ATV with their own hands, enthusiasts do not bother with all-wheel drive, making the front suspension independent. Such a solution is more expedient from an economic and practical point of view, but if all-wheel drive equipment is really needed, it is better to find factory units. Considering that there will not be a big load on the front suspension of the ATV, you can give free rein to your imagination and make it completely unique with your own hands.
It is better to make the rear suspension of the gear-cardan type, since such a design will be relatively light. If you install the rear axle of the car, then it needs to be shortened, and still the quadrocil with your own hands will turn out to be very heavy. The advantage of a car rear suspension will be a differential, but first you should consider whether it is needed, given the complexity of the work. Before finally fixing the motor and gearbox, it is necessary to tension the chain between them in order to check the operability of the drive system.
The front suspension of the old motorcycle will undergo significant changes that will affect the steering. Two wheels can only be turned if there is an automotive system of levers and rods, which is thought out in the manufacture of the front suspension. The connection of the steering wheel with the rod ends is carried out using a shaft made of a metal pipe. When making DIY ATV , you need to pay enough attention to the steering, otherwise riding it will not be safe.
Engine cooling is a more complex issue when building an ATV, and the air system will most likely be the choice. The simplest and most effective option would be to transfer forced cooling from an old car. This will allow you to operate a do-it-yourself ATV in the hottest weather without fear of overheating of the power unit.
It is clearly not necessary to save much on the brake system, so it is better to purchase new elements. A do-it-yourself ATV created should allow you to perform various maneuvers, and if necessary, the owner could quickly stop it. The most effective at the moment is a hydraulic disc brake system, but an amateur may have difficulty installing it.
One of the final stages will be wiring, connecting optics and other electrical appliances. The main thing is to insulate all connections with high quality and make them inaccessible to water. Lighting devices, heating and many other electrical equipment are best purchased in specialized salons.
Homemade appliances are often inferior in design to branded models, which is quite natural. Although, if you want to make an outwardly beautiful ATV with your own hands with a minimum set of tools. It is possible that original mounted parts will do, but this will always lead to an increase in the cost of the ATV. Self-manufacturing of exterior elements from thin sheet metal is probably the only right decision, since an amateur engineer will always have the opportunity to bring his achievements to life. The network has a lot of photos of ATVs, made by hand, outwardly not inferior to modern models.