Sipes have been a staple in tread design for a long time. Different brands use this tire detail to improve the traction and durability of their models. To ensure longer usability, excellent handling, improved braking, and better year round traction, small slits and cuts are added to the tires' footprint.
Tire sipes, or kerf as they are sometimes called, are a detail added to the tire tread. The siping consists of thin slits cut or molded into the tread blocks, which help to increase the grip in harsher weather conditions.
In other words, they improve the tires' grip on wet, snow, and ice-covered surfaces, optimizing the braking, handling, overall performance, and lifespan.
Closeup of a tire tread with clearly visible tire sipes.
The tire surface consists of versatile blocks, lugs, grooves, and slits, which work together to increase the tires' performing traction. They prevent the tire from slipping and optimize its performing ability.
Tire siping was invented by John F. Sipe, who patented his invention in 1923. However, his idea was for the soles of shoes and originally his patent did not work so well on tires. Later, Goodyear took over and improved the siping to upgrade the vehicle performance and the tires' grip.
Do Tire Sipes Work?Yes, the slits along the footprint work up to a certain point on snow and ice, as well as muddy surfaces. The slits cut into the rubber across the tire tread optimize the tires' surface grip and performing ability by providing a higher number of biting edges.
While they have their setbacks, they ensure better traction, heat build-up resistance, optimized wear formations, and optimize performance.
Like with all things, these footprint slits come with their own sets of positive and negative outcomes. Let's take a look at why these special footprint elements are good, and when can they hinder the performance of your vehicle.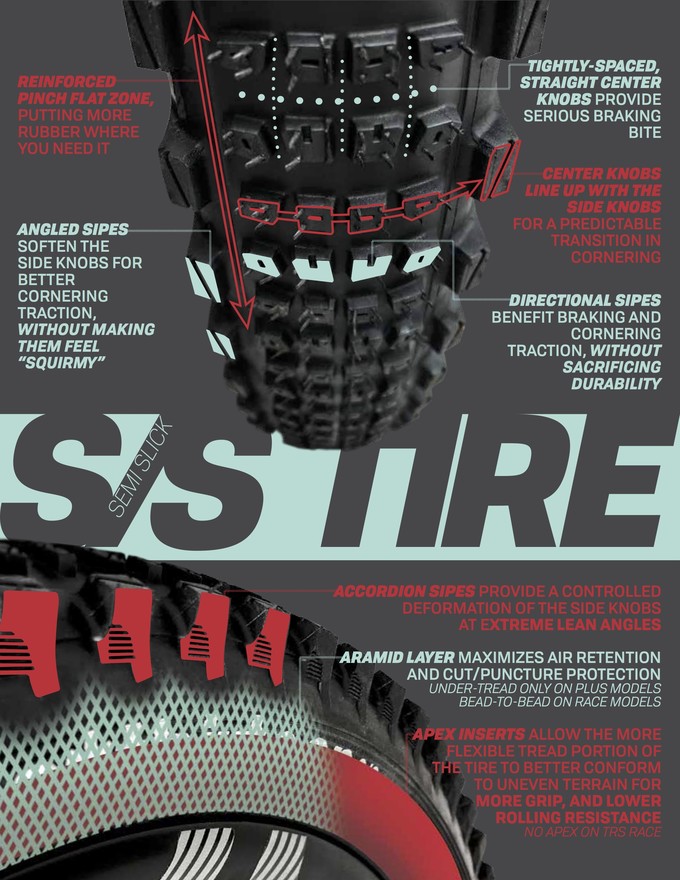
| Pros of Tire Sipes | Cons Of Tire Sipes |
| Increase traction in harsher conditions | Loss of surface grip in high-heat conditions |
| Upgraded and shortened braking | - |
| Improved surface grip and controllability | - |
| Longer lasting service life | - |
There is a good reason why winter, summer and all season tires do not have similar treading. Different weather conditions require versatile footprint elements to ensure the tire's better traction and driving safety.
Closeup of winter, summer and all season tire sipes.
Winter tires feature the highest density of the slits. They can be versatile details added to the tread area in order to improve traction on ice and snow-covered surfaces. The extra biting edges provided by these elements improve the tires' surface grip during the vehicle's colder weather application.
Summer tires do not boast many sipes. That's because, in summer conditions, the tire generates its traction with the rubber to road contact. Additional footprint details would just hinder the vehicle's durability and generate more pressure between the road surface and the tire footprint.
The in-between are all season tires, which do have siping detail on them but it's less dense than that of winter tires. These models utilize both the additional biting edges and the road-to-rubber ratio of the footprint to generate a better grip and boost the overall controllability.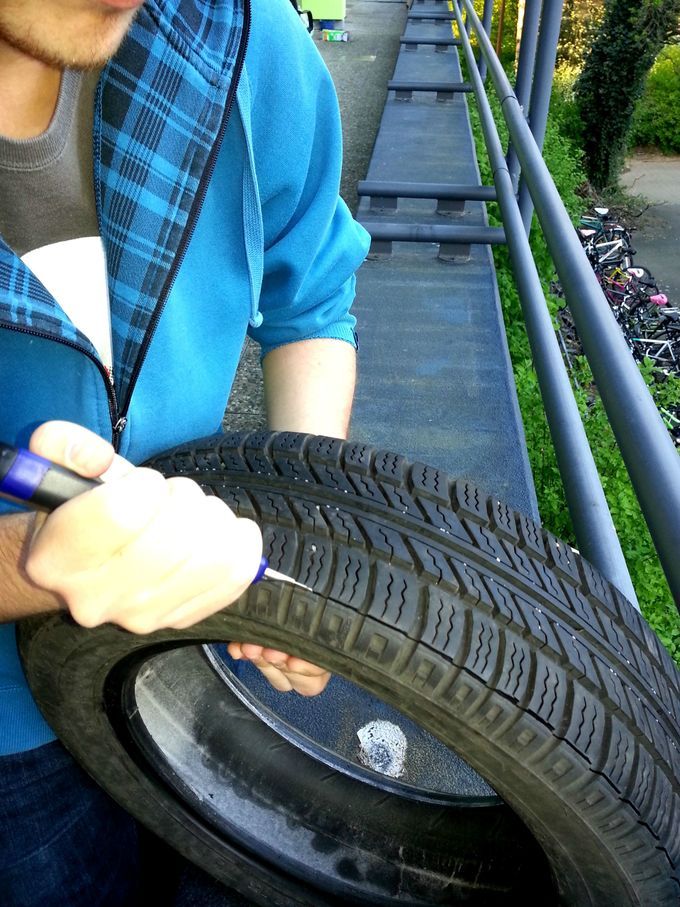
Many might not believe it, but all terrain and mud terrain models also feature small slits. While they are not extremely detailed, they still enhance the off-road terrain grip. Furthermore, some mud and all terrain models are even pinned for studs, to further increase the cold temperature driving safety levels.
Tire siping is not a good idea in most instances. While it will enhance the traction and the performance in winter weather situations, unfortunately, it comes with too many setbacks. It will cause accelerated wear, elongate the braking distances and hinder the model's performing ability.
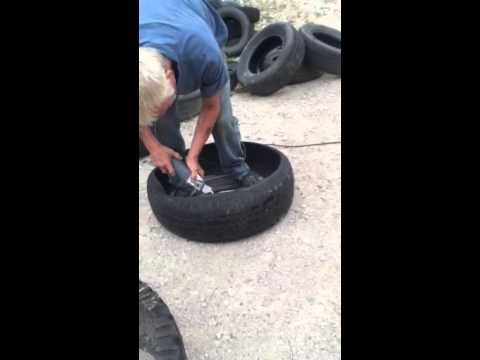
Mechanic siping tires.
Aftermarket tire siping is the process of cutting small slits into the footprint in order to shorten its braking distances and boosts traction, and performance. However, it does come with its setbacks. Unfortunately, manufacturers do not accept this service and, in most cases, it will void the tread wear warranty as it causes the tires to have accelerated service lives. Furthermore, adding extra details to the footprint can hinder the tire's summer weather application.
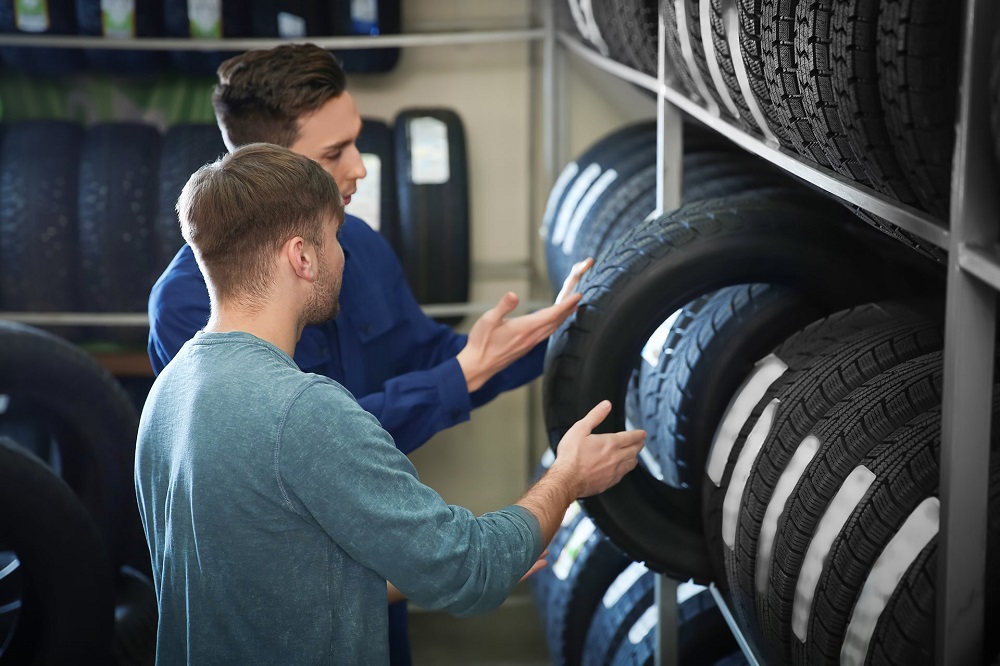
However, if you wish to have your tires siped, be sure you search for a reputable tire shop. The dealer you take your tore to needs to do the siping properly. Otherwise, it could lead to damage to the tread area, which will DEFINITELY cancel any warranty the manufacturers give with the specific models.
There are tools you can purchase online which you could use to sipe your tires. Buying such a tool will save you a few bucks in the long run, as you will be able to do it for free at home. As long as you know what you are doing, you can manage siping your own tires. Just be sure you know the setbacks aftermarket siping and be careful during the process, as you could hurt yourself too.
In most states, tire siping is illegal. This process modifies a footprint approved by the Department of Transportation, which will void its highway usability.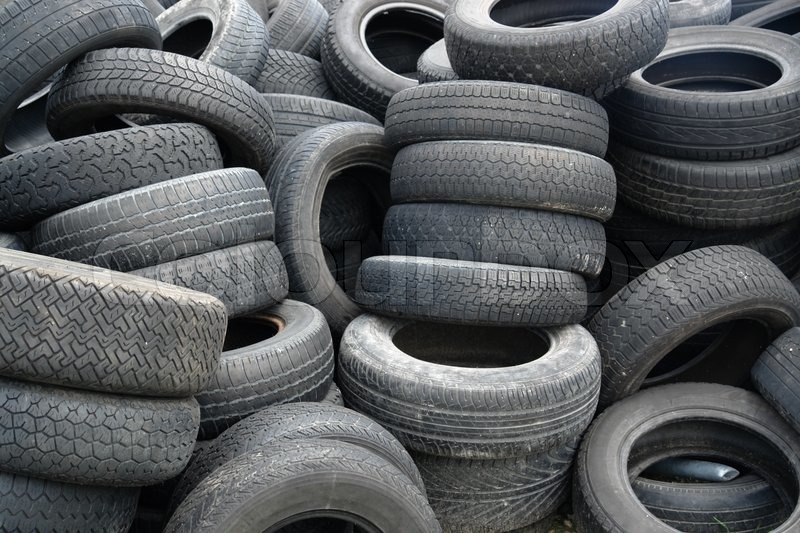 Added slits will shorten the service life and hinder its performance, even if they increase traction.
The cost of siping tires depends on the dealer you choose. Roughly speaking, the prices start at $15 and go up from there, which would be about $60 for the tire set. You can search online for shops near you that provide this service.
Tire siping will not increase the tires' life. In fact, it will shorten it. The additional slits will cause move tread movement, causing heat build-up. The tread design is already optimized by the manufacturer and siping the footprint will cause the warranty to be voided.
Siping the tires will not reduce the noise levels heard in the vehicle's cabin. Siped tires are designed by the manufacturer to minimize the road noise heard, which is ensured with the original kerf placement. However, any added details will definitely diminish the driving enjoyment with higher sound levels.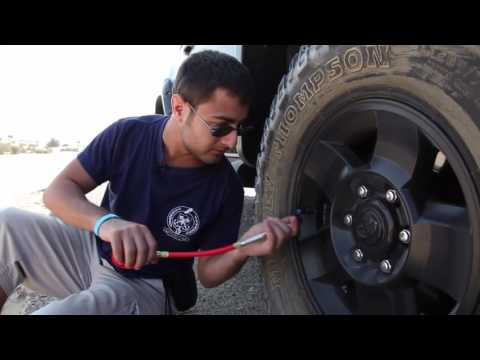
Home » All You Need to Know About Tire Siping
When you talk about tire siping, you can either mean the tread sipes of a tire footprint or the process of siping your tires. Today, we will take a look at the latter one. Let’s jump right into it!
Tire sipes are thin slits located across the tire’s surface area. They increase the tire’s road-gripping power, improve traction on wet and icy roads, boost controllability, and often decrease road noise. In other words, the number of sipes on the footprint will determine the tire performance.
On the other hand, tire siping is the process of cutting the sipes into the tread area of a tire. While tire siping is mostly done for racing vehicles, many everyday drivers would also prefer this option. But, it is a good idea?
Let’s take a look at the pros and cons of the tire siping process and its aftermath.
The main benefit of the tire tread being covered with thin slits is that they enhance traction in harsh weather conditions.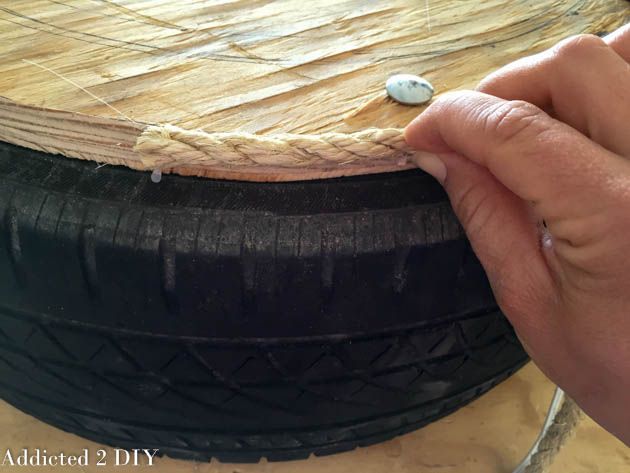 This ensures better overall performance on snow and ice.
It results in measurable improvements in the tire’s ability to establish a strong grip even on a slippery surface. This is why tire manufacturers make sure that winter tires have dense siping.
According to research, the tire’s braking power peaks right before it loses traction. It gets to the point when depending on the driving speed, the tire either reaches a halt or starts slipping faster.
The higher the tire sipe density, the more it is going to take for the tire to reach the peak of its braking power. This only demonstrates how important it is to have detailed tread blocks if you want a stronger braking capability.
Due to the tire sipes, the tread becomes better at absorbing impacts on various road surfaces. With proper siping, you can drive through a rough or coarse surface while experiencing fewer vibrations and noise.
The sipes basically boost the tire’s micro-flexibility, which is of crucial importance for a smooth ride.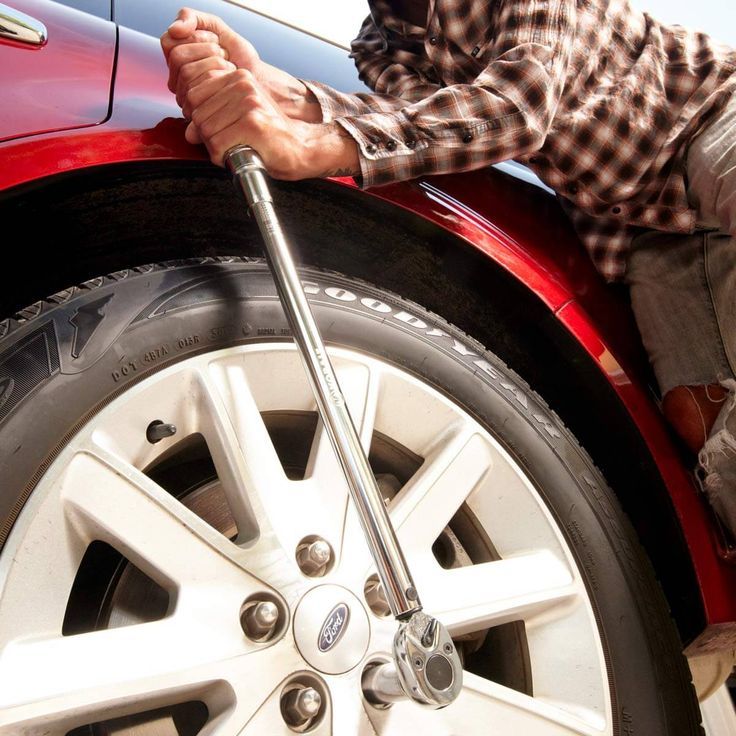 Touring tires are also designed with specific siping patterns to ensure a quiet and comfortable drive.
Another advantage of siped tires is that they last longer. The sipes, especially when they are 3D sipes, stabilize the tire footprint. This helps to evenly circulate driving pressure, effectively avoiding pressure accumulation along the tread area.
Therefore, footprints that feature sipes and grooves manage to prevent premature and irregular wear formations. Apart from the better traction they provide, they guarantee the tire’s even wear in the long run.
But, this is not true for aftermarket siping. If you decide to have your tires siped, not only will you lose any warranty associated with the tire, but you will significantly shorten its service life.
In order to safely sipe your own tires, without damaging them, you will need a tire siper. These tools are sold online and are offered in different versions – some more professional than others. At-home tire siping tools are easy to use. They feature sharp blades that need to be dragged across the rubber area, cutting thin slits into the tread blocks.
However, DIY-ing this process can be dangerous. Let’s see why.
You could sipe your tires at home whenever you want to or get a mechanic to do it for you. But is it actually a good idea? First off, if you do so, you can say goodbye to your warranty right away. You won’t be able to get a new set of tires in case something unexpected happens with them.
Aftermarket siping is common practice among professional racers, yet it’s not safe for everyday roads. If you feel like you need some extra gripping edges on the asphalt, then what you really need is a set of new tires. Those hand-made sipes are not going to help you out when your tire is about to expire.
It is also risky because those thin slits are going to reduce your surface grip during the summer. The high heat will have an adverse effect on your grip and tread wear as well.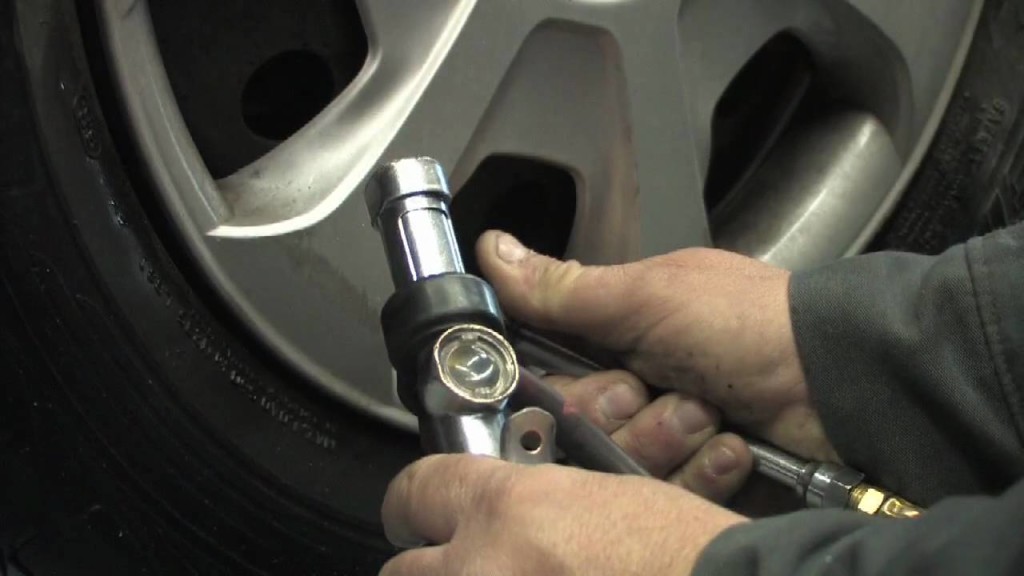
Siping tires is illegal n many states, meaning that only manufacturers are allowed to do it on new tires. Tire tread patterns have to comply with various requirements set by the Department of Transportation.
According to them, tires that are siped after purchase are dangerous. Siping your tire comes with various benefits but it has some serious downsides as well. We recommend you to stick to those models that are siped as new for your own driving safety.
FAQSiping makes a lot of sense for racing performance tires, although it is not recommended for city or highway driving. Getting a mechanic to sipe your tires or doing it at home is both illegal in many states. It is dangerous as well, as it shortens tread life and reduces grip in hot temperatures.
Tire siping increases traction and shortens the tire’s braking distances as well. More often than not, the whole point of siping is to boost the tire’s snow and ice-biting ability. After the siping process, the tire tread is going to be populated with more biting edges that grip the road surface.
- "Did you seal the wheel"?
- “Yeah, glued all night. "The owner of the glue will come in the morning."
(c) feature film "Boomer"
A tire puncture on the road is a common thing. Moreover, it is directly related to the state of the tread: worn tires are more susceptible to damage. Today we will learn what to do if a flat tire. And how to repair the tire yourself in order to continue moving with minimal effort.
Tubeless tires, in contrast to their tube counterparts, lose pressure gradually with little damage. This has a positive effect on traffic safety - the car does not lose control. However, large holes still lead to a rapid loss of shape of the wheel.
If, while driving, you feel that the car began to accelerate more slowly, and the reaction to turning the steering wheel worsened (the response became “cottony”, with a delay), it’s time to stop in a safe place to check the condition of the tires. We saw the pressure gauge readings higher than the passport ones - do not bleed excess air. In a warm tire, the pressure is higher than in a cold one.
In case of destruction by a large object (pliers, pieces of reinforcement, tile), an explosion of the wheel is possible.
If this happens - do not panic, beware of sudden movements of the steering wheel, avoid emergency braking. Try to level the car and carefully stop on the side of the road.
In case of any tire damage, do not leave the car on the road - it is dangerous. Even with a completely flat tire, you can drive about 50 meters without fatal consequences for the car to the nearest shelter.
We put up a warning triangle, put on a bright vest, and start troubleshooting.
For simplification of diagnostics turn forward wheels aside and smoothly move the car.
If you find a screw or a nail in the treadmill, do not rush to pull it out. With it, you can easily reach the nearest car service.
In 90% of cases, to get to the tire shop, you do not need to get your hands and trunk dirty in order to install a “spare tire”.
 Now you can safely move to the place of repair.
 If there is no tire service nearby, in the event of a side cut or hole of more than 6-8 mm, you will have to disassemble the tire. We put the removed wheel with the nipple turned out under the car, put a jack on the sidewall and begin to raise the car. At some point, the rubber will overcome the hump (internal protrusion on the rim), and the tire can be removed from the disk with a mounting spatula. We patch the hole with a fungus or a patch with a cord.
We glue the camera in the chamber construction. There is no glue - we clamp the puncture site with a washer or a coin bent in half.
For landing on the rim of tubeless rubber, we use a compressor. It is not possible to ensure tightness - we collect 10-20 ml of gasoline into a syringe or a tablespoon and pour it into the tire. We shake, with special care we bring a torch (the length of the handle is at least a meter). After the pop, the tire will snap into place.
Attention! This method is dangerous for hands and eyes. Use only in case of emergency in the absence of tire fitting and "spare wheel".
If the stop is not safe (for example, there are wild animals nearby), we continue to move on a flat tire. Gradually, the blows of the tire parts on the body will decrease, the remnants of rubber and cord will fly off, and it will be possible to move quite tolerably, and subsequently replace the “disk”.
Smooth roads without nails and punctures!
Sometimes drivers puncture tires on the roads. Most often, these are self-tapping screws or nails lying on tracks or in yards. Such a nuisance can happen to anyone. But what to do in such a situation, and what you need to have with you? The following material is an assistant in answering this question.
Content
The repair kit is a very useful item. It should be kept in the car just in case, because this is the best assistant in such a situation. With it, you can quickly patch a puncture. The main plus is that the set is small and will not take up much space in the car.
Puncture Just pulling a sharp object out of the tire and driving further will not work, the air will come out of the hole, here you need to solve the problem differently. Having a set in the car, the problem with a punctured tire will be fixed very quickly. It will not be necessary to call a tow truck and carry out repairs in a specialized service. A puncture repair kit is a very useful item and consists of all the necessary repair items to fix the problem.
Important!
It is necessary to have cutting pliers in the machine, as they are not included in the kit, but will be needed at the first stage of the repair.
Everything must be done in the correct order:

 When pulling out, you can turn the awl rod a little if the tourniquet adheres to it and is jointly forced out of the puncture hole. This is often observed when the hole is not sufficiently processed with a rasp.
 Please note!
The main role here is played by a bundle with glue fixed inside the hole. If there is excess material, then you can cut them off.
SetIt's not difficult to fix your car if you have this set. Repair will take a little time and a minimum of effort.
The repair kit includes the following items:
Note.
The repair kit is inexpensive (much cheaper than a repair that would be done in a car dealership), everyone can get one to make it easy to repair.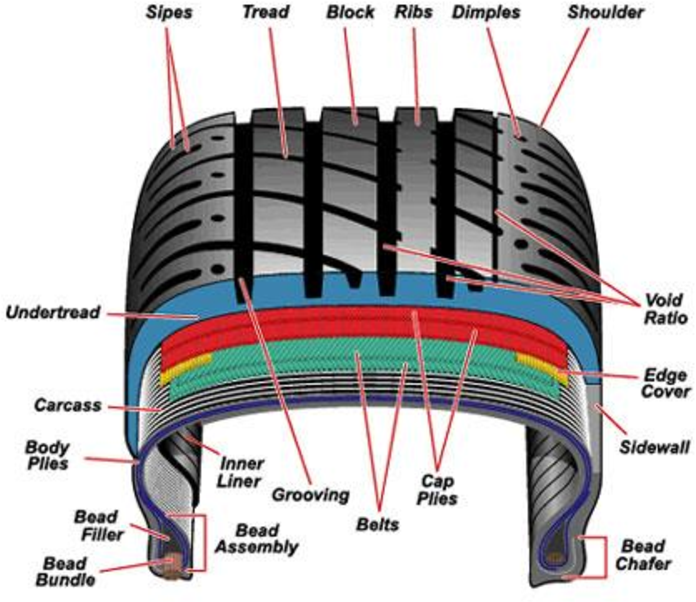 You can quickly fix the problem by working with this kit.
The tourniquet is practically the most important item in the repair kit. This is a soft material that is inserted into the puncture and fixed there with glue. You do not need to buy a harness, it is already included in the kit. A tourniquet is a thin and soft object up to 5 mm thick, consisting of strong threads that are impregnated with liquid, raw rubber.
A huge plus of tubeless wheels is that they can be repaired without removing them.
How to properly patch a puncture on a tire was written above. It is necessary to understand the topic of disassembling a tubeless wheel. This is necessary, for example, when repairing a side cut on a tubeless tyre, or when replacing with a new one if the puncture is too large.
Deborting a wheel is a rather difficult process if it is old. The difficulty lies in the fact that over a long period of time driving a car, the tire sticks to the disk, and it is difficult to detach it. In order to peel off a tire, there are two ways of stripping, which will be discussed later. But if the wheel is new, then disassembling it is not a problem.
From the name it is clear that in this method it is necessary to hit the wheel with something heavy. It can be, for example, a sledgehammer.
Procedure:

Please note!
The process is quite easy, but it requires special care and accuracy, because you can harm the wheel or disk itself, damage the limbs with a sledgehammer.
Impact methodIts advantage is that you can remove the wheel without damage, although more effort will be required. This method requires the help of a second machine and a strong board.
Place the board so that it is very close to the rim. The second car should run over the hanging board so that the rubber narrow strip of the board separates from one edge (ideally around the entire perimeter). With the help of its own force, the bead is pulled along the entire circumference of the wheel. On the other side, similar actions are repeated.
It is worth choosing a method that is convenient primarily for a car enthusiast, and doing everything very carefully and carefully.
A nipple malfunction can sometimes become a rather dangerous driving situation.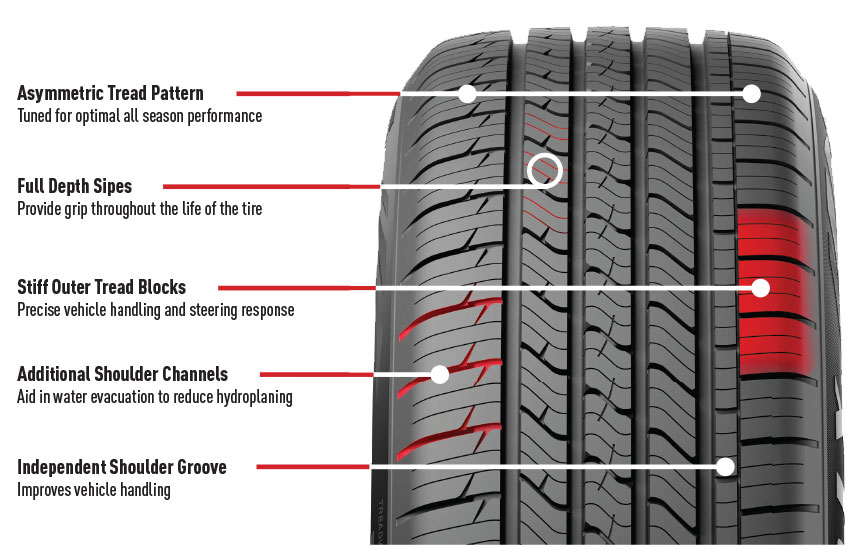 The wheel can burst right on the track due to low tire pressure, if you do not notice how it went down.
If the problem is not quite large-scale and the wheel has dropped at least half (then the nipple worked and holds pressure), then it is necessary to drive to the service station at low speed and eliminate it there. What to do if the nipple is stuck or frozen? How to fix the problem?
To repair the nipple yourself, you need only a few devices that are usually found in the garage:
Having all this, the problem is easy to fix, following the sequence of actions:
Nipple