| 10/27/2014 56 Comments
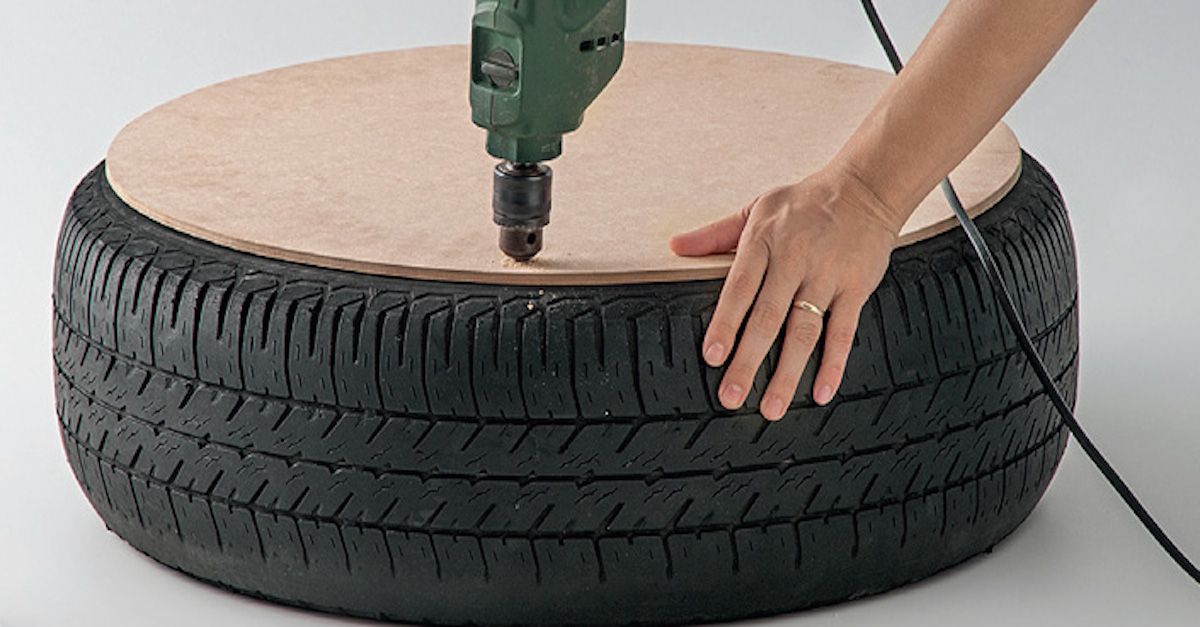
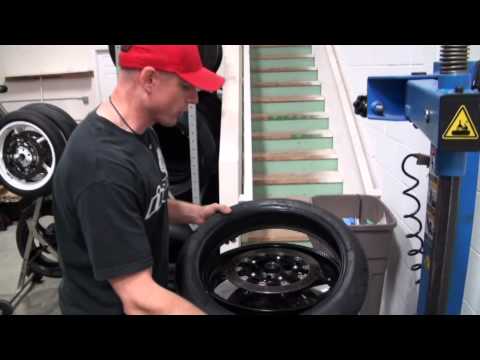
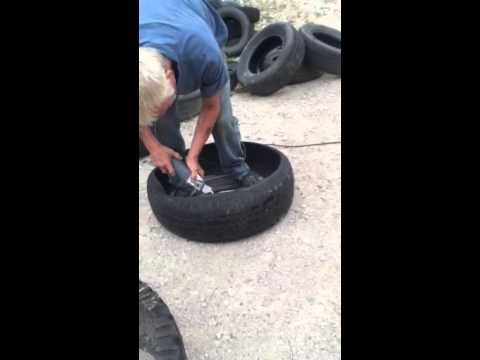
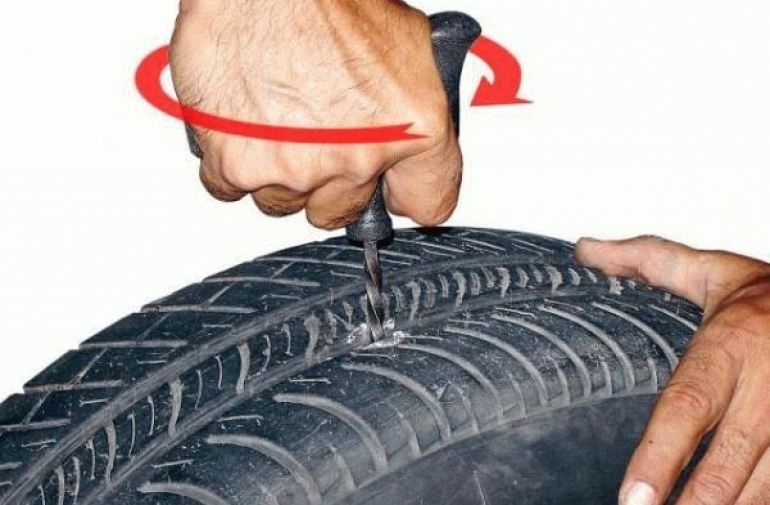
One of the things that is becoming more popular is to take used construction equipment tires and turn them into livestock waters. The benefits of these tire waters is that they are cheap (or free) to acquire and very low maintenance to keep in operation. They will supposedly keep the water cool enough in the summer to inhibit the growth of algae, and warm enough in the winter to keep it from freezing. I plan to install some of these at ESF so I will let you know how they perform. Back in the spring Greg and I made our way to Perry County, KY to pick up some tires of our own. There were plenty to choose from in this "little pile" they had. The biggest challenge was finding some small enough to fit on our flat bed trailer. After picking four out we drug them over to the trailer and then "flipped" them up onto the bed. We were able to lift the 6 foot tires up on top of the 8 foot tires and boom them down nice and tight. Those four tires was all the load we wanted driving back out of those mountains! After these tires sitting at the farm all summer, Greg and I finally found some time to cut one of them. This was a job that we had been dreading as it sounded like a dirty, all day, kind of mess. I will say that we were pleasantly surprised that we got a big tire cut in about two hours. I will give credit to Larry Clay and Ron Shrout for giving us some tips and pointers to help make it go easier. To cut these tires you simply take a reciprocating saw and cut your way around the edge of the tire. Sounds easy right? Step 1: Drill a hole through the tire big enough to get the saw blade started. Step 2: Start the saw in the hole and continue all the way around the tire until you remove the middle portion completely. Notice the chain in the picture. This was used to hold some upward pressure on the cut so that the rubber would not cause the saw blade to get pinched. We moved the chain around the tire with us as we cut. We also sprayed the blade with soapy water to help keep it cool and cutting good. It actually cut surprisingly well. We could cut around 2 to 3 feet before the blade would get too hot and break. By then we usually were ready for a breather too. It took us 8 blades to cut this tire. This tire was about 2.5 inches thick with steel belts all the way around. We cut it with 14 TPI metal blades which worked well. We are hoping to get this tire installed before winter. I will include pictures of that process once we get it completed. Until then, we have three more tires to cut. 56 Comments |
Archives June 2022 Kentucky Beef Network Categories All Welcome
RSS Feed |
Farmers, road departments, lawn mowing companies and property maintenance providers have long recognized the advantages of adding liquid ballast to tractor tires.
Key reasons to add ballast include:
Even minor improvements in traction are helpful on loose surfaces. Improved traction saves time and improves productivity. When bucket loaders and other accessories tend to pull the front tires off the ground, liquid ballast added to those tires can be particularly helpful.
Tractor ballast also lowers the vehicle’s center of gravity. This is particularly helpful if you frequently operate on grade. The oversized tires and high axle clearances on 4×4 tractors result in a high center of gravity. Tire ballast can improve stability by lowering that center of gravity.
Sometimes, ride quality is notably impacted by adding ballast to tractor tires. Ride quality is most affected at higher speeds, so the farmer that frequently operates a tractor on the highway will want to think more about ride quality than one who primarily keeps his tractor in the field.
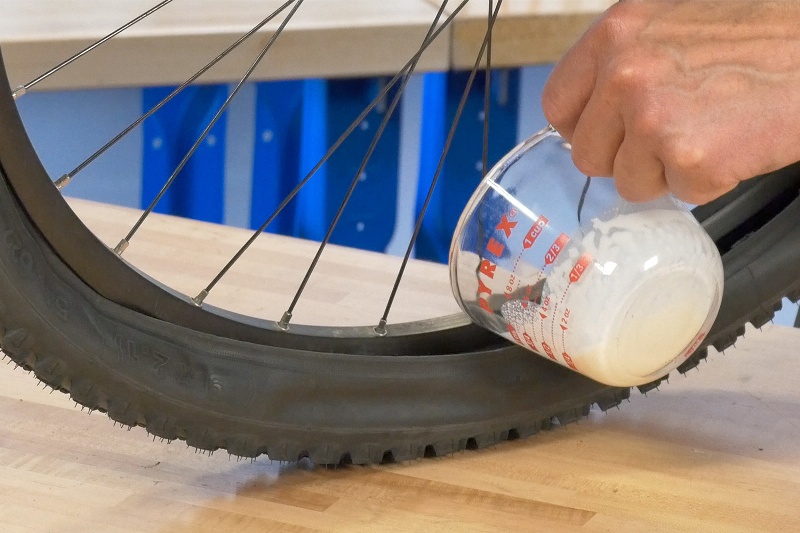
Everyone considering tire ballast wants to maximize performance and minimize cost. A wide variety of ballasts can be used, including water, windshield washer fluid, beet juice, calcium chloride, antifreeze and polyurethane foam.
There are two problems with using water as ballast. First, expansion during freezing can separate the tire from the rim. Second, there are heavier liquids that provide better traction.
Given water’s vulnerability at low temperatures, antifreeze is a logical alternative. Use pet-safe, non-toxic propylene glycol. It is relatively inexpensive, and it is heavier than water.
Calcium chloride is a relatively economical salt compound that keeps water from freezing down to very low temperatures. Consider that 3.5 pounds of calcium chloride per gallon of water will lower the freezing point to -58 degrees F. However, calcium chloride can cause problems with rust and/or corrosion. A calcium chloride solution is as much as 40 percent heavier than water.
Winter-blend washer fluid will readily resist freezing, and it is inexpensive. However, it weighs virtually the same as water, so you’ll miss out on the traction gains that heavier fluids offer.
Given the disadvantages of these other forms of tractor tire ballast, it may be worth considering beet juice for tire ballast. Beet juice is a non-toxic liquid that is about 30 percent heavier than water, and its freezing point is about -35 degrees F.
Polyurethane foam goes into a tire as a liquid, but then it hardens. The big attraction is that it increases ballast weight by as much as 50 percent over plain water. Filling tractor tires with polyurethane foam gives you a no-flat tire, but future tire pressure adjustments are not possible. When the tire wears out, you need to cut it off the rim or opt for a new tire/wheel assembly.
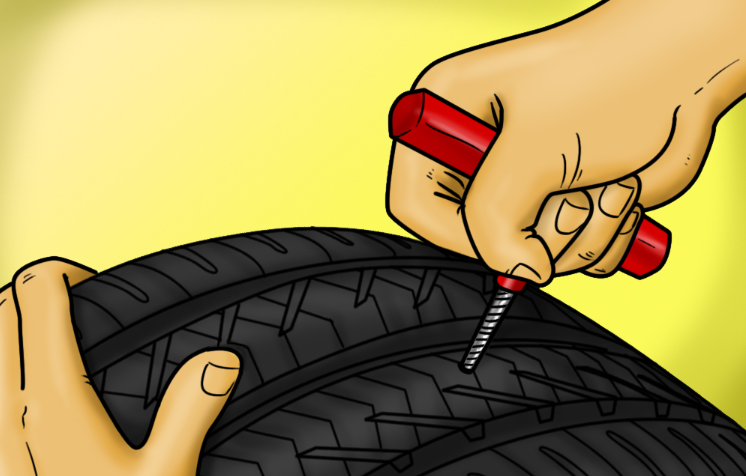
How much ballast should you put in a tire? In general, you’ll want to limit ballast to 40 percent to 75 percent of tire capacity. Michelin suggests a 75 percent maximum while John Deere says 90 percent is acceptable.
Here’s a step-by-step guide to adding tire ballast:
Bobby Ford Kubota is a family-owned kubota dealership in Angleton, Texas. Call us at 979-282-3142 or visit us in Angleton when you are looking for new or pre-owned Kubota tractors, parts and service.
What does a garden mean to us? First of all, it is a piece of land that requires constant cultivation, weeding and watering. Land that is taken care of always pleases its owners with a bountiful harvest. But how sometimes you want to take a break from all this fuss, sitting down with your favorite book in a cozy corner of the same garden. And everyone arranges such a place for recreation in their own way. Someone plants flowers, someone equips alpine slides and gazebos, but someone makes decorative figures for the garden with their own hands and receives a lot of positive emotions. A floral and sculptural ensemble of old car tires is a line of landscape design.
DIY garden figurines. How to make a fairy tale come true?
Decorative sculptures can be made from the simplest materials: old car tires, Styrofoam, plastic bottles. Even shoes and obsolete bowls and pots can be useful for creativity. Anyone can make figurines for the garden with their own hands, while receiving maximum pleasure and spending a minimum of money.
If you want to create a small floral and sculptural ensemble in your summer cottage or in the garden near the village house to surprise and please your loved ones, try using material such as car tires for this. Their disposal is not cheap, and with imagination and a small set of tools (a shoe knife, a jigsaw, a screwdriver), this almost eternal product can gain a second life.
Tires can be cut neat 9 out of 0019 rose flower beds ; by joining several processed tires and brightly coloring them, you can create a variety of original flowerpots - with flowers planted in them, they will look great framed by a path or add picturesqueness to a green garden carpet.
If you cut the tire lengthwise in a circle, and then turn the resulting "ribbons" and fix it with wire or screws, you can make, for example, a swan - with a gracefully curved neck, or a funny monkey merrily playing under a "tropical palm tree" suddenly grown in your garden - with a trunk trimmed with wooden rounds and elastic leaves - "ribbons" from tires . .. Turn on your imagination and create your own corner of nature, inhabited by flowers and ... fantastic creatures.
Read on the topic:
The time of standard-lying in the form of flower beds or dug into playgrounds, having served their time, tire covers has passed. Tires, thanks to the fantasies and efforts of the summer resident, have moved to a new, more beautiful level of existence and use of them.
It is not difficult to make flowerbeds from tires with your own hands. If you are not yet confident enough in your abilities to make flamingos and swans from tires, you can stop at round flowerpots or build an unusual border from tire flowerpots in the form of a large chain. To do this, it is enough to cut out the inner parts of the tires, lay the resulting flower beds, maintaining an equal distance between them, and dig empty tires vertically between them. The "chain links" are connected by means of transverse cuts in vertically mounted tires, the cut points are fastened with wire. Paint the finished "chain" of tires with silver or a solution of bronze powder to make it more similar - the original border with flowers is ready!
Forms for flower beds: ready-made and man-made.
At present, a huge amount of materials and ready-made forms for ennobling and arranging dachas has been provided to the services of the summer resident. In stores, summer residents buy only the most necessary, and for secondary issues they have enough of their own ingenuity and patience.
Garden paths built with his own hand, fences for flower beds, flower beds and flowerpots for them are not only beautiful, this is the pride of each summer resident. It is this approach in the arrangement that allows you to give the country design uniqueness and exclusivity. A huge variety of flower beds can be built from handy material. But when flowerbeds made of tires are made by hand, in an original carved shape, decorated in an interesting selection of colors, they really impress and decorate the territory very much. It is especially pleasant that from an old tire you can admire the form for a flower bed for one hour already - this is how much time it takes to manually process one tire.
How to make a flower bed from tires with your own hands:
step by step guide
A simple technology that does not require special knowledge, hard work and special equipment in a short period of time will turn an ordinary old tire into an original vase for a flower bed, into a rim-crown (rim-flower) for decorating the outer ground border of a flower garden, and into many other bizarre forms. How are the flowerbeds of tires made by hand?
First step : we select an old tire with a disk. The first step is to find a useless, old and bald car wheel. It is desirable that the wheel be with “winter” tires (it is easier to turn out than a wheel with summer tires) and from an imported car, because the rubber of imported tires is much thinner, softer, and therefore easier to process. By the way, for a high-quality flower bed made of a tire made by oneself, a tire with a disk is needed, if it is not there, it’s not scary, the tire will still come in handy. A tire with a disk, after some manipulations, can serve as a full-fledged flower vase, where the disk will serve as the bottom, and a tire without a disk is useful only as a decorative rim for decorating the outline of the flower bed.
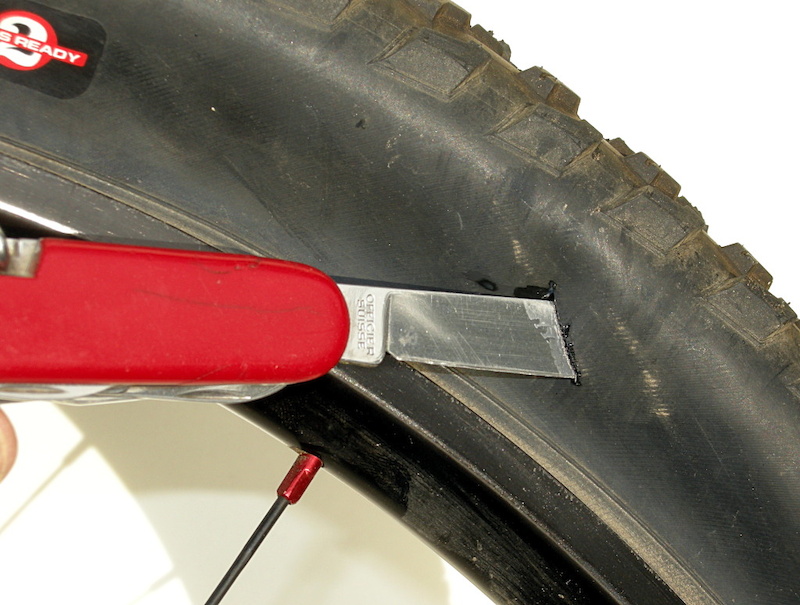
Second step : draw the cut line. In the second step, you need to put the tire on the ground and think about how to make a cut line. The essence of the cut is as follows: you need to cut off the upper part of the rubber of the tire so that the deep lower part and the upper (cut off) smaller part remain - something on the principle of "pot - lid". But it’s not worth cutting out with a simple straight line, it’s so uninteresting and not very beautiful in the end. You need to cut it so that the edge of the cut is uneven - wavy, serrated, fringed. Consider what edge your tire bed should have and draw a patterned line with chalk on the tire rubber around the entire circumference with your own hands.
Step three : cut along the marked line. We cut it out without removing the tire from the disk, that is, we divide it into two parts along the marked line. Now the lower and deeper part that remains of the tire needs to be turned inside out - not an easy task, it will take physical strength and some skill: turn the deep part with the cut down, step on the edge with your foot and pull the edges (as if from under your foot). Having turned out at least one section, then the process will go easier and faster. It will turn out a very nice and original thing in the form of a glass or a vase on a leg. Place it flat on the ground. Really, is it beautiful? If you wish, you can put such a flower bed directly on the ground on a leg - a rather convenient and mobile thing, easy to use, or you can dig a leg into the ground, neither children, nor dogs, nor intoxicated guests will definitely turn over the stationary version.
The top cut part is also useful, it still looks good. If you make 5-7 cuts across it from the side of the inner ring, with a depth of no more than 8-10 cm, and then dig in, deepening it into the ground with cuts, you get a chic outer frame for a flower bed. Plants that create a cushion of greenery are planted on do-it-yourself flowerbeds consisting of only one tier of tires . So you can grow creeping ground cover plants and ordinary nasturtiums. If several tires are installed one on top of the other, then, depending on their number and height, you can grow pelargonium in them with hanging stems and leaves, like ivy or cascading petunias.
After placing the tires on the site, crushed stone with sand is poured on the bottom of each, and only then fertile soil. Then they are watered so that there are no voids in the soil. Flowers and ornamental grasses are also planted between the tires.
Vertical landscaping also looks beautiful on the summer cottage. And you can make flower beds from tires with your own hands in the form of flowerpots with your own hands. For this you need a tire with a rim. It is necessary to draw a line with chalk around the entire circumference of the tire, dividing it in height in a ratio of 1: 3. After cutting, the part with a higher height of the tire turns out onto the rim. So it turns out the bowl of the flowerpot. The bottom of the tire will serve as the base of the vase. Even an urban-style alpine slide can be made from tires. You just need to take tires of different sizes and be sure to use natural stone.
Decorating flower beds and flowerpots from tires
Now the equally exciting and significant moment has come - decorating a flower bed from a tire with your own hands. Agree, growing flowers in these black forms is not entirely aesthetically pleasing, although ... this is a matter of taste, some gardeners deliberately leave the rubber as it is, arguing that such rubber attracts more heat and light. But if you still decide to get rid of the blackness of rubber, paint these forms with ordinary oil or enamel paint, with several colors, at the ring - with one color, petals or cloves - with another.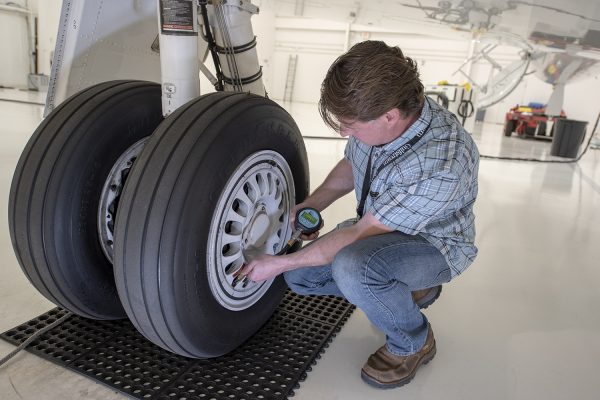 You can also paint the petals in different colors, alternating the paint in the desired sequence.
Do not be afraid to experiment in decorating the shape, for example, glue colored aquarium glass pebbles on the petals of a flower bed made of tires, they will look like dew drops, though larger in size. You can come up with any decoration or decoration, everything will look original, unusual and exclusive. Now everything is ready, you can plant seeds, bulbs or seedlings of flowers inside the flower beds, or you can transplant already adult plants and enjoy their appearance. This is how, at a minimum of costs, you can get quite a chic thing for arranging a summer house or a country house.
Do-it-yourself flowerpot is made from an old tire with a disk. It must be cut with a knife or a small grinder. Flowerpots from tires are distinguished by their original shape and the fact that the worn, unattractive tire tread is wrapped inside the tire, and its smooth inner part is turned out. Flowerpots made in this way look very attractive, and it’s not even immediately possible to understand what they are made of. Materials that will be required to make flowerpots from tires: * car tires * cement * sand * pebbles (gravel, crushed stone) * soap solution * paint * primer Tool (main): * Electric jigsaw * Grinding machine * knife * trowel * container for preparing concrete (mortar) * brush with hard bristles * brushes for painting and painting flowerpots Technology for making flowerpots from tires: 1. 2. The knife is suitable for simple straight cuts. To get a more complex cut pattern, you need an electric jigsaw. At the same time, it is also necessary to moisten the cutting line with soapy water, and also observe one trick - the cut should come as close as possible to the outer edge of the tire (preferably to the metal cord). 3. Turning the tire inside out is fairly easy. You can make the job of turning the tire even easier by cutting through a part of the steel cord with a manual angle grinder. 4. Having cut the sidewalls, we proceed to turn the tire inside out. We wrap the tire first in one place, and then around the entire circumference. This operation requires some effort and skill. Having turned the tire outward, we bring its curly edge to the desired condition with the help of a grinder. 5. If the tire that was not removed from the rim was turned out, then its lower part became the leg and support of the flowerpot, and the upper part became a container under the ground for planting flower seedlings. If the removed tire is cut off, then its separated parts are then mounted on the disk in the same way as when mounting the wheel. 6. To make flowerpots made of tires lose their resemblance to a car wheel, and the wheel disk does not rust, cover the flowerpot with a primer GF-021, and then paint it. The primer, by the way, fits well on the rubber, which in the future will allow the paint to hold on longer. For less heating of the earth in a flowerpot located in the sun, it is better to paint it with light colors. Concrete base for a flowerpot of on this could be stopped. But if you want to make your site even more beautiful, then install a flowerpot on a concrete base. This base can be covered with a stone mosaic. In order for the concrete mortar to adhere tightly to the disc, the latter must be wrapped with wire or plaster mesh, after which the mortar should be thrown onto the disc with a trowel. The mortar must be thick to avoid "slipping": * 1 part cement; * 3 parts of sand; * 0.5 water. Concreting of the base can be done before or after the flowerpot is in place. You can put a plastic film on the lid of the iron barrel (so that the cement does not stick to the iron) and install a flowerpot on it. Apply the solution to the disk, put pebbles and shells on top. After the mortar has hardened slightly, wash the stones with water using a brush or brush. And so that the concrete does not crack during hardening, it must be moistened with water from the outside during the first two or three days. After a few days, the pot is ready to be filled with soil and planted with flower seedlings. A few words about the advantages of a flowerpot made from car tires in comparison with beautiful plastic flowerpots purchased. Flowerpots made of plastic can break, crack, but nothing like this will happen with a flowerpot made of a car tire, and it will serve for a long time. And most importantly, flowerpots are made from discarded tires, which are lying in large numbers along the roads. By using tires to decorate your garden, you can contribute to a better environment. Read on the topic: Rubber Tire Car Crafts are fun and amazing. How much fiction and fantasy is invested in these creations. who is not here, just a whole zoo! And all of this is made from waste material, which often lies under our feet. Here rubber tires, plastic bottles, old basins and barrels, a hose from a vacuum cleaner, gas cylinders and even a box for gas cylinders have found their use. Of course, to make such a charming bunny, a funny teddy bear or just cut a swan, a crocodile or a flower bed out of a tire, you will need to put in a lot of effort, but when the craft is already assembled and you, taking a brush in your hands, paint your work, you yourself will fascinated by their creation. In order to make decorative sculptures from old tires, you will need the help of a man. Involve your husband in the creativity, because he, too, will be happy to relax in a fairy-tale corner created by himself. Graceful Swan We take an old tire, preferably “bald”, and make markings on it. Now, with a sharp knife, cut the tire along the lines, but not completely. Cut the top of the tire. This place will not succumb to a knife, a grinder is needed here. As a result, you will have a figure that is remotely similar to a bird. Cut along the lines - wings. Upper section - head and tail. Now you need to take a metal plate, bend it in the shape of a bird's neck, and screw it to the rubber base. We paint the swan with water-based white paint, and make the beak red. That's all, a graceful and proud bird has settled in your garden. Caterpillar Everything is very simple here. You will need: 4 tires, green, yellow and blue paint, a metal plate and two paint can lids. We add the tires so that they are close to each other, but at different levels. Color everything green. It is now necessary to fold the antennae-shaped plate and attach it to the top of the front tire. We paint the antennae in yellow. Make eyes out of metal caps. The pupils are highlighted with blue paint. Tire bear This cute bear is sure to please both children and adults. To create a sculpture, you need: 2 tires of different sizes (one for the bear's body, the other for the head), paints, thick rubber and plywood. First, we connect the body and head with a metal pipe. To do this, you need to cut holes in the tires. You can’t do this job with a knife, so ask your husband to cut holes with a grinder. We fix our bear by placing it vertically. We make round blanks from plywood (also with the help of my husband) and close the tires with them on both sides: both the muzzle and the body. Plywood is attached to the wheel rim with self-tapping screws. We cut out the paws and ears from thick rubber and glue them to the wheels with special glue. We paint the bear with outdoor paints. Here you can let your imagination run wild and paint the figurine as you wish. Boat This unusual boat of car tires can be made in any yard, on the playground in kindergarten, as well as on your own personal plot, if the territory allows it. There is nothing complicated in its creation, all you need is to get more car tires and dig them into the ground in the shape of the deck of the ship, then install the helm, masts and pull the sails. Sandbox To create a cozy children's corner in your summer cottage or in the garden, you can make such an original sandbox. For work, you will need three old tires from a car, a hacksaw and paint. First, carefully cut each tire across into two equal parts and paint each in a different color with bright oil paints. Turtle Please your children with such an unusual tire craft in the form of a cute and kind Turtle Tartila. To make it, you will need one large tire from a truck or tractor, an old enameled or aluminum basin, a five-liter plastic bottle, an automobile rubber tire, scissors, a knife, self-tapping screws, colored paints. First, decide on the place where your turtle will live, it is better that it be a green lawn, and install a large car tire there. Next, cover the round hole in the middle of the tire with an inverted basin and secure it with four self-tapping screws on all sides. By the way, if you do not cover the hole in the tire with a basin, but pour earth into it and plant flowers, you can get an original turtle flower bed. Rocking chair It is not difficult to make such a children's rocking bench. For work, you will need one car tire, a wooden board 25-30 cm wide and a length equal to the diameter of the tire, four self-tapping screws, a hacksaw, a drill, as well as paint and decorative elements to decorate the swing. Using an ordinary hacksaw or a sharp knife, cut the tire in half and attach a board to one of the halves with screws along the cut lines. Finally, paint the rocking chair with paint and attach decorative elements, in this case, funny eyes. If your family has two small children, then you can easily make two rocking benches out of one car tire, because you must agree that this is absolutely not difficult. Read on the topic: Summer residents often face the problem of water shutoff. The situation is not pleasant, but there is a way out for the owners of land plots - a well made of tires with their own hands. With him, the stay outside the city will not be overshadowed by anything and watering will become easy. Everyone dreams of having a source of life-giving moisture on their plot. Making a well from tires with your own hands is not too troublesome. Also, "building" will not take much time, but it will require effort. The construction of the source is divided into two stages - the device of the mine and the bottom. And, of course, you need to take care of a canopy that will prevent pollution from entering the well from tires that worsen water quality. Before you start building a well from tires with your own hands, you need to find a place where the water is at the same level (on an area of several square meters). Its quantity and quality are important. Digging is allowed at a distance of at least 50 meters (sanitary zone) from sources of soil pollution, i.e. heaps of manure, which are necessarily available in areas, toilets, places for walking animals, since domestic sewage will certainly get into the source, which will make the water not only smelly and tasteless, but also dangerous. It is important to analyze the quality of the found waters. If there is a construction site, there should also be geological exploration results on the depth of the water layer. If they are missing, you need to spend money on them, since only this procedure will give accurate data. This is no longer a purely decorative option. A septic tank is a variant of the sewer, which consists of two pits. Effluent flows directly into the first pit, where they are processed by bacteria, and the liquid partially neutralized in this way enters the second pit, where waste is also processed by bacteria. After that, almost pure water is absorbed into the soil. Important! A septic tank can be installed where groundwater is at least 5 m deep. Used car tires have proven themselves well as rings for such septic tanks. The volume of the septic tank should be such that three average daily volumes of wastewater can be placed in it. Based on this, it is necessary to calculate the depth and width of the well and, accordingly, the number of tires. It must also be taken into account that the water level should never be higher than the ground level. One tire is placed on the ground and the boundaries of the pit are marked. You can dig a hole a little wider so that it is more convenient to lay tires and have the opportunity to insulate the well. You need two such wells, arrange them as shown in the figure. Important! The main advantage of such a tire septic tank is its cheapness, but it does not last very long, about 15 years. It is impossible to overhaul it, therefore, in case of serious damage, you will have to arrange a new one. The condition of the septic tank should be checked every year. The septic tank must be located The septic tank works best on sandy soil. It is advisable to do it where the soil does not freeze to a great depth. The depth of the pit directly depends on the function that the well will perform. If it is being built to supply water in case of an unusual situation, it is enough to dig a hole of 2.5-3 meters. To build a full-fledged well, which is filled with groundwater, you will have to dig deep by 9meters. In the latter case, it is important to carry out work with extreme care so that the walls do not collapse. If necessary, water is pumped out. You can wait until large particles settle and pump everything out with a fecal pump. If there is a sump and the drains are relatively clean, then the water can be used to water the garden. But in this case, only the gray mass should be drained, excluding the fecal matter. The scheme for manufacturing such a septic tank was described in detail above. When there is no way to pump out, you can use special bacteria that will break down and dissolve all kinds of drains. Or call a pumping machine if the volume of wastewater is large. Plus, during operation, there is a need to check the tightness of the wheel connection. This is very important to eliminate the possibility of environmental pollution. Having decided on the place, stock up: Tools are indispensable: Usually 4-5 car tires of any size are enough for a meter deep well. Based on this, it is easy to calculate how many of them are needed to make a well from tires of any depth. Country craftsmen always use various scrap materials . Used: To build a decorative well for a garden or summer house, the following elements must be prepared in advance: You can take not four tires, but less - all depends on the desired height of the decorative well. When the preparation is completed and all the materials are collected, you can start building the well itself. It is good to involve all your relatives, children, neighbors in this exciting process. Friendly and fun all the work can be overcome in one day. After that, build a canopy or make a cover, for which a board is suitable. Depending on personal preferences, to facilitate the lifting of a container filled with water, an automatic system is mounted for pumping out or another device is made. We propose to consider step by step three options for making a septic tank from wheels: This is the cheapest option for arranging a sump using tires from a car. A pit is dug, tires are laid, and the bottom is prepared. This device has its drawbacks. It is unacceptable to direct sewage with fecal masses here. You can only drain water from the shower, sink / washbasin, washing machine, etc. But this can be corrected by ensuring the tightness of the walls and removing the drainage layer. In this case, the septic tank can be used to collect wastewater of a different nature. However, discharges should be pumped out regularly. DIY tire products have a lot of them: Its only drawback is that the depth cannot be more than 9 meters due to the unfortified walls of the pit. Guideline in the choice of car tires for a septic tank is made based on the needs and estimated volume of wastewater. If we are talking about tires from passenger vehicles, then up to 8 pieces will be required, from large vehicles, 5 pieces may be enough. The most crucial moment is the selection of colorants. Oil dyes adhere well to rubber, but such coating will not last long . External factors affect: Oil-painted well after a maximum of one year will have to be repainted . For greater stability of the coating on tires, other colorants should be selected: bituminous, acrylic or enamel. An excellent option is rubber paint . This substance does not consist of rubber in the usual sense, as the name says. But the paint is designed in such a way that, along with the surface of the tires, is able to stretch and shrink . In winter, the wheels are exposed to frost, in summer - the scorching sun, but the rubber paint does not crack or deform. In order for the paint to adhere well to the surface of the tires, it is necessary to create a high degree of adhesion - adhesion to the surface . In addition to washing and drying the rubber surfaces, oil stains must be carefully removed. It is better to do this with special chemical solvents . There are several options for tanks from tires. Each of the septic tanks is characterized by its own characteristics. It is customary to distinguish between three types of wheel structures: Design should be guided by the amount of waste liquid. So, for a large family, it is better to make a septic tank, which provides a sump. Features of the functioning of the tank with a filter system: The septic tank with filtration is not suitable for the treatment of feces. This structure should only be used to collect contaminated liquids from laundry, washing dishes, etc. The construction of the house continues with the installation of a log gate. Even if the water intake is carried out by a pump, a lifting gate is necessary, as power outages sometimes occur. Installation recommendations: Once the overhead gate has been installed, a bucket chain can be attached to it. For the manufacture of wells of the drainage system, two popular types of materials are used: You can do it on your own, if you simply pour the concrete shaft from the prepared solution into a specially prepared formwork. After the solution dries, it is removed and a strong, reliable well is obtained. Careless handling of concrete rings can damage the structure of the material. Outline the excavation for future tire sewerage. With a width of 110 cm, its length will be The depth in the pit is not the same everywhere. And should correspond to the total height of the tires + 40 cm on a concrete base and a gravel-sand filter. Under the last tire structure, the concrete base is not poured. First, dig a pit based on the depth of the first (or first two) wells. Pour sand into it first and then a layer of gravel on top. Pour a 10 cm thick concrete base over the gravel-sand filter. While the concrete is curing, prepare the tires. Tire rim needs to be cut. This can easily be done with a jigsaw with a metal blade. The hole for the canvas is drilled with an 8 mm drill. On the first and last tires, cut only one rim, there should be 4 such tires for a two-chamber septic tank, and 6 for a three-chamber one. Cut round holes for the pipes in the tires that will fit the pipes. Please note that the pipe must be sloped. Therefore, on the cover of the first well, the hole for the pipe is higher than on the cover for the second, and for the next transition, also cut holes to maintain the slope of the adapter. Important. Cut holes for pipes according to its size so that the pipe fits snugly. Then the tightness will be higher and less sealing agents will be required The tightness will then be higher and less sealing agents will be required. Once the concrete has hardened, the installation of the septic tank can begin. All the dirt gets into the first well. Therefore, having inserted pipes into it, it is desirable to seal these holes, as well as the joints between the tires, with sealant. Place the first bar with the uncut side down, the last bar with the uncut side up. Wrap the installed well with roofing material so that nothing seeps out from the gaps between the tire joints.
Flowerpots from tires 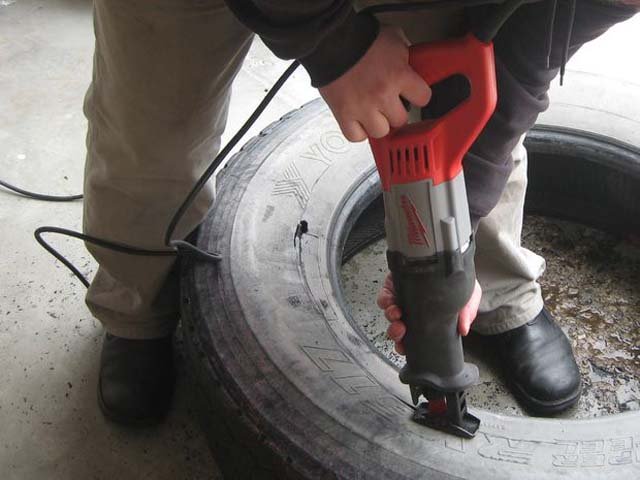 To do this, put the tire on the ground and cut around the entire perimeter on the side of the tread. The tire should be cut without removing it from the disc. Then turn inside out both the bottom and the top. Thus, you have a kind of glass, the sides of which can be cut and various pebbles, shells, etc. can be glued to them. You can also paint it with different colors. Here everything depends on your imagination. Then you can plant flowers in the middle. It will take you no more than two hours to make such a flower bed.
  Cut off the sidewalls of the tires: either just in a circle, or, which is much more original, figured. And the more original the cut configuration, the more beautiful the flowerpot will turn out. But in this case, you will have to work a little more. It is necessary to start such work by drawing cut lines on the sidewall of the tire, after which they begin to cut the rubber. Usually a sharp knife is used for this. And to make it easier to cut, the knife must often be moistened with soapy water.
 The foundation stones will retain their natural beauty as they are coated with a colorless pentaphthalic lacquer.
Car Tire Crafts 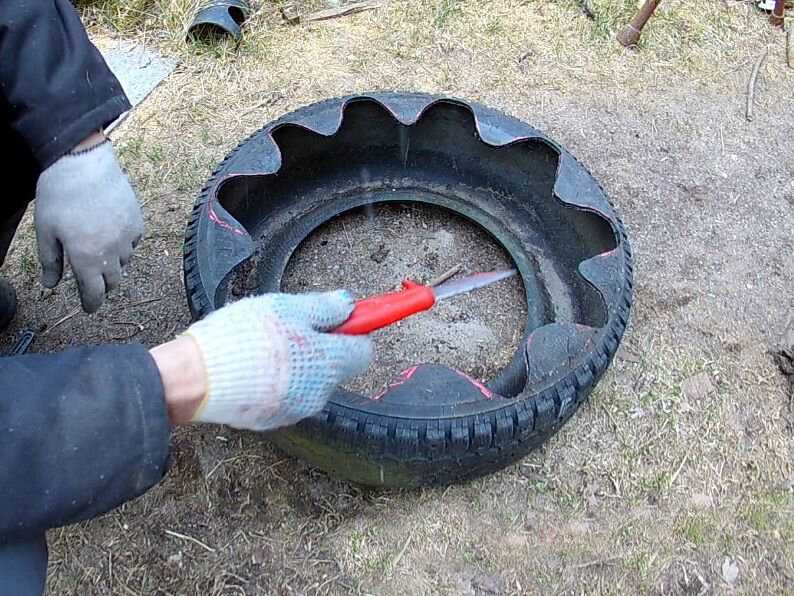 I want to get to work as soon as possible and decorate my garden or playground near the house with such beauty.
 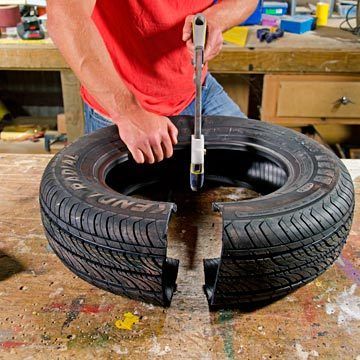 To do this, we draw two lines with a white marker along the contour of the tire: one at the very top, the other at the bottom.
  This is the body of a caterpillar.
 You can use paints in cans. After the paint is completely dry, form a sandbox in the shape of a flower consisting of six petals from the halves of the tires. Tires can be fastened together with self-tapping screws or simply dug them into the ground. In the end, it remains only to fill the sandbox with sand and you can call the children.
  Then take a rubber car tire and cut four identical legs out of it. Attach them with self-tapping screws or a construction stapler to the tire on four sides. The turtle is almost ready, it remains only to make the head, for this, take a plastic bottle, step back ten centimeters from its neck and carefully cut off the upper part in a circle - we will no longer need it. Heat the remaining part a little over the fire so that it becomes elastic, and quickly form an oblong shape out of it, similar to the head of a turtle. Attach the head to the body, and paint the whole figure with the colors of your choice.
How to make a well out of tires with your own hands?
Finding the right place to build a well
 From the house, a do-it-yourself well made of tires is located at a distance of at least 5 meters.
A well above a drainage pit or septic tank
 To make a septic tank with your own hands, you need to dig a hole and place tires in it according to the diagram. The figure shows a septic tank with or without a drain pipe.

How deep should the pit be
Operation and maintenance
If you have made a homemade septic tank, it is extremely important for long-term operation to service it from time to time.
First of all, it is recommended to check the level of drains. This is important to keep the container in working condition. If after some time you notice that this volume is not enough for a private house, you can dig a second container and upgrade the existing receiving well.
Materials and tools for the device source
Components of a well-flower bed
Step-by-step instructions for building a source of tires
 This helps to increase their service life and prevent harmful substances from entering the water;
 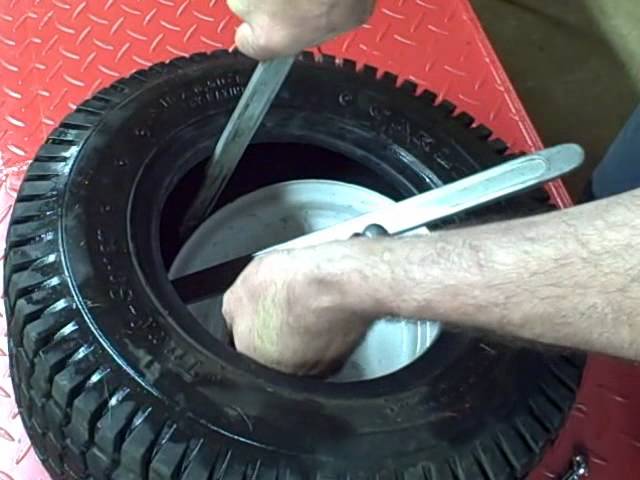 Between the towering tires, rubber gaskets are not needed;
Stages of work
With filter system
 The principle is as follows:
Benefits of a tire source
Where can I get it, which ones are better to use?
There are several sources where you can get a free tire. For example, you can contact a car maintenance service. Often they are thrown away.
You can also contact the recycling plant. Although no one will give them to you for free here, you can buy them cheaply. Perhaps your neighbor or acquaintance is changing car wheels. You can ask and pick up unwanted tires.
Choice of paint
Types of sewerage from tires
Tires should be fastened together
A tank with a filtration and sump is considered more durable. After the liquid enters the sewer (the first tank), large components are retained in the sump. The rest of the more liquid part penetrates the filter tank. This design is the most environmentally friendly option. However, a septic tank requires regular pumping of sewage. We install the gate
 Their depth must be at least 5 cm. Plates with holes of the same diameter are attached over the holes;
 Production material
 And special rings in the corrugation of the polymer pipe play the role of stiffeners. That is, such a mine well resists seasonal heaving and is prone to linear stretching. It is worth considering that it is easier to work with plastic when forming holes for drains. Yes, and the polymer serves from 50 years or more.
 Concrete is capable of cracking under strong mechanical stress.
 Excavation and trench for wells
 On intermediate tires, cut off the rim on both sides.
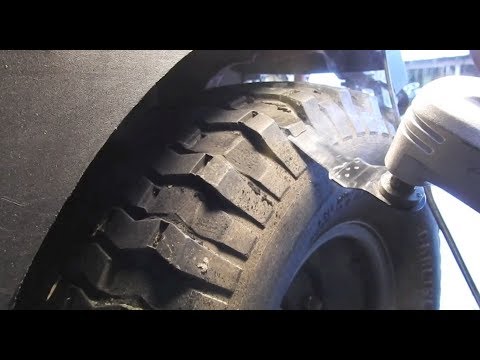

 All rights reserved. This content may not be copied, reproduced, distributed, or used in any manner without written approval from Kentucky Beef Network, LLC. For Informational Purposes Only.
 KBN took over operation of the Eden Shale Farm in April of 2013. We are using the 961 acre farm as a demonstration and learning center for beef cattle producers. This blog serves as a place to document daily farm activity and host discussions about the demonstrations being implemented. I hope you find this information useful and that you come visit us at Eden Shale Farm.