Having battery troubles? Yeah, we hear you. Almost everyday, we receive calls and comments about batteries that "won't hold a charge" any more. Maybe you've been in that boat before. To clear up a misconception: a battery isn't like a water bottle. You can't use up half now, and then wait and use half later. It's not a tank of electricity. Also, batteries don't "leak" power like water can. What we're dealing with is a lead acid battery in a plastic box that encases a delicate balance of chemicals which are ready to interact with each other to produce electricity when the load is applied.
If your battery is having trouble holding under load, then chances are it's a chemical issue.
Sometimes you can tell if your battery is bad by simply taking a good look. There are a few things to inspect:
Broken or loose terminals are dangerous and can cause a short circuit. If a short did occur, there would be some indication of burning or melting. When a battery short circuits, all the power is unloaded in an instant. That produces a lot of heat, and sometimes even causes the battery to explode.
If the battery is still intact, but there is a bulge in the case, this is usually a result of being overcharged. Other signs such as physical openings in the case are often caused by mishandling. Cracks, splits, and holes will not cause a battery to stop working, but for safety reasons the battery should be labeled unsafe to use.
With wet-cell (flooded) batteries, water levels must be maintained. If they are low, usually refilling them with distilled water will help. But, if the cells within the battery have been exposed to air for a long time, it can cause a problem. When the plates within each cell are exposed to oxygen it can rapidly dry the paste that surrounds the lead plates. When the paste has dried it creates a barrier that prevents the chemical reaction within the battery.![]() This can also cause the sulfation that has already occurred to harden leading to a sulfated battery which is the number one cause of early battery failure. We strongly recommend checking the water levels prior to charging a wet cell battery since charging a dry battery will burn it up. If your battery has plenty of fluid in the cells, but the color is dark, or brownish, this is also an indication of a bad battery. Even if one cell is brown, it is rendered useless and therefore the entire battery is, too. Time to replace your battery!
This can also cause the sulfation that has already occurred to harden leading to a sulfated battery which is the number one cause of early battery failure. We strongly recommend checking the water levels prior to charging a wet cell battery since charging a dry battery will burn it up. If your battery has plenty of fluid in the cells, but the color is dark, or brownish, this is also an indication of a bad battery. Even if one cell is brown, it is rendered useless and therefore the entire battery is, too. Time to replace your battery!
The voltage of a battery is a good way to determine the state of charge. Here's a handy table with the breakdown:
| State of Charge | Voltage |
| 100% | 12.7 - 13.2 |
| 75% | 12.4 |
| 50% | 12.1 |
| 25% | 11. 7 7 |
| Discharged | 0 - 11.6 |
If your battery is:
Sulfation is the natural byproduct when the battery discharges. Naturally, re-charging the battery will reverse the sulfation crystals and turn it back into electrolyte, ready to produce power again. But if a battery sat, uncharged, severely discharged, and/or drained for extended periods of time, the sulfation will increase in size and harden onto the plates. This covers the surface area of the plates, removing the chemicals needed to produce power.
Sulfation decreases the potential to reach a full charge, and it self-discharges the battery quicker than normal. Charging a sulfated battery is like trying to wash your hands while wearing gloves. At this point, charging alone will not restore the battery to a healthy condition. The majority of replacement battery purchases occur when the original battery has reached this point.
Your local automotive shop is more than able to load test your battery, but it's quite easy to do at home and all you need is a digital voltmeter. For any load test to be accurate, the battery must be fully charged and left to sit 12 hours before load testing the battery. A recently charged battery will hold a residual charge from the charger, so letting the battery sit for 12 hours will release that residual charge and give you a more accurate sense on how the battery will perform under normal circumstances. To the test...
Let's use a motorcycle battery for an example:
 Do not disconnect the battery because you will attempt to start the bike.
A healthy 12 volt battery should maintain a voltage range from 9.6 - 10.5 volts under the load for a good 30 seconds straight.
For starting batteries we don't expect you to run the starter for 30 seconds, so if you see the voltage meter drop within the voltage range and it sounded like a good strong start, then you probably just had a discharged battery. However, if under the starting load the voltage drops below 9.6v, then it is most likely time to replace the battery.
For deep cycle application if the battery holds under load for a few seconds then voltage starts to steadily drop this would indicate a problem with the battery. If the voltage instantly drops to 0 volts, that is also a problem. We call this the open cell. On a new battery, this can be a result of manufacturing flaws, but it also may be caused by sulfate crystal buildup.
A common occurrence with open cell batteries is that under the intense heat of the load, one or more of the weld pieces connecting the cells together is coming loose and separating. This will cut the current, and voltage will drop. When the battery cools off, the pieces will touch, barely giving a complete connection. This gives you a false voltage reading. Batteries with open cells may read fully charged in idle, but they fail under a load test every time. Once a battery reaches this point, there is no going back. The best thing to do is recycle the thing.
How to tell if a battery is bad or good: These 3 steps will help you test and determine if your battery is truly bad or getting there. Sometimes it's obvious if there is a failure, but other times it's not. Flooded batteries make it possible to simply look inside the cells and determine if the battery has a physical defect. But for sealed AGM and Gel batteries, it requires testing. The only tools you really need are a battery charger and a digital voltmeter. If your battery experiences any of the symptoms described in the steps above, then maybe it's time to replace the battery.
Look no further. We've got a wide selection of powersports batteries for your motorcycle, ATV, scooter, jet ski, or snowmobile. But we also carry batteries for lawn mowers, wheelchairs / mobility scooters, UPS systems, RVs, and marine applications. Whether you need a starting battery or a deep cycle battery, we have the stuff. And all of our replacement batteries come with warranties to ensure that you won't have any of these problems with your new battery.
Find Your Battery
 com
com ATV and UTV batteries are considered consumables that go bad over time due to sulfation, bad cells, poor maintenance, or simply old age. Before you go ahead and buy a new battery, it’s a good idea to test the condition of the one you have. That way, you know you are not wasting your money when other issues may be the real cause of your poorly performing battery.
No single test will troubleshoot all of the potential problems a battery can have. But by going through the steps in this little guide, you will cover most aspects that may be causing issues.
These are the tools you will need:
Caution: For all of the testing in this post, we recommend that you use safety glasses and gloves.
Page Contents
You may just have found that your ATV does not want to start, and you suspect that it’s caused by a dead battery. Keep in mind that there is a range of other reasons why your ATV seems completely dead or will not start.
Before spending too much time testing the battery, we recommend you make sure there are no simple solutions like forgetting to turn off the kill switch, not having the gear shifter in “park” or keeping the brake lever activated. Such mechanical safety features that may prevent your ATV from starting vary from model to model. Here is a complete guide for when an ATV won’t start.
Before you begin testing, it’s a good idea to inspect the battery visually. You may need to remove the battery from the ATV for a proper inspection.
If you notice any of the following defects, there is a good chance your battery is bad beyond repair. Replace it with a new one, no further testing is necessary.
A visible bulge may be a sign of overcharging. Smart chargers shut off automatically when a battery is fully charged.
Manual chargers, on the other hand, need to be monitored and turned off manually as soon as the battery reaches a full charge, or you face a risk of overcharging the battery.
The terminals should feel solid and not move even slightly. A loose terminal may create a potentially dangerous short circuit.
When a loose terminal short circuits, the battery will discharge all of its power immediately. Such a rapid discharge creates a lot of heat that can melt the plastic or make it catch on fire. A direct short like this can sometimes even cause the battery to explode.
Battery casings are tough but may crack open from impacts, mishandling, or if the battery has frozen. A cracked battery may still work fine but should be replaced never the less due to safety reasons.
Battery fluid should not leak off the battery. If it does, the battery should be replaced.
If the color of the electrolyte fluid inside one or more of the cells has turned brown or dark, your battery is most likely bad. It does not matter if the other cells look healthy; if one cell is dark, the entire battery is rendered useless.
Inside a conventional lead battery, there is electrolyte fluid that should reach up to a level where it fully covers the top of the lead plates or within a specified max/min level found in each cell.
Carefully remove the filler caps and inspect using a flashlight. If electrolyte levels are low, top of with distilled water until you reach the correct level. Never try charging a dry battery as it may cause it to burn up.
If the battery has been sitting dry or with a low electrolyte level for too long, chances are it has sulfated beyond repair.
By fully charging a battery and then measuring its open-circuit voltage, you can tell quite a few things about its overall health.
If you are not sure how to properly charge your type of battery, I advise you to follow the steps in this guide.
After charging the battery to a full charge, and with the charger disconnected, allow the battery to “rest” for a minimum of 12 hours.
This is necessary for the battery voltage to stabilize after the charging process, or you may get a false reading. Often there is a surface charge still present some time after disconnecting the charger.
If you don’t have time to wait as long as 12 hours, you could also turn the lights (high beams) on for two minuts to remove the surface charge.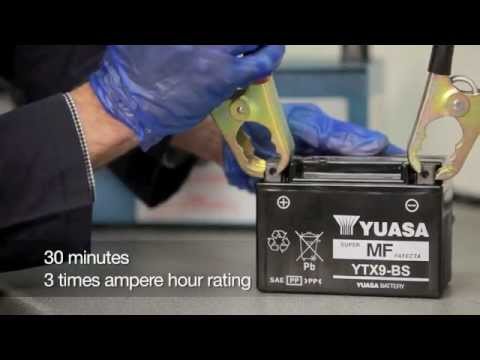
Use a multimeter or volt-meter to read the battery’s voltage under no load.
| Open-circuit voltage reading | What it tells you |
| 0V | THe battery is not able to hold a charge. The battery likely has an internal short circuit and needs replacing. |
| Less than 10,5V | One or more dead cells. |
| Less than 11,8V | The battery is heavily sulfated beyond repair, and is not able to hold a suficcient charge. |
| Between 11,8V and 12,4V (12,4V equals about 75% state of charge) | The battery is sulfated to a level where it may no longer be fully recoverable. |
| 12.4V or more | The battery his able to hold a suficcient charge. You can expect a high level of recovery by performing a desulfation charge. |
An open circuit voltage reading, as described above, is helpful but does not always paint the full picture. The battery may still be bad even if you get a reading of 12.4V or higher.
Sometimes, you will find that the voltage drops fast as soon as you draw power from the battery. If so, the battery is likely bad and needs to be replaced.
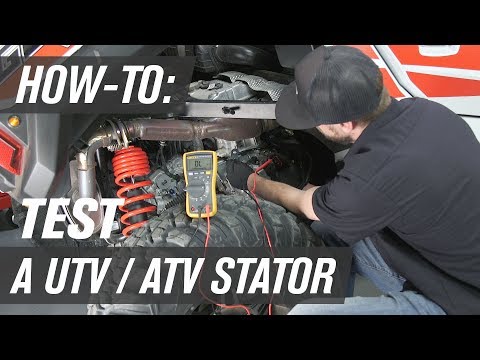
To test if the battery can drive a load, you can perform a so-called load test. The goal of this test is to make sure that the battery voltage does not drop too low when drawing a high load.
A healthy ATV or UTV battery rated at around 200-400CCA should be able to maintain a voltage of 9,6V or more even under load (at 70°F (21.1°C)). A 400CCA battery should not drop below 10V.
You will need a multimeter. Preferably one that has a max/min function. If you use a multimeter without a max min, you may get a false reading, as the display refresh rate cannot keep up to show the actual minimum voltage reading.
A variety of consumer-grade batty testing tools are available in the $20 to 50 price range, where the two major types are digital and analog testing tools. Each tool has a specific user manual that needs to be followed, but I will outline how they work on a general level below.
An analog testing tool uses a built-in resistance element/heat coil to simulate a high load. The tool measures the voltage drop under load, indicating if the battery is good, weak, or bad, relative to its CCA-rating*.
* CCA is the amount of current the battery can put out at -18°C (0°F) for 30 seconds while maintaining a cut-off voltage of at least 7,2V. You should find the battery’s CCA rating on the battery label. Each battery comes with a specific CCA rating. The actual CCA capacity decreases as the battery gets older or damaged.
If the voltage recovers to its full potentil an only a couple of seconds after releasing the load switch, you know that the battery is bad. However, if the voltage recovers slow, yor battery is likely just run down and needs a proper charge.
The scale on a typical analof battery load tester.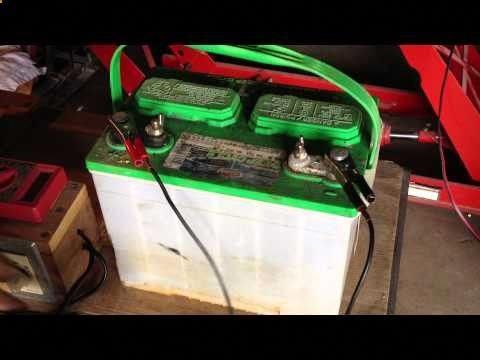
Please refer yor the user manual of your testing tool for test directions specific to your tool.
Digital consumer-grade battery analyzers are inexpensive, compatible with most battery types, and can offer a range of test features such as:
To load test the battery you need to set the tool to its CCA-mode. You will need to insert the battery’s CCA rating before you begin the test. You should find the rating stamped on the battery casing, or by looking up the battery model number online.
Head over to this post to learn more about what ATV battery numbers mean.
The test will indicate how many CCA the battery is capable of.
This AGM ATV battery gets a CCA reading well over it’s rated capacity of 320CCA, and should be in good health.
Based on the measured CCA, the test tool may also provide you with a useful capacity reading or state-of-health reading in %:
| State Of Health (SOH) in % | Battery status |
| 0% to 40% | The battery is damaged or too old for normal operation and should be replaced. |
| 40% to 60% | The battery is getting old or getting weak. Consider replacing it. |
| 60% to 80% | The battery is in normal working order. |
| 80% to 100% | The battery is in good to excellent working order. |
A digital test tool may also be able to test the battery’s internal resistance. Resistance is measured in milliohms (mΩ) and tells you how much restriction the electrons encounter as they travel through the internals of the battery. A lower value indicates less restriction.
This AGM ATV battery has an internal resistance of 6. 04 milliohms (mΩ).
The internal resistance of a modern ATV battery stays relatively flat throughout its service life and then increases as the battery starts to go bad. A high resistance reading indicates that the battery is getting close to the end of its life-span.
The internal resistance can vary as much as 5-10% from one batch of batteries to another. For the most accurate results, you need to measure the resistance of your specific battery when it is brand new as a reference for later testing.
A few years down the line, when you teat again and get a significantly higher reading, you know that the battery doesn’t have much time left.
Both Method 1 and 2 give you a relatively good indication of your battery’s health, but the accuracy of consumer-grade test tools are not always the best.
To get the most reliable results, you should have it tested with a professional load testing tool. A proper load test should draw a load that is half of the batteries rated cold-cranking amps for 10 seconds.
Most Battery suppliers have one and usually don’t charge to do a test. Disconnect the battery and bring it fully charged to be tested.
Several of the tests in this post are designed to indicate your battery’s level of sulfation. But what is sulfation, and why does it matter when testing an ATV or UTV battery?
Over-sulfation is the most common cause of premature battery failure. An undamaged battery with low levels of sulfation is healthy, while it gradually loses its capacity as levels of sulfation increase.
Therefore it can be helpful to have a general idea of what sulfation is and what it does to your battery:

 ”
”Electric ATVs are rapidly gaining popularity due to their economy and environmental friendliness. But many riders still do not know how to charge an ATV on a battery. Due to improper charging, the battery life is reduced or the battery quickly loses its capacity. Therefore, let's figure out how to charge a children's ATV and consider the key recommendations of experts.
There are two ways to recharge the ATV battery.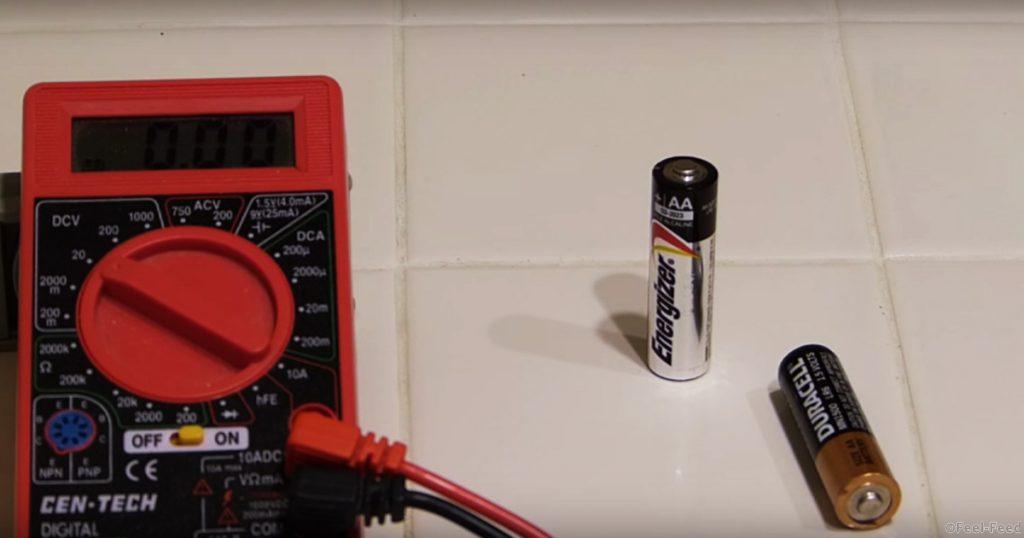 The first and easiest is to connect the charger to the appropriate connector. All electric cars and scooters are charged in a similar way, although not all quadrics have a similar socket.
If the ATV does not have a charging port, the rider will have to connect the battery directly to the charging station. To do this, you need:
It is important to note that lithium batteries have a charge control board. This means that after a full charge, the process stops. Although overcharging the battery is still not recommended.
Another important question many riders are wondering is how to charge an ATV battery with an in-car charger. Yes, such a procedure is possible, but you need to properly configure the charger. For recharging, you can only use devices with adjustable charging current and the ability to set its minimum level (0.5-0.7 A).
Important : The optimal current for charging the battery is 1/10 of the battery capacity (in Amps).
Each vehicle's user manual lists the optimum battery charging time. On average, this figure is 6-12 hours. The charging time depends on the generation of the battery, its capacity and the characteristics of the charger. Don't forget to charge the battery, though. If the battery has 30-40% capacity left, the recharging time should be reduced.
But what if you don't know how long to charge your ATV battery? In this case, you need to almost completely discharge the battery and charge it for 8 hours. After that, the battery should be installed on the quadric, and the charge level should be assessed. If the indicator shows 100%, next time you need to charge the battery for 6-7 hours. In this way, you can determine the optimal recharging time.
Also remember that overcharging is the main enemy of batteries. It is strongly not recommended to leave the battery connected to the network for 15-20 hours. This leads to a decrease in battery capacity and, accordingly, a decrease in the operating time of the quadric.
Knowing how long it takes to charge an ATV, you can make a schedule for recharging it. For example, the battery can be connected to the network in the evening or after each trip. You can also purchase a replacement battery, thereby increasing the riding time on the ATV.
The battery of any electrical equipment must be properly maintained. Violation of the recommendations may lead to a decrease in battery capacity or damage to it. To avoid such problems, it is recommended:
Separately, it is worth mentioning the "buildup" of the battery. Immediately after purchasing the equipment, you will need to fully charge and charge the ATV several times (2-3 times).
Most riders store their bikes before winter. And in order for the device to be ready for operation in the spring, it must be properly preserved. Preparing an electric quad bike for wintering is quite simple, you just need to find a warm and dry place to store the quad.
Another important conservation point is battery preparation. Before wintering you need:
Note : If you leave the quad battery in the cold, the battery will simply "leak" and stop working.
11/16/2020 7179
Hello Ivan.
Before answering this question, it should be noted that lead-acid batteries do not have "memory effect". Any special type procedures "Discharge to the end - fully charge" is not required at the first charge. Recharge the battery and send the child to ride.
Please note that the battery must be recharged at intervals of six months during storage. If this rule was violated by the manufacturer or seller of the electric vehicle prior to sale, the battery may already have partially lost its capacity.
And how to properly charge during operation:
1. Cycling battery life measured in cycles charge-discharge. If the battery is completely discharged, it "will last", approximately, 200 cycles. When discharged by 30% - the amount cycles increases by 5-6 times. Therefore, it is reasonable to charge battery after every day of use.
2. Be sure to fully charge the battery before winter storage. If the battery was discharged, due to self-discharge, by spring, it can completely fail.
Use the original charger or, if it is lost/failed, replace it with one designed specifically for lead-acid batteries of this voltage and capacity. Better if the memory is automatic. In this case, it will be able to determine that the battery is already fully charged and will automatically switch to maintenance mode (self-discharge compensation).
Children's motorcycles (as well as children's cars) typically use 6 volt batteries with capacities of 4.5 Ah, 7 Ah and 12 Ah. Suitable chargers for these batteries are shown in the table:
| Battery voltage and capacity | Battery name and photo (example) | Suitable charger from our range |
| 6 V 4.5 Ah | FIAMM FG 10451 | ROBITON LAC6-600 |
| 6 V 7-9 Ah | DELTA HR 6-7 | Leoch LC-2300 |
| 6 V 12 Ah | LEOCH DJW6-12 | East 220-6-2 |
Please note!
The chargers shown in the example are designed specifically for charging batteries, but are not chargers for a children's motorcycle or car. Almost every manufacturer of children's motorcycles and cars uses a connector that is convenient for him, the manufacturer. Very often they are unique and are not sold on the Russian market. The given chargers have either clamps for fastening to the battery terminals, or a mating part of the battery terminals of this type. They cannot be connected to a children's electric car. Accordingly, the battery for charging will have to be dismantled from the children's motorcycle and the charger connected to its terminals.
If it is necessary to replace the memory, you can determine the appropriate one from the data indicated on the battery itself: the front panel always indicates the charge voltage for cyclic use and the maximum charge current for that battery. Or you can navigate by this rule: the optimal charge current is 10-20% of the capacity. The maximum is 30%.
The charging time of the battery depends on the amperage of the charger. If it is 10-20% of the battery capacity, subject to the recommended charge voltage, a fully discharged battery should be charged in 10-12 hours. If the current is less, then the charge time increases inversely.
*****
If the given data did not help you to decide - call ( 8(495)197-78-47 ), write ( info@1000va.