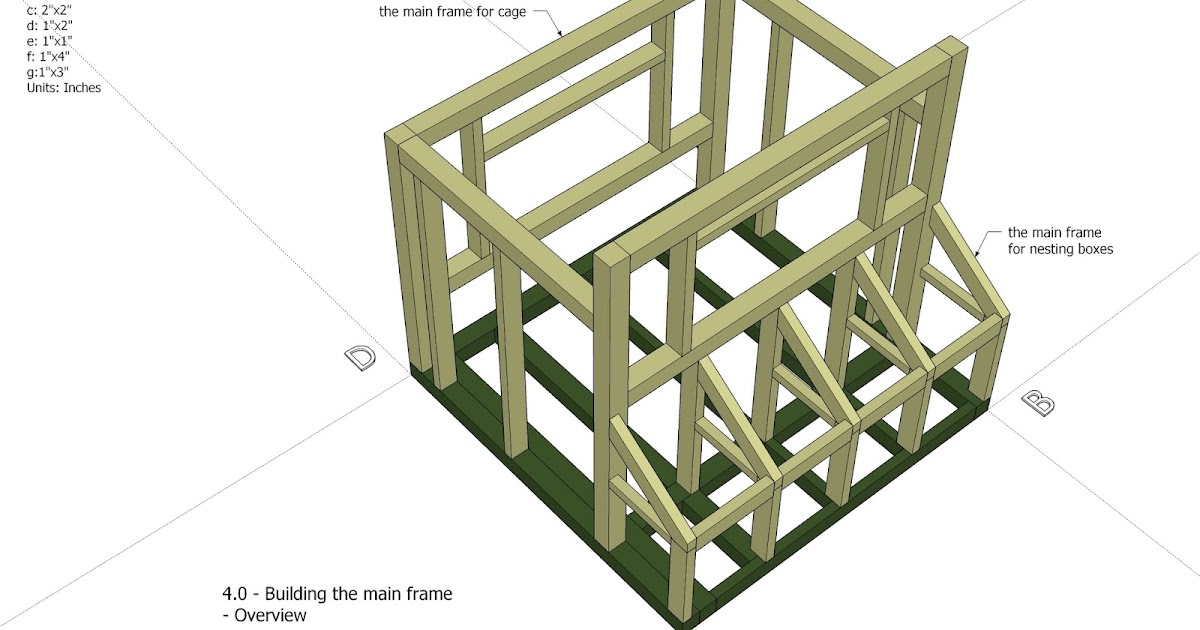
Two pieces of 40-by-20-by-3/4-inch plywood
Combination square
Variable speed drill
1/16-inch drill bit
3/8-inch countersink bit
Two pieces of 18-by-20-by-3/4-inch plywood
Wood glue
Phillips head screw tip
1 1/4-inch deck screws
One piece of 38 1/2-by-18-by-3/4-inch plywood
Small paintbrush
Framing square
Jigsaw
One piece of 40-by-19 1/2-by-3/4-inch plywood
Hinges
Handles
Latch
Building a dog box for your all terrain vehicle (ATV) is a project for the avid hunter who also is a do-it-yourselfer. Hunting dogs are a part of the hunter’s family so they want to be able to provide the best in boxes for them to ride safely on the back of their ATV. Dog boxes built for an ATV are not that different from those built for a truck; they are just smaller.
Place the two pieces of 40-by-20-by-3/4-inch plywood on a worktable. Set the blade of the combination square on 3/8 inch. Put the long leg of the head against the edge of the plywood, put a pencil on the end of the combination square blade and draw lines on the 20-inch sides and one 40-inch side of the two pieces.
Drill pilot holes on the lines with a 1/16-inch drill bit. Drill one about 1 inch from the ends of the lines and the others 4 inches apart. Drill countersink holes directly on the pilot holes about 3/8-inch deep with the countersink bit. These are the front and back of the dog box.
Put the 18-by-20-by-3/4-inch plywood on the worktable. Put the combination square against one 18-inch side as before and draw one line on each of the two pieces. Drill pilot holes followed by countersink holes as before. These are the sides of the box.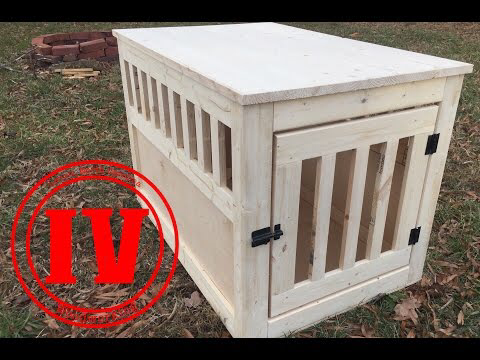
Apply glue to the 20-inch edges of the sides of the box. Set them between the front and back of the dog box. Secure them through the countersunk pilot holes with the deck screws. Turn the box on one long side.
Brush glue on the four edges of the 38 1/2-by-18-by-3/4-inch plywood with a small paintbrush. Set the piece inside the box from the sides with the pilot holes. Be certain it is even with the bottom edges of the sides, front and back. Secure it on three sides with the deck screws, turn the box over and secure it on the fourth side. Make this side the front of the box.
Measure from the right side of the box and make marks at 14 and 26 inches. Place the framing square on the marks and draw 20-inch lines on the front of the box. Mark the lines at 4 and 20 inches.
Lay the framing square parallel with the bottom of the box on the 4-inch marks. Draw a line from mark to mark. Repeat this on the 20-inch marks to complete the door cutout. Draw a small rectangle inside the lines for the door as a window in the door. Cut it out first with the jigsaw and then the cut out the door. Stand the dog box upright.
Cut holes in the sides of the box for venting. Set the 40-by-19 1/2-by-3/4-inch plywood on the worktable. Draw a line 3/8 inch from all four edges as you did with the other pieces. Drill pilot holes and countersink as before.
Apply glue to the top edges of the box and secure the top to it with the deck screws. Install hinges on the door according to manufacturer’s instructions. Do the same with the handles and latch.
Use deck screws because of the outdoor use of the dog box.
Cover the edges of the box with aluminum outside corner molding according to the manufacturer’s instructions. Clean up the excess glue immediately with a damp cloth.
Do not leave power tools within reach of children. Do not apply a finish to the dog box without proper ventilation.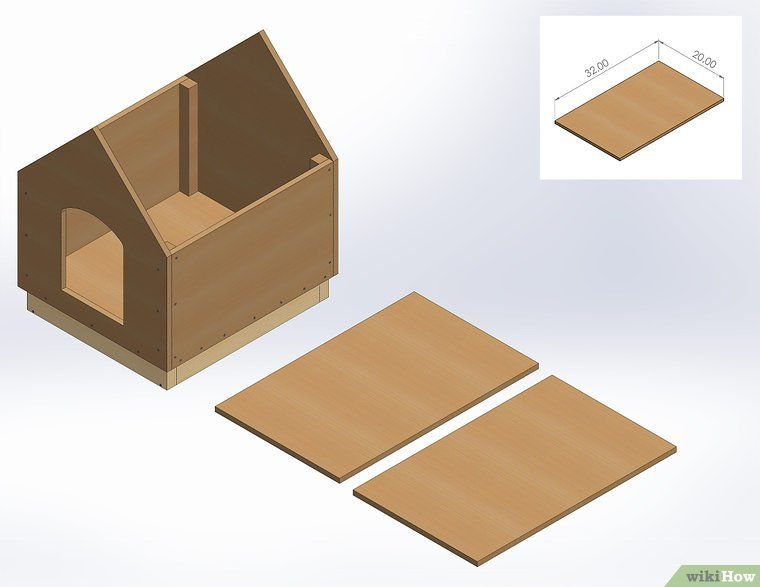
References
Photo Credits
Writer Bio
Michael Straessle has written professionally about the construction industry since 1988. He authored “What a Strange Little Man,” among other books, and his work has appeared in various online publications. Straessle earned a Bachelor of Arts from the University of Arkansas at Little Rock in professional/technical writing.
Photos.com/PhotoObjects.net/Getty Images
By: Michael Straessle
Updated September 26, 2017
Building a dog box for your all terrain vehicle (ATV) is a project for the avid hunter who also is a do-it-yourselfer. Hunting dogs are a part of the hunter’s family so they want to be able to provide the best in boxes for them to ride safely on the back of their ATV. Dog boxes built for an ATV are not that different from those built for a truck; they are just smaller.
Place the two pieces of 40-by-20-by-3/4-inch plywood on a worktable. Set the blade of the combination square on 3/8 inch. Put the long leg of the head against the edge of the plywood, put a pencil on the end of the combination square blade and draw lines on the 20-inch sides and one 40-inch side of the two pieces.
Drill pilot holes on the lines with a 1/16-inch drill bit. Drill one about 1 inch from the ends of the lines and the others 4 inches apart. Drill countersink holes directly on the pilot holes about 3/8-inch deep with the countersink bit. These are the front and back of the dog box.
Put the 18-by-20-by-3/4-inch plywood on the worktable. Put the combination square against one 18-inch side as before and draw one line on each of the two pieces. Drill pilot holes followed by countersink holes as before. These are the sides of the box.
Apply glue to the 20-inch edges of the sides of the box. Set them between the front and back of the dog box. Secure them through the countersunk pilot holes with the deck screws. Turn the box on one long side.
Brush glue on the four edges of the 38 1/2-by-18-by-3/4-inch plywood with a small paintbrush. Set the piece inside the box from the sides with the pilot holes. Be certain it is even with the bottom edges of the sides, front and back. Secure it on three sides with the deck screws, turn the box over and secure it on the fourth side. Make this side the front of the box.
Measure from the right side of the box and make marks at 14 and 26 inches. Place the framing square on the marks and draw 20-inch lines on the front of the box. Mark the lines at 4 and 20 inches.
Lay the framing square parallel with the bottom of the box on the 4-inch marks. Draw a line from mark to mark. Repeat this on the 20-inch marks to complete the door cutout. Draw a small rectangle inside the lines for the door as a window in the door. Cut it out first with the jigsaw and then the cut out the door.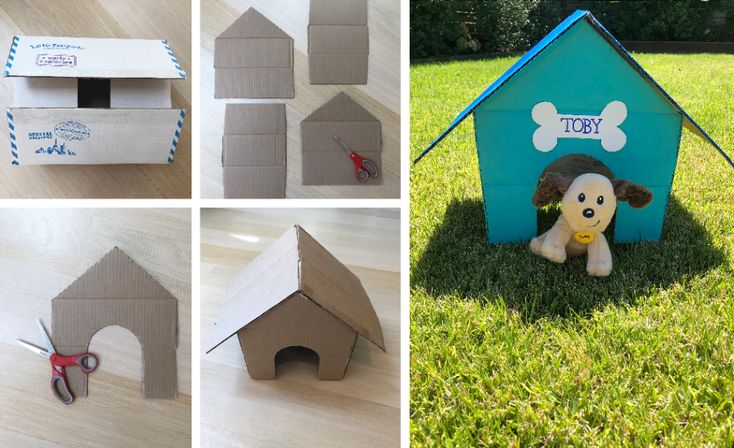 Stand the dog box upright.
Cut holes in the sides of the box for venting. Set the 40-by-19 1/2-by-3/4-inch plywood on the worktable. Draw a line 3/8 inch from all four edges as you did with the other pieces. Drill pilot holes and countersink as before.
Apply glue to the top edges of the box and secure the top to it with the deck screws. Install hinges on the door according to manufacturer’s instructions. Do the same with the handles and latch.
Use deck screws because of the outdoor use of the dog box.
Cover the edges of the box with aluminum outside corner molding according to the manufacturer’s instructions. Clean up the excess glue immediately with a damp cloth.
Do not leave power tools within reach of children. Do not apply a finish to the dog box without proper ventilation.
References
Writer Bio
Michael Straessle has written professionally about the construction industry since 1988.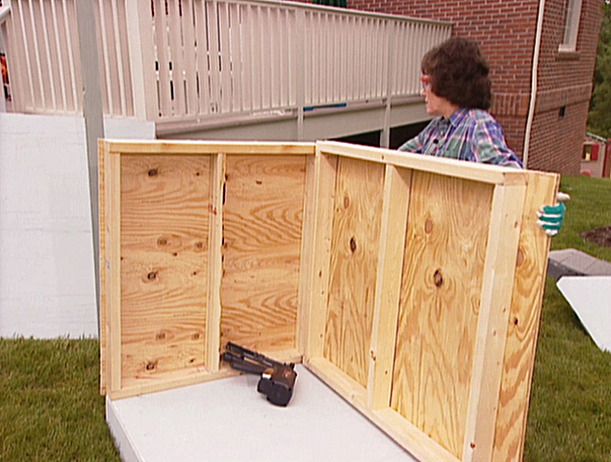 He authored “What a Strange Little Man,” among other books, and his work has appeared in various online publications. Straessle earned a Bachelor of Arts from the University of Arkansas at Little Rock in professional/technical writing.
If you decide to get a dog, a devoted friend and a reliable watchman for your home, then, first of all, you need to take care of a warm home for your pet. In this article, we will look at detailed instructions on how to make a warm capital booth for your dog.
First you need to decide on the size of the booth, which in turn depends on the size of the pet. The booth should not be large, because the dog will not be able to warm up well in a large kennel, the optimal size of the internal space of the booth should be such that the dog can turn around freely in the booth, the height of the booth is equal to the height of the dog with his head up.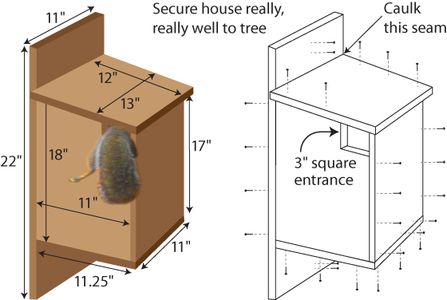
Optimal kennel size for some types of dogs.
What is the best material for making a dog house? Of course, wood is a natural material that does not contain harmful substances and retains heat well.
To make an insulated booth, you will need timber, boards and insulation. Foam or mineral wool can be used as insulation. You can use nails to fasten the boards, but self-tapping screws are more reliable.
Step-by-step production of a warm booth for a dog: drawings, diagram, photo.
Consider the process of making a booth step by step with drawings.
1.STEP. Let's make the base for the booth.
We saw off two bars 70 cm long and fix boards on them with self-tapping screws, the length of the boards is 90 cm. As a result, we get the base of the booth measuring 90 x 70 cm.
2.STEP. Niche under the heater.
We need a bar with a section of 50 x 50 mm. We saw it into bars, two bars of 90 cm and two of 60 cm each. We fasten the bars to the base.
3.STEP. Insulation lining.
Cut out the insulation and lay it tightly on the base. If you use mineral wool, then it must be wrapped on both sides with a vapor barrier, otherwise the wool will eventually draw moisture and lose its thermal insulation properties. Styrofoam and Styrofoam do not require a vapor barrier.
4. STEP. Booth floor.
We will need boards 90 cm long, we sheathe the insulation with boards, we fasten the boards with self-tapping screws to the timber.
5. STEP. Side walls of the booth.
Now we need to make two side walls, use boards 65 cm long and bars 40 cm. screw to the floor with screws, the distance between the walls is 70 cm.
6. STEP. Front and rear walls of the booth.
Let's make the front and back walls of the doghouse, using bars 40 cm long and boards 70 cm. In the front wall we make the entrance to the booth, the size of the hole should be sufficient for the dog to freely climb into it.
7. STEP. We fasten all the walls of the booth together with self-tapping screws.
8. STEP. We lay insulation on the walls of the booth (we do not forget about the vapor barrier for mineral wool).
9. STEP. We sheathe the walls of the booth with boards.
10. STEP. Booth roof. We fix the roof boards to the walls.
11. STEP. We fasten the bars under the insulation.
12. STEP. We install a heater.
13. STEP. We sheathe the ends of the roof of the booth with boards. Since the roof of our booth is shed, it is necessary to provide for a slight slope towards the back wall to drain water from the roof.
14. STEP. We sheathe roof insulation with boards.
Now you need to cover the roof with any covering material, you can use slate, roofing material, bituminous tiles or corrugated board .
Where is the best place to set up a dog house?
The kennel should be installed in the yard of the house in such a way that the dog has a good view of the yard and the entrance gate, but at the same time, during the scorching heat, the kennel should be in the shade of buildings, a fence or a tree.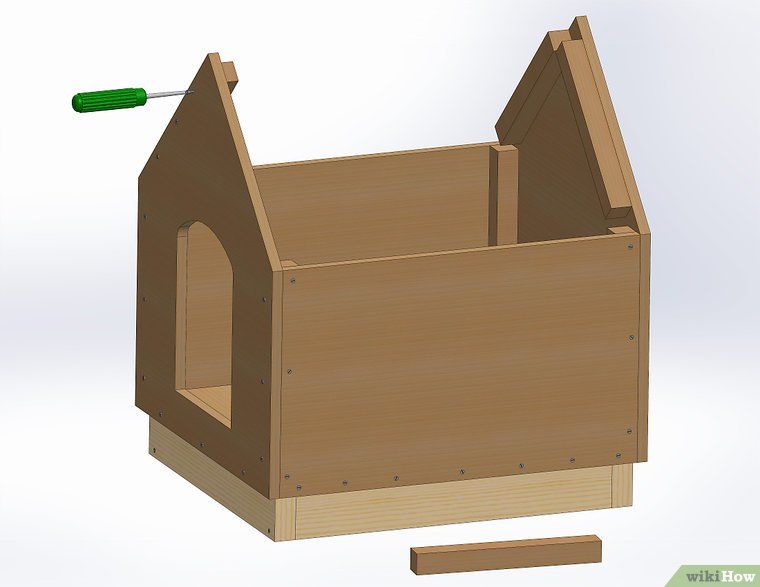 In winter, do not forget about the bedding for the dog, the booth should be half filled with hay or straw to make it easier for the dog to warm up.
I recommend watching an interesting video of making a dog house.
Drawing of a dog house with dimensions and photos. How to build a dog house, detailed instructions.
How to make a simple house for your pet? In this article, we will take a closer look at all the stages of making a dog house.
How to make a do-it-yourself dog house.
Materials needed to make the booth:
Tools:

Drawing of a dog house with dimensions.
Let's make a harness for the floor of the booth, we need 3 bars 115 cm long, and 2 bars 92 cm. We fasten the frame from the bars with self-tapping screws (100 mm) as shown in the figure.
Cut out a sheet of plywood 125 x 92 cm, fasten it to the frame with self-tapping screws (50 mm).
Let's make two side frames for the dog house, for each frame we need 2 bars of 125 cm, and 3 bars of 58 cm. We assemble the frames and fasten them to the floor of the house as shown in the drawings.
Now we will make a frame for the rear wall of the booth, the frame consists of 3 bars 58 cm long and 2 bars 115 cm long. We fix the frame with self-tapping screws to the floor and to the adjacent side frames.
In the same way, you need to assemble the front frame, in the front frame you need to provide a place for the entrance to the booth with a width of 38 cm. The figure shows the installation diagram of the front frame. All frames are attached to each other and to the lower frame with self-tapping screws.
Let's start making the roof for the dog house. This design uses a gable roof, for its manufacture it will be necessary to cut out from a bar, 8 stacks 76 cm long. We cut the lower edge of the rafters at an angle of 45 degrees, from the lower edge at a distance of 11 cm we make a cut for joining the rafters and the side frame of the booth. As a roof ridge, we use a beam 125 cm long.
We assemble the roof frame of the booth as shown in the diagram.
Let's start trimming the side frames. We cut out the walls for the booth from plywood with an electric jigsaw, carefully mark out in the front wall and cut out the inlet for our pet.
In the same way, we cut out two panels for the roof of the booth from plywood, the dimensions of each panel are 125 x 77 cm. We fasten the panels to the rafters with self-tapping screws.