Knowing how to change a tire is a necessary skill for all drivers. If you rely on a cell phone to save you in a roadside emergency, there’s always that chance you will forget to charge it, be out of range, or leave it at home. Flat tires can happen anywhere, and a cell phone is no substitute for knowing how to change a flat tire.
Thankfully, changing a tire isn’t all that hard! Just adhere to the following guidelines to be prepared in case you have a flat.
These items should have come with your vehicle:
Jack
Lug wrench
Fully inflated spare tire
Vehicle owner’s manual
If you have misplaced any of these items, or if your car did not come with these items, you should purchase new ones right away. And be sure you’re regularly inflating the spare tire to your vehicle manufacturer’s recommended PSI. You should check the spare’s air pressure every time you check your other tires.
Remember to check pressure every month and before long trips or carrying extra load.
Here are some items that don’t come with your vehicle but that you should stow in your trunk or glove box in case you have to change a flat tire:
Flashlight with working batteries
Rain poncho
Small cut of 2"x6” wood to secure the jack
Gloves
Wheel wedges
As soon as you realize you have a flat tire, do not abruptly brake or turn. Slowly reduce speed and scan your surroundings for a level, straight stretch of road with a wide shoulder. An empty parking lot would be an ideal place. Level ground is good because it will prevent your vehicle from rolling. Also, straight stretches of road are better than curves because oncoming traffic is more likely to see you.
Never attempt to change your tire on a narrow shoulder near oncoming traffic. Keep moving (slowly) until you find a safer spot. While driving on a flat risks ruining your rim, replacing a rim is better than being hit by an inattentive driver.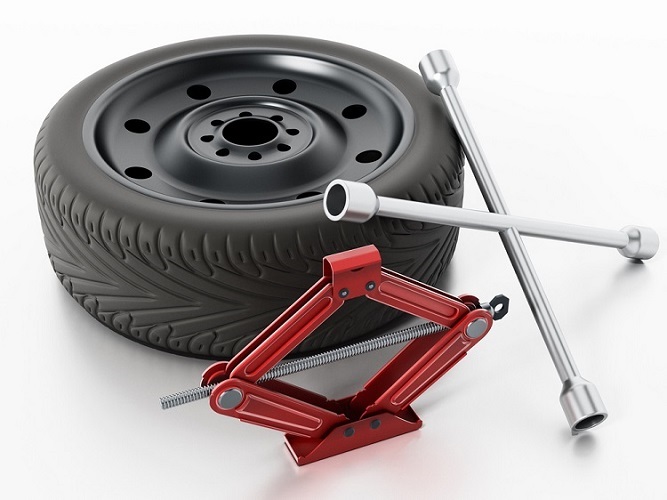
Make sure to consult your owner’s manual and review their specific steps on how to change a flat tire for your vehicle
Your hazard lights or “flashers” will help other drivers see you on the side of the road. To avoid an accident, turn them on as soon as you realize you need to pull over.
Once stopped, always use the parking brake when preparing to replace a flat tire. This will minimize the possibility of your vehicle rolling.
Wheel wedges go in front of or behind the tires to further ensure the vehicle doesn’t roll while you fix the flat tire. If you’re changing a rear tire, place these in front of the front tires. If your flat tire is at the front, put the wheel wedges behind the rear tires.
Bricks or large stones will work just as well as “real” wheel wedges. Just be sure they’re large enough to stop the car from rolling.
If your vehicle has a hubcap covering the lug nuts, it’s easier to remove the hubcap before lifting the vehicle with the jack. If your lug nuts are exposed, you can skip ahead to Step 6.
Use the flat end of your lug wrench to remove the hubcap. This will work for most vehicles, but some hubcaps need a different tool to come off. Consult your owner’s manual for proper hubcap or wheel cover removal procedures.
Using the lug wrench, turn the lug nuts counterclockwise until you break their resistance. You may have to use force, and that’s ok. Use your foot or all of your body weight if necessary.
Loosen the lug nuts about ¼ to ½ of a turn, but don’t remove them completely yet. Save that for when it’s time to remove your tire/wheel from the vehicle.
The right place for the jack is usually beneath the vehicle frame alongside the tire that’s flat. Many vehicle frames have molded plastic on the bottom with a cleared area of exposed metal specifically for the jack. To safely lift and avoid damage to the vehicle, follow the instructions for jack placement in your vehicle owner’s manual.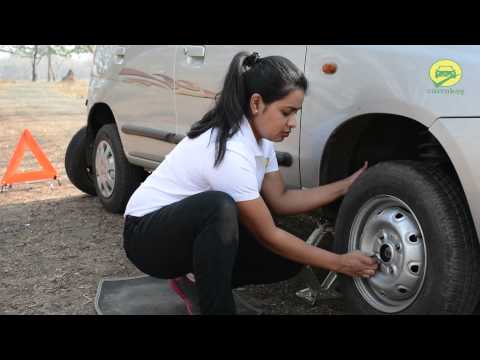
To prevent the jack from settling under the weight of your vehicle and coming off balance, place a small cut of 2x6” wood beneath it before attempting to raise your vehicle. This tactic is especially helpful on asphalt.
With the jack properly positioned, raise the vehicle until the flat tire is about six inches above the ground.
Never put any part of your body under the vehicle during or after raising the vehicle with the jack.
Now it’s time to remove the lug nuts all the way. Since you've already loosened them, you should be able to unscrew them mostly by hand.
Gripping the tire by the treads, pull it gently toward you until it’s completely free from the hub behind it. Set it on its side so that it doesn’t roll away.
Now place the spare on the hub by lining up the rim with the lug bolts. Push gently until the lug bolts show through the rim.
Put the lug nuts back on the lug bolts and tighten them all the way by hand. Once they are all on, check each one again, tightening as much as possible. You will tighten them with the wrench after lowering the vehicle to the ground.
Use the jack to lower the vehicle so that the spare tire is resting on the ground but the full weight of the vehicle isn’t fully on the tire. At this point, you should tighten the lug nuts with the wrench, turning clockwise, as much as you can. Push down on the lug wrench with the full weight of your body.
Bring the vehicle all the way to the ground and remove the jack. Give the lug nuts another pull with the wrench to ensure they’re as tight as possible.
If the hubcap you took from the flat tire will fit your spare, put it in place the same way you removed it initially.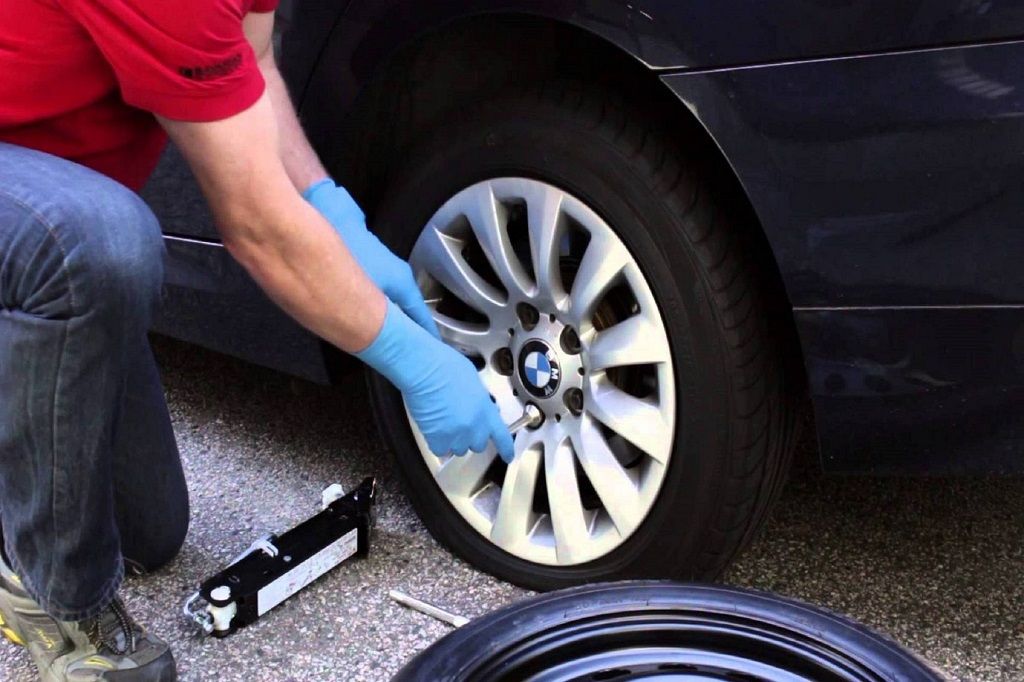 If it doesn’t fit, stow it away with the tire when you stow your equipment.
You have before you a jack, a lug wrench, wheel wedges, your flat tire, and possibly a hubcap. Don’t forget to put all of them in your vehicle before driving away.
You should check the tire pressure of the spare tire to make sure that it is safe to drive on. “T-Type” temporary spares, also called “mini-spares,” require 60 psi (420 kPa). If the tire needs pressure, drive (slowly) to a service station immediately.
Temporary spare tires aren’t made to drive long distances or at high speeds, so drive cautiously until you’re able to visit a tire technician. A professional should be able to determine whether your tire needs a repair or if it’s time to replace it.
Aside from taking your tire to a professional, the above procedure shouldn’t take more than 15 to 30 minutes to change a tire.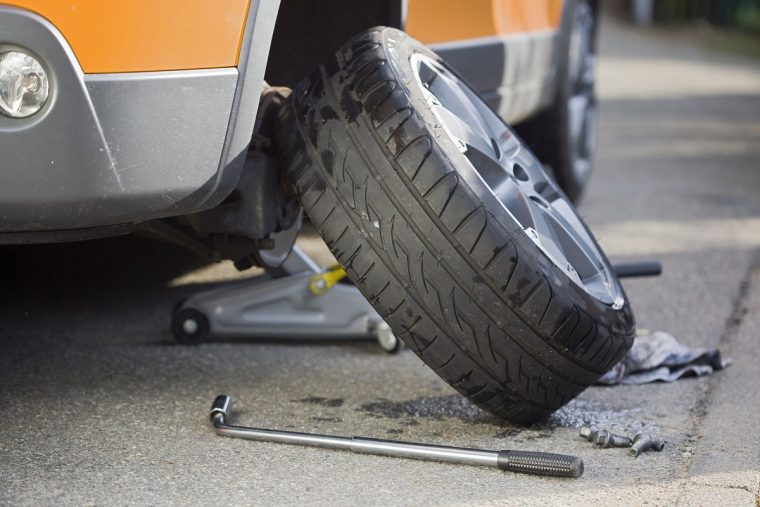 Just be sure you don’t leave out any steps.
It’s beneficial practice changing a tire in your garage or driveway to ensure you’re ready to handle this situation if it ever happens to you.
Knowing how to fix a flat tire is great, but regular tire maintenance is even more important. In addition to reviewing this guide regularly, remember to do the following:
Keep your tires properly inflated
Rotate your tires according to the manufacturer’s guidelines
Monitor for tread wear
All of these precautions will extend the life of your tires and reduce the likelihood of a flat. While there’s no way to prevent flat tires completely, proper care can improve performance and ensure your tires last as long as possible.
There’s never a good time for a flat. That’s why Bridgestone DriveGuard tires are masterfully engineered to keep you moving for up to 50 miles at speeds up to 50 MPH without disruption.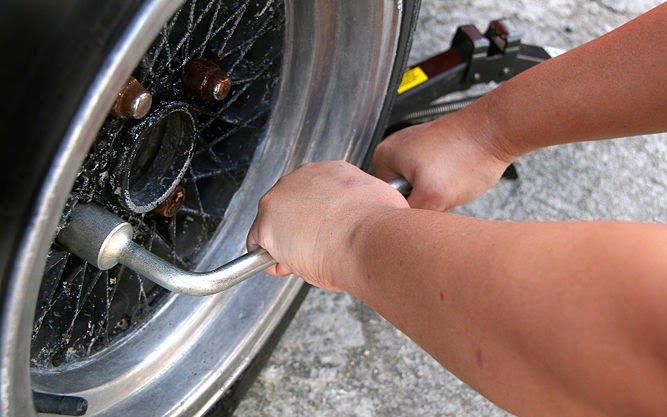
There’s never a good time for a flat. That’s why Bridgestone DriveGuard tires are masterfully engineered to keep you moving for up to 50 miles at speeds up to 50 MPH without disruption.
See Details Find Your Fit
Getting a flat tire while on the road is never convenient. If you’re not prepared it can derail your entire day, and even put you in danger. But if you have a spare tire onboard, chances are you can get back on the road within an hour, provided you know what you’re doing.
Road & Track spoke with Kevin Hines, senior technician at McLaren Philadelphia, to learn the correct way to change a flat tire on the side of the road quickly and safely. Hines is North America’s only factory-certified McLaren F1 technician, which means his day job is working on $20 million exotics. If anyone understands how to swap out a flat, it’s him.
Before reading any further, we suggest consulting your car’s owner’s manual for exact instructions on how to change a flat tire on your car. The manufacturer’s suggestions may differ from the instructions below.
How to Be Ready for a Flat TireAbove all, make sure you’re prepared for any flat tire that may occur. “Always make sure that your spare is inflated properly,” Hines said. “Any time you do an oil change you should also be checking the pressures in your tires, and that includes checking the pressure in your spare tire.”
Aaron Brown
Aaron Brown
The last thing you want to discover when swapping out a flat is that your spare tire is flat, too. Also make sure to periodically check the other equipment in your car needed to change a tire. “You’re usually going to have some sort of emergency jack, a lug wrench that’s specific to your vehicle, and whatever other little bits and bobs that are needed,” Hines says. Make sure the kit is complete and its contents free of damage before using it.
When you experience a blow-out on the highway, your first instinct might be to pull over immediately to get off the road and out of the way of other motorists. If your car is damaged to the point where it can’t move under its own power, that could be your only option. However, if you can limp your car to the nearest exit or safe area, it’s better to do that instead.
“It’s better to drive on a flat tire to a safe location then to risk changing a tire on the side of the road,” Hines tells us. “We’ve all seen it. At night, in the rain, on the side of the highway, somebody just way too close [to the road]. It’s not worth it.”
If your car is stuck on the side of the road and you don’t feel comfortable changing a tire while there are cars flying by, call a tow truck. For these situations, it’s important to keep reflective triangles or flares in your car.
If and when you find a safe area to park your vehicle for the tire swap, make sure you’re on flat, level ground. Ensure the material you’re parked on isn’t soft dirt, sand, snow, or grass. You want your emergency jack to have a solid base to safely lift your car in the air.
Once you’re parked in a safe location, it’s time to address your flat tire. Take all of the necessary tools out of your car and assess the situation. You’ll want to make sure the tire is the only part of your car that’s been damaged. Finding out a piece of plastic or a loose hose is hanging from the underside of your vehicle after you’ve replaced a flat is never a fun time.
Before you lift the car into the air, you’ll want to make sure it can’t roll forward or backward. Engage the emergency brake. If your car has a manual transmission, place it in first gear (with the ignition off, obviously). If your car has an automatic transmission, place it in park. You’ll also want to chock the wheel farthest from the flat corner with a solid object as a backup.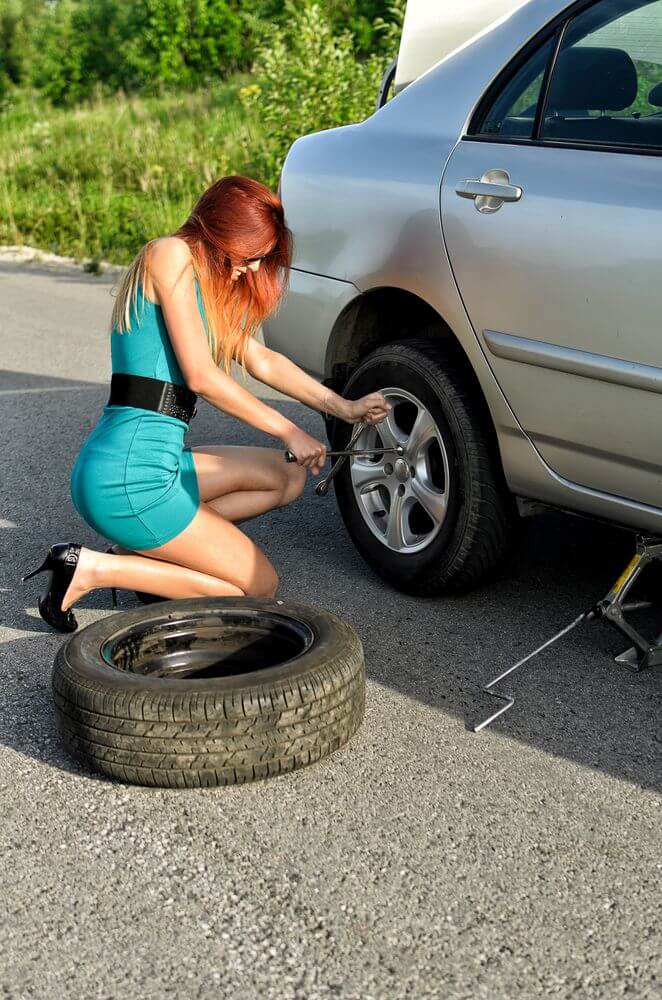
Aaron Brown
Next, before you lift the car in the air, break the lugnuts loose on the wheel with the flat tire using your vehicle’s supplied lug wrench. If you do this after you’ve used the jack, you won’t have the leverage necessary to crack the nuts loose.
Once this is done, you can use the jack to lift the car into the air. These jacks are safe—Hines notes they wouldn’t be put in the car if they weren’t—but they aren’t the highest quality. That’s why you should make sure only to lift the car from its designated jack points, which can be found in your owner’s manual. Otherwise, you could find yourself in an unsafe situation that could damage your car or put you in physical danger.
Once the car is in the air, place your spare tire underneath the car next to the jack. It’ll act as an extra layer of safety in case the jack collapses while you’re removing the wheel with the flat tire. Then use your lug wrench to fully remove the nuts. After that, pop off the wheel, then slap the spare tire on, placing the wheel with the flat next to the jack where the spare used to be; safety, again.
Aaron Brown
Tighten the lug nuts as much as you can with the spare in place, then slowly lower the car back onto the ground. Once you’re finished with the jack, go back to the lug nuts and snug them up. Throw everything back in your car. If you’ve done everything right, your car should be driveable again. We suggest driving a few miles and then checking the lugnuts again to ensure none of them have come loose.
Make sure to check your owner’s manual for instructions on how to drive your car with a spare in place. Some cars have space-savers with a factory-suggested speed rating, while others are full-size tires that can be used normally. Driving with a space-saver equipped for long periods of time could cause uneven wear on your tires or even put extra stress on your differential, if the space saver is on a driven wheel.
Brian Silvestro Road & Track staff writer with a taste for high-mileage, rusted-out projects and amateur endurance racing.
Photo https://www.roadandtrack.com
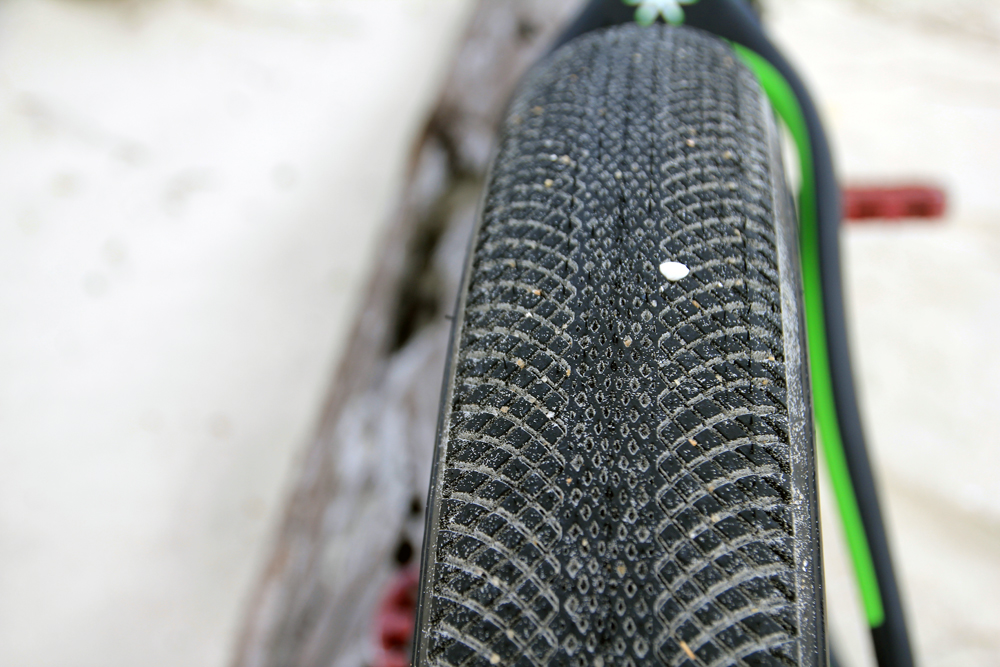
and the specialist in tire fitting did not find visible punctures, cuts or other damage to the rubber. What could be the reason for the depressurization of the wheel in this case, and how to determine it, the AvtoVzglyad portal figured out.
Ivan Flyagin
The vast majority of modern cars are equipped with tubeless tires, which allow maintaining pressure in the wheel for some time with a slight puncture. That is why, unlike tires with a chamber, which, if damaged, can instantly go down or even burst at high speed, such rubber is considered the safest.
Most often, tires deflate due to a puncture or side cut, but sometimes the driver does not find visual damage on them, and in order to determine the cause of depressurization, he turns to the tire shop.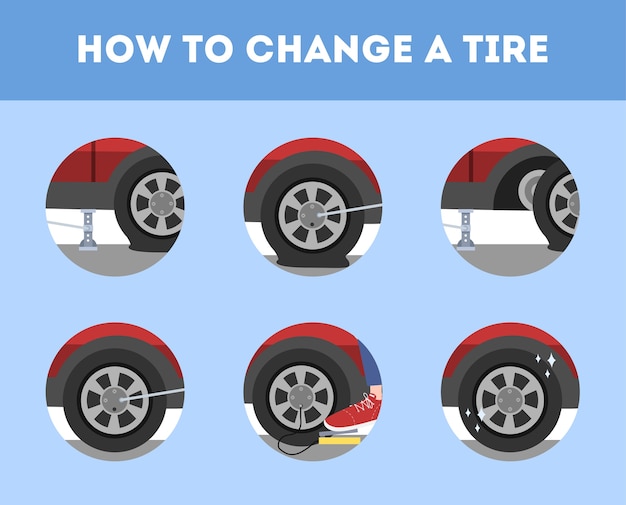 Even if it happens on a trip, far from home in an unfamiliar area, it is still better to replace a flat tire and not hesitate to diagnose and repair it. The use of various tire sealants in this case will give a temporary effect. But, first of all, it is necessary to establish the cause of tire depressurization.
What does the specialist do in this case? To begin with, he usually pumps the wheel 1-1.5 atmospheres and tries to catch by ear where the air comes out. If there is no result, then most likely, he will moisten the surface of the tire with plenty of soapy water and determine the location of the damage by the emerging air bubbles.
But even this sometimes does not help, and then the wheelmaker will dip the entire wheel into a tank of water. Alas, even in this case, there may be no bubbles, since it happens that the removed wheel holds air, and if you install it on the car, it lets it through. This is mainly due to an object stuck in it - a self-tapping screw, a nail, a piece of wire.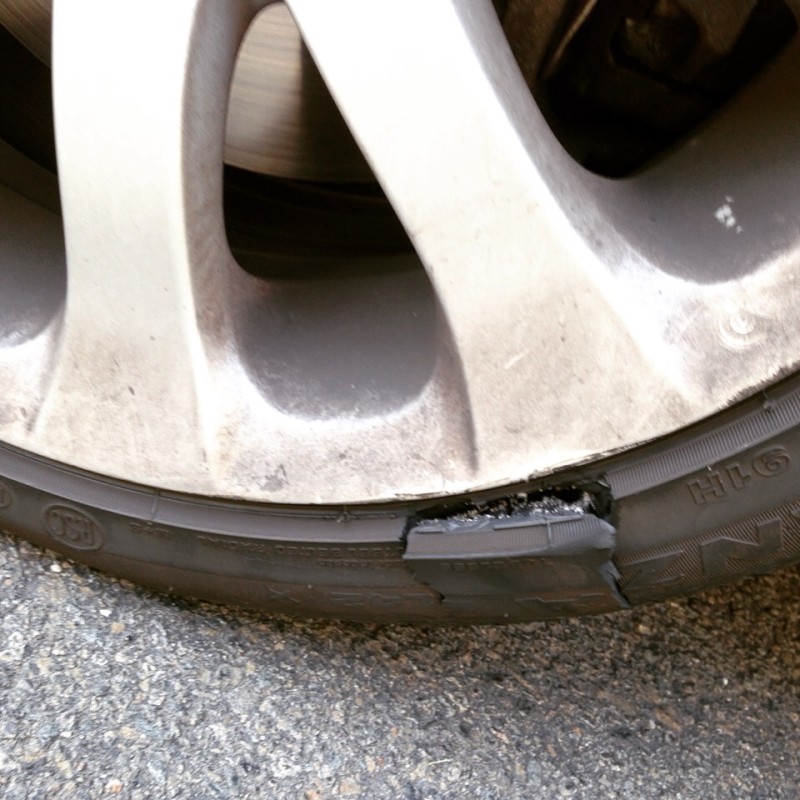 One effective way to solve the problem in such a situation is to disassemble the wheel and run a rag over the inside of the tire. If the rubber caught some sharp object, then it will definitely stick out from the inside, and the rag will catch on to it anyway.
If the mechanic has not been able to find the damage to the rubber, then the wheel can be flat only in two cases - due to a disc failure, or due to depressurization of the spool (nipple). In the first case, the tire does not fit tightly enough to the damaged disc due to its deformation. To do this, it is enough to fly at high speed into a deep hole or a steep bump. If it is still maintainable, then the situation will be corrected by rolling it on special equipment, which will restore its geometry.
The price of the issue depends on the diameter of the disc and its type - cast or stamped. In Moscow, this is a maximum of 2,500. Sometimes the rubber moves away from the disk due to its corrosion in the places where the tire fits - in this case it is better to replace it. If it's a penny spool, then we are talking about a less expensive problem, which is solved by replacing this inexpensive part.
132766
How did the domestic market manage to achieve such success
2984
How the domestic market managed to achieve such successes
,2984
Subscribe to the Autovzglyans channel:
Buildings, Road safety, Road safety, safety, safety of road wheels, technology, repair, spare parts, components, accessories, tyres, disks, tyres, maintenance, tire service
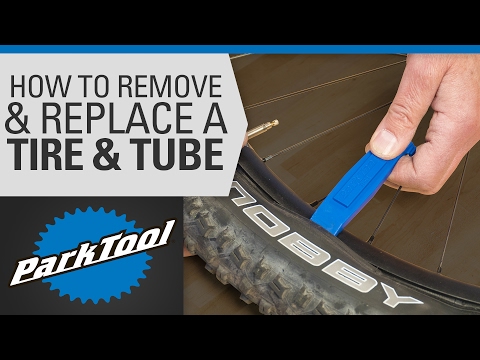
To change a wheel, you need a jack, a wheel wrench, a spare tire with an inflated tire, gloves, an old mat, a couple of wooden blocks. It’s good if there is a cutter or a sharp knife, a flat-blade screwdriver, a car manual.
Apply hand brake, engage first gear or, for vehicles with automatic transmission, engage P mode. To prevent the car from rolling, install wooden supports under the wheels - with one support the wheel opposite to the broken one, with the second support the wheel that is located diagonally from the broken one. Put on gloves, pull out the spare tire, jack and "balloon" wrench - a socket wrench for attaching nuts. Manufacturers place the tool in the luggage compartment under the floor covering. A more accurate location of the jack, wrench and other tools will tell the car manual. Place a rug next to the machine on which you can kneel.
If the drive has a cover cap, pry it off with a flathead screwdriver. Alloy wheels may have a decorative wheel bolt cap, remove it.
Use a wheelbrace to loosen each bolt on the affected wheel about half a turn. The bolt heads can be custom-sized so that they cannot be unscrewed with a standard wrench - protection against theft. In the shelf with the tool of the car there should be a "secret" put on the "balloon". With it, you can easily unscrew the wheel bolts.
Set the jack head to the point of support as close as possible to the affected wheel. You need to support the steel part of the body with a jack. If you prop up a part of the body made of plastic, the plastic will burst. As a general rule, the safest place to jack up is the inner lower part of the car body between the front and rear wheels. Place the spare tire under the vehicle next to the wheel that needs replacing, but away from the jack. The spare tire will insure the car if the jack slips and the car starts to fall rapidly. Jack up the machine until the wheel is 25-50 mm off the ground. The jack must be placed on a flat, firm surface. If you are changing a wheel while standing knee-deep in snow or on slippery ground, place a board under the jack to support it. Failure to do so could result in the jack slipping on slippery surfaces or sinking into the snow.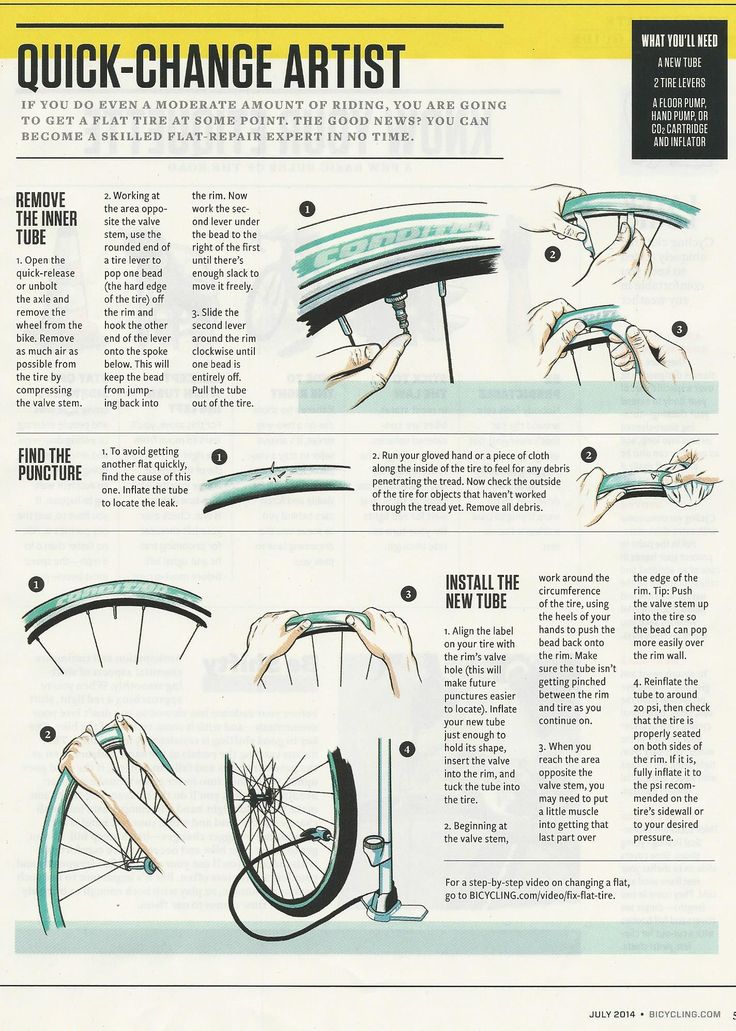 Raise the car on a jack, unscrew the bolts, and remove the wheel. Put the spare tire on the wheel hub of the car, and put the damaged one under the car body.
If the wheel is heavy, put it on your foot to maneuver it into position.
Install the wheel bolts in their socket first by threading them in and then tightening them so that they hold the wheel firmly, but not completely. You need to tighten the nuts not in turn, but crosswise. Remove the safety wheel from under the car, lower the car, remove the jack. When the machine is already on the ground and the jack is removed, tighten the wheel bolts to the stop, alternating tightening also crosswise, and not alternately. Check the air pressure in all 4 tires with a pressure gauge or ask them to do this at the first available service station, gas station. The tire pressure warning label is located on the inside of the driver's door. A flat tire wears out faster, with it the car will drive to the side, if it gets into a hole, it can break and lead to an accident.