I know why you’re here.
You’re tired of replacing fuel filters, cleaning your carb, or you’re putting a neglected bike back on the road. You’re searching for the solution. I know this, of course, because I learned how to do this moons ago because I was in a pickle just like you. I had a a fuel tank that was deteriorating from the inside out, and it was a problem for my tank, my fuel filter, my carb, and my engine. Your service manual probably won’t tell you much about how to deal with a rusted fuel tank (“Remove and replace,” I’m sure, if it even mentions such a thing), but given how expensive and/or unobtainable tanks can be (and how costly that colorful stuff on the outside of ‘em usually is!), you’re doing the right thing by rejuvenating yours.
So as a motorcyclist who has rescued a tank or two throughout my career, allow me to give you some things to think about, a process, and a few photos that you may find useful. You'll probably want to read through the whole thing before you get started.
How to clean a fuel tank
- Plan your work
- Assess commercial options
- Prepare the tank
- Add chemical and mechanical descaler
- Agitate (Shake it!)
- Flush and neutralize
- Seal (optional)
Every tank differs in terms of its level of degradation. I’ve seen some tanks with light surface rust and a concerned owner, and I’ve also seen (and owned!) some fuel vessels that had more barnacles and scale than the hull of the Queen Mary. The course of action one would take may differ wildly in those scenarios — or they may be exactly the same.
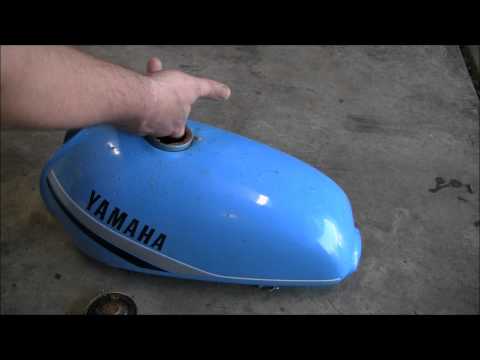
The object of my labor is this tank from a 1964 Yamaha YG1 belonging to Johnny Greaser, our New Guy's brother. Chrome! Neat! Photo by Lemmy.
First, removal and replacement is sumpin’ to think about. I mention this because this is a very viable option nowadays, especially with so many online avenues for replacement. Simply spending a hundred or two hundred bucks on a brand-new aftermarket tank that could just essentially bolt up and function correctly once again may be the most prudent course of action. Also consider used tanks that may be in better shape than your own. And if your bike’s not too old, heck, a dealer might have a new one sitting on a shelf somewhere.
Old fatbobs tend to stay in service for a while simply because they were built to last. They ain't light, but to get a set to rust through you almost have to drop 'em in the ocean for a few decades. Generally, the newer a bike is, the thinner the sheet metal tends to be in the interest of saving weight — and forming more complicated tank shapes. Photo by Lemmy.
Consider, too, the tank’s construction. Old Harley-Davidson fatbob tanks, for instance, have excellent survival rates simply due to the insanely thick steel used in their construction. Generally, though, newer bikes have tanks that are made of lighter gauge metal. If your tank is made of thin steel and the rust and scaling within is heavy, rectifying the problem will be more difficult and time-consuming. If your tank has rusted through in any areas, that too may be an indicator that the tank is beyond saving, depending on your time and finances budgeted to the task.
Obviously, rarity comes into play; a tank of a given condition that may be considered refuse for a high-production bike may be the holy grail for one of lower production. Factoring into this is also the outside of the tank: Original paint certainly helps an original bike retain value. A motorcycle tank still in its original livery may very well be worth putting some effort into simply because of the value that component brings to the whole bike. Similarly, even a repaint that cannot be easily reproduced to match other items on the motorcycle may be costly to duplicate.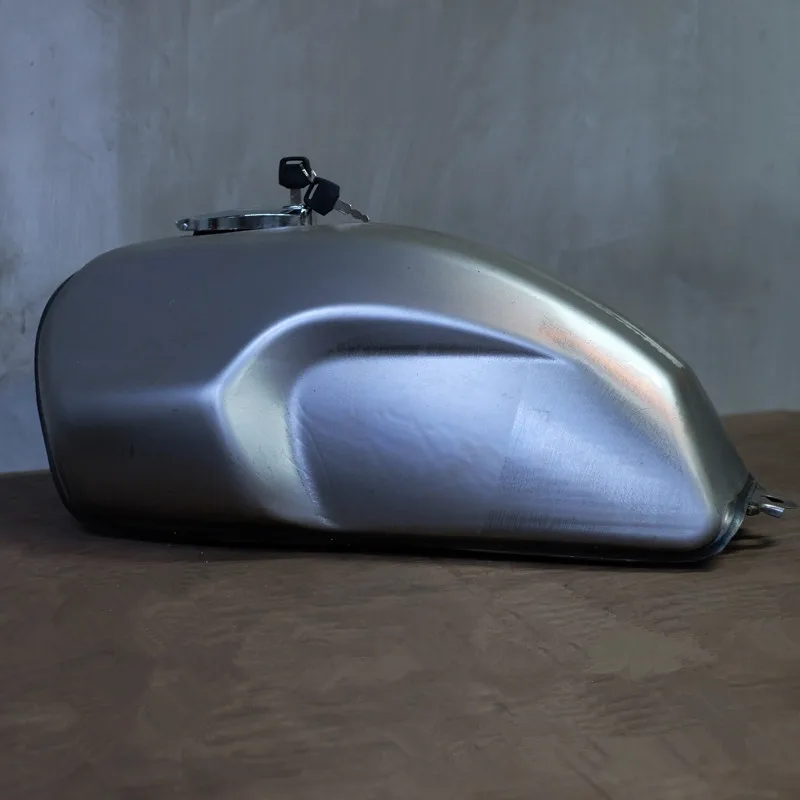
Once you’ve determined that a particular tank project is worth your time, money, and effort, it’s time to quantify the damage. A flashlight, mirror, cell phone, and bore scope may all come in handy at this time. Mild rusting or scale issues are usually not too complicated to deal with. Heavy pitting, pinholes, and/or missing metal will generally require both metal fabrication and body work to remediate. We’ll assume in this article that the structural integrity of your tank is uncompromised, but if it is, further surgery may be required — up to and including cutting open the tank for further inspection and repair.
Here's what we start with. This is definitely not the worst I have seen, but make no mistake, this tank needed help a long time ago. Photo by Lemmy.
Johnny Greaser’s YG1 tank you see here had about 50 years of neglect and scale for me to contend with. It was bad. Real bad. Not rotted through, but definitely one of the more problematic tanks I’ve wrestled with.
Most fuel tanks require a two-pronged fork of treatment. The first prong deals with removing the heaviest rust deposits, and the second involves rejuvenating the finish, possibly in preparation for the installation of a tank sealer. It has been my experience that heavy deposit removal is best handled mechanically, and finish restoration is usually tackled chemically — though that’s not always the case. (If you have your own methods, please feel free to add them!)
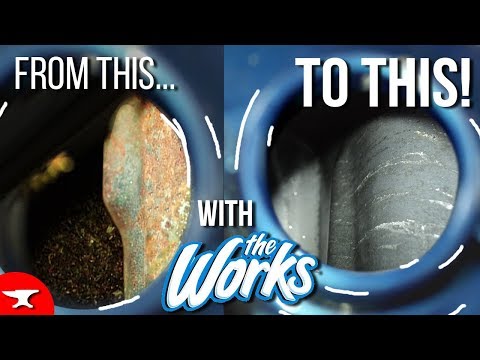
I shoved a borescope into the tank to see the extent of the rust. This was about average, though there were a few spots with some thick scaling and deposits. Photo by Lemmy.
For the mechanical rust removal, I’ll normally choose an abrasive element, something that can be put inside the tank to help strip the scale manually. Nuts and bolts are a popular agitator, and I know some people who use plain ol’ gravel. I’ve used BBs with success before, and often use those in tanks that have crevices where something larger may not reach, or become lodged. Because they’re round, they’re not very likely to get caught in a tank that may have very pronounced “lobes” with sharply tapering walls. I’ll tell you my secret weapon a little later on.
And when it comes to the chemical aspect of things, generally an acid will help clear the rust away through etching action. I like to start with a mild acid (white vinegar), and work my way up to something stronger if necessary.
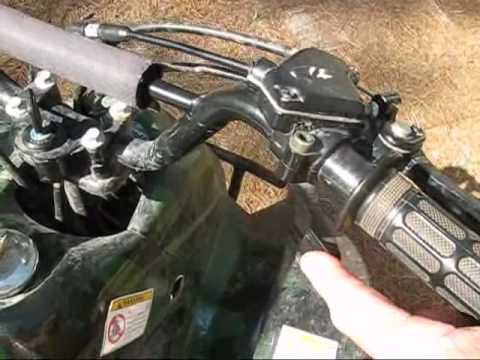
Remove the tank and empty it of fuel first, of course. At a minimum, you’ll want to seal the holes in the tank. Most tanks will have a filler cap and a petcock outlet, but others may have crossover tubes, like dual-tank Harleys and dirt bikes with two big lobes that overhang the engine.
Plugs, stoppers, vacuum caps, threaded fittings — I have all this stuff, but that's because I've done this a time or two. Order the right equipment to do the job correctly, and your results will be indicative of your diligence. Photo by Lemmy.
You have a few options here. I’ve had good luck with silicone plugs and rubber or vinyl vacuum caps for small holes and bungs. If you are working on a modern motorcycle, you may find you need to pull your fuel pump plate out. Those can be tricky to seal up because they’re so dang big! A gasket teamed up with a block-off plate you purchase or fabricate is usually the order of the day here. If you’re using vinegar, you can seal the filler with the cap, with the understanding that you may need to buy a fresh cap or replacement seal for it after the cleaning.
Holy moly? The best way to deal with a hole like this is probably to make a block-off plate, acquire a gasket, and install it just like you would the fuel pump. Photo by Lemmy.
Leave the fuel filler open for now.
You need to do this in a well ventilated area, and as the acid can splash about, you don’t want to be near anything it could damage.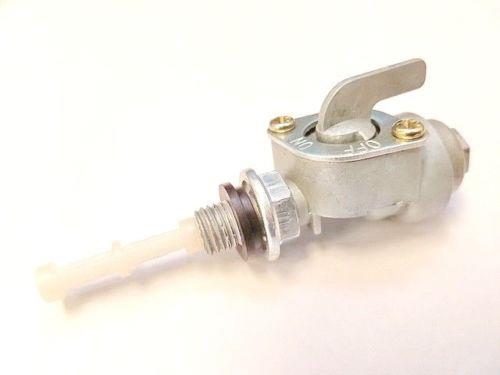 Even if you’re using comparatively gentle acid like vinegar, you don’t want the acidic fumes building up indoors. They may not be that harmful, the smell can be objectionable, and having acid vapor near items that you don’t need stripped is probably a bad idea.
Personally, I like to set my tanks up with a catch basin underneath them containing all possible leak points. That means a plug or cap failing and leaking is just a day lost of soak time. Vinegar can be recaptured, and if the tank is elevated above the basin (rather than in it), the paint is never put in harm’s way.
If you’re using something stronger, you’ll be working very quickly, so don’t stress this part too much.
Before you start loading your agitating substance into your fuel tank, you may want to place a few test pieces in a glass or ceramic bowl and make sure your acid does not have an adverse reaction. The odds are low if you're using vinegar, but you don’t want to ruin anything, make a mess of your tank innards, or poison yourself. And if you're using something stronger, it's a possibility the item(s) may react violently and turn to dust.
I’d recommend not using a stronger acid than vinegar for a few reasons. It’s possible to eat directly through the metal, and it’s also really easy to damage paint with such a strong acid. Disposal requires extreme dilution, and the risk of personal injury is quite high. It’s an effort I would consider last-ditch. The highly dilute acetic acid dissolved in household vinegar is not particularly fast-acting, but that is the point. It removes rust and metal alike rather gently.
Petcocks are often made of pot metal. I'd remove them even if using vinegar, but this is a must if you are using something stronger. If you don't, they might disintegrate by the time your tank's innards are sparkling. Photo by Lemmy.
If you do use something stronger, you may want to think about protecting the paint, and you definitely want to protect yourself. Have a garden hose nearby, and a base to neutralize any acid should you see it on the paint or other delicate item… or you! With all those warnings in place, on some tanks, something like vinegar ain’t gonna cut it.
Note that with something fairly weak like vinegar, you may need to let your tank sit for some time; a few days is not uncommon. Top it up and let it chill out. If you’re using something like phosphoric or muriatic acid, it’s a different story: you’ll want to start churning the brew through the tank as soon as you get the agitator in. Those work much faster than vinegar and will begin etching the tank almost immediately.
After you’re convinced your chosen mechanical abrasive is somewhat inert in your chosen acid, add your sheet metal screws, hardware, or BBs. Use some common sense here. Enormous bolts are likely to dent a tank. Smaller is better, to a point.
Here's a handful of hardware plucked from the bin to de-scale this tank. (My poor kid got stuck sorting the nuts from the bolts when I was done!) Photo by Lemmy.
You’re not trying to pack the tank full. Instead, you want a handful or two to knock off the rust and fling your acid about the tank into nooks, crannies, and crevices. If you’re particularly paranoid, you can count the items you’re using so you can take a count when you empty them back out. Oh, and remember that secret I told you about before? It’s a length of chain. Use that, and you don’t have to worry about keeping count of your rust looseners!
Now cover it up.
Like a Polaroid picture, for those readers old enough to remember both the song I am referencing and the actual act of shaking a Polaroid snap. I use my arms. I got two of ‘em, so I pick the tank up and shake until I run out of breath, open the filler up, and see how things look. I repeat this process whenever the urge strikes me (a few times a day, perhaps?) until I see bright bare metal under that filler cap.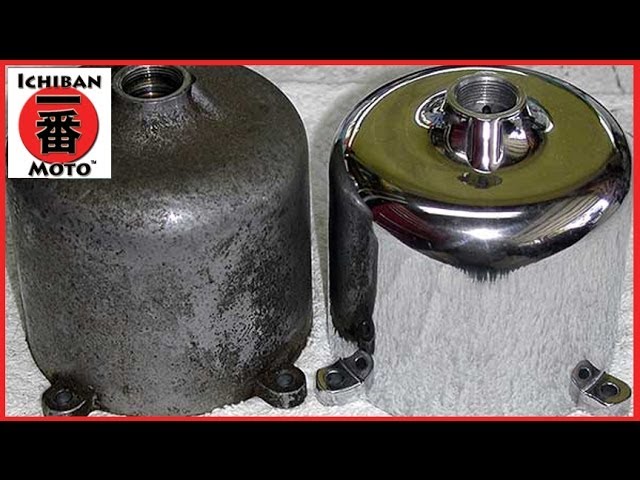
After I give it a good shakin’, then set the tank on its receptacle, and go into the shop and sip beer. Note: do not leave your tank outside if it is freezing outside, or you risk rupturing it.
You can try other methods of agitation. I knew of a fellow who’d wrap the whole affair in heavy moving blankets, duct tape them in place, and stick ‘em in an old clothes dryer with no heat for a while. I also heard of a guy who’d jack up the rear of his riding mower and use bungee straps to attach the tank to the rear wheel, then pop it into gear to slowly roll the tank ‘round and ‘round. I’m not telling you do to that (I never have), but I can understand why someone might try it. It probably works fine if you use your noodle.
Repeat until you’re satisfied with the cleanliness level of the tank. Depending on the level of scale and rust in your tank, this process may take as long as a few weeks. Greaser’s tank you’ll see in the photos sat for eight days, and probably could have gone longer with no ill effect.
Since it’s highly likely you’ll be doing this on a different day, before you go to flush, put a five-gallon pot of water on a stove or hotplate in the shop and get it hot. It doesn’t need to be boiling, but it does need to be uncomfortably hot to the touch. We’ll get back to that in a bit.
Once you’re done and everything looks bright and shiny clean, remove your plugs/caps/filler cap and dump your acid into that waiting bucket you had (that won’t be damaged by the acid!). Empty the mechanical scrubber you used (the nuts and bolts) and get that garden hose flowing. You want to get all the acid out, of course. Pick it up, shake it, get that water all around, even with the hose hanging out of it. Prepare to get wet.
Here you can see our tank prepped correctly, with all ports on the bottom side of the tank securely blocked off. Photo by Lemmy.
Finally, plug the tank once more and drop some dish soap in there to neutralize the acid. Then add the hot water you pulled off the hotplate. The idea here is to neutralize any vinegar left with the dish soap. You’re using hot water because it will quickly transfer heat into the metal of the tank. Once you drain it all out, the resultant heat will help to drive moisture off quickly.
Strip off all the items you used to seal the tank and empty it for the final time.
Get air flowing through the tank. The best thing I have found for this is a heat gun or hair dryer. Be careful! Heat guns can get hot enough to locally damage paint. Use low heat, keep the gun moving, and use your fingers to feel parts of the tank to make sure nothing is getting too hot. If you’re doing this on your winter project, make a little stand and go set it on your woodstove.
You may see rust quickly reappear if you don’t work quickly and/or the moisture content in the air is high enough. This is known as “flash rust,” and we are trying to avoid it, which is why it’s important to work reasonably quickly at this stage.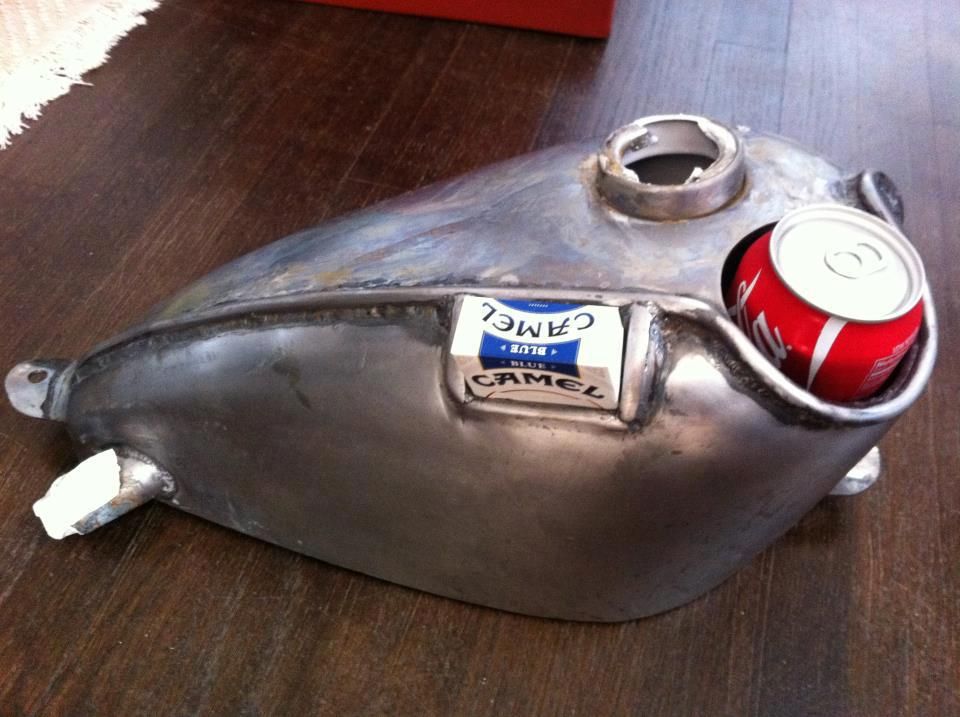 A little is OK; don’t make yourself crazy. Flash rust is usually fine enough and collects in such a thin layer that a fuel filter will catch it — and what it misses will probably run through your carb with no problems.
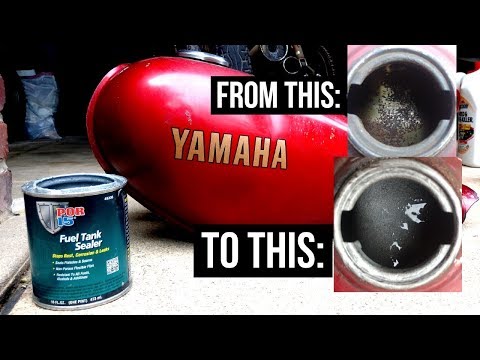
Not too bad, if I do say so myself. Photo by Lemmy.
Some people like commercial tank sealers. Kreem, Redkote, and Caswell come to mind as products that have enjoyed a good reputation over the years. Me? I hate ‘em, and will only use them in super-specific scenarios, like when a replacement item cannot be sourced or made reasonably. I’ve had too many go bad and soft and then wind up clogging my carb(s). In my eyes, a tank that needs sealer needs replacement. There are plenty of people who will disagree with me, and that’s OK: there’s more than one way to skin a cat. If you want to use one, now is the time.
If not, I would recommend sealing up the metal a different way: with a fuel-soluble sealer. If you are going to reinstall the tank immediately, toss a little kerosene in there, seal it back up, and swish it around, coating the tank’s innards completely. That will prevent the formation of that flash rust we talked about. If you are building a bike and the tank is likely to sit on the shelf for a bit, I’d recommend something a touch thicker, like some motor oil, or nice, tacky two-stroke oil.
I have an admission. Greaser’s YG1 tank here is actually the first tank I’ve ever cleaned using vinegar. (I have cleaned many other steel items this way, but this is the first fuel tank I’ve tackled in this fashion.)
Over the years, I’ve actually used much stronger acids to clean tanks. Phosphoric is said to work well, and my go-to has always been muriatic acid cut 50/50 with water. (You can get this at your local hardware store.) This stuff is nasty, but it works, very, very quickly. It etches in almost no time flat. Fifteen minutes usually does wonders on even deeply damaged tanks.
As such, there are a number of caveats you need to be aware of should you choose to go down this path.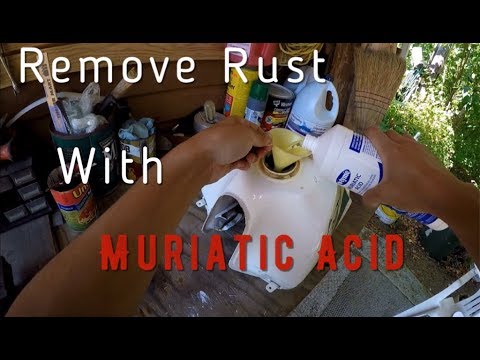 First, that stuff will chew through solder quickly, so if you have a valuable old tank that’s been soldered in either manufacture or repair, avoid muriatic acid. You’ll also want to find a different method of sealing the filler; muriatic acid can and will damage caps, which can have elements that will not stand up to the corrosion. (Or get a junk cap and fresh seal.) Remember that fuel caps are vented, so even if it seems to seal up well, it still may not be liquid-proof, which brings me to my next point.
The acid doesn’t care about what it corrodes: paint, human flesh, clothing, surroundings… it doesn’t matter. As such, you need to be extra careful about protecting yourself, protecting the paint, protecting people and property around your agitation zone, and about neutralizing and disposing of the acid responsibly.
It works well, but consider that the pro-level option, as well as the one of last resort. I often used it to get customer bikes turned over quickly, but starting with weaker acid and repeating only if that’s not working makes a lot of sense: think of how much material you’re stripping away. The acid will eat the rust, but it’s also going to eat through some of the raw steel it reveals, too, and that steel has already been made thinner by the portions that have oxidized to rust and scale. If preservation is the goal, leave as much meat on the carcass as you can in case another rider has to repeat the process decades down the line.
Ready to run. And to think some folks would have replaced this tank. Pity. Photo by Lemmy.
We’ve shown you the grocery-store way of doing this. There are other products designed to do this that are awesome. EvapoRust comes to mind, as does Metal Rescue. Generally, they convert iron oxide (rust) to ferrite, which is a bit more stable and moisture-resistant. They work really well, albeit at higher cost. Especially if you’re trying to save something valuable, the cost of specialty products may be a good expenditure.
Don’t forget to replace your fuel cap gasket. That’s probably shot by now, or dang close. Heck, if the tank was in poor shape, it was probably toast before you started.
Here's a shot from the borescope after it was all said and done. Not bad at all. Photo by Lemmy.
If you are using it immediately, here’s a word of advice. I have some very, very old fuel tanks, and they don’t rust because I keep them full of fuel, and I use the bikes! Full tanks displace air, which is needed for rust to form. Frequent use keeps the moisture from the air that modern ethanol-laced fuel will pull into the tank from getting a hold. It gets the fuel inside sloshing around, helping to knock naturally forming condensation off the very top of the tank, and the use also burns off that stuff, letting you refill it with fresh fuel. If you should need to store your bike with a repaired tank for an extended period (years), drain the the tank and repeat the oiling process. I’ve known some folks to fill a tank with oil specifically for this purpose. If you don’t mind draining it down the road, it can be a great way to keep the rust gone.
Another gratuitious "this came out acceptably" shot. No more, I promise. Photo by Lemmy.
There are other ways to do this, of course, for nearly two decades I’ve been rescuing tanks that seemed beyond repair. This way will get you where you want to go — and so will many others.
Where the world gathers for
plating, anodizing, & finishing Q&As since 1989
-----
2005
Q. I am restoring a Porsche that has been sitting idle outside for about 7 years. I am at the point where I need to clean the fuel tank and get the rust out of it before using fresh fuel and possibly burning up a rather expensive fuel pump. I have heard that Muriatic Acid [affil. link to info/product on Amazon] was the way to go but haven't found any literature on 1: How fast acting is it? 2: Will it clean all the rust that is in the bottom of my tank? 3: Is there actually a safer product that will do the job just as well?
I have been restoring cars for some time now but this is the first time that I haven't just replaced the tank because of the expense involved.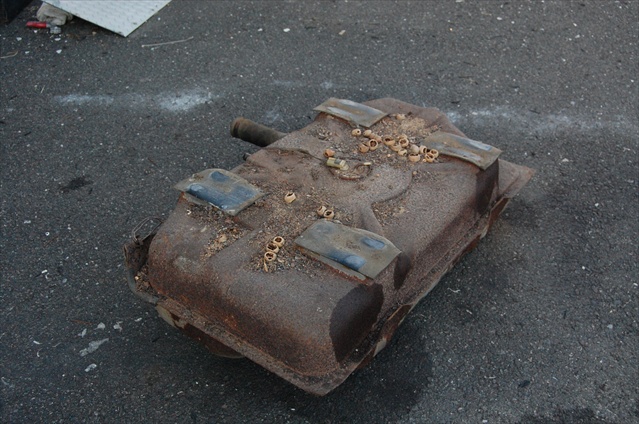 I would appreciate any advise or comments.
William M [last name deleted for privacy by Editor]
Hobbyist Auto Restorer - Georgetown, Texas
| Fuel Tank Kit A. The muriatic acid you suggest using would certainly clean the rust out but unfortunately you will experience two subsequent problems. First, once the acid is rinsed out, the freshly cleaned steel will be very prone to oxidation (rust) unless you apply a rust inhibitor of some type. That is going to be unavailable to the home user. Secondly, what are you going to do with extremely hazardous, corrosive substance such as Hydrochloric (muriatic) Acid? If someone like myself were to do this in an industrial setting I could go to jail and face serious fines. Since you won't have a wastewater treatment system, I urge you not to do this. Perhaps a better solution would be to use abrasive blasting done at a shop that specializes in this type of work. If you're concerned about abrasive dust remaining in the tank after cleaning, you can use CO2 blasting which just evaporates as soon as it contacts the part. Daryl Spindler, CEF decorative nickel-chrome plating - Greenbrier, Tennessee 2005 A. Muriatic acid is a weaker mixture of Hydrochloric acid, don't let that fool you, it is still very potent stuff and should be handled with the utmost care. In regards to your idea for cleaning the tank with the acid I can say that yes, it will eat the rust out of your tank, and then promptly let it rust back up again, very very quickly, about 30-45 minutes you will have rust on it again. You will need to seal the tank (possibly fiberglass?), very quickly after using the acid. Overall I think this is a bad idea and you would be better off getting a new tank, but there is my prediction and suggestions for you. Good luck with the Porsche Marc Banks- Elizabeth City, North Carolina 2005 A. I would caution you about using hydrochloric acid on your fuel tank. While it will do a good job dissolving the rust, you may uncover holes you didn't know you had. In addition, you will need to rinse the metal very well to remove the chlorides that can cause more corrosion. I recommend using the least aggressive method possible. I assume this rust in on the interior of the tank. If it is light rust, phosphoric acid or citric acid will do well. Try a 10% (w/w) solution and drain and rinse well after 60 minutes. Temperature is important too. Batch the solution using hot tap water and try to keep the tank at least warm throughout the process. Good luck. Joseph Lockrem- Indianapolis, Indiana |
| 2005 A. As you can see, no one here thinks derusting with muriatic acid is a good idea. Muriatic is too aggressive, and you will have a subsequent rusting problem. Jeffrey Holmes, CEF Spartanburg, South Carolina ---- 2005 A. Hi William, What Marc suggested about fibreglass seems to be a good idea. However, this does mean REMOVING the tank first of all. Having done that and 'cleaned' out the insides, then I'd suggest you clad the whole outside with at least one layer of mat plus a suitable fibreglass resin (Isopthallic may not be good enough chemically speaking, go for a vinylester due to its better flexibility over a Polyester). Maybe you should 'coat' the inside of the tank first of all. Ask your friendly local frp shop for some advice. They might well suggest a THIN vinylester coating by pouring it into the tank and sloshing it around ... maybe that should be first thing to do. Thinning done with Acetone [affil. link to info/product on Amazon], I believe. Re hydrochloric, have a gander in the archives at # 12044 which might/might not be useful. I did use fibreglass on my rear muffler ... the Volvo's rear muffler didn't last too long in winter/salt conditions. It worked out A.OK. ... but that was in Ye Olden Days of the 70's. Freeman Newton [dec] (It is our sad duty to advise that Freeman passed away April 21, 2012. R.I.P. old friend). Fuel Tank Sealer A. Co-incidentally I am in the process of removing electroplating from plastic using a diluted muriatic acid. As I have learned from other posters to your thread the environmental damage is of concern. I had not considered this before my project. I can tell you that it works very well, and be very careful about contact with anything you care about. Eyes!, Hands, clothes, even the sink can be damaged. Fumes can be very bad if not diluted so you may need breathing equipment as a dust mask won't help. A few years back I read a motorcycle magazine D-I-Y article covering this exact subject. The article outlined a kit with two or more parts. First a cleanser then a sealant is applied to the interior of the tank. This leaves a painted look to the tank that won't rust and can help prevent leaking. One avenue to follow up is that Harley does this to all their tanks when manufactured, so a field trip may be in order. Check out POR-15 as a start. There is a fuel tank repair kit [affil. link to info/product on Amazon] listed. Good luck. David M [last name deleted for privacy by Editor]- Vancouver, Canada |
2005
Agree with David.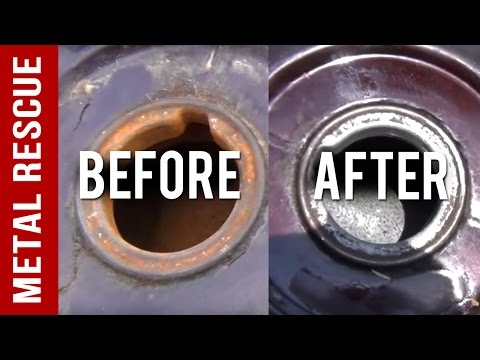 For $55 you can't go wrong.
Jeffrey Holmes, CEF
Spartanburg, South Carolina
2005
A. You can use 5% citric acid solution (or 50 gm citric acid/1 lit water/+ some ammonia, pH must be 3,5)! Rinse well! Much better and safer than muriatic acid! Good luck!
Goran Budija
- Cerovski vrh Croatia
2005
A. I can vouch for the POR-15 fuel tank repair kit [affil. link to info/product on Amazon] , and have used it in motorcycle fuel tank restoration. In addition to the kit(which includes a metal etching chemical), however, I have also used muriatic acid to remove rust from the inside of the same tank. The muriatic acid(1 qt for a 6.5 gallon tank) was put in full strength and the tank was then "rolled" for about two minutes. I immediately drained the acid into a drain pan, and rinsed the tank for about 5 minutes. Then dried the inside of the tank with hot air.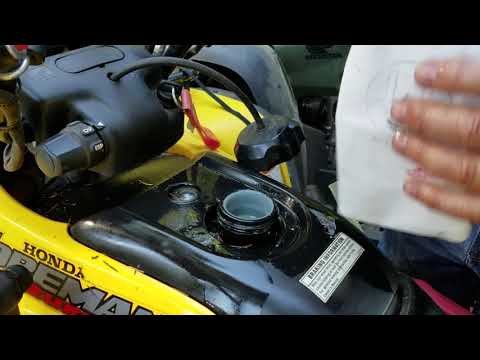 As soon as it dried, the POR-15 was applied. The muriatic acid was then poured from the drain pan into the original container for proper disposal at the municipal hazardous material disposal center. The muriatic acid did a great job of removing the rust, as, overall, the inside of the tank looked like bare metal.
One word of caution regarding the POR-15; if you have any small passages(in my case the tank crossover tubes), insert a wire cable prior to applying the POR-15, as it hardens like iron, and those passageways will be impossible to clear. Let the POR-15 cure (4 days), and pull out the wire cables.
Good luck,
Johann Uhrmann
- Michigan
2005
A. Try Eastwood. The company has it all for restoring cars (including gas tanks)
Pete Ross
- Portsmouth, Virginia
2005
A. FYI, muriatic acid can be neutralized with Baking Soda .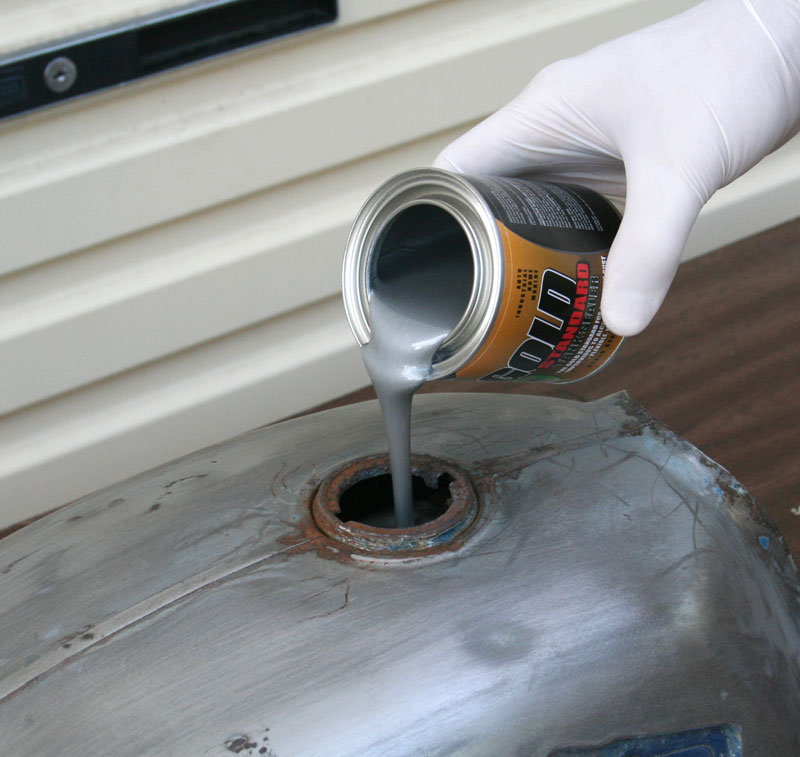 It must still be properly disposed of, but neutralizing makes it much safer.
Bob Nauta
- Nunn, Colorado
2006
A. Muriatic/Hydrochloric Acid is just HCl + Water (not sure of the dilution).
Add Baking Soda (NaHCO3), and one gets NaCl + H20 + C02...
I.e., when one neutralizes HCl with Baking Soda, one gets a resulting mixture of Water, Carbon Dioxide, and SALT, none of them are considered caustic substances. If "pure", it would require no special handling.
That doesn't mean that the sludge that you are picking up isn't caustic.
You might note, your own body makes and regulates Hydrochloric acid (stomach), and regulates the sodium and carbonate levels quite effectively.
Clifford Keele
- St. Louis, Missouri
Thanks Bob, thanks Clifford. While HCl certainly can be neutralized with baking soda, we wouldn't want people to extrapolate from their experience of neutralizing vinegar, and fail to realize that this neutralization procedure will gas and foam 10X as much as they expect, even after being warned to expect extensive foaming. It can take half of forever to neutralize one cup of strong HCl with baking soda if conditions aren't right.
Also, I'd like to reconcile Daryl's warning of dire legal consequences with Bob & Cliff's more cavalier attitude. The fact is, the government "categorically" regulates some industries, such that the legal requirements can depend more upon what 'sector' you are in than what chemical you are discussing. In the plating industry, for example, every drop of hose water is regulated even if it is totally neutral and so dilute that you could safely drink a tank-car full. If you are a hobbyist rather than a professional, you are not part of any sector and can probably legally do a lot that Daryl isn't allowed to do. But if you are taking in work and being paid for it, be cautious about the fact that you may now be in a 'category' where waste disposal is strictly regulated regardless of how safe or neutral or innocuous you think it is.
Regards,
Ted Mooney, P. E.
E.
Striving to live Aloha
finishing.com - Pine Beach, New Jersey
2006
A. Suggest you look at a product POR-15 [affil. link to info/product on Amazon] I had a rust problem in the fuel tank of my Austin Healey which I treated with POR 15
I was quite impressed with the result.
Keith Bailey
- Brisbane, Australia
| 2006 I have used Muriatic acid and it works great. I don't see the big deal about the stuff, dump it along the fence as I also do with used motor oil. It makes a great edging solution and I don't have to weed it. I really think everyone is going way over board about the environment stuff as if this is the worst thing that is being done to the Earth in each person's daily life. Jason HeightsTampa, Florida 2006 That was probably a put-on, Jason, but just hope you never have to sell the property. Not sure about Florida, but in most states all that earth will have to be excavated and disposed of. Ted Mooney, P.E. Striving to live Aloha finishing.com - Pine Beach, New Jersey |
2007
A. THERE ARE A NUMBER OF OTHER PRODUCTS THAT WORK JUST AS WELL. Ospho [affil. link to info/product on Amazon] FOR ONE WORKS GREAT AND ANOTHER IS CALLED Rust Bullet [affil. link to info/product on Amazon]. RUST BULLET "KILLS" THE RUST AND TURNS IT INTO A PRIMER. IT SAYS IT WILL LAST FOR 10 YEARS Guaranteed BUT I DON'T KNOW about INSIDE A FUEL TANK. ANYWAY, YOU CAN CHECK THEM BOTH OUT. HOPE THIS HELPS!
JEREMY MORGAN
- WESLEY CHAPEL, FLORIDA
2007
Q. I have a gas tank that I am redoing. It was in an accident and someone was going to fix it and didn't. It has been sitting with no paint or any coverage for 2 years. There is start of rust. Should I remove the rust before I Naval Jelly [affil. link to info/product on Amazon] (Big project), or will the sanding after Bondo [affil. link to info/product on Amazon] take care of it?
Joan Cooper
hobbyist - Orangevalle, California
2007
A. I just got off the phone with Rust Bullet, and was told that their product can NOT be used for the inside of a fuel tank.
Scott Flanders
- Gig Harbor, Washington
May 18, 2008
A. Have you ever tried Naval Jelly [affil. link to info/product on Amazon], it destroys rust and washes off with water.
Danny Roberts
- Lawrenceville, Georgia
August 18, 2008
Q. I am planning to clean out the front and rear fuel tanks on my 1944 Ford F250 diesel truck. I will drain them, remove them, wash with Purple Power [affil. link to info/product on Amazon] cleaner and a pressure washer.
If it rusts I am planning to use muriatic acid . What effect does muriatic acid have on the internal finish (aluminum)? - Thanks
Pete Petersen
- Atlanta, Georgia
September 5, 2008
A. I have used muriatic acid for rust on motorcycle tanks. Of course, these petrol tanks can easily be removed.
I use 1:2 dilution with warm water and get good results in about an hour.
I then neutralize by rinsing with common dish soap and water. Rinse completely, and blow out with compressed air.
I then immediately coat the inside with two-stoke oil and rinse out with cheap gasoline. The tank is then ready to fill with fresh premium.
I guess they're all right for car tanks, but I have had bad results with tank liner solutions. The stuff never seems to set completely and causes paint on the outside to blister.
David Patterson
- Madison, Tennessee
November 2, 2008
A. You guys are missing the boat. BIG TIME. I worked in the steel treatment industry for years and Phosphoric acid is the way to go. WHY ... The FeO3 will be removed and a Phosphate coating with convert the FeO3 to a higher resistant to corrosion surface. Used to treat metal before painting for years. So go with a 5% solution, heated to 140 °F. Follow with water rinse and then alcohol rinse.
Tank will appear slightly gray in color if done correctly. Google Phosphate coatings for more info.
Bill Mikolay
- Waynesboro, Virginia
August 31, 2009
A. The issue of disposal of muriatic acid should not be a problem. After use it is easy to neutralize the acid with sodium bicarbonate (baking soda) or sodium hydroxide. In the first reaction you yield CO2 Salt and Water.
HCl (muriatic acid) + NaHCO3 (sodium bicarbonate) --> H2O (water) + CO2 (carbon dioxide gas) + NaCl(Table salt)
In the second reaction you yield salt and water
NaOH(sodium hydroxide) + HCl(muriatic acid) --> NaCl(table Salt) + H2O(water)
There is no problems with disposing of this into most city sewer systems (it's just salt water). The only issue to be aware of is ensuring the material is completely neutralized. This is much easier with sodium bicarbonate because as it is buffered, so you can add too much of it and end at an acceptable pH. With Sodium Hydroxide you can create a very high pH mixture which can also be dangerous. In either instance, most water treatment plants prefer between a 7 and 10 pH. You can test this will relatively inexpensive pH strips.
Always follow proper neutralization techniques when working with acids and bases - Neutralization releases energy, so when you neutralize a solution quickly you generate a potential for explosion, and trust me... exploding acid all over you and your equipment is dangerous (and destructive).
These neutralizations are very common, and information about the techniques involved are very readily available online.
Be safe!
Shawn Fels
- Central Point, Oregon
March 18, 2010
A. Like Johann U. in Michigan said, I will vouch for POR-15 fuel tank repair kit. Just finished my 25th gas tank, thank you Daytona Bike Week!
Only thing I did different was first I used the marine clean which is a very good product, it does remove any old fuel tank liner and varnish and a "small" amount of rust. I was out shaking tanks like crazy and rotating them. Usually let them sit for 24 hours then rinsed them out till they didn't feel slippery.
Then I still prefer to still use Muriatic Acid, pour a quart in raw, non diluted and added about 100 daisy bb's, and just shake the gas tank around for 4 minutes turning it constantly.
This will remove all of the rust. It's just a pain in the ass trying to get all the bb's out. Then rinse it for like ten minutes to get all the Muriatic Acid out. This stuff is very dangerous, you must wear Rubber Gloves [affil. link to info/product on Amazon] gloves and put goggles [affil. link to info/product on Amazon] on cause it will burn through your shirt and your skin in seconds and hurt like hell.
Then I dry the tanks out with a heat gun, use a hair dryer if you don't have a heat gun for like an hour.
Then tape of the drain and air plugs and pour in the POR-15 Metal Ready and duct tape off the cap hole and roll it around for like 5 minutes. Then turn the tank on its side for 30 minutes a side for no longer than 2 hours as the instructions specify. Rinse the tank out several times then back to the drier for at least an hour.
Then pour in the tank liner and let it dry. And walla! You will have a just as good as brand new gas tank. I just did 25 this week and every one looks as good as the other.
Just remember that rust will flash in seconds, so plan on doing your tank project when you have 4 hours of free time.
Woody
Woody McTootle
- New Smyrna Beach, Florida
July 31, 2010
A. A chain or old nuts and bolts, shaken inside to remove pieces of rust, 50/50 mixture of normal swimming pool acid called hydrochloric acid and water poured inside for about 3 hours to remove all rust,rinsed with water and thereafter with acetone to remove all traces of water and your problems are solved-Andrew of South Africa.
Andrew Pietersen
- Roodepoort,South Africa
December 12, 2010
Q. I had severe rust in my gas tank, could this cause damage to my fuel injectors? I just put in a used motor, ran great for first 20 miles then lost all power just like the first motor, I pulled the tank to replace fuel pump and noticed the extreme rust, replaced the tank, pump and filter but the engine running very rough
Les Daniell
just me - Lubbock, Texas USA
June 4, 2011
A. I'm in process of rehabilitating a John Deere E35 edger (Kawasaki engine) with SEVERE internal fuel tank rust and some pitting on top around the breather holes. Many gardeners consider the JD E35 the Porsche of edgers.
Had no time to go to store so used ordinary household vinegar (glacial acetic acid, I think) and a bunch of nuts and bolts followed by water rinse. Got out most of the rust but got a light film of yellow corrosion, probably not enough to foul the rebuilt carb.
Found a university extension site that OK'd pouring out the vinegar on the lawn.
Also tried CLR after 66 yr. old neighbor told me he used Red Devil Lye for the job as a boy, but one has to certify they are a saponificator to get this methamphetamine ingredient today. I buy my soap at Walmart.
I maybe could try the Phosphoric acid trick above, before reassembly and use.
Paul Bush
- Durham County, North Carolina, USA
Pure Lye
Affiliate Link
(your purchases make finishing.com possible)
June 6, 2011
Hi, Paul. Thanks for the info. Two small corrections:
Vinegar is rather dilute acetic acid, whereas glacial implies 100% strength;
Lye is still readily available; drain cleaner crystals are often lye. It's dangerous stuff, but has a very common household use.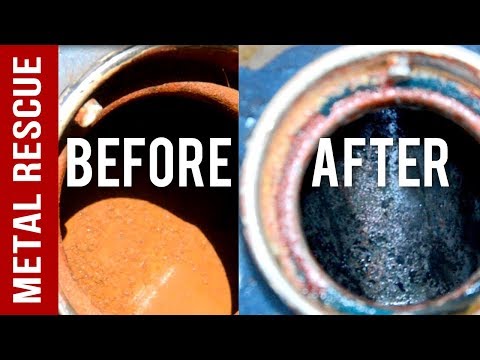
Regards,
Ted Mooney, P.E.
Striving to live Aloha
finishing.com - Pine Beach, New Jersey
July 29, 2011
A. Look at a product called Red-Kote fuel tank liner by Damon Products.
It can be found on the internet and eBay. It does not require that all rust be removed and bonds the rust with a flexible coating.
I have used it on several Tractor tanks in poor shape and never had a problem.
John Black
- Thomasville, North Carolina
September 3, 2011
A. The tractor restorers I talk to tumble their tanks with sharp hard pebbles, any kind of small granite or marble chips from the garden center. It's easy enough to make a tumbling jig for your tank. Or if you have a pickup truck with bad shocks and bumpy dirt roads just put the tank and pebbles in there for a few weeks, turning occasionally.
Greg Reid
- Millerton, Pennsylvania, USA
February 17, 2012
I have an old Suzuki Motorcycle that once had a rusty gas tank. My buddy told me to use this stuff called Muriatic Acid (with which I was unfamiliar). The first time I messed it up and it rusted all over again (because I did nothing afterwords). The second time around I managed to get out all the rust, I washed it out with a ton of water, took a hair dryer to it, and pumped in a bunch of WD-40. Well, 2 years and 4000 miles later I see no rust in my tank. So something must have worked! And on a lighter note, don't inhale the yellow smoke. That's what you call toxic.
Ryan Naro
Hot Rodding - Loveland, Ohio USA
May 30, 2014
Q. Hobby is car restoration and I am wrestling with a problem of removing rust from the inside of a Porsche fuel tank. I had it professionally done but am unhappy with the outcome. Examining the internal surfaces I see some black rust patches (probably neutralised) and quite a lot more brown patches, apparently not treated. The tank has a relieved area to accommodate part of the spare wheel.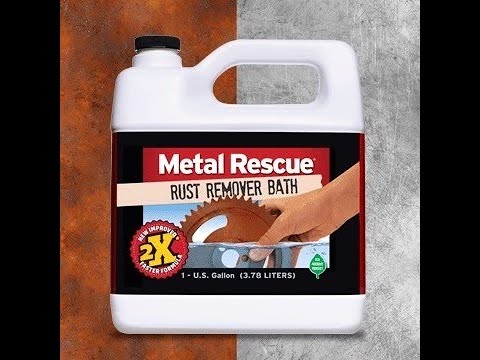 As a result of this it has complex interior surfaces.
I plan to prepare about 5 litres of muriatic acid solution of 1:5 (hot water) to give enough volume to cover all surfaces with some rotation. I would leave this in for about 30 mins rotating each few minutes, then flush with water and neutralise with solutions of baking soda flushing finally with fresh water.
At this point I am considering introducing phosphoric acid to coat the entire internal surface.
I would appreciate your opinion on the ratio for the solution of phosphoric acid and the length of time to leave it in the tank. I presume final flushing with fresh water and drying would be needed to prevent further rust.
Ivor Engleby
- Eltham, Victoria, Australia
June 1, 2014
A. Try 5% ammonium citrate solution (pH 3,5) ... Much safer and better for you and environment ... Hope it helps and good luck!
Goran Budija
- Zagreb,Croatia
June 3, 2014
Q. Goran
Goran
The ammoniated citric acid works great on stainless steel, but is it effective on mild steel?
Willie Alexander
- Colorado Springs, Colorado
June 4, 2014
A. Ammoniated citric acid or ammonium citrate 5% pH 3,5 must work on mild steel too. Hope it helps and good luck!
Goran Budija
- Zagreb,Croatia
December 1, 2014
A. Hey guys, here is the easy answer. Use a 5-6 meter thick dog chain. Shake the chain around in the tank to get the worst rust out. Wash out the tank with clean water. Use one bottle of Deoxidene - Rust Cleaner. Tape up the filler hole and shake around vigourously till it foams. Alow to dry in the sun. Wash out using three liters of fuel. Works for me!!
Kendall Williams
- Cape Town, South Africa
September 14, 2015
Hey, working on tanks is not may favorite thing; spending a load of cash for crappy products, products that work but cost too much and crappy so called PROFESSIONAL work is even more NOT MY FAV THING.
Despite my actions during my crazy younger days. I care about the environment and I try very hard to leave as small of a footprint wherever I go ( I do have size 17 feet though).
Anyway, I wanted to tell you about this thing I found about tanks when I was about 20 from a old man I was working for in Oklahoma. He told me to go to the store one day and get him 3 gallons of apple cider vinegar, cheapest they had. I thought he was making pickles, I didn't even ask him about it. I brought him his apple cider vinegar and he just went straight over to a nasty gas tank we had pulled the day before, he poured 1 and a half gallons in it, looked at me and told me to block off all those holes and shake that thing real good for a few minutes every hour until it was time to go home.
Anyway, you get the picture. I'm not even exaggerating; the next day when I was told to go empty that tank out (we left it overnight). I could see myself on the bottom through the sending unit port.
Now, that tank was shellac and some rust. The one I am working on right now is straight-up chunky nasty dry rust. So I have the vinegar in there with about 8 feet of tow chain -- cleans my chain too, LOL. I am getting too old to be swinging tanks around but I am doing it anyway. I had a thought a bit ago though where I would strap the tank to my engine stand mount so I could just turn it with a steering wheel effect. Would me much easier than picking this up and shaking it like I have been.
If I am Lying and you try this, you would have wasted a couple of bucks and made your tank smell like a fresh dyed easter egg. I'm not lying though. This works and it's cheap and won't kill you.
Flush with water, repeat if you didn't wait long enough and it's still dirty, and so on. Common sense.
Larry L [last name deleted for privacy by Editor]
- Boise Idaho, USA
July 8, 2016
Q.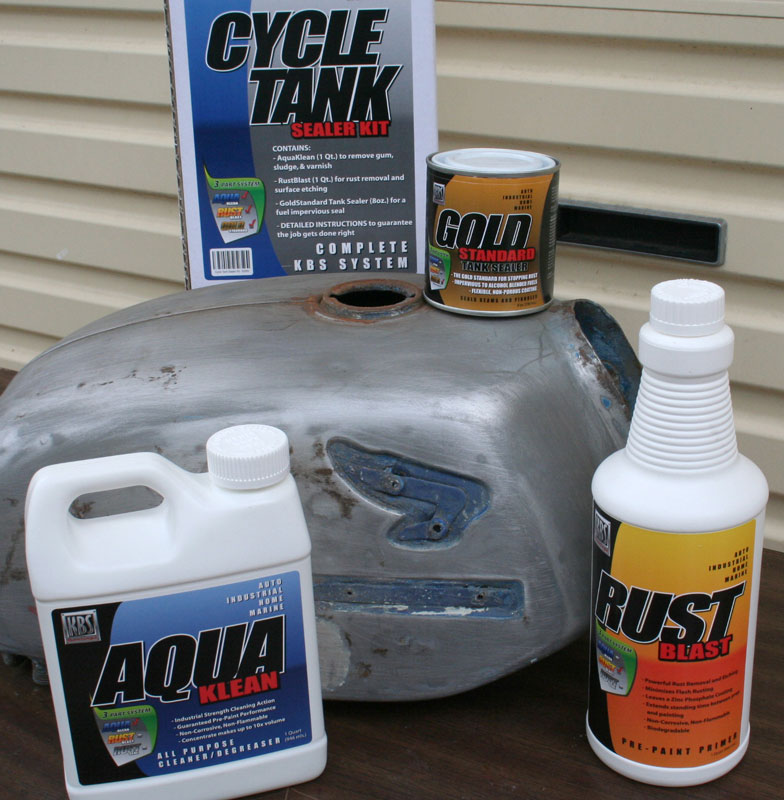 Hi, we restore steel gas tanks, in the process we use a common conversion coating. Tanks often come in with heavy rust and other unknown contaminants. Tanks are tumbled with a ceramic media and heated alkaline solution, then with tumbling media and a diluted (1:1) solution of HCl (ambient temp, inhibited or not depending on condition) to achieve the level of cleanliness required. Tanks usually require 1-2 hours of acid tumbling, occasionally heavily rusted tanks require as much as 12 hours.
My question is will 12+ hours of HCl cause long term damage to mild steel? Some tanks have stainless steel fittings installed, can they be damaged?
Tony Markus
- North Hollywood, California, USA
July 2016
A. Hi Tony. "Maybe" is not a good answer, but you have found that sometimes it doesn't, whereas it's obvious that HCl can attack steel and eventually will eat through it. So I think the answer then is to attempt more educated guesses via some documentation. ..
..
Take a tank that you plan to tumble for a long time, and measure the steel thickness at 3 or 4 different points, tumble it for a measured number of hours, and re-measure the steel thickness at those 3 or 4 points. If you are eating away a third of the thickness, that's a serious problem and the process is highly questionable. If you are eating away only 5%, it's probably not causing tanks to fail that wouldn't have failed in another day or two anyway. It may be difficult to get accurate thickness measurements and you may have to supplement them with tumbling a scrap tank until failure, cutting a scrap tank to understand the thickness profiles after years of use but before recoating, etc.
The mechanism of attack is dissolution in acid, so if the tank is sound after tumbling, and you are confident that you can fully neutralize the acid, I don't think it's a problem -- but read through the earlier postings on this thread and see if there is any additional food for thought. Good luck.
Regards,
Ted Mooney, P.E. RET
Striving to live Aloha
finishing.com - Pine Beach, New Jersey
July 8, 2016
Q. Hi Ted,
You do a wonderful job and service with this forum!
Thanks for the help, you're right, the understanding of the effects are more important to me than a detailed analysis. It was not clear to me if hydrogen embrittlement or some other type of chemical reaction would be a concern with the longer than normal exposure times required to achieve the cleanliness required. That being said, we are looking into alkaline rust removers to reduce the amount of acid use. Other than the increased handling risks do you have any thoughts on their use?
Again, thanks for your help.
Tony
Tony Markus [returning]
- North Hollywood, California
July 2016
A. Hi again. Thanks for the kind thoughts. My experience is with general metal finishing rather than restoration of fuel tanks, and alkaline rust removers are sometimes used in such cases -- but it's not nearly as common as using muriatic acid.
I have never heard of spending hours in muriatic acid even in a simple immersion application, let alone hours and hours of tumbling with media in acid. Something sounds crazy that it should take many hours of acid and tumbling to remove the rust and other contaminants. Maybe you're not getting off the old coatings in the alkaline cleaner before proceeding to the acid.
Although I have no experience in this, and you have a lot, it would have seemed to me that tumbling in hot alkaline cleaner for as long as necessary to remove grease and old organic coatings, followed by a few minutes of tumbling in phosphoric acid would get the tank ready for coating.
Regards,
Ted Mooney, P.E. RET
Striving to live Aloha
finishing.com - Pine Beach, New Jersey
July 12, 2016
A. Tony,
Tony,
HCl is very bad for stainless, so if your tanks have stainless components in them I would avoid it.
Phosphoric ought to be plenty for most rust removal and acid cleaning needs, if you really need something stronger I would look to a nitric/HF pickling formula.
Ray Kremer
Stellar Solutions, Inc.
McHenry, Illinois
July 13, 2016
A. Good day Tony.
Have you considered sand blasting / glass bead peening to remove the rust / contaminants?
How large are the gas tanks, and do you use "barrel" tumblers or a vibratory machine?
I'm sure AF Kenton from Nova Finishing Systems could offer some good advice.
Food for thought.
Regards,
Eric Bogner, Lab. Tech
Aerotek Mfg. Ltd. - Whitby, Ontario, Canada
July 6, 2016
Q. Hi, we restore steel gas tanks, in the process we use a common conversion coating. Tanks often come in with heavy rust and other unknown contaminants. Tanks are tumbled with a ceramic media and heated alkaline solution, then with tumbling media and a diluted (1:1) solution of HCl (ambient temp, inhibited or not depending on condition) to achieve the level of cleanliness required. Tanks usually require 1-2 hours of acid tumbling, occasionally heavily rusted tanks require as much as 12 hours.
My question is will 12+ hours of HCl cause long term damage to mild steel? Some tanks have stainless steel fittings installed, can they be damaged?
Tony Markus [returning]
- North Hollywood, California, USA
June 30, 2017
A. Have used diluted muriatic acid with good results. Flush with Acetone to remove water and line. Dump acid down toilet when done. I would not use EastWood tank sealer as I am stripping it out of a tank I sealed with it 9 years ago. Rust bubbles everywhere. Have used Kreem with good result and have a tank lined in 1993 that still looks like it did the day I lined it.
Brad Howren
- Warsaw Illinois USA
March 17, 2018
Q. Ok so I used Muriatic acid and it seemed to remove the rust but in the process discovered that there is some kind of liner in it. So now I have MEK sitting in it. It's turning it gooey but not getting it off the tank. Any suggestions?
Don kurtz
Painter - Ohio
June 26, 2018
A. If you are tumbling the tank with media in it, the concern is always getting the last of the media out. I use BB's when I tumble a tank, and use a magnetic on a string to get the last few out. Just drop the magnet in the tank opening and stick it to the bottom of the tank. Tumble around, and pull the magnet out with the last of the BBs on it.
Brian Haygood
- Tyler, Texas, USA
August 18, 2018
Q. Hello I've come across this site via google and I'm a one-off hobbyist I guess.
I'm based in the UK and I have an issue with a fuel tank in my Ford Explorer.
The tank seems to be rusted on the inside; and the result is the fuel pump is picking up all this gunk in the tank and blocking the fuel lines, I've replaced the filters but it's still cutting out whilst driving on the motorway.
As it's internal I was going to take the tank out, drain it and then add some acid such as brick cleaner diluted to try and remove as much gunk and rust as possible.
Would this be feasible in your professional eyes?
Many thanks
Mark
Mark Woodfield
- West Midlands, UK
August 2018
A. Hi Mark. It's probably a bad idea. We added your inquiry to a thread which discusses it.
Regards,
Ted Mooney, P.E. RET
Striving to live Aloha
finishing. com - Pine Beach, New Jersey
finishing.com is made possible by ...
this text gets replaced with bannerText
Q, A, or Comment on THIS thread -or- Start a NEW Thread
Disclaimer: It's not possible to fully diagnose a finishing problem or the hazards of an operation via these pages. All information presented is for general reference and does not represent a professional opinion nor the policy of an author's employer. The internet is largely anonymous & unvetted; some names may be fictitious and some recommendations might be harmful.
If you are seeking a product or service related to metal finishing, please check these Directories:
About/Contact - Privacy Policy - ©1995-2022 finishing.com, Pine Beach, New Jersey, USA
The gas tank needs to be cleaned periodically, washed from rust, gasoline impurities and various substances and debris that enter the tank when refueling. Before you flush the gas tank of your car, you should familiarize yourself with the theoretical side of the issue.
The gas tank can be flushed without removal, but the flush will be much better with the gas tank removed.
Gasoline drain
Flushing without removal requires a fuel drain hole. Not all car models have it. If you are convinced that there is one, proceed:
Flushing as described above is not effective, so it's best to remove the fuel tank from the machine and do it a little differently.
It is better to remove the gas tank
We perform simple operations one by one:
To install the capacitive tank VAZ 2106, do everything in the reverse order.
So, the gas tank is removed, you can start flushing.
There are several methods of flushing:
Catalyzation process
This type of cleaning must be carried out outdoors! The gas generated during the electrolysis process is life threatening and flammable!
 We use sodium carbonate for the electrolyte.
 If you can't find sodium carbonate commercially, make your own at home. Take ordinary soda, heat it to 180 ° C, hold the powder for about 40 minutes in the oven. Take out the contents carefully. Cool the finished powder, this will be sodium carbonate. For fifteen liters, you need to use 5 tablespoons of powder. The electrolyte is ready. But since we have a gas tank capacity of more than 20 liters, this recalculation will have to be done for your gas tank.
 We connect to the charger (you can use a powerful power supply from 12 to 24 volts). Don't confuse plus with minus.
 You can watch the catalytic process.
Hydrogen (explosive mixture) forms on the surface of the tank, and an oxygen mixture forms in the middle. There is a visual revival of the old tank. The mixture removes old rust and restores the original layer of metal. The process can be accelerated if the solution is slightly warm. We perform the operation for 20 minutes and look at the result. We flush the tank with warm water and dry it.
They also use soda
Some do something extraordinary, take, for example, several bottles of cheap soda. It is heated in a saucepan to about 40 ° C and poured into a sun-warmed tank, leaving it in this state for several hours.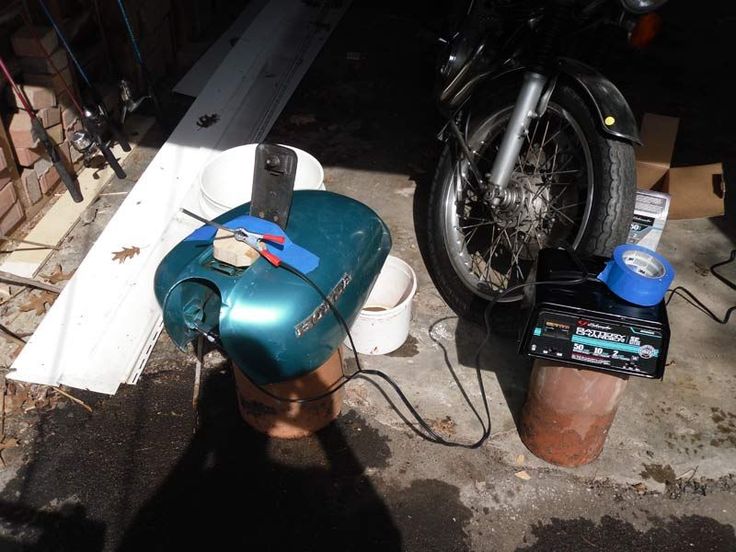 The composition of the drink contains phosphoric acid in a small concentration. The tank must be filled to the brim, leaving a small air opening. Of course, it is unprofitable to flush a car’s gas tank with soda, but this method is suitable for washing a moped’s gas tank.
There are many old ways to remove rust from a tank.
Can be cleaned the old fashioned way with small nuts
Old-fashioned way. Of course, you need to consider how much rust has eaten through the gas tank.
In case of severe metal corrosion, pour a couple of handfuls of small nuts (you can use granite stones) inside the container. There is no need to fill up with petrol.

Similarly, you can fill the tank with sand and with a powerful air stream with a grid placed in the gas tank cap and start blowing sand at different angles. All the sand, together with the plaque, begins to fly away from the walls of the vessel. After cleaning, everything should be poured out and rinsed with gasoline.
Rust removes well with phosphoric acid
Standard method for removing rust oxide. We buy a couple of liters of rust converter or phosphoric acid in a car shop.
If the rust is not only in the gas tank, but also on the body, read this article to learn how to get rid of it.
After washing the gas tank, all that remains is to put it in place and enjoy the result of the work done.
 ..... So let's consider the options for cleaning the tank. I will not say anything new, but I hope it will be useful to someone.
 I met on many resources, so it is generally accepted. Further actions depend on how deep the corrosion of the tank wall has gone. If it is significantly covered with rust from the inside, then you can use a simple and reliable method.
It is necessary to remove the gas tank, drain the remaining gasoline from it, rinse it with water and fill it with a couple of handfuls of nuts (not large ones). After that, we stock up on patience and strength, and begin to shake the tank so that the nuts beat off all the rust from the walls. If desired, you can replace the nuts with pebbles or sand, sometimes sand is used to clean the remains of rust after the initial processing of the gas tank with nuts. Fill with gasoline for the final flush. After washing, we drain the burda and see what's with the tank. If there are still small remains of rust, then you can use the already proven phosphoric acid or special rust converters.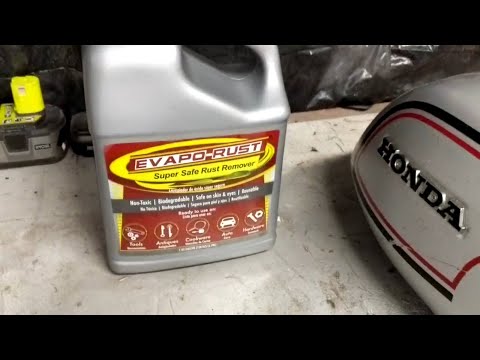
Wikipedia: “Phosphoric acid is also used to remove rust from metal surfaces. Forms a protective film on the treated surface, preventing further corrosion.
Take the tank, drain the gasoline, blow or dry the tank with the cap open. When everything is dry, we take about 0.5 liters of any rust converter (chemistry), of which there are a lot in any auto shop. As an option, the same phosphoric acid. But be careful with her: do not breathe and do not drip on the LMB. Close the cork and twist the gas tank so that the liquid wets all the internal walls. We wait a little - from 25 minutes to an hour (depending on the temperature) and the whole burda. that formed pour out. To remove any chemical residue, you can rinse with plain water with the addition of baking soda. Soda neutralizes acid residues and softens the water that washes absolutely everything. But do it carefully. Drain the remaining soda and rinse with running water, and simply dry the tank.
Some "kulibins" take Coca-Cola, or something like that (there is enough nonsense), heat it up to 35-40 degrees and leave it for a couple of hours. Why this vodka? The fact is that if you disassemble the chemical composition, then in cola there is also orthophosphoric acid, but it is slightly less than in the rust converter. But, as they say, eat the same everything, including rust. Another interesting fact: all this machmala, along with rust, can clean chrome or tile with a toilet bowl well.
Whoever fumbles in physics will quickly grasp, but the rest either don’t take risks or suffer. School physics course: resort to the help of electrolysis.
Attention - these works cause the release of harmful and flammable gas! They must be carried out in a well-ventilated area!
For this method, you will have to pour the electrolyte solution into the gas tank. Ordinary washing soda (sodium carbonate) is suitable as an electrolyte. If you can’t find it on sale, you can heat ordinary baking soda in the oven (160-180 degrees, for about 30-40 minutes). The output is just sodium carbonate. Then pour water into the tank and stir the aforementioned sodium carbonate in it. For 15 liters of gas tank volume, about five tablespoons will be required.
The electrode is immersed in the resulting electrolyte solution (without touching the walls of the tank - to avoid a short circuit; it is not recommended to use a stainless steel electrode to avoid the release of especially harmful gases during the electrolysis process). An ordinary ferrous metal, that is, a banal piece of iron or iron wire, will do as the electrode itself.
Then the minus is connected to the gas tank body, and the plus is connected to the electrode. To the case MINUS (it will be scientifically called CATHODE), and to the electrode - PLUS (ANODE). Rust will begin to disappear from the walls of the tank and materialize on the electrode. The main thing is not to reverse the polarity if you don't want to corrode the tank into trash! Then we connect a direct current and observe the result.
Hydrogen is released at the cathode, and oxygen is released at the anode (hence the intense oxidation-corrosion of the electrode). The healing effect occurs due to hydrogen, firstly, it acts as a sandblast from the inside and removes soft rust even where it was impossible to get sandblasted, and secondly, due to hydrogen, the metal is restored from its oxide (iron oxide - rust), recovery is better if heating is present.
Do not use stainless steel as electrode as during electrolysis, a side compound is released - hexavalent chromium, a very unhealthy thing, toxic, a carcinogen.
Another option I found on the net was the guy’s reasoning (sorry didn’t write down the name): unscrew the faucet and insert the fitting with air supply there, but the jet should be strong, install a mesh on the side of the tank cover. small. But before that, pour a small fraction of pebbles or sand into the tank. Come on and turn it all on! I don't know how much it will help but as an option.

 Obviously the geometry of the tank will be of consequence because you may not be able to reach every remote area of the tank but it's just a suggestion.
 There are two good approaches. 1). You can buy a kit which contains cleaner, deruster, and tank coating materials, and do the job yourself. I used this process on my AH tank fifteen years ago, and it is still fine. 2) You can send your tank to a company which will derust and hot dip galvanize it. Either of these methods will prevent future rust and seal small pin holes. Get a copy of Hemmings Motor News [affil. link to magazine on Amazon]. You'll find both advertised there.
 This should cover, as Joseph said, any 'holes'.
 The muriatic acid probably wouldn't last for too many years, but the oil will be around for many decades.