|
What to do when a rock keeps you from rollin'. By Josh Piven EMERGENCY SITUATION: You’re mountain biking on Mount Mitchell when a rock punctures your tire. Foolishly, nobody has a patch kit. How do you get moving again? SOLUTION: You could try doing a very long-distance wheelie—assuming you punctured the front wheel. And assuming you knew how to pop a wheelie in the first place. But this probably won’t help your guys earn their Cycling merit badge. However, there are a couple of better (and safer) emergency fixes that may.
If you have a bike pump and some tape but no patch kit: First, turn the bike over and examine the tire. If the breach is obvious, mark it with a dab of mud or some chalk. Then, using tire levers or a flat-blade screwdriver, carefully remove the tire and its tube. If the breach isn’t clear, you’ll need to locate it. There are a number of ways to do this. If you’re near a stream or other body of water, submerge the tube and squeeze it to force any remaining air out. Track the escaping bubbles to locate the hole. You can also fill a pot or pan with water from a canteen, provided you’re not broken down in the desert, of course. If no water is available, squeeze the tube while holding it next to your face; you’ll feel the air escaping. Mark the hole. Cut a three-inch piece of electrical or duct tape. Believe it or not, materials contained in patch kits often aren’t as effective as good-quality tape. Place the piece of tape over the hole, making certain the hole is in the center of the strip. Wrap the tape completely around the tube. Put the tube back in the tire and the tire back on the rim. Add air to the tube using the pump. Ride back to camp. Avoid rock-hopping. If you have no patch kit, no tape, and no pump: First, raise your right hand. Remove the tire, leaving the damaged tube in place. Next, begin pulling up as much grass as you can find. You’ll need lots. Take care not to pick thistles or anything with thorns, or you’ll be mending your fingers as well as the tire—and you’ll probably further damage the tube. Next, stuff the tire with the grass, packing it in until the inside of the tire is full. Carefully put the tire back on the rim. You may need to add more grass as some falls out. Ride back to camp slowly. Be prepared: First-aid kits often include plastic-coated medical tape. In a pinch, you can substitute this for electrical or duct tape. If you’ve punctured the rear tire—and you have the proper wrenches—consider putting the front wheel on the back before making your repair. Particularly if you’re riding with a heavy pack, more of your weight will be above the rear wheel. Josh Piven is the co-author of the Worst-Case Scenario Handbook series. www.joshpiven.net. Top of Page September - October 2009 Table of Contents |
Is it a good idea to take duct tape on a bike tour? It sure is! Duct tape is the perfect item for emergency bike repairs when you need to hold something together.
When it comes to choosing which pieces of equipment to include in your bike touring gear setup, don't overlook one of the greatest gifts to mankind – Duct Tape!
It's a perfect item to use in an emergency when you want to hold something together. It may not look very attractive, but it will hold up well until you can replace the broken part or find someone who can fix it better than you.
You don't need to carry around a whole roll of duct tape when cycling either.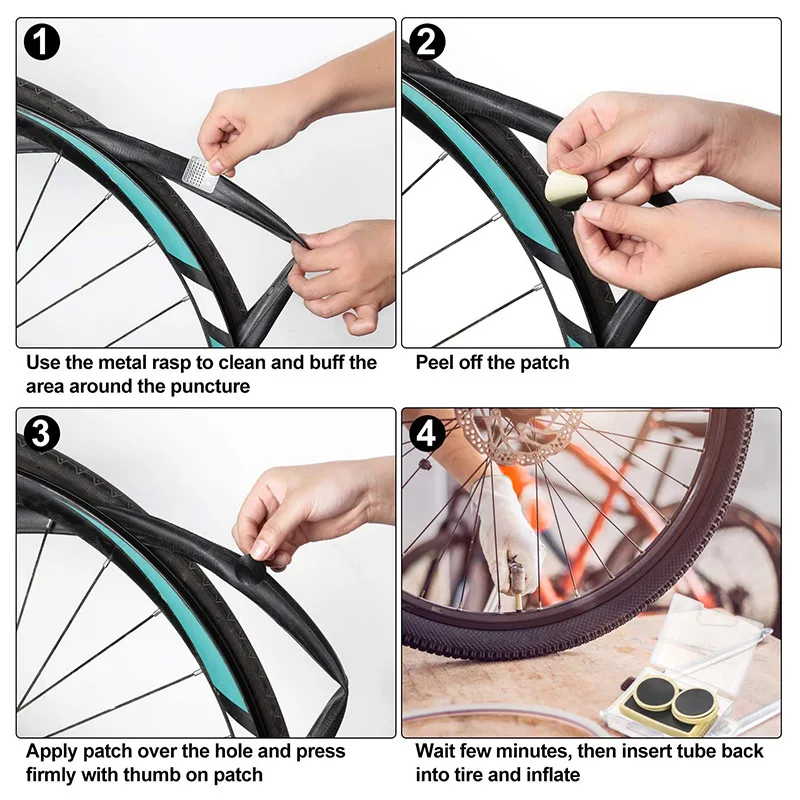 You can simply cut off a few feet and wrap it around a tire lever, bike pump, or perhaps even part of the bike frame.
There's many ways that duct tape can come in useful on a bicycle tour. Here's some ideas of how to use duct tape on a long distance cycle trip.
All you need is duct tape to patch up your inner tube – it's not ideal, but it might get you out of a fix.
You can use duct tape to cover the hole and at least go down the road for a short distance. If there’s no puncture repair kit in sight, use some more tape to cover up your hole until you have time to fix it properly.
Related: Why is my bike pump not working
When you break an arm on your sunglasses, duct tape can come to the rescue. With a little ingenuity and some patience, you can fix those broken shades so they're as good as new! Definitely a good tip if you're cycling miles from anywhere in the blazing sun.
Did you know that one of the best ways to fix a broken bike light mount is by using duct tape? It's quick and simple but most importantly, it works! It will also work with broken Go Pro mounts and water bottle cages.
Are you cycling in an area where you seem to be getting more punctures? Is your rim causing punctures? Protect your inner tube by using two layers of duct tape, saving you from a string of flats, until you can get to a bike shop to fit proper rim tape.
Want to get rid of those pesky loose flapping cables on the bike? Do it with duct tape! It’s quick and easy.
Tent poles can break in a number of different ways. The most common one is when you're putting up the tent and there's too much tension on the poles. You might also find that the string snaps inside the poles.
You can use duct tape to hold broken poles in place, or you can make a temporary splint out of sticks if the pole has been snapped clean off.
You can use duct tape to seal any worn areas in the shoe so you don't need to worry about a hole, sole separation or mesh upper blowout. Of course, getting some good quality bike touring shoes in the first place might mean that you never have to do this!
You might have a hole in your panniers, or perhaps they're rattling a lot? Broken panniers can rattle an awful lot, secure it tightly to your bike with duct tape.
If you don't have a sewing kit, quick repairs to clothes can be made by taping any tears. Useful for Gortex jackets and the like! The same theory can be applied if you tent gets a hole.
Duct tape along with string and perhaps a T-Shirt will hold a broken saddle together nicely until you can get it fixed properly or buy a new one.
For those who are planning a long-distance bike ride, you’ll be surprised to know that some of the most creative ways of packing food for your journey is by duct taping the containers closed. This way you won’t have to worry about spilling everywhere inside your panniers!
A few commonly questions about using electrical or duct tape for emergency repairs include:
Duct tape is a fantastic temporary alternative for repairing bicycles' problems. Duct tape is water resistant (you can also purchase a waterproof variation) and is easy to carry with you on a bike. You may even get a tiny pocket-sized version of it.
If one of your tires (not inner tubes) has a gash in it or a torn sidewall, you can use duct tape on the inside of the bicycle tire to temporarily ride on. You'll still need to replace the tire as soon as you can though at a local bike shop.
If you have an inner tube puncture, using a proper patch kit is always going to be the best way to fix it. Occasionally, you might find your rubber cement has solidified though, so you could use duct tape as a temporary measure to stick the patch on the tube.
If you have a wide rim and can find a way to narrow the width of the tape, you could potentially use duct tape as emergency rim tape. A better option would be to use electrical tape if possible.
You might also want to check out these other bike touring tips and guides:
– Dave Briggs
Dave wrote this travel guide about using duct tape for emergency bike repairs after years spent cycling all around the world.
Check out two of his long distance bike tours here: Cycling from England to South Africa and Cycling from Alaska to Argentina.
Follow Dave on social media for travel, adventure and bike touring inspiration:
When you're on the track or biking in the middle of nowhere, know how to fix a flat bike tire if the unexpected happens.
Here is a step by step guide on how to fix a flat bike tire.
Part of learning to ride a bike is that you also need to know how to fix a tire when the air is leaking or you have a puncture. It's like knowing how to maintain your car when you know how to drive.
If you haven't learned this skill yet, here's a simple guide on how to do it.
1.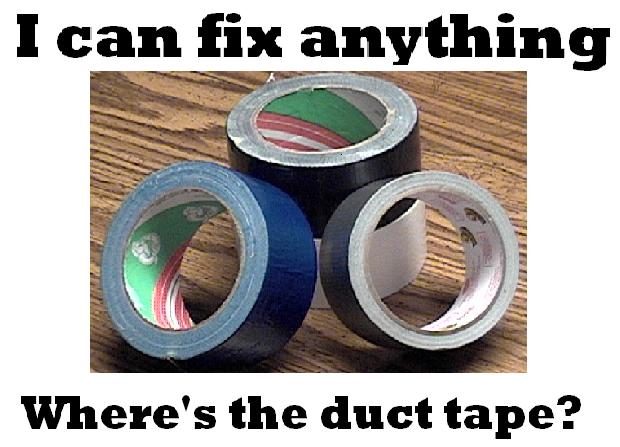 Remove the tire to be repaired from the bicycle. Release all the air by pressing the valve to release all the air.
2. Remove the outer rubber using the mounting tools or by pulling the tire off the rim.
3. After removing the outer rubber, remove the inner tube from the rim.
4. Check if there is a hole in the inner tube.
5. You can visually check where the hole is. To do this, inflate the tube with a hand pump and see where the air comes out.
6. You can also inflate the tube with a hand pump and pour water over the inner tube and see where the bubbles form. Bubbles usually form where air escapes.
7. Once you find the tire, use the repair kit to repair the hole.
8. Apply adhesive around the hole area, then patch it up with a patch.
9. Press firmly for a few seconds. It should dry easily and cover the hole almost instantly.
10. Purge the inner tube to check that you have closed the hole properly.
11.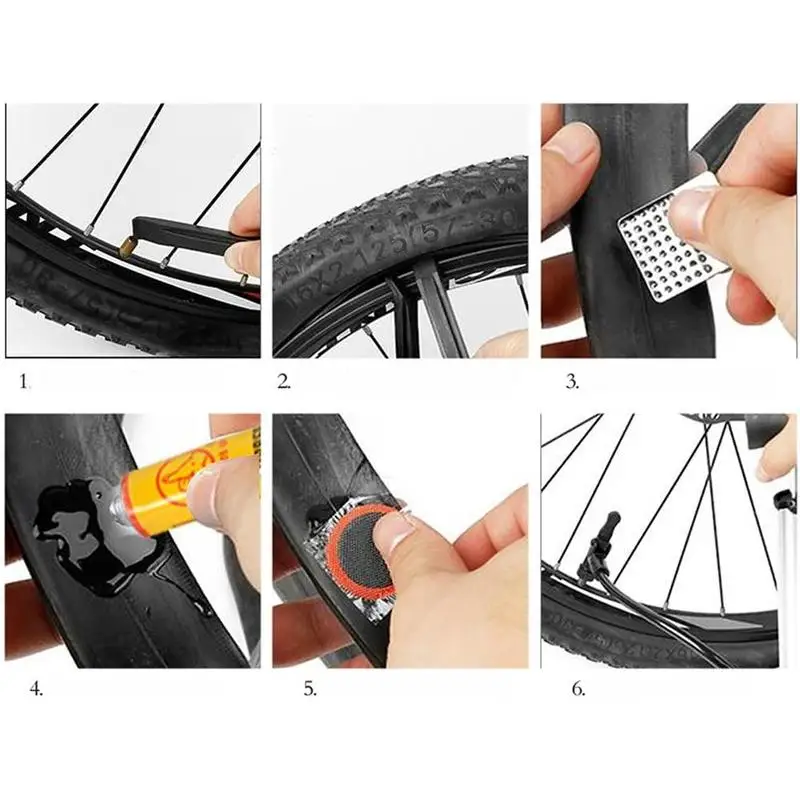 Place the tube around the rim and make sure the valve is in place right at the valve hole.
12. Replace the outer rubber, then inflate the inner tube with a hand pump to the correct PSI.
notes : Most outdoor tires have a recommended PSI. If you have no way of knowing the correct PSI of a tire, inflate the tire and test by pinching the tire to make sure it is stiff enough to support your weight.
It is very important to carry a hand pump or any kind of access to a tire inflator when riding a bicycle.
It's like driving a car without keys or basic tools - when it breaks down, there's nothing you can do.
But if that's all you have and you don't have spare tubes with you, there are a few common household items you can use to repair your bike's tube.
This way you can at least get home or drive to the nearest repair shop.
1. Follow the instructions above up to step 6.
2. To use gum, chew it until it is sticky enough to close the hole.
3. To use a sheet of paper and superglue, apply superglue around the hole and cut off a piece of paper large enough to cover the hole. Press firmly and let dry before continuing.
4. To use duct tape, cut off a small piece of duct tape and stick it over the hole.
5. Once you have finished sealing the hole, place the tube back on the rim, aligning the valve with the hole, and bleed again.
notes: This method may not be a permanent solution, but it should be enough to help you get to your destination or get help from someone.
Most mountain bikes these days don't use tubes and use tire sealants instead.
Although it can recover from small punctures, large holes can still occur and this is how you can repair them.
1. Look for areas where tire sealant can come out.
2. Small holes can be easily covered with sealant inside the tire, and there should be enough sealant through the hole to cover it.
3. If the sealant does not do its job and the hole is large, you can use a plug kit to repair the hole.
4. A tire plug kit is usually supplied with a drilling tool and tubeless plugs (consisting of sticky rubber in the shape of a worm).
5. Use a drilling tool to make a larger hole in the tire hole and rotate it as it enters. This will allow the rubber compound to properly enter the hole.
6. Place the rubber compound over the hole and use the expansion tool to push it in and plug the hole.
7. Trim off any remaining protruding rubber compound and let the sealant do its magic by filling the small hole on the left.
8. Inflate the tire.
notes : If you have tire sealant and your tire has dried out because of the sealant, be sure to apply it before following these steps.
If your bike's rims are the problem, watch this video from the Global Mountain Bike Network on how to straighten your bike's wheels:
Learning how to fix a flat tire is an important skill that a cyclist or even a bike rider should have.
You never know when an accident might happen and you may be in the middle of nowhere when it happens.
Learning how to fix a puncture can save lives in some situations and can make a difference if you're driving home or pushing your bike for miles.
To apply bicycle patches, first use vulcanizing adhesive to seal the gap. Make sure you apply enough and wait a few minutes for the glue to dry.
How much does it cost to fix a flat tire? While you might think that puncture repair can be expensive, it is actually one of the cheapest auto repair services. The price usually ranges from 6 to 20 euros, although they are usually around 10 euros.
The regulation states that tire repairs must be carried out within the central three-quarters of the drawing, called the “small repair area”. It is also not allowed to repair the tire if the puncture is equal to or greater than 6 mm in diameter.
The critical decision after applying the mortar is to let the area dry for at least one or two hours, especially if it is hot and humid, because if we let it dry for just a few minutes and apply a patch, it will most likely dry. take longer or finish peeling early.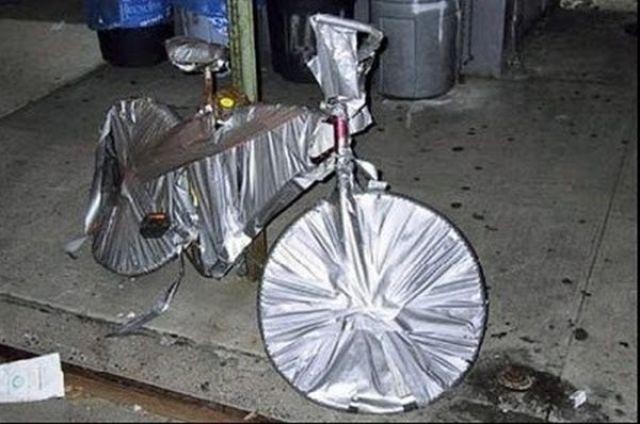
Cyanoacrylate instant adhesives will be the best choice for rubber or rubber bonding. Cyanoacrylate adhesives cure in seconds so you can quickly check if it will stick or not!
Place the patch sticky side down and apply a hot iron to the fabric, pressing for about 30 seconds to ensure the adhesive adheres to the fabric.
The answer is simple. It's just a matter of physics. Bicycle tire pressure is reduced due to the composition of the air containing nitrogen and oxygen. Be aware that a flat tire is not always synonymous with a puncture.
It usually takes 15 to 20 minutes to repair a puncture. But the time will also depend on the complexion and the type of tire puncture.
patch | Definition | Spanish Dictionary | RAE - ASALE. 1. tr. patch (‖ install patches).
Stick the patch with rubber glue as it sticks best to inflatables without coming off again even if you get wet, then put something heavy on the patch to press it down and let it dry overnight! !
The best thing in these cases is to put the vulcanized patch inside, a quick and safe repair, that is, in a workshop, that after a while the tires can lose air and be damaged, of course.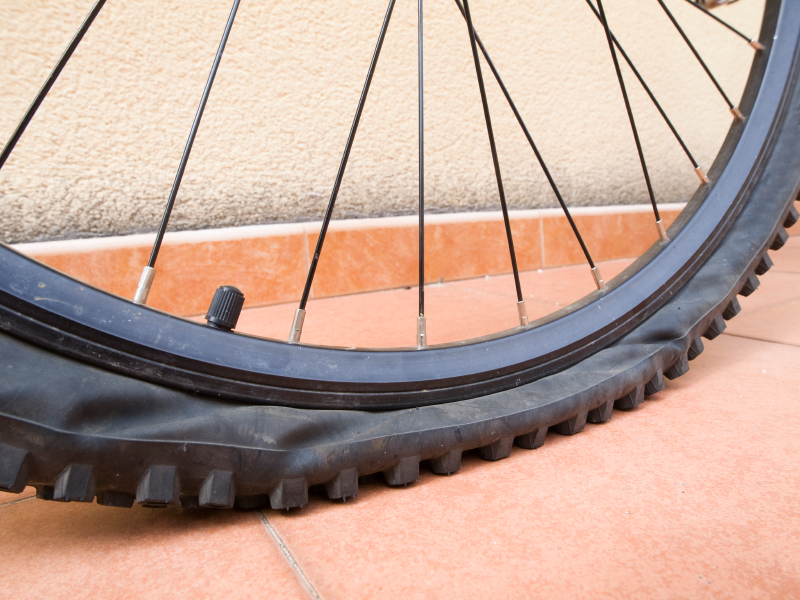 ..
..
Driving with a flat tire. Drive slower. Avoid driving faster than 24 to 32 mph (15 to 20 km/h) with a flat tire. You can cause irreparable damage to the metal wheel under the tire and even lose control of your vehicle.
In fact, continuing to drive on a flat tire means inexorably damaging the tire itself, which can be repaired at little cost. But that's not all: in addition to rubber, after a short time, the rim, on which the weight of the car will be unloaded, will also be damaged.
m. RD, PR, Ve. A piece of cloth, paper, or other material that is pasted to the surface of an object to repair or cover up damage.
Mix one or two grated potatoes, a tablespoon of flour and a tablespoon of milk, moisten two cotton pads and place them under the eyes for 15 minutes. After the procedure, wash yourself with cold water.
For homeowners, the easiest solution is an epoxy or other adhesive designed to bond metals and similar non-porous surfaces. It does not require any special skills or equipment.
A vulcanizing or vulcanized tape is a type of tape made up of materials with a rubbery and elastic composition. This tape is also called heat shrink or self sealing tape. Being heat shrinkable, when we heat the tape, it shrinks from the heat.
It is recommended to use a polyolefin primer such as Permabond POP to prepare the silicone surface, after which the parts can be safely bonded with cyanoacrylate adhesive. Clean with isopropanol or Permabond Cleaner A to remove any contamination.
Set the iron to 110º without steam. Lay a white cotton cloth over the patch and apply the iron for 20-30 seconds. Move on to small heat strokes until the entire patch is stuck. Make sure it is well glued and the edges are not raised.
Apply the patch to your clothing: peel off the backing paper and place the patch where you want to stick it. Iron on clothes at 140ºC for 15 seconds. And your clothes with a patch are ready.
Too high pressure reduces tire grip; too low pressure allows the tube to pinch on impact (on a pothole, on a step), and rubbing the rubber against itself often causes holes in the tube.
You will notice how it wears, especially if it takes time at less pressure than recommended. Transportation of a tire in a flat state increases the wear of its outer edges, the shoulder areas of the tire. You will also notice that the tire is hotter than the others.
It usually takes about a year for a tire to lose its minimum safe pressure, but if our car has been exposed to extreme temperatures and the situation suddenly changes, the porosity can increase and lose more air than usual.
Apply the paste to a brush or sponge and apply to a rusty bike. Don't rub or remove the paste right away - it will take time for it to settle and break down the rust. Leave the paste on for 10-15 minutes. The baking soda paste should be thick enough to cover the rusted area well without dripping.
Sectional tires have a price range of 150 to 300 pesos depending on size and other conditions, so this can be a temporary measure to avoid the cost of a new tire.
to patch | Definition | Spanish Dictionary | RAE - ASALE.