Knowing how to change a tire is a necessary skill for all drivers. If you rely on a cell phone to save you in a roadside emergency, there’s always that chance you will forget to charge it, be out of range, or leave it at home. Flat tires can happen anywhere, and a cell phone is no substitute for knowing how to change a flat tire.
Thankfully, changing a tire isn’t all that hard! Just adhere to the following guidelines to be prepared in case you have a flat.
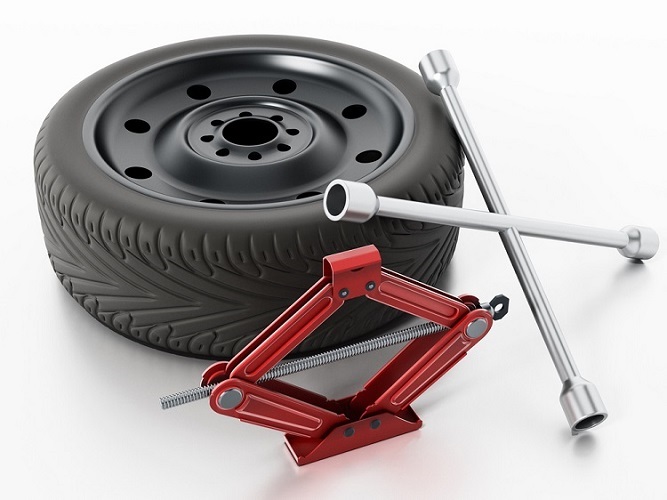
These items should have come with your vehicle:
Jack
Lug wrench
Fully inflated spare tire
Vehicle owner’s manual
If you have misplaced any of these items, or if your car did not come with these items, you should purchase new ones right away. And be sure you’re regularly inflating the spare tire to your vehicle manufacturer’s recommended PSI. You should check the spare’s air pressure every time you check your other tires.
Remember to check pressure every month and before long trips or carrying extra load.
Here are some items that don’t come with your vehicle but that you should stow in your trunk or glove box in case you have to change a flat tire:
Flashlight with working batteries
Rain poncho
Small cut of 2"x6” wood to secure the jack
Gloves
Wheel wedges
As soon as you realize you have a flat tire, do not abruptly brake or turn. Slowly reduce speed and scan your surroundings for a level, straight stretch of road with a wide shoulder. An empty parking lot would be an ideal place. Level ground is good because it will prevent your vehicle from rolling. Also, straight stretches of road are better than curves because oncoming traffic is more likely to see you.
Never attempt to change your tire on a narrow shoulder near oncoming traffic. Keep moving (slowly) until you find a safer spot. While driving on a flat risks ruining your rim, replacing a rim is better than being hit by an inattentive driver.
Make sure to consult your owner’s manual and review their specific steps on how to change a flat tire for your vehicle
Your hazard lights or “flashers” will help other drivers see you on the side of the road. To avoid an accident, turn them on as soon as you realize you need to pull over.
Once stopped, always use the parking brake when preparing to replace a flat tire. This will minimize the possibility of your vehicle rolling.
Wheel wedges go in front of or behind the tires to further ensure the vehicle doesn’t roll while you fix the flat tire. If you’re changing a rear tire, place these in front of the front tires. If your flat tire is at the front, put the wheel wedges behind the rear tires.
Bricks or large stones will work just as well as “real” wheel wedges. Just be sure they’re large enough to stop the car from rolling.
If your vehicle has a hubcap covering the lug nuts, it’s easier to remove the hubcap before lifting the vehicle with the jack.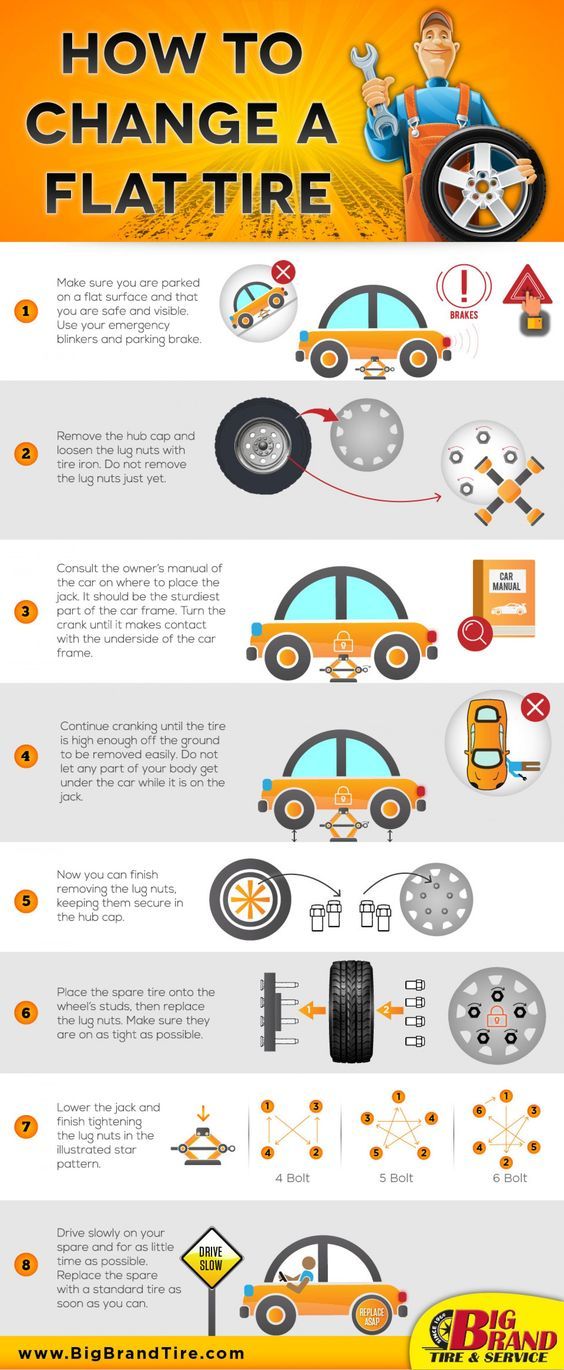 If your lug nuts are exposed, you can skip ahead to Step 6.
Use the flat end of your lug wrench to remove the hubcap. This will work for most vehicles, but some hubcaps need a different tool to come off. Consult your owner’s manual for proper hubcap or wheel cover removal procedures.
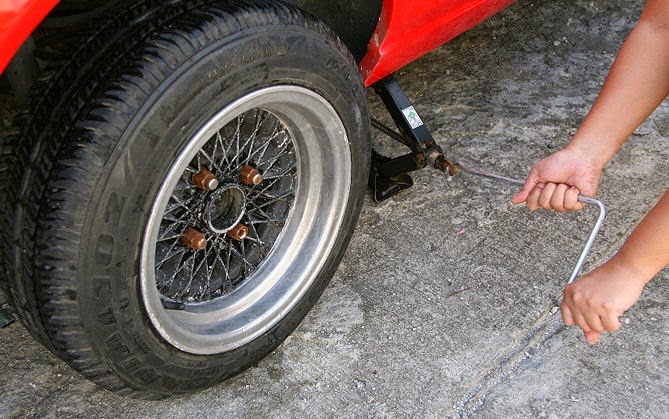
Using the lug wrench, turn the lug nuts counterclockwise until you break their resistance. You may have to use force, and that’s ok. Use your foot or all of your body weight if necessary.
Loosen the lug nuts about ¼ to ½ of a turn, but don’t remove them completely yet. Save that for when it’s time to remove your tire/wheel from the vehicle.
The right place for the jack is usually beneath the vehicle frame alongside the tire that’s flat. Many vehicle frames have molded plastic on the bottom with a cleared area of exposed metal specifically for the jack. To safely lift and avoid damage to the vehicle, follow the instructions for jack placement in your vehicle owner’s manual.
To prevent the jack from settling under the weight of your vehicle and coming off balance, place a small cut of 2x6” wood beneath it before attempting to raise your vehicle. This tactic is especially helpful on asphalt.
With the jack properly positioned, raise the vehicle until the flat tire is about six inches above the ground.
Never put any part of your body under the vehicle during or after raising the vehicle with the jack.
Now it’s time to remove the lug nuts all the way. Since you've already loosened them, you should be able to unscrew them mostly by hand.
Gripping the tire by the treads, pull it gently toward you until it’s completely free from the hub behind it. Set it on its side so that it doesn’t roll away.
Now place the spare on the hub by lining up the rim with the lug bolts. Push gently until the lug bolts show through the rim.
Put the lug nuts back on the lug bolts and tighten them all the way by hand. Once they are all on, check each one again, tightening as much as possible. You will tighten them with the wrench after lowering the vehicle to the ground.
Use the jack to lower the vehicle so that the spare tire is resting on the ground but the full weight of the vehicle isn’t fully on the tire. At this point, you should tighten the lug nuts with the wrench, turning clockwise, as much as you can. Push down on the lug wrench with the full weight of your body.
Bring the vehicle all the way to the ground and remove the jack. Give the lug nuts another pull with the wrench to ensure they’re as tight as possible.
If the hubcap you took from the flat tire will fit your spare, put it in place the same way you removed it initially.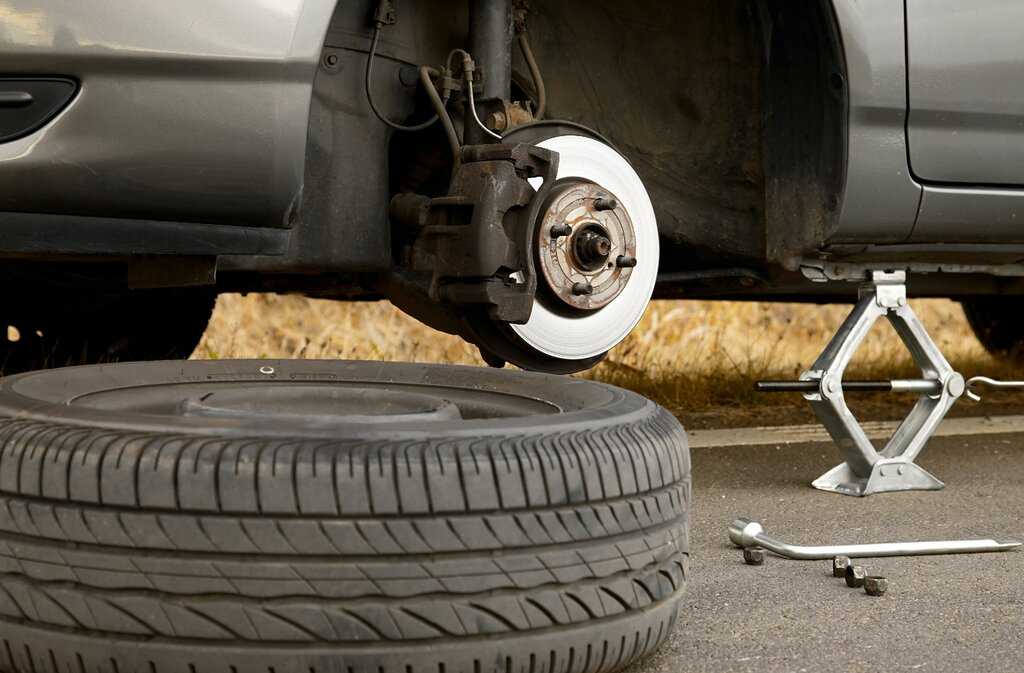 If it doesn’t fit, stow it away with the tire when you stow your equipment.
You have before you a jack, a lug wrench, wheel wedges, your flat tire, and possibly a hubcap. Don’t forget to put all of them in your vehicle before driving away.
You should check the tire pressure of the spare tire to make sure that it is safe to drive on. “T-Type” temporary spares, also called “mini-spares,” require 60 psi (420 kPa). If the tire needs pressure, drive (slowly) to a service station immediately.
Temporary spare tires aren’t made to drive long distances or at high speeds, so drive cautiously until you’re able to visit a tire technician. A professional should be able to determine whether your tire needs a repair or if it’s time to replace it.
Aside from taking your tire to a professional, the above procedure shouldn’t take more than 15 to 30 minutes to change a tire. Just be sure you don’t leave out any steps.
It’s beneficial practice changing a tire in your garage or driveway to ensure you’re ready to handle this situation if it ever happens to you.
Knowing how to fix a flat tire is great, but regular tire maintenance is even more important. In addition to reviewing this guide regularly, remember to do the following:
Keep your tires properly inflated
Rotate your tires according to the manufacturer’s guidelines
Monitor for tread wear
All of these precautions will extend the life of your tires and reduce the likelihood of a flat. While there’s no way to prevent flat tires completely, proper care can improve performance and ensure your tires last as long as possible.
There’s never a good time for a flat. That’s why Bridgestone DriveGuard tires are masterfully engineered to keep you moving for up to 50 miles at speeds up to 50 MPH without disruption.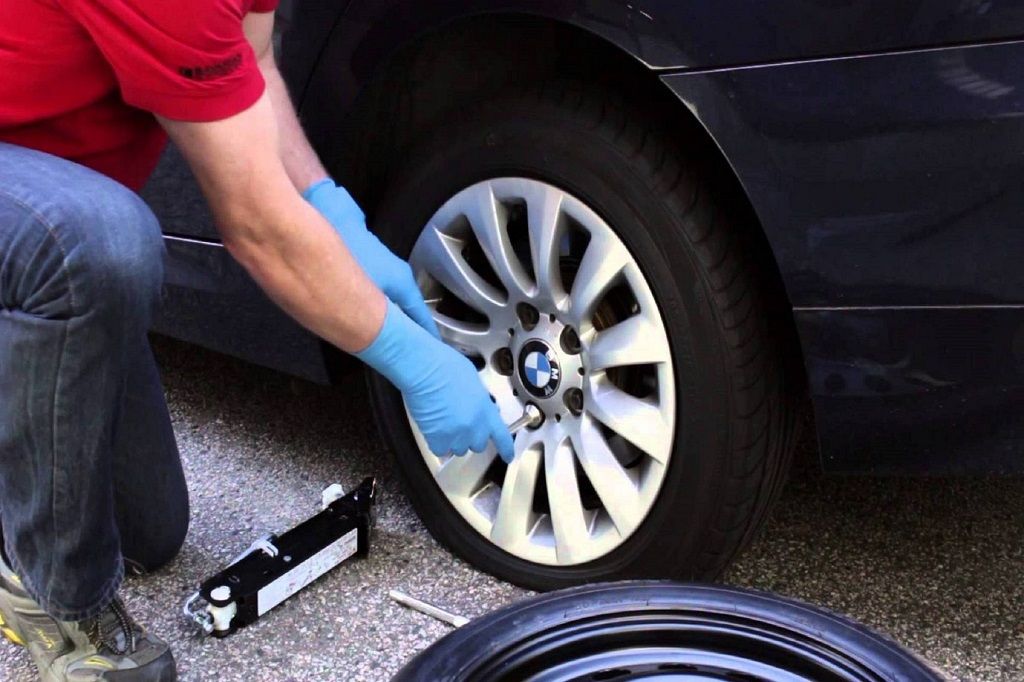
There’s never a good time for a flat. That’s why Bridgestone DriveGuard tires are masterfully engineered to keep you moving for up to 50 miles at speeds up to 50 MPH without disruption.
See Details Find Your Fit
Automotive>Tires & Brakes
May 20, 2019
A tire blowout is one of the scariest experiences you can have while driving. Impact damage, a large cut with rapid air loss, or even an unnoticed small puncture that allows the tire to slowly lose air over time can all cause tire failure.1 A flat tire can seem overwhelming when you are on the road, but there are five steps you can follow to switch to your spare and get home (or to the nearest tire shop).
Learn How to Fill Your Tires with Air to help prevent a flat tire.
Before you exit your vehicle, you need to pull over or find a place away from the rush of traffic on the road. Stay calm and aware of your surroundings while you look for a place to stop the car. While you don’t want to damage the metal rim by driving more than several yards on a flat tire, your safety comes first.2 When you pull over, remember to put your hazard lights on when on the side of the road, turn off the car, and apply your parking brake. When you’re ready to investigate the damage, try to exit on the side of the car away from traffic and no matter what, make sure you watch for oncoming traffic before opening the door. Keep children and other passengers calm and comfortable inside the vehicle. If you have them, place flares or reflectors every 10 feet and at least 300 feet behind your vehicle on the right edge of the main roadway to oncoming traffic where your vehicle is parked.3 Apply wheel wedges or find large rocks to apply behind wheels on the opposite side of the car to prevent the vehicle from rolling.
Once you are in a safe location, locate all the necessary tools to change your flat tire. Your owner’s manual should tell you where the tools are located, but most are in the trunk with the spare or in the floor of an SUV. A basic tire changing kit should include:
1. A jack to easily lift the car
2. A lug wrench with a socket on one end and a pry bar on the other
3. A spare tire to replace the flat tire4
Some vehicle models may require additional tools like a wheel lock or extension bars for lowering the spare tire so be sure to consult your vehicle's owner’s manual before you attempt to change to your spare. It is also important to note that while fixing something yourself can feel empowering, if you don’t feel comfortable changing your flat tire, it’s a good idea to call a trained expert to help.
If you have a hubcap or wheel cover, carefully remove it.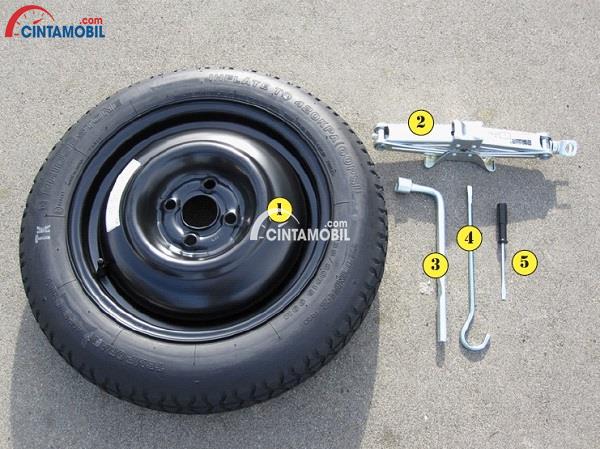 Use the lug wrench and socket to loosen the lug nuts, but don’t remove them just yet. Stop turning if the socket slips around the lug nut. Constant slipping could damage the nut by stripping it, making it more difficult to remove. Next, refer to your owner’s manual to find the correct location to use the jack. The correct location is reinforced so It won't do damage to your car’s frame or undercarriage. Putting the jack anywhere else could cause damage to the frame of the car, or even worse, could cause the car to fall off the jack while you are working on it, seriously injuring you. Once you identify the correct location, use the jack to slowly lift your vehicle until the wheel spins freely, but not far enough for the car to slide off the jack.
Without losing track of them, remove the lug nuts and pull the tire off the car straight towards you. Place the spare tire on straight and reattach the lug nuts with your hands while holding the tire still.
Learn more about how to keep your tires healthy by avoiding these 5 Ways to Avoid a Flat Tire.
Use the jack to slowly lower the car back down. Once all four tires are touching the ground, use the wrench to tighten the lug nuts all the way. Be sure to tighten the nuts in a diagonal pattern rather than a circle so the tire will stay straight.
Once the flat has been safely removed and replaced with a spare, you still need to purchase a true replacement tire or get the tire repaired. Driving on the spare faster or longer than the owner’s manual recommends could cause even more damage to your vehicle.
Find a shop near you that accepts Synchrony Car Care TM and take advantage of promotional financing* on purchases of $199 or more.
Read more about Why You Shouldn’t Just Replace One Tire.
Find a shop near you that accepts Synchrony Car Care TM and take advantage of promotional financing* on purchases of $199 or more.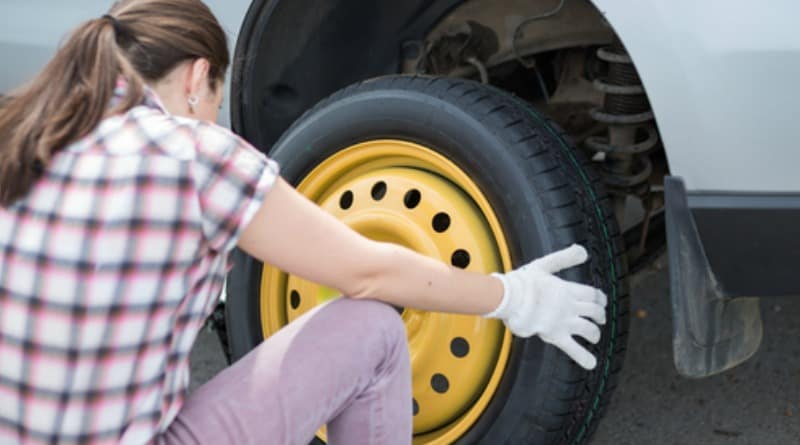
Apply Today
Find a Location
*Subject to credit approval. Minimum monthly payments required. See merchants or mysynchrony.com/carcare for promotional financing details and merchant locations.
Disclaimer: We include links to another website in this article for your convenience. We do not endorse any content on these sites.
All product names, logos, and brands are property of their respective owners. All company, product and service names are for identification purposes only. Use of these names, logos, and brands does not imply endorsement.
This content is subject to change without notice and offered for informational use only. You are urged to consult with your individual business, financial, legal, tax and/or other advisors with respect to any information presented.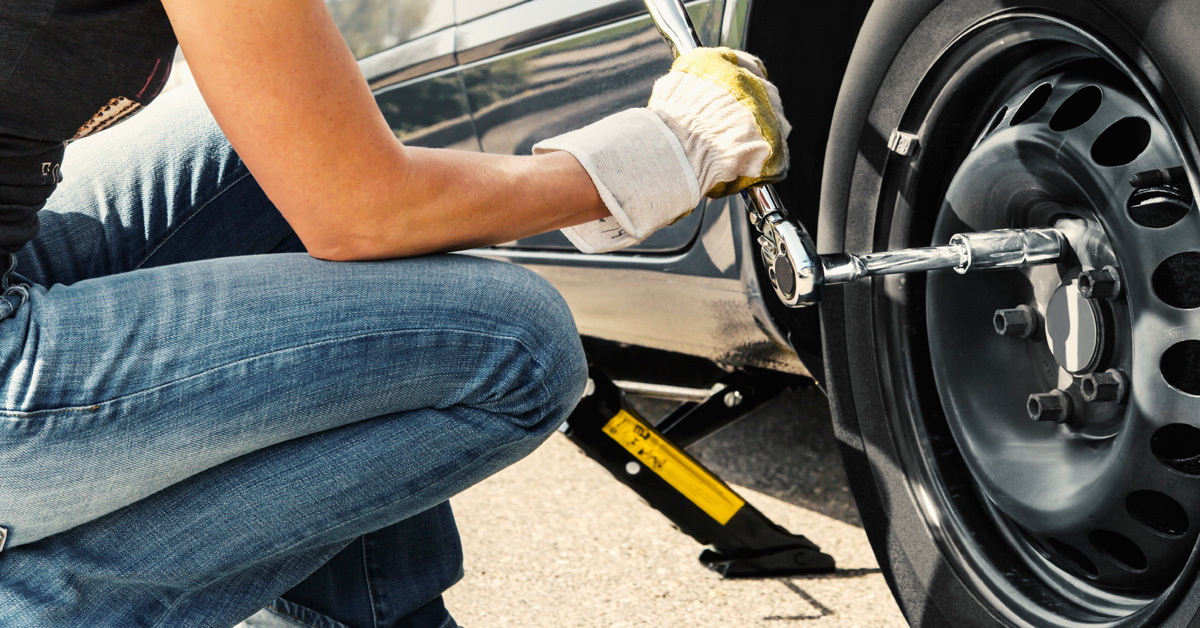 Synchrony and any of its affiliates (collectively, “Synchrony”) make no representations or warranties regarding this content and accept no liability for any loss or harm arising from the use of the information provided. Your receipt of this material constitutes your acceptance of these terms and conditions.
© 2022 Synchrony Bank.
This set of letters is mainly intended to remove all questions about modern standards for getting rid of archaic cameras. We are talking mainly about lightweight tires for cross-country and trail.
Benefits:
Many people think that initially tubeless is lighter than a camera kit and this is its main advantage. However, it is not. Modern tubeless technology certainly allows you to gain weight, but the original goal of eliminating tubes is to be able to use lower pressure. Low pressure (1.6 - 2.0 bar), especially in the race, saves a lot of energy, the bike rides much softer, allowing the rider to stay in the saddle longer. The transition to tubeless is perceived by many very calmly, the sensations practically do not change, but when you switch back to a bike with chambered rubber, you will immediately notice how it hammers at the fifth point.
Tube rubber does not allow the use of low pressure due to the fact that the tubes break through rocks and roots very easily. This phenomenon is called "snake bite" - upon impact, the camera breaks through in two or four places due to a hit between the rim and the edge, which can be the very roots, stones and steps. In the event of such an excess, there is practically no threat to a tubeless case; it cannot be pierced with a rim.
Some tubeless enthusiasts still believe that the lack of friction between tube and tire also results in some energy savings.
The second very nice feature of tubeless is its resistance to punctures. The standard tubeless tire has a very thick layer of rubber and the air in the event of a puncture leaves it rather slowly, often enough time to get to the technical assistance point in the race, or even finish the race with a nail in the wheel.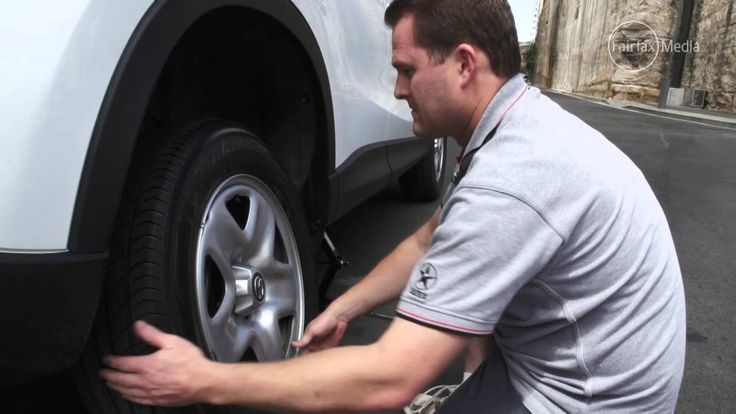 Let me remind you that the chamber tire loses air very quickly and the chamber has to be changed here and now.
Nowadays, tubeless is rarely used without sealant, which seals punctures on its own without the participation of the rider. The sealant consists of a bunch of secret ingredients, the main of which is liquid latex, it is precisely its particles that plug the hole in the tire. The possibilities of the sealant are not endless, but it does an excellent job with punctures and small cuts in the tire. According to reviews, the best latex-based sealant is produced by NoTubes. Friends from Ukraine make their own sealant by mixing liquid latex with water. This mixture works better, but dries faster in the tire. The original sealant dries out in two months, self-made in three to four weeks. You can find liquid latex at professional make-up artists and in the construction markets in five-liter containers. Liquid latex can also be bought in sex shops, it is used to make masks and clothes, where its purchase is not economically justified . .. but only there it can be colored!
Now a little about the terminology.
Regular tire is just a tire for use with a tube. In fact, all tires can be used with a camera, but without it is always better =)
A normal rim is simply a rim designed to be used with a camera. Almost all rims can be converted to tubeless with Tubeless Kits. The Tubless Kit includes "yellow tape", nipples and the so-called rim strip, which makes the tire-rim connection tighter. About Rim strip you will be told here.
How to Install Rim strip
In fact, with a regular rim, a regular tire and a couple of torn tubes, you can make a ghetto tublis, which this cute Chinese will tell you about.
Tubeless (UST) rim The is a rim specially designed for use with tubeless tires without any additional movement. The rim has a specific profile and a special hook that provides a tight connection in the area of the bead cord. An important feature of UST rims is the lack of spoke holes.
Tubeless (UST) The is a specially designed tire with an extra butyl layer inside to keep air in and a bead cord design that allows the tire to stay on the rim better. When installing a UST tire on a UST rim, characteristic clicks are heard when the bead cord enters a special ledge on the rim.
The sidewalls of such tires are usually much thicker than the sidewalls of a tubed tire, which affects the weight. Full-fledged tubeless tires weigh 500-700 grams, depending on the model and manufacturer. Only UST tubeless tires can be used without sealant. In fact, UST is a kind of GOST for manufacturers of tubeless components, guaranteeing their compatibility without latex and other tricks.
Tubeless Ready The is the child of tube and tubeless use. It does not have a butyl layer and thick sidewalls, but it has a bead cord like on full-fledged tubeless tires. Such tires were invented by Hutchinson and are increasingly appearing in the model lines of leading manufacturers, the entire Schwalbe 2011 line has Tubless Ready versions.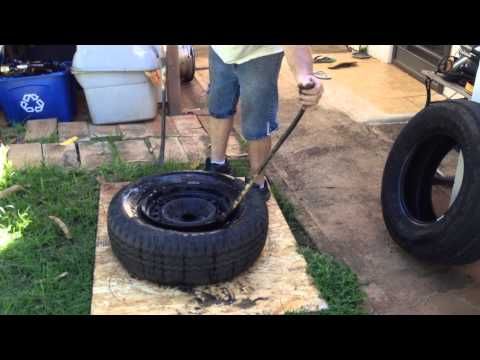 It can only be used with a filled sealant that seals all the micro-holes in the tire and at the same time protects against punctures. These tires weigh much less than UST tires and are the ones most commonly used in racing.
Judging by the descriptions of technology Maxxis 2011 tubless ready versions are called EXO.
This picture from Geax clearly illustrates this. Their Tubeless Ready technology is called TNT.
Tubeless Ready Rim The is a rim that has a special profile that is compatible with tubeless tires and allows tubeless tires to be installed with minimal hassle. Rim strip is no longer needed when using these rims! As a rule, when we talk about such rims, we mean the products of the same American company No Tubes - ZTR rims. According to the ZTR patent, the rims are produced by the Italian-German fetish manufacturer FRM. FRM rims, unlike ZTR, are pistoned and asymmetric. At the same time, the rim manufacturer ZTR is sure that the caps are only useful for assembling the wheel by an inexperienced craftsman, in all other cases it is extra weight.
Such rims have holes for the spokes, which, when used, are sealed with a special adhesive tape, popularly known as “yellow tape” or “yellow tape”. The optimal yellow tape is made by Specialized - for a reasonable price you get 50 meters of an excellent product, blue, by the way =)
Joe's tape is rubbish, don't buy it. It splits and tears.
Take wheels with such rims, wrap them with yellow tape, insert a tubeless nipple and put a chambered tire with sealant. It is best to pour a little more sealant for the first time than it should according to the instructions - 100 ml instead of 60-80, so that the tire is well sealed. After the first installation, it is useful to let the tire lie down first on one side, then on the other, periodically scrolling it - this way the sealant will better seal the leaky sidewalls. So you get the lightest possible tubeless option. Many professional riders have been doing this for years! The only downside to using super-light tubeless tires is their lateral compliance due to the very thin sidewall, especially on steep hills. For those who like very low pressure or just feel this phenomenon keenly, it is recommended to use Tubeless Ready rubber, in which the sidewall is more stable.
Personal opinion
For the coming season I will be racing FRM 355/ZTR XMD 333 rims using either Tubeless Ready or regular tubed tires shipped without tubes. Of course, both will be used with sealant.
For training, I already bought myself on sale tubeless (UST) Fulcrum Red Metal 3 wheels, which will be reliable, reliable and predictable Maxxic CrossMark LUST 2.0, proven in multi-day races.
The abundance of winter studded tires can lead a person who is about to change wheels into bewilderment. It's really hard to choose. In order not to blink amazed eyes, listening to a specialist helping you choose wheels, you need to at least have a little idea of \u200b\u200bwhat's what.
The abundance of winter studded tires can lead a person who is about to change wheels into bewilderment. It's really hard to choose. It is clear that in Russian conditions, tires must necessarily have a relief tread with a winter pattern, transverse multidirectional sipes and spikes. In addition, it is also important where and how the wheel was studded, by what technology it was done and which stud sticks out of the socket.
And in order not to blink astonished eyes while listening to a specialist helping you choose wheels, you need to have at least a little idea of what's what.
It is known that there is an original tire studding by the manufacturer (most often it is Gislaved and Nokian), and there is non-original (Russian, Finnish, German, Polish, etc.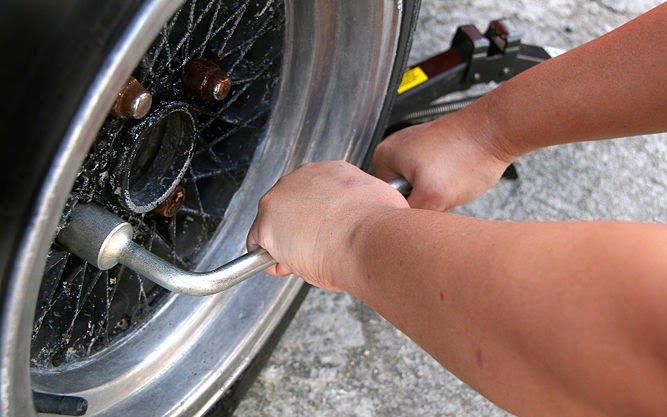 ). In Russia, more than 90% of tires belong to the second option. Although this does not mean at all that the tire is bad - just the original studding is more expensive. And, say, in Finland the same Bridgestone can be hissed no worse than the Japanese themselves, if this is done in a factory way. Meanwhile, despite the huge variety of spikes and manufacturers, all "thorns" have approximately the same design. The main components are the body and the carbide insert. Moreover, the material of the stud body is an indicator of its reliability, efficiency and durability of the tire. The main task of the stud body is to provide the latter with a stable position in the tire tread so that the carbide insert maintains a vertical position and can cling to the ice. It can be plastic, but in this case, the main problem will be rapid wear. This spike is light and holds well in the tread socket. Although after the case is erased, and then the core, it is of little use, even if it is still held in the tire.
There are aluminum spikes - a better option than a plastic shell, since such "barbs" are light and very reliable. For Europe, where the roads are not sprinkled with salt, it is ideal. In Russia, one season is enough for this stud to turn into a substandard product, although it all depends on the mileage of the tire and the shape of its stud. Therefore, for our conditions, steel is the most attractive material for the stud body. There is no need to talk about its resistance to corrosive processes. Although it should be taken into account that a steel spike has a much larger mass than an aluminum one, and even more so a plastic one, so illiterate studding will lead to a large imbalance when balancing. The same mass constantly pulls the stud down, "luring" it out of the tread socket. The shape of the "needle" can resist this process.
So we come to the question of which design of studs is the most reliable and what method of fastening the stud will allow it to remain on the surface of the wheel the longest. Housings are available in one-, two- and three-flange designs. The first ones are less durable, because after a short operation they begin to deviate from the original radial position. Two- and three-flange spikes are in their original "pose" for a longer period. However, the spikes are not installed on the tires, as they say, from the bulldozer. Only specialists should decide, based on the many features of the tire, which spike to put on it.
We must pay tribute to foreign manufacturers of tires, which, if they do not undertake to stud themselves, make holes for the "needle" in the wheel by vulcanization. In this case, all nests are almost the same, the rubber remains elastic. The spikes in such a groove sit evenly and for a long time, because the rubber around does not tear even under high loads.
The domestic manufacturer is often not so caring and produces wheels without holes for studs. Although it happens that nests are still made, they are all so different that a standard spike will not sit correctly in them.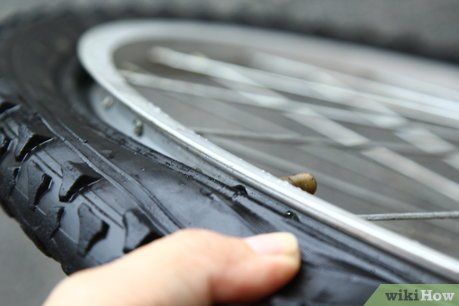 The holes have to be re-drilled. This is done most often with a pen drill at high speeds, so the rubber along the edges of the sockets is burned out, becoming "oak". In addition, as a result of this simple process, tears appear on the walls of the groove. It is clear that in these places the rubber will tear, and the spike will fall out.
Although this method is not the most terrible. You can ruin a tire in general by piercing the wheel with a studded gun and inserting a "needle" into the resulting hole.
The best way is to make the same holes on the machines with a hollow tube, which will ensure a strong fastening of the "thorn". Since the wheel tread is multi-layered (the upper layer is soft, the lower layer is hard), the hollow tube does not press the upper layer into the hard one (this is how tires are poured at the factory with a hole for the spikes), but goes through it, reaching the lower "step". In the first case, the spike will be held by a soft shell, which is not entirely reliable. In the second version, the "needle" will be firmly fixed in a layer of hard rubber.
When you go to the store to choose your own wheels, you will certainly not understand who studded the tire, by what technology and what kind of stud is on it. True, there are some details that can immediately tell a lot about the installation of the spike. This refers to the position of the "needle" on the surface of the tread. The spike must be planted at the optimum depth. If the "thorn" rod sits hidden behind the walls of the socket, then there will be no use from it until the tread is worn down to the desired level. If the spike rises above the surface of the wheel along with the body, then it will break or fly out too quickly.
It is worth paying attention to how the spikes are set relative to each other. If their rods do not rise at the same height from the tread or stick out in different directions, then most likely the tire is a sample of studding with an ordinary pistol. Acceptable quality in the landing of spikes provides a semi-automatic device. In this case, the spikes will be planted at the same depth and, as a rule, relatively evenly. But the best studding is given by factory automatic machines, in which the participation of the human factor is minimal, and therefore the result is encouraging.
There are three rules for motorists to keep the studs stable in their holes. Firstly, the driver should drive calmly for the first 500 km of a new tire, without violating the speed limit in the city. At the same time, the trip should not be accompanied by sharp braking and lightning acceleration. Secondly, it is necessary to observe the speed limit of no more than 160 km / h, since only up to this speed, manufacturers guarantee adequate behavior of the studded wheel. Thirdly, when installing studded tires that have already been in operation, it is necessary to mount them in the same direction of movement that was last season, since the stud still acquires a certain slope during operation. If you change direction during the subsequent installation, then the spike in the socket will begin to "loose", it will have a tendency to fall out. It will simply be a shame to throw away relatively new wheels, on which I still expected to leave for a couple of seasons.
practice
Articles / Used cars 5 reasons to buy and not to buy Toyota Fortuner II “Impeccable car”, “phenomenal cross-country ability”, “shaky suspension, hard steering, the engine inside bellows like a buffalo”, “huge miscalculations in terms of comfort”, “comfortable handsome man”, “very ... 213 0 0 09.10.2022
Articles / Practice Look into the kingpin: what is a kingpin suspension, how to maintain it and why to inject The word "pivot" today seems to someone as archaic as "zipun", "endova" and "batog". In fact, this is not so: the king pins have not left us yet, and it is likely that some will have to ... 714 7 0 07.10.2022
Articles / Used cars Along Route 60: The BMW 325i E36 Ownership Experience Getting a car from the cult road movie "Route 60" is not an easy task in our country. These are lengthy searches, and "parallel imports", and complex logistics, and years of painful waiting... 1690 7 5 06.10.2022
Test drives / Test drive Haval Dargo vs Mitsubishi Outlander: the dog is barking, the stranger is coming In the Haval dealership in the south of Moscow, life is in full swing: buyers look at cars, communicate with managers and sign some papers. While I was waiting for the test Dargo, the same cross... 12821 7 151 13.09.2022
Test drives / Test drive Motor from Mercedes, emblem from Renault, assembly from Dacia: test drive of the European Logan 1.0 It would seem that what's new can be told about the second generation Renault Logan, known to every Russian taxi driver, as they say, up and down? However, this car has... 11244 ten 41 08/13/2022
Test drives / Test drive Geely Coolray vs Haval Jolion: Free Cheese? If! Do you want to buy a car today with a full warranty, on credit at an adequate rate, without wild dealer markups? Now this is still a task, because a full-fledged chain of "representation - s.