By Mary Lougee Updated May 11, 2022
Slow air leaks in lawn mower tires are not always apparent from a visual inspection. Low or uneven tire pressure results in lawn scalping when the blades cut the crown of your lawn or stepped grass that appears as if it is cut on an angle. Removing the front and rear wheels from a Craftsman rider is necessary to make repairs or replace the tires.
Park your Craftsman rider on a flat surface, such as a driveway. Turn the ignition key off and engage the parking brake.
Place an automotive jack under the center of the front or rear axle, and raise it. Place a jack stand under the axle on the inside of each tire on the front or rear of the rider. Lower the jack and remove it. Place two bricks in front of the front tires when removing rear wheels or behind the back tires when removing the front wheels.
Pull the axle cover off a wheel with adjustable pliers, instructs Repair Clinic. Slide the washer and retaining ring off the axle. Grasp the square key behind the wheel on the axle with needle-nose pliers and pull it straight up to remove it. Only the rear wheels have a square key to lock the rear-wheel drive transmission in place so the lawn mower can move.
Grasp the tire on the rim with one hand on each side, and pull it straight out to remove it for repairs or replacement, advises The World as Seen by Tom.
Reinstall the front tires on the axle, replace the washer and retaining ring, and tap the axle cover onto the axle with a rubber mallet. Align the grooves of the rear tires with the axle grooves and slide the wheel on, replace the square key into the axle, replace the washer and retaining ring, and tap the axle cover on with a rubber mallet.
Automotive jack
2 jack stands
2 bricks
Adjustable pliers
Needle-nose pliers
Rubber mallet
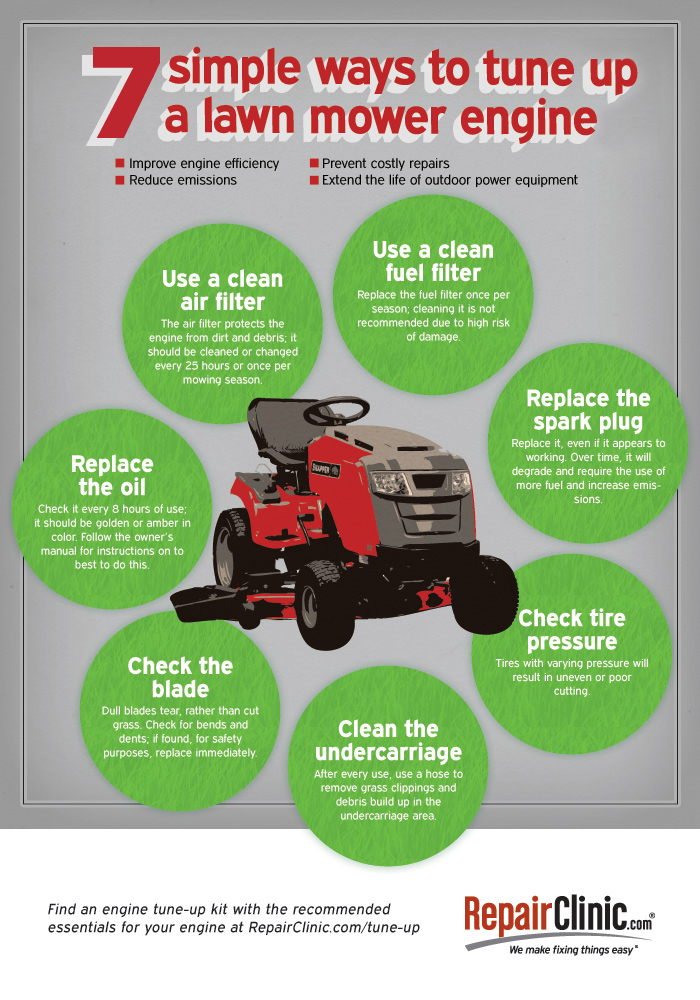
Check the air pressure in your tires before mowing your lawn. Tires that are low or leaking air need repairs to prevent lawn scalping.
Proper tire inflation extends the life of tires without cracking sidewalls and increases mowing efficiency by using less gasoline.
Wear proper personal protection gear including sturdy shoes, safety glasses and earmuffs when operating a riding mower.
References
Resources
Tips
Warnings
Writer Bio
Mary Lougee has been writing for over 10 years. She holds a Bachelor's Degree with a major in Management and a double minor in accounting and computer science. She loves writing about careers for busy families as well as family oriented planning, meals and activities for all ages.
Please enable javascript to view the website ..
Repair help > Front-Engine Lawn Tractor repair > Front-Engine Lawn Tractor repair guides
January 1, 2015
By Lyle Weischwill
This step-by-step repair guide explains how to change a front tire on a riding lawn mower if the old tire is damaged beyond repair. Replacing the front tire is fairly easy; you just need a few tools and a manufacturer-approved riding mower part.
Follow the steps in this repair guide and video to replace the front tire on Craftsman, Husqvarna, Toro, Troybilt, Ariens, Poulan, MTD, Murray, Snapper, Yard-Man, John Deere and Weed Eater riding mowers and lawn tractors.
If you'd rather use tire sealant to repair the tire, the video How to Repair a Riding Lawn Mower Tire shows how.
Quick links
Tools required
Floor jack or bottle jack
Jack stand
Slot screwdrivers
Pry bars
Pliers
Valve stem core removal tool
Liquid detergent
Water
Wood blocks
Work gloves
Safety goggles
Compressor air supply
Repair difficulty
Time required
60 minutes or less
Repair difficulty
Time required
60 minutes or less
Replacing a front tire on a riding lawn mower
This video explains how to replace the front tire on a riding lawn mower.
01.
Park the riding mower on a level surface and set the parking brake.
Turn the ignition switch off and remove the key.
Wear work gloves to protect your hands and safety goggles to protect your eyes.
Lift the riding lawn mower hood and disconnect the spark plug wire.
Lower the tractor hood.
Tip: Disconnect both spark plug wires if your engine has 2 cylinders.
PHOTO: Disconnect the spark plug.
02.
Block the rear tires to keep the riding mower from rolling.
Position the jack under the frame and jack up the riding mower to raise the front wheel.
Place a jack stand under the frame to support the riding mower.
Remove the jack.
PHOTO: Block the rear wheel.
03.
Pull off the axle cover.
Remove the retaining ring and then pull off the washers.
Pull the tire off the axle.
PHOTO: Remove the front wheel.
04.
Remove the valve stem cap.
Remove the valve stem core, which lets any remaining air out of the tire.
Break the tire bead and pry the tire off the wheel rim on one side.
Pry the tire off the rim on the other side.
PHOTO: Pry the tire off the rim.
05.
Clean the wheel rim.
Set the new tire flat on a work surface.
Lubricate the top tire bead with liquid detergent.
Pry the rim into the top side of the tire.
Flip the rim and tire over.
Lubricate the tire bead with liquid detergent.
Pry the remaining side of the tire onto the rim.
Warning: Use blunt tools to pry the tire to avoid damaging the new tire bead.
PHOTO: Lubricate the bead.
06.
Fill the tire with air to seat the tire bead.
Reinstall the valve stem core.
Fill the tire fully with air.
Tip: If the tire didn't fill with air, install a ratcheting tension strap around the center of the tire tread, tighten the strap to force the beads outward, and fill the tire with air to seat the tire bead. Carefully release and then remove the strap.
Tip: If the bead doesn’t seal, check the rim and replace it if you find damage.
PHOTO: Shoot air into the tire.
07.
Slide the wheel on the axle.
Reinstall the washers and snap the retaining ring onto the axle.
Push the axle cover onto the wheel.
PHOTO: Reinstall the wheel.
08.
Push the jack under the frame and raise the riding mower, and then pull out the jack stand.
Lower the riding mower to the ground.
Remove the wood blocks from the rear tires.
09.
Raise the tractor hood.
Reconnect the spark plug wire and lower the hood.
Tip: Reconnect both spark plug wires if your engine has 2 cylinders.
Warning: Undertaking repairs to appliances can be hazardous. Use the proper tools and safety equipment noted in the guide and follow all instructions. Do not proceed until you are confident that you understand all of the steps and are capable of completing the repair. Some repairs should only be performed by a qualified technician.
Choose a symptom to see related riding mower and lawn tractor repairs.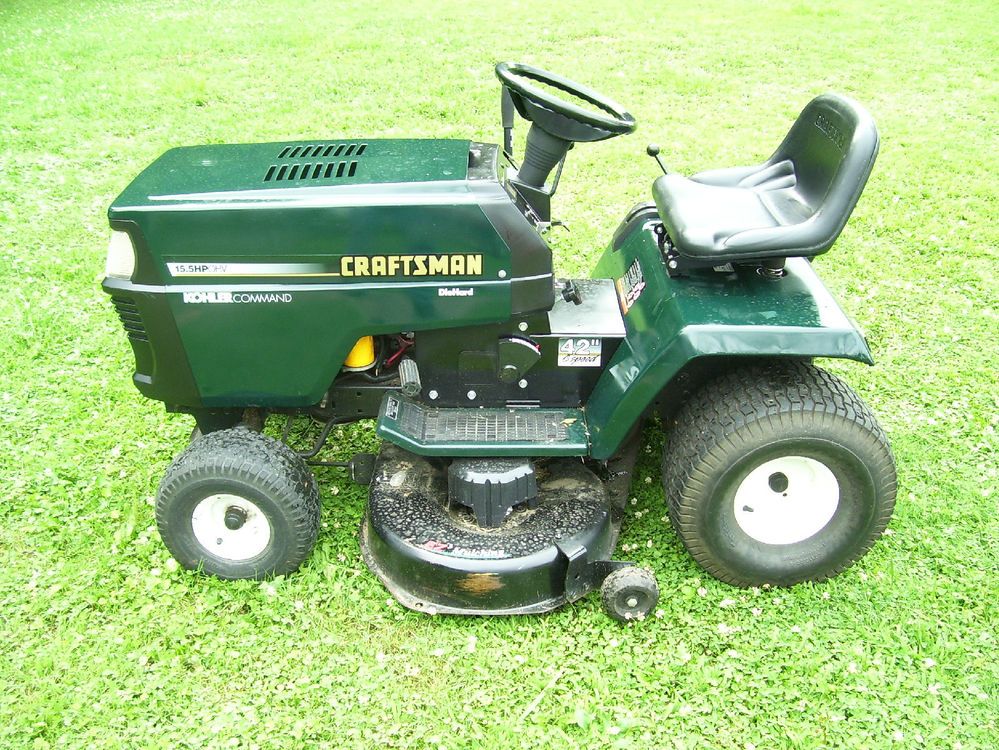
Main causes: punctured tire or inner tube, leaky valve stem, damaged wheel rim
Read moreMain causes: worn or broken ground drive belt, bad seat switch, transaxle freewheel control engaged, transaxle failure, dirty carburetor
Read moreMain causes: shift lever needs adjustment, neutral control needs adjustment
Read moreMain causes: worn or broken blade belt, broken belt idler pulley, blade clutch cable failure, bad PTO switch, damaged mandrel pulleys
Read moreMain causes: damaged cutting blade, worn deck pulley, damaged mandrel pulley, loose fasteners on mower deck components
Read moreMain causes: engine overfilled with oil, leaky head gasket or sump gasket, damaged carburetor seals, cracked fuel pump, broken fuel line
Read moreMain causes: clogged carburetor, damaged flywheel key, dirty spark plug, stale fuel, improper valve lash, engine needs a tune up
Read moreMain causes: faulty battery, bad alternator
Read moreMain causes: unlevel mower deck, dull or damaged cutting blades, worn mandrel pulleys, bent mower deck, engine needs tune up
Read moreThese step-by-step repair guides will help you safely fix what’s broken on your riding mower or lawn tractor.
January 1, 2015
By Lyle Weischwill
Your mower can’t run on a damaged rear tire. Here’s how to install a new one.
Repair difficulty
Time required
60 minutes or less
Read moreJanuary 1, 2015
By Lyle Weischwill
If a blade on your mower is dull or bent, replace it following the steps in this repair guide.
Repair difficulty
Time required
30 minutes or less
Read moreJanuary 1, 2015
By Lyle Weischwill
Help your mower run better by replacing the fuel filter during your riding mower's annual tune-up.
Repair difficulty
Time required
15 minutes or less
Read moreUse the advice and tips in these articles and videos to get the most out of your riding mower or lawn tractor.
August 6, 2020
By Lyle Weischwill
Learn how a blade removal tool makes replacing the blade easier and safer
Read moreApril 9, 2019
By Kim Hillegass
Keep these 6 things on hand to keep the mower season running smoothly.
Read moreMarch 1, 2016
By Lyle Weischwill
Learn how to use a battery charger if your mower battery is dead.
Read moreDryer
Samsung DVE52M7750V/A3-00 dryer parts
Electric Range
Shop GE JBP70WK4WW electric range partsShop Maytag MET8885XB02 electric range partsShop Kenmore 79096419406 electric range parts
Electric Wall Oven
Shop KitchenAid KEBS177YAL2 electric wall oven parts
Front-Engine Lawn Tractor
Shop Model #917274961 Craftsman lawn tractor
Furnace
Weatherking Furnace Repair Parts
Garage Door Opener
Shop Craftsman 13953918D garage door opener parts
Gas Range
Shop Magic Chef 83EY-1 gas range partsShop Model #NX58K3310SS/AA-00 Samsung gas slide-in range
Gas Snowblower
Shop MTD 31AS6HEG799 gas snowblower parts
Miter Saw
Shop Craftsman 137212290 miter saw parts
Parts
Refrigerator Door Bin DA63-08646A
Refrigerator
Refrigerator Parts CraftsmanNorge Refrigerator Repair Parts
Snowblower Attachment
Craftsman Snowblower attachment Repair Parts
Speaker
Kenwood Speaker Replacement Parts
Top-Mount Refrigerator
Shop Roper RT18HDXJW00 top-mount refrigerator parts
Toys & Games
Shop Model #6209SR Roadmaster sidewalk wagon
Wet/Dry Vacuum
Craftsman 12512008 wet/dry vacuum parts
 How easy is it to change a wheel on a car?
 Replacing a damaged wheel is not difficult - everyone can do it!
On the road, many can boast of their driving skills, but when fate puts us in front of the next difficulties in the form of a broken wheel, not everyone will be able to cope with such a problem on their own, including women. But the most important thing is not to give up and to come out of this difficult situation as a winner with dignity. And how - we will tell you now.
It is quite easy to determine whether a wheel is punctured in motion. If you accidentally notice that the car began to behave strangely, it began to tilt in different directions, it began to bounce a little, make noises of unknown origin, and indeed all the comfort of a calm movement disappeared, then be sure that what you were so afraid of happened - the wheel was pierced .
What we need to replace:
Tip: if the wheel nuts are difficult to unscrew, then they can be lubricated with a special tool - WD-40 oil spray or other numerous analogues.
What to do at the very beginning
First you need to turn on the alarm, turn off the engine and set the warning triangle at a safe distance (15 meters from the vehicle within the city and 30 meters outside it). By doing this, you will warn other drivers that something is wrong with your car and it is better to go around you.
Next, you need to install stops on the wheel located diagonally with the damaged wheel - in front of and behind it.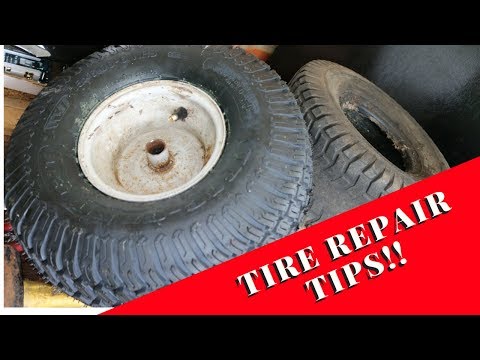
And of course, prepare all the necessary tools and, in fact, a spare wheel.
On this we can consider the preparations completed.
Changing the wheel
1. Before installing the jack, you need to unscrew the bolts and nuts of the wheel to be replaced with a wheelbrace half a turn;
2. Next, you need to raise the car with a jack so that the wheel to be replaced rotates freely, and you can install a spare in its place.
3. Then you need to unscrew the nuts holding the wheel on the hub and put them in one place so as not to lose them.
4. Remove the damaged wheel and carefully install the spare.
5. Next, you should carefully and slowly tighten the nuts in this order: first we tighten the top nut, and then all the others crosswise. It is important to spin them in this order so as not to disturb the alignment of the wheel, which can later be very dangerous on the road, as it is likely to lead to emergency situations.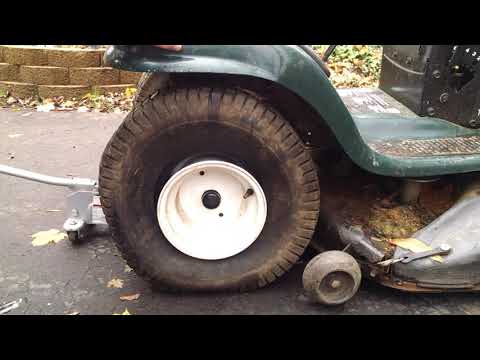
6. After what has been done, you should lower the car to the ground, tighten all the wheel bolts to the maximum.
7. Next, you should measure the pressure in the replaced wheel, for this we use a pressure gauge. The usual indicator is 2 kgf, if less, pump up the wheel.
8. Now you need to twist the nipple and carry out a leak test - to do this, moisten its tip, if there are no bubbles, then everything is fine.
9. Do not forget to remove the wheel supports, the warning triangle and the damaged wheel in the trunk.
With a similar set of tools from the ARCEHAL brand, changing a wheel is easier than ever!
Using the tool of the trademark "ARSENAL"
"That's all?" - you ask. Yes - everything is extremely simple! But, despite the elementality of the whole event, many experience difficulties when faced with it in practice, and in order to avoid them, it is important to clearly follow the instructions, as well as have a good working tool that can help out in difficult times. These include products of the domestic trademark "ARSENAL". The company's hand tools are made of heavy-duty Taiwanese steel, cast at the China Steel plant, which has practically no analogues in the world.
Belarus
CameroonCôte d'IvoireEgyptEquatorial GuineaGambiaGhanaGuinea BissauIsrael (en) Israel (he)KenyaKuwaitLebanon (ar)OmanenMobanon (en) Qatar (ar)Qatar (en)Saudi Arabia (ar)Saudi Arabia (en)SenegalSeychellesSouth AfricaTanzaniaTunisiaTurkeyUgandaUnited Arab Emirates (ar)United Arab Emirates (en)ZambiaZimbabwe
AustraliaAzerbaijanMainland ChinaFijiFrench PolynesiaHong KongIndiaIndonesiaJapanKazakhstanMalaysiaNew CaledoniaNew ZealandPapua New GuineaThe PhilippinesSingaporeSouth KoreaTaiwanThailandTurkmenistanUzbekistanVanuatuVietnam
AlbaniaAustriaBelarusBelgium (fr)Belgium (nl)Bosnia and HerzegovinaBulgariaCyprusCroatiaCzech RepublicDenmarkEstoniaFinland (fi)Finland (sv)FranceGeorgiaGermanyGreeceHungaryIcelandIrelandItalyLatviaLithuaniaLuxembourg (de)Luxembourg (fr)MoldovaMontenegroNetherlandsNorth MacedoniaNorwayPolandPortugalRomaniaRussiaSerbiaSlovakiaSloveniaSpainSwedenSwitzerland (de)Switzerland (fr)Switzerland (it)TurkeyUkraineUnited Kingdom
ArgentinaBoliviaBrazilChileColombiaCosta RicaDominican RepublicEcuadorGuatemalaMexicoNicaraguaRepublic of PanamaParaguayPeruUruguay
Canada (en)Canada (fr)MexicoUSA
How-To
If your yard is slippery or has slopes, use the Rough Ground Kit to increase Automower® performance.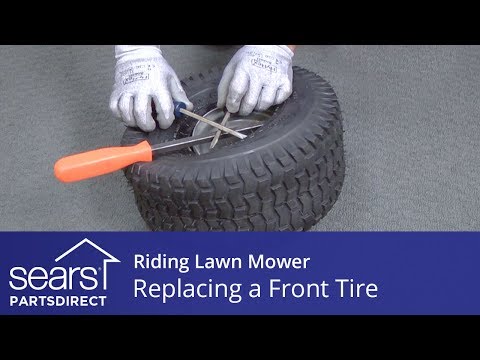 In this video tutorial, we'll show you how easy it is to install the Rough Ground Kit on your robotic lawnmower. If you have an Automower® 400 series, instructions are available here: