“Ksh ksh ksh” goes your wheel as your ride. This is the sound of a bent rim. Here’s how to fix it.
By Dan Goldwater
“Ksh ksh ksh” goes your wheel as your ride. This is the sound of a bent rim. Bent rims are frustrating because they slow you down, but they are usually easy to fix if you know how.
Rims can get bent out of shape from hitting a big pothole, by getting twisted when you try to wedge your bike in or out of a rack and when a spoke breaks. When the bend in the rim is large enough, it will hit your brake pad every time it goes around, causing the characteristic “thwp” or “ksh” sound, and slowing you down.
Fixing a moderately bent rim yourself is easily accomplished with a spoke wrench, which comes in several sizes. Most multi-tools will have two to four sizes of spoke wrench to fit the different sizes of spokes available on the market. Pro mechanics remove a bent wheel from the bike and put it on a special truing stand, but this is not needed unless you want to get a racing bike in tip-top shape.
For a regular bike, you can true it quite nicely without even removing your wheel from your bike.
Checking the rim and spokes
Flip over your bike so you can spin the wheel easily. First check if you have any broken spokes. If so, you can follow the same process to straighten out your rim, but you will want to get that spoke replaced soon. Lighten the load on your bike as much as possible if you have a long way to go with a broken spoke. Next, check that your axle is fully seated in your dropouts. If you have a quick-release wheel, it might not be. You don’t want to re-true the rim if the only problem is that the axle is not sitting straight. Same thing with your brakes – first check that they didn’t get bashed to the side or the brake cable isn’t hung up on something.
Checking the alignment
Slowly rotate your wheel while you look at the size of the gap between it and your brake pad. As the wheel turns, you will notice that in some places it is closer to the pad and in some places farther away. With a perfectly true wheel, the gap will be even all around. You don’t need it to be perfect.
Finding the problem spots
Slowly rotate to the part of the rim where it is hitting the brake pad. Here my rim is bent to the left. To fix it, I tighten the spoke opposite the bend: the spoke circled in green. Tightening this spoke pulls the rim to the right. If the bend was going in the opposite direction, I’d instead tighten the spoke circled in blue.
Tightening spokes
To tighten a spoke, place the spoke nipple into the notch in the wrench. Check that you have the right size of wrench. Turn COUNTERCLOCKWISE to TIGHTEN. If you have any doubt, first “pluck” the spoke like a guitar string to make a sound. Tighten one full turn and pluck again. If the pitch is higher you are tightening the spoke; if it’s lower, you are loosening it.
Getting it true
The ding in your rim might be a couple of inches long. Start by evenly tightening the two spokes opposite the ding by a half turn of the spoke wrench.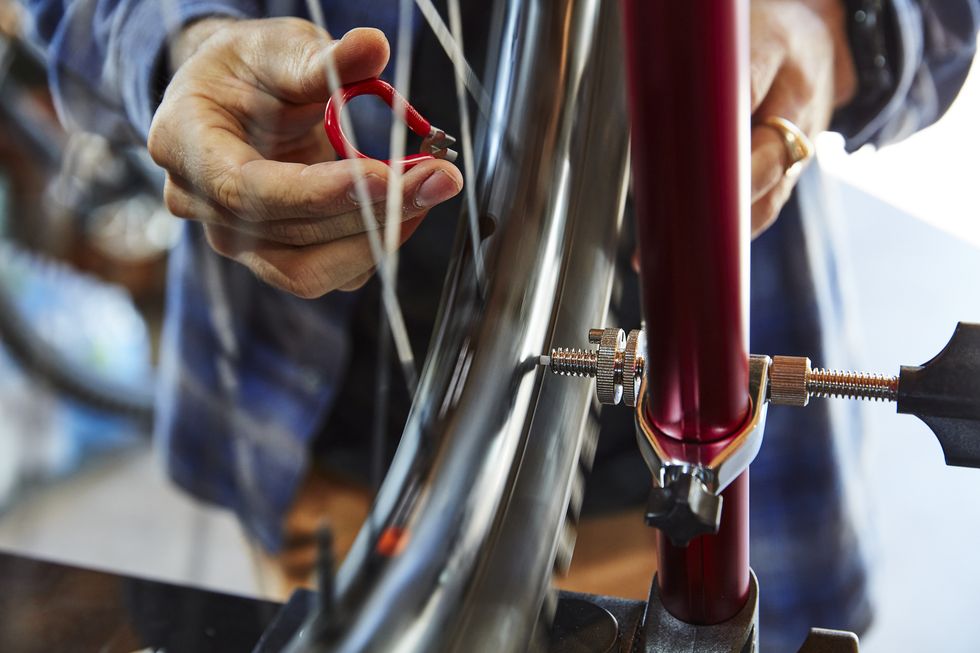 Then recheck the gap. Repeat until the ding is mostly straightened out. If you have a larger dinged area, you might end up tightening three or four spokes opposite to it. If the nipples are corroded, put a drop of oil on them so they are easier to turn.
Finishing up
After the wheel spins freely and the gap looks reasonably even all around, go around the rim squeezing each pair of spokes. This will even out any stresses in the rim. Recheck your truing after this.
Tips

Want more?
You can find this article with extra photos at: instructables.com/group/momentum
Dan develops bike accessories with MonkeyLectric. Previously, he co-founded instructables.com, was a scientist at MIT and developed microchips at Intel.
facebook.com/Monkeylectric
Biketoworkday is supported by its audience. When you buy through our links, we may earn an affiliate commission. Learn more
Written by Gary Johnson / Fact checked by Henry Speciale
Did you notice that your rim bent after a day trip? Luckily, you can fix it yourself. A bent bike rim is not the end of your bike’s career. So, you don’t have to buy a new one just for its sake.
One characteristic of a bent rim is the annoying sound it makes. It slows your speed, which can be a total bummer if you’re out there.
Worry no more. We will teach you how to straighten a bent bike rim right here.
Table of Contents
Rims are usually bent from hitting huge potholes. They also deform from too much twisting as you wedge your bicycle. A hugely bent rim hits your brake disc in every rotation, resulting in the swishing sound of your bike.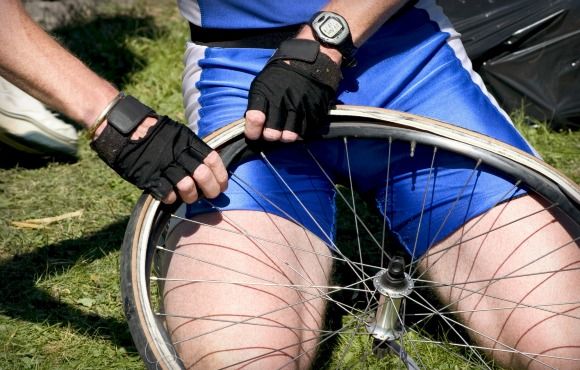
To straighten a bent bicycle rim, you will need the following tools to effectively true your bike wheel:
If your bike is in top shape, you can ditch this tool.
Follow these simple steps to true your bike.
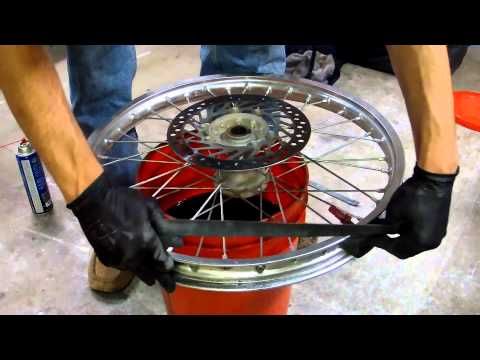
If you have a truing stand, it’s time to put your bike in there. If not, you can flip it over.
This will give you a good angle that allows you to access all hard-to-reach areas when you straighten a bike rim. Besides, spinning your bike wheel is easy with this position.
Check if your bike has broken spokes. If it does, you can also use this method to fix and straighten your spokes. But I still suggest replacing the damaged spokes as soon as possible.
I suggest you lighten your bike’s load if you have a broken spoke. Also, ensure that the axle completely sits in the dropouts unless your bike comes with an instant-release wheel.
It can be a waste of time truing your rim if the only problem is an axle that does not sit straight. This rule also goes for your brakes. Check them out and ensure that they are not moved to the side. Also, take a look to see if the brake cable is stuck on something.
Once you finish checking your bike, it’s time to slowly turn the wheels and inspect the gap between your wheel and the brake disc. You will notice that there are parts that are closer to or farther from the pad.
You know that you perfectly fix a bent bike rim if it comes with even gaps all around.
To straighten bike rim, start by carefully turning to the rim area where it hits your brake pad. This will allow you to determine if the rim is bent right or left.
For the next step, tighten the spoke opposite to the damaged area. This will pull your bike rim to the opposite direction of the bend. So, if the rim is bent to the left, it will tug your bike to the right.
Place your spoke nipple to the notch located in your wrench. It is crucial to check your wrench and ensure that it comes in an accurate size. Then, turn it in a counter-clockwise direction to constrict and tighten.
You can double-check by plucking the spoke, similar to how you pluck a guitar. Tighten one whole turn and pluck it again. A higher pitch indicates your spoke tightening, while a lower sound means the spoke is coming loose.
Take a look at the rim’s ding, which is a few inches in length.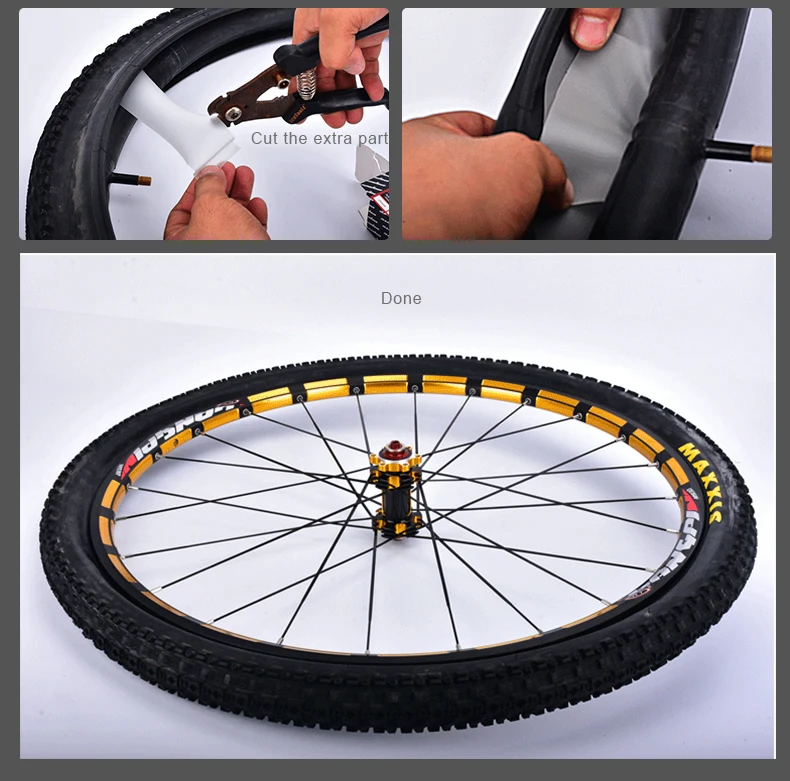 Then, evenly tighten the two spokes across from the ding. Do this with a half turn of your spoke wrench then check the gap.
Do this method again until you notice that your bike’s ding is mostly unbent. If your bike comes with a larger dinged area, you might have to tighten three to four spokes that are opposite the dinged section.
You can also apply a lubricant if you notice that the nipples are rusty. This will make them easier to rotate.
After fixing the wheel and making the gaps even, proceed with pressing each pair of spokes in your bike rim. By doing so, you can easily even out the remaining stresses.

By doing so, you can keep your bike rim from overtightening and being out of round. You can also use masking tape to fix an out-of-round issue. This can come in handy if you do not have a truing stand.
Carefully adjust your masking tape like how you do with the brake calipers. Slowly squeeze it tighter each time the wheels do not touch.
Now that I finished telling you all my tips, it’s time to start truing your bike. You can also check out this video so you will know more when you fix bent bike rim.
Did you enjoy the tutorial? I hope you did. Knowing how to straighten a bent bike rim allows you to effortlessly speed up any driveways with your fixed rim. You can also ditch the worry of having a bent rim that slows you down.
Remember to have a handy spoke wrench in your toolbox always. If you don’t have one, you can try out the LETUSPORT Bike Spoke Adjustment Wrench.
Tell us your experience in the comments and also share this article with your loved ones if you enjoyed it. It would really mean a lot. Remember to keep riding and stay active.
Henry Speciale
“Bike commuting should be the trend for the next few years, and it is a convenient and eco-friendly way for us to travel. And we are here to make it a bit less troublesome for people who want to maintain their vehicle for a long time. So, the content I expect to put out here is offering help for bikers who are facing issues with parts of their bikes once in a while. Let’s have fun and protect the environment together!”
We welcome cyclists of all ages!
In this most interesting section of our site you will find articles about bicycles carefully collected and written by us. They reflect all the most necessary technical knowledge about bicycle technology, advice from professionals from the world of cycling, interesting facts and many other entertaining things.
If you are a beginner and do not yet understand complex terms or can not catch technical subtleties, then our experts will always assist you in choosing a bike or explain this or that article - just leave a comment.
Our collection of articles about bicycles and everything related to them is constantly updated and is added, and we strive to ensure that you have no questions left. But if they do arise - do not hesitate to ask, you will always be answered!
All Top ten most read articles Brands, manufacturers Cycling clothes and shoes Bicycle trips Bicycle and safety Bicycle and city Bicycle and health Bicycle and sex Bicycle and creativity Bicycle equipment Bicycle accessories Bicycle parts (bike parts) Bicycle personalities Cycling Bicycle tuning Bicycle selection Mountain bikes Skiing Children's bicycles Clothes, shoes and accessories for winter skiing Preparation of winter equipment pokatushki Buying a bike Different Bicycle repair and maintenance scooters Sledges and snow scooters Bicycle assembly slopes Snowboard Snowboard and ski for kids Test reviews cycling technique Alpine skiing technique snowboarding technique Electric bikes electric scooters English-Russian Dictionary
cycling terms Dictionary of a cyclist
The cycle computer does not work
The most common causes of malfunction and how to solve them
How to winterize your bike
Everything you wanted to know about seasonal storage at VeloDrive
Re-Wooting a Bicycle Wheel
Detailed guide to spoke tensioning, assembling a wheel, fixing figure eights, ellipses and umbrellas
Adjusting the bike and getting ready to ride
Properly adjust the saddle, check the position of the handlebars and tighten all the necessary components
How to set up a
suspension forkHow to set up different settings for
forksHow to set up a bike suspension
A detailed guide to setting up a bike suspension and fork in particular
Repair of your bikes and scooters
Guide to all services in the store
Washing a bike
How to wash a bike
Complete bike overhaul
What does bike overhaul
includeBicycle Repair Questions and Answers
Quick Reference Guide (blank)
Answers to frequently asked questions about repair
We will try to give comprehensive answers to your questions
Frame work
What frame work is done in our workshop
How to take care of your bike
A few tips on how to take care of your bike and support your two-wheeled friend
Recommendations for bicycle maintenance
What can be repaired by yourself and what is better done by the master
Getting ready for the cycling season
Or resuscitation of the bike after hibernation
 This problem is "not carefree" for an experienced cyclist, but can put a novice cyclist in a very difficult position. It’s good if you find a breakdown at home and you can give the bike for repair. In any bicycle workshop, within a maximum of an hour, the figure eight on the bicycle wheel will be removed for you. The cost of this type of service averages from 50 to 200 UAH, depending on the curvature of the wheel. But if this problem arose in the field, or you often encounter it, then this article will help you fix it yourself, without anyone's help.
 Contents of the guide:
It doesn't matter if a bend has formed on the front or rear wheel, it is equally dangerous not only for the bike, but also for your health. It should be understood that the use of a wheel with a bent rim is fraught with:
Prevention of the appearance of the "eight":
You should pay attention to the fact that if you prefer an aggressive driving style and are accustomed to passing obstacles at maximum speed, then the adjustment should be carried out at least once a month.
The most important tool in this business is a spoke wrench, with which you can adjust the degree of spoke tension on your bike. In the absence of this, you can use pliers, but in this case there is a high chance of stripping the thread on the spoke. It is best to choose a wrench specifically for the size of your bike's spokes, and not its universal counterpart. Also, in order to fix the figure eight on a bicycle wheel, you will need a marker or chalk to fix places with deformation.
Mention should also be made of the so-called "force method" of bicycle wheel alignment.