By Jeff Barber
Updated
Whether you’re on the trail or in your driveway, it’s no big deal to fix a flat mountain bike tire. In the ideal situation, all you need is a pump, tire levers, and a new tube.
If your tire still has some air pressure left in it, release the air by pressing in on the tire valve. Depending on the type of valve your tire has, you may need to unscrew the pressure release or use your fingernail to press the release valve.
Next, pull the tire away from the rim. You may need to use your tire lever to get the tire started, once it’s out you can trace around the rim to quickly remove one side of the tire. Repeat the process for the other side of the tire wall. Don’t forget to remove the screw locking ring if your tubes have one.
Remove the tire and tube from the rim. Check the rim to make sure there isn’t anything ganky on the rim that could have caused your flat. Pay particular attention to the rim tape covering spoke connections inside the rim and replace as necessary. Run your hand through the tire itself to check for thorns or other sharp objects. If something causes you to bleed there’s a good chance that it’ll pierce your tire as well.
Now you’re ready to start putting things back together. Inflate your new tube with just enough air to give it some shape. This will help you place it in the tire easily. Place the tube completely inside the tire like a hot dog in a bun. Find the valve hole on your wheel and place the valve stem in the hole.
Start working one side of the tire onto the rim. You should be able to use your hands for most of it, once you’ve made your way around most of the tire you may need to use your levers to pop the tire wall bead inside the rim. Repeat for the other side (note: the second side may be more difficult than the first, especially for tight fitting tires).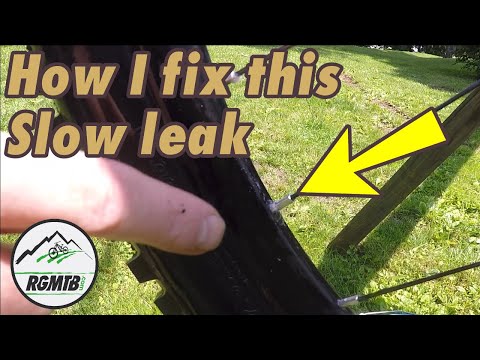
Before you begin inflating your tire it’s important to make sure the tube isn’t pinched between the rim and the tire (called a pinch flat). Start at a known point on the tire (I usually start at the valve) and work your way around the tire looking for pinches. When you get back to your start point, flip the tire and check the other side all the way around.
Now you’re ready for the fun part: pumping. Inflate your tire to a reasonable pressure. My pump has a gauge that’s marked for different types of bike tires. It recommends 30-60 psi for mountain bike tires but it’s really up to you. If you like a squishy ride or you like to use your tires as a poor man’s suspension, keep the pressure low. If you’re riding hardpack you may want to go for a higher pressure which will help you go faster. I personally prefer staying at the high end of the range because I’ve found that I get fewer flats on the trail at higher pressures.
Singletracks may receive compensation for purchases made through any affiliate links in this article.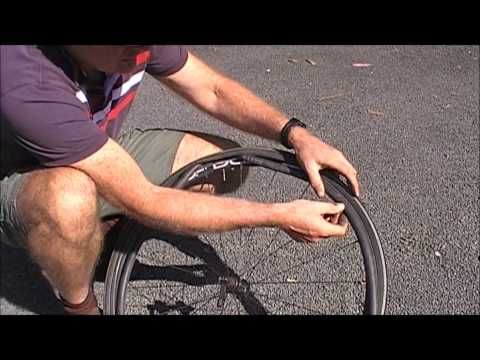
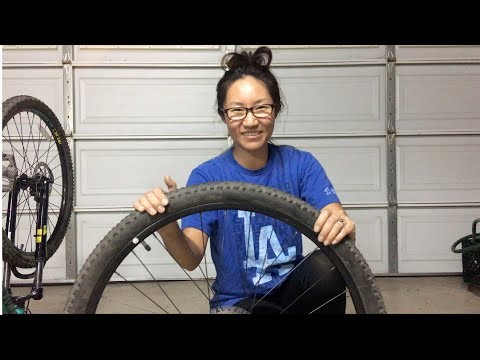
Changing a bike tire is a beneficial skill that, as a cyclist, is handy to know. It might seem pretty straightforward, but you can make it very easy or very difficult for yourself if you don’t know how to do it properly. In this article, we will tell you everything you need to know about how to change a bike tire, replace a bike tire, and even replace a bike tube.
For a bike tire replacement, check out our full selection of bike tires. Before we start, the first thing we need to think about is what tools and spares we will need. We highly recommend having these at your disposal;
The first thing you are going to do is remove the wheel. Depending on where you are, you can either turn the bike upside down, lean it on its side, or get it into a stand. Typically you have two different types of skewer which hold the wheel on, a quick release and a thru-axle. Both of these you will need to release and unscrew.
Once removed, your wheel will come out, and you will be able to work on it. A top tip if you have hydraulic disc brakes, ensure that the lever is not pressed with the wheel out as this will cause the pistons to adjust.
Now, you'll want to deflate the tire, ready for removal completely. You can do this by removing the cap and either unscrewing the Presta valve and pushing the pin or just pushing the pin on the Schrader valve. Once deflated, push the tire's bead inwards to loosen it off the rim.
Now you will want to take your tire lever, insert it under a part of the tire, slowly ease the tire off the rim, and be careful not to snag the inner tube. If you are using tubeless, you might want to put a rag inside to soak up any old sealant, or it might get messy. Once one side is off, you should be able to pull the tire straight off with the inner tube.
Now you have the tire off and the wheel free, you will want to inspect it to ensure that it is in good working order. Check the wheel is straight and true by spinning it in your hand and holding on to the hub. Then make sure there are no cracks near any of the spoke holes. Once you have done this, ensure that the rim tape is in good condition and covers all the spoke holes. If you’re using tubeless, you are doing to give this a big clean and remove any excess sealant.
If you are swapping the tire out because of a puncture, you will need to inspect the tire to ensure the thorn or piece of flint is gone. Then you will need to either swap the tube out or even patch the old one. You can do this by finding the hole, scratching it clear, and sticking a patch on it. We recommend changing a tube instead of patching.
Shop Bike Tubes and Tubeless Kits | Shop Bike Tire Repair Patch Kits
How to put a tire back on the rim? Firstly check the rotation of the side of the tire to ensure it’s going correctly. Start by running one side of the tire into the inside of the wheel and then insert either the inner tube into the tire with it partially inflated to make sure it doesn’t nip. If you are using sealant, you can insert it here or later into the valve.
After this is complete, you will need to pump the new tire up to the recommended PSI. If you are unsure, check the manufacturer's recommendations, but whatever you do, don’t go over the maximum stated on the tire or have it too low that the tire is very spongy. Now make sure the tire is on correctly and is in the bead. You can check this by spinning the tire to ensure it's not lumpy.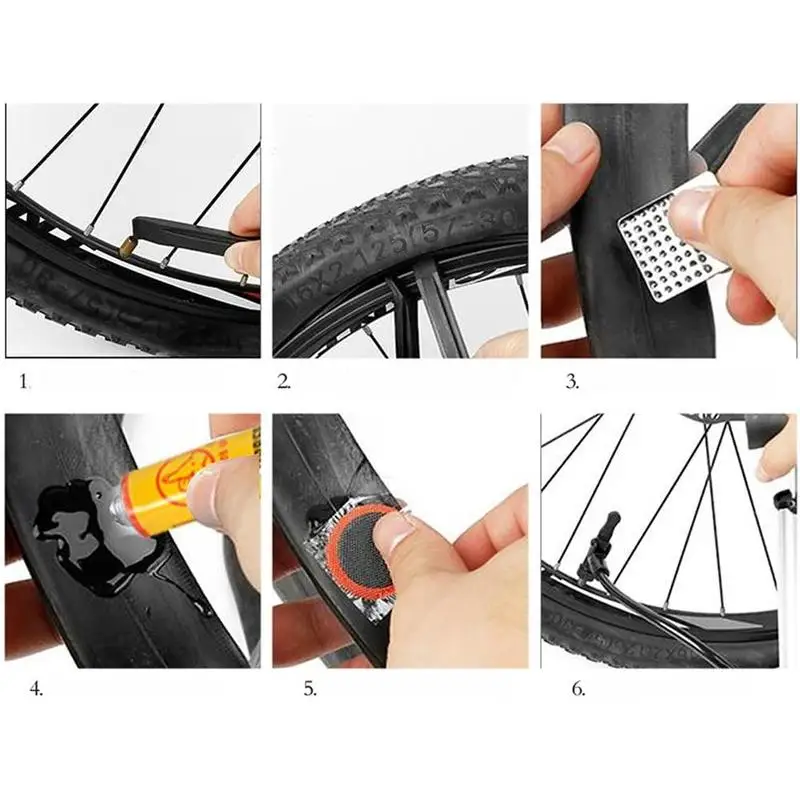 If it is, push the side of the tire up onto the bead with your fingers carefully.
Now it’s time to reinsert the wheel. You will need to pop the wheel back and ensure it is in the correct place. If you have removed the rear wheel, check that the chain runs correctly. Tighten up the quick release or thru-axle to the proper tightness. Now it’s time to get the bike on the floor. Check the brakes work and that the wheel is tight.
The process is the same for any tire. Generally, the larger the tire, the easier the process. Road bike tires can be challenging and might need a little more attention. For more information on types of tires, check out these pages Link to dirt mountain bike tires, road bike tires, gravel bike tires, and cyclocross bike tires.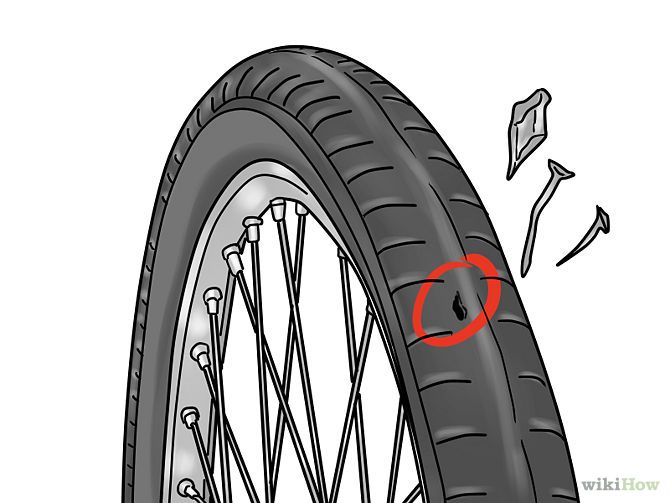
Firstly you have the cost of the inner tube, sealant, and tires. If you get a tire replaced at a bike shop, they will charge anywhere from roughly $10 to $20 for labor on a tire with an inner tube. For tubeless, it could be $20 to $30 as the process is much more complicated and takes longer.
How often should Tires be changed?If they look worn and have a lot of small slices or are giving you a lot of punctures, they will need changing. Depending on the tire, they might give you 5000 miles or 500 miles depending on the discipline and quality of the tire.
How much do bike tires cost?They can be as cheap as $20 or as expensive as $100. It depends on puncture protection, the tire's weight, and performance.
What are the best tire brands?Some of the top current brands are Continental, Vittoria, Specialized, Maxxis and Schwalbe
It will take time to replace a bike tire, but the more you do it the quicker you will get. Replacing tubes and tires is a great skill to learn and will help you while riding out on the road.
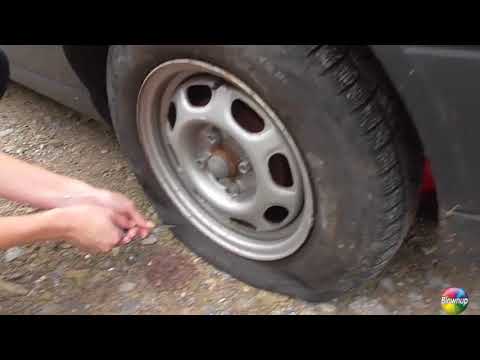
The need for tire repair arises if the pressure in the cycle chamber is not kept, it drops at a noticeable speed. In this case, the rolling resistance of the wheel increases significantly, and the rim begins to hit the micro-roughness of the track. Unfortunately, from a puncture to
The need for tire repair arises if the pressure in the cycle chamber is not kept, it drops at a noticeable speed. In this case, the rolling resistance of the wheel increases significantly, and the rim begins to hit the micro-roughness of the track. Unfortunately, no cyclist is immune from a tire puncture.
Tire failures can be caused by manufacturing defects and mechanical damage. Mechanical damage includes cuts and punctures. The following damages are the result of manufacturing defects: stratification of the thread, rupture of the thread, rupture of the seam at the single-tube, delamination of the tread. A piece of wire, a sharp stone or a piece of glass, a nail, and the like can pierce the tire and the chamber. The chamber can be cut by the wheel rim when it hits an obstacle hard. Sand that has fallen under the tread will eventually lead to a hole in the bike chamber. If this happens far from home, during a trip or a tourist run, then you have to rely only on your own strength. With a certain skill, it is possible to repair the bicycle wheel chamber in 15-30 minutes. To do this, you must have at least a complete first-aid kit. However, of course, only in the workshop will they be able to guarantee a high-quality result of the repair.
Procedure for repairing the inner tube

Depending on the nature of the damage, the repair of bicycle tires may have a different procedure.
Sport mountain bikes with tubeless tires are very popular. These are UST and BST wheels. The peculiarity of such wheels is that compressed air is pumped directly into the cavity between the tire and the rim. The most widely used wheels of the BST standard. They must use a sealant that ensures tight contact between the rim and the tire. The same sealant also seals possible punctures directly in the movement of the bicycle. At the same time, high-quality repair of a tubeless bicycle tire can be carried out in a stationary or mobile workshop. This is not easy to do in the field. Poor repair of a bicycle tire can lead to the fact that when the wheel slips sideways, the tire can fly off, and the consequences can be very serious.
In our bike workshop you can repair not only traditional tires and tubes, but also repair tubeless mountain bike tires. We carry out scheduled preventive maintenance of bicycles, we make repairs with a guarantee.
0067 Chamber puncture
Brake repair
Jump chain
Figure eight on wheel
Play
Some malfunctions can be prevented by, for example, installing protection.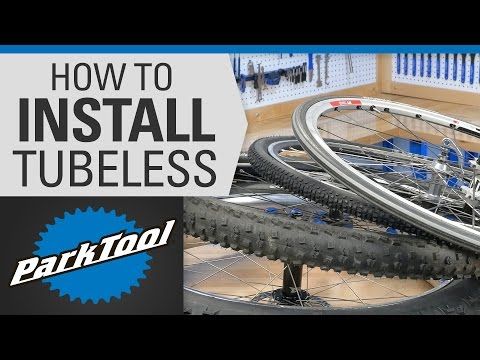 Read more about this in the article "How to choose the protection of the main components of a bicycle." And here - about how the bike works.
The bike needs regular maintenance, especially before the start of the season. Static parts (bolts, bushings and connecting rods) periodically become loose. The undercarriage needs to be cleaned and lubricated, and the tire pressure checked.
Contents
Chamber puncture
Brake repair
Jump chain
"Eight" on the wheel
Backlash
Patches and adhesive are usually included in a standard bicycle repair kit. Read more about this in the article "How to use bicycle repair kits".
To repair a puncture :
The bicycle must be placed on the saddle.
Purge air from chamber.
Pull out the tire using a set of pryers. If they are not available, any flat screwdriver with a blunt end will do.
Determine the location of the damage: pump up an empty chamber, squeeze and listen for the hiss. Another option is suitable if there is water nearby: lower the inflated chamber into the water and determine the puncture site by air bubbles.
The found place must be marked and cleaned with sandpaper.
Attach self-adhesive patch.
Slightly inflate the bicycle inner tube, place the inner tube in the tire and bead the tire with the set of pliers.
Inflate the inner tube.
Important! When traveling long distances, always take a repair kit or a spare tire with you
If this is not at hand, in the field you can do this:
Can be pre-filled with tire and puncture sealant. In case of damage, it penetrates the hole, preventing air from escaping. There are different sealants for different tires.
Bicycle tools
Cyclotech | Multikey Cyclotech CT-6
Buy
Cyclotech | Scraper Cyclotech
Buy
Dayton | Lubricant Daytona Multispray 6 in 1
Buy
Dayton | Chain lubricant for dry weather with Teflon 100 ml Daytona
Buy
$1.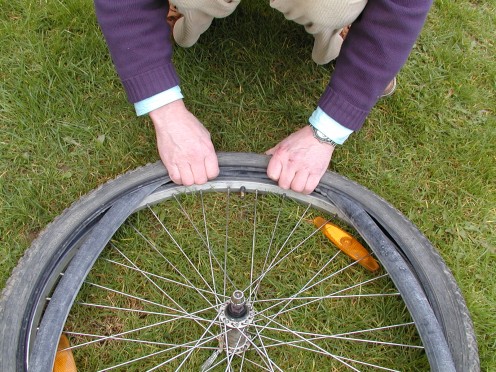 99
99
$2.99
Stern | Repair kit Stern CT-S2
Buy
Cyclotech | Multikey Cyclotech CT-10
Buy
Dayton | Wet Weather Chain Lubricant Daytona 100 ml
Buy
Dayton | Lubricant Daytona Multispray 6 in 1
Buy
$3,519
$4,399
Topeak | TOPEAK Multi Key
Buy
Dayton | Daytona chain cleaner
Buy
Dayton | Cycling Shampoo Daytona
Buy
1999 ₽
Cyclotech | Cyclotech chain cleaner
Buy Now
EXPERT TIP
The most annoying type of puncture is the double snakebite type. They appear during aggressive riding, hitting a sharp stone or curbs. Self-adhesive patches may not work. It is worth using permanent repair kits
0003
Rim brakes (v-brake) need to be checked and adjusted at least once a season, after a long period of inactivity or signs of incorrect operation.
Signs that something is wrong with the brakes:
Manufacturers make special notches on the product to help determine system wear.
If the pads are so worn out that the slots on them are no longer visible, these parts must be replaced promptlyReplacing worn pads with new ones :
Release the brakes and pull the brake jacket out of the holder with force.
Loosen the pad fixing screw.
Pry off and remove the old block, install a new one in its place.
Shoe adjustment :
The shoe must be level with the rim and must be parallel to the rim when checked for clearance in both the open and braked positions.
When the wheel is rotated, the pads must be pressed exactly along the rotation vector, without deviating from it.
Tension adjustment :
Fine adjustments are made using a special screw on the brake lever.
If this is not enough, you need to loosen the bolt on the brake foot and stretch or tighten the cable, then tighten the bolt.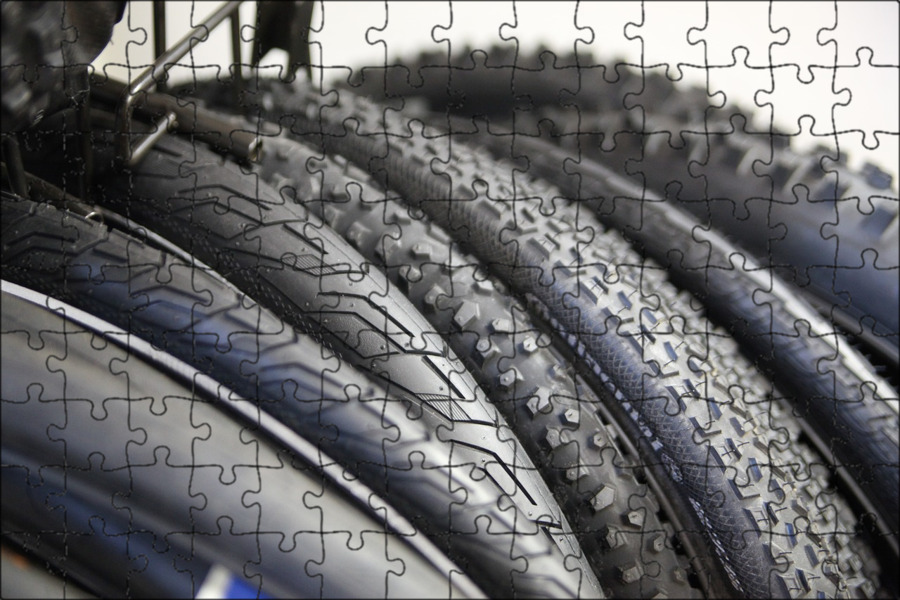
After the brake pads, the chain is the second most frequently replaced element. High-quality chains on city bikes wear out after several thousand kilometers.
Why does a bicycle chain slip:
Chain slack can be removed by simply shortening it. To do this, you need to remove several links. Modern chains are easy to dismantle, they are made with special locks.
The chain must be periodically cleaned of old grease, new grease applied, tension adjusted.
If, while driving, the wheel touches the feathers and pads, it means that the rim has deformed, the wheel is no longer round.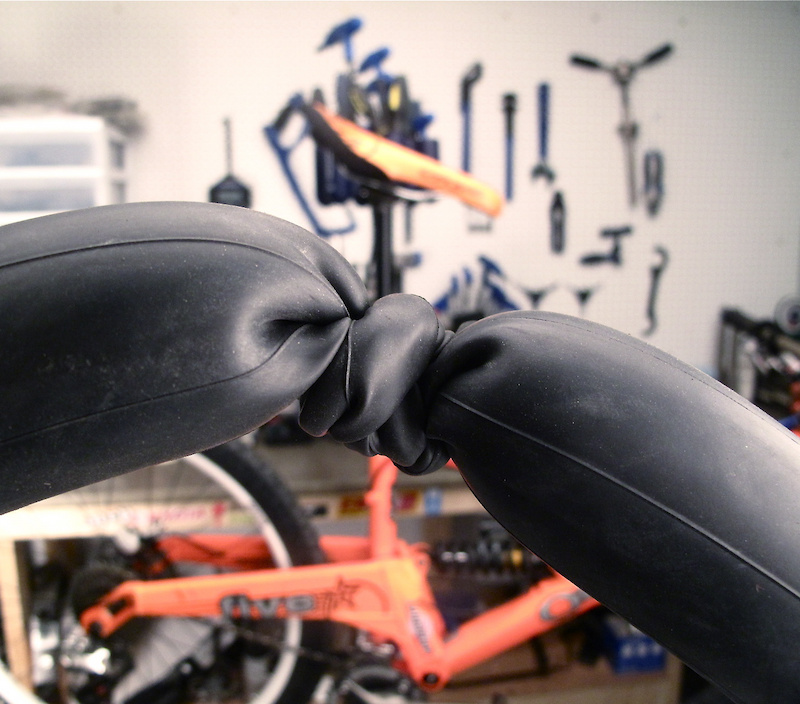
It is common for cyclists to find a loose wheel after a hard hit or a bad ride over an obstacle.
Important! It is difficult to straighten the rim and correctly tighten the spokes at home. This will be a temporary measure, subsequently it is necessary to contact a specialized service
The deformation of the wheel, in which it takes an oval shape, is associated with uneven tension of the spokes inside the rim.
To correct defect , the knitting needles are pulled up from both sides (bottom and top), starting from the central knitting needle. It is necessary to monitor the number of turns of the spoke key so as not to drag the spokes into the "eight" or not to aggravate the already existing "egg" Backlash is the space between tightly fitting parts that develops when they begin to loosen. As a result, vibration occurs when driving. There is a backlash of the wheel, carriage or steering wheel.
Causes of backlash:
Removing wheel play:
If there is little play, it is enough to find loose locknuts and tighten them with a suitable wrench.
If, after turning the bike on the saddle and swinging the wheels, you find that they stagger from side to side, then the play is serious and you need to contact the service center.
To check the bearings:
Remove the wheel.
Rebuild the bushing, paying attention to the integrity of the bearings, the condition of the axle and its components.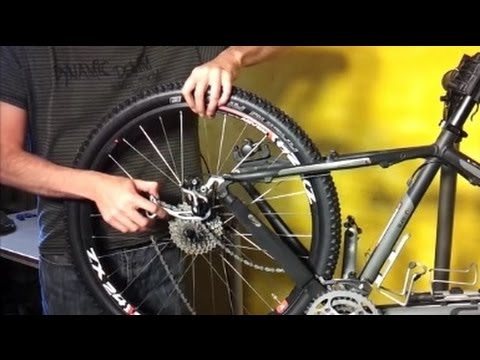
Important! It is unsafe to continue riding with backlash. The hub may fail, which threatens to completely change the spokes in the wheel and deform the rim
Lubricants for bicycles
Dayton | Lubricant Daytona Multispray 6 in 1
Buy
Dayton | Wet Weather Chain Lubricant Daytona 100 ml
Buy
Dayton | Chain lubricant for dry weather with Teflon 100 ml Daytona
Buy
Dayton | Lubricant Daytona Multispray 6 in 1
Buy
Dayton | Daytona chain cleaner
Buy
Dayton | Cycling Shampoo Daytona
Buy Now
If, in addition to a loose wheel, you hear a cracking sound while driving, it is most likely a problem with the hub. In case of severe damage to this part, it will have to be replaced.
To replace bushing :
Lower the wheel.
Remove tire, inner tube and rim tape.
Unscrew the nipples from the spokes using a special screwdriver and the appropriate spoke wrench.
Pull out the bushing and replace it with a new one.
Assemble the wheel.
For handlebar play diagnostics apply the brake and move the bicycle forward then backward. If you find that the handlebar wobbles, you need to:
Using a hex key, loosen the bolts on the handlebar stem that fix it to the fork stem.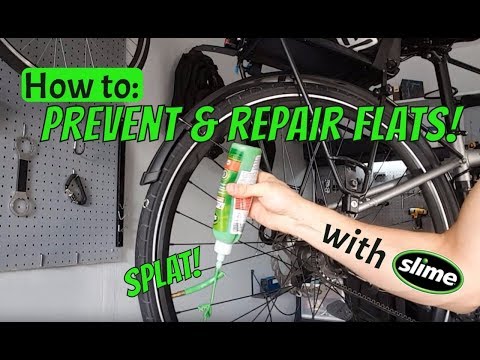
Tighten the hex bolt, which is located on top and tightens the stem-fork-steerer system.
You can combine the process of tightening the bolt with moving the bike back and forth with the front brake applied. Thus, the backlash is eliminated more completely, and all working parts sit in their places.
Check the stem-fork-steerer system again for play and make sure there is no movement under the fingers.
Align the handlebar so that it is perpendicular to the wheel and tighten the fixing bolts on the stem. The steering wheel must turn freely.
Important! If the minimum play is ignored, threads, bearings and bushings may be damaged.
The bottom bracket of a bicycle is the part that connects the crank arms to the frame and makes the pedals spin. Carriage play may occur after a long drive on rough roads. If it is not eliminated in time, you may encounter a violation of the clarity of gear shifting or damage to bearings and cups.
The play can be eliminated by a simple adjustment:
Remove the left connecting rod.
Clean the carriage tube, cups and carriage shaft from dirt.
Remove the jam nut from the left bottom bracket cup.
Use the special wrench to loosen the left carriage cup.
While swaying the right crank (the crank is mounted on the shaft), smoothly turn the left bottom bracket cup until the play disappears (it becomes impossible to sway the right crank).
After the play on the shaft disappears, tighten the left bottom bracket cup until a slight resistance appears when the bottom bracket shaft (right crank) is rotated by hand.