Description Fitment Reviews Q&A
| Specification | Details |
|---|---|
| Bolt Pattern | Varies (make selection above) |
| Country Of Origin | Varies (make selection above) |
| Country of Origin | Varies (make selection above) |
| OEM Reference | Varies (make selection above) |
| Outside Diameter | Varies (make selection above) |
| Position | Varies (make selection above) |
Fitment is guaranteed or your money back plus free return shipping.
Don’t waste time installing a product that doesn't fit. We worked hard ensuring that this product is an exact fit on the vehicles listed below.
 O. 2005-2006, 2008-2013
They fit perfectly, overall good.
I think they are little stiff but all terrain very durable.
Overall:
4 of 5 stars
Value:
4 out of 5
Quality:
4 out of 5
Great shocks, stronger than stock ones.
Overall:
5 of 5 stars
Value:
4 out of 5
Quality:
4 out of 5
Way better then the worn out stock parts. Fit correctly with no issues.
Overall:
5 of 5 stars
Value:
4 out of 5
Quality:
4 out of 5
Fit really well on our 2006 Polaris Ranger 700 XP 4x4. Hard to find parts for these older side by sides but this fits like a glove.

Overall:
5 of 5 stars
Value:
4 out of 5
Quality:
4 out of 5
2000 sportsman 500. These do not fit they are to thick to go into the strut housing.
Overall:
1 of 5 stars
Value:
4 out of 5
Quality:
4 out of 5
Awesome price.
Overall:
5 of 5 stars
Value:
4 out of 5
Quality:
4 out of 5
Great riding shock.
Overall:
5 of 5 stars
Value:
4 out of 5
Quality:
4 out of 5
So far all is good.
Overall:
5 of 5 stars
Value:
4 out of 5
Quality:
4 out of 5
All I can say is didn’t last a year on a Yamaha rhino that’s used for light farming. One shock lasted 6 months the other went out in 10.
Overall:
1 of 5 stars
Value:
4 out of 5
Quality:
4 out of 5
The Bronco shocks look great. Wish there was a little info on setting them up but there isn't.
Overall:
4 of 5 stars
Value:
4 out of 5
Quality:
4 out of 5
Perfect fit on my 04 grizzly 660. Ride is so much better.
Easy install. Looking to purchase for the rear soon.
Overall:
5 of 5 stars
Value:
4 out of 5
Quality:
4 out of 5
Excellent buy and extremely pleased.
Overall:
5 of 5 stars
Value:
4 out of 5
Quality:
4 out of 5
So far, great shocks. Great price. Arrived fast. Time will tell on durability. Fit was perfect.
Overall:
5 of 5 stars
Value:
4 out of 5
Quality:
4 out of 5
Put this rear shock on a 2002 Yamaha Big Bear. Substantial upgrade over the stock piece. Totally changed the ride.
Overall:
5 of 5 stars
Value:
4 out of 5
Quality:
4 out of 5
Fit great and a nice ride.
Overall:
5 of 5 stars
Value:
4 out of 5
Quality:
4 out of 5
Parts were exactly as described and made my 09’ foreman with 13,600+ miles ride like new again. They seem to handle being loaded down also.
Overall:
5 of 5 stars
Value:
4 out of 5
Quality:
4 out of 5
Part was exactly what I needed.
Overall:
5 of 5 stars
Value:
4 out of 5
Quality:
4 out of 5
The springs were a little weak for the ranger but shocks fit well.
Overall:
5 of 5 stars
Value:
4 out of 5
Quality:
4 out of 5
Purchased new shocks on all four corners of my 05 Rhino, still had OE ones on it. These installed with relative ease, but the fronts needed some convincing. Good shocks.
Overall:
5 of 5 stars
Value:
4 out of 5
Quality:
4 out of 5
How many stars would you give this product? Write a review.
Write Review
It would have a preload adjustment ring but no other adjustable features.
By Andy
Answer Question
Have a question? Please ask our experts and customers who own this product.
Ask Question
Has your pride and joy been misbehaving lately? Perhaps it seems like it’s losing traction despite having a mean set of tires? Maybe every molehill you ride over feels like a mountain? Well, it sounds like you need to learn how to adjust ATV shocks.
Don’t worry, though… out-of-whack shocks aren’t a terminal ATV illness. In fact, it’s one of the easiest, not to mention effective, bits of routine maintenance you can do. Once you get those springs back in line, your ride will feel silky smooth, and the loss of control you’ve been experiencing will subside!
And here’s some more good news – you can’t adjust your shock absorbers without tearing about on your ATV, making it, in my opinion, the most fun you can have during a maintenance session.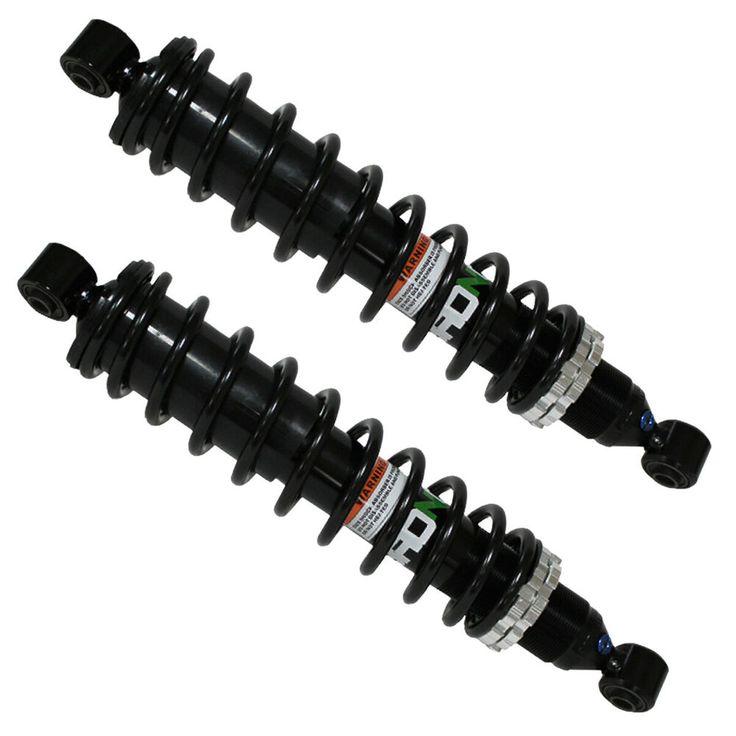 But before you get your gear on, let’s go over the how to adjust ATV shocks guide.
Let’s get to it!
Contents
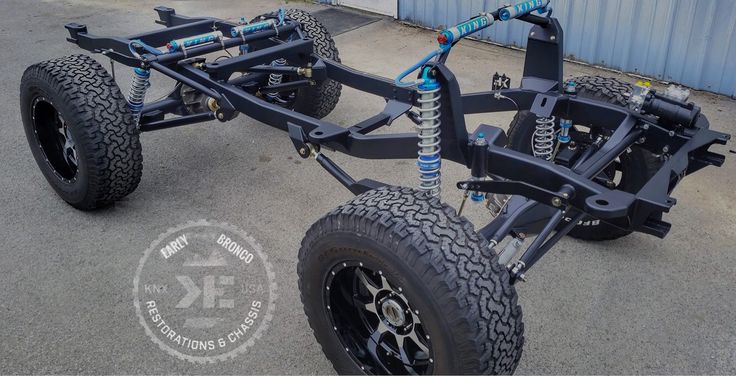
Shocks are an essential part of your ATV’s suspension. They’re responsible for keeping your ride feeling nice and smooth, no matter how gnarly the terrain gets beneath the wheels.
They achieve this by working together to nullify shock, hence the name, but when they fall out of balance, their turbulence-terminating powers dissipate, leaving your ATV feeling like more of a bucking bronco or solid piece of metal than a highly specialized all-terrain vehicle.
Cool, But How Do Shocks Work?ATV shocks are crafted from two main components, and these are:
Together, they’re able to take the sting out of all the little and big hits before the force reaches the chassis and, of course, the rider.
The Role of the SpringWhen your wheel(s) collide with a bump, the spring section of an ATV shock compresses, allowing the tire to remain on the ground.
Once you’re over the bump, the spring decompresses, maintaining tread contact with the ground, so despite the carnage, you’re riding over, you never forfeit acceleration, traction, or control.
Sounds pretty good, right? Well, while the spring does good work, it’s nothing without its partner in crime, the dampener.
The Role of the DampenerSure, the springs keep our tires on the ground, but without the dampeners (or shock absorbers), we’d be flying all over the place up top, holding on for dear life, trying our darnedest not to blow chunks inside our helmet.
Nope, for an ATV shock to function properly and save us from ending up face down in the mud with a handlebar lodged where the sun doesn’t shine, impact force needs to be exhausted before it reaches us, and that’s precisely what dampeners do.
The dampener is an oil-filled tube that runs through the middle of the spring. Inside this tube is a piston and a sequence of valves that determine how quickly oil can travel through said piston.
When the spring is compressed, the piston and pressurized oil receive the shock before efficiently phasing it out with just the right amount of resistance.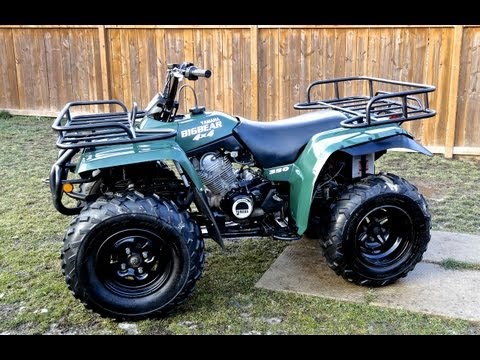 They also prevent oscillations in the spring, thereby stabilizing your ride.
Remember when I mentioned that the oil flow in the dampener is controlled by internal valves? Well, the valves themselves are controlled by clickers, which are typically little set screws, nuts, or knobs fitted into the top of your ATV shocks. In a nutshell, they’re the primary tool used to adjust ATV shocks.
Why are they called clickers, you ask? Why, that’s because every time you use them, they make an audible clicking sound, an affirmative noise that tells you that you’ve successfully adjusted the compression of a shock by a small increment.
Now, most shocks have a single compression adjuster system, but this isn’t always the case. Some high-end shocks boast both high and low speed clickers.
The high-speed adjuster determines shock compression during those monster impacts, while the low-speed clicker controls a shock’s reaction to mild hits. It’s rare, but some shocks even have a mid-speed adjuster too.
If your ATV is getting a little long in the tooth and is still kitted out with its factory shocks, don’t be alarmed if you can’t find any clickers, as they may not be there. If that’s the case, look for a threaded collar on each shock. That’s going to be your primary compression adjustment tool in lieu of a clicker.
What’s This “Compression” You Keep Mentioning?Compression refers to the dynamic response of your ATV shocks when you hit an obstacle or hit the ground after big jumps. Simply put, it determines how stiff your suspension feels.
Set it too loose, and the break bumps will make you feel like you’re in a bounce house, even when riding over relatively tame terrain.
Take your compression adjustment too far at the other end of the spectrum, and you’ll feel every single pebble in your path. Both extremes are bad for your back, ride quality, and control.
So, where’s the sweet spot on this sliding shock scale? Well, ultimately, it comes down to personal preference, but most ATV riders aim to set compression to the point their shocks almost bottom out on a big hit, the operative word there being almost.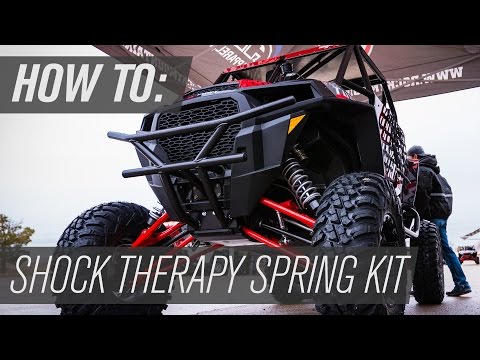
People often confuse compression and rebound, but they’re very different entities. Compression happens first, and rebound is how your shocks react after the fact; rebound is all about decompression.
Some shocks arrive with an integrated rebound adjuster a set screw found on the base of the unit, but it’s not a universal appointment.
Much like the compression adjustment, rebound adjustment is all about finding a balance.
A stiff rebound makes for sluggish decompression, which means when you’re tackling wavy sections such as the whoops, your tires won’t make it back to the ground after a bump before you hit the next one.
Conversely, if you ease the rebound off too much, you’ll be back in bounce house territory, flopping all over the place, losing speed and control.
The Goldilocks zone for most shocks is a state in which they decompress swiftly without putting an unnecessary spring in your ATV’s step, so to speak. In other words, you want your ATV shocks to settle into a neutral position before you hit the next obstacle.
So, as you can see, compression and rebound are inherently linked. To optimize one, you must balance the other. Here’s how it’s done.
What Will I Need to Adjust My Shocks?All you need to sort out your shocks is a quality jack to lift your ATV so you can make your adjustments. If you don’t already have one, I recommend this VIVOHOME Steel Hydraulic Jack. I’ve used it for years and had no problems.
How to Adjust ATV ShocksOkay, so I know I just unloaded a lot of information on you, but don’t be intimidated. We’re going to take this step by step, and now that you know all the essential basics, this guide should be incredibly easy to follow.
I’d recommend setting up somewhere you can easily hop on and off your ATV so you can do some trial and error adjustments. If there’s a quiet trail or track nearby, perfect!
Step 1. Correcting Tire Air Pressure
You may not realize it, but your tires are actually an integral part of your ATV suspension system, so before you get started adjusting your first ATV shock, be sure to correct their air pressure.
If you’re wondering how much pressure your tires can handle, the standard for ATVs is between 4 and 8 PSI.
Should you skip this step and jump straight into shock adjustment, when you finally do refill your tires, your shocks will be out of whack again, and all your hard work will be wasted.
Step 2. Setting Your Ride Height (Preload Adjustment)Once your tires are taken care of, your first port of call is to set the ride height of your ATV. To do so, you’ll have to tinker with either the snail cam or threaded collar on your shocks.
Before you do anything, I highly recommend checking your user manual to establish the safe zone you should stay within when adjusting your shocks.
For a collar, get your ride lifted and loosen the locking ring on the top of a shock to reveal the adjustment collar.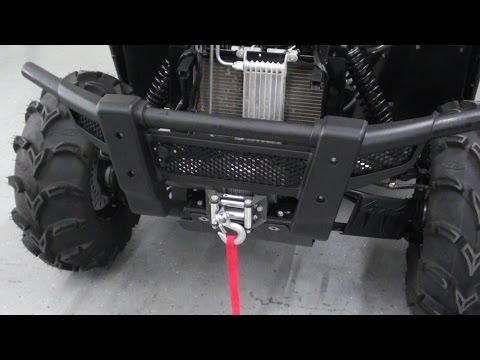 Threading the adjustment collar downwards will tighten it increase ride height, making for a stiffer suspension. Threading it upwards will loosen it, lower ride height, and soften your suspension. I’d advise going as low as is comfortable with your ride height.
Should you be adjusting spring preload on a removed shock, make sure to take into account the effect your own weight will have on the tension.
If you’re using a snail cam, you’ll find it on the base of your shock. The adjustments are inverse to those of a collar, so you’ll be setting it higher to raise the ride height and stiffen the shock and setting it lower to bring the ride height down and soften up the ride.
Just like with a threaded collar, the lower you can comfortably set the preload, the better.
Step 3. Clickers pt.1 Setting Your High Speed AdjusterGuess what? That’s all the boring stuff out of the way. From here on out, you’re going to have a blast because you get to sling some mud in order to check your clicker adjustments.
If you’re lucky enough to have dual-clicker shocks, you should always start with the high-speed adjuster, which is the one that determines how your ATV handles seismic hits.
For shocks with a single clicker, follow this step, then skip the next one, as individual adjusters require an identical approach to high-speed clickers.
When you’re ready, find yourself something you can use to get some air, then let ‘er rip! It doesn’t need to be a monster ramp; it should simply reflect an average obstacle you might come across where you normally ride.
Done it? Fantastic. How did it feel? Did you notice the suspension bottom out, or was it way off? If the latter is true, you need to turn your tension adjusters anticlockwise by two clicks to reduce compression.
Remember, you should adjust each clicker; equally, one after the other, to ensure your front and rear shocks are balanced.
Hit the jump again and see what difference those two clicks have made. Still not bottoming out? No problem; rinse and repeat until it does.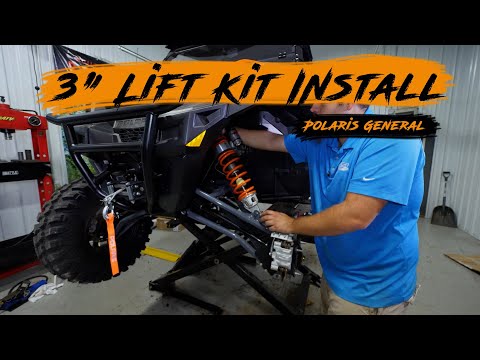 Then, all you have to do is adjust each shock clockwise for two to three clicks, and voilà; you have achieved optimal compression. Now we can move on to the low speed clicker.
The testing process for low-speed compression adjustment isn’t quite as simple as it is for the big impacts. You’re best off looking for a whoops section and hitting it at serious pace.
As you navigate the bumps, focus on how your ATV feels. Is it A. cushioned but too bouncy to maintain a consistent riding position, or B. so stiff that you can feel your bones rattling in your body?
If the answer is A, then your low speed clicker is set too loose and must be tightened with two clockwise clicks. If the answer was B, your clickers are too tight and should be loosened with two anticlockwise clicks.
Now ride the same section again, monitor the feeling, and set your compression adjustment accordingly. The aim is to glide over the whoops without losing pace, wobbling all over the shop, or feeling each bump in your teeth.
Just to recap, the rebound of a shock is the time it takes to decompress after an impact, and, on most shocks, it can be found on the base of the unit.
Much like when you were testing the suspension travel at speed, you should test rebound on a single, small jump, but instead of focusing on the immediate impact response of your shocks, you should focus on the aftermath.
If you notice that your ATV bounces up and down rather than just up, then you’ll need to hit your rebound adjuster with a couple of small clockwise turns to tighten it up. Bear in mind that the rebound adjuster is not a clicker, so don’t expect any sound to guide you.
On the flip side, if you felt your shocks compress but take their sweet time to reset to a neutral position, then you need to loosen them up with a couple of counterclockwise turns of your rebound adjuster.
Continuing launching yourself off the jump and adjusting your rebound until you feel your shocks reset efficiently without causing excess bounce – this is your baseline point of reference.
You may want to alter it one way or the other to suit your riding style or favored terrain/event. For example, if you’re planning on enjoying some low-speed, technical riding, a slightly stiffer rebound may give you more control.
It’s Smooth Sailing From Here on Out!There you have it, my friend – each shock in your ATV has been tweaked to perfection, your compression and rebound is on point, and now it should be riding like an absolute dream. Take it for a spin and assess how it feels.
If everything has gone to plan, your ATV should offer the perfect balance between performance and comfort, and all you had to do was some sweet jumps and tear up some whoops – not bad for a spot of maintenance, ay?
Related:
Patrick Johnson
Hey there! I’m Patrick, and I’m the guy behind ATV Legion. I created this site to share everything I know about ATVs – from repairs and upgrades to riding tips and tricks.
Latest posts by Patrick Johnson (see all)
Sorting: Default Name (A - Z) Name (Z - A) Price (low > high) Price (high > low) Rating (starting from high) Rating (from low) Model (A - Z) Model (Z - A)
Show: 12 25 50 75 one hundred nine0003
High Lifter Spring Adapter for Polaris Sportsman 500 550 800 850 RZR 800 (2011+)
Fits the following models: 2012 Polaris Ranger RZR 50 8002012 Polaris Sportsman 500 HO 2012 EPS Polaris Sportsman 500 Touring HO20 Sports110 Polarisman XPMAN 505 800 EFI2012 Polaris Sportsman 800 EFI 6x62011 Polaris Sportsman 850 Touring EPS2011 Polaris Sportsman 850 X2 EFI 2011 . .
.
1980 rub
nine0002 Rear shock Arctic Cat 1000/700/650/550/450/400 0404-158Fits the following models Arctic Cat TRANSMISSION 4X4 SILVER (A2008IEW4EUSL) - REAR SUSPENSION ASSEMBLY 2009 1000 TRV CRUISER SUNSET ORANGE (A2009TCW4..
12135 rub
Rear shock absorber BRP/CanAm G2 Outlander/Renegade 1000/800/650/500 2012+ 706000958
Fits: 2012 Outlander STD, XT, 1000 EFI - Rear Suspension2012 Outlander STD, XT, 800R EFI - Rear Suspension2013 OUTLANDER 1000EFI, DPS, XT & XT-P - Rear Suspension OUTLANDER 650EFI STD, DPS & XT - Rear Suspension2013 OUTLANDER 650EFI XMR ..
11410 rub
Rear shock absorber Polaris Sportsman 800/700/570/500/400 7043374 / 7043100
Fits: Polaris 2008 Polaris ATV SPORTSMAN TOURING 500 EFI (DN50AF) (BOARDWALK BLUE) 2008 Polaris ATV SPORTSMAN TOURING 500 ) 2008 Polaris ATV SPORTSMAN TOURING 500 EFI (DN50AW) (PEARL WHITE) 2008 Polaris ATV SPORTSMAN TOURING 500 EFI (DN50AZ) ((INDY RED)) 2008 Pol..
RUB 13348
Rear shock absorber assembly Yamaha Grizzly 700 2014+ 2BG-F2210-00-00
Suitable for: Yamaha: 2014 Grizzly 700 Fi Eps Hunting 2014 Grizzly 700 Grizzly 700 Fi Eps 2014 Fi Eps 2014 Fi Eps 2014 Fi Eps 2014 Fi Eps 2015 GRIZZLY 700 4WD 2015 GRIZZLY 700 4WD HUNTER 2015 GRIZZLY 700 EPS 4WD 2015 GRIZZLY 700 EPS SE 2015 GRIZZLY 700 FI EPS HUNTING.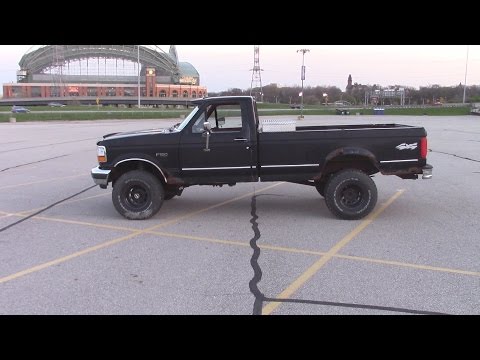 .
.
25754 rub
Can-Am G1 Rear Shock Absorber 706000337
Fits the following models: Can-Am2006 Outlander 650 STD 4 X 4 - Rear Suspension2006 Outlander 650 XT 4 X 4 - Rear Suspension2006 Outlander 800 STD 4 X 4 - Rear Suspension2006 Outlander 800 XT 4 X 4 - Rear Suspension2006 Outlander MAX 65 4 X 4 - Rear Suspension2006 Outlander MAX 650 XT 4 X ..
13900 RUB
Can-Am Commander ATV Rear Shock 706000615
Fits the following models: Can-Am2011 Commander 1000 - Rear Suspension2011 Commander 800 - Rear Suspension2012 Commander STD, XT, 800R EFI - Rear Suspension2012 Commander STD, Rear XT0, X, -10 Suspension2013 COMMANDER (ELECTRIC 9)KW) STD, XT, LSV - Rear Suspension2013 COMMANDER STD, DPS, X..
16900 RUB
Can-Am Outlander G1 Rear Shock Absorber 706000792
Fits: Can-Am2010 Outlander 500 EFI - Rear Suspension2010 Outlander 650 EFI - Rear Suspension2010 Outlander 800R EFI - Rear Suspension2010 Outlander Max 500 EFI2 - Rear Suspension 2010 Outlander Max 500 EFI2 - Rear Suspension 500 EFI2 - Rear Suspension 500 EFI2 - Rear Suspension 500 EFI2 Rear Suspension2010 Outlander Max 800R EFI - Rear Suspension2011 Out.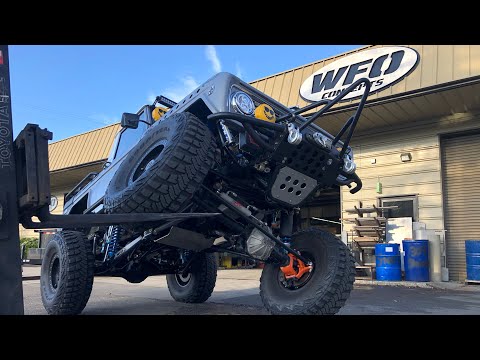 . 970
. 970
Fits the following models: Can-Am2013 OUTLANDER MAX 1000EFI, DPS, XT & XT-P - Rear Suspension2013 OUTLANDER MAX 500EFI STD, DPS & XT - Rear Suspension2013 OUTLANDER MAX 650EFI STD, DPS & MAX0 XTR - Rear Suspension2013 EFI, DPS, XT & XT-P - Rear Suspension2014 OUTLANDER MAX 1000EFI,..
12880 rub
Original rear shock absorber for Yamaha Grizzly ATVs 1HP-F2210-01-00
Suitable for the following models: Yamaha2012 Yamaha ATV GRIZZLY 550 4WD HUNTER2012 Yamaha ATV GRIZZLY 550 4WD2012 Yamaha ATV GRIZZLY 550 EPS 4WD (DARK PURPLISH2) Yamaha PURPLISH2 5WD (DARK PURPLISH2 5WD) EPS 4WD (PASTEL DEEP GREEN)2012 Yamaha ATV GRIZZLY 550 EPS 4WD HUNTER2012 Yamaha ATV GRIZZLY 700 4WD HUNTER20..
19250 rubles
The QUAD MASTER workshop carries out the following types of ATV tuning:
The concept of "tuning" itself implies the improvement, improvement of something. As a rule, this concept is applied to technical means, although recently the scope of tuning has expanded significantly. As for the improvements in vehicles, in addition to the traditional tuning of cars, the improvement of motorcycles, ATVs, snowmobiles, boats, scooters and other equipment is becoming increasingly popular. nine0003
One of QUAD MASTER's areas of work is the professional tuning of ATVs, including ATVs with low pressure tires and vehicles from the UTV category with a car seat. Our highly qualified specialists work equally effectively with any models of ATVs. They have enough technical knowledge and practical experience to perfect the products of brands such as Yamaha, Kawasaki, Honda, CF-MOTO, Polaris or Cectec.
Leave a request for service
Regardless of the model, ATV tuning, as a rule, begins with the installation of a special metal protection on the bottom. This measure allows you to ensure the operability of important vehicle components in any, even the most extreme, operating conditions. Also, to conquer the off-road, it is necessary to “shod” the ATV in special mud tires. Our workshop uses proven brands including Maxxis, KENDA, ITP, Deestone.
Taking into account the specifics of ATVs, the presence of an electric winch for this type of equipment is no less important than for off-road vehicles. If the manufacturer for some reason did not take care of equipping the ATV with a winch, our craftsmen will easily correct this omission. We can install a winch mechanism on both sides of the ATV, which will maximize its autonomy. As for the winch brands, we offer Warn or T-MAX, which have proven themselves in practice. Of course, the client can offer his own version. nine0003
For problem-free driving in unlit areas at night, you will need to install additional LED lighting devices. The Quad Master workshop has an extensive and varied range of modern LED devices, different both in design and price. Our experts will help you choose the option with the optimal ratio of functionality and cost.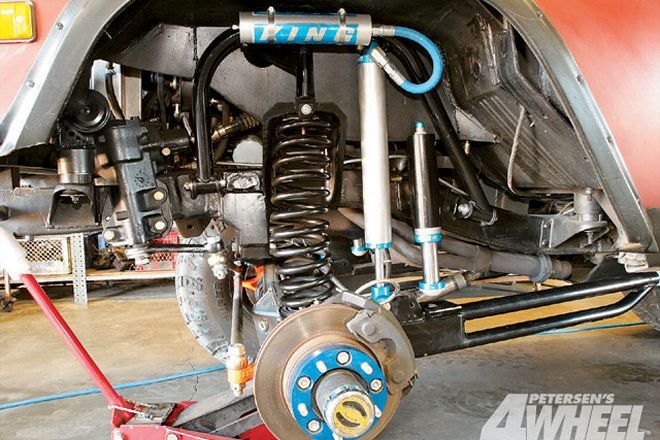
One of the important steps in preparing an all-terrain vehicle for off-road testing is the removal of the radiator and the installation of snorkels - devices that allow you to overcome deep fords without the risk of water entering the engine and variator. The radiator extension keeps the cooling system running while riding in the mud, preventing the engine from overheating. nine0003
CVT tuning is recommended primarily for quad bikes with large off-road wheels. The clutch kit of the variator is able to significantly increase traction in the lower and middle ranges of the engine, which, in turn, will significantly facilitate the overcoming of serious off-road terrain by the all-terrain vehicle. The tuning of the variator also has a very beneficial effect on the speed qualities.
ATV suspension tuning is useful for those who like to make high-speed races over rough terrain. Among other things, the installation of reinforced shock absorbers allows you to increase the speed of cornering, improves the handling of the all-terrain vehicle.