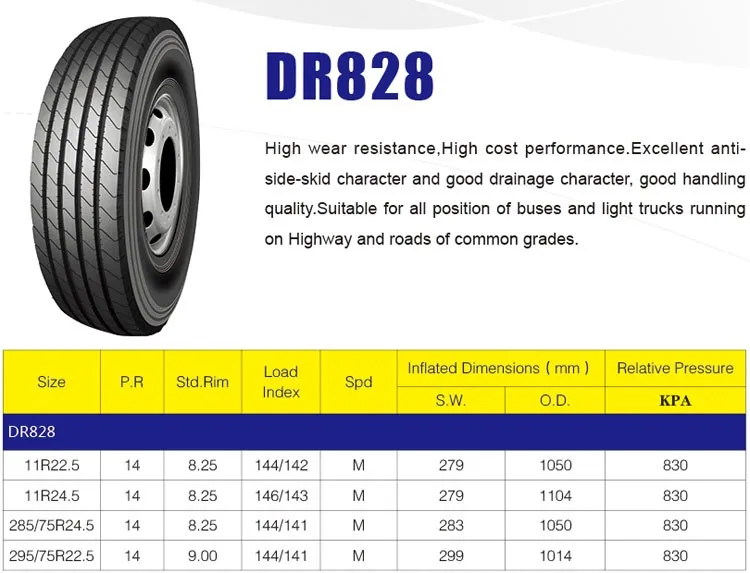
Having spent the better part of a year installing tires at the Pep Boys in Fredericksburg, Va., I thought I knew a thing or two about how a tire is mounted to a rim. It was my first job after graduating from college, and knowing very little about working on cars, I was an eager pupil. As I soaked up knowledge from my well-meaning teachers, I felt confident that following their directions would give me the power to mount and balance tires perfectly.
But 16 years later, while re-learning how to use the tire mounting and balancing machines at Brooklyn Motor Works– where, in case you were unaware, we're rebuilding a 1988 Toyota Land Cruiser – I discovered that I also had to re-learn the whole tire installation process. But that's nothing new. As Carlos, Brooklyn Motor Works' proprietor has pointed out, we learn many things as hobby mechanics that must be un-learned when there are schedules to keep and customers to satisfy.
Anyway, here's the correct way to mount tires. Now that I know these simple tricks, I'm wondering if any of the 12 tires on the three dilapidated beater cars I drive around on a regular basis are actually mounted correctly. Chances are, they're not (I had 'em mounted at Pep Boys).
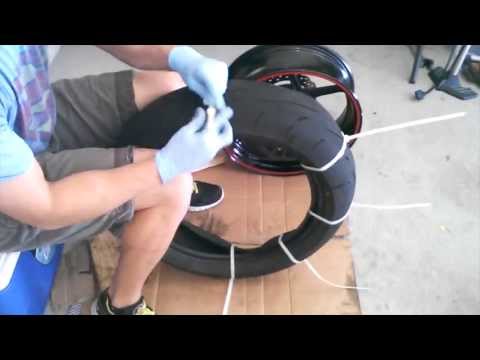
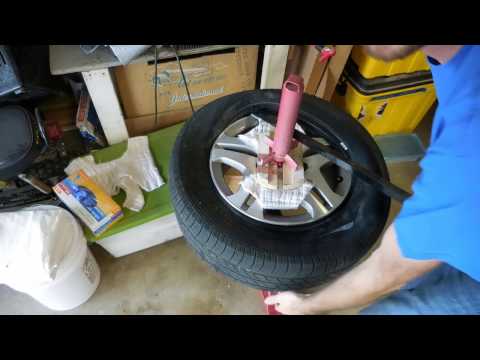
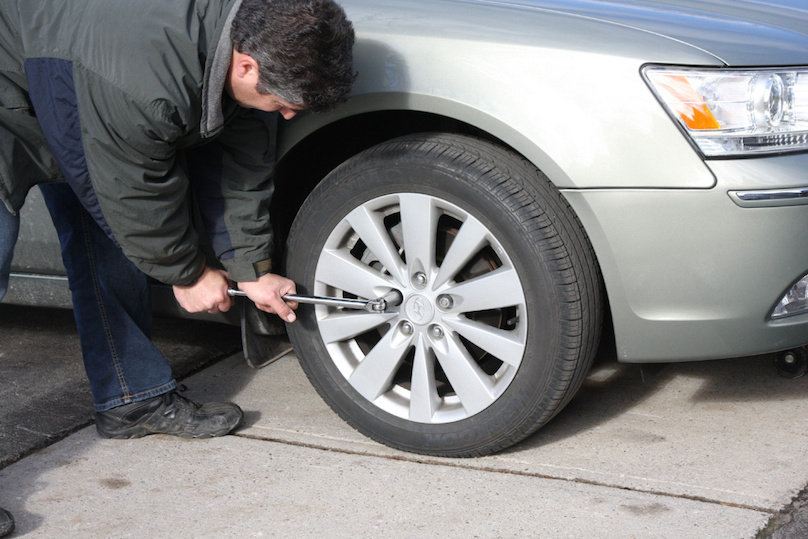
1. Remove the valve stem core to deflate the tire. Set the core aside for later use (if you're installing new tires, pull out the stem and install a new one, removing the core).
2. Use the tire machine to remove the tire from the rim
3. With the tire off, run your finger along the inside lip of the rim. Does it feel perfectly smooth? If not, it needs to be. Rust pitting can cause leaks, and will cause the bead of the tire to hang up when it's trying to seat on the rim (the beads are the really thick parts of the tire that come into direct contact with the inner and outer lips of the rim.
4. To remove rough patches, use several different grades of abrasive pads (I used coarse and medium Scotch Brite pads) to smooth out the inner lip of the rim, as well as the part of the rim the bead slides over as it seats on the lip.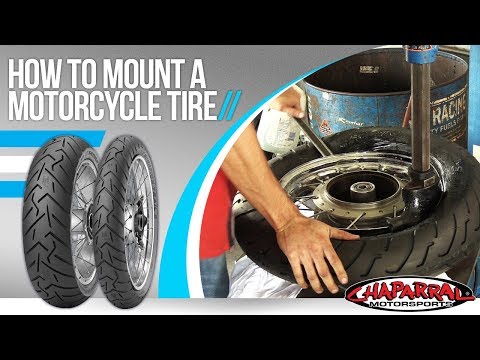 If there's too much damage, it may be necessary to get another wheel. You'll never be able to balance a wheel if the tire isn't properly seated upon it.
5. Before installing the new tire (or, if reusing the old one, the same tire, mounted the same way it was before), apply a generous amount of tire bead lubricant to the tire beads and the rim. Don't use soapy water (not enough slip) or grease (you'll never clean it all off and the bead could pop off the rim in hard cornering). Bead lubricant is slippery, but dries, allowing the bead to set.
6. Use the machine to install the tire. Then, remove the wheel from the machine mounts.
7. Spray more bead lubricant between the beads and the rim.
8. With the stem core still removed, inflate the tire to its maximum pressure (you'll see that number printed on the sidewall of the tire). The beads should pop onto the rim pretty quickly if the rim lips are smooth and you've used enough lubricant. It'll go "POP.. POP!" as the beads seat.
9. Install the stem core and re-inflate the tire to its max pressure.
Assuming you followed all of these steps correctly, your wheel and tire are now ready for balancing. Then you'll adjust the tire pressure to the vehicle manufacturer's specifications when you mount the wheel and tire back on your car.
Now, I realize most people don't have access to a tire mounting machine, but being aware of what it takes to mount a tire will, at the very least, give you the tools to ask your tire installer if they're mounting your tires the right way. If the tire shop you're using is doing things the quick and dirty way (mounting tires dry on pitted rims), find a better shop! No one wants to feel a sickening shudder as the car passes 65 miles per hour on the highway.
Mounting tires can be a pretty pricy service so it’s no wonder why you might want to do it yourself.
But for most people, it’s something that’s just too difficult and that they’d prefer to just get it done at the shop. But if you’d rather keep your dollars in your wallet, here’s how to mount tires at home.
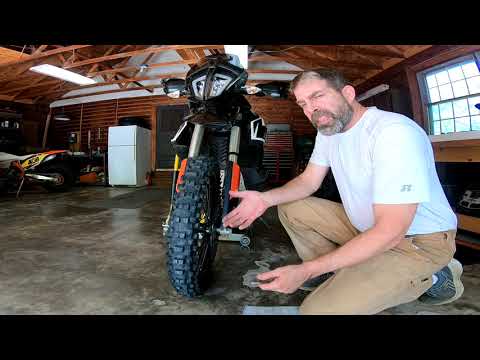
Even if you don’t have a machine, all you need to mount tires yourself is a basic set of tools that most people have. All you need is a jack, a lug wrench, a torque wrench, a set of tire irons, a bead breaker, a valve stem tool and a can of WD-40.
Mounting a tire is the process of attaching a tire to a wheel. The most common way to mount a tire is by using a machine at a service station or garage. However, it is possible to mount tires at home with some basic tools and knowledge.
There are three main methods for mounting tires: bead seating, cold mounting, and hot mounting.
Bead seating is the most common method and is done by using a machine to push the tire onto the wheel.
Cold mounting is done by using a special adhesive to attach the tire to the wheel.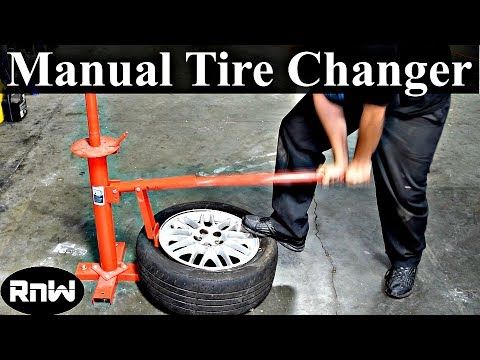
Hot mounting is done by using a machine to heat up the tire and then attaching it to the wheel.
There are a few reasons why you might want to mount a tire yourself at home. The most common reason is to save money. Mounting a tire yourself can be cheaper than taking it to a service station or garage.
Another reason why you might want to mount a tire yourself is for convenience. If you have all the necessary tools and knowledge, you can mount a tire in a short amount of time.
Lastly, some people enjoy the challenge of mounting a tire themselves. It’s a great way to feel a little bit more self sufficient in a world where it feels everything is done for you.
The cost of mounting a tire can vary depending on the type of tire, the size of the tire, and where you take it to be mounted. On average, it usually costs between $15 and $30 to have a tire mounted.
To mount a tire at home, you will need:
Note: Before you start, make sure you have all the necessary tools and knowledge. Mounting a tire can be dangerous if done incorrectly.
 Repeat this process for the other side of the tire.
Here are some things you need to keep in mind when mounting tires at home that could cause issues for your tires (or yourself) and should be avoided.
If you’re looking to save some money and are excited about the idea of the challenge of getting your hands dirty, then you can absolutely mount tires at home yourself. Just make sure to follow the guide above and always stay safe.
We hope you enjoyed this article and found it informative. If you have any questions then please leave a comment below or get in touch via email or through social media and we will read and respond to every comment, email or question. Thanks for reading!
Old ways of making car and motorcycle tires yourself.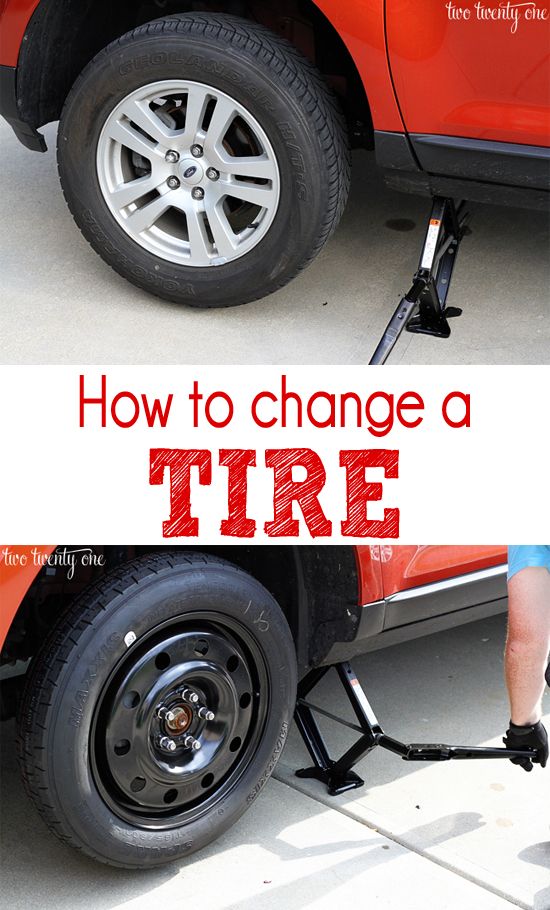
Automobiles and motorcycles are made with the so-called "frame", a power unit that perceives shocks and shocks that the wheel experiences when moving. Even on a flat road, the number of such shocks is very large. If you make a tire from rubber mass alone (and this is how model tires are made), it will very quickly lose its shape and collapse, unable to withstand the loads applied to it. To prevent this from happening, a carcass is introduced into the tire structure.
It consists of a large number of strong threads that are located around its entire perimeter and form a sort of mesh that is able to withstand the high pressure of the air enclosed in the tire and a large number of shocks and shocks perceived by the tire from the outside. And in order for the tire to hold securely on the wheel rim, rings of flexible steel wire are molded into its sides.
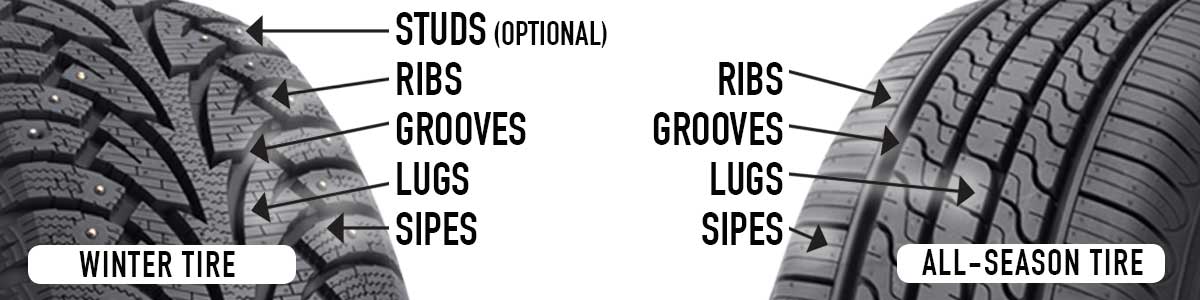
Tire carcass parts are interconnected with a rubber mass having sufficient strength and elasticity. And the outer part of the tire is protected by a tread layer - more rigid rubber. The thickness and pattern of the tread depends on the purpose of the tire. For example, for off-road driving, a higher and larger tread pattern (so-called "lugs") is used.
Tires with finer patterns are made for asphalt. The cross section of the tire is shown in fig. 1. and fig. 2
Fig.1. Cross section of a homemade tire.
Tires on micromotorcycles operate under exceptionally severe conditions. For example, if a normal motorcycle wheel, when passing ten meters of the road, must turn around its axis eight times, then the wheel of a micromotor scooter makes three or four times more revolutions, since its diameter is smaller.
Thus, at a speed of 70 km/h, the wheel of a micromotorcycle with a diameter of 320 mm should make 1200 rpm. At such high speeds, the frequency of tire deformation and heating are very high. Overheating of the tire leads to its rapid destruction. In the most unfavorable conditions is the rear wheel tire.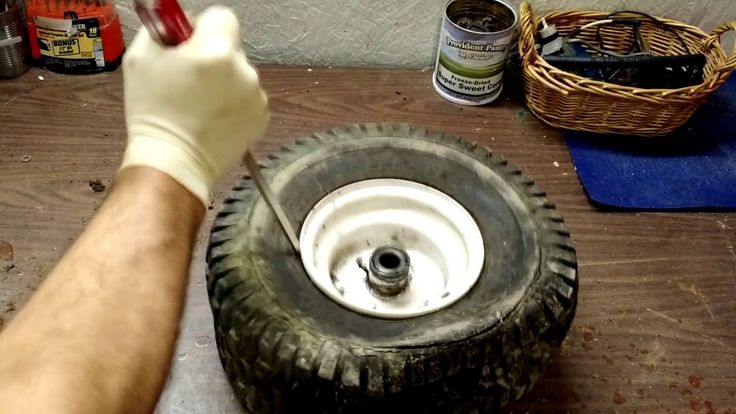
Micromotorcycles have about 1/3 of the weight on the rear wheel, which is also less cooled than the front wheel. Due to the small size of micro motorcycles and micro scooters, the distances between a hot engine and wheels are very small. This can cause the tires to overheat quickly.
Therefore, the most difficult problem in designing tires for micromotor vehicles is to increase their heat transfer. The tire walls, which have a large heat capacity, do not allow the necessary amount of heat to be dissipated into the surrounding space.
Reducing the thickness of the tire is possible only within certain allowable limits, since the load on it is very large. Considering all this, when designing microtires, we are guided by the following considerations: the tire carcass is made of two layers of high-strength nylon cord, more than other materials that meet the conditions of work in the tire, since it has a low weight and high resistance to repeated bending. We made several tires from viscose and cotton cords, the carcasses of which, due to their low strength, had to be made 4-ply. these tires quickly failed due to overheating.
When the tire is inflated with air, large tensile forces act in the cord plies. The magnitude of these efforts depends not only on air pressure, but also on the number of cord layers, and on the geometric profile of the tire, its dimensions, load and rim width. Each tire profile is designed for a specific rim width. The use of rims from children's roller skates (scooters) does not provide the necessary conditions for the normal operation of tires, even at a speed of 40 km / h and a load of about 50 kg. To ensure the necessary working conditions, the rims must be much wider (at least 35-38 mm between the shoulders). In this case, it is possible to produce tires designed for a load of 60-80 kg and a speed of about 60-70 km/h.
The geometric profile of the tire designed by us is shown in fig. 2 in full size, and the design of the tire is shown in fig. 3.
Fig.3. Auto tire design.
When operating the tire, it is important that the cords are well insulated from each other with rubber and do not fray.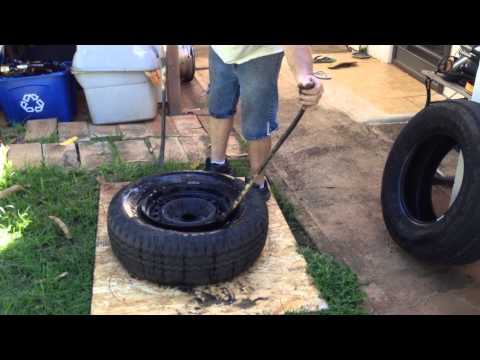 To do this, a thin layer of rubber (0.5 mm) is laid between the layers of the cord (although it is already rubberized), the so-called "squeegee". For this purpose, you can use raw rubber used to repair car cameras in car fleets. The presence of a layer of elastic rubber between the layers of the cord and the same rubber over the entire carcass not only prevents the cord threads from fraying, but gives the carcass elasticity and increases the strength of the bond between the carcass layers and the next layer, called a breaker.
Breaker is an additional layer of elastic rubber with a thickness of 2-2.5 mm, which serves to increase the strength of the connection between the tire carcass and the tread. It protects the frame from possible breakdowns and damage. With sharp braking and acceleration, an internal shift is obtained between the low-elastic, but wear-resistant tread rubber layer and the carcass. The task of the breaker layer is to extinguish the energy of this shift, to prevent the tire from exfoliating. The rubber of the breaker must be elastic, heat-resistant and tear-resistant.
When assembling the tire, the breaker tape is made wider than the tread band by 5-6 mm. For her, the most suitable is ready-made raw rubber based on isoprene or natural rubber. But since it is not always possible to get such rubber, we successfully use the following method: we take ordinary raw rubber intended for repairing cameras (about 0.8-1 mm thick) and a piece of natural rubber for making rubber glue. Plates 1-1.5 mm thick are cut out of it with a sharply sharpened knife. Then, carefully smearing the prepared strip of raw rubber and cut rubber plates with glue for hot vulcanization and letting the glue dry for 5-6 minutes, we glue the plates onto the strip in a continuous layer, without cracks and crawling on top of each other.
The resulting two-layer tape is glued to the carcass with the side of the rubber plates, and then the tread layer is glued onto it. The protector is made of high-strength, wearproof rubber. It is located only on the treadmill of the tire. Its thickness depends on the size of the tire itself. For our tires having a diameter of 320 mm, the tread thickness should be between 4-6 mm. The quality of the tread determines the durability of the tire, so the requirements for the rubber from which it is made are somewhat different than for the rubber of the belt layer. The best is rubber, designed for repairing car tire treads.
For more convenience in assembling the tire, the two-layer tape of the breaker layer and the tape of the tread layer can be glued together, and then the resulting three-layer tape can be glued to the tire carcass. The width of the tread band for our tires is 50-55 mm.
The tread pattern may vary depending on the purpose of the tire and operating conditions.
Shown in fig. 4 The tread pattern is universal. Tires with such a tread work equally well on roads with a wide variety of surfaces.
Making a die to obtain this tread pattern is not difficult and can be done even at home.
To do this, take a strip of soft aluminum 4-6 mm thick (the thickness of the material determines the desired depth of the pattern) and in it, according to fig. 5 holes are drilled. Then the strip is cut with a hacksaw along the center line into two equal parts. In each part, shaped grooves are cut, chamfers and burrs are removed with a sharp knife, all irregularities are leveled with a file, and the ends remaining after sawing the spikes are ground at an angle of 45 °.
Fig.5. making a matrix for the tread pattern.
After the final sanding, the die parts are riveted with soft aluminum wire rivets to the mold halves from its inside. This design of the mold allows you to avoid complex milling work. The mold itself is made by casting into the ground, from aluminum or another light alloy (we used old pistons from car engines collected at a landfill for this).
Casting tooling (mould and box) shown in fig. 6. Aluminum melt can be carried out directly in the mold by heating it with a gas burner flame or, as usual, in a muffle furnace. For example, we made a casting at the site of the repair of the park's metal fence, where gas welding was carried out.
Fig.6. Equipment for casting tires.
Castings must be removed from the mold without destroying it, and only after they have completely cooled down. It is impossible to accelerate cooling by wetting the casting with water.
Matrix preparation is completed by drilling holes for bolts that tighten it during tire welding.
The cast blanks for the mold are machined on a lathe according to the drawing. Particular attention must be paid to matching the mold halves and discs to each other, as well as careful riveting of the tread grille (fig. 2).
As a mandrel for assembly, we use an unusable (“bald”, but not deformed) tire from a children's scooter. First, on emery, and then with a sandpaper of different grain sizes, the remnants of the tread are removed from it so that the surface becomes completely smooth.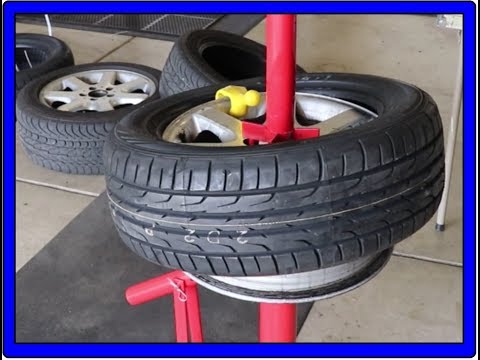
Having filled the chamber inside the tire treated in this way and slightly pumping it up with air, we sew the inner edges of the tire with strong threads, carefully grabbing the bead rings. The distance between the sides should be the same around the entire circumference (Fig. 9).
Their length should be such that after wrapping around the mandrel at an angle of 52° to bend around the bead (wire) ring, 20-25 mm remain.
In this case, it is necessary to slightly stretch the middle of the blanks, thereby increasing the distance between the threads so that they are the same around the entire perimeter of the wheel. The cord threads should lie evenly, in one layer, and not crawl on top of each other even at the location of the bead ring (where the density of the threads is maximum). To facilitate laying, it is not recommended to make cord blanks that are too wide, the most convenient width is 40-50 mm.
As practice has shown, the rapid failure of tires from children's scooters is explained precisely by the poor quality of the bead rings - they diverge, since their ends are not fastened in any way, the tire diameter changes, and this leads to self-disassembly of the wheel. To make the ring, we use the wheel rim itself as a mandrel.
To do this, first cut a strip of 3 mm rubber (for example, from an old car inner tube) 10-12 mm wide and glue a ring from it with a diameter slightly smaller than the rim seat. This ring is stretched onto the rim, then a 10 mm wide ribbon is cut out of raw rubber 0.5 mm thick and one turn is made from it around the ring put on the rim. After winding the wire (8-10 turns) directly on the raw rubber, a large tightness should not be done, since it is possible to cut the rubber through with a thin wire. Having fastened the ends of the finished ring with a twist, grease it abundantly with glue, let it dry and wrap it, without removing it from the rim, in a raw rubber ribbon on which it was wound. The finished ring is removed from the rim along with a rubber ring that can be reused.
Coating with glue and rubberizing the wire ring is necessary so that the wire does not peel off from the tire bead during its further processing.
Two rings must be made for each tire. They are carefully smeared with glue and stacked in place after laying the first layer of cord.
The glued rubber must not stick to the bead rings. But there should not be large gaps between them; it is more convenient to paste over, having previously cut, raw rubber in the form of a tape slightly wider than the distance between the side rings, and then - after gluing - remove its excess with curved nail scissors.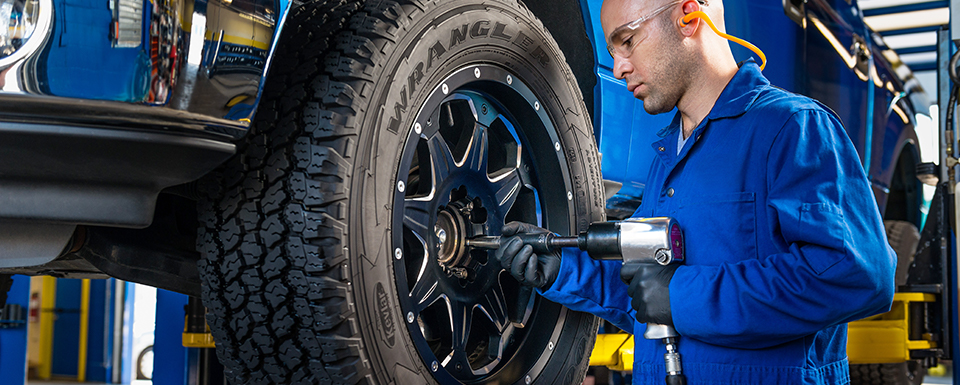
The glued ends must not overlap and be longer than 15-20 mm. If they are too long, they need to be trimmed.
7) Laying the second layer of cord. It is made in the same way as the first one, with the only difference that the angle of inclination of the cord threads must be opposite to the angle of inclination of the first layer. The ends of the cord threads of the second layer are wrapped around the bead rings not outwards, like the first, but inside the tire. This operation is more convenient to do when the finished tire is removed from the mandrel.
The tape should cover the treadmill and extend slightly over the sides (approximately 2-3 mm on each side).
Suitable raw rubber for repairing chambers with a thickness of 0.5-0.7 mm. First, it is cut in the form of a tape, which should be glued tightly to the bead of the tire butt-to-butt with the edge of the already glued breaker tape. In this case, it is necessary to carefully smooth the tape to the side of the tire so that air bubbles do not form. Excess bead tape is cut with curved scissors along the inner (landing) diameter of the tire.
The tread tape must not go over the bead of the tire and must be firmly attached to the glued breaker layer tape.
To do this, air is released from it, removed from the tire, after which the second layer of cord is wrapped and glued to the inner surface of the tire with an overlap of about 15-20 mm. This completes the tire assembly. It is also desirable to glue the seats of the assembled tire with a “chafer”, that is, a layer of rubberized plain weave fabric. This strengthens the beads, which is especially important if the tire will be used on a wheel with a rim with a shallow stream. But if the rim has a deep stream, like, for example, the Agidel micromotorcycle, pasting with chafer is not necessary. The chafer tape is glued onto the seats so that on the outer side of the tire its width is 30-35 mm, and 20-25 mm is wrapped inside.
Fig. 7. Mold for casting tires.
Fig. 8. Mold with grating tread.
Fig. 9. Tire assembly procedure.
1 - section with the first layer laid, 2 - sewn edges of the piston 1 3 valve, 4 - raw rubber layer (thickness = 0.5 mm), 5 - second layer of cord, 6 - bead ring, 7 - wrapped the ends of the cord outward, 8 - the edges of the cord screwed in.
The tire assembled in the manner described must be vulcanized to give it durability and strength. After all, raw rubber, from which we assembled the tire, is called raw because it does not have sufficient resistance to various mechanical and chemical influences. But after a short heating to a certain temperature, raw rubber irreversibly changes its physical and chemical properties - it becomes practically insoluble, hard, elastic, able to withstand large shock and tensile loads and resist abrasion well.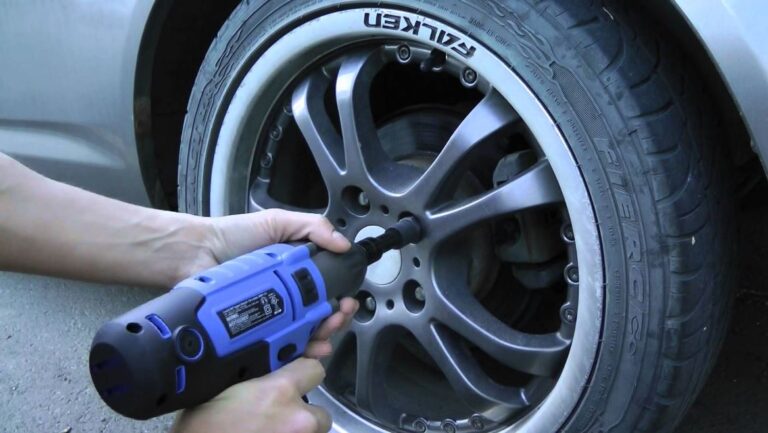 This process is called vulcanization.
Vulcanization is now widely used not only in industry, but also for household needs, for example, in the repair of rubber shoes and other household items. Portable vulcanizers, powered by a battery or equipped with a gasoline torch, allow you to repair car cameras on the go.
Hot Cure Adhesive
This adhesive is not always available but can be made at home. To do this, natural rubber is dissolved in pure gasoline (aviation, or the so-called "galosh") and 50 g of powdered sulfur is added to one liter of glue. If there is no such sulfur in finished form, lump sulfur should be crushed and sifted through a metal sieve with cells of 0.2X0.2 mm. Before applying glue to the surface of vulcanized rubber, it must be prepared: carefully cleaned on an emery wheel or manually with a coarse-grained sandpaper. Do not touch clean surfaces with your fingers. Raw rubber does not need to be cleaned. If its surface is dirty, it is enough to wipe it with a cloth soaked in gasoline.
After applying glue to both surfaces to be glued, they are dried in air and pressed tightly against each other, making sure that there are no air bubbles between them. When gluing rings, cooking or running chambers, the ends of the tape must not only be cleaned, but also brought to a cone so that the thickness of the gluing is not thicker than the tape itself. If the glue has stood for a long time without use, it must be thoroughly stirred, reaching to the bottom of the dish in which it was stored, since sulfur settles to the bottom over time.
Related materials
5 cool and inexpensive Chinese car ideas for autumn
You don't have to go to a car wash or a spare parts store to get your tires back to a deep black color. You can get by with improvised means, and some of them are sure to be found in almost every home.
There are several ways to blacken tires that are safe and do not affect traction. In the absence of special means for restoring color, for example, shoe polish, glycerin, silicone oil, and even laundry soap and household chemicals are used. Each substance has its pros and cons, but it should be remembered that none of them fully possesses the qualities inherent in special solutions: neither long-term effect, nor protective properties, nor ease of use.
Related materials
11 factors that the driver needs to remember in the fall
Blackening tires with shoe polish or other shoe care product is the first thing that comes to mind. At the same time, the processing process itself is no different, only instead of a brush it is better to use a sponge so that splashes of shoe polish do not stain the body. We simply rub the sidewall of the washed and dried tire with shoe polish and let it dry.
To be honest, the result does not look very good, even when using the product with wax: there is neither shine nor color depth. The application process itself is also inconvenient - imagine what it would be like to process four wheels. The downside is that you have to wait for the shoe polish to dry completely before driving.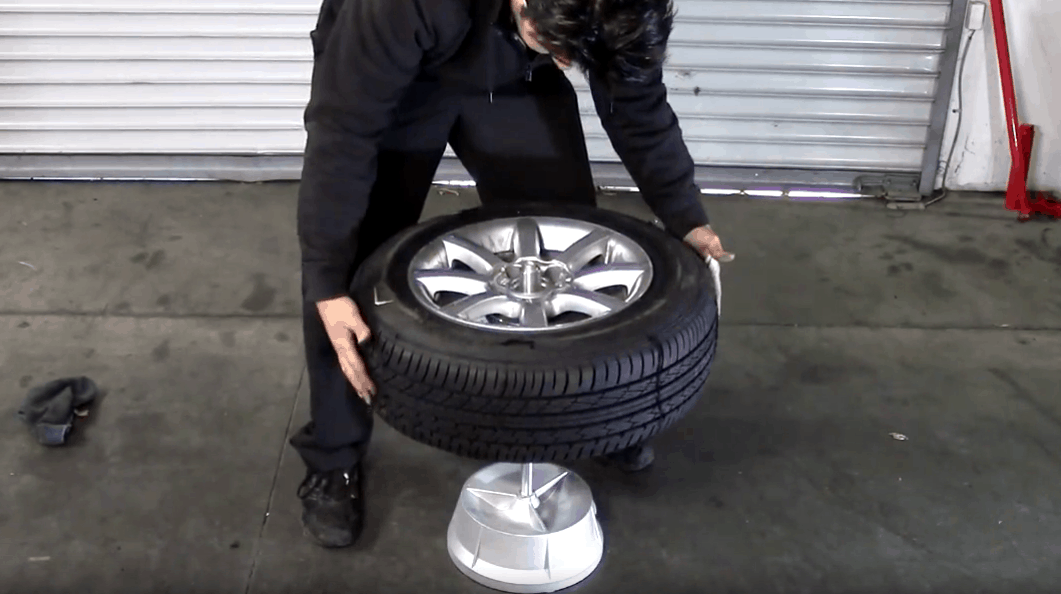 Otherwise, road dust will quickly stick to the treated surface, reducing all the efforts made to nothing. Of course, there are also quick-drying paint creams, but their cost is such that it will still be cheaper to buy a special product for blackening tires.
Due to its consistency, glycerin creates a stunning jet-black shiny tire effect, and the degree of "greatness" can be adjusted by diluting the product with plain water. For one procedure, only one hundred grams of glycerin and the same amount of water are enough. We mix them, taking into account the fact that the less water in the composition, the more "fat" the effect will be. But it’s better not to spare water, otherwise dust will stick to the tires, as in the case of wet shoe polish. The composition is applied with a simple sponge without rubbing. By the way, unpainted black plastic body parts can also be processed with this composition.
The advantage of this method is its low cost and the availability of glycerin in any pharmacy. The disadvantages overlap all the advantages: glycerin quickly ages rubber, causing it to crack. In addition, the composition is very well washed off with water - the very first rain or driving through a puddle will not leave a trace of glycerin. In dry weather, tires will only stay black for a couple of days.
Related materials
How to sit behind the wheel - check your fit
Blackening tires with silicone oil is not the cheapest way because it is not sold in small containers and you will have to buy an annual supply of funds right away. This method is the simplest, most efficient and less labor-intensive than the others. It is better to use medium viscosity oil, which will also come in handy for treating tires before winter or summer storage - this is the only substance described that somehow protects rubber from cracking, drying out, ultraviolet radiation and moisture.
The effect after treatment with silicone oil is long-lasting and the tires look blacker than new. Silicone oil is also treated with door seals and trunk lids so that they do not freeze.
Laundry soap is perhaps the cheapest product suitable for blackening tires. It can be applied with a pre-soaped brush, or by dissolving a crumb of soap in water, apply the composition with a sponge. There is no need to rinse off the soap: when it dries, the rubber will acquire a beautiful and deep black tint. Like most artisanal methods, blackening tires with laundry soap has its drawbacks. Rubber because of it, as in the case of glycerin, ages faster and may begin to crack, so we do not recommend this method of blackening.
Related materials
Preparing the car for winter: what needs to be done first
Household chemicals are often used in car washes. This is a cheap, effective and harmless method for rubber and its adhesion to an expensive method, which can be offered as a bonus or "gift".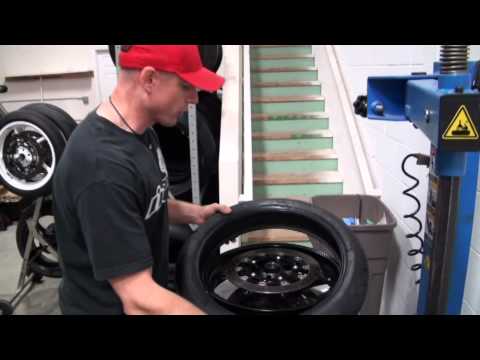 It is mainly used for washing glasses, as well as dishes. The first is sprayed onto the sidewall of the tire and rubbed quickly, while the second is applied with a damp sponge. It is not necessary to wash off the compositions.
Also on the forums it is advised to blacken tires with drinks. More often than others, Coca-Cola is mentioned. But because of the sugar in the composition of the cola, it creates a sticky layer, on which dust quickly settles, and is easily washed off in the first puddle.
***
All of the listed products, of course, are inferior to the special compounds sold in auto chemical departments. Their blackening effect is short-lived and does not look so beautiful. In addition, most of them can harm rubber by affecting its chemical composition and reducing its service life. Nevertheless, the described methods are in demand due to their availability and spontaneity, because most motorists do not need to blacken tires every day.
However, the safest alternatives to professional tire blackeners are silicone and household chemicals.