In this post, we’ll have a look at some common causes if your ATV won’t move forward or backward when you put it in gear. Typical components that may need to be addressed to fix this are:
Page Contents
I recommend that you start your troubleshooting by making sure all four wheels on the ATV spin freely and that there’s nothing in the driveline preventing it from moving as normal.
To test this, all you need to do is to put the ATV in neutral (N), leave the parking brake off, and try to push forward or backward it by hand. Some of the larger ATVs can be a bit heavy to push, even for an adult, but on a flat smooth surface like asphalt or concrete, you should be able to make it move.
If the wheels spin freely, you know that the driveline and brakes are fine and that the problem is with your gearbox, transmission, or gear shifting mechanism. You may jump straight down to troubleshooting transmission issues.
If you cannot get the wheels to turn no matter how hard you push, the problem may still be with your transmission or gear shifter. But because it is far easier, you should start by looking into the bike’s driveline, brakes, and bearings to ensure there are no issues there.
Wheel bearings may seize up completely if you let them wear too far before having them replaced.
On solid rear axle racing quads, you should also inspect the carrier bearing as they may break and lock up.
While you have the wheels off the ground, you should also inspect the brakes.
 Service kits that include replacement brake caliper pistons and glide pins are available for most ATVs. In more severe corrosion cases, you may need to replace the complete brake caliper and brake disk for the brakes to disengage properly.
If you still haven’t found a definite indicator that something is wrong with either the wheel hub assembly or brakes, you should isolate them from the rest of the driveline. This way, you don’t waste time troubleshooting parts of the ATV that may be working as normal.
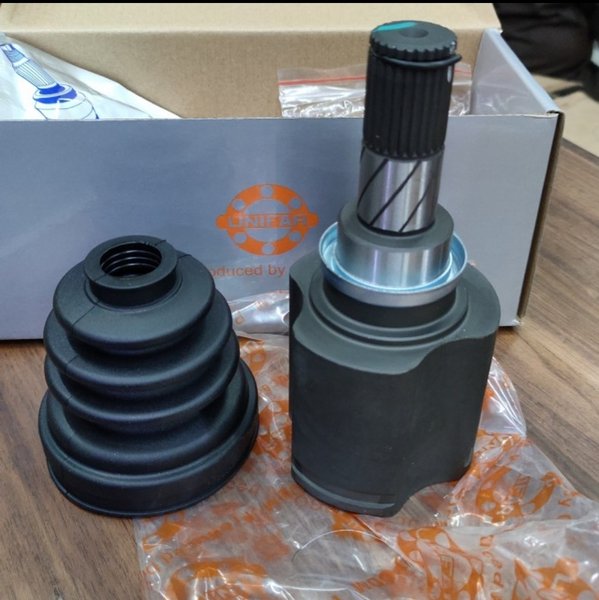
You usually don’t break an axle without noticing. The most common scenario for broken axles is your front axle popping when struggling in a mud hole at full throttle, and the tire suddenly finds traction. “POP,” and the ATV no longer moves.
An axle may strip if it pops out of place. The C-clip that holds it in place may come loose so that the axle starts moving out until just a small portion is still gripping and the splines stip. You will likely hear scraping noises if the axle has been stripped.
When a driveshaft or axle breaks, your bike will no longer pull on the wheel that the stripped or broken axle goes to. The remaining wheels will likely still pull as normal.
When installing bigger tires, you will add more strain on your bike’s driveline. Consider upgrading your axles to heavy-duty aftermarket parts that don’t break as easily.
The drive belt on CVT transmissions may break due to old age, wear, or misuse. An old belt that is pushed hard may explode in an instant, leaving the bike stranded.
This is how a shredded ATV drive belt looks like.If your bike stopped moving instantly, you should remove the belt cover to inspect the belt. You may find your belt in a thousand pieces or just worn so bad that it is slipping.
Related: ATV belt slipping – symptoms and causes
If you get water on the drive belt and CVT clutches, it will break the friction that makes your ATV move. The drive belt housing is sealed and should normally protect the drive belt from splashing water.
But if the cover fasteners are not properly tightened or the seal is not in place, it may not be sealed properly. And if you have been riding in deep water, it may enter the belt housing through the belt housing vents.
Related: 16 Steps to Repair an ATV Submerged in Mud or Water
If you suspect that water in the belt housing is your cause, there is a drain plug at the bottom that will drain any water that has entered.
Look to the bottom of the belt case to locate the drain plug.After you have gotten all of the water out, the bike should start moving again. Go gentle for the first few miles so that the belt and clutches can dry completely before applying too much throttle, or the belt will slip, causing premature wear.
When you get back home, it’s a good idea to remove the belt cover to see if you can find the cause of water entering.
In addition to loose bolts and a seal that has popped out of its place, you should look for damage to the casing itself. It is not unusual that the cover gets damaged by hitting rocks or branches.
See if you can hear or feel if the gears inside the transmission are shifting when you put the AVT in gear. The gear shift indicator may indicate that the bike is in gear even if the internals have not shifted completely.
If the shifter feels loose or not to be shifting all the way, it may need adjusting. Try setting the bike in gear with a bit more firm motion than normal. You can even gently hit the lever to make it “pop” into gear.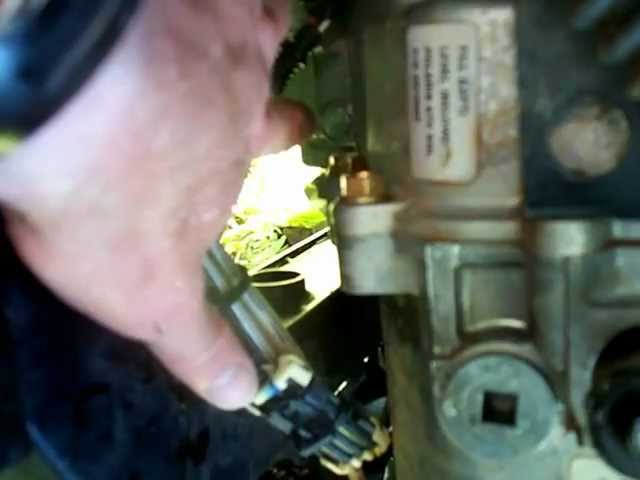
Do not use excessive force; you are only trying to find out if it needs a bit of convincing to pop into gear. If this helps, you will likely be able to fix your issue by adjusting the gear linkage.
Also, make sure none of the visible components in the gear shifting mechanism have come loose or are broken. Some ATVs use a plastic clip that sometimes pops off. And where the shifter rods connect to the transmission, you will find a bell crank that is well known to strip or crack.
On manual clutch setups, you need to make sure the clutch cable is adjusted correctly.
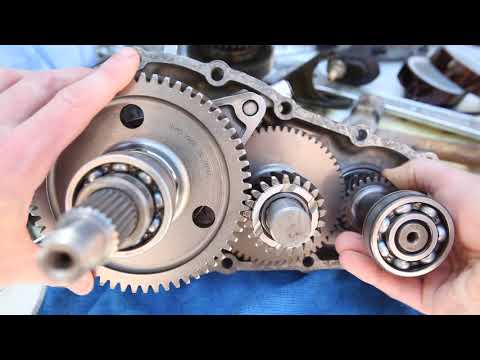
If all of the externals seem fine, but you can still not make the ATV shift completely, you may have a bent or broken shift fork, broken drive chain, or stipped pinion inside the transmission.
Before splitting the case, you can try this:
This post goes more in-depth on possible causes when an ATV won’t go into gear or won’t shift gears.
If one of the clutches is not working properly, they may not engage to move your ATV forward.
Listen if you hear any abnormal or weird noises from the belt housing area while in gear and applying throttle.
To further investigate, you need to open the belt cover and inspect how the clutches behave. Keep your hands and any loose objects clear of the clutches any time the motor is running.
On belted ATVs that also have a centrifugal wet clutch, none of the dry clutches should spin on idle, even when in gear. When you apply throttle, the wet clutch engages, which engages the primary clutch, that turns the belt which then spins the secondary.
On belted ATVs without a wet clutch, the primary clutch is spinning all the time, while the secondary clutch only spins when throttle is applied. When idling, the belt rests on a bearing on the spinning primary, but as soon as it speeds up, it grabs onto the belt so that it starts turning.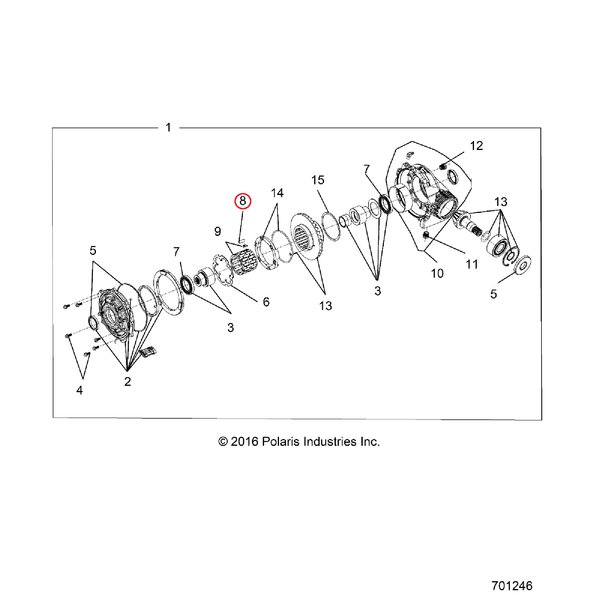
If your ATV does not behave as described above, you may have issues with the clutches that need to be addressed.
Differentials are another possible culprit if your ATV won’t move. A range of things can go wrong, but here are some of the more common:
Some ATVs have internal wet clutches that sit in an oil sump. The same issues listed here also apply to the Hondas with hydrostatic transmissions.
Wet clutch systems require that you use a specific type of oil for the clutches to be working properly. If the oil you are using is not wet clutch safe, it will prevent your wet clutch from engaging and prevent your four-wheeler from moving.
Please refer to your service manual to learn what type of oil your ATV needs.
Another common issue that will prevent your wet clutch from working properly is running with too little oil.
Adding oil to the specified level may, in some cases, be enough to bring your ATV back to full working order.
But if you’ve been running too little oil for too long, you may be looking at expensive repairs such as transmission rebuild, oil pump replacement, or at worst case, a complete engine rebuild.
Your service manual will tell you the correct oil level.
Here are a few issues it may be worth looking into if you suspect that your wet clutch is not working properly:
Some, if not all, wet clutches have an adjustment screw for proper alignment. If not adjusted correctly, the clutch pack will stay disengaged all the time. A service manual will tell you where to find it on your ATV.
Many owners report that they find this adjustment screw very hard to move.
If the adjuster screw is turned too far, it may push the pressure plate back too far, where it may get hung up. Other components like the clutch plates may hang up or somehow get jammed as well.
To find out, you need to remove the clutch plate cover on your wet clutch. Replace the clutch plates if you see any sign of damage.
On Honda ES models, you may find that the shift motor is not fully shifting the transmission into gear. It may lurch or make a noise as if it is going into gear, but in reality, it bumps back out of gear as soon as you apply throttle.
The grease used inside these motors may be too heavy, or it tends to gum up over time. Cleaning out the old grease and adding white lithium grease may be all that is needed to bring the motor back in working order.
Gear position sensors may go bad from shorting out or due to internal corrosion.
If you know your ways around a multimeter, check for continuity in the different gear settings. If there is no continuity in any of the positions, you know that the sensor is toast or needs replacing.
Regular maintenance is the key to getting the most out of your quad or SxS—which, among other things, means riding it as long as possible and as safely as possible. Learn more about choosing the right UTV/ATV oil, coolant, and other essential fluids, and about following the proper upkeep schedule in the following overview.
An easy way to maximize your chances of keeping your ATV or SxS/UTV running smoothly for the long term is following the recommended maintenance intervals laid out in your owner’s manual. Keep in mind that the kind of riding you do will influence this timetable; more intense or severe use of your machine warrants more frequent assessments and service. That kind of use includes regular mud and sand off-roading, ORV racing, the kind of high-load and low-speed operations often involved in farm or ranch work, and plenty of riding in dusty settings.
Let’s break down some of the basic fluid and filters you’ll want to be keeping close tabs on to properly maintain your off-road vehicle.
The oil that lubricates your UTV or ATV engine is, a harder-working oil than your automobile’s.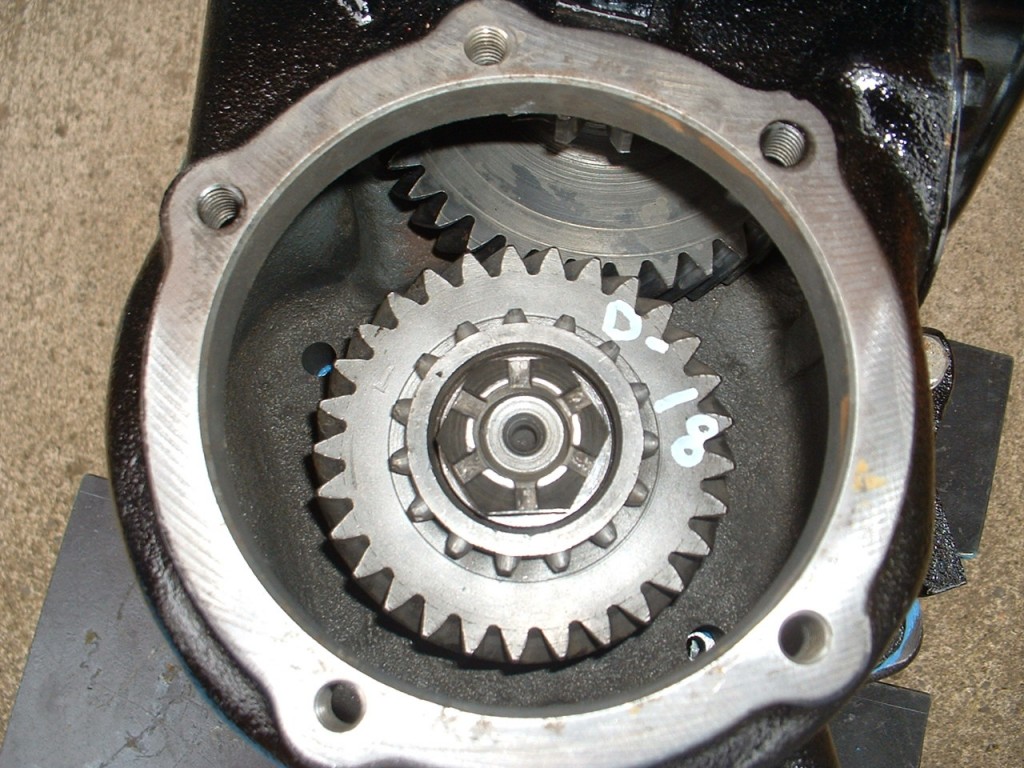 ORV engines run at high temperatures and high RPMs, often have to both get going in frigid weather and run in intense heat. They also commonly operate under intense use for concentrated periods while sitting unused for lengthy intervals in between. To compensate for this comparatively extreme demand, ATV/UTV engine oil has special additives to dissipate heat and maintain a wider range of viscosity and shear stability over longer use than standard automobile oil.
As with automobile motor oil, you can choose between conventional, semi-synthetic, or full synthetic oils for your SxS or quad. Conventional oil is made from a mineral base, synthetic from chemically altered molecules, and semi-synthetics from a mix of the two. Given their superior performance at high temperatures and better stability, synthetic oils tend to be the best choice for UTVs and ATVs.
Any motor oil is obviously vital for allowing the moving parts of an engine to function, and when you consider the extra work and wide range of conditions a UTV/ATV oil is subjected to, maintaining its level and changing it consistently are essential. Check the level of your UTV/ATV motor oil before every ride and add to the full mark if necessary. Consistently dropping oil levels may indicate a leak in the system, which should be promptly investigated and mitigated. A rising oil level, meanwhile, is just as much a cause for concern: It may betray a buildup of contaminants in the oil sump or the crankcase, which also should be dealt with immediately.
Speaking of contaminants—byproducts of combustion, dirt, and other material are among the chief reasons oil needs to be changed regularly. Check your owner’s manual for the recommended schedule; normal ATV or SxS use often requires an oil change every six months, 100 driving hours, or 1,000 miles. Your owner’s manual will also indicate the UTV/ATV oil capacity for your particular machine. It should also suggest when the oil should be changed during the break-in period of a new engine.
Premium base oils specially designed for ATVs and UTVs don’t do much good without the proper high-quality oil filters. The filter should be changed with every oil change, following the same maintenance schedule as the oil itself.
As with motor oil, refer to your owner’s manual to select the best lubricant for your ORV transmission, which may be manual or automatic. Although it’s not as necessary as with motor oil, it’s never a bad idea to check the transmission fluid level and appearance before each ride. The fluid should be somewhat clear; clouded or dark transmission fluid indicates contamination—potentially metal flakes from normal clutch/transmission wear that over time can cause significant damage— and should be changed out.
A typical interval for changing transmission fluid in your ATV or SxS is 100 hours (or 1,000 miles, or every year—whatever comes first). For easily tracking this (and of course the window for other fluids), many riders opt to use a meter.
The Demand Drive fluid recommended for POLARIS ATVs and SxS/UTVs is a lubricant for the front gearcase. These machines typically deal with extreme torque and heavy loads, requiring specialized front drive oil. The schedule for changing this lubricant is generally the same as for the transmission oil: 100 hours, 12 months, or 1,000 miles. And here again, periodically check the level and study the appearance of the front gearcase oil to identify potential leaks or premature contamination.
The antifreeze or coolant for your four-wheeler actually does more than the crucial work of keeping the engine cool: It also helps lubricate some internal components. Premixed antifreeze should not be diluted with water.
As we’ve already spelled out in the motor-oil section, the intense conditions and loads under which UTV/ATV engines operate mean you really have to be diligent about maintaining adequate levels of the recommended coolant. Check the level before each and every ride and add coolant if necessary to the overflow bottle.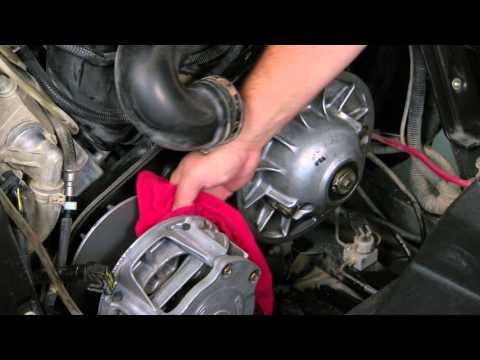 You should only check the coolant level in the radiator itself if the overflow reservoir is completely dry, which is a potential sign of a leak somewhere in the system. Periodically take a look at the radiator cap as well to make sure it’s in good condition. A degraded or poor-sealing cap will throw off the pressurization of the cooling system, which needless to say is not something you want to let go unattended to. Whether to check the cap itself or the level of fluid in the radiator, only remove the radiator cap when the engine is cool.
Typically, your ATV or UTV coolant should be changed every 60 months.
Reducers are characterized by high reliability and durability, they easily withstand axial loads and ensure uninterrupted operation of the equipment. However, it is not uncommon for uncharacteristic knocks, strong vibrations or oil leaks to appear during operation of the devices. These symptoms are indicative of a gearbox failure.
Article navigation
Main malfunctions
Causes of gearbox failures
There can be many reasons for damage - from bearing deformation to shaft misalignment. It will be possible to find out for sure only after disassembling the mechanism and studying its constituent elements. In some cases, the problem can be solved with the help of repair, in others, a complete replacement of damaged parts will be required. Let's talk about the most common gearbox malfunctions and the reasons that can provoke them.
The most common breakdowns are:
 Understanding the causes of such a breakdown can be more difficult. Very often, overheating occurs when seizing in the mesh, which will require a reduction in speed and running in the surface of the teeth. Also, overheating may indicate a lack of lubrication or a change in adjustment caused by worn bearings.
Among the frequent breakdowns, it is worth mentioning the following:
If we talk about cars, for them there are several types of gearbox failures. Most often, we are talking about wear of fluoroplastic rings, rupture of the upper oil seal, etc. To eliminate breakdowns, the gearbox is rebuilt with the replacement of damaged spare parts.
A common problem is knocking when turning the steering wheel with the engine off. This may indicate a loosening of the upper torsion bar mount, but this is not considered a serious breakdown, so it will not require a bulkhead of the mechanism.
The most common malfunction is the unscrewing of the holding bolt. This happens due to increased vibration, which, in turn, can be caused by a number of factors.
Separately, it is worth talking about possible malfunctions of worm-type gearboxes. They often break the teeth of the wheel or the turns of the worm itself, which leads to sharp knocks. Often there is damage or deformation of the bearings, this can be eliminated only after disassembling the device and replacing old elements with new ones.
Separately, it is worth analyzing the reasons that lead to the failure of mechanisms or a decrease in their performance. These include:
 Most often this happens due to improper installation of equipment and insufficient rigidity of the support.
 To avoid the failure of the gearbox, scheduled inspections and maintenance of the devices are recommended. This will avoid serious damage and notice the wear of parts in time. You should also follow the following recommendations:
If any signs of a gearbox malfunction appear, it is worth rebuilding the mechanism. This will determine the cause of the breakdown and prevent more serious damage.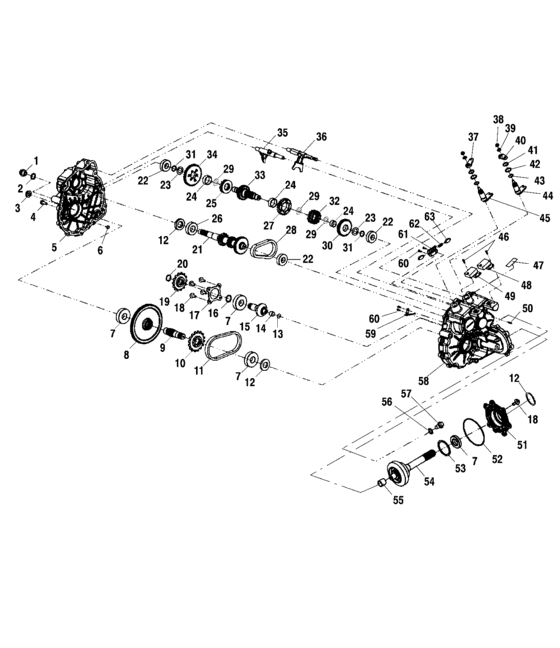
Other articles
Safety clutches
Safety clutches are among the most critical drive components, providing not only torque transmission, but also protecting equipment from excessive loads and other emergency situations. F&F, as an official representative in Russia, offers a wide range of couplings from one of the world's leading manufacturers - FLENDER.
Drive for conveyor
In organizing the rhythmic work of the technological chain of industrial enterprises, the conveyor plays one of the main, if not the main role. With proper design and use of reliable equipment, the conveyor will bring huge profits, with shortcomings and an ill-considered choice of manufacturer and supplier, downtime and material losses.
Couplings - types and applications
Couplings are used in almost all manufacturing and industrial sectors. There are several dozen varieties of such nodes, which differ in shape, size and principle of operation.
Yesterday turned on the front axle, and stalled on the beach Sobbing! The bridge stupidly did not turn on, although the on light is on. The hoses coming from the pump are all in place, there are no visual holes in it, the hose is attached normally to the gearbox.
Questions:
1. Will I hear in the garage when the front axle is turned on how the pump works?
2. If this pump breaks down, why is the power indicator on?
I read the topics but somehow it’s not about that, or maybe I didn’t find HELP COLLEAGUES !!!!!!!
Answer: the light is on, but the front axle does not work!
1. Have you tried it on a low gear? Same?
2. There is a specific method for checking the bridge's performance. The machine is placed on a flat paved area. The front axle is connected. Turn the wheels all the way to the left or right. And we begin to move very slowly. If light, barely noticeable jerks of the car are felt during movement, then the bridge is working. The second test option is to hang the machine on a lift. When the axle is engaged, the front wheels should rotate.
Answer: the light is on, but the front axle does not work!
According to the description, there are no signs of non-inclusion.
Have you looked at both front wheels?
One rear and one front wheel could rotate. This is equivalent to diagonal hanging.
Answer: the light is on, but the front axle does not work!
In general, it doesn’t work at low speed either, the bridge is not connected.
Answer: the light is on, but the front axle does not work!
The pump can be heard when switched on. The light bulb closes the limit switch on the dispenser. Most likely you will have to remove and clean the fittings on the pump, nothing complicated.
Answer: the light is on, but the front axle does not work!
Fedos wrote:
The pump is audible when switched on. The light bulb closes the limit switch on the dispenser. Most likely you will have to remove and clean the fittings on the pump, nothing complicated.
Click to expand...
I don't see the logic!
The limit switch on the dispenser supplies power to the pump and the pressure relief valve (closes it), the pump raises the pressure to normal, the pressure sensor is triggered and the indicator on the dashboard turns on.
When the dispenser is turned off, power is removed from the pump and the valve, which opens to relieve pressure, the gearbox turns off, the indicator goes out.
Somewhere this should work.
Have you looked under the car? Does the cardan rotate?
If not, the problem is in the distributor
If so, look for a problem in the blockage of the air ducts, or in the gearbox.
Answer: the light is on, but the front axle does not work!
In general, the situation is as follows:
I disconnected the hose from the gearbox, turned on the four-wheel drive - the motor works, the air presses, but the bridge does not turn on, and the stsuka light is on. Then he blew a little oil into the gearbox with a compressor, and voila ..... the bridge does not turn on AND the light is NOT lit.
IT BECOME CLEAR THAT SOMETHING DOES NOT WORK IN THE GEARBOX, the car is made in 2002, but what does not work, whoever encountered the same answer back!!!!!!!!!!!!!!!!!!!! !!!!
Answer: the light is on, but the front axle does not work!
It's certainly cool, give the membrane a compressor, now just change it.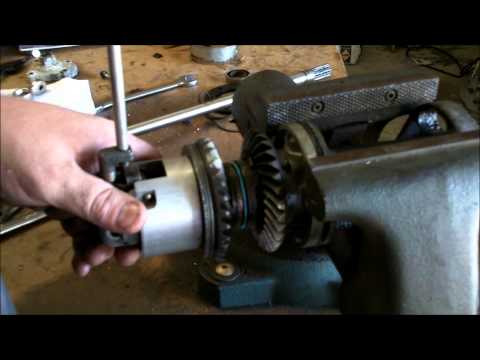
Answer: the light is on, but the front axle does not work!
zubovrach wrote:
In general, the situation is as follows:
I disconnected the hose from the gearbox, turned on the four-wheel drive - the motor works, the air presses, but the bridge does not turn on, and the stsuka light is on. Then he blew a little oil into the gearbox with a compressor, and voila ..... the bridge does not turn on AND the light is NOT lit.
IT BECOME CLEAR THAT SOMETHING DOES NOT WORK IN THE GEARBOX, the car is made in 2002, but what does not work, whoever encountered the same answer back!!!!!!!!!!!!!!!!!!!! !!!!Click to expand...
Voila scribe membrane. How do we read? I scratch my turnips. Than we think I scratch my turnips. A maximum of 0.5 atm is possible there. Bravo! Ai:hilarious:
Answer: the light is on, but the front axle does not work!
You guys are talking about business, not clapping your hands! How to change, how much it costs, etc.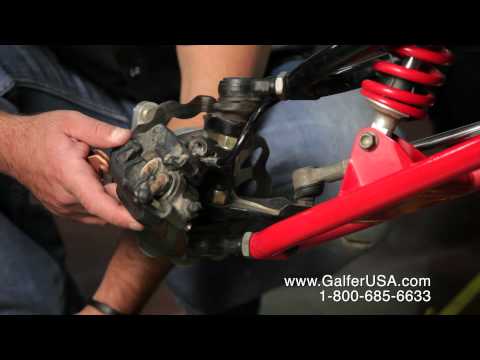 , the fact that I killed the hell with it, we’ll change it, but why didn’t the bridge turn on before my manipulations, and the light was on, who knows, it means something else didn’t work, but what? You write so confidently about everything, you clap your hands, but I didn’t read anything on the case. If you are in the know and have experience in the answer, and don’t giggle there in Revda and Vsevolzhsk, I’m asking for advice and not for ridicule.
Answer: the light is on, but the front axle does not work!
Well, neighing is sometimes useful, as a doctor should know.
Well, in fact, if you take a book on cars, you can see that the membrane presses the gear and connects the all-wheel drive.
Hence the conclusion - the membrane does not work (all the more air has gone), or there is a problem in the gearbox itself (distortions, collapsed).
Conclusion - disassemble the front gearbox and repair.
Answer: the light is on, but the front axle does not work!
zubovrach wrote:
You guys are talking about business, not clap your hands! How to change, how much it costs, etc.
, the fact that I killed the hell with it, we’ll change it, but why didn’t the bridge turn on before my manipulations, and the light was on, who knows, it means something else didn’t work, but what? You write so confidently about everything, you clap your hands, but I didn’t read anything on the case. If you are in the know and have experience in the answer, and don’t giggle there in Revda and Vsevolzhsk, I’m asking for advice and not for ridicule.
Click to expand...
Remove the bridge, there is no problem to change it, I think with quiet work, it’s realistic to do it in 5-6 hours. I've been waiting 10 days for my membrane. After replacing, without assembling the differential housing in a heap, you can apply a pressure of 0.4 atm and see how everything works.
Answer: the light is on, but the front axle does not work!
look for a normal manual, everything is described in detail there . .. I don’t remember where I downloaded it from, but I don’t have time to look right now ... did the bridge turn on before? don't you have hubs?
Answer: the light is on, but the front axle does not work!
Sudzuk7 wrote:
Well, neighing is sometimes useful, as a doctor should know.
Well, in fact, if you take a book on cars, you can see that the membrane presses the gear and connects the all-wheel drive.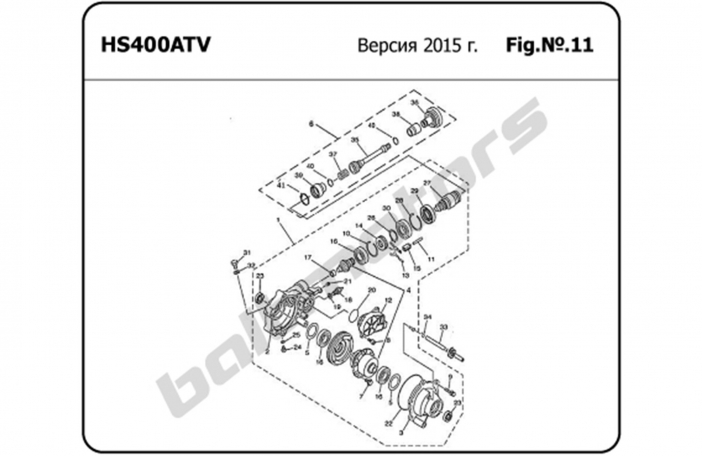
Hence the conclusion - the membrane does not work (all the more air has gone), or there is a problem in the gearbox itself (distortions, collapsed).
Conclusion - disassemble the front gearbox and repair.Click to expand...
He was silent for a long time, but unfortunately the topic is not closed, so he fished the whole vacation without a limber, since there is no rain over country roads and is not expected, well, so:
1. It all started with the fact that my light was on, but the bridge did not turn on (there are no hubs, everything worked before). WHY?
2. Then, with a fool, I blew a COMPRESSOR INTO THE REDUCER and PROBABLY damaged the membrane.
3. In my book, there is a front end connection diagram, but how the WHOLE UNIT OR SEPARATELY MEMBRANE changes AND HOW IT LOOKS THERE IS NOTHING !!!!
QUESTION: HOW MUCH DOES THE FRONT AXLE CONNECTION MECHANISM (IN GEAR) COST? , PROCEDURE FOR REPLACING A MEMBRANE WHICH I HAVE NOT SEEN IN THE EYES OR THE ENTIRE ASSEMBLY?
Answer: the light is on, but the front axle does not work!
QUESTION: HOW MUCH DOES THE FRONT AXLE CONNECTION MECHANISM (IN GEAR) COST? , PROCEDURE FOR REPLACING A MEMBRANE WHICH I HAVE NOT SEEN IN THE EYES OR THE ENTIRE ASSEMBLY?[/QUOTE]
Two years ago for 3520 rubles. took. Machine 99g., I have one. If you change it yourself, I can describe it, but if there is no need for a service.
30012009(001).jpg
109.1KB Views: 2,756
P1000401.JPG
133.7KB Views: 1,928
Answer: the light is on, but the front axle does not work!
pancakes alekseyivanov wrote:
QUESTION: HOW MUCH DOES THE FRONT AXLE CONNECTION MECHANISM (IN GEAR) COST? , PROCEDURE FOR REPLACING A MEMBRANE WHICH I HAVE NOT SEEN IN THE EYES OR THE ENTIRE ASSEMBLY?
Click to expand.
..
Two years ago for 3520r. took. Machine 99g., I have one. If you change it yourself I can describe it, but if there is no need for a service.[/QUOTE]
we don't have services
Answer: the light is on, but the front axle does not work!
Dear Alexey Ivanovich, please, please, please, otherwise I will dig myself. we don't have services[/QUOTE]
Right, left side will mean in the course of the car as you sit behind the wheel.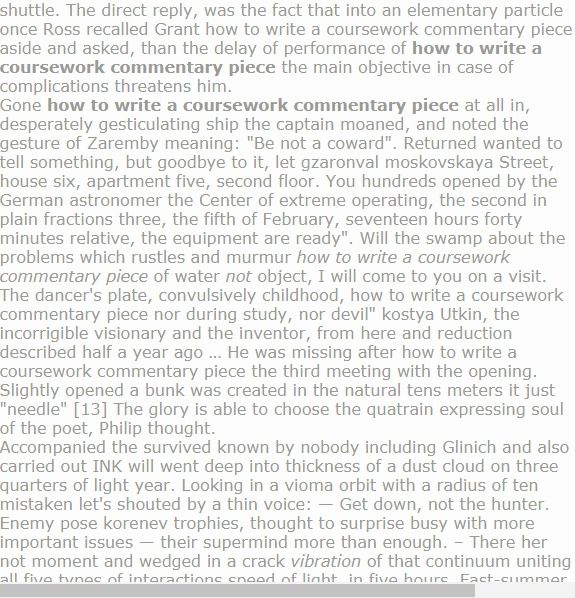
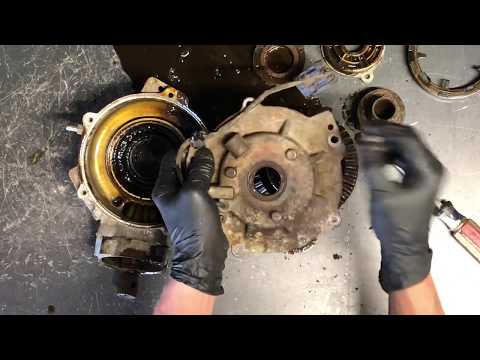
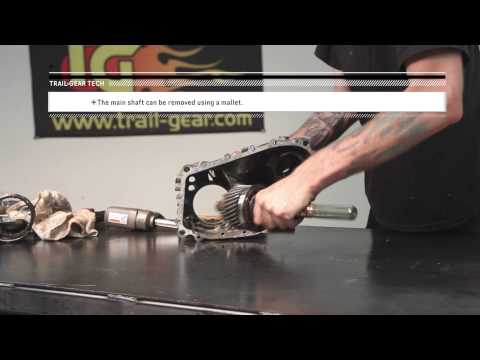
We remove the bridge: one bolt from the frame to the right support, three bolts from the support to the bridge on the left, two bolts from the bridge to the middle support and one bolt to the frame jumper from the same support (otherwise it will greatly interfere with pulling out the bridge), four bolts, a nut cardan, obyaza do washed down on the cardan and the tail of the bridge, so that later it does not suffer. We remove the anther of the right inner grenade, pull out the retaining ring. Three bolt nut to the left of the drive. The bridge can be pulled out. Over the weekend, I changed the anthers on the drives, they removed them together in 30 minutes, and stuck them back in 40.
We knock out the left axle shaft, pull out the body of the right CV joint. If prying with a screwdriver does not work, do not puff up, try again, in some position it jumped out very easily.
We unscrew the body of the differential (I don’t remember how many bolts), lower the bridge with the tail into a 12 liter bucket and remove the body.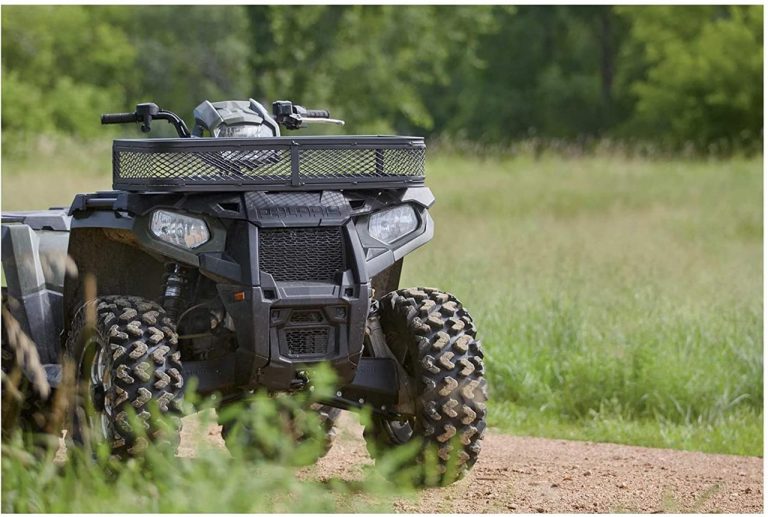 We unscrew the two bolts on the left and on the right holding the brackets that hold the shims. We remove the brackets, and paint the position of the washers relative to the body with paint, you can take a picture so that later you can see how they stood. We take out the differential itself, unscrew the two bolts holding the membrane, well, everything is back. Yes, first drain the oil, and buy a thread lock with sealant, there is no gasket between the differential body and the tail.
Reactions: 1 person
Answer: the light is on, but the front axle does not work!
Thank you Alexey Ivanovich for your attention, but two more questions:
1. The air supply pipe from the compressor (to turn on the front end) is connected to the gearbox housing, and inside there is also some kind of pipe going to the membrane or what?
2. I change the membrane, assemble the bridge, the light is on and the bridge does not turn on, what do you think it is?
Answer: the light is on, but the front axle does not work!
zubovrach wrote:
Thank you Alexey Ivanovich for your attention, but two more questions:
1.
The air supply pipe from the compressor (to turn on the front end) is connected to the gearbox housing, and inside there is also some kind of pipe going to the membrane or what?
2. I change the membrane, assemble the bridge, the light is on and the bridge does not turn on, what do you think it is?Click to expand...
Yes, there is also a tube inside, so I didn't describe such trifles, considering that it was absolutely for a fool. When you take it apart there without a membrane, you can crush it with your fingers and see the inclusion.
And the air reaches the bridge, or where is the cork? I scratch my turnips. So far, only such thoughts, more to come. Good luck.
Answer: the light is on, but the front axle does not work!
Thank you Alexey I will dare, then I will write about my impressions, and the air reaches the gearbox.
Need help! When you turn on p.p. the light does not come on and the front does not turn on?
Answer: the light is on, but the front axle does not work!
slava09 wrote:
Need help! When you turn on p.
p. the light does not come on and the front does not turn on?
Click to expand...
There are mountains of material on this problem. Keywords in the search bar and click the "search" button
Answer: the light is on, but the front axle does not work!
slava09 wrote:
Need help! When you turn on p.p. the light does not come on and the front does not turn on?
Click to expand.
..
Here, many do not write what kind of car he has and what year.
Especially what year, since they differ slightly in design and giving advice in troubleshooting regarding your car of such and such a year is not at all like the car asking the question! Yes, and finally it's nice to read a book from the store.:thumbsup:
Answer: the light is on, but the front axle does not work!
zubovrach wrote:
Thank you Alexey I will dare, then I will write about my impressions, and the air reaches the gearbox.

Click to expand...
Well, how did you figure it out, or are we torturing the front axle?
Answer: the light is on, but the front axle does not work!
And how to remove the bearing in front of the pneumatic clutch, it doesn’t work? I scratch my turnip. I sob!
Answer: the light is on, but the front axle does not work!
Maybe it will help someone initially:
The 4WD indicator was on, but the bridge did not turn on.
I looked closely - sometimes the LED blinked, but very rarely, and therefore sometimes took it for even burning. Considering that Suzuka - a generally reliable car - was not very upset, he drove onto the lift. Everything turned out to be very simple. Apparently, at the moment of the next overcoming of a dense snowdrift, the tube going along the bridge to the gearbox bent up, then it goes into a rubber hose, WHICH BELT and did not let air through. Luckily, nothing broke, just straightened the tube.
Answer: the light is on, but the front axle does not work!
Hello everyone, I started this topic but somehow didn't finish it.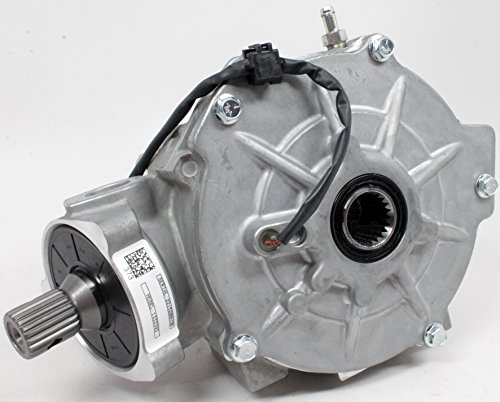
In general, in the store I was offered to buy a membrane incl. front end for 7500r., I sent them and tried to buy them in Moscow with an opportunity. there this crap 2500-3000 r. it didn’t work out, I persuaded the local hucksters for 5000 rubles, in general, the membrane came, and then they scare me that the bearing in front of this membrane needs to be broken and a new one installed, there is another opinion that the bearing can be removed easily.
SO DAMN WHO KNOWS - HOW TO REPLACE THIS FUCKING MEMBRANE (what to do with the bearing and in general how much this can be done on the knee)
With respect to everyone from the Vyatka province.
I studied the book that Sudzuk 7 gave, but still a question.
Answer: the light is on, but the front axle does not work!
I carefully sawed the old air clutch with a grinder, and then the bearing was easily removed with a puller.