Some people confuse simple collections of user tracks and waypoints (.gpx) with GPS maps. While useful, collections of user tracks and waypoints are quite different from true GPS maps such as our trail map products.
User tracks and waypoints storage is often limited by the GPS firmware to 20 tracks and 10,000 waypoints. While that might sound like a lot, it is hardly enough to store even a small subset of the ATV or snowmobile trails within a state. True GPS maps on the other hand use a different storage methodology. They can store tens of thousands of miles of trails, map points and map features, and still leave you the complete allocation of space to store your own tracks and waypoints.
Our snowmobile and ATV trail maps are fully autorouting. If you have a GPS that supports autorouting our trail maps will route you along snowmobile or ATV trails to your destination with spoken turn by turn directions, visual and audible indications of turns, lists of turn by turn directions, estimated time of arrival (ETA), detouring, route avoidances and precise distance to destination calculations.
Your GPS pin-points your location centered on the map as you move along a trail, so you will always know precisely where you are. With the autorouting capability, you will also automatically know how to get to your destination along the trails. You can zoom in and out and scroll around the map to see different parts of the map to plan your next travels.
For snowmobile maps. you can set GPS navigational avoidance setting to select whether you want to be routed over ice crossings (lakes and streams) or not. This may shorten your path by many miles if conditions are safe. If you have the right equipment and permissions you can optionally select to have the the map route you on a limited number of unmaintained off-trail paths (usually un-plowed logging roads in very remote areas).
When installed on a computer using Garmin MapSource or BaseCamp, you can display the map, calculate custom routes, find custom POI’s and map points and more. With BaseCamp connected to your GPS you can display combined trail map and optional topographic background in a single map view. Routes can be overlaid on DEM capable( Digital Elevation Model) maps such as Garmin TOPO US 2008, to display the elevation changes along snowmobile routes. Plan custom routes and download them to your GPS. It’s a great way to plan out a loop for the days ride where you never have to ride the same trails twice, or even plan multi-day cross state expeditions.
If your GPS model does not support the download of routes, you can create a “poor mans route” by creating several waypoints (favorites) and then using the maps routing ability to route your from point to point along the trails. Shape your ride with a route or shaping waypoints to make sure you hit every scenic spot and trail along your ride.
Our New England snowmobile trail maps for Garmin GPS have over
27,654 miles of snowmobile trails.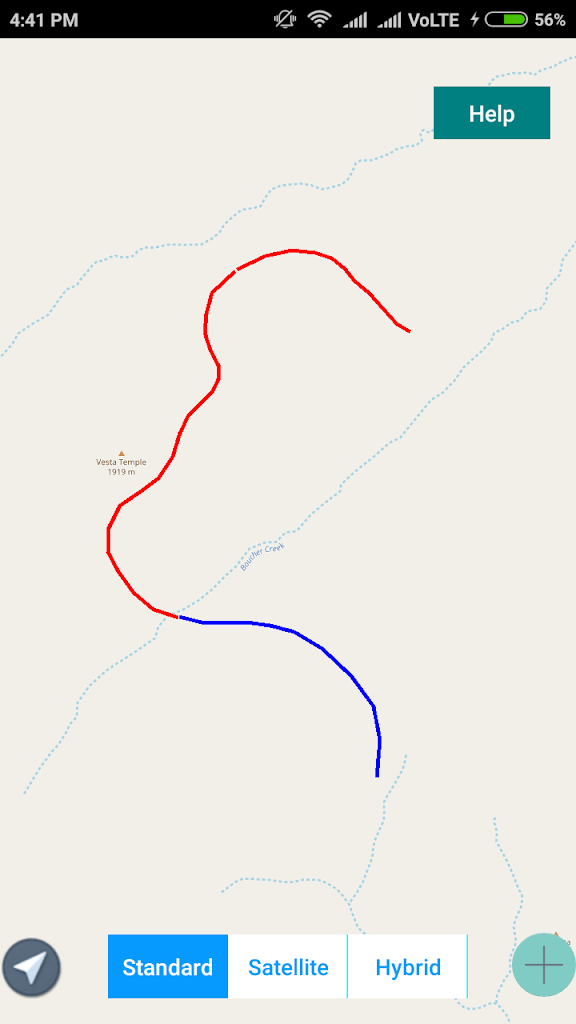 Corridor trails, primary trails and club trails and challenging un-maintained off-trail paths are included in the mix. We also have hundreds of points of interest for on-trail services, such as gas stops, food, scenic views, lodging, and even cell towers. You can add your own favorites and track logs and favorites to customize the map for places you ride the most. If you add Quebec trails, then you end up with 49,985 miles of trails. To put it in perspective, that is as many miles as traveling around the circumference of the Earth TWICE!
Compare our maps to other trail maps and see the difference. Switch to satellite mode and zoom in close to the trail. Does it follow precisely along the visible logging roads and trail paths that can be seen in the satellite images. If the lines look like zig-zag and do not follow the curves, they are approximated and may cause errors in navigation. Pay attention where the trails cross streams and rivers. Do your see a bridge? If not, that trail is probably bogus.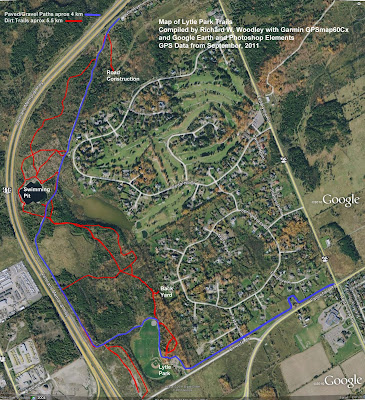
Buy from us with confidence. Your satisfaction is guaranteed on all trail maps or you get your money back (within 30 days please).
Our trail maps can be downloaded from your Windows or Apple computer and to all models of Garmin GPS mapping units that support the loading of optional map products.
Our trail maps are compatible with all Garmin brand map products including City Navigator, TOPO USA 2008 as well as many other Garmin and third party map products. They are compatible with maps that are build-in to Garmin GPS units such as Nuvi, Montana, Colorado, Oregon, Zumo and most others.
Our trail maps are transparent, so they can be displayed simultaneously with other maps that are build-in to your GPS or downloaded from your computer. For example, if your GPS includes built-in topographic maps as do the Montana 600T, Colorado 400T or Oregon 400T you can view all the Garmin built-in topographic and road detail with our trail maps overlaid. The data from all maps are visible at the same time on your GPS map display. You can use the map setup feature of your GPS unit to toggle between the types of map data displayed, to reduce clutter or increase detail depending on your needs. Free topographical background maps are included in in our map downloads and on pre-loaded micro-sd.
Each trail map contains hundreds of search-able POI’s (points of interest) for trail-accessible services, like gas stations, convenience stores, lodging, and restaurants, that are in addition to POI’s included with your other maps. We focus on hard-to-find on-trail services that are important to trail riders. We organize them in a way that enables you to find relevant POI’s quickly. Most of our map points and Custom POI’s for lodging food and fuel include additional information including street address, phone number and web page links (when available). Note: some models of GPS will only display the extra information when POI is displayed via the EXTRAS – Custom POI search method.
Each map comes with installation procedures to install the trail map data on to your Windows or Apple computer.
The installation is straightforward to install all the necessary maps on your computer. The computer setup procedure makes the trails-only maps viewable in Garmin MapSource or BaseCamp and MapInstall programs on your Windows computer. If you don’t already have Garmin MapSource or BaseCamp, you can get them from Garmin for Free.
Both Mac and Windows computers can display the maps read from the GPS in Garmin BaseCamp when the GPS is connected to the computer using a usb cable. If using a pre-loaded micro-sd, or you installed maps on your GPS by copying our pre-built map image file (gmapsupp.img) file to your GPS, then BaseCamp will display a combined trail and topographical map when connected to your GPS via usb cable. This is great for trip planning because you see all the trails and all the detailed geographic information from the topographical map in a single screen.
Using the Garmin programs on your computer can enhance your planning capabilities, but if you just want the maps on your GPS you can simply copy the files from the downloaded ZIP file, or use our pre-loaded plug-and-play micro-sd card.
We provide support by email to answer your technical and non-technical questions specifically about our products and GPS in general. Responses come from an experienced engineer with detailed product, regional and sport knowledge.
Our trail maps are distributed with media options that you can pick to best suit your needs. All map products are available for instant download from the Internet when you complete you order. We keep track of what you purchase, and if your hard disk crashes we will supply a free replacement of the downloaded product to get you back up and running again fast.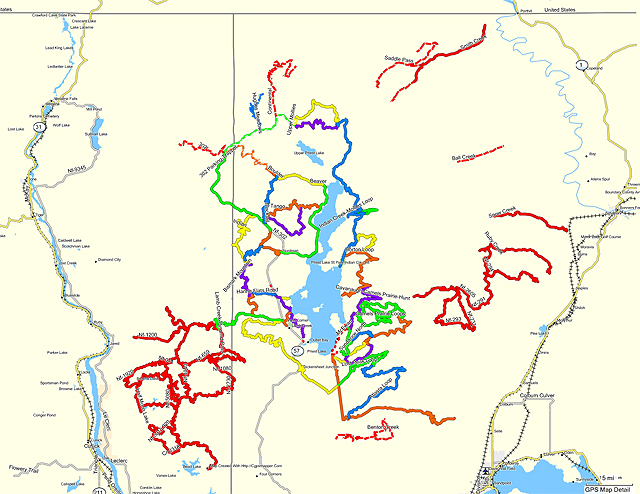 You can also order on micro-SD (trans-flash) for the ultimate in effortless plug-and-play installation. Unlike other companies who only distribute locked, non-writable SD cards, you are free to add whatever you want to our micro-SD cards, and to reuse them when maps are updated.
Your download trail map purchase includes 4 free updates via immediate Internet download with no time limit. (5 if ordered on micro-sd) Check back with us for the availability of map updates before you start out on your important trail riding vacation. We have a large ridership base that provides us with feedback on trail additions, corrections and other improvements to our maps during the season. If they (or you) find missing information, un-mapped trails, trail names, trail re-routes or useful POI’s, we are committed to quickly updating our maps to include this new or changed information. We can usually incorporate corrections and additions into an update within two weeks or less.
All of our GPS trail map products are shipped by US Postal mail for free. NOTE: International shipping (Canada) will be charged an additional fee to cover the additional costs. These costs will be invoiced to the customer. Shipping to Canada will only be considered in special cases.
FOR ATV – Plug the Micro-sd card into your GPS. On waterproof GPS models the slot is located under the battery.
To enable routing by ATV trails, turn off any routing (highway or snowmobile) maps such as Garmin City Navigator or routing highway maps that are built-in to your GPS. Turn on ATV trail maps from Backwoods GPS Trails. The topo map may also be turned on to provide background. It shows highways, but does not route on them. TOOLS->SETTINGS->MAP->MAP INFO – check uncheck boxes. The navigation settings should be set to navigate ON ROAD, even when routing by trail.
Use the Where To? button to set a destination and begin routing. Select EXTRAS- CUSTOM POIs and select from on-trail ATV services. There are several other means to select a destination including browsing the map and pointing at a location.
If you are too far away from an actual ATV trail, routing will occur as the crow flies (a straight line) to the nearest trail. From there routing will be along trails.
Turn off the trail maps and the routing highway maps back on when you are ready to navigate by automobile. Addresses are not on ATV maps, but are on most highway maps.
The micro-sd card already has the latest version of the trails and a topographical map. There is no need to download anything from your computer. When a map update is released we announce it on the website. They you can download the map update to your computer, and from your computer to your GPS. The same micro-sd card can be reused.
You must also install either Garmin BaseCamp or MapSource to view the maps on your computer.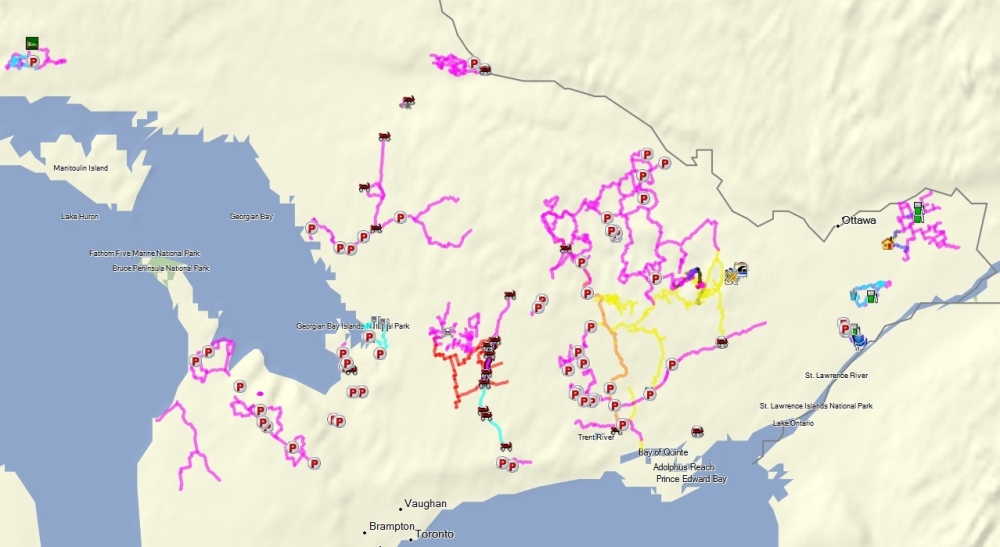 You can use the maps on your computer to create your own custom routes and download them to your computer. There are instructions on our web site on how to do this. You can run the ATV_Tr_XX.exe program on the micro-sd card to install trail maps to a Windows PC. Since maps and POIs are already on the micro-sd card, skip the part of installation where it asks you to put them on your GPS.
You can view the combined trail map and topo that is on your GPS using Garmin BaseCamp. Connect your GPS to your computer using a USB cable. Run BaseCamp and use the Device->Receive from Device menu. You can click on the trail map that shows up as being on your GPS. This also works when running BaseCamp on a Macintosh computer.
There is an ATV vehicle icon (bash.srf) in the Garmin/Vehicle folder on the micro-sd card. Copy that file to the /Garmin/Vehicle folder on your GPS main storage drive and it will be available for use when you setup your GPS driving more.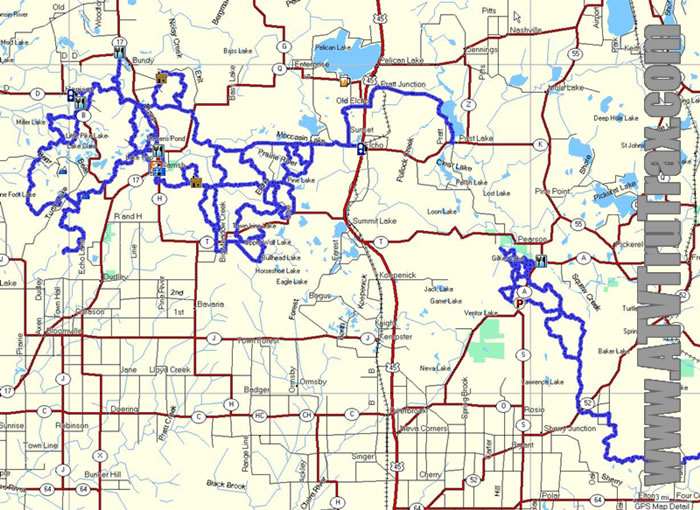
Highest contrast between the trails and the background can be achieved by setting your GPS display to NIGHT MODE. Highly visible bright cyan trails are displayed over darker background.
To avoid being routed on ATV only trails in Maine, set navigation to AVOID TOLL ROADS. To avoid being routed on US52 in WV, set AVOID TOLL ROADS.
Caution: Do not format the micro-sd if your GPS asks you to. It will destroy all map data. Send an email and we will tell you how to proceed. (there is a bug in certain Garmin Drive models)
There are two tasks that tourists regularly set for themselves. The first is to prepare a route for a future trip (lay a route yourself, manually or automatically, or load someone else's route into the navigator). The second is to record the path (track) you have traveled during the journey, so that later you can see on the map where you went, and also share this track with others. Next, we will consider how the OsmAnd program solves these problems, as well as how it navigates the loaded (created) route.
Previous sections:
The following sections:
First of all, let's try to figure out what the words "route" and "track" mean. It is generally accepted that the route is a plan for your future hike (trip). A track is a record of all your movements made during the trip itself.
Tracks are usually recorded in sufficient detail, representing a continuous line that unites many closely spaced points (after all, a track is a kind of document that remains, along with photographs, after travel ).
But the route, depending on the desire and needs of the tourist, can be either detailed (in the form of a solid line, like a track), or include only the most important points (5-20 points for each day of travel).
Unfortunately, there is often confusion between these concepts. They can call a route a track or a track a route (for example, if you take an already recorded track and follow it as a route). And in the OsmAnd program, unfortunately, the word “track” is often synonymous with the expression “GPX file” (I already wrote about this in section about points ). But I hope your quick wit plus my help will help you figure out what's what.
So, what can you do with tracks and routes? During your movements, you can record a track. Also, the track can be downloaded to a smartphone (tablet) from the outside, and then walk along it, as if along a route. The route can be laid in the OsmAnd program itself, both manually and automatically. You can turn on navigation so that the device guides you along the route. And, finally, any tracks and routes saved in the program can be exported (that is, copied from your smartphone to a computer).
To start recording a track, you need to press the "GPX" button on the right tab in the map window (I hope you set its display in the "Screen Settings").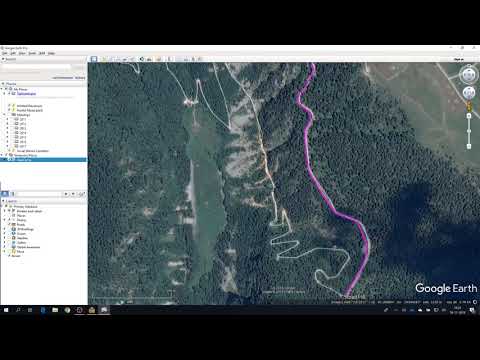 A window will appear where you specify at what interval (from 1 second to 5 minutes) the track points should be recorded.
| 1 - press the "GPX" button; 2 - select the item "Start recording GPX". |
| Set the interval at which track points will be recorded |
If you have turned on route navigation, track recording starts automatically. In this case, it is advisable for you to set the track recording interval in advance in the “Settings” section, the “Trip recording” item.
| Section “Settings”, item “Record trips”. Set the interval for recording track points. |
If track recording is enabled, pressing the GPX button will perform the following three operations:
| Operations on the track, available during its recording |
The meaning of operations is quite clear from their names. I think it is advisable to first stop the recording, and then save the track. Well, you need to start a new segment if for some reason you need a track not continuous, but broken into several semantic parts-segments.
The saved track can be found in the "My Places" section, "All Tracks" tab, "GPX rec data" category. The track file can be found in the osmand/tracks/rec folder or in the Android/data/net.osmand/files/tracks/rec folder (the file name is the current date).
| On the left - "My Places" section, "All Tracks" tab. On the right is the file manager, the osmand/tracks/rec folder. |
A track or route can be downloaded from the Internet or created on a computer using any program, and then downloaded to your smartphone (tablet). You can also use your old track, which is stored on your computer.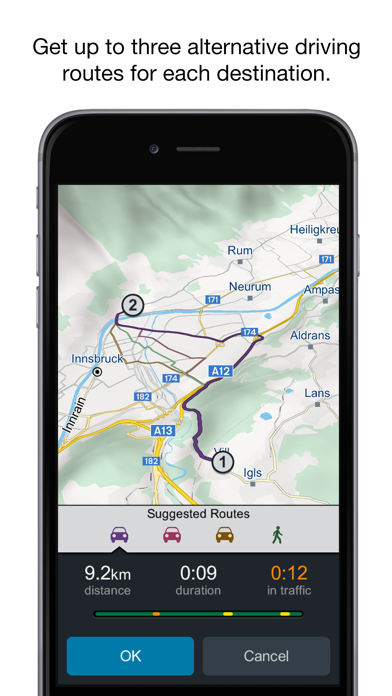
Your track (route) must be a GPX file (track or route in another format - KML, KMZ, PLT, RTE - must be converted to GPX using some program). This file must be copied to the osmand/tracks folder (or to the Android/data/net.osmand/files/tracks folder). You can then find it under My Places, All Tracks tab, GPX Data category.
| Someone else's track loaded into the OsmAnd program Creating routes using the OsmAnd program Routes can be created directly in the OsmAnd program itself. There are two ways to plot a route:
To build a route manually, in the map window, click on the "Start" button. Select the item "Start editing", then under the brief instruction that appears, click "OK".
instead of the inscription “Start” - the length of the route | |
 osmand/files/tracks folder).
 If you plotted a route by mistake, do not save it, but select the "Clear all waypoints" option. The route will be deleted.
| 1 - Removal of the laid route without saving, 2 - maintaining route |
The route is laid along the roads and paths that are part of the local vector map you uploaded. Therefore, this method is suitable only for those cases when the start and end points of the route are on the road (path) or near it.
In order for the program to create a route, you need to specify its start and end points. The easiest option is to plot a route from your current location to any object. You just need to select the end point (using the "Search" function or mark an arbitrary point on the map) and select the "Get route" item in the context menu of the point.
If it is necessary to use as a starting point not your current location, but an arbitrary point, then we will do it differently. First, mark the end point and select the "Destination" function in its menu. Then we mark the starting point, and in its menu we select "Point of departure". The laying of the route immediately begins, and it will be displayed on the screen as a solid line.
| Left: 1 - plotting a route from your location to an arbitrary point, 2 - plotting route between two arbitrary points. On the right - the laid route on the screen. |
In versions 2.3.3 - 2.5.4, a separate button is provided for automatic route planning at the bottom of the screen with a map. This, of course, speeds up the process of laying the route.
| Version 2.3.3 - automatic route button |
After pressing this button, the automatic route menu will appear at the bottom of the screen. You can select the start and end points, and make a number of other settings.
| Version 2.3.3 - automatic route menu |
its context menu item "Add intermediate point"). Moreover, you can add intermediate points before the program builds the route, and after that (in the latter case, the already laid route will be rebuilt). When adding another intermediate point, a list of points arranged in a certain order will appear on the screen. You need to either agree with the existing order or change it.
| We mark the point and select in its context menu point “Add interim point” |
 Button 1 - change the order of points.
 | Window for changing the order of points (using the arrow buttons) |
Another way to get directions is to use waypoints from the Favorites section. Click on the flag icon in the upper right and mark the desired points. Confirm the selection by pressing the checkbox again, after which a list of points will appear. You can change their order (the "Order by distance" function, i.e. by distance from you, can be quite useful here). After that, go to the map window, open the menu and select the "Route" item. The program will create a route from your current location through all the selected points in the specified order.
| 1 - click on the flag, 2 - select the points, then again click on the box |
| 9000 9000 |
| A list of points appear where they can be changed |
In the previous window, click "OK". A map window appears with the selected points. A map window appears with the selected points. Open the menu and select the "Route" item. |
After the program has created a route, several new buttons will appear at the bottom of the screen. The second button on the right (with the image of a car) allows you to change the route settings, for example, from car to pedestrian (car, unlike pedestrian, does not follow paths), as well as set some more conditions (choose the shortest route instead of the fastest, avoid toll roads , ferries, etc.).
| Button and window for setting route parameters |

If you want to save the route, press the third button on the left (there is some strange icon on it, like a pointer, but it reminds me of a cavemen's stone hammer). A window will open in which you should press the "i" button. In the next window, you will see information about the route, and in the upper right corner, a floppy disk icon. Click on it and save the route, after entering its name.
| How to save the route: 1 - click on the "hammer" button, 2 - click on the "i" button, 3 - click on the diskette. |
The remaining functions of this and other buttons will be discussed in section on navigation .
Once you have saved your recorded track or route (manually or automatically), you can export them as GPX files for transfer to your computer or other mobile device.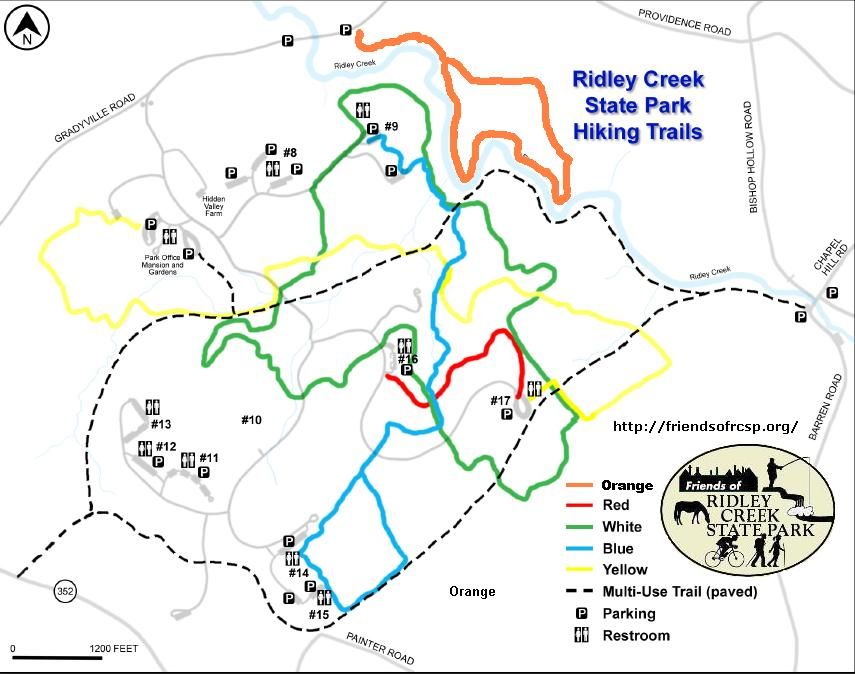
All routes you create are stored in the osmand/tracks folder (or in the Android/data/net.osmand/files/tracks folder), and recorded tracks are stored in the osmand/tracks/rec folder (Android/data/net.osmand/files /tracks/rec). You just need to copy the desired GPX file from there.
Another way to export is to find the desired track or route using the OsmAnd program menu (“My Places” - “All Tracks”) and long press on it. A context menu will appear, where we select the "Export" item. After that, you will be able to use one of the proposed options: “Email”, “Disk” (i.e. Google Drive), “Skype”, etc.
A number of operations can be performed with all recorded tracks, laid routes, and both imported into the program.
Find the desired track in the "My Places" section on the "All Tracks" tab. A short press will show us information on this track. A long press opens a context menu with the following options:
| Track (route) context menu |
We have already considered the “Export” item.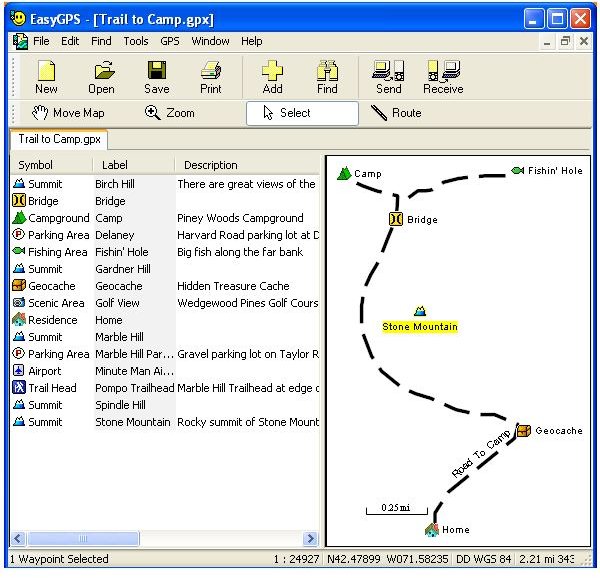 The items "Rename" and "Delete" are clear without explanation. Submit to OSM sends your track to the OpenStreetMap project site (useful if you want to contribute to improving the map).
The "Show on map" item opens the map window, where your track (route) will be shown. And already from the map menu you can turn on route navigation.
Select to display places a track (route) on the Selected Tracks tab. It will also be displayed on the map, but on this tab you can perform some actions on it.
| Track on the Selected tracks tab |
Secondly, clicking on the gear on the right opens a window where you can specify the interval for splitting the track by distance (from 50 m to 10 km) or by time (from 15 seconds to 15 minutes). A new list of segments appears according to our breakdown, with information about each of them. And on the map we will see small circles located at the same distance or at the same time intervals along the entire length of the track. This can be convenient both when planning a future route and when moving along a route.
| We click on the gear, and the window opens where you can indicate the breakdown of the track |
Immediately after you have laid the route, the OsmAnd program switches to mode navigation . You can also use one of your saved (or imported) tracks and routes to navigate. We select one of them in the "My places" section on the "All tracks" tab, perform a long press and select the "Show on map" item in the context menu.
We are transferred to the map window, where we see the track (route) we need. We go to the menu and select the item "Route". To the question “Do you want to use the shown path for navigation?” we answer "Yes". Navigation mode starts.
| After choosing in the context menu of the “Show on the map” the track appears on the screen |
At the bottom we see the menu button and some new buttons. New items appeared in the menu: “Continue navigation” (starts navigation or continues it after a pause), “Cancel route” and some others. Next to the menu button is a button with a cross to exit the navigation mode.
| Navigation mode buttons: 1 - menu button, 2 - navigation mode exit button |
saving the route). It opens a window in which it is indicated where the route is from and where, and there are also a few more buttons.
| Hammer button and the window it opens |
The "i" button displays a list of turn-by-turn directions. Clicking on any of the items in the list shows you the corresponding point on the map. And at the top right we will see three buttons: "Print", "Save" and "Share".
The "i" button opens a list of step-by-step route hints. Each click on the arrow will show the starting point of the next route segment (along with hints). 6 |
Below is the Start Simulation button. It launches on the screen a simulation of your movement along the route. An arrow will crawl on the screen, simulating your movement, and at each moment of the way, your speed and route tips will be shown on the screen.
| Simulation - simulation of route |
Now consider the buttons located in the lower right corner of the screen. One of them (by default, it depicts a car) is used to change the parameters for laying the route (we talked about this earlier). The second button (with a blue arrow) turns on route navigation.
| 1 - button for selecting route parameters, 2 - navigation enable button |
Tips are displayed on the screen, and the bottom buttons disappear. But as soon as you click on an arbitrary place on the screen, the zoom buttons, the "i" button and the menu button appear at the bottom.
| The screen type of navigation |
if we immediately go to the menu, then we will see two useful items:
At the same time as navigation starts, track recording starts automatically. You can save a track using the “GPX” button, which we have already discussed in more detail in section about recording and saving a track .
If navigation is on and you go to a place other than your route, the route will automatically rebuild, each time connecting your current location and destination.
Both the tracks recorded by OsmAnd and the routes created with its help look almost the same when saved. These are GPX files, in which, if opened with Notepad, we will see the tags "trk" (short for "track") and a lot of tags "trkpt" (short for "track point", that is, "track point" ). The logic of moving along such routes in the OsmAnd program is to move exactly along the route line without deviating from it.
But a number of popular PC programs (OziExplorer, OkMap, VantagePoint, etc.) are able to create other types of routes. If Notepad opens the GPX file of such a route, we will see the tags "rte" (short for "route", that is, "route") and the tags "rtept" (short for "route point", that is, "route point"). ").
This type of route is for a completely different way of navigating. This is practically the same as point navigation , when the device shows you the direction and distance to the selected point, and you just have to move in the indicated direction in the way that suits you - along the road, trail or just through the forest (if There are no trails in this area.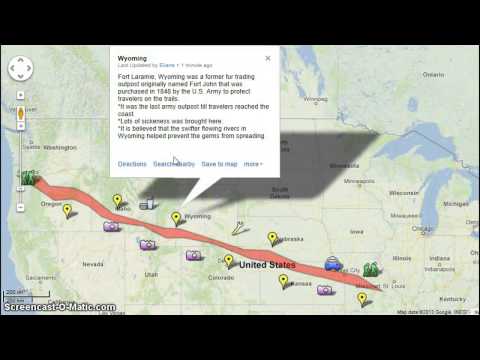
The only difference is that here the points are combined into a route, and when you reach the next point, the navigation automatically switches to the next one. Since this type of navigation is not tied to the presence of roads or paths, it is very convenient for those who travel in the wild.
But there is one “but”: your device (or the program you use) must support this type of navigation. I have to disappoint you: almost the only disadvantage of the OsmAnd program is that, unlike tourist navigators, it does NOT support this navigation method. You can only use waypoints individually, without automatically switching navigation from waypoint to waypoint.
But what will happen if you load such a route into the OsmAnd program? Let's try. Let's create a route on the computer and copy the resulting file to the smartphone (tablet) to the osmand/tracks folder (or to the Android/data/net.osmand/files/tracks folder).
We find our route in the "My places" section, the "All tracks" tab. After selecting the “Show on map” item in the context menu, you will see the route in the map window as a broken line indicated by a dotted line. If you now select the “Route” item in the menu, the program will plot a route along the roads, trying to make it as similar as possible to the route we loaded.
| The route is shown on the map as a dotted line |
If after that you click on the button with the car icon (used to change the parameters of the route) and in the window that appears, uncheck the box next to the item "Calculate route between points", then the program will plot its route not along the roads, but exactly along the line of our loaded route.
In both the first and second cases, the navigation will lead you exactly along the lines of the laid route, and not from point to point.
You can also place the route on the Selected Tracks tab in the My Places section using the Select to Display item.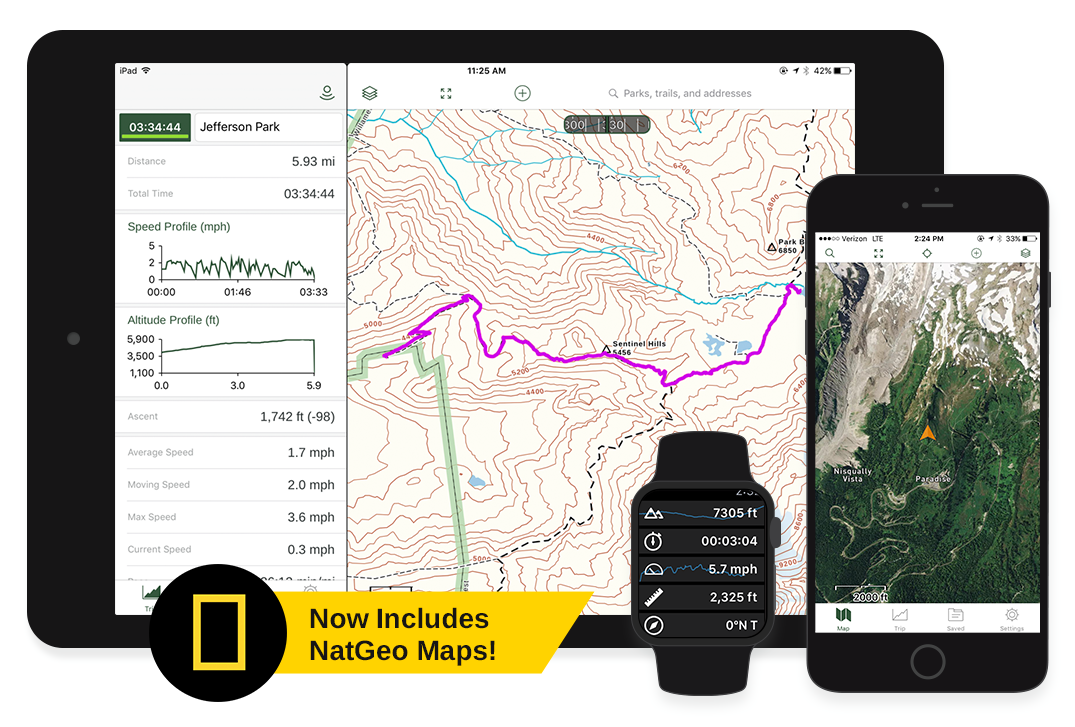 Here we will see a list of route points, on each of which you can perform a number of operations, including enabling navigation to the point.
| List of route points |
| Operations on route |
Previous sections:
collected a service for building routes for hiking and cycling ActiveTrip.me / Sudo Null IT News
Hello everyone! My name is Alexander, I'm developing ActiveTrip.me, a service for building routes for hiking, cycling, water trips and travel, as well as for storing and grouping interesting places in the form of labels.
We will tell you in detail why we started to create such a service in a separate article, and here we will highlight the technical features.
What you can already do in the service:
Automatically build a route along paths and roads, depending on the type of movement you expect
Automatically build a route along rivers points)
Build multiple routes on one map
Mark important places on the route with markers
Explore the area thanks to different maps and layers
Explore routes and download in GPX and KML formats
The implementation of such a mapping service involves solving several basic tasks:
Working with maps and layers . Receipt, storage and distribution to users of maps and additional layers of interest to them
Working with geodata. Providing the user with a tool for building a route by waypoints indicating a set of additional restrictions, which include:
Selected mode of transportation: on foot, by bike, by car, along rivers
Surface type: asphalt, soil
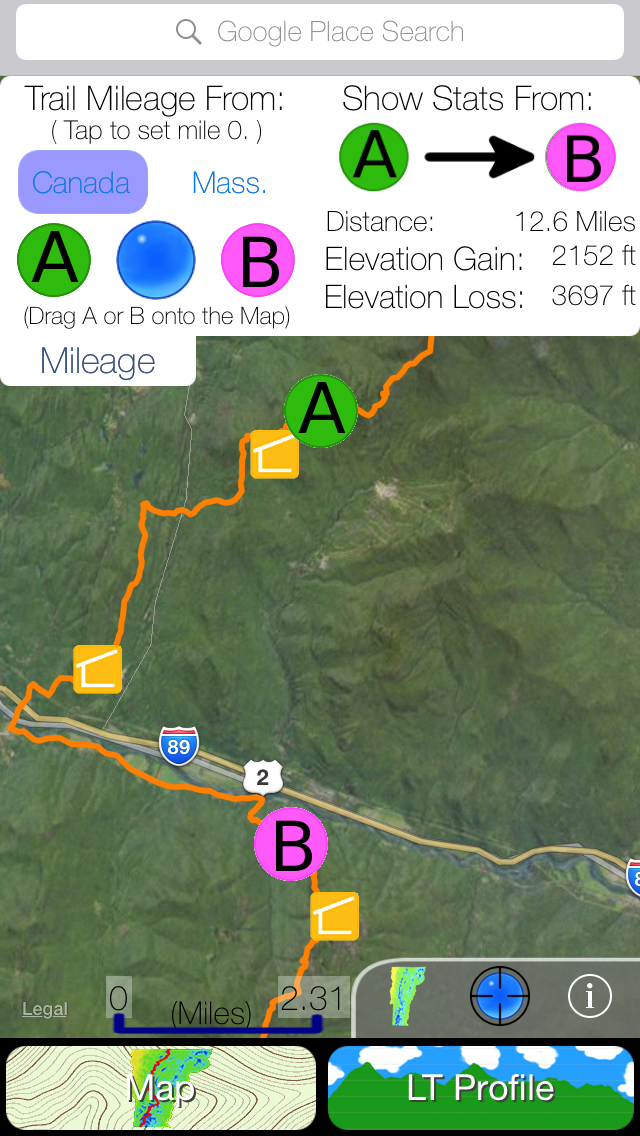
Calculation and provision of data on the constructed route. In particular about:
Length of the route
Types of surface covering on which the route passes: asphalt or dirt. Important for cyclists and off-road travellers.
Altitude information: route altitude profile graph, cumulative climb and drop, maximum and minimum altitude on the route, etc. Essential for any hike in the mountains
Forward and reverse geocoding. Search and navigation of the user to the desired section of the map by the specified place name or address, as well as auto-naming of the route by specified start and end points
Tags (POI)
Storage and provision of user information about the route: adding images, comments
In addition to the main functionality, it turned out to be quite important to provide additional integration features that allow you to import existing tracks into the service, as well as share and publish the results. In particular, we have implemented:
Possibility to share the created track via a direct link
Import GPX and KML files into the service for further editing. GPX and KML are formats for representing three-dimensional geographic coordinates and are based on XML markup. Most navigators and navigation applications (Garmin, Locus, OsmAnd) use the GPX format, but some (Maps.me, Organic Maps) only support KML format
Export GPX and KML files. After preparing a route on our service, it can be loaded into a navigator or mobile application and set off on a journey.
There are many ways to implement each of the above features in your own mapping service. As a rule, you can:
Resort to using available SDKs, open source modules and libraries by setting up your own server
Use specialized services that provide integration via API
When trying to solve the problem of building routes, we turned to well-known open source solutions. The task was to cope with minimal costs for computing and financial resources (at the start, we had a modest VPS server with 1 TB HDD and 4 GB RAM).
We tried Valhalla , GraphHopper and BRouter .
A detailed comparative overview of the listed instruments can be found, for example, here and here . Below we will share our personal experience in operating these tools and mention which solution was chosen to implement the prototype.
Building and running Valhalla using your own resources is detailed in the documentation and consists of two steps:0018 or build it yourself from source using CMake. The sources include an http service, as well as a set of utilities for preprocessing geodata
Next, download OSM data of the desired regions and feed it to the preprocessing utility
When deployed, processing of individual small regions is carried out on the mentioned hardware in tens of minutes ( Switzerland took 20 minutes). The processing of the countries of Europe and Asia worked for several days and, as a result, ended with an error.
The algorithm for launching a GraphHopper instance is largely the same.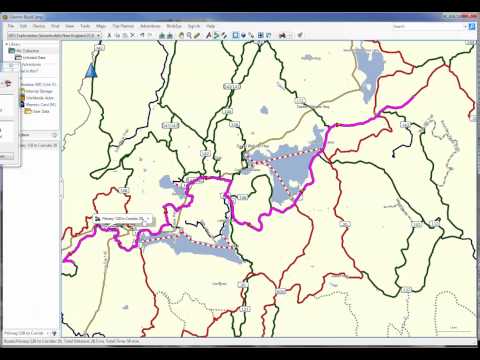
Processing takes much less time (~12 hours for the whole world), but requires a significant amount of RAM. In our case, this is about ~128 GB for preprocessing and ~64 GB for further service operation (stores data in memory in a compressed form).
The overestimated numbers compared to those mentioned in the documentation appear due to the need to work not only with car routes, but also on foot with bicycle routes.
An alternative is to use the already deployed GraphHopper Direction API . The free version is limited to 500 requests per day, which was not enough even to implement the prototype.
Mapbox is a well-known provider of custom online maps, navigation and location services for websites and applications.
Mapbox also hosts and provides the ability to use Valhalla within the Navigation API . In the free use case, up to 100,000 requests per month are available.
In addition to directly building a route, Mapbox provides information about the built track - the length and approximate travel time. From the functional limitations - the inability to build routes on water, as well as the ability to obtain information about the type of surface along which the track passes.
BRouter is an open source engine for building routes. It is presented in the form of the source code of the engine, a server for deployment on your own hardware and a mobile application.
Has a much lower resource requirement. Data after preprocessing takes up much less space than in the case of GraphHopper and Valhalla.
Data can be updated on a regular basis (currently BRouter delivers fresh data once a week).
Among the shortcomings - it builds a route more slowly than solutions built on the basis of Valhalla.
One of the key advantages is the ability to build routes on water.
To implement the prototype, we decided to limit ourselves to using the Valhalla API provided by Mapbox to build routes on land, for water we used the Brouter server deployed on our own hardware.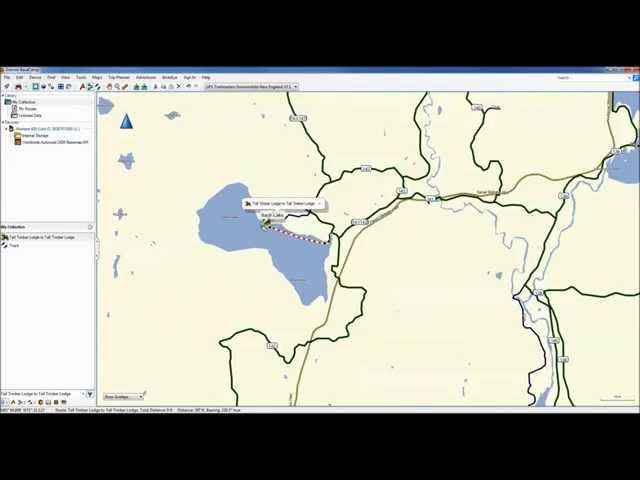
To optimize the number of requests to Mapbox (subject to the free usage limit), we have implemented the following:0018 and cache on our side. When re-accessing the created track, we avoid unnecessary calls to the API and draw the track based on the saved data
When making modifications to the built route, we rebuild only the necessary section. In addition to optimizing the number of calls, we improve the user experience, since the route update operation is generally not idempotent: we have no guarantee that for the same set of points we will always receive routes of the same type
Giving to the calculation of heights We looked at the creator of the project nakarte.me :
Open data from http://Viewfinderpanoramas.org
We raise the server working with the prepared data. The server, according to the route string passed to the input, interpolates heights based on the prepared data and returns the result
Data is downloaded from this site, preprocessed using the utility and added to SQLite on its own server
Geocoding is used to improve the usability of the service.
Direct geocoding - obtaining the coordinates of a geographic point at a given address. Reverse geocoding, respectively, solves the inverse problem: getting the address or name located at the point of the object, according to the specified coordinates.
Habré already has an article with a detailed description of the process of testing existing services to solve these problems. After reviewing the terms of use and some testing, we settled on the following options:
For direct geocoding, we use the API from MapyCZ from Seznam (it is not mentioned in the article above)
For the task of reverse geocoding, we use Mapbox in within the same free limit as for building routes
Reverse geocoding capabilities are useful for the service in two scenarios:
Automatic generation of the route name based on the starting point
Indexing user-built routes for further catalog generation. It can be useful to implement functionality like "find all built user tracks passing through village X". At the same time, the problem of localization is relatively cheaply solved - the API accepts a set of required languages as input
We support uploading and downloading custom tracks as GPX and KML files. These files can be used in mobile applications and portable navigators. In addition, you can share your track through a public link
At the moment, drawing is completely based on the use of the library Leaflet . Out of the box, the display of map layers in format 9 is supported0017 Tiled web map , display of geometric objects, lines and markers.
Of the problems that have arisen and are not yet resolved - Leaflet cannot cope with the simultaneous rendering of a large number of markers (> 100 pcs.). For now, we get around this through dynamic display depending on the scale, but this approach is not appropriate in all cases.

 Now we click on the map, marking the points of the route, and on the button instead of the inscription "Start" its length will be shown.