Installing chains on your ATV may seem a bit tricky at first. But as long as you know the steps involved, including a few key success criteria, it’s actually not that hard.
I made this step-by-step guide so that anyone should be able to install ATV chains on their bikes. For those with some previous chain installing experience, you may even find a few tricks for an even faster and snugger install.
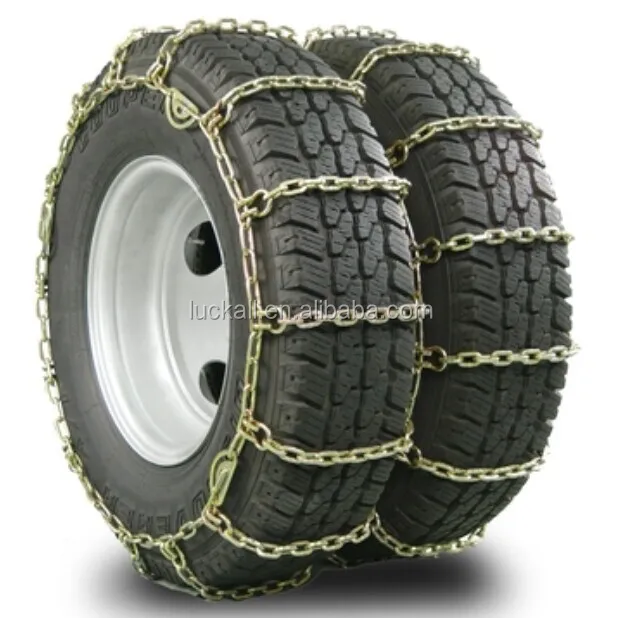
The guide fits both ladder-style chains and diamond-style chains.
My personal experience with installing tire chains began over 15 years ago. I had to install chains on the tractors on the farm every winter. I’ve also been using chains on my ATV for the last couple of seasons.
Page Contents
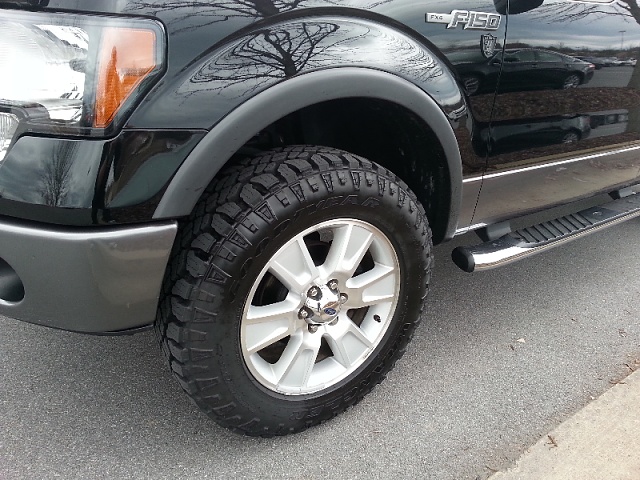
Take a note of the size of your tires. This number will be marked on the side of the tire.
ATV tire chains come in several different sizes, where each size is made to fit a range of tire sizes.
You should generally have no problems finding chain-sizes that fit your specific tire size. But sometimes there is necessary to make a small modification to the chain to get a snug fit.
You will need just a few tools to install ATV tire chains:
Most ATVs are actually not designed with the use of tire chains in mind. Many bikes do not have enough space in the wheel wells for the tires to spin freely when chains are fitted.
The front wheels are often the ones causing problems because of the space needed for turning.
There are no clearance issues on my Polaris Sportsman after installing two-inch spacers on all four wheels.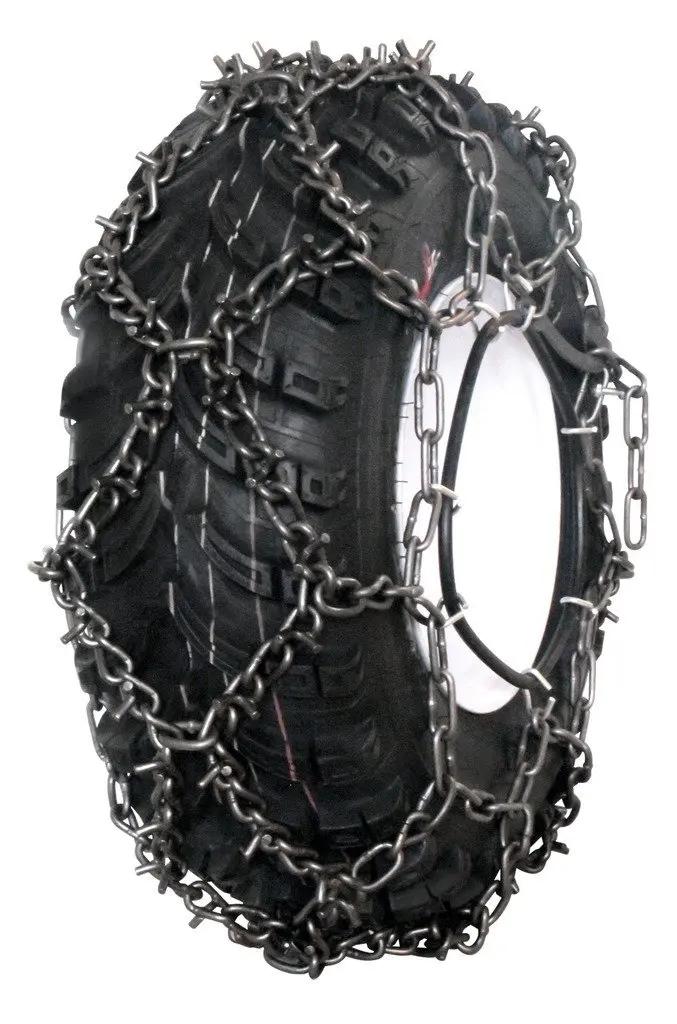
As a general rule, I recommend a minimum clearance of two inches anywhere around the wheel.
This also includes the distance between the tire’s sidewall and any fragile components like the brake-lines or plastics. Ensure you also measure the clearance when turning the wheel completely to the left and the right.
Because you have limited space, it is crucial to achieving a really snug fit when you install the chains.
This will keep the chains as close to the tires as possible. Thus needing less space around them without running into any collision issues.
If the chains are fitted too loose, they can cause severe damage to the bike’s brake lines, fenders, suspension, exhaust, or other parts that get hit.
This is especially true when riding at some speed. The centrifugal forces involved will sling the chains outward from the tire. Thus, needing much more space than if the chains were installed snug.
But sometimes, a snug fit will not be enough to give you enough clearance.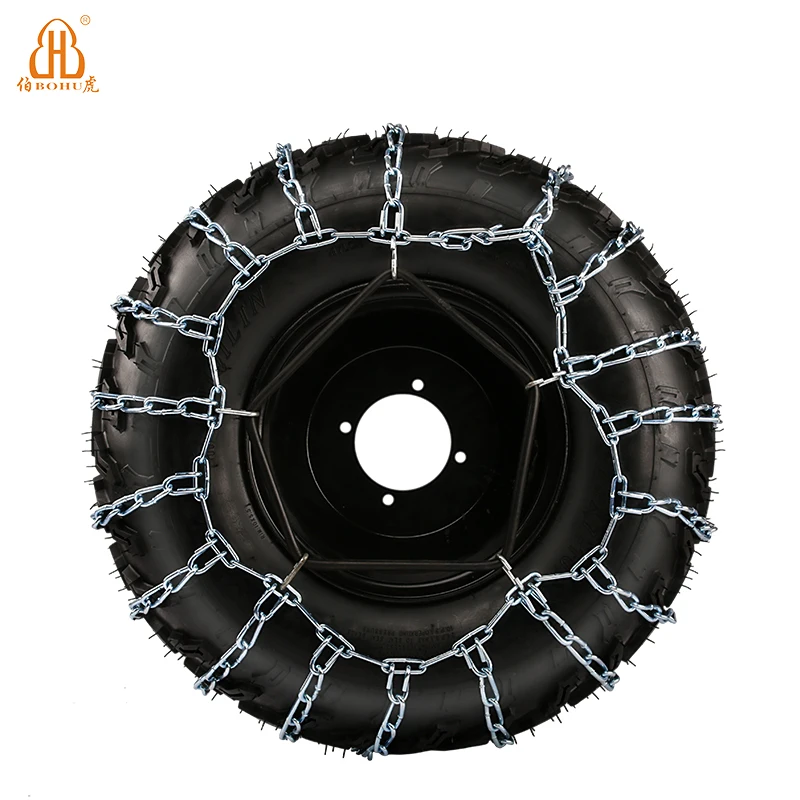
By installing wheel spacers, you move the wheels outward. This creates more space on the inside of the tire.
Wheel spacers will give you better clearance.You can either use special spacer bolts or a one-piece wheel spacer made out of metal. The spacer bolts are the cheapest option. But proper wheel spacers are generally a bit stronger. So they are what I recommend getting.
Wheel spacers come in different sizes, adding anything from ½ – 2 or even 3 inches of extra space on each tire. A spacer width of about 1,75 – 2 inches will be enough in most cases.
Going too wide will only add unnecessary strain on the bike’s bearings and suspension. This is not recommended.
During the installation process, you will be pushing the ATV slightly forward. This will be a lot easier if you have some sort of hard, smooth surface to work on. A concrete driveway or a garage floor is ideal.
Working on a clean hard surface will also make the whole process a lot more enjoyable.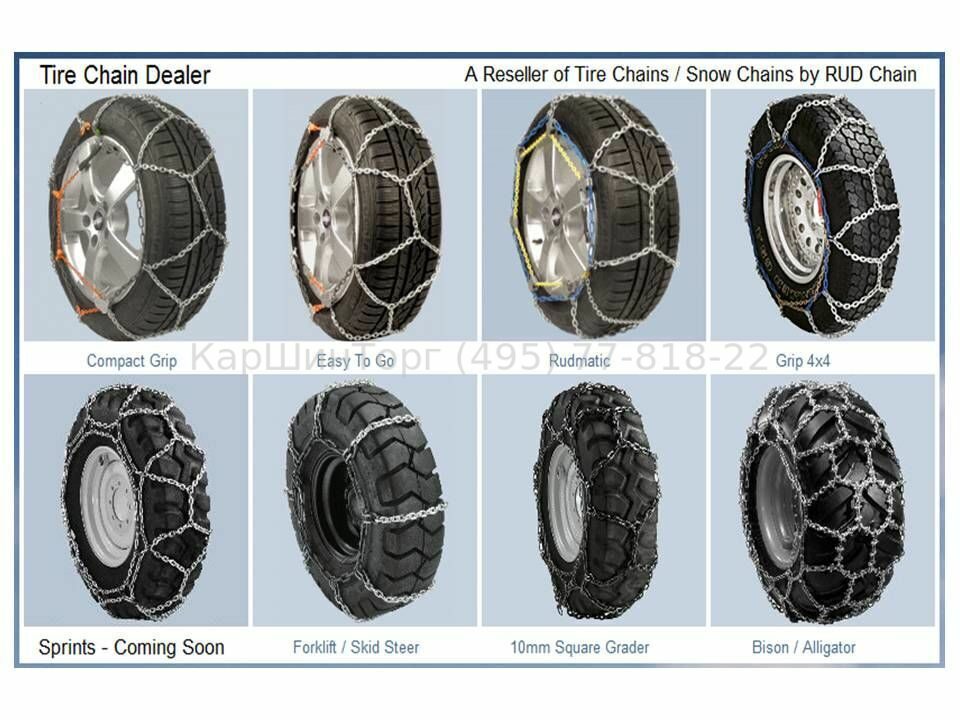 You won’t have any wet mud or gravel that will make your hands cold and your clothes dirty.
In a pinch, it’s no problem installing tire chains out in the woods, neither. It’s just a bit messy and requires some more fiddling to get a good result.
Put the bike in neutral to roll freely, but leave the parking brake on for now.
The easiest way to assure a snug fit is by deflating the tires slightly before installing the chains. And then, after the chains are in place, you inflate the tires again.
Dropping 3-4 PSI should be fine. Some even prefer deflating them completely to achieve a very tight fit.
Use a valve tool to speed up the process. Or you can push down the little pin inside the tire valve – if you have the patience.
Slightly deflate the tire using a valve stem core removal tool.Valve stem removal tools are cheap and can be bought at most auto supply stores or tire shops.
Caution! It’s important to know that this procedure for snugging up the chains is not risk-free.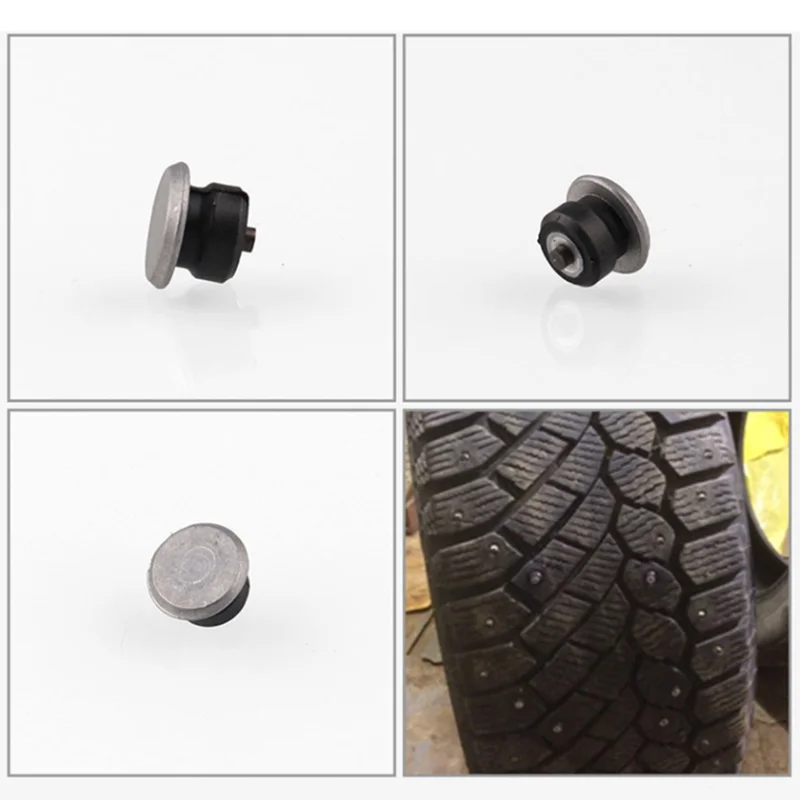 If you do it incorrectly, or if the chains are weak or damaged, they may break, and the tire may blow up. You should never do this on weaker chains like ordinary truck chains.
However, most quality ATV chains should be strong enough to handle this procedure, as long as you don’t overdo it.
If you are not confident that you can keep track of how tight the chains get when re-inflating the tires, you should skip this step.
Instead, you should use other means of keeping the chains snug. Installing chain tensioners is a good option.
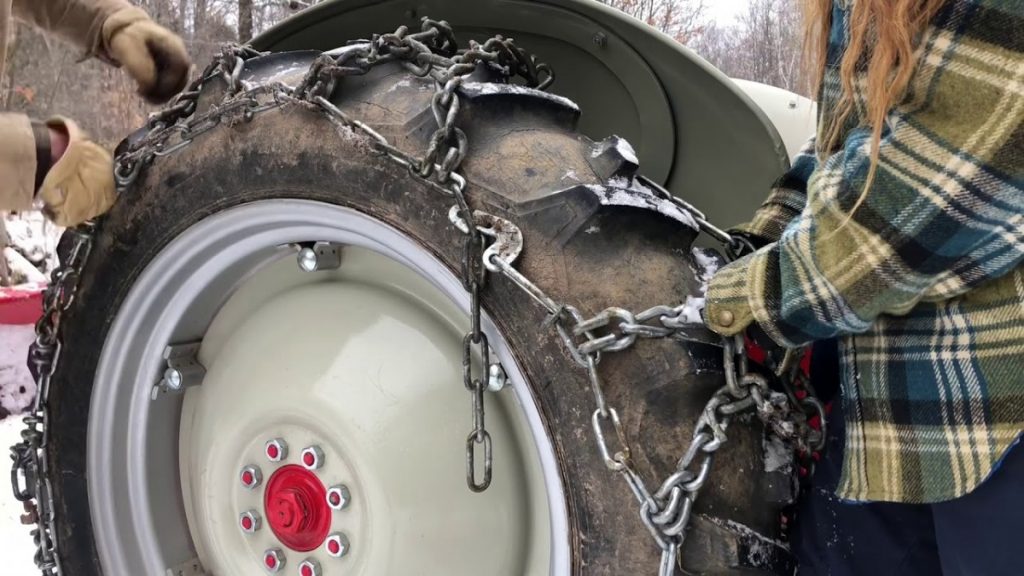
Lay the chain flat behind the rear tire and remove any twist and tangles. For the front tires, you lay the chains in the front of the tire.
The studs (the aggressive side of the chain) and the ends of the cross-chain hooks should be facing upwards.
Lay the chain flat behind the tire. Studs should be facing up.At one end, you will find a boomer fastener on one side and a C-hook on the other. Or, on some models, you will find a boomer fastener on both sides and no C-hook.
Ideally, you should orientate the chain so that the „bend“ of the boomer fastener is facing forward in the tire rotation direction. This lessens the chance of it coming unloose when riding in deep snow and mud or from debris rubbing against the tire.
Boomer fasteners do, however, need more space than a C-hook. If space is limited, it’s better to orient the chain so that the boomer fastener is outside of all tires, even if that means that the “bend” of the fastener is facing backward on one side of the bike.
There are ways you can prevent the fastener from coming undone, like adding a strong zip-tie.
If the type of chain you have uses boomer fasteners on both sides, lay the chains with the boomers facing forward. This will ensure correct installation.
On diamond pattern chains, you will find a set of shackles at one end of the chain. Remove these and set them aside for now.
Remove shackles and set them aside.
I find that it’s easier to keep the chain nice and straight if you drag them straight from the front or from the behind of the tire. Or, you can lift them over the tire from the side.
It’s really a matter of personal preference.
Use both hands to slightly lift and adjust the chain sideways so that the same amount of chain hang down on each side of the tire. It needs to be in the center of the tire.
The studs and the ends of the cross-chain hooks should be facing up and away from the tire. Untwist any twists so that the chain is laying as smooth against the tire as possible.
If any sharp parts of the chain are in direct contact with the tire, it will soon start wearing on the tire. After a while, this can cause a flat or even a blowout.
The front end of the chain should now be at about ground level. Tuck this end in under the front of the tire to be ready for the next step that is rolling the bike forward.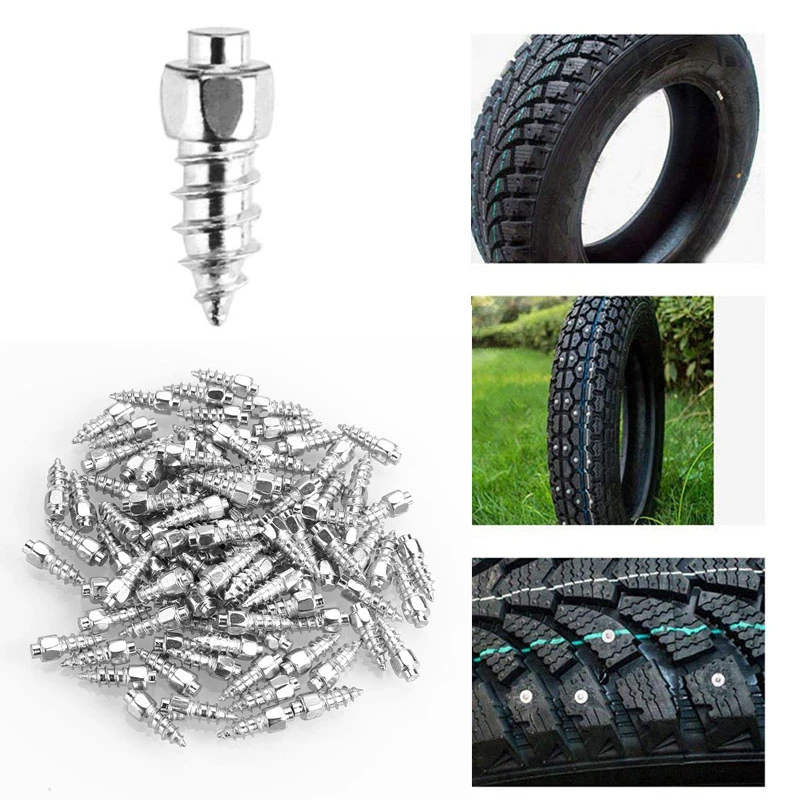
Release the park brakes so that the bike rolls freely.
You may also start the bike and ride it if you need to. But this will leave you with less control of the positioning of the chain.
If needed, stop and make adjustments to the chain to sit as tight as possible on the tire and stay in the center.
Continue moving the bike until about 15 inches of the chain lay behind the tire. The other end of the chain should now be hanging freely at about 2 o’clock on the tire.
The chain is in position and ready to be connected.In this step, it is crucial to make sure both the inner and outer chains are the same length.
If one side ends up being shorter, it will be tighter than the other side. This will drag the chain over to whatever side is tighter when you ride.
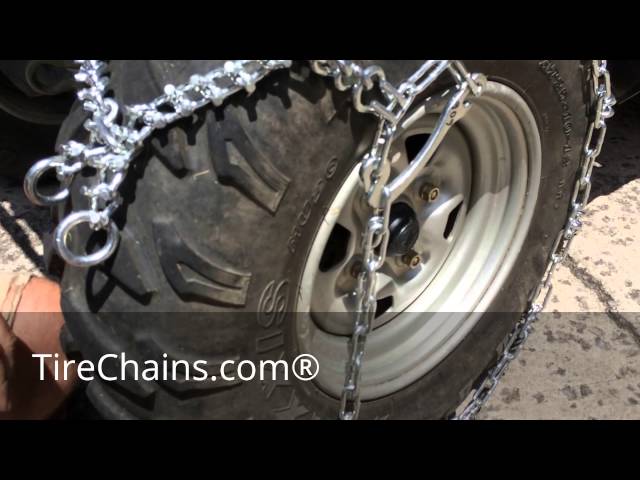
Grab the 15 inch part of the chain that still lays flat on the ground and lift it against the end that hangs at 2 o’clock. You will be connecting the side chains that go all around the tire.
At one end, there will be a fastener (boomer or C-hook, depending on the model). At the other end, there will be some free links available.
Connecting a C-hook:
Connecting a boomer fastener:
Start with the inside fastener. Try to get the chain as tight as you can while still keeping it at the center of the tire. The “leftover” links should be facing away from the tire. Make sure nothing gets twisted.
Then move on to the outside fastener. Use the same number of links as you did on the inside.
If the chains you are installing are ladder chains, you can skip step 8.
If the chains you are installing are diamond pattern chains, you will find that you still have two loose ends of chain at one end. At the other end of the chain, you will have two metal rings.
Grab the loose chains and thread them up through each of their rings ring from underneath. Tighten until the chain is snug. Then pull one of the tail ends over to the side chain.
Connect the tail ends to the side chain using a shackle.Make sure that all studs are facing outward and everything lays as flat to the tire as possible. Any twist and bumps will make the ride a lot more uncomfortable and may cause premature wear to the chain and tire.
Tighten about as much as you did on the two side fasteners so that it feels snug. Connect the tail end to the sidechain using one of the small shackles you removed in step 3. Tighten the shackle only by hand for now.
Tighten the shackle by hand for now.Count the number of tail links from the one that you’ve already connected. Then repeat the process with the remaining tail end on the other side of the wheel. Use the same number of tail links on this side as well.
Some chain kits come with shackles included. If your kit didn’t, or if you have lost them, you can get new ones for cheap at most hardware stores. Get one with about the same thickness as the chain links; 4-6mm is common.
Both tail ends are now tightened and fastened.Then repeat steps 3 – 8 with the remaining tires.
Now it’s time to put air back into the tires. Use a pressure gauge to keep track of much air you are adding.
As you put more air into the tires, the chains will tighten up. Ideally, they should become tight/snug just before you reach your desired tire pressure.
Inflate the tires again. Be careful so that you don’t overinflate!If you had tightened the chains too much before you started inflating the tires, they might become too tight. Do not overinflate. Doing so could potentially break the chains and have the tire explode with a force so powerful it can cause severe injury.
If the chains are getting tight before reaching about 75% of proper air pressure, do not continue. Deflate the tires and loosen the chain by one link on each side. Then inflate again.
Now it’s time to test your installation. Start by riding very slowly to make sure nothing is catching.
Then take some turns to see if you’re still good when turning the wheels to the max. Do not ride faster than about 5mph on your test ride.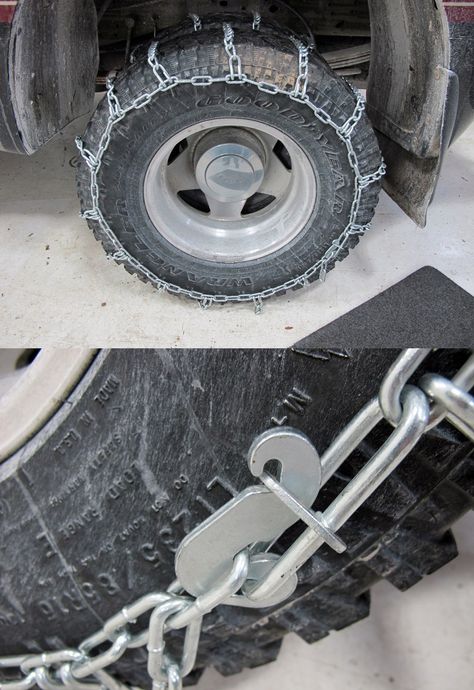
In fact, never go fast. Chains are for slow riding.
The ride doesn’t have to be so long; a couple of runs up and down your driveway is fine. You only need the chains to „slip in place, “which will happen naturally when the wheels rotate.
This will often allow you to re-tighten the chain when you get back from your test ride. One more link on each of the tighteners is normal.
It does require some work to deflate, tighten and re-inflate the tires once more. But it may be necessary to get the snug fit you need.
Now tighten all shackles using some pliers or a wrench.
Any loose ends of the chain need to be securely fastened. If not, they will quickly damage your fenders or other components of the bike.
You can retain the piece of chain that’s left by the boomer tensioners onto the arm of the fastener itself.
In this pic, the free links of the chain are hooked onto the boomer fastener.The free links of chain by the C-hook also need to be fastened.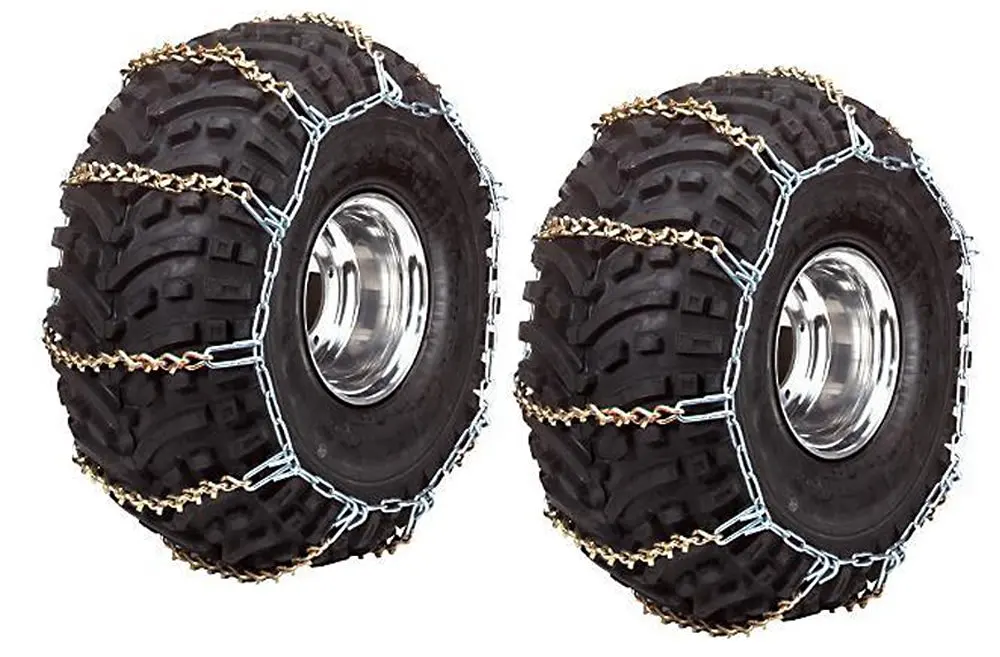 Use a heavy-duty zip-tie or preferably a shackle. You can use this method to fasten all free links of chain if that’s what you prefer.
As a final option, you can cut them off using an angle grinder.
But doing so does come with the disadvantage of making the installation a bit harder the next time. You will also lose the possibility of using the chains if you later decide to get slightly bigger tires.
Now you are done!
If you do not like the potential risk involved with using tire pressure to snug up the chains, there are other ways. You can get almost the same effect by adding chain tensioners. It will keep the chains centered on the wheel and keep them from sliding around.
Be aware that you should not install these until after taking a test ride and re-tightened the chains.
Chain adjusters are springs or rubber bands with small hooks on each end. They are made as a star pattern where each spring connects to the side chain.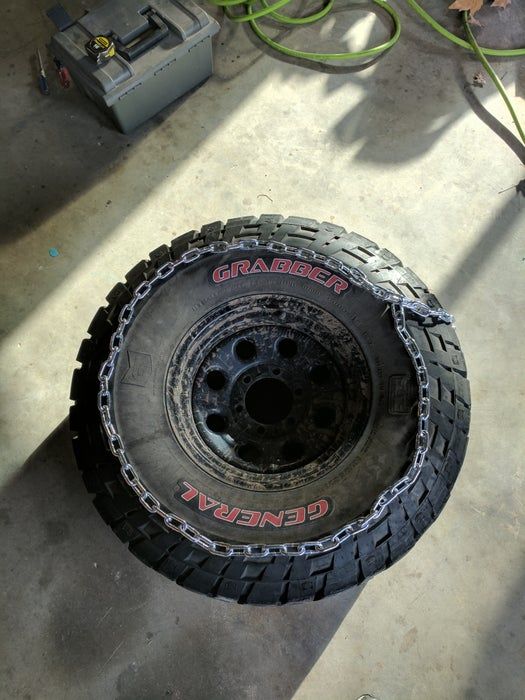 4-6 spring-loaded „arms“ are common.
You can also use a basic bungee cord installed in a star pattern to get the same effect.
You should add a tensioner both on the inside and on the outside of each tire. This will stretch the chain towards the center of the tire and keep it snug at all times.
Sometimes you won’t be able to find chains that fit your tires. Or you may have bought a new ATV with smaller tires than the one you had before.
Also, when the chains have been used for some time, they will wear and stretch out. Painted chains will stretch just from wearing down the paint. The paint is not thick, but it adds up when counting every link on the chain.
So at some point, you may need to shorten the chains. This is just a part of owning chains for any vehicle.
All you need to achieve this is an angle grinder or some good bolt cutters.
You need to cut away at least one complete „diamond“ to get a good result on diamond-shaped chains.
How do ATV tire chains work?
ATV tire chains have sharp studs that penetrate the ice for better grip. Because of the aggressive pattern they provide, they also improve traction on compact snow and gravel.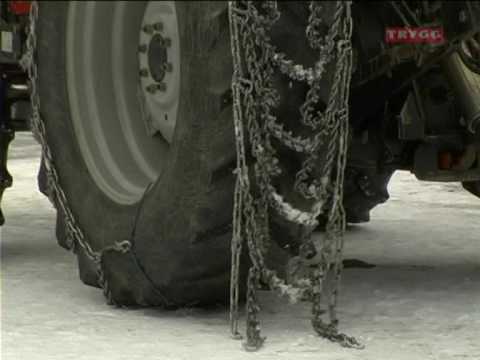 They are not made to be used at any kind of speed.
How long do ATV chains last?
ATV tire chains’ life expectancy heavily depends on factors like surface hardness, speed, and proper installation. Snugly fitted chains will last about twice as long as loosely fitted chains. Using chains on hard surfaces like concrete or asphalt will wear much faster.
How to tighten ATV tire chains?
ATV tire chains can be tightened by adding chain adjusters to both the inside and outside of the wheel. Many prefer attaining proper chain tightness by slightly deflating the tires before installation. After installation, they are re-inflated. This procedure requires caution.
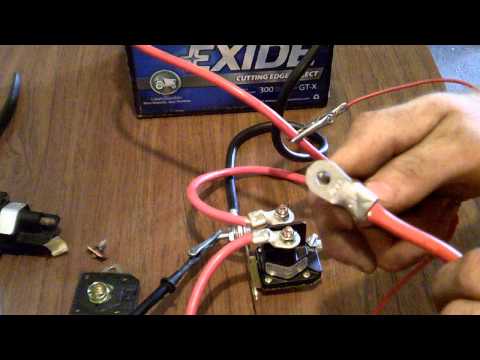
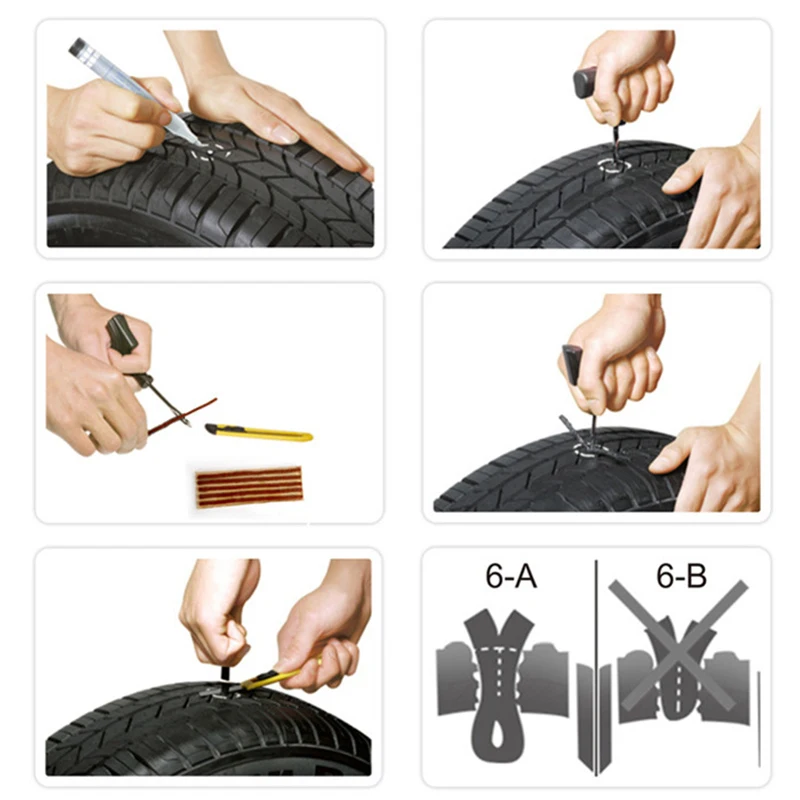
How to repair a broken ATV tire chain?
When a link breaks on the ATV tire chain, use a pin connector to replace the broken link. This repair will make the chain just as strong as it was originally.
Home ATV/UTV Tires / Wheels Tire Chains
Open filters
You can refine your search by selecting one or more filters. The following filters are the attributes for ATV Tire Chains.
Price
from
to
BRAND
CATEGORY
SECTION
TYPE
STYLE
LENGTH
WIDTH
MODEL
SPACES
If you think that an item should be in our collection, contact us!
Products per page
12244896
Sort by
Description A-ZDescription Z-APrice low to highPrice high to lowDiscount % low to highDiscount % high to lowBestsellers
Prices displayed on this web site are exclusive for online orders and might be different in store.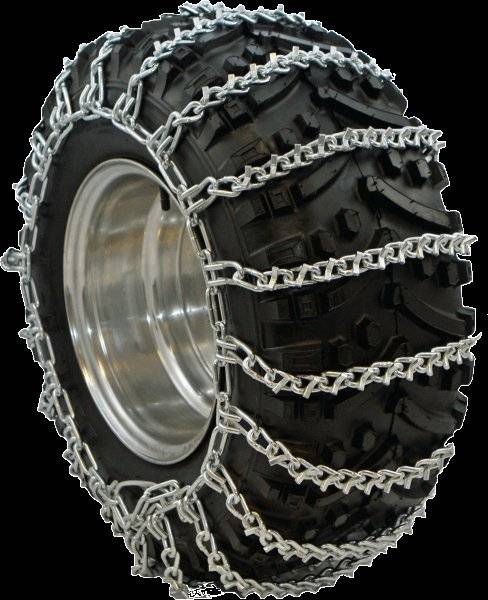
X
Delivery
Eligible amount for free delivery excludes taxes and/or other applicable fees
(ex: environmental taxes: tire or hazardous substance taxes).
Some items available for purchase online can also incur additional delivery costs due to excess weight or size.
Shipping
Shipping time excludes weekends and/or holidays.
It represents the time needed by the supplier to prepare and ship the products after receiving your purchase order. Please do not confuse with the receiving date which could vary among carriers.
Do-it-yourself chains for ATV wheels? Yes, easily. The manufacturing process is not laborious, it is not difficult to buy everything that is needed for the product, saving on the face, so why not do it yourself? nine0006
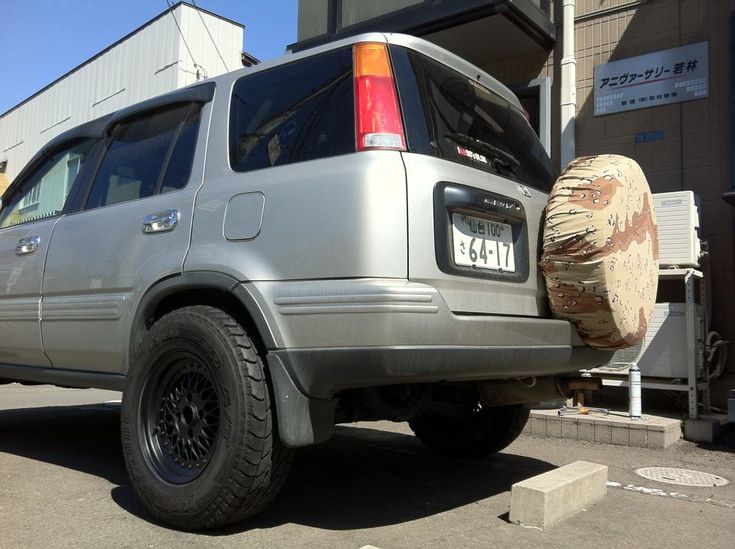
There are many ways to improve your ATV's ability to handle snow, but chains are the most affordable, fairly effective way to overcome snow and ice obstacles.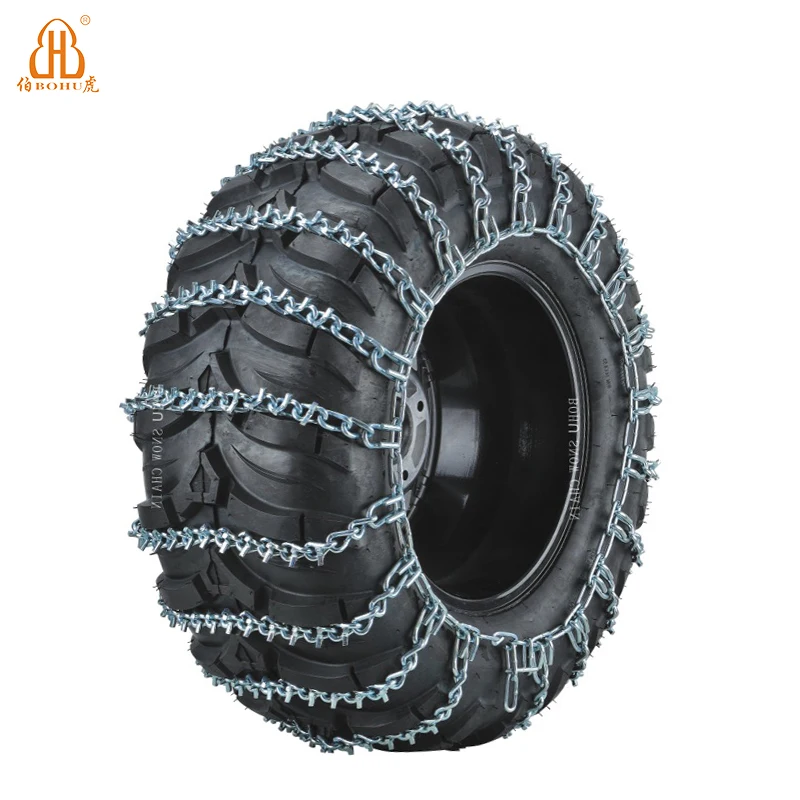
So that the birth of chains into the world would not be too long and painful, remember the good old saying: "Measure seven times, cut once." In this article, we propose to make chains for a 150cc ATV with stock wheels 22x10 \ 10, according to the size of which everything is calculated. If the diameter of the wheels of your ATV differs from the proposed one, then you will have to recalculate the length of the chains, which is not difficult. nine0006
The budget of chains for one wheel is about 400-700 rubles, since the prices for chains in different stores vary greatly….
Total for one wheel will have to be purchased (with a small margin):
Production:
Provision in a bag of chains, you need to have 2-3 spare carabiners just in case.
The effect on the first tests in the yard is very positive, now it is much more confident, and so far there is no need to spend money on new tires.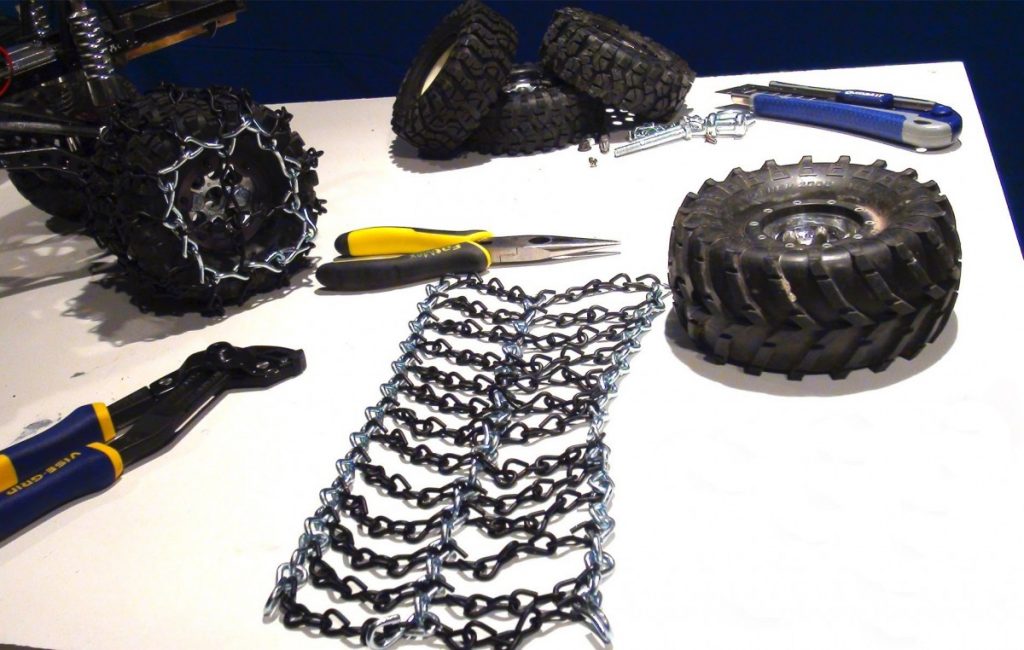 Tests in the field revealed a clear positive trend. nine0006
Author: Kazanova
"Walking on a quad...
Attachment for a blade..."
01/14/2019
In winter, the owner of an ATV faces many different questions regarding the selection of equipment (shoes, clothes), various protection, seat heating and other things. Perhaps one of the most important issues is the issue of patency in conditions of ice or significant snow cover. Of course, there is no ideal option for everyone, for several reasons, this is a different driving style and a different cubic capacity, and even different weather conditions in the regions of the country.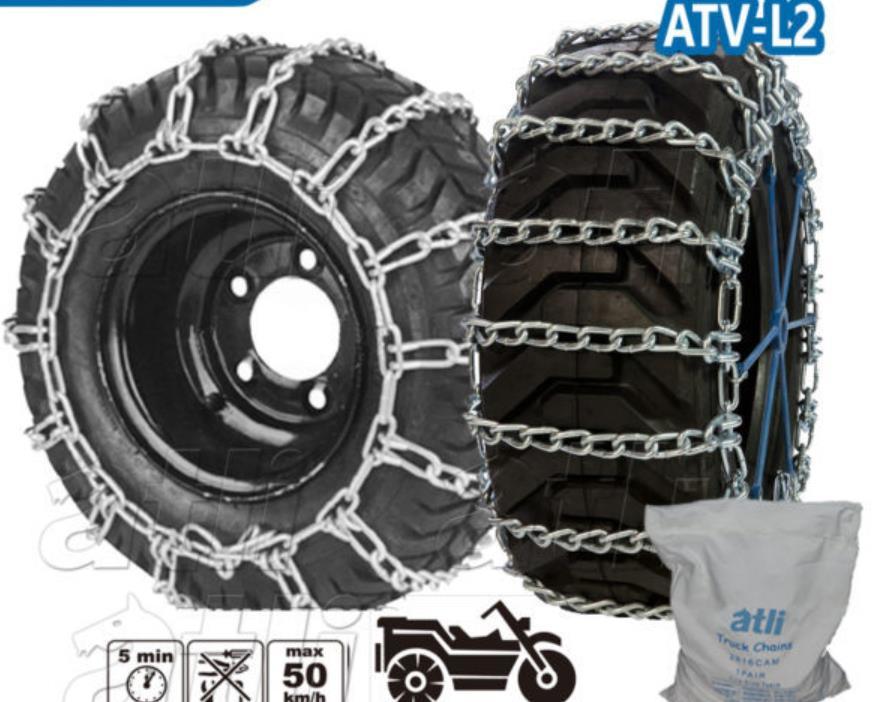 By and large, there are only three ways to increase the cross-country ability of your ATV in the winter. nine0006
Snow chains are a subject of considerable disagreement among ATV riders. Someone claims that in winter the chains quickly become clogged with snow and mud, as a result of which their use becomes useless, some argue that the chains will turn your ATV into a tractor. Well, as they say, how many people, so many opinions.
Chains are sold in any store, there are no particular difficulties. Just choose the chains for the size of the dismounted wheel, put on and then pump up the wheel. All this can be done with your own hands, carabiners and chains can be found in any store with building or fastening materials. An hour and a half to fit and try on, and you're done. Most ATV enthusiasts do not recommend installing chains with a ladder and prefer to install them with a diamond, because. tires get better traction and less digging into loose snow. There are chains specially designed for ATV with triangle holds.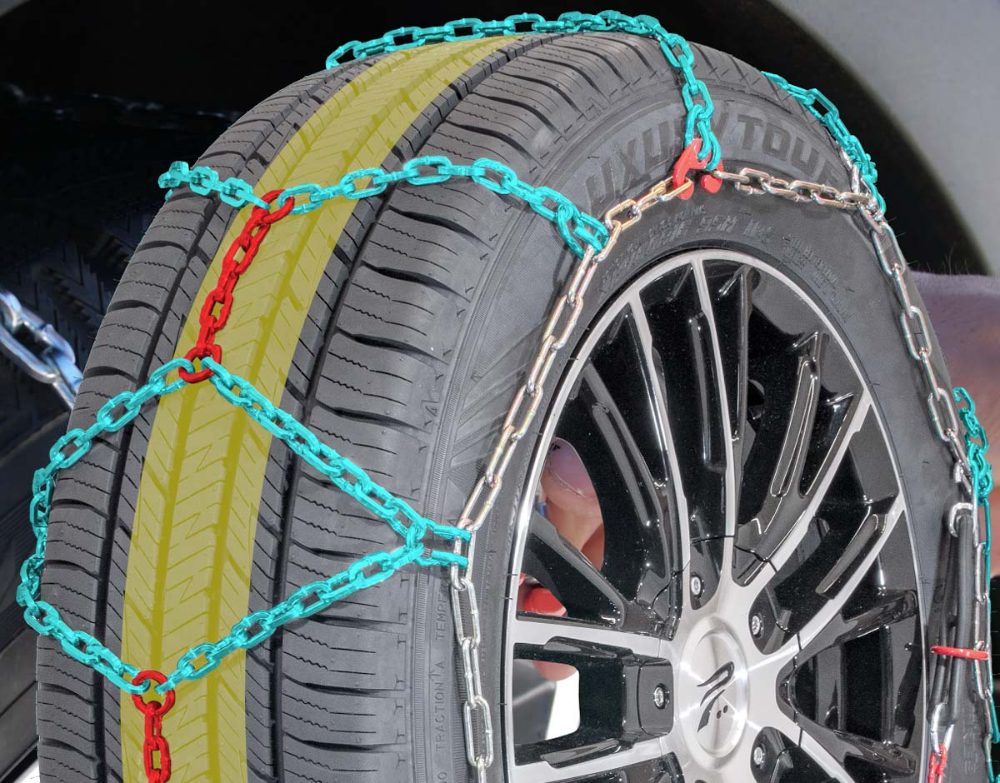 nine0006
Tracks are the most expensive and time-consuming way to deal with snow obstacles.
But despite this, there are a lot of people who use this option.
Looking at various advertisements, you might think that the tracks will turn your ATV into a snowmobile.
And this is not entirely true. Of course, a snowmobile from your ATV will not work, or rather it will work, but it is very specific. Firstly, after installing the tracks, the dimensions of your ATV will increase noticeably. Secondly, an ATV with tracks automatically acquires a heavy handlebar. With a 100 kg track cage, your ATV will receive a significant load, almost twice as heavy as the wheels. nine0006
The maximum speed with this setting will naturally decrease and in addition there will be specific restrictions on overcoming obstacles. The angle of attack of the rear tracks often does not allow to overcome obstacles in the form of various logs and stumps at a right angle. The rear tracks will simply simply "bump" into an obstacle. There is a specificity of driving when overcoming such obstacles: you have to overcome them by unloading the caterpillar at a right angle by counter-hanging.
There are also advantages to this method. One of the most important is the traction gain of the "quad-snowmobile" with a significantly higher cross-country ability. In the totality of these qualities, it will drag or take away the load hundreds of kilograms more, while being less critical to the trajectory of movement. Of course, with the exception of a forest thicket with many obstacles. nine0006
The ability of the quadra to storm various hills and slopes is greatly increased. And from a place in tightness, and not "move" as on a conventional snowmobile. This quality is an obvious advantage when performing various household needs.
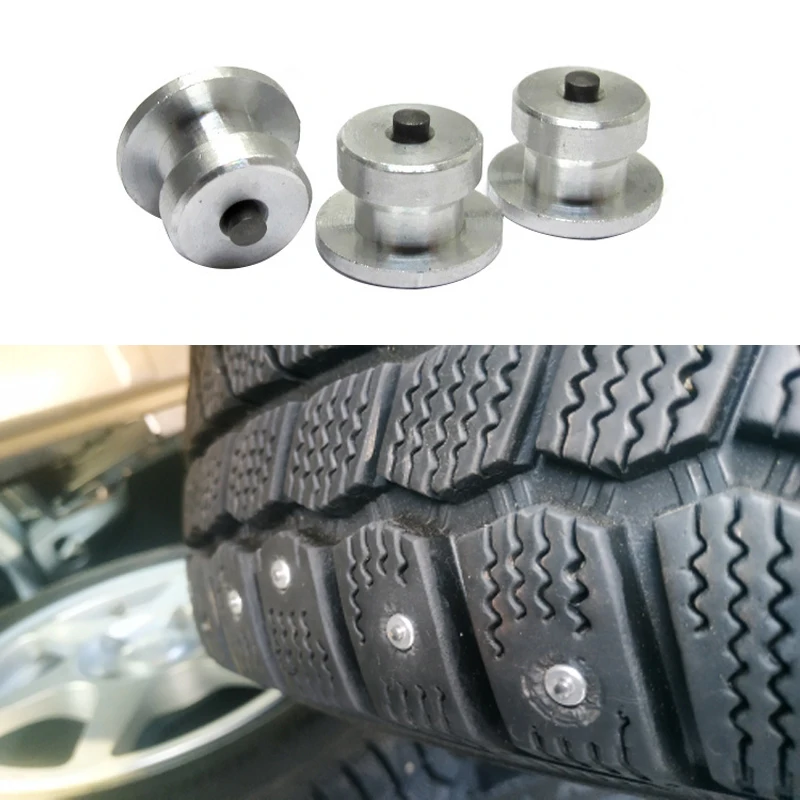
The choice of stud size depends on the type of tire and the intended use (on-road, competition, off-road, etc.). It is not recommended to use short spikes on public roads, but longer ones are usually used outside them.