Skip to Main Content
Item#: 490-241-0029
From $59.99 MSRP
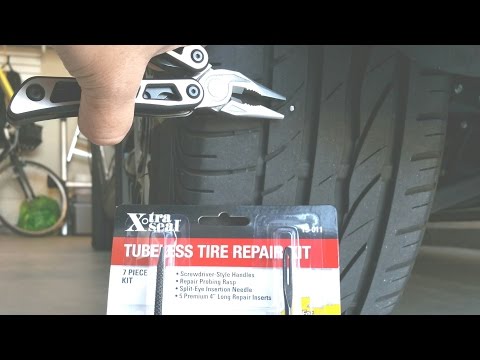
Snow Blower Tire Chains
Item#: 490-241-0029
From $59.99 MSRP
This part replaces:
Avoid frustration when buying parts, attachments, and accessories with the Cub Cadet Right Part Pledge.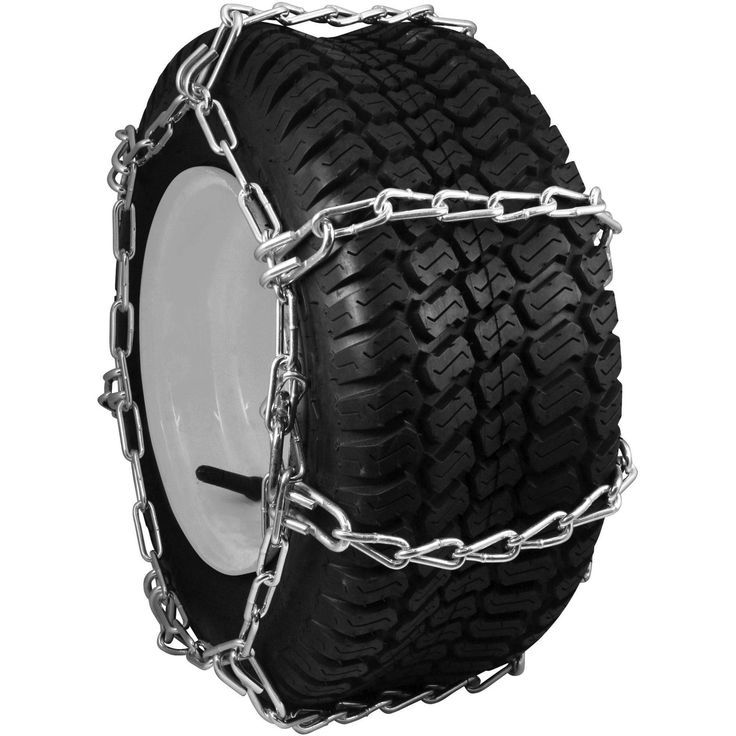 If you purchase the wrong part from Cub Cadet or a Cub Cadet authorized online reseller, Cub Cadet, or your Cub Cadet authorized online reseller will work with you to identify the correct part for your equipment and initiate a free exchange. See full terms and conditions.
Parts orders over $50 ship free, and orders placed before 5 pm ship same-day.* Delivery for standard shipping averages three (3) business days. Expedited shipping is available.
*Some exclusions apply. Read full shipping policy.
We'll make sure you get the right part. Enjoy 90-day returns for unused parts and we won't penalize you for ordering the wrong part when you follow our return policy.*
*Some exclusions apply. Read full returns policy.
Our outdoor power equipment experts are just one click away through Live Chat. Available Mon-Fri 9am - 7pm EDT.
Phone support also available:
1-800-269-6215
The zip code you entered may change the shipping method.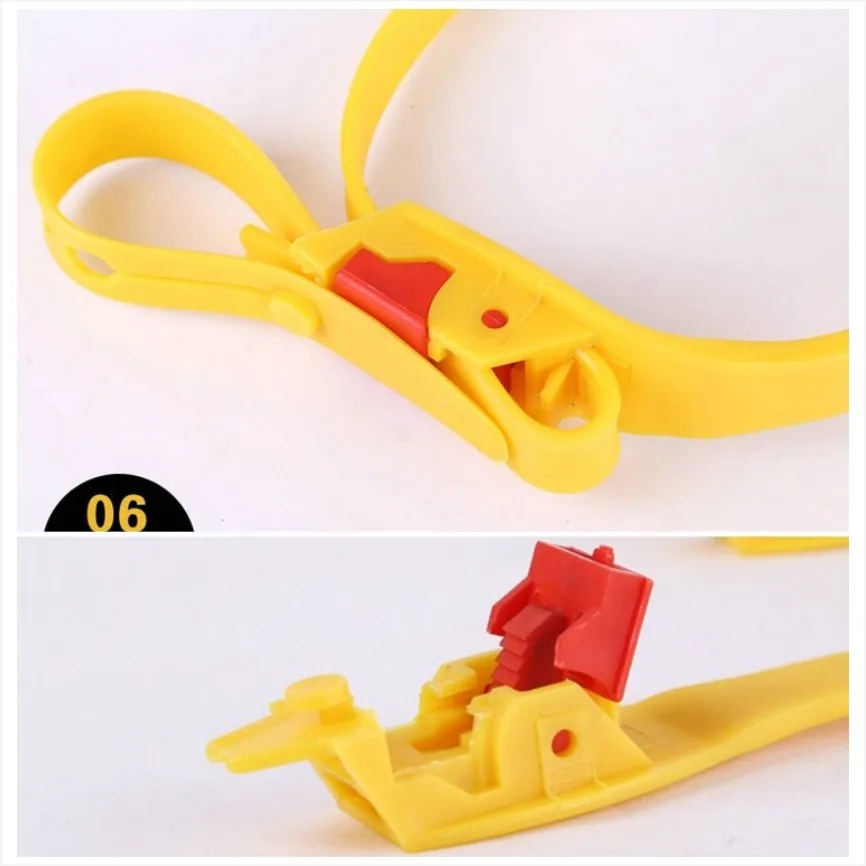
Enter Zip Code
Incorrect Zip Code format. Please correct and try again.
List View
Map View
We're sorry, we couldn't find results for your search. Please change try your search again. If you cannot find a service dealer near you, please contact our Customer Service through Chat with Cub, or toll-free at (877) 428 2349.
We're sorry, we couldn't find results for your search. Please change try your search again. If you cannot find a service dealer near you, please contact our Customer Service through Chat with Cub, or toll-free at (877) 428 2349.
>
Please obtain a google maps api key and put it in Site Preferences!
If you experience any problems accessing this website, please call us at 1-877-428-2349 for assistance.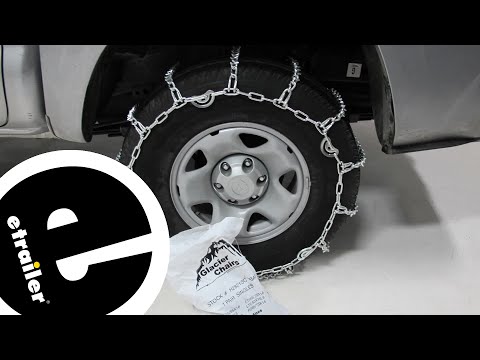
Engine Disclaimer: The engine horsepower information is provided by the engine manufacturer to be used for comparison purposes only. See your local Cub Cadet Dealer for warranty details.Pricing Disclaimer: Posted price is in USD Dollars and is manufacturer's suggested sale price. Models and pricing may vary by location. Taxes, freight, set-up and delivery not included. Optional equipment, accessories and attachments sold separately. See your retailer for details. Image Disclaimer: Products may vary from depicted model image in design, required attachments, safety features and non-functional appearance, and may not reflect dealer inventory or unit specifications.
Specifications Disclaimer: Specifications subject to change without notice. Images may not reflect retailer inventory and/or unit specifications. Operator's Manual Disclaimer: The operator's manual posted is for general information and use. To ensure the download of the operator's manual specific to your unit, we require a model and serial number. Speed Disclaimer: Actual vehicle speed varies based on load, use and environmental conditions. Battery Disclaimer: Battery and battery powered product performance varies with load, use and environmental conditions. Software Disclaimer: Software available on Company websites is provided on an "as is" basis without any warranty of any kind, either express or implied. The download and use of any software is done at the user's own risk. Professional Products: Cub Cadet commercial products are intended for professional use. UTV: Cub Cadet Utility Vehicles (UTV) are intended for off-road use by adults only. Please see the operator’s manual and the warning labels posted on the vehicle itself for more details. Email disclaimer: Sign up to receive communication on services, products and special offers.
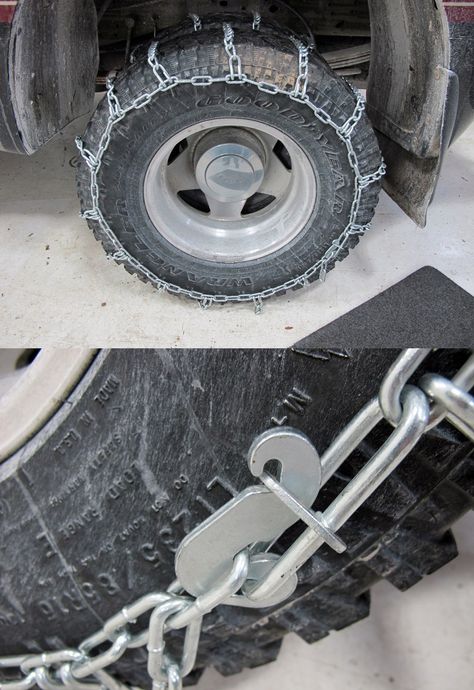 You may unsubscribe at any time. Please refer to our .
Skip to Main Content
Item: 490-241-0029
Snow Blower Tire Chains
Item: 490-241-0029
Quantity
Availability:
In Stock
$59.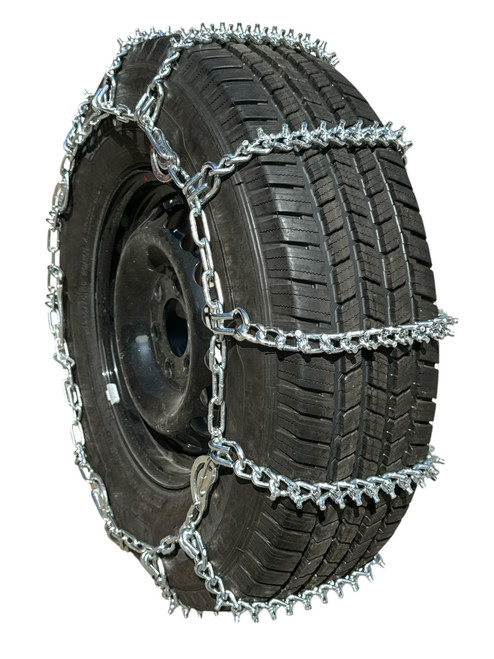 99
99
* This part replaces: 390-655, 390-655-000, 390-655A, 723-0430, OEM-390-655, OEM-390-655-000
Content
 1 Method of installation
 , ice or deep snow. It is often almost impossible to get out of such situations on your own - only with the help of another vehicle.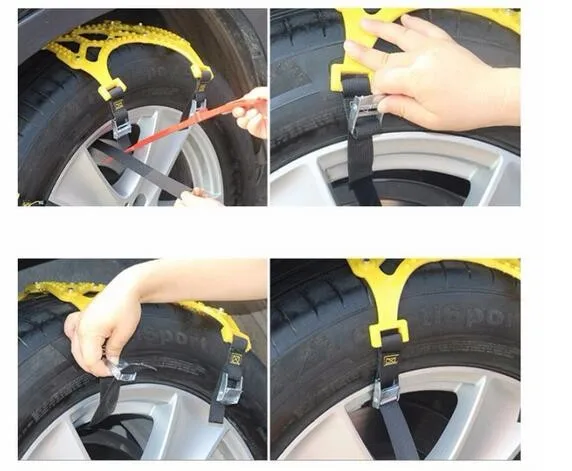 How are our colleagues doing? Some people buy studded tires after such incidents, others simply put the car on a "fun" during natural disasters. But there is another category of motorists that uses homemade chains for wheels and, I must say, quite successfully.
These devices are based on a simple design consisting of steel links or reinforced wire . A successful application lies in the uniform distribution of the elements along the entire radius of the tire. Failure to comply with this condition threatens to break the product and loss of anti-skid properties. The classic scheme, proven by more than one generation of motorists, consists of internal and external components that run around the entire circumference of the tire. They are interconnected by transverse parts, the so-called " grouser ". The manufacturing technology of do-it-yourself wheel chains is available even for beginners. Depending on the layout of the structural elements, there are three types of devices :
Each type has its own advantages and disadvantages. In terms of labor costs, the first option is the most accessible - "ladder" .
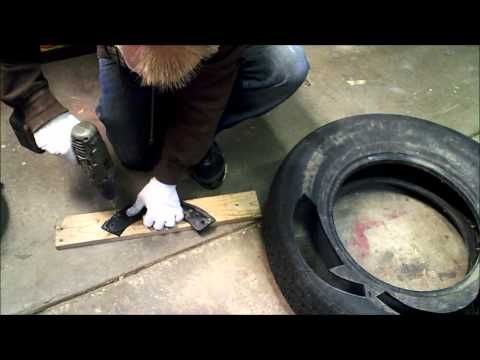
It is not always possible to purchase an anti-skid device - the high price and lack of availability of the right size makes car owners decide such issues on their own. I must say that this is a pretty good choice - all the necessary components are always available in hardware stores. In a critical situation, you can try to simply wrap the tire with a cable or a piece of metal rigging , but not everyone carries a similar set with them. Moreover, for a disc type brake system, this option is absolutely contraindicated - such a design will disrupt the operation of the mechanisms.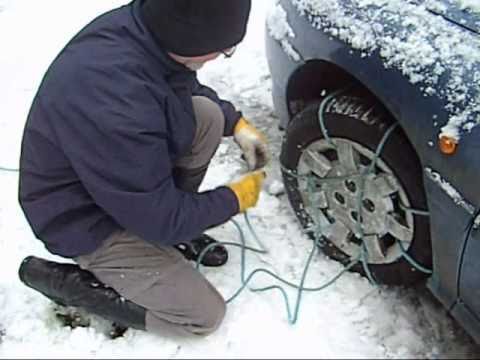 Therefore, it is worth preparing in advance homemade chains for wheels , for which will need :
The dimensions of the workpieces depend on the dimensions of the tire used, so it is important to measure the desired values in advance. The number of transverse parts is also individual - craftsmen recommend making sure that there are two "crossbars" at once in the plane of contact between the tire and the ground. Thanks to this scheme, traction characteristics and reliability of the entire product will increase. Preparatory action process and do-it-yourself assembly of chains on wheels consist of the following items:
As can be seen from the description, with a certain skill and tool, the operation will take no more than 40 minutes. Those who have welding experience can put it into practice and refuse threaded connections, which will certainly affect the quality of the equipment.
Having checked the reliability of the finished product, it remains only to install it on the car.
The anti-skid device is mounted first of all on the drive pair and this is done using two methods :
The choice of method remains with the driver, but it is worth focusing on one recommendation - you need to think about installation in advance, even before entering a difficult area . Only in this way will it be possible to avoid annoying mistakes and save a lot of time.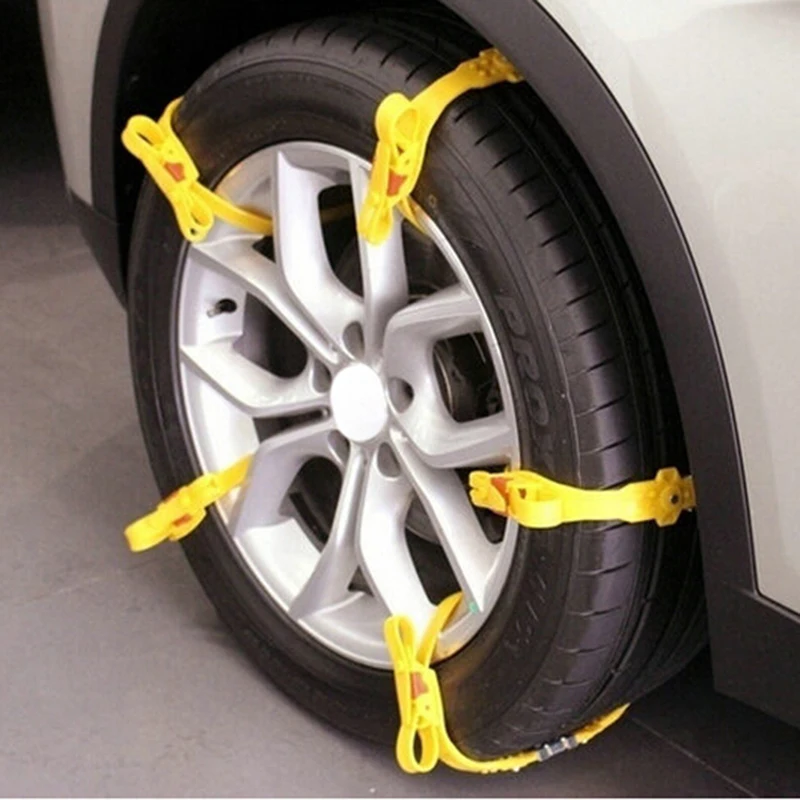
Before proceeding with the operation of installing homemade chain on car wheels , carefully lay it, not allowing the links to twist. Further, we act according to the points:
Do-it-yourself installation of the chain on the wheels of a car using a jack is similar to the technology described above, its only advantage is to facilitate the task. For a better installation, you must first reduce the pressure in the tires, but after the operation, do not forget to restore normal parameters.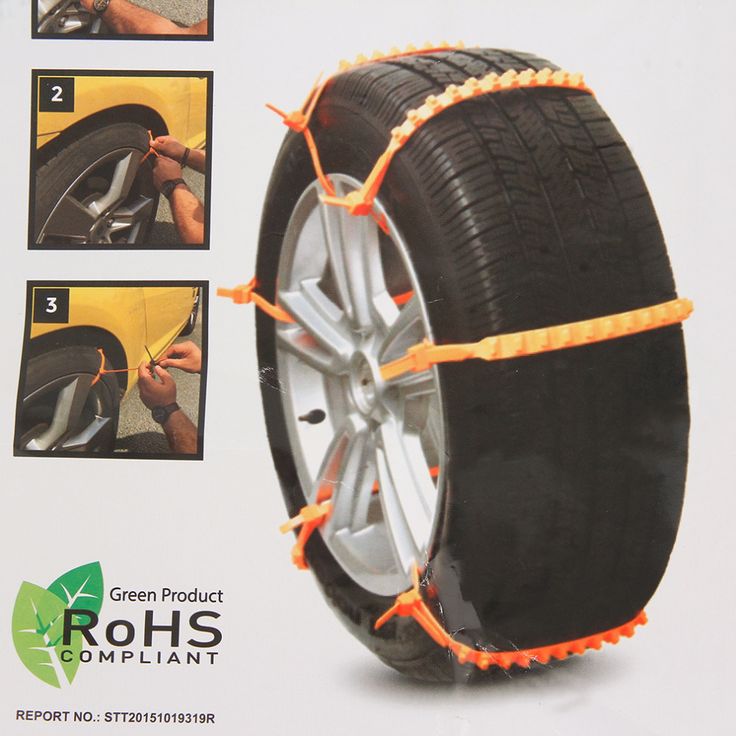 This procedure will allow the product to fit as tightly as possible to the tire.
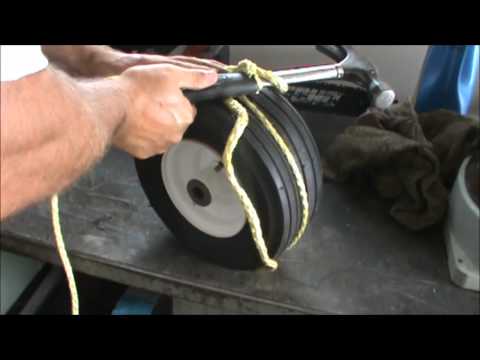
The idea of folk craftsmen does not stand still - and now they offer an alternative solution: anti-skid bracelets . In principle, these are the same home-made metal chains for wheels , only with a difference in the absence of longitudinal elements . The advantages of bracelets are as follows:
So what is needed for the manufacture of :
For 195 and 205 mm tires you will need about 4 meters of chain. As you can see, the costs are minimal, and you only need to cut the material to the required length. Another alternative is kits for DIY wheel bracelets using chains , they are quite affordable and of good quality (except for Chinese ones).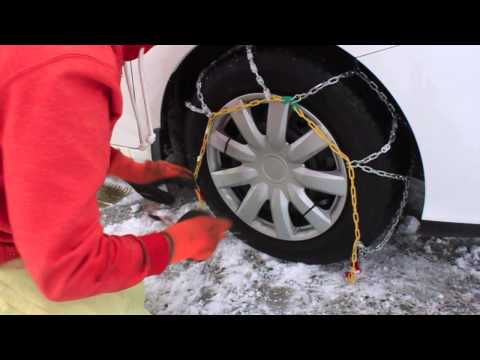
Set consisting of:
The kit is very easy to use and does not take up much space. An important plus is the possibility of using machines with disc brakes . Judging by the reviews, owners of expensive SUVs do not disdain to use them, which once again speaks of the practicality of the device.
For more information on how to make your own anti-skid bracelets, see the video:
Anti-skid chains must not be used when driving on paved roads (concrete, asphalt). In conditions of loose snow or soil, it is recommended to adhere to a speed of 10-20 km / h. Wheel slippage must not be allowed.
After installing the anti-slip device, after driving the first 100 meters, you should stop and check the reliability of its fixation, as well as the tension around the entire perimeter. A loose chain can cause damage to suspension and steering components.
How and from what to make a snow scraper with your own hands ?
Despite all the discussions about global warming, winters in most regions of our country continue to be severe, so it is not uncommon for heavy snowfall to impede the movement of vehicles and even the movement of passers-by in courtyards and streets. This issue is especially burning for the owners of mansions or suburban houses, because they have to rely only on their own strength. Naturally, you can buy a mini snowplow, but not many people can afford it. In addition, from time to time its implementation is problematic and even unrealistic, because the snow scraper continues to be a necessary inventory.
Now in stores you can find a wide variety of scrapers for cleaning sidewalks, yards and steps. They are mechanical and manual. If you are not ready for huge waste, then you will have to purchase a manual scraper. It is often referred to in the British manner as a pusher or scraper, emphasizing the main purpose of this product - to push and scrape. Regardless of whether we are talking about a store product or deciding how to make a scraper for snow with his own hands, it should be:
From what has been said, it is clear that when choosing a snow scraper, it is better to pay attention to options made of plastic or aluminum, because they are high strength and at the same time light. In this case, the one who will be cleaning will get tired less, and the possibility that the device will break will be reduced to zero. In addition, it is better that the handle be covered with rubber to prevent slipping of the hands, and the height of the tool should correspond to the height of the person who will use it, because working in a hunched position is not particularly comfortable.
Everything said about the choice of such devices in the store applies to home-made tools for cleaning the yard or sidewalks. The easiest way is to make a manual scraper that resembles a shovel. For its production, you can use an ordinary duralumin sheet 40-50 cm in size, bent along the upper edge so that a side 4-5 cm high is formed. You can also bend the side sides, and the handle make in the form of a frame, such as a garden wheelbarrow.
To make a scraper for snow with your own hands with sides of a pine board measuring 210x23x2.5 cm, you will also need a rail of the same material 280 long, 8 wide, and 2.5 cm wide. will use a 73 x 70 cm sheet of zinc-coated iron. In this case, the width and length of the scraper can be taken good from those indicated, taking into account the fact that the device must pass freely through the gate.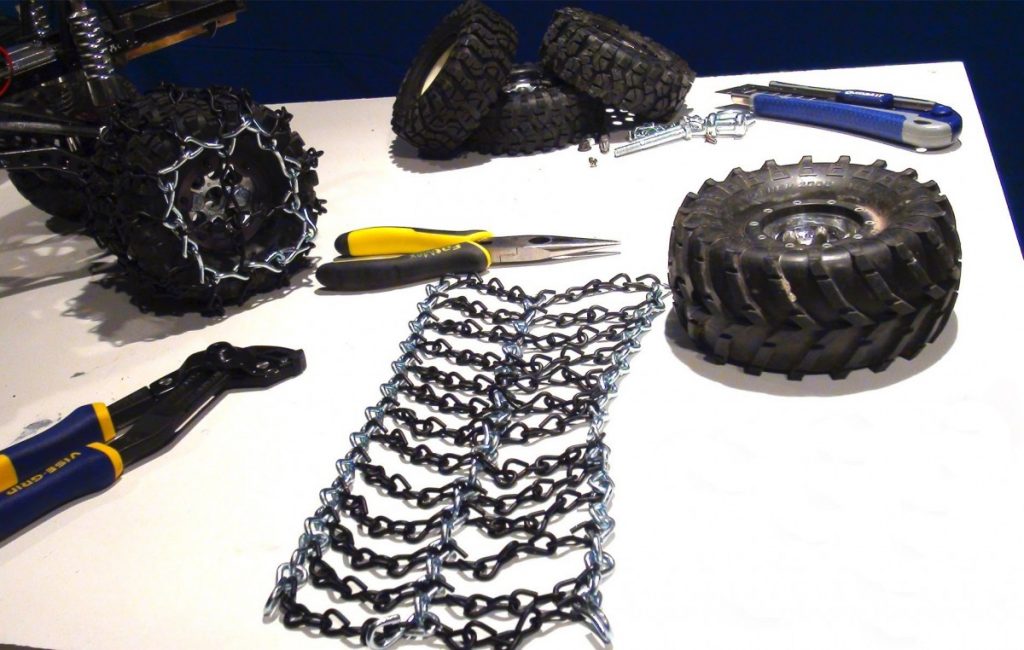
The bottom of the scraper is made of steel sheet, to which the sides cut from the board are reinforced with self-tapping screws or screws. Such a tool may also be needed in the spring, because by adding wheels from a baby stroller to it and reinforcing the bottom with wooden slats, you can turn it into a light wheelbarrow for removing sawdust and debris. With all this, the wheel axle must be placed between 2 boards and secured on 2 sides with metal plates.
Stihl 180 snow blower, bicycle chain and sprockets.
Description It is necessary: pipe 1 inch, shaft 30 mm.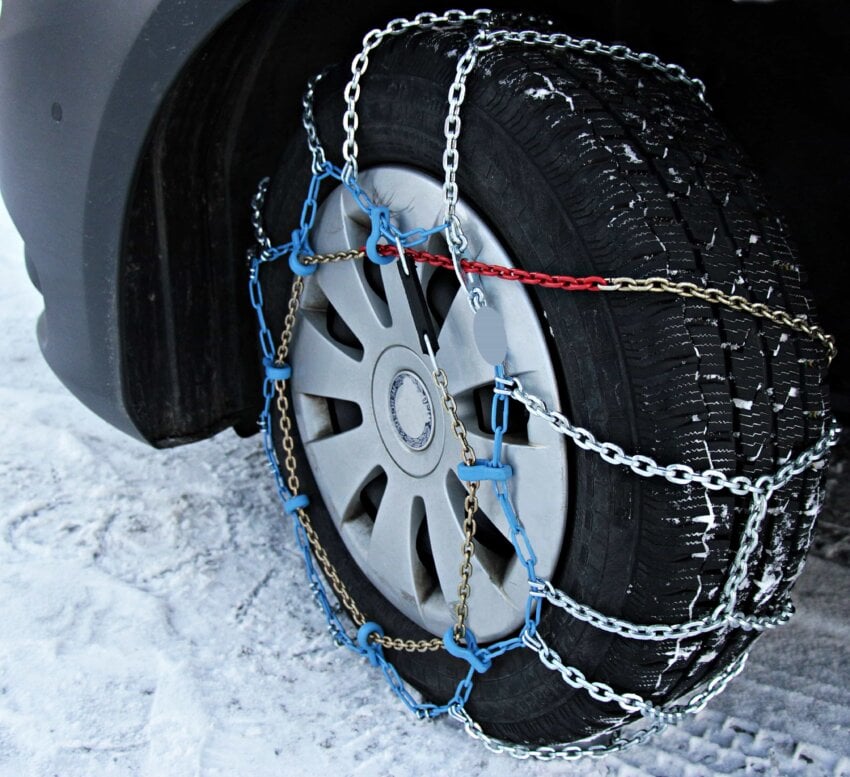 2 bearings from a Niva combine or from a flax combine, 2 discs from a grain sow.
Rolling is always easier than dragging. Having guessed this, our distant ancestors invented wheels. They can also be used to facilitate the process of removing snow with a manual scraper. For the manufacture of such a modernized device, you will need a plastic or aluminum pipe with a diameter of 27 cm, from which you need to cut a sector with a side part length 2-3 cm less than the circumference of the section. The result is a part that will be used as a blade. As for the frame, an old baby stroller will come in handy to create it, which is sure to be found in any home where there are preschoolers or schoolchildren. You will also need to get old water pipes. Next, you need to perform the following operations:
This product will be a great helper, as it is easy to use and does not scratch the road surface. In addition, it can be adjusted in height to suit the user.
Wheels are not the only way to make the scraper easier to move. It will be easy to move if you install the blade on the skids.
To make such a useful device you will need:
To make a free-sliding snow scraper :
If the snow scraper, the photo of the diagram of which is shown below, is intended for summer cottages and may need to be transported by car, then the scraper can be made folding.
Yard and street cleaning in winter can be made easier by making a scraper for snow with their own hands based on a walk-behind tractor. To do this, you do not have to make any special efforts, since it is enough to attach a snow-removing cloth to the bumper, made, for example, from a curved stainless steel sheet. You can also use a ready dump. You can also install a snow shovel on your bike by attaching it below the handlebars.
If the scraper is needed urgently and is supposed to be used only for one season, then such a tool can be made in a couple of hours. To quickly make snow scraper do-it-yourself , you will need a sheet of thick plywood measuring 50 by 50 cm, the surface of which should be treated with water-repellent impregnation, and the edge with epoxy.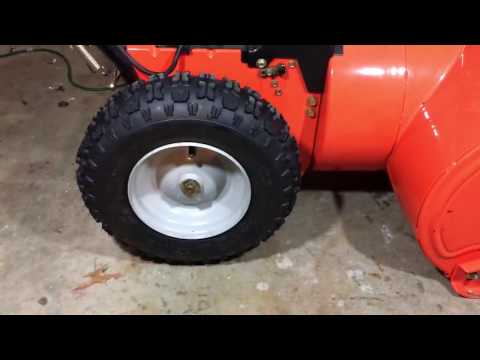 On both sides it should be finished with aluminum to ensure ease of sliding. As for the handle, it needs to be made somewhat shorter than that of ordinary shovels, and the edge that was supposed to be attached to the scraper needs to be cut at an angle of 45 degrees. In order for the scraper to turn out to be reliable, you need to drill 6 mm holes in two places and put bolts and nuts. Next, the handle should be fixed with a wooden plank so as to increase the angle of attachment.
Now you know several ways to make a snow scraper and you will be able to face the winter fully prepared.
If the car is not designed for off-road assault, but clean asphalt is required for normal movement, then it will not be possible to do without anti-skid equipment.
There are no reliable facts in the foreseeable history of the first cases of using a snow chain to increase flotation. Most likely, the first analogues appeared on trucks operating in a column in muddy mud or snow.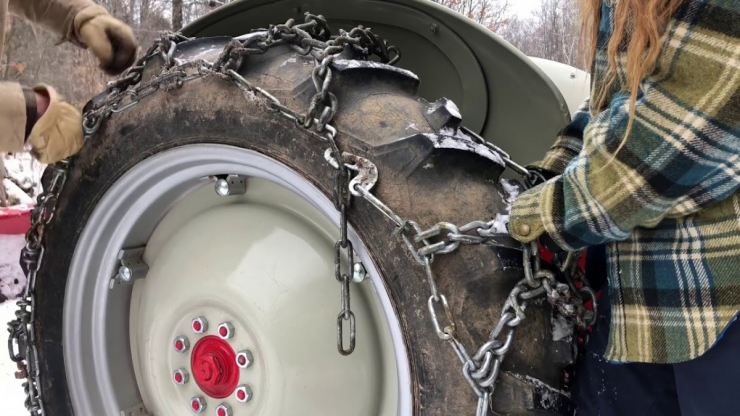 And the experience of using anti-skid chains for trucks was attempts to wrap the wheels of tractors and light-duty tugs on the roads of the First World War with pieces of chains and cables. Of course, most of what belonged to the first snow chains was made by hand.
Today, a large part of motorists make various versions of snow chains with their own hands, captures the process on video and puts it on the Internet.
The effect of increasing the car's cross-country ability is based on increasing the adhesion of the wheel tire to the ground or snow base, making it more reliable Chain links act as lugs with a large coverage area of snow or mud mass. On the other hand, under the weight of the wheel and the car, the pressure of the chain links on the road surface - ice, snow or muddy soil - increases hundreds of times, due to which the supporting surface is compacted and adheres to the wheel. A simple anti-skid device allows you to make the movement of the car controllable and double the traction.
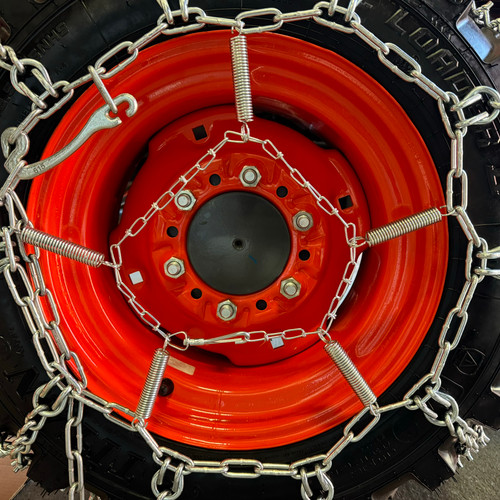
The working area of the snow chain is a strip of interconnected fragments of 15-20 links, forming a diamond-shaped, ladder or diagonal pattern. A denser pattern may simply make the fixture unbearable. Depending on the design, the fastening of the tape is carried out by two cables or wire rings, which tighten the ends of the fragments on both sides of the wheel, thereby ensuring the fastening of the working surface on the tire tread. To fix the tension, a frame lock or latch is usually used. The effectiveness of the pattern in anti-skid is evaluated differently.
The most important characteristics of snow chains:
Sometimes, to increase the anti-skid effect, the links can be made of a bar or wire not of a round section, but of a square or rectangular one.
If you look closely at the snow chain in the photo and carefully study the tension system, it becomes clear how to make snow chains with your own hands, especially if there is a video of the manufacturing process. Simply put, it is necessary to make a kind of grid of chain segments according to the size of the tire, with a system tension mechanism. Usually, for manufacturing, the dimensions of the sidewalls and transverse sections are measured with a margin of 1 link and the length of the cable is determined, with which it is supposed to stretch the chains on the wheel. In the simplest version of the chain, you can use a conventional household chain, with a bar diameter of at least 5-6 mm, with securely welded links.
A pair of M10 or M12 bolts is used as a tensioner. As a side mount, you can make a wire arch, or you can use a cable from the car’s handbrake drive, having previously made loops at the ends for threading the tension bolt.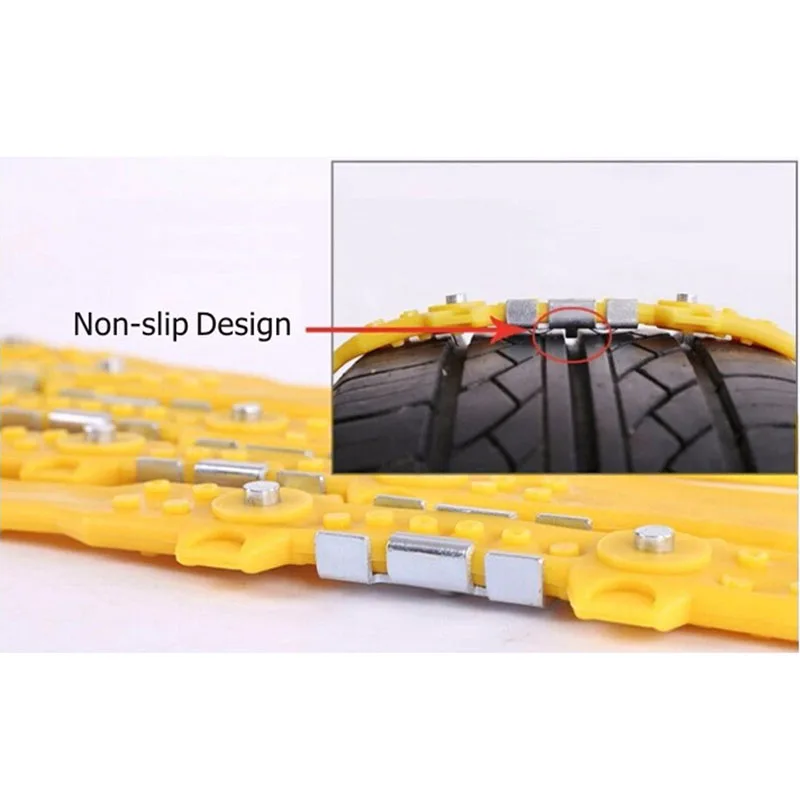 Sometimes homemade snow chains are made from different materials, for example, belts made of Kevlar and polyamide fibers are used to fix and tension.
Unlike home-made options, made by one's own hands, industrial designs are forced to compete in the market, which means that they need to be made more convenient and reliable through the use of:
As an illustration, we can cite products - classic snow chains from Pewag, one of the oldest in Austria, or trackers - Mita snow chains. The latter are installed in the tread groove, fastened individually, all operations can be done with one key. Efficiency is not worse than the classic version, but the cost of a kit weighing 9kg about three times more expensive.
One of the most famous brands was the classic Thule snow chains. The design uses a diamond-shaped pattern with external asymmetry, which makes it possible to effectively provide traction on ice. Mounting on the wheel is carried out with the help of a special arched device and a central aluminum rack, which provide automatic tension of the fragments and quick removal in a few movements. To prevent possible damage to the disk, a protection made of synthetic wear-resistant material is additionally installed.
In addition to the unusual idea of Meath trackers, snow chain bracelets stand apart among the anti-skid devices. The idea of a unitary device, cheaper, more versatile and easier to use, has long demanded its implementation. What are the advantages of the anti-slip bracelet scheme.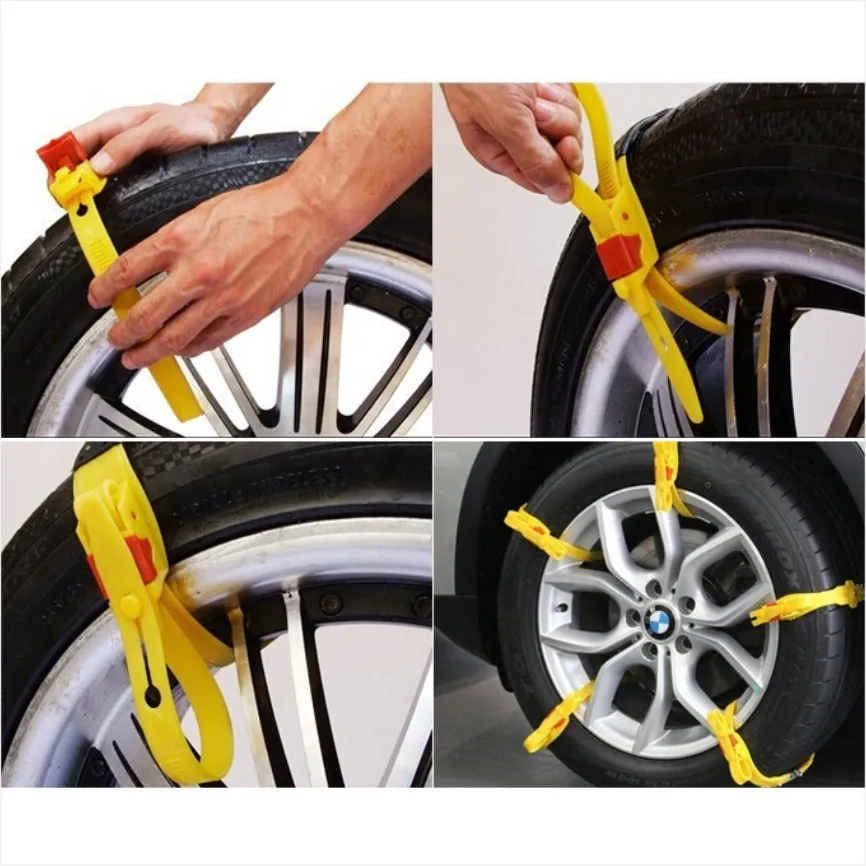
First, versatility and flexibility. The bracelet is easier to put on the wheel, you can easily adjust the number of installed devices, the rubber of the wheel suffers much less.
Secondly, they are made from high-strength rubber, Kevlar fibers, wear-resistant polymers and, as a result, are much lighter than steel chain devices. The bracelet is easier to repair and maintain, the rubber pad studded with high-strength ceramic-metal or carbide spikes is easier to repair than if it were an all-metal construction.
Among the disadvantages of bracelets, one can note the higher cost and the danger of making sharp turns at a speed of more than 20-25 km / h, in any case, after overcoming snow or mud barriers, they must be dismantled.
Classic chain devices have a longer service life, are cheaper and harder to use. For classic off-road, this is the best option.
Everything that allows you to fight truck slippage will make it work more reliable. Both conventional classic anti-skid chain devices and original ideas - automatic anti-skid chains for trucks - have found wide application. One of the representatives of automatic devices, ONSPOT VBG, is remotely controlled, the design allows connection using a pneumatic actuator controlled from a remote control in the driver's cab. Used at speeds up to 50 mph. The performance of the machine and its reliability are slightly lower than conventional snow chains for trucks, but the machine will make the application safer.
In order to make a do-it-yourself chain anti-skid device, you should:

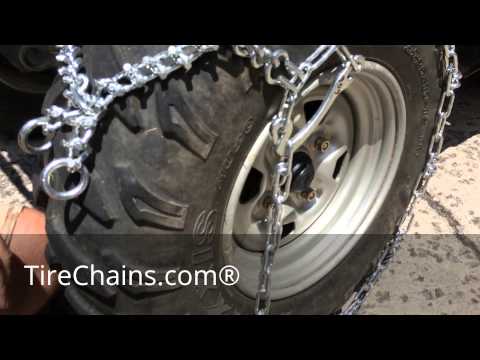
Putting it on is not particularly difficult, but it requires work, accuracy and attention. First of all, the chain is unfolded in front of the wheel, the locks on the outside and the hooks of the back of the chain on the inside of the wheel. We run over the device so that from the end of the unfolded device along the track to the point of support of the wheel on the snow or ground is about 20-25 cm. We throw the rest of the chain system onto the wheel and carefully straighten all the elements. Next, a hook is hooked on the inside of the wheel and the outer lock is closed. If the chain has a tension adjuster, everything must be done to increase the tension and remove the slack.
Video how to install anti -scenery chains:
Content
Construction and varieties of anti -scenery agents
Production of a simple -made chain for automobile wheels
How to install the chains on the wheels with your own hands
Installation method without jacking up the machine
Alternative solutions
Things to remember
Any experienced car enthusiast has experienced unpleasant moments when the drive wheels of the car began to slip in mud, ice or deep snow.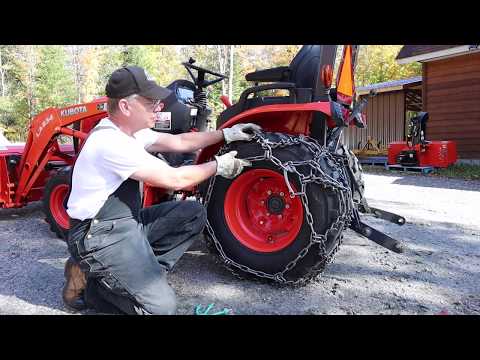 It is often almost impossible to get out of such situations on your own - only with the help of another vehicle. How are our colleagues doing? Some people buy studded tires after such incidents, others simply put the car on a "fun" during natural disasters. But there is another category of motorists that uses homemade chains for wheels and, I must say, quite successfully.
These devices are based on a simple design consisting of steel links or reinforced wire . A successful application lies in the uniform distribution of the elements along the entire radius of the tire. Failure to comply with this condition threatens to break the product and loss of anti-skid properties. The classic scheme, proven by more than one generation of motorists, consists of internal and external components that run around the entire circumference of the tire. They are interconnected by transverse parts, the so-called " grouser ". The manufacturing technology of do-it-yourself wheel chains is available even for beginners. Depending on the layout of the structural elements, there are three types of devices :
Each type has its own advantages and disadvantages. In terms of labor costs, the first option is the most accessible - "ladder" .
It is not always possible to purchase an anti-skid device - the high price and lack of availability of the right size makes car owners decide such issues on their own. I must say that this is a pretty good choice - all the necessary components are always available in hardware stores. In a critical situation, you can try to simply wrap the tire with a cable or a piece of metal rigging , but not everyone carries a similar set with them. Moreover, for a disc type brake system, this option is absolutely contraindicated - such a design will disrupt the operation of the mechanisms.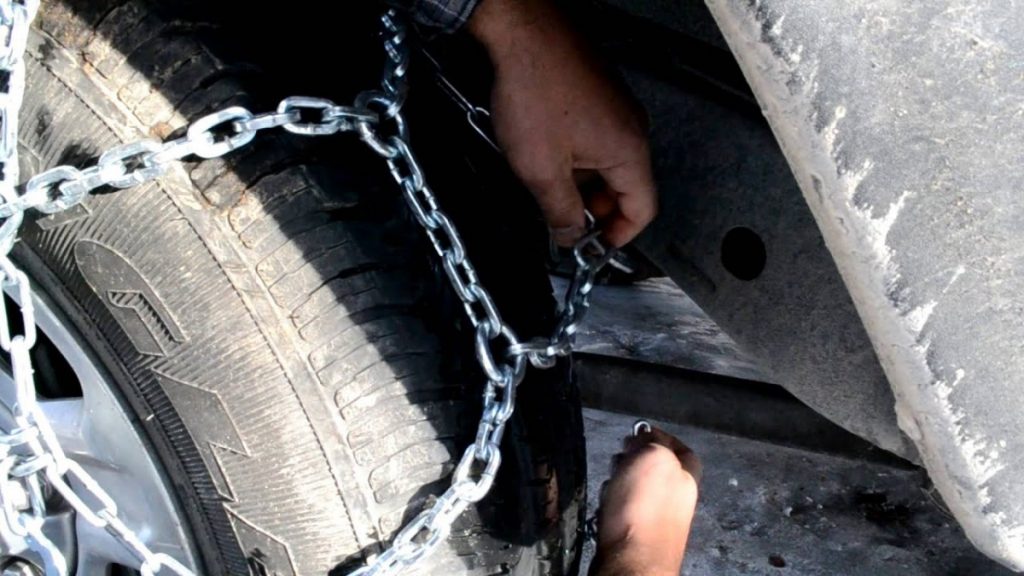 Therefore, it is worth preparing in advance homemade chains for wheels , for which will need :
The dimensions of the workpieces depend on the dimensions of the tire used, so it is important to measure the desired values in advance. The number of transverse parts is also individual - craftsmen recommend making sure that there are two "crossbars" at once in the plane of contact between the tire and the ground. Thanks to this scheme, traction characteristics and reliability of the entire product will increase. Preparatory action process and do-it-yourself assembly of chains on wheels consist of the following items:
As can be seen from the description, with a certain skill and tool, the operation will take no more than 40 minutes. Those who have welding experience can put it into practice and refuse threaded connections, which will certainly affect the quality of the equipment.
Having checked the reliability of the finished product, it remains only to install it on the car.
The anti-skid device is mounted first of all on the drive pair and this is done using two methods :
The choice of method remains with the driver, but it is worth focusing on one recommendation - you need to think about installation in advance, even before entering a difficult area . Only in this way will it be possible to avoid annoying mistakes and save a lot of time.
Before proceeding with the operation of installing homemade chain on car wheels , carefully lay it, not allowing the links to twist. Further, we act according to the points:
Do-it-yourself installation of the chain on the wheels of a car using a jack is similar to the technology described above, its only advantage is to facilitate the task. For a better installation, you must first reduce the pressure in the tires, but after the operation, do not forget to restore normal parameters.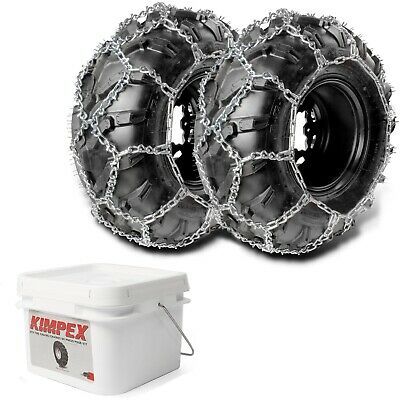 This procedure will allow the product to fit as tightly as possible to the tire.
The idea of folk craftsmen does not stand still - and now they offer an alternative solution: anti-skid bracelets . In principle, these are the same home-made metal chains for wheels , only with a difference in the absence of longitudinal elements . The advantages of bracelets are as follows:
So what is needed for the manufacture of :
For 195 and 205 mm tires you will need about 4 meters of chain. As you can see, the costs are minimal, and you only need to cut the material to the required length. Another alternative is kits for DIY wheel bracelets using chains , they are quite affordable and of good quality (except for Chinese ones).
Set consisting of:
The kit is very easy to use and does not take up much space. An important plus is the possibility of using machines with disc brakes . Judging by the reviews, owners of expensive SUVs do not disdain to use them, which once again speaks of the practicality of the device.
For more information on how to make your own anti-skid bracelets, see the video:
Anti-skid chains must not be used when driving on paved roads (concrete, asphalt). In conditions of loose snow or soil, it is recommended to adhere to a speed of 10-20 km / h. Wheel slippage must not be allowed.
After installing the anti-slip device, after driving the first 100 meters, you should stop and check the reliability of its fixation, as well as the tension around the entire perimeter.