When it’s time to replace your old tires, the new ones will need to be mounted and balanced correctly for optimum driving safety.
Your first instinct might be to call a professional. But it’s completely possible to take this task on yourself!
If you have an understanding of mechanics and want to save some money, you can learn how to mount and balance tires at home. Read on for a comprehensive guide.
Before we dive in, let’s look at the definitions of mounting and balancing your tires. What do these terms mean, exactly?
The term “mounting” means fitting the new tires onto the rims before attaching them to your vehicle’s axles. You can mount tires without a tire mounting machine, but it will require significant strength and effort.
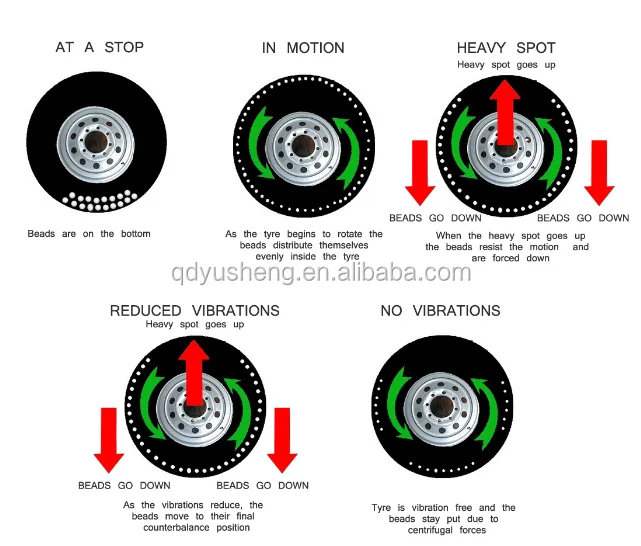
The word “balancing” refers to the process of making your wheels aligned so that there are no wobbles or vibrations. A wheel is in alignment when its center of gravity is the same as the axis of rotation. Another way of explaining this is to say that a wheel is balanced when the wheel and tire weight is distributed evenly around the axle.
You will need the right equipment – a balancing machine – to achieve wheel alignment. Though it’s also possible to balance tires without a machine. While you can align tires without a machine, this process takes longer and is less accurate.
Professional technicians use spin balancing machinery to assess wheel balance and identify where the wheel is out of balance. The machine runs a series of diagnostic tests on the wheels while they spin in the air.
When the machine shows where the wheel is out of alignment, a technician will add tiny weights to the wheel rim in particular places to even out the wheel’s weight distribution.
A technician can also use a machine that simulates how road force acts on the tires to evaluate if they are in alignment or not.
A large roller is pressed against the tires to ascertain this. The machine then works out any deviations from the perfectly round shape of the tire. Some say that this technique can pick up misalignments that spin balancing cannot.
The technician can then put weights on the tires to align them.
If you do not balance your wheels effectively, you will notice a vibration through the vehicle at around 40 to 45 miles per hour. The shaking will only get worse as you accelerate, meaning you’re in for an uncomfortable ride.
Wheels that are misaligned can also cause damage to your vehicle and cost you money in unnecessary repairs. The tires will wear down unevenly, and other vehicle components such as shocks and wheel bearings may be damaged or compromised.
Consider checking: How Often Should Tires Be Balanced
Ready to get started? See below for our step-by-step instructions.
You’ll need a mounting machine, lubricant, pliers, and an air compressor.
You’ll need a tire balancer, wheel weights, a jack, a flat-ended screwdriver, and a lug wrench.
Mounting and balancing your tires is not that complicated. If you have a fair knowledge of and interest in vehicle mechanics and you’re willing to make the necessary purchases, then it is certainly doable.
Otherwise, if it’s not your thing, you’ll be much better off visiting your local tire shop.
Did you find our guide helpful? Then consider checking:
How Long Does It Take To Balance And Rotate Tires
How Long To Mount And Balance Tires
How Much Does It Cost To Get Tires Rotated And Balanced
How Much Does It Cost To Mount And Balance Tires
How To Tell If Tires Are Unbalanced
Dave Gran Race Tires
While I don’t exactly enjoy spending money on tire purchases, at least I feel like I’m getting something for what I’m spending. Paying a shop between $100 and $120 to mount and balance each set of tires? That just frustrates me! Considering how often many of us racers need race tires mounted and balanced, this becomes expensive quickly. There’s got to be a better way.
Tire Mounting:
I first looked into manual tire mounting machines such as the Roger Kraus System which retails for $565 plus shipping. My online searches didn’t produce any used units available and from what I saw when used ones do go on sale, they go quickly and tend to hold their value. I spoke with the company for a bit and it sounded like it might work. My concern is that the Hoosier tires I use are even a challenge to the experienced guys who work at tire shops. (I put a 225 wide tire on a 6″ wide rim.) When talking with them about this concern, they said that it does take some time to get the technique down. If you’ve read any of our garage adventure articles, you’ll quickly realize that maybe this isn’t the ideal solution for us. I know what you maybe thinking – I wish they tried it and captured the mayhem on video!
Then I began looking at pneumatic tire mounting machines. I found a used one from a shop that had closed down, but later realized that this was quite an old model and while okay for steel rims, there’s a high probability it would damage my race wheels. This would totally defeat my goal of saving money, therefore I ended up opting to pass on it. The better models quickly jumped in price. I estimated that would cost around $1,200 for a decent used machine. Then on top of that, it requires that you have an air compressor capable of 150 psi or more. The air compressor I currently have probably wouldn’t be adequate which means yet another expense. I attempted to justify purchasing the larger air compressor because it is something that I’d like to have, but that goes against my current goal of saving money for track time.
Evaluating the tire mounting decision further: The average price I’ve found to mount a tire is $10 each.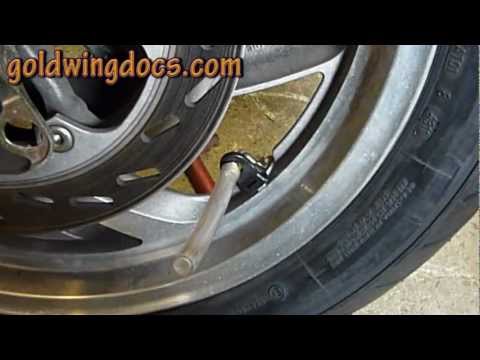 Even to reach a cost break even on the manual machine, we’re looking at a minimum total of 60 tires (shipping costs for me would be more, but that’s close enough for this purpose). That’s a lot of tire mounting. Then factoring in time and potential frustration, it is hard to justify purchasing a tire mounting machine. With most race tires having a stiff sidewall, mounting them can be challenging even for guys in the industry who are experienced and have quality equipment.
Tire Balancing:
There still was the potential opportunity to save money on tire balancing. Again based on the averages I see, tire balancing averaged $15 – $20 per tire for the shops I frequent. It quickly became evident that purchasing a dynamic balancing machine (spin balancing) like tire shops utilize would be too expensive (over $1,000). I then learned about static balancers which are also referred to as “bubble balancers”. As with most topics researched on the web, you’ll find quite a bit of conflicting information about using this type of balancing machine. A downside of the static balancing method is it can still result in the wheels having dynamic imbalance. Dynamic Imbalance occurs when there is unequal weight on one or both sides of the wheel assembly’s lateral center line, which then results in side-to-side wobble or wheel shimmy. At the same time, this was the method used for many years before the better dynamic balancing machines were available. I was able to find a static balancing machine on sale for $60 at HarborFreight (currently it is $69). It was also necessary to purchase a package of wheel weights, but they were on sale for only $4 which included 12 strips. For an investment of less than $75, balancing a set of rims would almost cover this expense. Why not give it a try?
That weekend I was in need of having a set of tires mounted and balanced. I brought the tires to the shop, had them mounted and walked away with a bill of $40. Not bad considering how much of a struggle it can be to mount race tires. Now for the balancing act. Admittedly I was a bit nervous about balancing them, but the process turned out to be fairly simple and quick to complete. I informed Kai about my purchasing this machine and he wasn’t quite enthusiastic with my saying “this method should work.” Instead of getting “Dave, that’s a brilliant idea!” I quickly received a reply message of “dude, you know our track record with these types of things, right?”
Well don’t worry Kai, we’ll first give this a try with your Civic rims and tires. <grin>
Depending on how lucky I get, it typically takes less than 5 minutes to balance each rim. Like most things, the more experience one gets the faster this process becomes.
I’ve now used the static balancing machine successfully to balance multiple sets of race tires / rims. When out on the track I have not noticed any imbalance in the wheels. The first time out I was almost expecting the steering wheel to shake. Is there any imbalance? Quite possibly but even when inspecting the tires after a session, there’s often a fair amount of rubber stuck to the wheel anyway which also causes it to be out of perfect balance. If I were racing a ultra fast formula car, I doubt that I’d attempt to use this method but it works great for the majority of cars we race. It was absolutely a worthwhile investment for me.
What are your thoughts? Will you give one of these a try? Or will you still prefer to have a shop mount and balance your race tires and rims?
Note: I still will have a tire shop use a dynamic balancing machine for my street cars especially because they require balancing so infrequently.
0003Related materials
Tire inflation with nitrogen and 7 more wirings at the tire fitting
The tire manufacturer's instructions say to change shoes when the temperature drops below +7°C. In my opinion, it's too early. There are still a lot of cars with summer tires on the roads around. And at this temperature, the braking distance on studded tires may be even longer.
I advise you to change the wheels to winter ones when the temperature drops below zero at night. That's when it really is time, because in the morning an icy area may come across on the roads. At the same time, out of habit, it will seem very slippery.
Precisely in order to do it at the most correct and convenient time. The vagaries of the weather are unpredictable. Residents of the Rostov region, for example, say that sometimes during the winter period they rearrange the wheels from winter to summer and back several times.
Dismantling wheels (that is, dismantling a tire from a rim) at home is a difficult task that requires appropriate skills and knowledge. We will describe a simpler job that, in theory, any average motorist who does not have special tools and experience in tire fitting should be able to handle.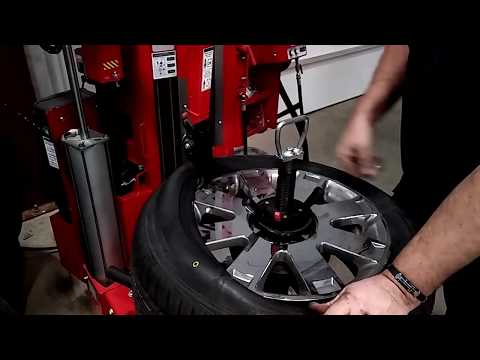 And therefore we mean that you have a complete set of serviceable winter tires mounted on disks. You remember that in the spring they did not lose pressure, there are no cuts on them, and a couple of self-tapping screws do not stick out of the tread in addition to the spikes. And, most importantly, the tread height is more than 4 mm. These are the modern requirements for winter tires. If at least one of the conditions is violated, then it is better to solve the problem before the onset of the hot tire season.
Related materials
If I change wheels, do I need to balance them every season?
There are car owners who meticulously balance tires before each season. In my opinion, this is not justified by anything. I recommend installing the wheels on the car, then drive at different speeds, but not higher than your usual ones. If the imbalance (it is manifested by vibrations on the steering wheel or seat) is not felt, then balancing can be postponed until future seasons. In principle, winter tires can be balanced before being stored for storage: after all, the spring period for changing wheels in tire shops is more extended in time compared to autumn, and therefore the queues are noticeably shorter.
So we take the wheels out of storage. For one, this is the corner of the garage, for the other, a balcony, for the third, the warehouse of the nearest car service that provides a wheel storage service. Depending on storage conditions, tires may have different temperatures. Wheels removed from a warm room, having cooled down by 20 ° C, will lose about 0.2 bar of pressure, and gradually, as they cool down. Well, the cold ones have nothing to lose! Therefore, cold ones can be immediately pumped up to the nominal pressure, well, maybe 0.1–0.2 bar more, given that it will only get colder further. And warm tires must either be inflated with a large margin immediately, or set the pressure at the end of all work, when the air in them cools down.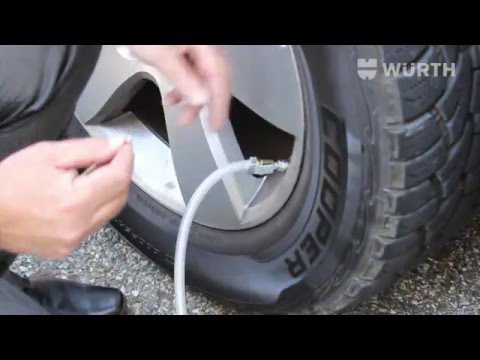
If you use a standard jack, it is better to place a special stand under the car for insurance. Well, or at least place the spare wheel so that when it falls, the threshold lies on the rim, and not on the tire. Please note that this will most likely damage the disc. Therefore, it is better to use an old unnecessary wheel.
If you use a regular jack, it is better to place a special stand under the car for insurance. Well, or at least place the spare wheel so that when it falls, the threshold rests on the rim, and not on the tire. Please note that this will most likely damage the disc. Therefore, it is better to use an old unnecessary wheel.
Related materials
Which jack is better? — expert examination of the ZR
We find a flat area with a hard surface. If you change wheels yourself twice a year, then I strongly advise you to get a convenient jack. At least small and inexpensive, but rolling. It is noticeably more reliable and durable than the regular one that was equipped with your car. It is advisable to use a balloon wrench with a cruciform or with an extended handle - it is more convenient than the standard one attached to the car.
Prepare a wheel stop - yes, at least half a brick. Inspect the secret key for damaged code elements and clean the secret nuts/bolts on all wheels.
If the winter set of wheels has different disc characteristics, remember if spacers are needed between the disc and the hub lug - they should be prepared in advance.
The wheel jack is based on a hydraulic cylinder. Raises quickly, and lowers even faster.
The wheel jack is based on a hydraulic cylinder. Raises quickly, and lowers even faster.
 The arrow on the sidewall will help us. For installation on the front axle, we try to choose less worn tires.
  We clean the mating surface of the hub from dirt with a metal brush and apply a thin layer of lubricant. Better special, copper.
 Just in case, after the first ride, check the tightness of the wheel fasteners, and the next morning, check the tire pressure.
Our new video
Test of the most affordable (well, almost) family crossover
Test of the new Chinese crossover Skywell ET5
Nissan on the outside, "Chinese" inside - test of the new Russian car
Like this post? Subscribe and you will always be in the know!
Driving on Yandex.Zen
News smi2.ru
DIY
| Author: Press service of the company "Dalnoboy" Publication date: 08/08/2019 Category: Accessories |
First of all, pay attention to the marking and the inscription ROTATION with an arrow, which indicates the direction of rotation of the tire along with the tread pattern. If you are replacing an old tire with a new one, the rational solution is to replace the air valve as well. Even if the air vent works and looks normal, there is still a risk of it breaking. Valves are considered consumable items and require periodic replacement. All valves, as well as discs, comply with ETRTO standards, which must be taken into account when choosing and installing.
Installing a tire on a rim
Absolutely all tires and rims, despite the high-precision equipment in their production, have a slight heterogeneity in themselves, in fact, these are grams, outwardly invisible. If you immediately mount the tire on the disk, it will inevitably vibrate. Therefore, in order to reduce the imbalance of the tire / disk pair even before mounting the tire. To do this, manufacturers indicate the easiest place on the tire to facilitate the work of the tire fitter. The red dot on the sidewall of the tire indicates the location of the largest dynamic radius. This point is not present on all tires, but only on those supplied for original equipment.
On the outer side of the rim, you can also sometimes see a red dot or depression, which indicates the location of the smallest dynamic radius. When installing tires in the original configuration on the conveyor, connect the red dot on the tire with the red dot or recess on the rim. Thus, the mutual dynamic characteristics of the tire/disk pair are corrected.
You won't need the red dot for normal tire fitting, but the yellow one is worth paying attention to. And that's why. Look for a yellow or white dot on the tire and check if it is located near the valve. If yes, then your tires are mounted correctly, if not, the tire fitting is done with violations. The manufacturer indicates the lightest spot on the tire with a yellow or white dot.
But the heaviest place on the disk is where the air valve is located. Thus, due to this simple procedure - by connecting the lightest and heaviest places in the wheel at the installation stage - it is possible and necessary to reduce the imbalance. In the future, this will simplify the process of balancing the wheel assembly. Next, you should pay attention to the "landing" of the tire on the rim of the rim. With a poor-quality "landing", the eccentricity of the wheel assembly may occur.
This means that the axis of rotation of the tire differs from the axis of rotation of the rim by more than the permitted 2 mm. Which leads to imbalance, uneven tire wear and a negative impact on the chassis. Static imbalance occurs when the wheel's center of gravity shifts and the wheel vibrates up and down. With dynamic imbalance, the wheel "wags" from side to side. This problem is solved by balancing the tire / disk pair on the stand.
Installing the wheel on the hub
During operation, the elements of the hub and disc wear out and over time, when installing the wheel, play may occur. The output should be special centering bushings in order to accurately install the wheel. When a wheel is mounted on a car, it works in conjunction with a hub, brake disc, or drum. These details may have their own imbalances. This problem is solved with the help of finish-balancing. The essence of the final balancing is that the mounted wheel is mounted on the hub, fixed and then the entire wheel assembly is balanced.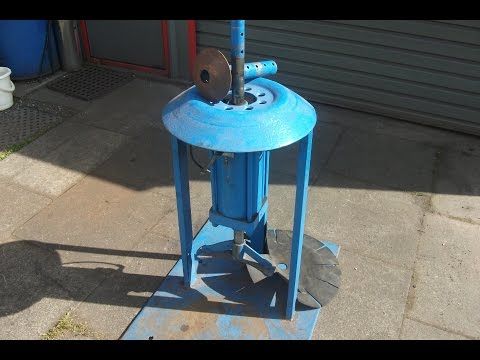
Wheel fasteners on the hub
Not everyone knows, but the tightening force of the wheel nuts is also regulated and depends on the size of the thread, studs and the shape of the nuts. In order to tighten the nuts with a standard force, specialists in Dalnoboy use a torque wrench. If the nuts are tightened "by eye" there is every chance of getting one of the following problems:
• weakly tightened nuts - this is fraught with unscrewing the nuts while driving a loaded car;
• When the nuts are overtightened, the threads are damaged or the disc flange cracks. In addition, the nuts must exactly match the pattern of centering and fastening on the hub. Tightening the nuts is the final step in tire fitting. As you can see, there are many nuances and the risk of losing a tire resource begins even at the time the tires are installed. Most transport business owners are serious about choosing and buying tires. While much less attention is paid to tire maintenance, although the durability of tires depends on professional and timely care.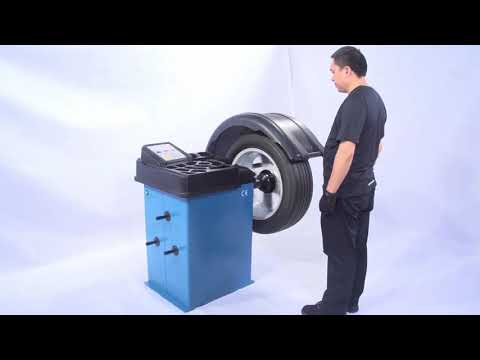 Trust your tires to the professionals and keep your tires, money and peace of mind.
The tire manufacturer's instructions say to change shoes when the temperature drops below +7°C. In my opinion, it's too early. There are still a lot of cars on the roads with summer tires around. And at this temperature, the braking distance on your studded tires may be even longer.
I advise you to change the wheels to winter ones when the temperature drops below zero at night. That's when it really is time, because in the morning an icy area can be caught on the roads. At the same time, out of habit, it will seem very slippery.
Precisely then, to do it at the most correct and convenient time. The vagaries of the weather are unpredictable. Residents of the Rostov region, for example, say that sometimes during the winter period they rearrange the wheels from winter to summer and back several times.
Dismantling wheels (that is, removing a tire from a rim) at home is not an easy task that requires appropriate skills and knowledge. We will describe a simpler job that, in theory, any average motorist who does not have special tools and experience in tire fitting should be able to handle. Therefore, we assume that you have a complete set of serviceable winter tires mounted on rims. You remember that in the spring they did not lose pressure, there are no cuts on them, and a couple of self-tapping screws do not stick out of the tread in addition to the spikes. And, most importantly, the tread height is more than 4 mm. These are the modern requirements for winter tires. If at least one of the conditions is violated, then it is better to solve the problem before the onset of the hot tire season.
There are car owners who meticulously balance tires before each season. In my opinion, this is not justified. I recommend installing the wheels on the car, then drive at different speeds, but not higher than your usual ones. If the imbalance (it is manifested by vibrations on the steering wheel or seat) is not felt, then the balancing can be postponed until future seasons. In principle, it is possible to balance winter tires before storage: after all, the spring period for changing wheels in tire shops is more extended in time compared to autumn, and therefore there are noticeably fewer queues.
So we take the wheels out of storage. For one, this is the corner of the garage, for the other, a balcony, for the third, the warehouse of the nearest car service that provides wheel storage. Tires may have different temperatures depending on storage conditions. Wheels removed from a warm room, having cooled down by 20 ° C, will lose about 0.2 bar of pressure, and gradually, as they cool down. Well, the cold ones have nothing to lose! Therefore, cold ones can be immediately pumped up to the nominal pressure, well, maybe 0.1–0.2 bar more, given that it will only get colder further.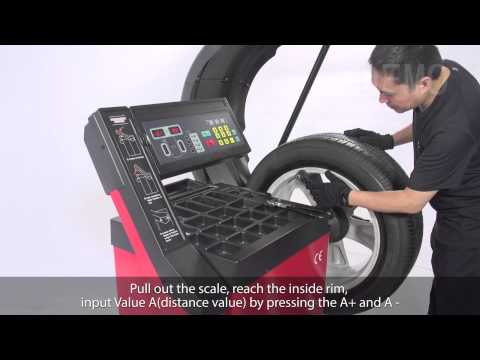 And warm tires must either be inflated with a large margin immediately, or set the pressure at the end of all work, when the air in them cools down.
We find a flat area with a hard surface. If you change the wheels yourself twice a year, then I strongly advise you to get a convenient jack. At least small and inexpensive, but rolling. It is significantly more reliable and durable than the regular one that your car was equipped with. It is advisable to use a balloon wrench with a cruciform or with an elongated handle - it is more convenient than the standard one supplied with the car.
Prepare a wheel stop - yes, at least half a brick. Inspect the secret key for damaged code elements and clean the secret nuts/bolts on all wheels.
If the winter set of wheels has different rim characteristics, remember if spacers are needed between the rim and the hub lug - they should be prepared in advance.
 Two right wheels and two left. The arrow on the sidewall will help us. For installation on the front axle, we try to choose less worn tires.
  We clean the mating surface of the hub from dirt with a metal brush and apply a thin layer of lubricant. Better special, copper.
 Just in case, after the first ride, check the tightness of the wheel fasteners, and the next morning check the tire pressure.
Did you like the note? Subscribe and stay up to date!
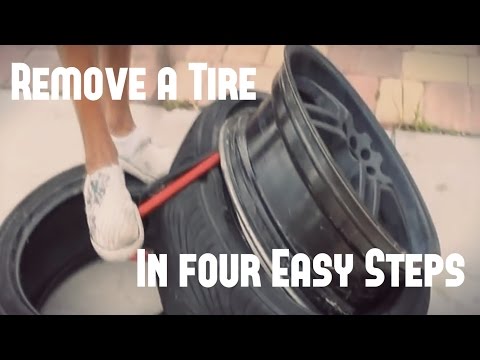
Car enthusiasts often change tires - either from summer to winter, then from winter to summer, then when buying new tires, then in case of damage and punctures. Tire replacement is usually entrusted to service stations. But, in order to save money or for other reasons, motorists can master this procedure on their own. To replace rubber with your own hands, you need a wheel wrench, a pair of mounting blades, a jack and a car pump. However, without knowing some “secrets”, it is difficult to replace a tire on your own. We'll talk about the tricks of replacing a tire now.
First, remove the old tire from the rim. To do this, raise the car with a jack, unscrew the fixing bolts with a wheelbrace and remove the wheel from the car. Lay the wheel on the ground with the valve up, remove the nipple from the valve and let the air out of the tube or tire (if the tire is tubeless). After that, “drown” the valve inside the tire and stand with your feet on the wheel so that the sidewalls of the tire are wrung out from the rim. Sometimes the tire "sticks" to the rim and you have to make an effort. After you managed to wring out the sidewalls, insert the mounting spatula into the gap between the rim and the sidewall of the tire. Working with two mounting blades, bring the sidewall of the tire out of the wheel rim, and pull out the chamber into the resulting gap. In the same way, bring the other sidewall of the tire through the same rim, and remove it from the disk. Be careful not to damage the disc. Particular care must be taken with a fragile alloy wheel.
Before installing a new tire on a rim, check its condition - carefully inspect it for defects and damage, make sure that the tire and rim fit each other in size. Also check the condition of the disk, for mechanical damage, the absence of dirt and rust, wear of the rim flanges.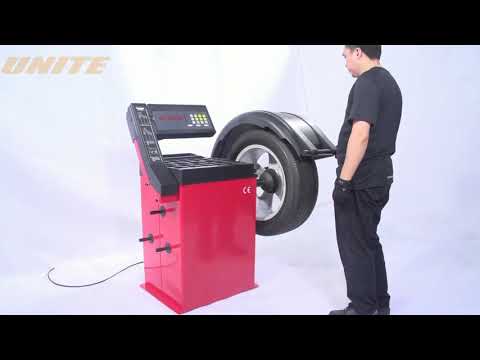 Remove the old balance weights and the old valve if the tire is tubeless.
When fitting new tyres, remember to take into account the color markings and indications on the tyre. Namely, the recommended direction of rotation, which is usually indicated by an arrow on the sidewall of the tire. For an easier and more gentle installation of the tire, you need to apply a special lubricant or soap solution to its bead and bead heel. Don't over-lubricate or the tire will slip on the rim!
Mounting the tire on the rim is carried out in the reverse order with respect to dismantling, that is, first one sidewall is put on the rim of the rim and, if it is a tire with a tube, then the tube is inserted, while its valve must enter the hole in the rim. After that, the second sidewall of the tire is put on.
If the tire is tubeless, then the task is more complicated. Unfortunately, it will not be possible to inflate it with a conventional hand or foot pump or even a car compressor until the tire beads “sit” tightly on the rim, since the air will simply go out into the gap between the tire and the rim of the disk. But there is a way out!
To solve the problem, inflate any car wheel to 3.5 - 4 atm., remove the hose from the pump, put one end of this hose (the one without a fitting) directly on the valve of a freshly mounted tubeless tire, after removing the nipple from the valve , and put the other end of the hose, equipped with a fitting, on the “pumped” tire. At the moment of putting on the fitting, a large portion of air will enter the empty tubeless tire and "put it in place" on the disk. The beads of the tire will sit firmly on the rim, and the tire can now be inflated in the usual way. At service stations, special compressors with volumetric receivers are used to inflate tubeless tires, but, as you can see, you can solve this problem yourself, at home.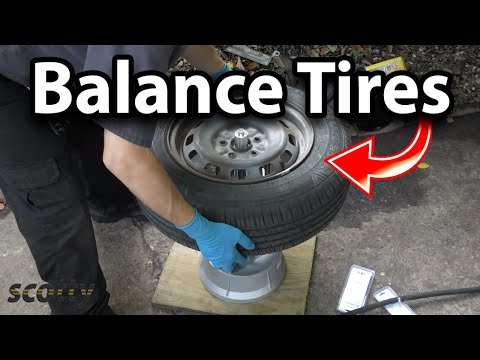
Do not forget that after installing a new tire, the wheel must be re-balanced.
Mounting and dismantling of tires is today cleverly carried out in a tire shop. And, some 30 years ago, the drivers themselves were engaged in repairing the wheels. For the “experienced”, disassembling a tubeless wheel is not difficult. But what about those who have no repair experience, and in a traffic situation there is no other way out? Such drivers should study the theory of self-breakdown. The acquired knowledge can be put into practice.
Dismantling of wheels is the procedure for removing a tire from a rim. To disassemble the wheel, it may be necessary to replace the rubber with a new one, or in the case of an off-season “change of shoes”. And sometimes, you need to disassemble the wheel to repair a tire or disc. The most common are two methods of dismantling.
One of the oldest methods still used by truck drivers.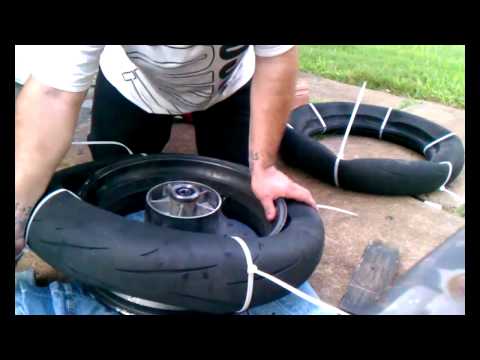 During the operation of the wheels, the tire bead is "welded" to the seat on the disk. This phenomenon is especially common with tubeless tires. In this case, it is possible to separate two elements that have become attached to each other by hitting a wedge with a sledgehammer. A wedge is a piece of steel thick corner with machined ends so as not to tear the rubber. After a series of blows, the tire and disc are separated.
In this case weights must be used. The method is more humane, since it harms the rubber and the disk less (it is not always possible to accurately hit the corner with a sledgehammer). For weight, it is possible to use the mass of the car or your own body. In the second case, in order to increase the pressure, you will have to use a lever structure (pipe or board).
Tires with tubes stick less often (except for truck wheels). Therefore, it is enough to bleed the remaining air, clean the wheel of dirt and start dismantling. Tubeless tires stick a lot. Therefore, a few hours before disassembly, it is recommended to apply a decoking spray, for example, WD-40, to the stuck place. It is also possible to pour a little vinegar on the connection, as professional drivers used to do in the old days.
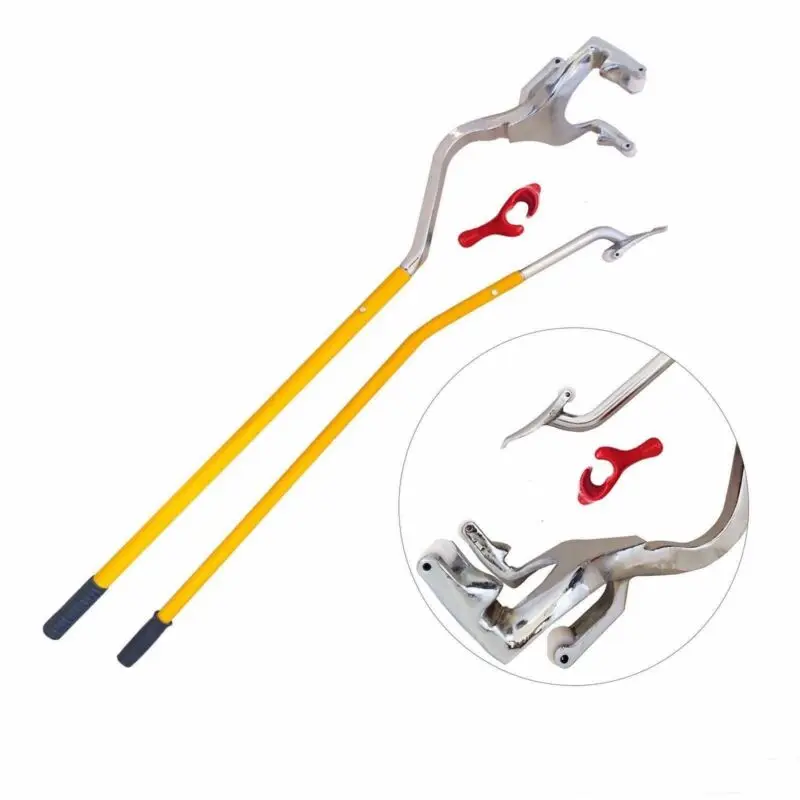
To disassemble the wheels at home, you need to prepare the tools. First of all, these are mounting blades 2-3 pieces. For the shock method, you will need a sledgehammer and 1-2 corners. In the case of shockless technology using the weight of the car, you will need: a jack and pieces of boards. Consider the case on the road. The steps are as follows:
 We fix the position with the foot. With the second spatula we pry the tire bead and take out the edge of the rubber from the disk, and so on;
 Before disassembly, it is recommended to inspect the mounts for chips and burrs. Sharp edges can damage the disc and tire. Never use crowbars or nail pullers. Their sharp edges are guaranteed to tear the tire bead.
Another option is how to disassemble a tubeless wheel yourself using a rack and pinion jack. We tie the edge of the lifting platform to the disk with a wire or cable, and rest its heel against the tire. We raise the disk. In the process of work, we gradually move the jack along the perimeter of the tire. However, this option is dangerous. If the connection breaks, the structure will shatter.
Assembling a tubeless tire is easy.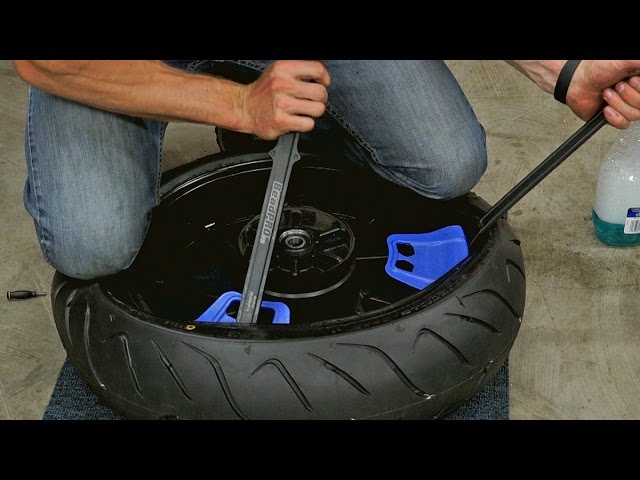 A few movements with the shoulder blades, and the tire is in place. But, how to pump up such a cylinder, because the tire bead does not have an airtight connection? This will require high air pressure, which will quickly expand the rubber. The compressor will supply the necessary pressure. But in the field there is no compressor. There is an exit.
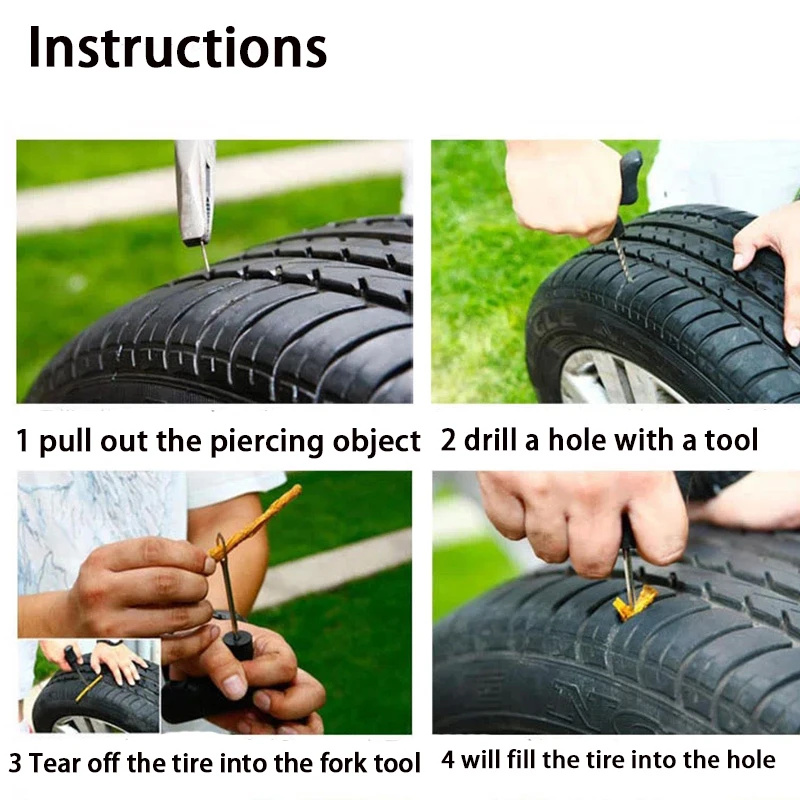
It is possible to apply two types of pumping. The first is the use of flammable liquids. Pour some gasoline inside the wheel, step back and set it on fire. Hot air will instantly expand the rubber. The second option is a radial tire tie. Wind the towing cable around the protector and twist it with a mount. The tire will expand. Its edges will press against the disk. After that, you can inflate the tire with a foot / hand pump and remove the bandage.
Before you try to disassemble the wheel yourself, you should take care of the tool. Keep a couple of mounting spatulas in stock, they can come in handy on the road. The rest: a jack, a pump and a tow rope should always be in the trunk. As can be seen from the material of the article, the disassembly operation can be carried out with an improvised tool.
Before mounting a tubeless tire, the wheel rim must be inspected and checked. It is recommended to check the rim profile with a special template.
The rim must be free of dents, dirt, rust, scratches, weld beading. The rim must be carefully painted. Particularly clean and even should be the shelves and flanges of the rim, mating with the tire beads.
Rust and irregularities on the rim are smoothed out with sandpaper or a file. Damaged paint must be restored by applying it in an even thin layer, without sagging.
Then install a valve on the rim, the hole for which must be clean and free of burrs. Cap 13, nut 10, metal washer 9 and rubber washer 8 are removed from the valve and the valve with rubber sleeve 7 is inserted from the inside of the rim into the hole. Then washers 8 and 9 are put on the valve and nut 10 is tightened, which ensures tight installation of the valve in the rim. Then the cap is screwed on.
Fig. Wheel with tubeless tyre:
1 — wheel rim; 2 - valve; 3 - sealing layer of rubber; 4 - wheel rim; 5 - sealing layer; 6 - balancing weight; 7 - sealing sleeve; 6 - sealing washer; 9- valve washer; 10 - nut; 11 - valve body; 12 - spool; 13 - key cap
The tire beads, flanges and flanges must be cleaned with warm soapy water before mounting the tire. The tire is mounted with extreme care. Even slight damage to the special rubber layer on the seating surface must not be allowed.
It is very important that clean and smooth mounting blades are used, with well-rounded edges. During installation, it is necessary to moisten the blades with clean water. It is necessary to refuel the tire beads onto the rim, starting from the side opposite to the valve, and then gradually approach it from both sides. At the same time, the blades are moved over short distances, no more than 100-150 mm.
A tubeless tire is difficult to inflate at first, as it is necessary to ensure that the bead of the tire fits snugly on the flanges and rim flanges and that the tire retains the inflated air.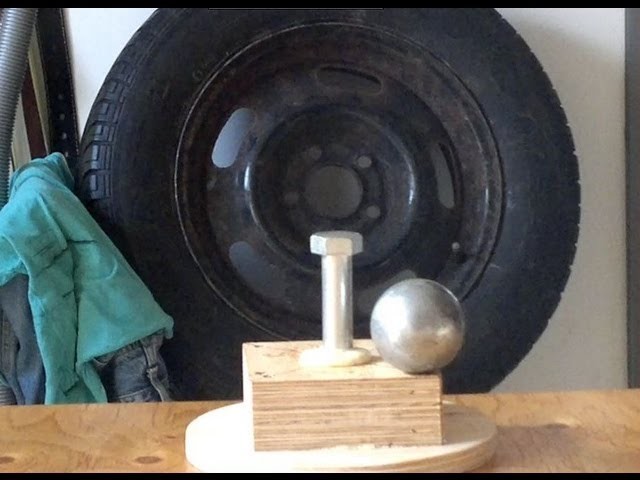 Then, when the tire is under some pressure, its sides will press against the rim themselves and provide tightness.
Before inflating, raise the wheel and, while turning it, hit the tread on the ground several times so that the tire beads sit on the rim flanges. Then the spool is unscrewed from the valve and the tire is inflated with a compressor. It is difficult to inflate a tubeless tire with a hand pump, since it cannot immediately supply the necessary amount of air that would fill the tire quickly enough and tightly press its beads to the rim flanges.
Inflate the tire with a compressor to a pressure of about 1.5 kg / cm2, then remove the hose and quickly screw in the valve so as not to release much air from the tire. After that, the tire is inflated with a hand pump to a pressure of 2-2.5 kg / cm3 in order to firmly seat it on the rim. If the tire beads are not yet firmly seated on the rim shelves, it is necessary, while turning the wheel, to hit it several times with the tread on the ground. After that, you should check the tightness of the tire, that is, let the wheel go into the water or, laying it flat on the ground, pour a soapy solution between the tire bead and the rim. After checking the tightness, you need to bring the tire pressure to normal 1.7 kg / cm2.
If no compressor is available, the tubeless tire can be inflated with a hand pump using the following procedure. To do this, they tie the wheel with the tire with a rope along the middle part of the tread and tighten the rope, twisting it with a stick. Due to the compression of the harmful part of the tire, its beads diverge to the sides and are pressed against the rim flanges. Instead of a rope, you can use a special steel tie-down band. If enough air has been inflated to pre-compact the tire, the rope or tape should be removed.
A tubeless tire sticks to the seat of the rim and is therefore more difficult to remove than a tube tire when removed. For this purpose, a special shoe is attached to the driver's tool kit.