Don’t let losing or forgetting your ATV key stop you from enjoying your quad. In this article, I’ll show you a few ways to start your ATV or UTV without the key. You can do any of these methods with basic hand tools found in most garages.
Your ignition switch is simply a break in a circuit telling your electrical box when it’s ok to start or not. When there’s no key in the ignition, no power can be sent to the rest of the needed components to start the engine. There are some pretty simple ways to get around this though.
Of course the easiest way is if your machine has a pull start or kick starter on it. A lot of the newer quads being made don’t have this functionality anymore unfortunately. If you do have this option, simply unhook the ignition switch from the cdi or electrical box. That way the engine will start without needing a key inserted, then start the engine.
This method may work without a pull start or kick start if you can push your machine to a good pace and pop it into gear. Your other options are:
This is my preferred method to starting an ATV without the key. Most ignition switches will only have two wires going into it. On wire is sending power in, and the other wire sends power to the electrical box if the key is inserted. Telling the machine that it’s ok to start.
Simply remove the ignition switch from the equation. You can disassemble the switch or just cut the two wires leading to it. Be sure to leave enough slack in the wire just in case you want replace the ignition switch later on.
Now connect the two wires and your electric start should work like always. Remember to connect the wires on the side leading to the engine not the side leading to the ignition.
You have to remember to disconnect the two wires when you’re done riding or you’ll drain the battery dead.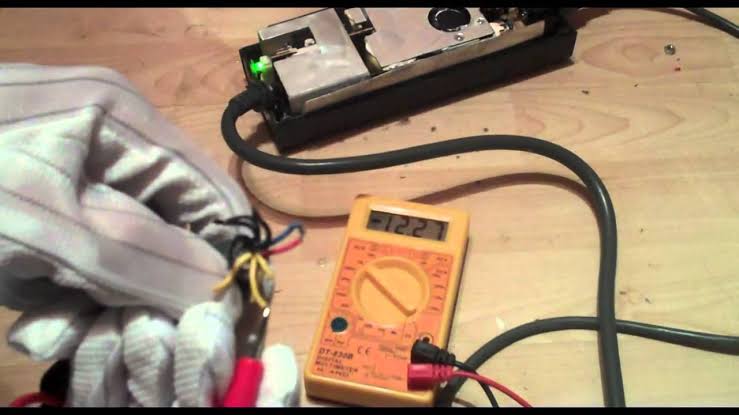 I would recommend you put a simple switch here in place of the ignition, a simple on/off switch will work perfect.
Some of the newer quads have more than two wires coming out of the ignition switch, not to worry. A lot of times there will also be a ground wire or something like that. The two wires you should focus on are red and black. Cut those two wires and tape them together. Make sure you tape together the ends of the wire leading to the engine not to the ignition.
You may also see a black with white stripe and green wire. These two wires are shorted together when the key is in the off position. You will need to open that short by cutting the black with white stripe wire and tapping off the end.
Once the black with white stripe is cut and taped, and the red and black wires and spliced together and taped. You should have power to your quad as if the key was turned on. You can use your normal electric start and everything the way it is.
Remember to disconnect the black and red wires when you’re done to avoid killing the battery. You could also tape the black with white stripe wire back together to prevent anyone from easily starting the quad.
This doesn’t work on all ATVs, only machines with an electric start option only. Your solenoid should be near your battery and wiring harness. On some quads you have to remove a side panel to access it.
Your solenoid will have two main wires coming out of it and possibly some other smaller ones, we only care about the two big wires. You need to lay a wrench or something metal across the two connectors of the main wires. Then, you should be able to start the quad.
I don’t use this method myself because you have to be real careful the wrench or piece of metal is not touching anything else that could short it out. If you accidentally touch the frame or something when doing this, you could cause damage to your electrical parts of the engine.
Desperate times call for desperate measures, and that’s what this method is. This trick is mostly used by thieves, so if you’re driving around the trails with a screw driver sticking out of the ignition and get stopped by trail enforcement, be ready to get asked some questions.
Basically you just hammer a screwdriver into the ignition and turn it on as if it were the key. The screwdriver will brake the pins in the lock allowing you to turn the ignition on.
I don’t recommend this method because you could damage the ignition and not get the quad to start anyway. And even if you are successful, you’re now riding around with a screwdriver sticking out.
This is obviously the best method in the list. Of course if you forgot your key and you’re already way out on the trail, then there’s no way you can order a part and do the replacement. This is more for someone who lost their key, or broke their ignition trying the screwdriver method.
Here’s a decent Replacement Ignition Switch found on Amazon to help get your search started.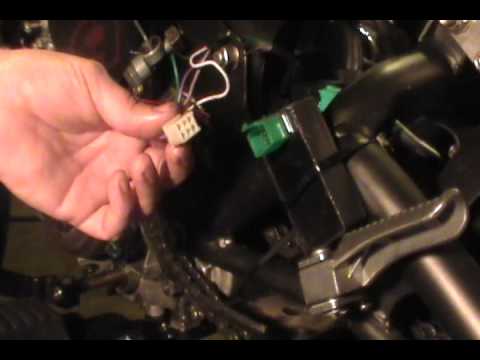 If you can find a replacement from the manufacturer for your specific machine, that would be the best route, but probably a lot more expensive.
One thing I want to mention is that it’s always best practice to tape up any wires you cut and exposed. You may have gotten the hotwire job done correctly, but if any of those wires hit the frame and short out you could have bigger problems.
Leave enough slack in the wires to work on them again later on. Try to avoid cutting the wires to the ignition real close to the ignition itself, or somewhere that makes it hard to get to the wires. You may want to work on it later on, like putting in a new ignition switch or on/off switch.
Don’t tell everyone how easy you hot wired your quad and how you did it. Maybe you’ll be safe to do this, but I lean a little more to the cautious side when it comes to my machines.
Sharing is caring!
So you have driven five hours to ride a great ATV trail through some beautiful mountains, you get the campsite set up and you go to unload the ATV and realize you left the key at home. The ten-hour round trip drive is off the table, so you have two choices: You can spend the weekend camping with the ATV on the trailer, or you can find a way to start the ATV without the key.
Here is what you need to know. As a disclaimer, don’t go stealing someone’s ATV using this advice. Only use it on an ATV you legally own for which you do not have a key.
How do you start an ATV without a key? Here are 7 ways you can try.
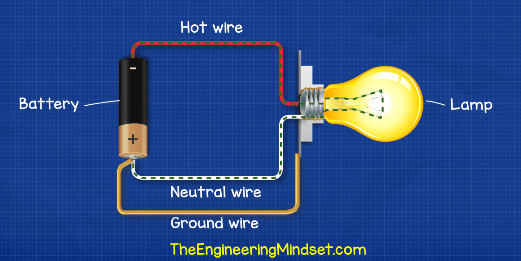
Your ATV key is not some magic trigger that makes everything in the engine work. Turning the key in the ignition opens and closes a circuit that allows a spark to ignite the engine. Once that spark ignites the engine, assuming your engine is good, then you are good to go, with or without a key.
The real dilemma in the situation where you don’t have a key to your ATV us whether you want a permanent solution or something just for the weekend. The other issue is how much you are willing to risk damage to the ATV and how much you are willing to spend.
I am going to start with the less ideal methods that should probably only be used when you really need it or just don’t care because it is an old machine or because you are going to get an new ignition anyway.
This one will not work on all ATVs, but if your ATV has an alternative start method that permits you to do a pull or kick start, this is going to be your best option by far.
Hopefully you have your owner’s manual or can locate an owner’s manual online so you can look at the exact directions for your ATV model, but here are the basic steps.
Okay, hot wiring an ATV is going to depend on the type of ATV you own. Basically, the goal behind it is to change the wires so they bypass the ignition switch, leaving the circuit open so that a spark can start the ATV’s engine.
I am going to list the different hot wiring guides I have found so you can hopefully determine which one will work best for your ATV.

This option is probably the best and easiest of the hot wiring methods if is available to you. Just remember to leave some extra wire from the ignition so you can rewire it if you find or replace your key.
 This should cause your instrument panel to light up.
This method is not going to work on most ATVs, but you may get lucky. It will only work on certain ATVs that have an electric starter without an alternative start method.
You might as well give it a try and see if you are able to do it before moving on to the more advanced hot wiring discussed above.
First, you need to locate the ATV’s starter relay or solenoid. It is usually located on the outside of the plastic right next to or under the battery and near the wiring harness.
A starter solenoid is a switch that controls a high amp load with a low amp. Starter solenoids come in all different shapes and sizes, but normally they have a round or square body with two larger and two smaller wires. The larger wires are for the high amp load and the smaller wires are for the low amp switch.
Your ATV’s solenoid may only have one smaller wire if the ground is coming from the frame where it is mounted. It may be sitting in a plastic or rubber cover, but it’s not uncommon for it to be on the outside.
Once you have located the starter solenoid, you should see two big main wires. Hopefully, it will be set up so you can jump those two main wires using a wrench. If you can jump the wires, you should be able to start the ATV.
This method requires you to take apart the ignition so I would only use it if you are planning to get a new ignition to install or if you are comfortable enough with getting the ignition back together if you plan on it.
The point of this method is to basically line up the ignition the same way turning your key would. Follow these 5 steps to give it a try.
This is the first method I saw used to start a vehicle when I was 13 or 14. My friend wanted to take our his parent’s spare vehicle, but didn’t have a key so he took a screwdriver, jammed it into the ignition, turned it and the van started right up. While this method works, it is not ideal.
Once you have jammed a screwdriver into your ignition, there is no point in a key because anything you jam in there will turn the ignition. There is also a good chance of damaging your ATV’s ignition to the point where you need to buy a new one anyway.
I have also seen people use one blade of a pair of scissors the same way. I am not sure if one is any better for your ignition, but I would have to assume there is not much difference.
This is definitely your best option if it is available. If you are in the situation we described above where you are far from home and simply left your key behind, you may be able to buy a new key from a local dealer.
Assuming you can locate a dealer near you that can replace keys by the code, get in contact with someone back home that can access your ATV key.
There should be a code stamped onto the key. If you tell the local dealer that code, they should be able to make you a new one. Another alternative that may work is telling the dealer your ATV VIN and model. If they trust you didn’t steal the ATV, they may make you a new key.
If you don’t have the code stamped on your key, your best option is finding a lock smith that can hopefully cut you a new key. Note some locksmiths also have key codes so that may be an alternative if you can’t fine a local dealer that can make you a key from the code.
If you can’t get a locksmith to your ATV, you can hopefully remove the ignition from your ATV and get a key made.
If you aren’t in the situation where you are camping and need immediate access to the ATV, getting a new ignition switch is a good alternative, especially if you can’t get a new key made.
A new ignition switch is surprisingly inexpensive and should be easy to install. If you are not comfortable doing this yourself, you can always take it to a dealer to have it done for you.
 If you lose your key, that won’t help you much, but you could write that code down now and store it somewhere safe so you have it in the event you lose a key in the future. I recommend sending it to yourself in an email and storing it on your phone so you can access it wherever you may be with your ATV and no key.
 How to adjust the carburetor on an ATV? What to pay attention to? What are the signs of misuse of the device? About this today in our article. Using the proposed instructions, you will be able to set up the carburetor step by step without the help of specialists.
For stable operation of the ATV, it is necessary that the engine receives the optimal amount of combustible mixture corresponding to its rev range. Otherwise, the following problems may occur:
What needs to be applied in this case:
Important! Carry out tuning only when the carburetor is cleaned outside and inside, as well as when the engine is warmed up to operating temperature.
 2 so that the power unit reaches maximum speed - approximately 2-2.5 turns.
 Note. The location of the bolts on each carburetor model may vary, so read the instructions that came with your machine.
1. Start the ATV and test ride. Wait until the engine has completely cooled down.
2. Check the condition of the spark plug. To do this, unscrew the cap and inspect the candle.
What to look for:
3. Unscrew the needle cover at the top of the carburetor. Pull the needle. This is the main element that regulates the supply of fuel to the combustion chamber, since the needle is connected to the gas trigger. When the trigger is pressed, the needle rises, slightly opening the hole for supplying the fuel mixture. This directly affects the growth of power and speed of the ATV.
4. Remove the cable, then press the needle to pull it out. The needle has 5 grooves and a retaining ring. By default, it is set to medium. The lower the retaining ring is located, the higher the needle is raised, which means that a lot of gasoline and little air is supplied. Accordingly, the higher the ring - the less gasoline and more air.
5. Reposition the circlip in the desired direction to optimize carburetor performance. Insert the needle into place.
6. Start the engine and press the throttle trigger. With proper adjustment, the engine should not stall from a sharp pressure.
And remember, you should resort to adjusting the needle only as a last resort, when adjusting the quality and quantity screw does not bring results.
The performance of a four-wheeler depends on the correct level of gasoline in the carburetor. An excessive amount will flood the candles, spill onto the ground and lead to unnecessary expenses. If there is too little fuel, the engine simply will not start.
How to optimize the fuel supply
Buying a children's ATV or its adult counterpart is not just about being a rider. This technique requires special attention. As a rule, the owners of this motorcycle often do not pay enough attention to charging the battery, which can cause it to fail almost every season. Remember, if you charge your ATV battery correctly, it will last you many times longer.
To avoid premature battery failure and loss of battery capacity, follow these guidelines:
Always follow the connection diagram when installing the battery in the ATV. You need to start by connecting the positive terminal. Be careful not to reverse the polarity as this can cause both the fuse to blow and the battery to explode.
If the vehicle battery suddenly stops charging, there may be several reasons for this:
The first signs of regulator relay failure are when the ATV battery starts to drain too quickly. Diagnosis of such a breakdown is carried out by measuring the resistance with a voltmeter at the battery terminals. Repairing any electrical equipment of an ATV is a rather complicated process that a true professional should perform.
Often the best solution when a battery or regulator fails is to replace it with a new one. It is much easier to prevent this kind of breakdown than to fix it later. That is why it is necessary to charge the battery of motor vehicles in strict accordance with the requirements of the manufacturer.
There are two ways to charge the child's ATV battery with the charger. The easiest of them is to connect the charger to the appropriate connector on the motorcycle. True, such a nest is not available on all models of ATVs. If there is no such connector, then the battery should be connected directly to the charger. The battery is charged as follows:
Lithium ATV batteries usually have a board that monitors the battery level. But even in this case, it is strongly not recommended to charge the device longer than necessary.
Each ATV gel battery manufacturer provides detailed charging instructions. It is very important to choose the right charger with the ability to adjust the amperage in order to avoid overcharging the battery. On sale you can find specialized chargers for ATV gel batteries.
It is necessary to charge such a battery as follows: