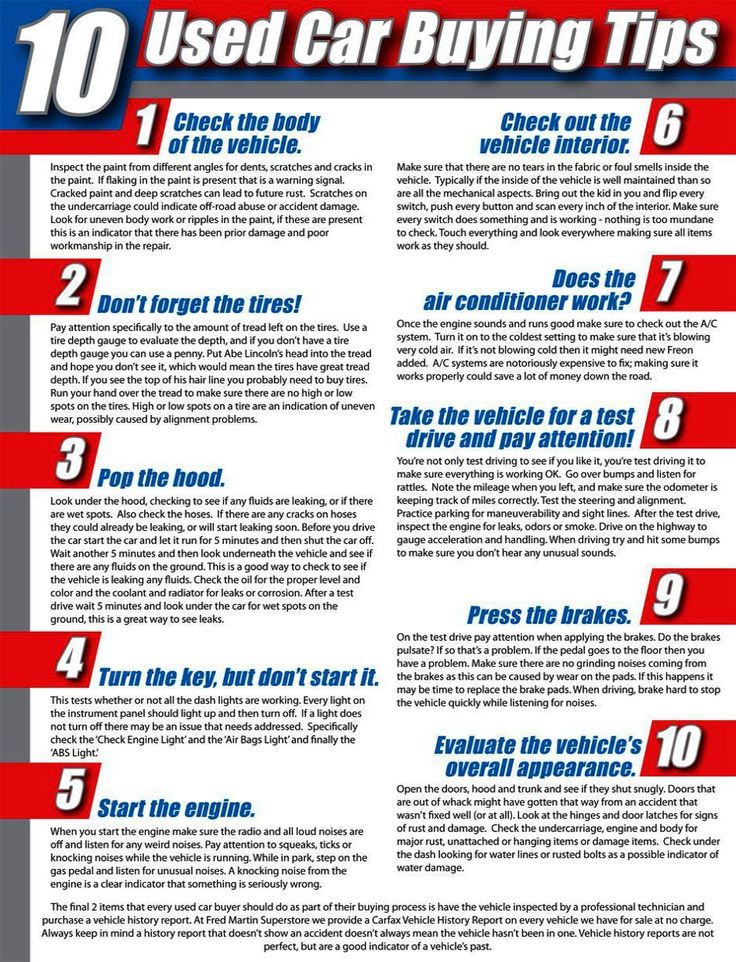
“A tire only loses air if it’s punctured.” This is a common misconception that we have all had or heard and yet the reality is quite different. Indeed, a tire can lose air even without a puncture, as for example in the case of a crack in the valve that is used to inflate your tires. A punctured valve is difficult to detect, and not taking care of it in time can have real consequences for your tire, but also (and above all!) for your safety. Blackcircles Canada, your online tire specialist, offers below a complete guide to the causes and consequences of a punctured valve, and how to repair a leaking valve stem.
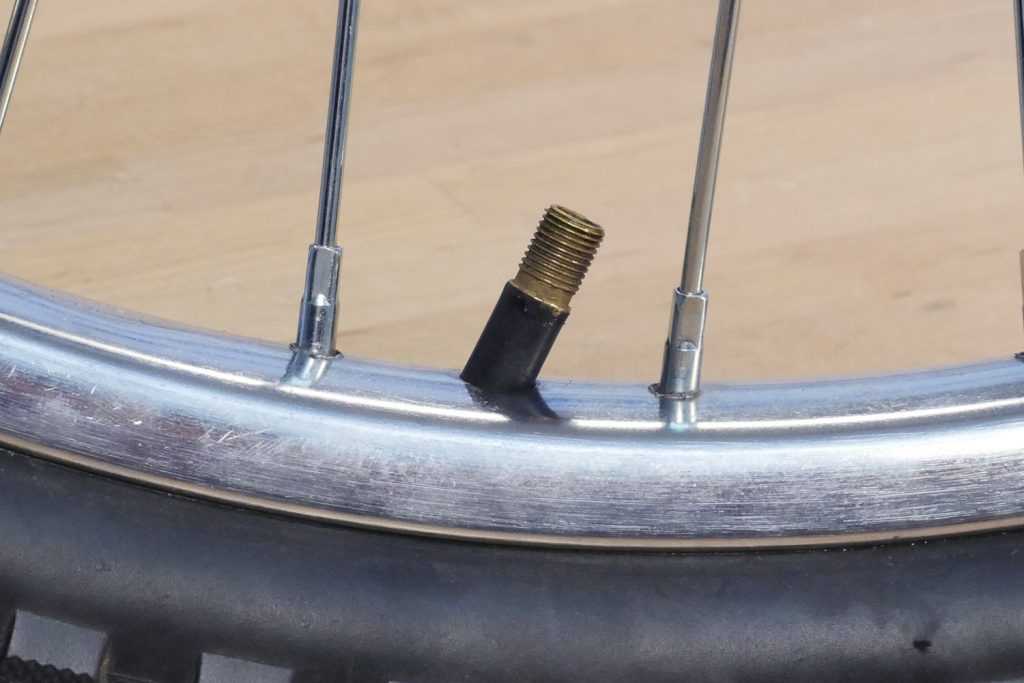
A valve is a pin located on the outside of the tire, through which the tire can be inflated/deflated. It has a mechanism consisting of a spring-mounted valve that closes tightly with the air pressure inside the tire.
Over time, the stem valve may become brittle and cracked, which may increase the risk of air leaking through it.
When the stem valve leaks, the affected tire is no longer able to retain air. Depending on the extent of the damage, the air will leak out slowly or more quickly. In both cases, the valve must be replaced.
If the air leakage is slow, you will be subject to the problems encountered by drivers driving with underinflated tires. Internal damage that can shorten the service life of the tire by up to a quarter, increased fuel consumption due to higher rolling resistance: the tire will damage faster, and your energy-efficiency will be significantly lower. The tire will also have poorer traction and the stability of your car will be reduced when cornering, not to mention the more pronounced deformation of the tire that increases its internal temperature, which can cause it to burst. Finally, an under-inflated tire increases the risk of hydroplaning. Tire pressure is thus very important!
 Here’s how to do it!Step 1: Make sure it’s your valve stem that’s leaking.
First of all, make sure it is the tire valve stem that is leaking. To do so, there’s a very simple trick! Apply a mixture of water and dishwashing soap to the valve with the cap removed. If bubbles start to appear, your valve is leaking. If this is not the case, and there is a definite air leak, it will be located elsewhere on the tire.
Step 2: Gather the right tools before you start!Before you begin, make sure you have all the necessary equipment to complete the replacement of the faulty valve stem.
For this, you will need the following:
You are now ready to start the process!
Step 3: Loosen the nuts on the wheel you are going to work on.
To do so, use the wrench mentioned in the previous step to loosen each of the lug nuts holding your wheel in place. Do this while the car is still on the ground.
However, for certain models of vehicles, it is possible that the wheel nuts have an anti-theft ring. If this is the case, you’ll have to use the appropriate special key to remove the locking nut(s).
Step 4: Raise your vehicle with the jack and then remove the wheel.First and foremost, make sure the handbrake is applied so that your vehicle is completely immobilized. Then, use your jack to lift your car. Be sure to position it on the right part of the chassis so that the car is properly supported. This will prevent any damage to the car and any bodily injury. Once your car is lifted, secure it on jack stands. Unscrew the wheel bolts completely, then remove the wheel. Finally, place the wheel on the ground flat, with the outside of the wheel facing up.
Step 5: Remove the valve stem core with the removal tool and let the tire deflate.
If you have not already done so, remove the valve cap. Then remove the valve stem core using the valve stem removal tool to release the air from the wheel, which should normally deflate completely on its own.
Step 6: Separate the tire’s bead from the wheel.For this step, use the sledgehammer in the following way: hit the tire sidewall with the sledgehammer in the same spot until you hear a crack or popping sound, and see the inside lip of the tire visibly break loose from the rim. This means that the tire has been successfully detached from the lip of the wheel.
Once the tire bead has been broken, continue hitting with the sledgehammer around the tire to detach the sidewall around the entire circumference of the wheel.
Step 7: Remove the tire from the rim.Once the sidewall of the tire is separated from the outer edge of the rim around the entire circumference of the wheel, insert your tire iron between the edge of the rim and the inside lip of the tire, and then pry upward to pull the lip of the tire over the edge of the wheel.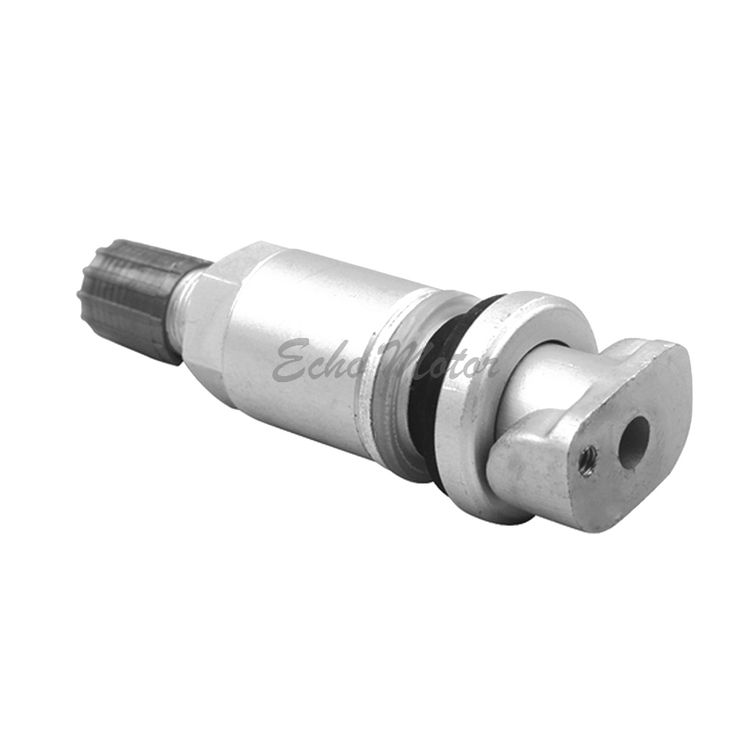 Once you have pulled the lip of the tire over the edge of the wheel, work the tire iron around the rim until the entire lip of the tire is off the rim.
Once the sidewall of the tire is completely above the wheel, grab it by its removed lip and pull it upward so that the opposite lip that was at the bottom of the wheel is now touching the top edge of the rim. Use your tire iron again by inserting it between the tire’s lip and the edge of the wheel and pry upwards to pull the lip over the edge of the rim. As before, work the tire iron around the edge of the wheel until the tire is removed from the wheel.
Step 8: Remove the defective valve stem and replace it with the new one.Once the tire is separated from the rim, it is time to remove the valve stem. To do this, first pull out the valve stem free from the wheel using the needle-nose pliers. Once this has been done, install the replacement valve stem from the inside of the wheel. Once it is in position, use the needle-nose pliers again to pull it through into its right place on the wheel.
Once the stem is in place, it is time to put the tire back on its rim. To do this, start by pressing the tire down over the rim until the bottom bead clears the edge of the rim. The aim here is to return the lower sidewall of the tire to its original position on the wheel.
Then press the upper sidewall of the tire down underneath the edge of the wheel. Then tuck your tire iron between the tire sidewall and the rim edge and use it to make the opposite movement to the one you used to pull the tire sidewall out of the rim. Once the bead clears the lip of the wheel, use the tire iron to work your way round the entire wheel until the tire is completely installed on the wheel. Then inflate it to the correct pressure using the air compressor.
Step 10: Make sure there are no other leaks, and mount your wheel back on!Once the tire is inflated to the correct pressure, check for other leaks.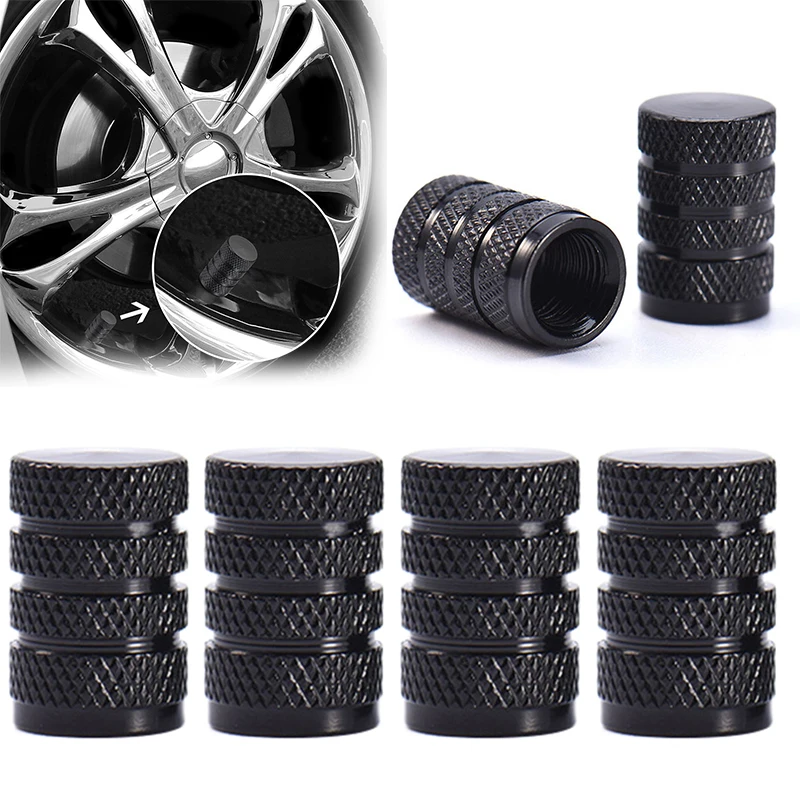 If all is well, mount the wheel on your vehicle and bring it down by lowering the level of the jack stands until the repaired wheel touches the ground and you can safely remove them.
Ultimately, it is very important to make sure your tires are free of air leaks to maintain proper air pressure at all times. In the case of a slow air leak, the consequences can be dramatic. If the air leak is due to a faulty tire valve, you will definitely need to replace it. You can either follow the above procedure on how to repair a leaking tire valve or take it directly to a specialist. If, on the other hand, you need to change the entire tire, consult our selection of tires adapted for your car directly online on our website!
Tire Installation 101: When and how to change your tires?
Inflatable tire valve stems are one of the characteristics of a wheel that enables you to maintain proper tire inflation by adding or removing air as required.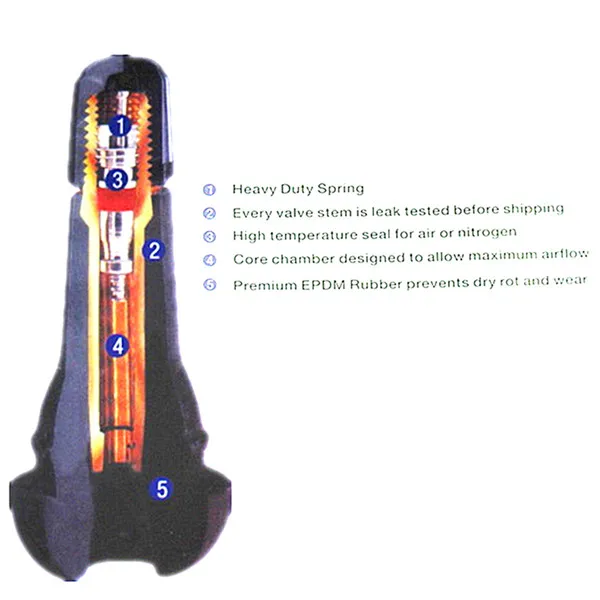 However, different factors will influence the tire valve stem to loosen, or worse, produce a leak. The good news you can tighten a loose tire valve stem with common tools and techniques.
To tighten the tire valve stem, begin with a clockwise rotation of the valve stem to the greatest extent feasible, screw up the valve stem with the valve stem tool to finish the tightening operation. Remember not to overdo it as this might result in damage to the valve.
It is possible for the valve stem to become loose and produce a leak in the tire. Some of the reasons for valves to leak include exposure to chemicals on the road, impact from bumps and potholes, corrosion from moisture, and aging.
When a valve stem is exposed to the sun for an extended period of time, the rubber components of the stem might dry out and fracture, causing the valve to fail. Failure to tighten might have catastrophic repercussions since a valve is crucial to the performance of a tire as well as the safety of the vehicle on the road.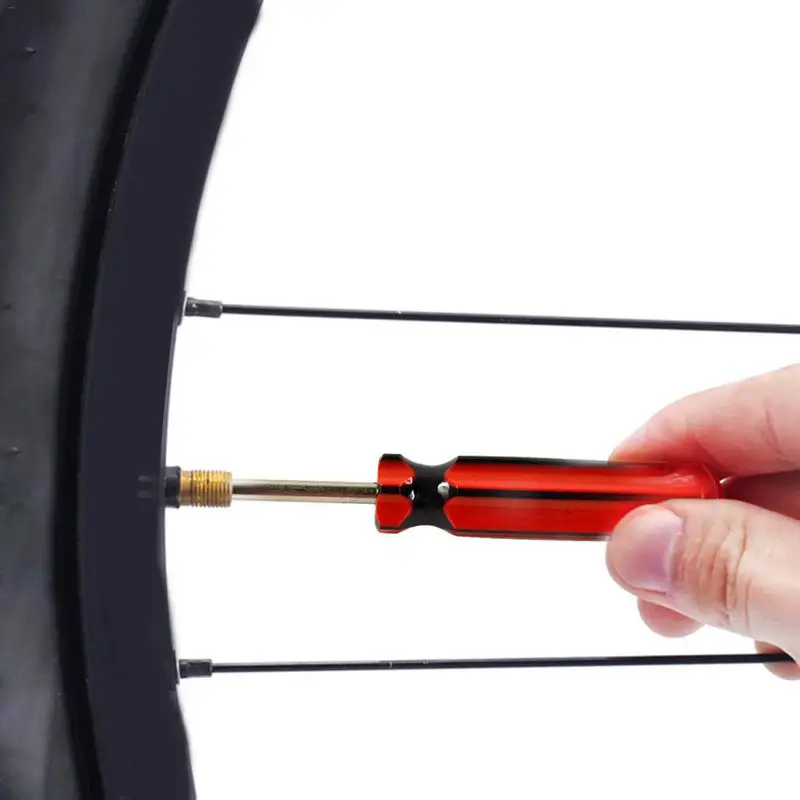 It is just as vital as installing and maintaining your vehicle’s equipment to ensure that it is properly tightened.
What's In This Guide?
Because of the internal workings of your valve stems, the air is allowed to enter and remain in your tires. To inflate your tires, you just set the air pump on top of the valve stem’s tip and turn the handle. The valve on the inside is opened to allow air to flow in. Then, when you turn off the pump, the valve shuts and remains sealed due to the pressure or a spring that is in place.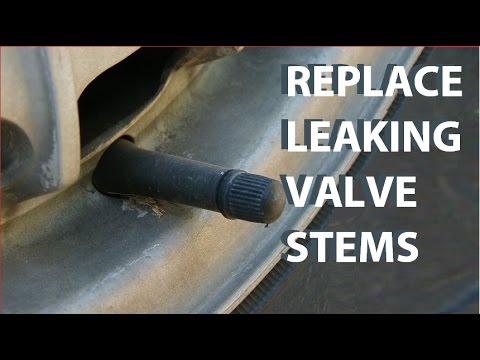
Rubbing a water-dish soap mixture over the uncapped valve stem with your finger is the easiest way to see if it’s leaking. If air is escaping, bubbles will appear, indicating that the valve is leaking. There is no leakage on the tire if no bubbles form.
What Is The Proper Tightness For a Valve Stem?Not only may valve-stem nuts be overtightened, but so can valve cores if the valve is overtightened. A valve core that has been subjected to excessive torque will be damaged, and a leak will result. Valve cores should be tightened to a torque of between 2 and 5 inch-pounds, which is practically hand-tight in nature.
How to Tighten the Stem of a Loose ValveWhen you have the main tool required, which is a tire valve stem tool, tightening your valve stem is a simple procedure. The tightening technique is as follows:
Step 1: RemoveTo get access to the valve stem, you must first remove the plastic valve stem cap from the valve.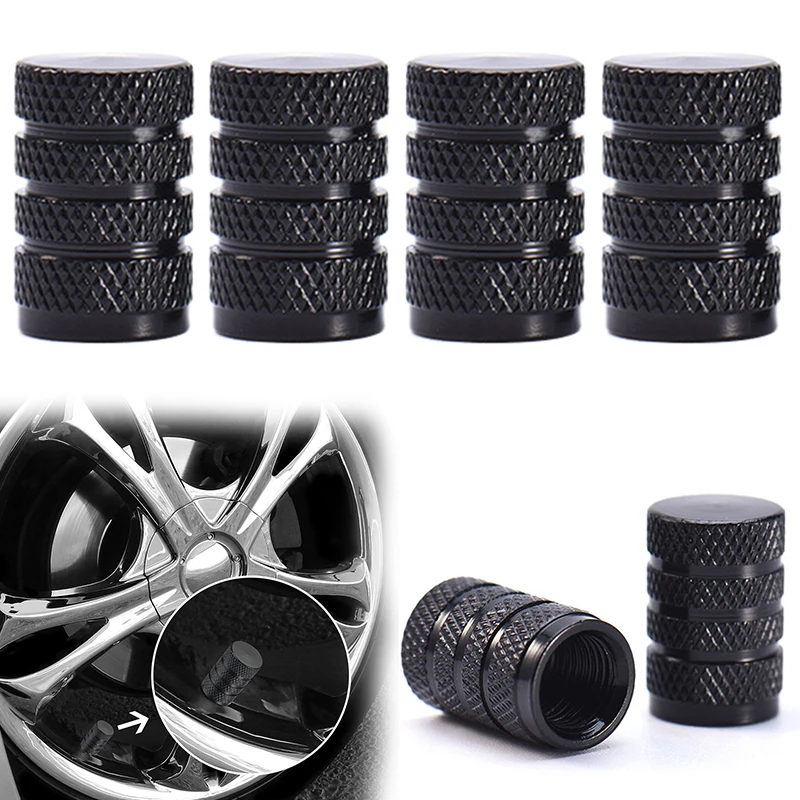
To tighten the valve stem, use your fingers to crank it clockwise as far as it will go or until it feels tight.
Step 3: HoldHold the valve stem in place as you turn the valve tool clockwise onto the top of the valve stem; this will assist you in attaching the valve tool to the valve stem more securely and effectively.
Step 4: Continuous TurningUntil the stem is tight, continue turning the valve tool clockwise.
To remove the tool from the stem when you are done, hold the valve stem and turn the valve tool counterclockwise.
Cause of Tire Valve BreakageIn the case that moisture enters the valve stem and freezes, it might result in air loss and/or a flat tire. As the rubber components of the valve stem age and dry out, they may fracture, resulting in air leakage or even complete air loss.
Fixing a Leaking Tire Valve StemAside from a loosened valve stem, air leakage may occur even when the valve stem is well secured, which can be a source of concern. And if this occurs, you will be required to replace the valve in question.
Going to the tire shop for replacement or repair may be more expensive, but doing it yourself with a few simple instruments like a core removal tool and a replacement valve tool core will be more convenient and will save you money in the long run.
The following are the measures to take while changing a valve stem:
Step 1: Perform a DiagnosisFirst and foremost, determine if the leak was caused by a valve issue rather than a separate puncture.
Step 2: Deflate the tireDeflating the tire and removing any leftover air before beginning with the valve repair is critical because the pressure may cause the valve core to eject at a high enough speed to cause injury.
Step 3: Remove the Valve CoreRemove the core from the valve using the valve core tool. There are four separate ends, each of which serves a different function, and a forked end is required for the removal and installation of the valve core.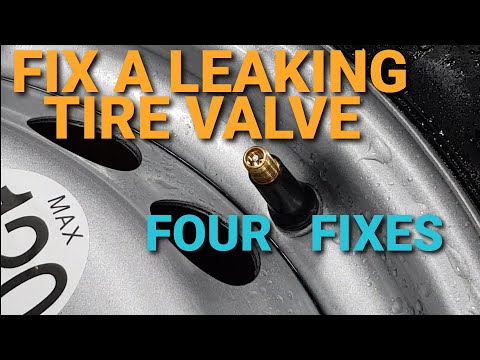 Put pressure on the forked end of the tool to remove the core as you spin the tool counterclockwise. Insert the forked end into the valve. Clean the interior of the valve using the tapered end of the tool that is adjacent to it.
Always remember to clean out the valve of any dirt or debris.
Step 4: Install a New Valve Core and Inflate the TireInsert the new core into the valve, and using the forked end of the valve core tool, screw the core into place, turning it clockwise. Make sure that the core is not excessively tight since this might cause damage to the new valve core.
Step 5: Replace the Stem CapReplace the cap on the tire once it has been inflated and check the pressure. Even though it does not directly contribute to the tire’s ability to retain air, it is critical that you replace the caps once you have inflated the tire.
The valve’s inside is protected by the covers from debris and corrosion caused by moisture and chemicals carried in by the road, which can cause leaks.
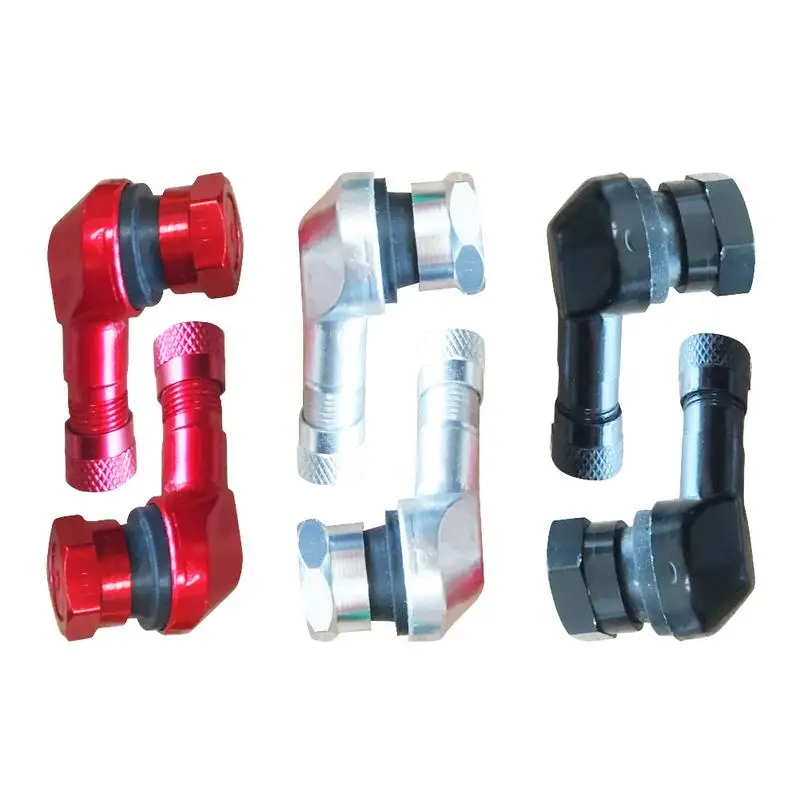
New tires are given with brand new valve stems. As a result of exposure to road chemicals and impact from bumps and potholes, as well as corrosion caused by moisture, valve stems may get damaged over time and with ongoing usage. In addition, prolonged exposure to the sun may cause the rubber components of valve stems to dry out and break, resulting in a leak.
It goes without saying that a broken or worn-out valve stem will not function properly, causing air to slowly but steadily seep out of the valve. Also, leaks may occur anywhere along the valve stem, such as at the place where the valve contacts the tire.
Choosing the Right Valve StemInflation pressures and higher speed limits make a selection of the proper valve stem extremely important. Most of the complaints involve light-duty trucks with TR413 or TR415 series snap-in valve stems. Many of these tires are now categorized as medium or even heavy-duty truck and bus tires.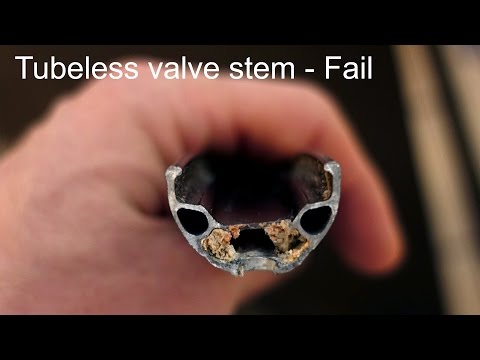 But because of their load-carrying capacity, some tires are still produced in sizes we formerly considered light truck tires.
The stem hole in these tires’ wheels is sometimes the same size as a passenger vehicle’s valve stem hole. The TR413 and TR415 valve stems were intended to handle up to 60 psi (4.1 bars). They are now rated at 65 psi (4.5 bars). Many outdated catalogs still grade the TR413 and TR415 valve stems at 60 psi maximum. One of the most common issues with the TR413 and TR415 series valve stems is that they run hotter than usual due to hot weather or other comparable conditions. Valves may break, blow out of the rim hole, or get unseated.
Replace it with a TR600HP or TR801HP high-pressure snap-in valve stem. Valve stems rated at 100 psi (6.9 bars). A 200 psi clamp-in metal valve stem is also an option (13.8 bars). The TR600HP and TR602HP valve stems have .453-inch stem holes whereas the TR801HP and TR802HP stems have.625-inch stem holes.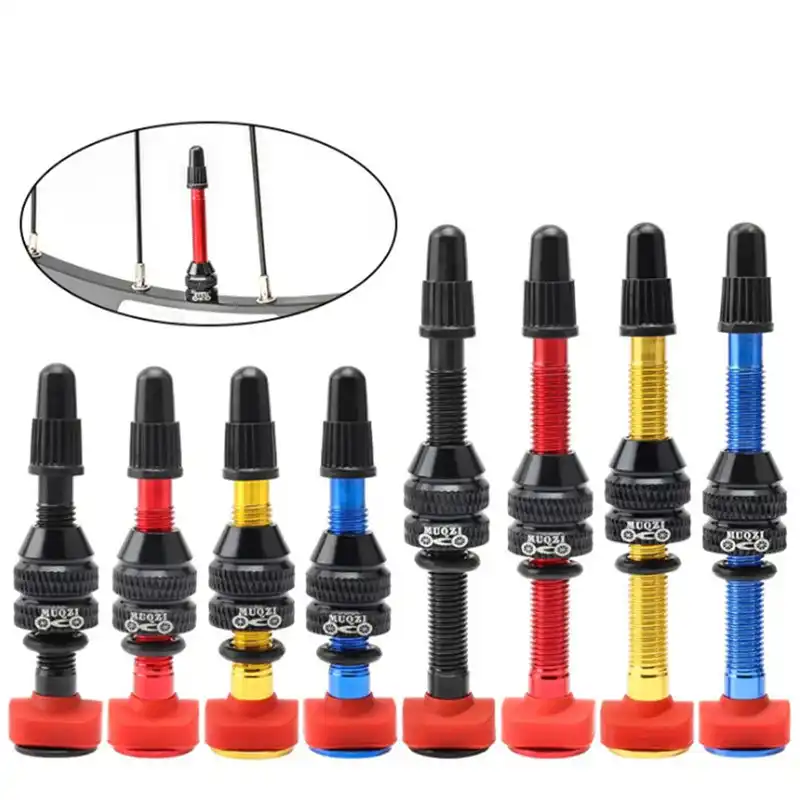 TR413 valve stems are for wheels with a maximum stem hole thickness of.156 inches, while the TR600HP high-pressure valve stem series is for wheels with a maximum stem hole thickness of.205 inches.
The TR602HP, TR801HP, and TR802HP valve series share this tolerance. A metal clamp-in valve stem must be used when the rim thickness at the stem hole is larger than .205 inches. In this case, the wheel might be thicker if the hole is larger. However, use the specified stem provided for the wheel’s stem hole thickness.
Making Use of ExtensionsWith the TR600HP and TR801HP series snap-in valve stems, metal stem extensions should never be utilized with the valve stems. The additional weight of the extension may cause the stem to shatter or crack, resulting in the stem being dislodged and air being lost. Metal extensions should only be used with metal clamp-in valves, and they should not be any longer than is absolutely required.
Get the Torque RightThe TR416S is one of the most common clamp-in valve stems for wheels with a.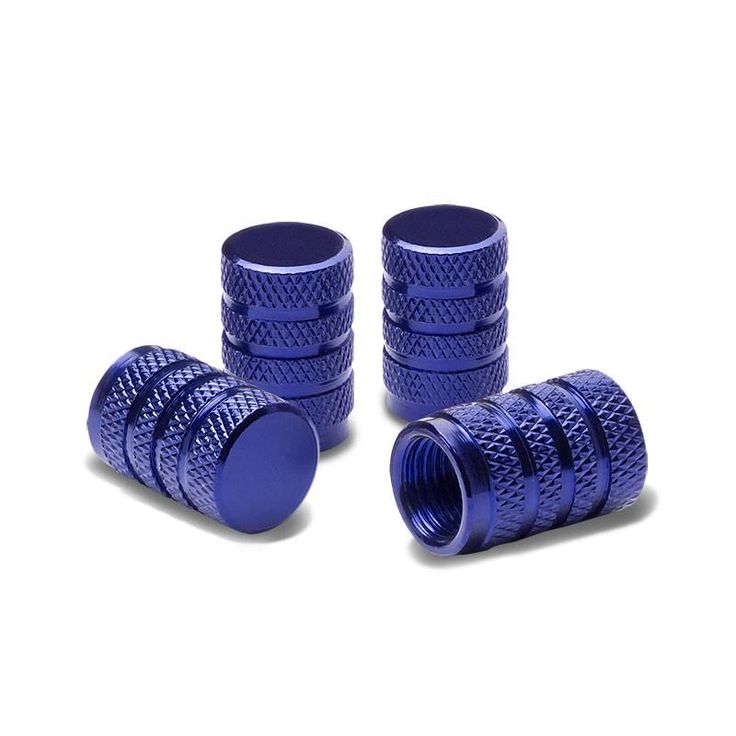 453-inch stem hole, and it is available in a variety of sizes. It is possible that this valve stem will survive a long time since both the sealing grommet and the valve core may be changed if they get damaged or worn out during normal operation. When installing the clamp-in valve, extreme caution should be used since each one has a distinctly required torque for tightening the nut.
Never assume the stem on the tire/wheel assembly is the correct stem. There may not be enough coined or machined area around a.453-inch stem hole. The coined area must be at least.125 inches larger than the valve hole.
Watch For ZippersZippers are harmful on all tires, not only on long-haul medium truck tires. A sidewall fracture in a tiny light truck tire can be as hazardous as a bigger truck tire. Underinflated steel cord tires are always prone to zipper failure.
Frequently Asked QuestionsWhen should a Tire Valve Stem be replaced?Despite the fact that a broken valve stem is a minor component of a tire, it may cause significant problems.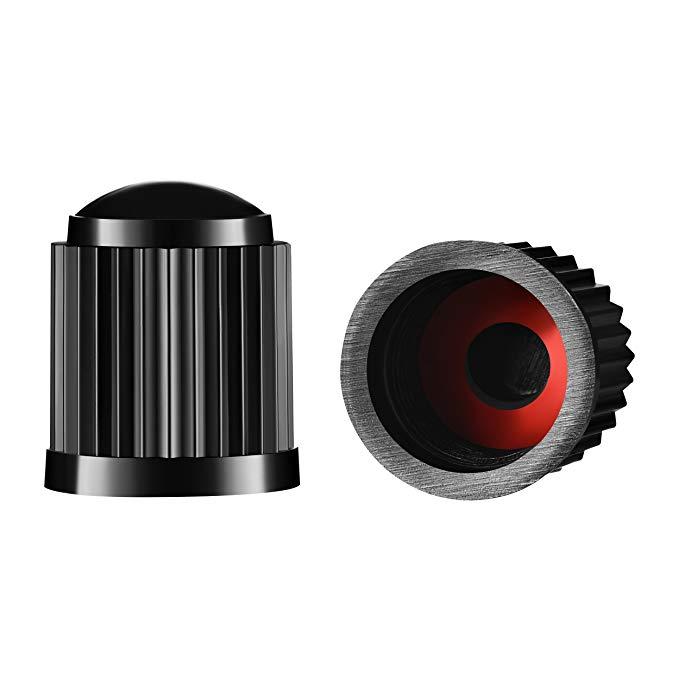 It’s possible to adjust the tightness and looseness of a tire stem valve, but it’s best to do it on a frequent basis to avoid damaging it. When you remove your tire from your vehicle, you should do it carefully.
Repairing the valve stem using a valve stem tool and a few other basic tools may be done by the car owner if the valve stem is leaking. In order to get started, all you will need is a valve core tool and a package of replacement valve cores (both inexpensive). Use a valve core tool to carefully remove the old core and screw in the new core (be careful not to strip the threads), then fill the tire with air until it’s fully inflated.
How can you tell if a valve stem is bad?When the tire is completely inflated, drip a combination of dishwashing liquid and water over the valve stem, around its base, as well as around the inner edge of the wheel where the tire and rim meet, to see if you can pinpoint the source of the issue.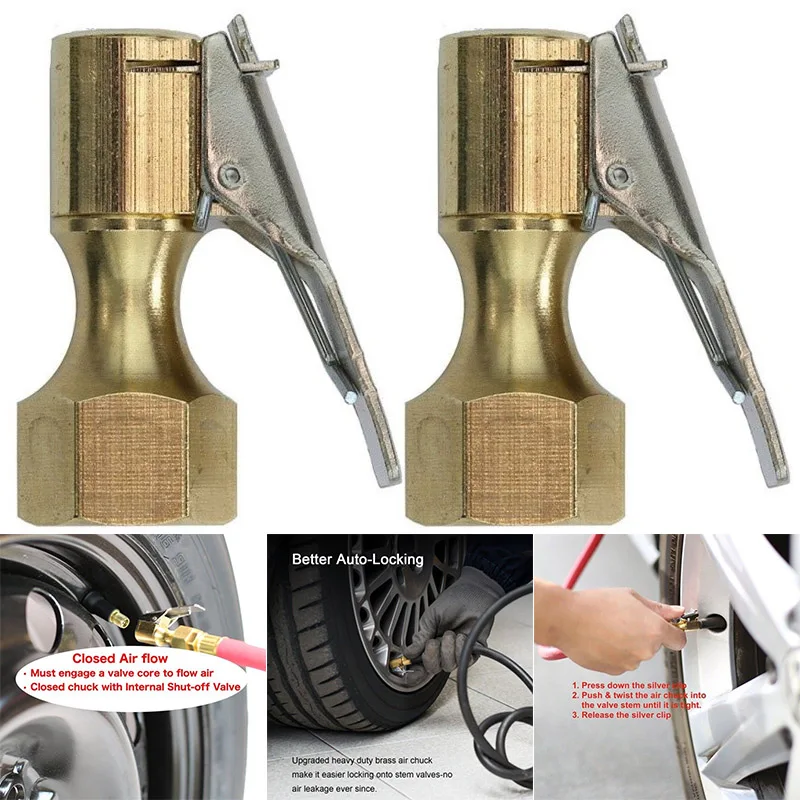 Any escaping air will cause bubbles to form in the soapy water around the leak’s location.
Valve stem damage – New tires typically come with new valve stems, because the old ones tend to wear out. If you have older valve stems, they may go bad over time, due to use, dislocation, and exposure to chemicals on the road, such as road salt. They may corrode and go bad.
Can a valve stem be replaced on a tire?If possible, take the tire to a tire shop and have them remove the tire and replace the valve stem using a tire machine. This is the quickest method for replacing a valve stem in most circumstances. However, in the event that this is not a possibility, a tire may be removed and the valve stem replaced by hand in certain cases.
How do you change a valve stem on a tire core?Insert a valve stem removal tool or a slotted metal valve cap into the valve stem removal hole and screw counterclockwise until the valve stem removal tool or slotted metal valve cap is removed. Remove the core of the valve stem and set it aside. Replace the valve stem core with a new one and tighten it clockwise until the valve is fully closed. Then inflate the tires.
A ‘no-name’ valve stem may seem to fit and function well today, but how long will it last? Time and temperature influence the material’s lifespan. Reliable valve stem brands have a long service life and can go well with the tires’ life span, lasting up to six, eight, or even ten years.
ConclusionWhen the tire valve stem becomes loose over time, it may result in gradual leaks that are difficult to detect. How to tighten a loose valve is a simple procedure that takes nothing more than a valve stem tool and your fingers to accomplish.
The procedure of tightening a slack valve stem, or replacing a valve core, is affordable, fast, and simple, and it may be completed by the car owner at their convenience and leisure.
Two parallel vertical copper bars 1 m apart, closed at the top with a resistance of 1 ohm and placed in a uniform magnetic field of 0. 1 T, perpendicular to the plane of the tires. A conductor of mass 0.1 kg falls along the busbars. Determine the steady rate of its fall.
Task No. 8.4.56 from the "Collection of tasks for preparing for entrance exams in physics of USPTU"
upsilon-?\)
To solve this problem, we conditionally accept a magnetic field directed towards us (see the figure for solving the problem).
So, it is quite clear that the conductor will initially slide down under the influence of gravity. Since the sliding conductor is in a horizontal magnetic field, it means that induction EMF \(\rm E_i\) will appear in it, equal to:
\[{{\rm E}_i} = B\upsilon l\]
Due to the emerging EMF induction \(\rm E_i\) in a circuit consisting of tires, resistance and conductor, a current will flow, which can be determined using Ohm's law. The direction of the current is clockwise (see the figure for the solution) - to prove this, you need to isolate a positive charge in the conductor and find out the direction of the Lorentz force acting on it.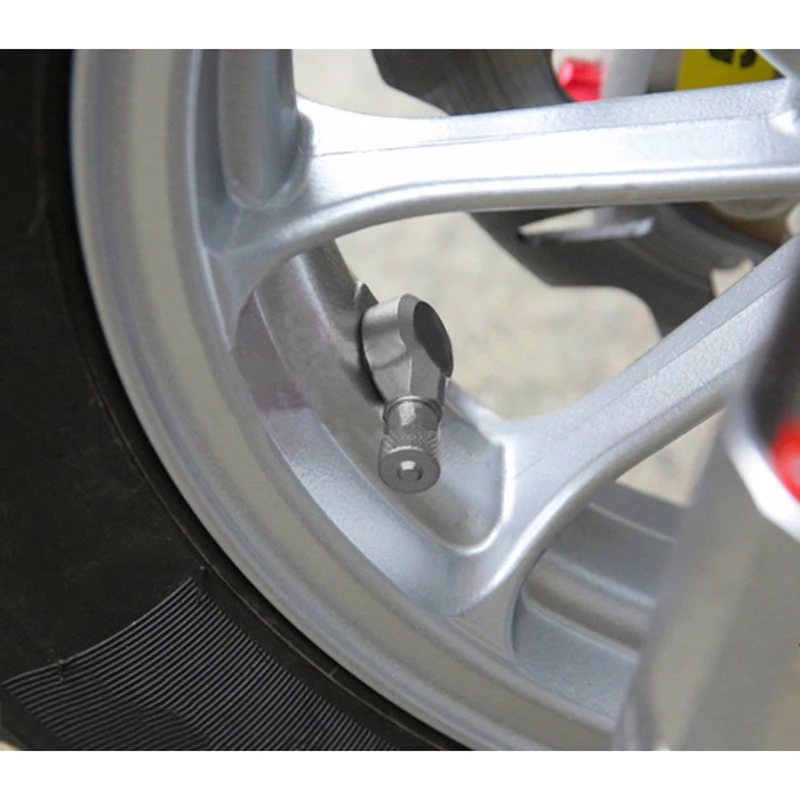 The direction of the current coincides with the direction of the Lorentz force acting on the positive charge.
It is interesting that the initial accelerated motion of the conductor under the action of gravity \(mg\) will quickly change to uniform due to the additional action of the Ampere force \ (F_A \), since the faster the conductor moves (i.e., the greater the EMF of induction), the higher the induction current in the circuit, and the higher the Ampere force \ (F_A \), which slows down the movement of the conductor. For the uniform motion of the conductor, we apply Newton's first law:
\[{F_А} = mg\]
Taking into account (2), we get:2}}} = 100\;m/s\]
If you do not understand the solution and you have some question or you have found an error, feel free to leave a comment below.
8.4.55 Two metal rods are placed vertically and closed at the top by a conductor
8. 4.57 Placed vertically in a uniform magnetic field with an induction of 10 mT
8.4.58 A coil of wire with an area of 100 cm2 is cut at some point , and in section
Author Teplov Pavel Reading 4 min. Views 9 Posted by
Flat tires can be dangerous for a variety of reasons. It can make you late for an important meeting, get stuck in a bad part of the city, or cause an accident while driving on the highway. While some issues can be delayed until the next payday, such as an oil change, a low tire issue should be addressed as soon as you realize there is a problem. NAPA is well versed in tire problems and has some tips on how to find out where the leak is coming from and how to fix it yourself or replace it.
Content
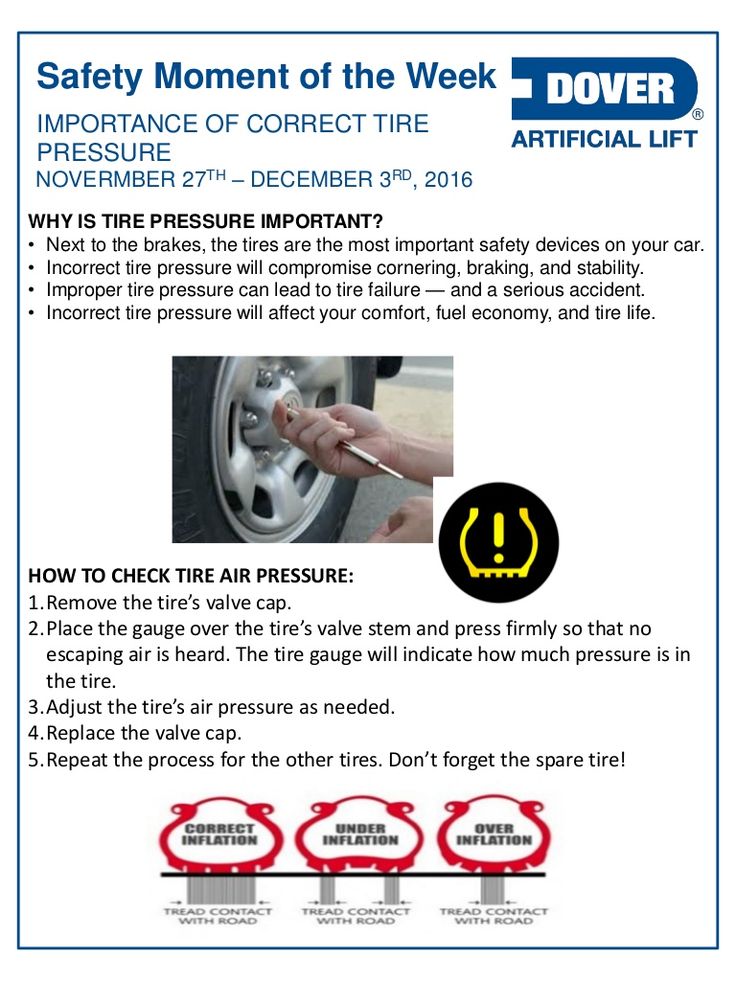
tire, start by adding air. Filling a tire with air while it is hot can give inaccurate readings, so make sure the tire is cold first. Also make sure you don't add too much air. The owner's manual lists the required pounds per square inch (PSI) for your tires. The pressure gauge will tell you if you need to add more air or not. Check each tire to make sure it is sufficiently filled with air. Newer vehicles will warn you of low tire pressure with a tire pressure monitoring system, but older models do not have this feature.
Once all your tires are full of air, keep an eye on them for the next few weeks. If it's a small leak, it won't be immediately apparent. The tire will slowly deflate and become more visible because it loses air faster than other tires.
The weather will also affect this. AccuWeather reports: “Hot weather can cause tires to overinflate. However, very cold weather can cause your tires to dangerously under-inflate.” If you have extreme winters where a tire can deflate, there are other ways to check for leaks.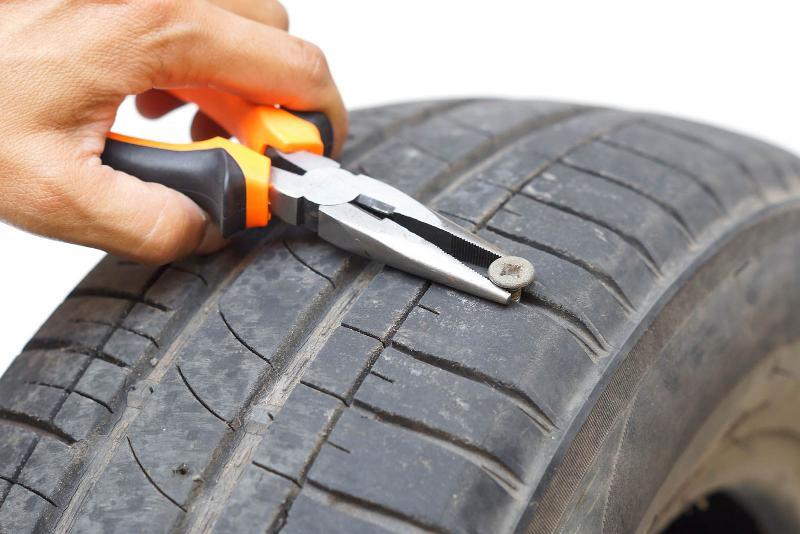
Also check for more obvious signs, such as a protruding nail, tears or punctures. For less visible openings, you may hear a slight whistle as air escapes from the opening. You can also feel it.
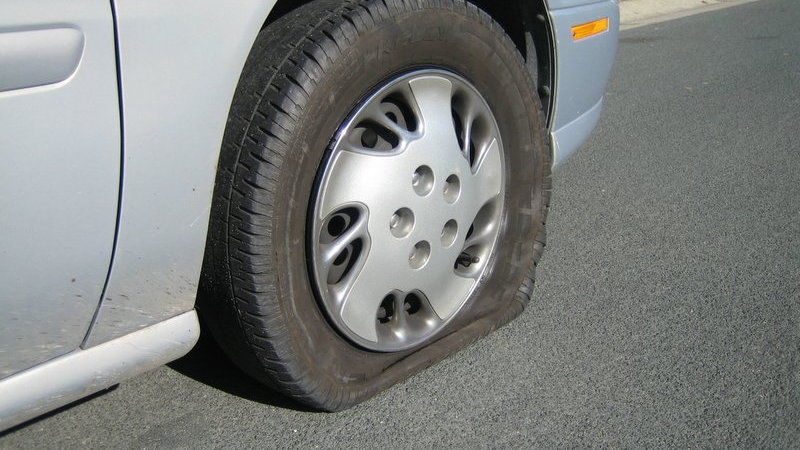
If the sidewall or shoulder has been punctured, you will need to replace the tire. Otherwise, you can remove the nail and fill in any holes. Just keep in mind that this is a temporary fix and you should keep an eye on it.
If you don't see or hear a leak, the next step is to pour out the water. Take a bucket, fill it with some water and add some soap. You will then cover the low tire with soap and water. Just like when your kids blow bubbles, blowing out air will cause soap and water to bubble. If you still can't find a leak, try removing the tire and submerging it completely. If there is a leak, the pressure of the escaping air will cause it to bubble.
The tire itself may be in great shape but still leak due to a bad valve stem or a damaged wheel mounting surface.