Most winches in the market contain a solenoid. A solenoid is an electromagnetic switch that ensures the winch operates properly by regulating the electric current from the car’s battery. But in some cases, such as when troubleshooting a winch motor or if there is a heating issue, you may need to bypass the solenoid and winch without it.
The winch can be wired without a solenoid in five easy steps:
This article explains how you can wire a winch without using a solenoid. Then, you can use your mechanical knowledge to discover if your winch motor has a problem.
Let’s explore the steps in more detail.
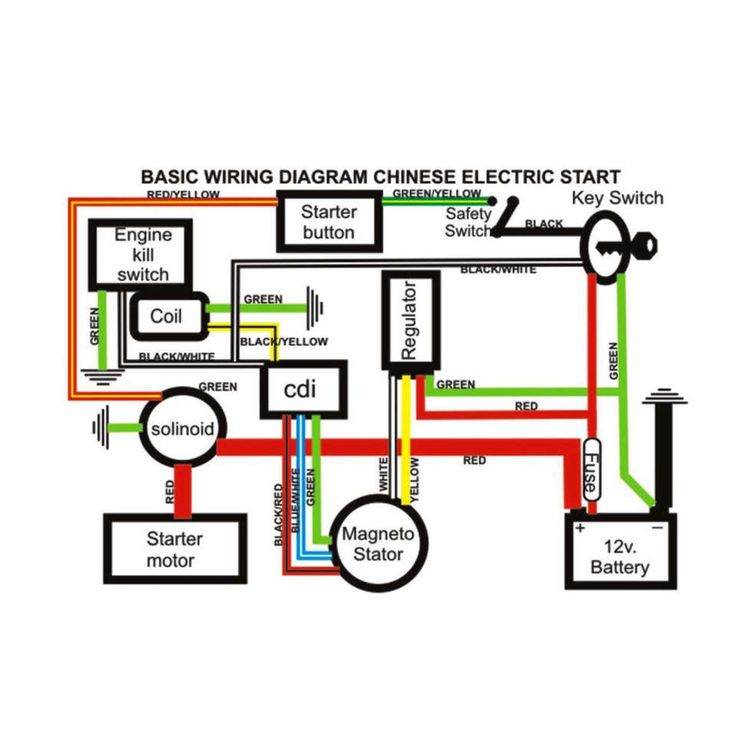
Since this problem is related to wiring, the first step is to consult the circuit diagram of the winch solenoid system. This will help you understand the connections of the winch motor, where and how the positive and negative terminals of the battery are connected.
The circuit diagram would vary depending on the type of winch and the manufacturer of the winch. But most likely it will be similar to the one, shown in figure 1.
You may look at the user manual of your winch for more precise pictorial representation. Near the motor, you will find three labels, A, F1, and F2. These connections are important in the next steps.
After you have analyzed the circuit, the next step is to set the winch to free spool mode. This can be done by turning the knob. That makes the system easy to move.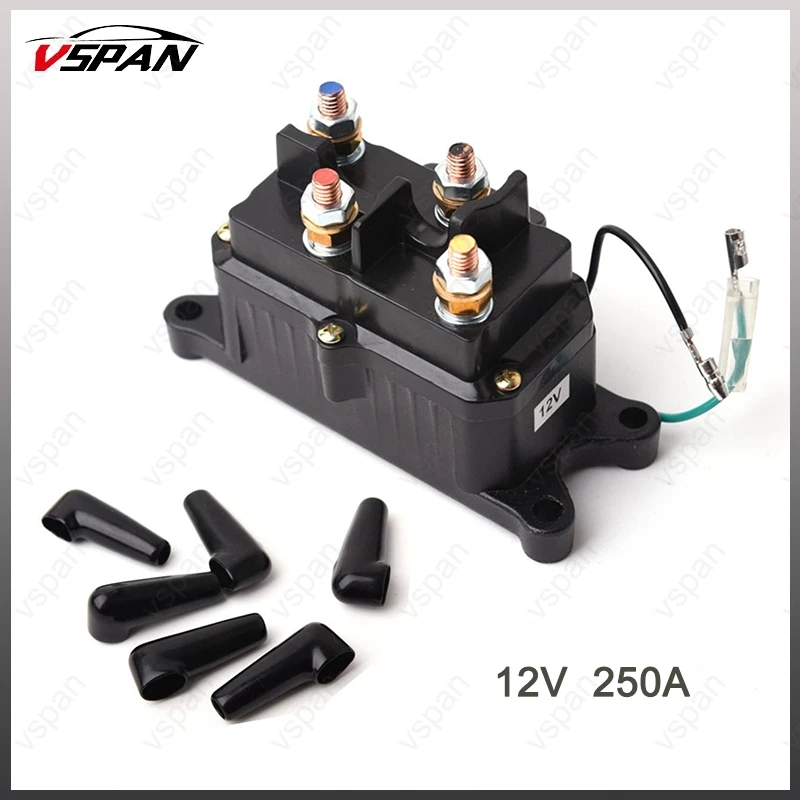 Also, ensure that the winch carries no load.
In the next step, you have to disconnect the wires from the battery terminals. First, remove the connection from the positive terminal. Keep the grounded wire engaged, as it is. You can take the help of a circuit diagram while doing this step.
And for disconnecting the wires from the battery, it is recommended to use a pair of pliers.
Now, since you have disconnected the winch motor from the battery. Next, you need a jumper wire. A 5-6” inch jumper wire will be perfect for this job. Connect the jumper wire from point A to F1. And then engage the battery through point F2. You will notice that the winch motor starts to rotate. It is rotating in one direction, to check if it can rotate in another direction, follow the next step.
This step is similar to step 4, but the connections of the jumper wire are opposite. Now, you have to connect the jumper wire from point A to F2. And power it by the battery through point F1. The motor should now rotate in an opposite direction.
As I mentioned at the start that the purpose of wiring a winch without the solenoid is to troubleshoot. If your winch is not working or over-heating, you can test it by directly running the winch motor. The steps I discussed are the means to follow while investigating a harmed winch solenoid to decide whether you really want a winch solenoid substitution.
If the winch motor works perfectly fine, then that means the problem may be with the solenoid or the wiring connections. Have a look at the wiring connections, and check if they are as explained in the user manual.
To test a 12 volt solenoid in a winch; first turn off the winch. Then, connect the two terminals of the voltmeter with the solenoid, if the reading is less than 12V that means the solenoid needs a replacement.
While you are working with a winch, you need to follow some precautions.
Keep your working space clean: Clean the space you are working on. Ensure that there isn’t any stuff that can make you excursion or slip. Clean your workspace and ensure there are no pools of water around you, this is a risk while dealing with electric wirings.
Work very Carefully: Always work carefully, particularly while you are dealing with electrical connections. Keep in mind that winches are designed to pull large pounds of force; be cautious.
Use Gloves: Winches are made to pull or lift weighty items, and these things can gauge a huge number of pounds. In addition, the winch link might have metal splinters on them, so make sure to wear gloves to safeguard yourself from setbacks. Since you will work with electrical wirings too, so try to shield your hands from power.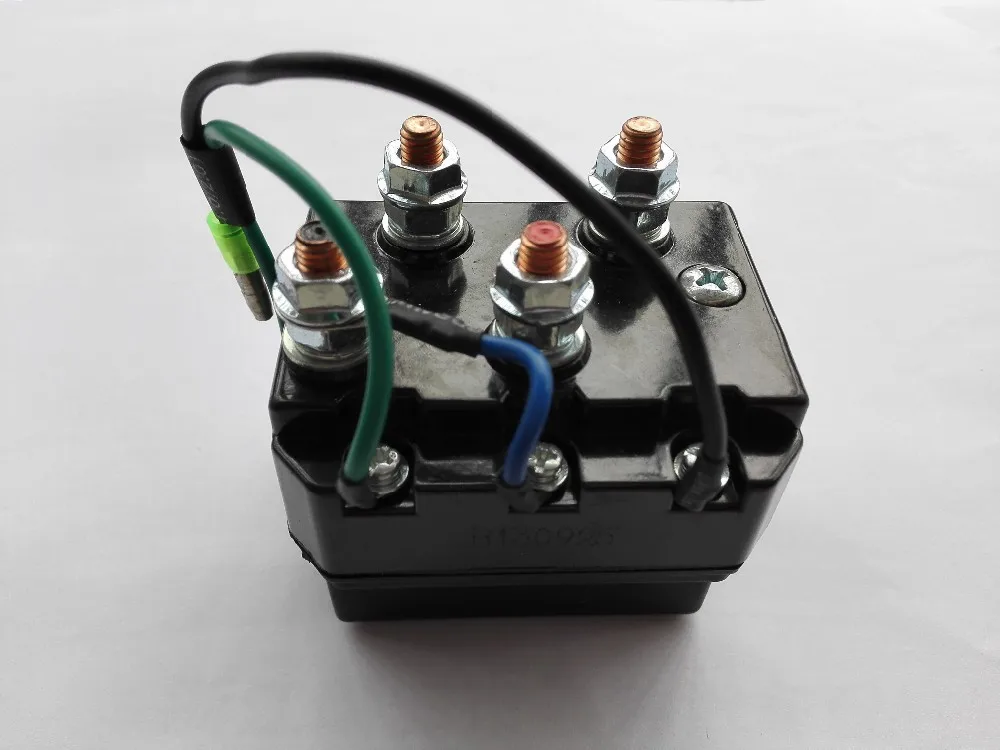
Avoid Loose Clothing: Avoid wearing any adornments, watches, or any loose clothing as they can get caught in the winch’s moving parts.
Now, I have explained how a winch can be wired without a solenoid. But the question is, what is the purpose of using the solenoid in a winch, do we really need it?
Solenoids are electromagnetic switches. On a vehicle, mounted with a winch, the solenoid is utilized to operate the winch motor. It is made to deliver the appropriate current without causing damage to the winch motor or switch.
A winch solenoid’s primary function is to relieve stress on the winch switch and prevent it from overheating. As a result, the solenoid is critical to the winch motor’s operation.
Learn More: How Powerful Winch Do You Really Need?
What do you think, do we really need a solenoid on the winch?
Yes, you really need a solenoid on a winch to assist with safeguarding the winch engine. Replacing a solenoid is much cheaper compared to replacing a motor. Though that winch motor can run without a solenoid, it needs extra caution.
Here are some of the best winches for car trailers with multiple solenoid mounting options that can prove to be really helpful in certain situations.
I hope you have learned how you can wire the winch without a solenoid, in case your winch motor is not working properly.
Do remember to follow all the safety precautions. If you are not good at these things, you should take the help of an expert technician.
(Visited 3,570 times, 11 visits today)
This guide is made to help you troubleshoot the most common ATV winch issues. It will also point you in the right direction on how you should go about fixing them.
ATV winches are tough. They can handle incredible amounts of use and abuse. And as long as you steer clear of the cheapest models and you treat it well with some maintenance now and then, you should expect many years of hassle-free winching.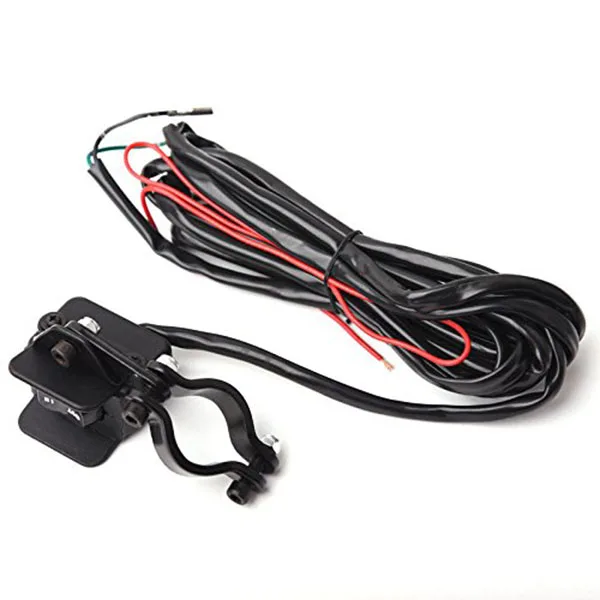
But from time to time, even the best will face some technical issues that need to be addressed.
Luckily, there is a lot you can do yourself to troubleshoot and repair an ATV winch that doesn’t work as it’s supposed to.
Page Contents
ATV winches are small but still powerful and potentially very dangerous. If you have any doubts or lack the basic mechanical skills to perform the troubleshooting or repairs described in this post, you should rather take it to an authorized dealer and let them take care of it for you.
A winch out of control has the potential to inflict damage to your equipment or possibly cause severe injury to yourself or others.
I’ve structured this guide so that you can start your troubleshooting based on what symptoms you are experiencing. After all, that’s how it starts; suddenly, the winch will start behaving differently than it should.
This will lead you to the root of the problem much faster than by just randomly testing all the different things that can go wrong.
For many of the symptoms, there are several possible causes, and some causes may give several types of symptoms.
After you have determined what’s causing your problem, you’ll find a suggested solution to the issue.
With the engine running, you push the winch switch, but nothing happens. The winch motor is not turning. Not even making a click or a buzzing sound.
The fastest way to troubleshoot a winch that does not give any sign of life is by isolating the problem.
Before you spend too much time investigating other possible causes, it’s a good idea to determine whether the problem is with the winch itself or with the wiring.
To do this, you simply need to perform this quick test:
This test will bypass all of the wiring and other electronics and will tell you if the winch motor is working or not.
Test the winch motor using starter cables.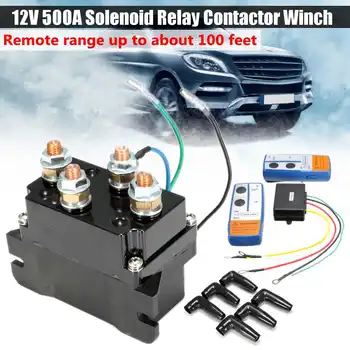
Now you should know what causes to look at for further troubleshooting.
Some winches, but not all, have a circuit protector or a fuse that is meant to blow when the winch, for some reason, is pulling too much power. A circuit breaker may also trip if it gets submerged in water.
Suggested Solution: If the fuse is blown, replace it with a new one with the correct amp rating.
Suggested Solution: The circuit-breaker may need to be reset manually if it’s been tripped.
If the winch starts working again, you have fixed the problem.
If the new fuse blows again right away or the circuit breaker trips, you likely have a short somewhere.
A short happens when the positive (red) cable gets in contact with any metal part, like the bike’s frame, due to a damaged cable. A faulty switch may also cause a short.
Suggested Solution: Repair or replace any damaged cables or broken switches that are causing the short.
If you can’t find any shorts in the wiring, a short may also be inside the winch itself or in the contactor—more on that further down.
A completely dead winch often indicates that it’s not getting any power or that something is not grounded the way it should be.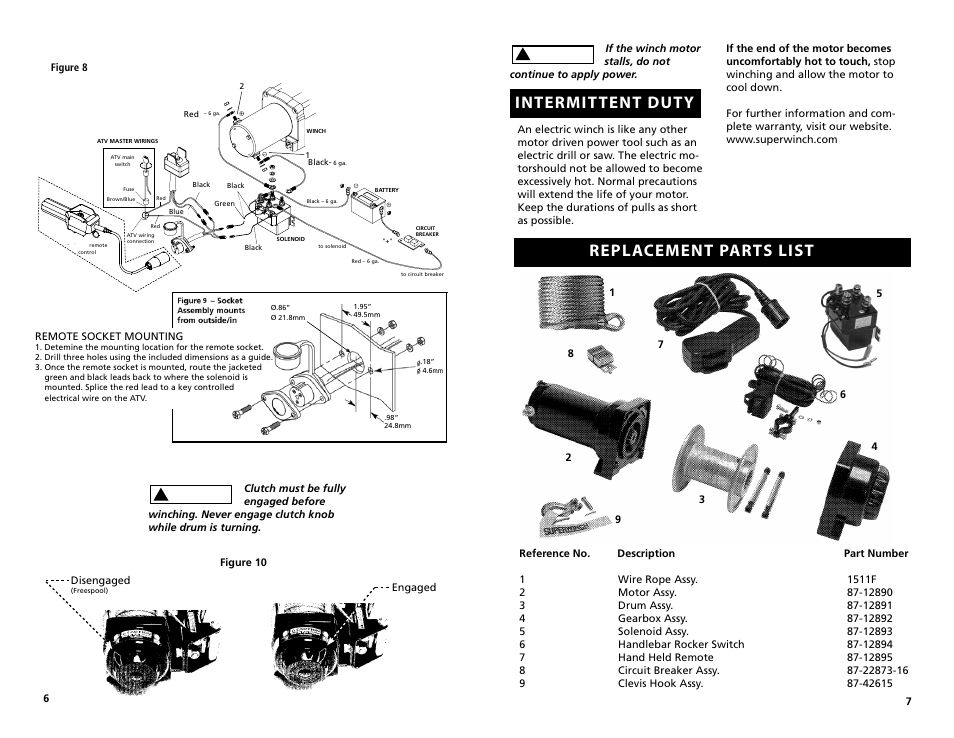
Suggested Solution: Make sure the winch is wired correctly.
If it has been working correctly before and you haven’t done any modifications to the wiring, an incorrect installation should not be what’s causing your issue.
But if you’re in the process of installing a new winch now, and you can’t get any sign of life, it’s a good chance you’ve got the wiring wrong somewhere.
All winches should come with a complete wiring diagram. Make sure you follow it to the point!
The basic principles on how to do the wiring should be the same on any winch. But it’s worth noting that you will see some minor but important differences between the different brands.
Commonly, the contactor’s battery terminals have different setups, where connecting the wires wrong may lead to a dead winch.
When the winch has been installed on the bike for a while, the cable terminals may corrode or come loose.
Winch cable connector that’s slightly corroded.Suggested Solution: Dissasemble and clean all terminals, one by one, to make sure you have a good connection everywhere and that they are properly fitted.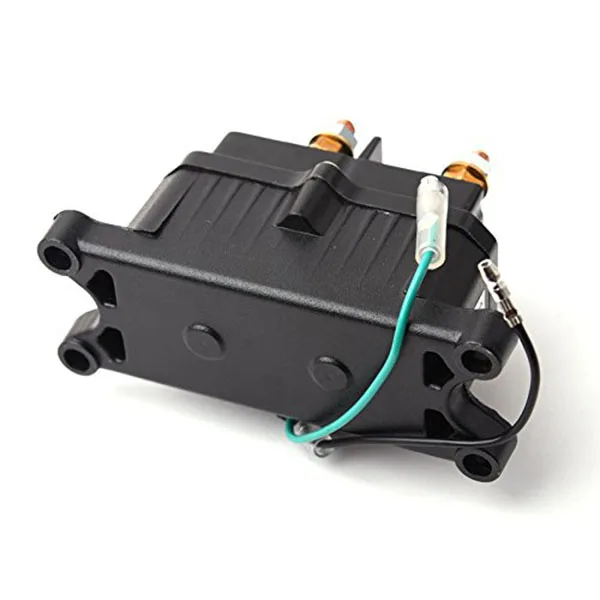 Any corrosion can be removed with some sandpaper so that the terminals become shiny again.
Any switch can break due to material fatigue when it’s been pushed enough times. Cheaper winches usually come with less robust switches that will break sooner.
It may also stop working due to water entering and corroding its internals. Again, the cheaper ones are often less protected and are more likely to be acting up after a few encounters with salt and water.
If a switch is damaged or corroded, it may not engage the winch at all when you push it.
There are several ways you can go about troubleshooting a bad switch:
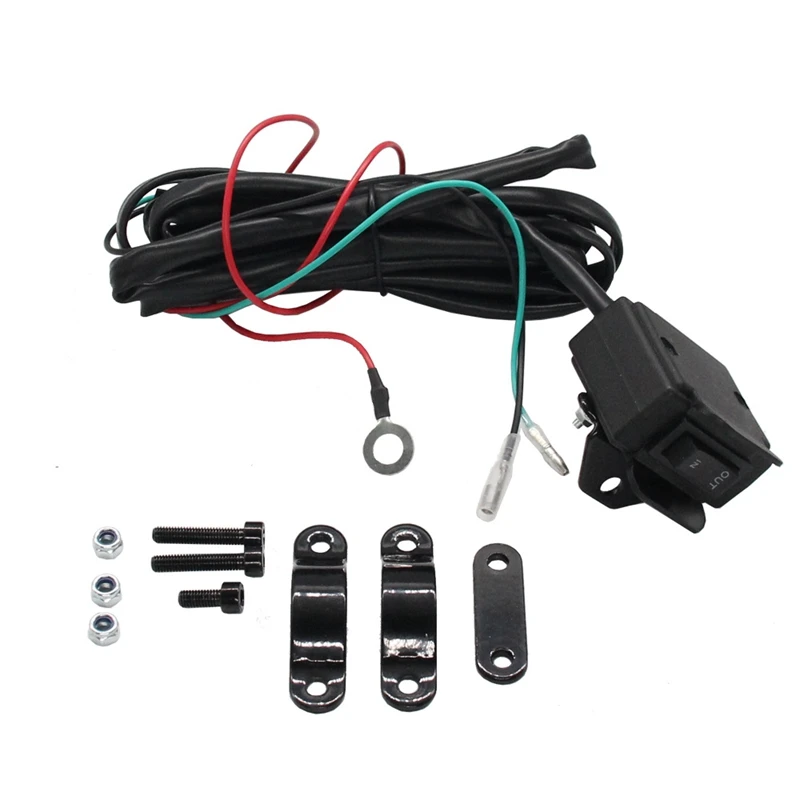
If the bike has more than one switch to activate the winch, you should begin by testing them both to see if one of them works.
Wireless remote and remote rocker switch.It is doubtful that both switches will fail at the same time. If one works, but you get no reaction from the other, it has likely gone bad.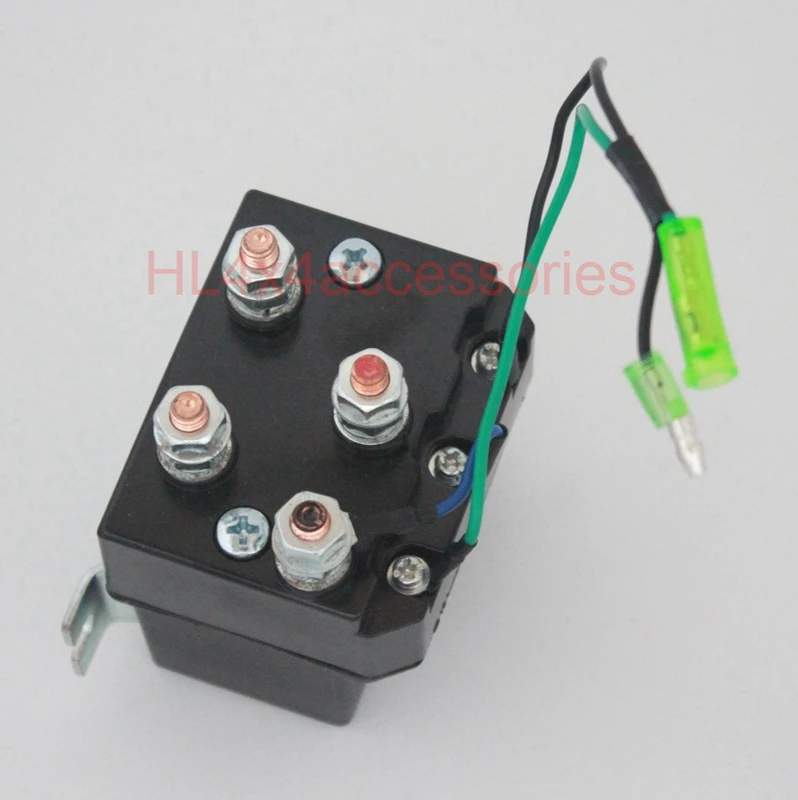
If you have only one switch, you can determine if it’s defective by testing if the winch works when you bypass the switch:
Bypass the remote switch to make sure it’s not what’s causing the issue.Suggested Solution: Replace the damaged switch.
If none of the above resolved your issue, and the system is simply just dead silent even when performing the jumper cable test, you are likely facing some sort of issue with the winch motor itself.
Another way to test the engine is by reading voltage drop across the motor. You need a multimeter to do this test.
Possible Solution: Clean the motor. The electric motors inside winches are actually quite simple and robust. But they are not completely fail-proof. And sometimes dirt may enter the motor housing, creating a dead short.
Disassembling the motor and giving it a good clean may be all that it takes to bring it back to life.
Use brake-clean to clean the winch motor.If cleaning does not help, it may have a burnt coil or a short in the motor armature. This may happen if you wire the winch incorrectly or if it’s been overheated.
Possible Solution: Replace or repair the damaged motor. If the motor is damaged, it may need replacing or a complete rebuild performed by a specialist.
The brushes will wear over time, or they may become damaged from a damaged armature commutator.
Suggested Solution: Replace worn or damaged brushes. If the motor has some age to it, the brushes may be worn and need replacing. And if the motor armature gets damaged, it may also damage the brushes.
When you engage the winch, either using the handlebar rocker switch or a wired or wireless remote, the winch motor will turn just one way.
It may spool in but not out again, or it may spool out but without being able to spool it back in.
Before you spend time and money on more expensive parts, it’s a good idea to make sure the problem is not in the wiring, as these kinds of issues are usually cheap and simple to repair.
Again, the cause of the issue maybe some sort of wiring issue.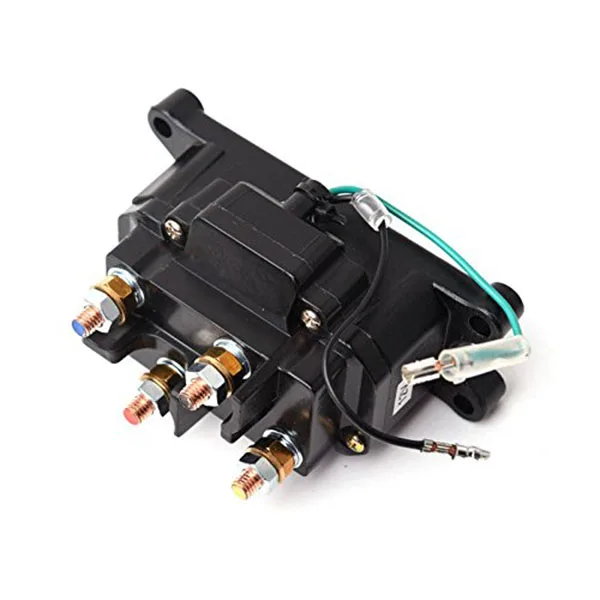
But before you check the rest of the wiring as described above, you should start by looking at the cable that goes from the remote switch to the contactor.
The cable itself may be damaged, or the connector at the contactor may have come loose.
Also, check if the pins inside the remote control plug have become pushed out of position or bent.
Suggested Solution: Repair or replace any damaged wiring.
If the switch is only partially defective, the winch may not go completely dead but can work in only one direction. Test the switches as described above to see if they are all working properly.
If you’ve ruled out that the problem is not in your wiring, you will likely find it in the solenoid inside the contactor.
You can compare the contactor to an ordinary relay. They have the same purpose: To prevent sending all of the current directly through the remote switch, which would require a very impractical huge switch.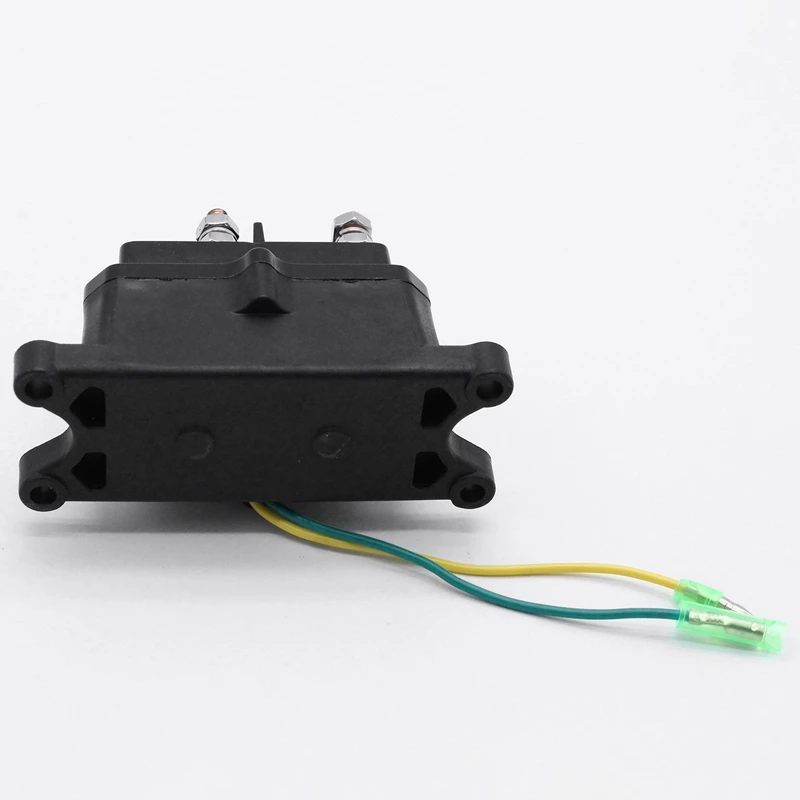
The contactor is basically a huge switch that can handle high currents. It’s activated with a low current from a much smaller switch.
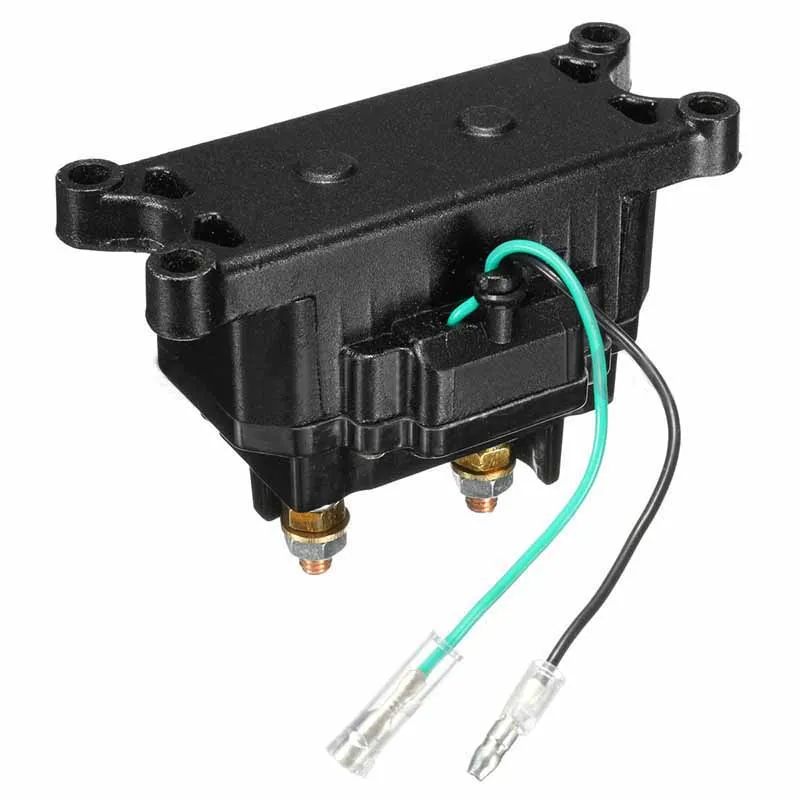
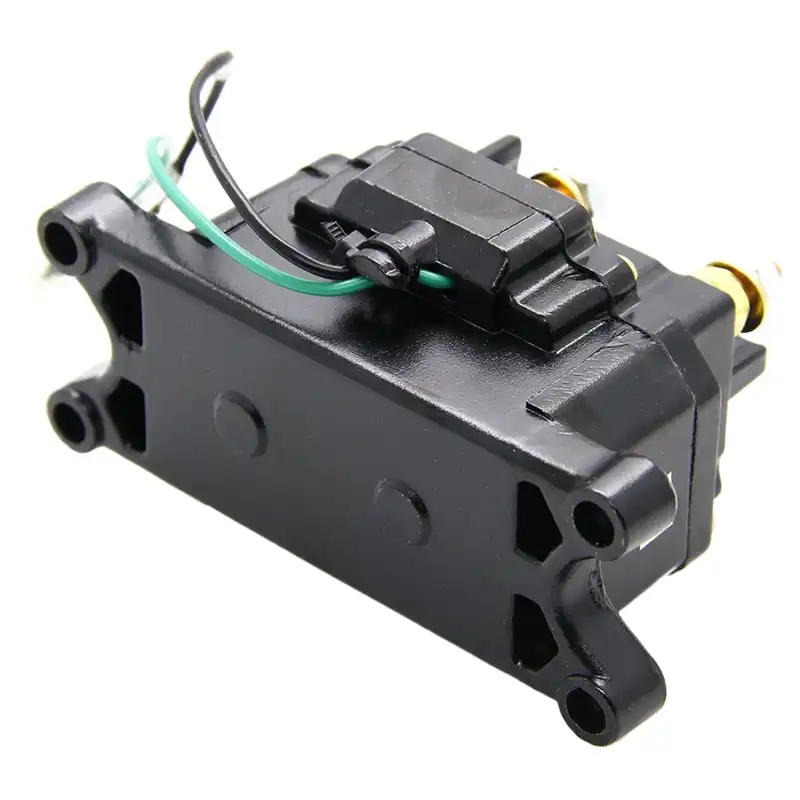
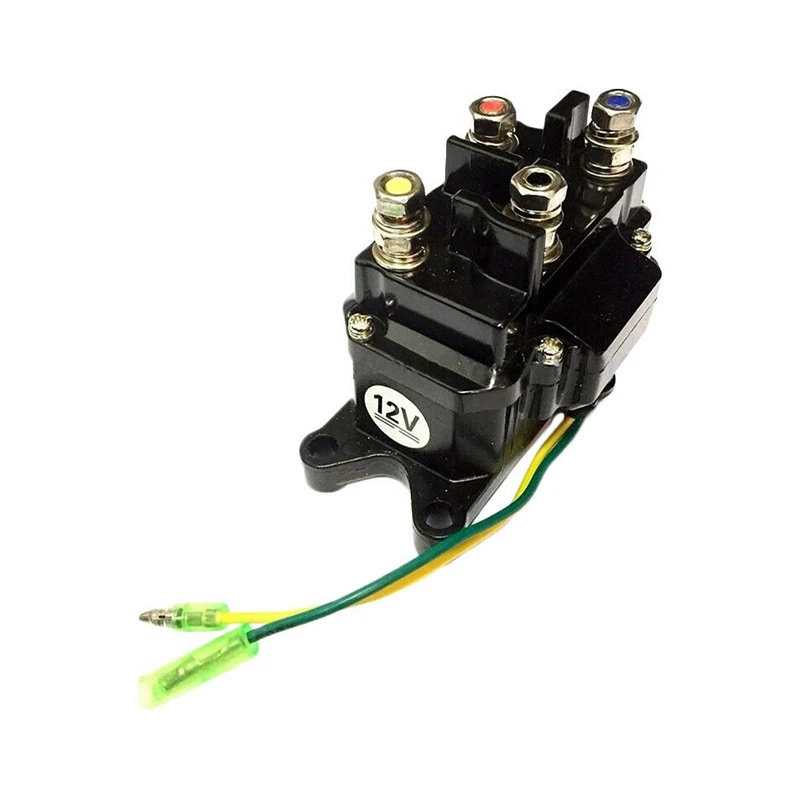
This contactor uses only black and red color-coding. Others use yellow and blue as well.All ATV winches will have one, and its job is to switch between sending a positive and negative electric current to the winch. This is what determines which way the engine turns.
Inside the contactor, you’ll either find one two-sided or two single-sided solenoid magnetic coil switches. One is activated when pressing the in button, and the other is activated when pressing the out button.
When the solenoid works as it should, it will physically move when it’s being activated. This is what makes the audible clicking sound when you activate the winch switch.
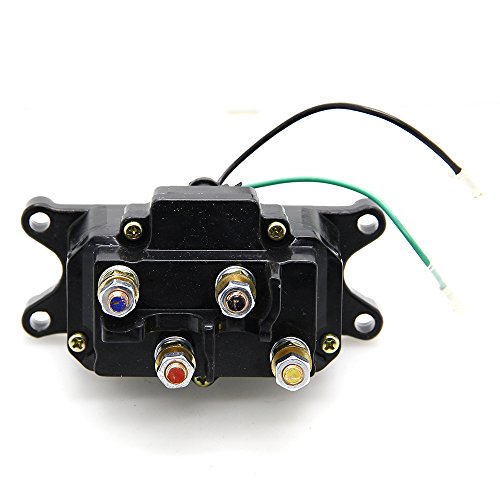
A two-sided solenoid will have four battery cable connections, where one side is wired + to – and the other side is wired – to +. These are often marked with red, black, blue, and yellow, matching the wires that go on them. Some winches use only red and black color coding.
Solenoids do, however, tend to break or get stuck. When it’s stuck, you won’t get it to switch between positive and negative current.
Suggested Solution: You can try gently tapping the contactor with the handle of a screwdriver to free it up. But this will just be a temporary fix. It may soon get stuck again until you replace the contactor with a new one.
Because of the wet and muddy conditions that lead you to get a winch in the first place, the solenoids may rust over time. Rusted plungers will not move freely, so that you don’t get proper contact.
When you take off the contactor cover, you will quickly see if corrosion is what’s causing your issue.
Suggested Solution: Replace rusted contactor.
You can test the solenoid by hooking a test light on the cables that go to the winch.
Test first with the blue, then with the yellow. If you don’t get a light with one of them, you likely have a bad solenoid.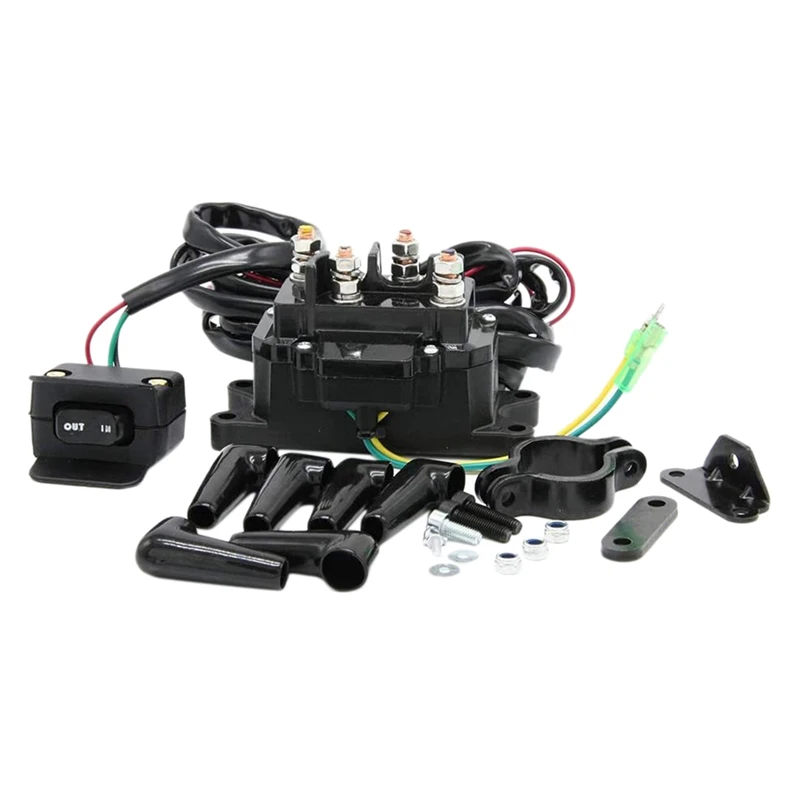
A good way to protect your new contactor is by slathering it with dielectric grease and make sure it’s placed up high and dry.
This one is widespread, and when it comes to troubleshooting, it has a positive side to it:
When you hear an audible click sound, you know that the contactor is getting power when the switch is being pushed. This means that everything up to the contactor, including the switch, should be fine.
Suggested Solution: Start by making sure the battery is fully charged and has a voltage reading of at least 12,4V. Remove the battery terminals and clean them to ensure a proper connection.
Also, make sure that the grounding cable on the winch motor housing is properly fitted.
This leaves either the winch motor or the contactor.
When you are in a situation like this, you want to rule out one or the other.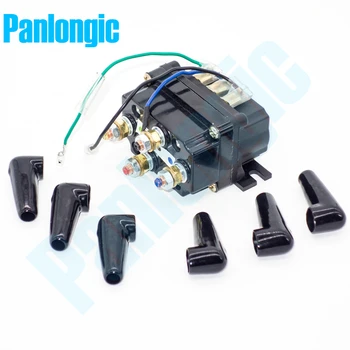 Again, the easiest way to go about doing this is by performing the jumper cable test as described above to see if the winch is working or not.
If the winch works as normal when you power it with jumper cables, the issue will very likely be in the contactor.
The solenoids may be firing up, but they are not connecting. This may be due to corrosion or damage from overheating.
Suggested Solution: In this case, the contactor needs replacing.
If the motor does not turn as normal when being fed power directly from the battery, you know it has some issue.
The possible causes for it not working and procedures for troubleshooting and fixing are the same as when the winch is completely dead.
If the winch works fine sometimes, but other times it just makes a clicking sound, the cause of the issue will likely be the same as when you always get clicking, and the winch never works. Just follow the steps above, and you should find your problem.
If the winch works sometimes, but other times is completely dead, you are more than likely facing a loose cable, creating a bad connection somewhere. Go over the wiring, and make sure nothing has come loose.
You may find that the winch turns but does so very slowly. It seems to seem to be down on power or may even stall out when pulling loads that it normally should manage just fine.
This may be due to a damaged motor, as described above, where you just get a clicking sound. Other possible causes are:
If the cable or rope, for some reason, is not spooled onto the drum in the correct direction, it will work against the automatic brake. This will be like trying to drive your car with the handbrake on.
Suggested Solution: Spool the cable or rope all the way out, and re-install it in the correct direction. There should be a sticker indicating correct drum rotation.
Suggested Solution: Fully charge the battery. Replace it if the battery is damaged. Clean terminals.
If the battery keeps draining, even after replacing it, the issue may be with the bike’s charging system.
Related: 10 Reasons Why Your ATV Battery Keeps Draining (Going Dead)
Suggested Solution: Please refer to the procedure for re-greasing the gears when the winch won’t free spool.
If you put too much grease in the planetary gears, have used the wrong grease (too thick), or if the grease has gummed up due to water contamination and age, the gears will not turn as freely as they should.
Suggested Solution: Remove old grease, apply correct amounts of new grease.
Brand new planetary gears with factory grease.
If your winch cable has become all jammed up and goes in no matter which way you run it, this little trick may get you out of a pinch.
This works most of the time.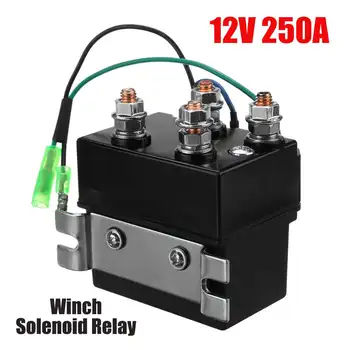 Other times it just makes the situation a lot worse.
Another tip is to put the winch in a free spool position and use another winch to pull it out.
While some heat is normal whenever the winch motor is being put under a heavy load, you may find that it gets abnormally hot after being used for a short time.
Also, note that operating the winch over a long period may also overheat it, with the risk of permanently damaging the motor. Take breaks to allow the motor to cool down.
Suggested Solution: Remove the winch motor end cap. Use some fine sandpaper or emery cloth and give both the motor end shaft and the inside of the bushing a light rub.
Suggested Solution: Replace winch motor.
The motor may be turning, but you cannot get the winch to engage.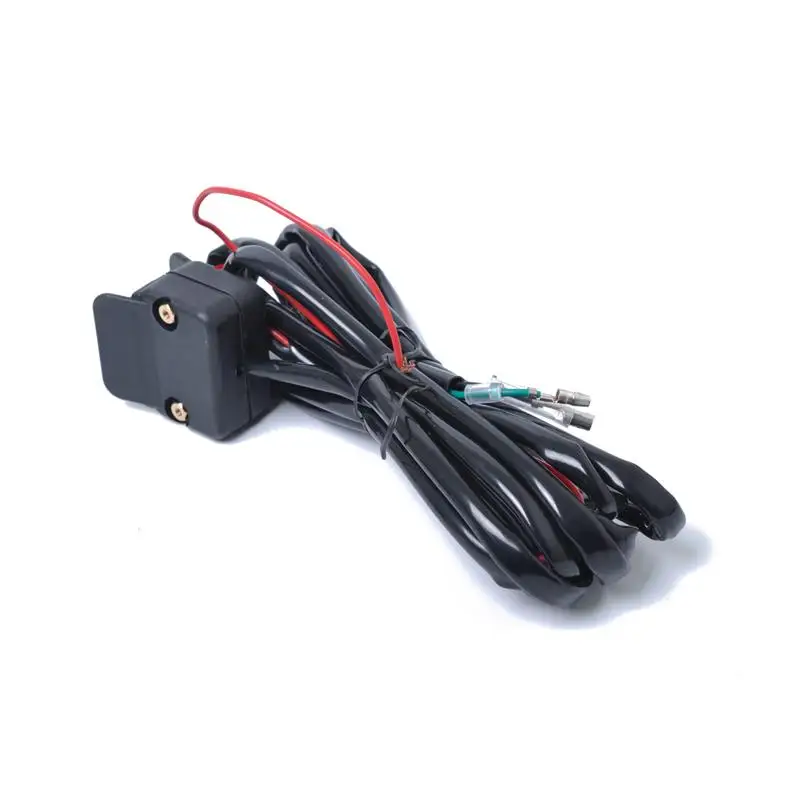 Or you may have problems getting the winch to disengage to the free spool position.
When the engage lever does not budge, the problem can be with the knob/ lever itself or with the gears; it operates.
Suggested Solution: Clean, remove rust and apply new grease.
The lever needs to come out to be cleaned, and any rust must be removed. Some levers can be removed without disassembling the winch.
Other winch models require some disassembly for the lever to come out.
Now that your winch is already disassembled, it may be a good idea to service the gears while you are at it.
Suggested Solution: Clean and remove corrosion. Apply oil.
Inside the winch, on many models, there is a ring gear that needs to slide freely sideways for you to be able to engage and disengage the winch.
If this gear or the outside diameter of the winch housing it slides up against starts to corrode, it will become stuck either in the engaged or disengaged position.
Dirt and other debris won’t help the situation either.
Disassemble, clean, remove rust, lightly coat gear and housing surface with oil, and reassemble.
It may also be hard to get this ring gear to slide if someone mistakenly has applied grease on the outside of the gear or to the inside of the gear housing.
While the other winch gears should be lightly greased with some CV-joint type grease, this is not true for the ring gear.
The grease will create too much drag, making the gear hard to operate.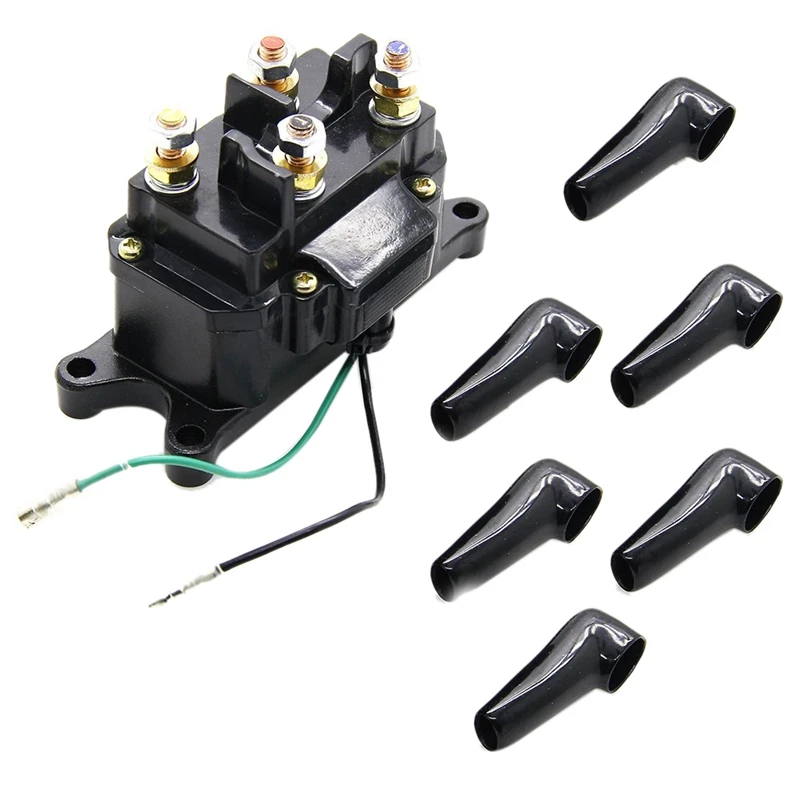 A light coat of oil is all that should be used here.
If the gears have become damaged somehow, you may not be able to budge the engage lever at all. Using the winch to tow someone, or trying to yank on someone that’s stuck, is a common rookie mistake that is likely to strip the gears.
Suggested Solution: Replace damaged gears.
You need to disassemble the winch and inspect for damaged gears. All damaged parts can be replaced to get the winch back in working order.
Warn, and many other ATV winch manufacturers use a design where you need to twist a knob at the end of the winch housing to switch between free-spool and locked position.
However, this design seems to be a bit more fragile than the angled knob often seen on larger winches. Some models have issues with the knob getting stuck due to bad design.
What happens is that the knob gets stuck when it is over-rotated, and the clutch bar gets hung up on a small plastic sliding ramp that’s part of the design.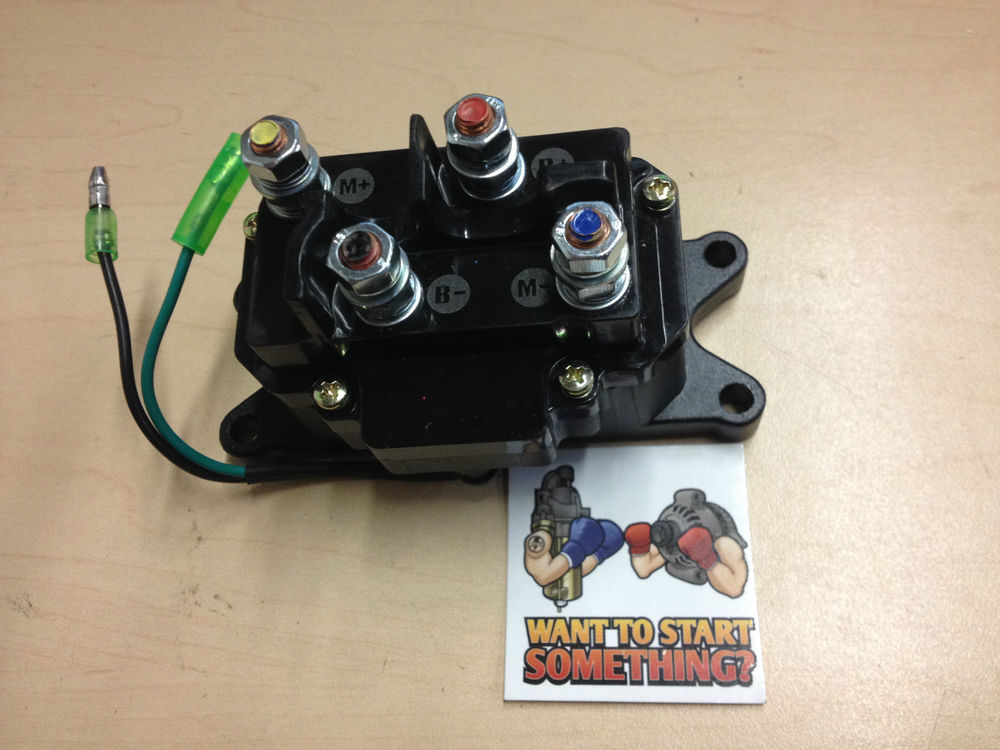
You can disassemble the knob to put everything back in place, but if your winch is affected by this issue, you will soon get it stuck again if you are not careful.
Suggested Solution: Get upgraded parts from the manufacturer.
If you face issues with engaging or disengaging a winch that uses this type of knob, I suggest taking it to the dealer to get upgraded replacement pars if it’s still under warranty.
Even if you managed to get the winch to disengage properly, it very hard to free spool. It requires a lot of force to pull out the cable/rope.
If you engage or disengage the winch under load, it may create a burr outside the ring gear. This creates mechanical friction and makes it harder to free spool the winch.
Suggested Solution: Use a file and gently remove any burr. Apply oil before reassembling.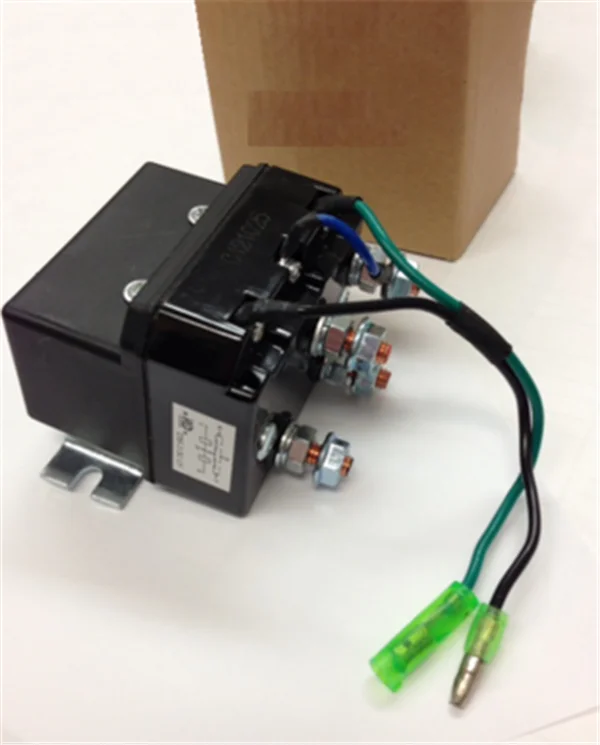
The sliding ring gear and the inside diameter of the winch housing that it slides against should not be greased.
Not only does this makes it hard to engage the winch, but it will also create drag, making it hard to free spool the winch.
Suggested Solution: Remove grease, apply a thin layer of oil.
If you winch at an angle, all the cable will stack up on one end of the drum.
This may not only get the drum stuck, but it may also damage the drum itself by forcing the sidewalls outwards.
Disassembled winch drum.Suggested Solution: Disassemble and try to straighten the drum walls. If it cannot be repaired, the drum needs replacing.
Suggested Solution: Try troubleshooting why it won’t engage as described earlier.
Whether it is due to using the winch, the clutch not being completely engaged, or from incorrect use like towing or yanking, the gears may be stripped.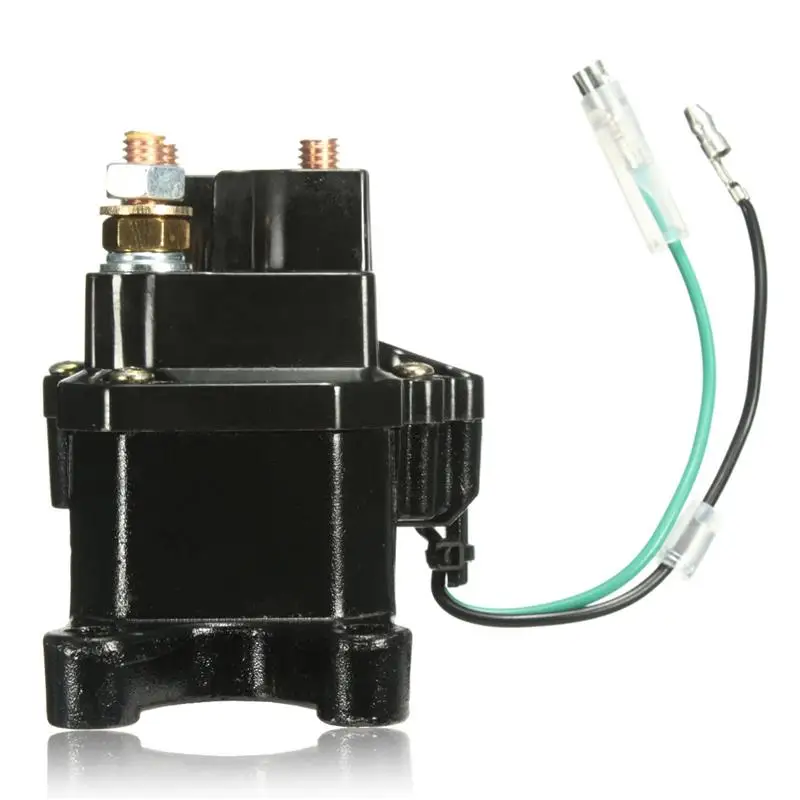
Suggested Solution: Disassemble the winch to inspect the gears, and replace them if needed.
A winch is a must have for off-road riding. It allows you to pull a stuck ATV out of mud, water or deep ruts. Many models of CFMOTO ATVs and ATVs have a winch from the factory, for others it needs to be purchased separately. In this article, we will tell you how the winch works, what to look for when choosing, and also give useful tips on how to use it.
ATV winch is a drum with a cable. An electric motor is located on one side of the drum, and a gearbox on the other. Rotation from the electric motor to the gearbox transmits a shaft that passes inside the drum. The gears of the planetary mechanism are located in the gearbox.
Reducer reduces speed and increases traction. The rotation from the gearbox is transmitted to the drum, which winds the cable, creating traction and gradually pulling out the stuck equipment.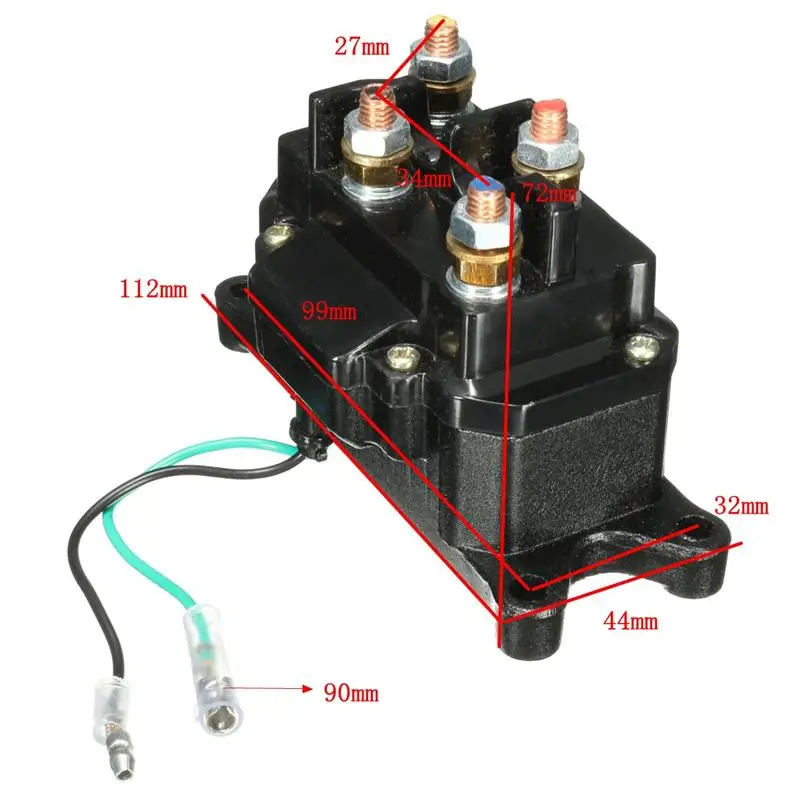
One of the key parameters to consider when choosing a winch is traction. It determines the maximum weight of the load that can be torn off the surface. With each skein of the drum, the winch force decreases.
Thrust is measured in pounds (labeled on winches as lbs), 1 lb = 0.45 kg. The force depends on a number of features: the diameter of the drum, the number of wound turns, the power of the electric motor, as well as the gear ratio of the gearbox.
It is not always necessary to choose the most powerful and fastest winch: the more powerful the mechanism, the more difficult it is to handle. Beginners can harm equipment and even their health - it is not uncommon for a broken cable or a broken hook to cause injury.
Matches the cubic capacity of the ATV:
Steel - cheap and easy. Requires work with gloves, not repairable. May cause injury if mishandled.
Synthetic - requires maintenance but is easy to use. It does not "shoot", and if the cable is damaged or torn, it can be braided on the spot.
Most experts believe that material selection should be based on personal preference, with some riders leaning towards steel over time, others towards synthetics.
The winch is installed on a special platform on the ATV frame. If there is no platform, you need to buy it and install it according to the instructions. The site has standard anchor points that fit classic winches up to 3,500 feet of pull.
When choosing a winch, pay attention to the width of the drum:
With certain skills, you can modify the fasteners and install almost any winch - the main thing is not to make the fasteners “to break” and not to strengthen weak points. If the ATV is under warranty, it is advisable not to touch the frame and buy a standard winch.
Installing the winch is easy, but the connection will have to be tricky. To lay the wiring, it is advisable to remove the plastic from the ATV. The winch must be connected to the control unit and battery. It is recommended to keep the power cable as short as possible to avoid current loss. All wires must be hidden in the corrugation so that they do not come into contact with the frame and are protected from moisture.

If you have any questions or would like further advice on purchasing, installing, operating and maintaining an ATV or ATV winch, please contact your nearest authorized CFMOTO dealer.
Dealers CFMOTO
The use of button modules for switching electrical circuits is not always convenient due to the difficulty of visual position control, especially if there is no light indication on the buttons. Rocker switches are used in applications where constant visual position control is required.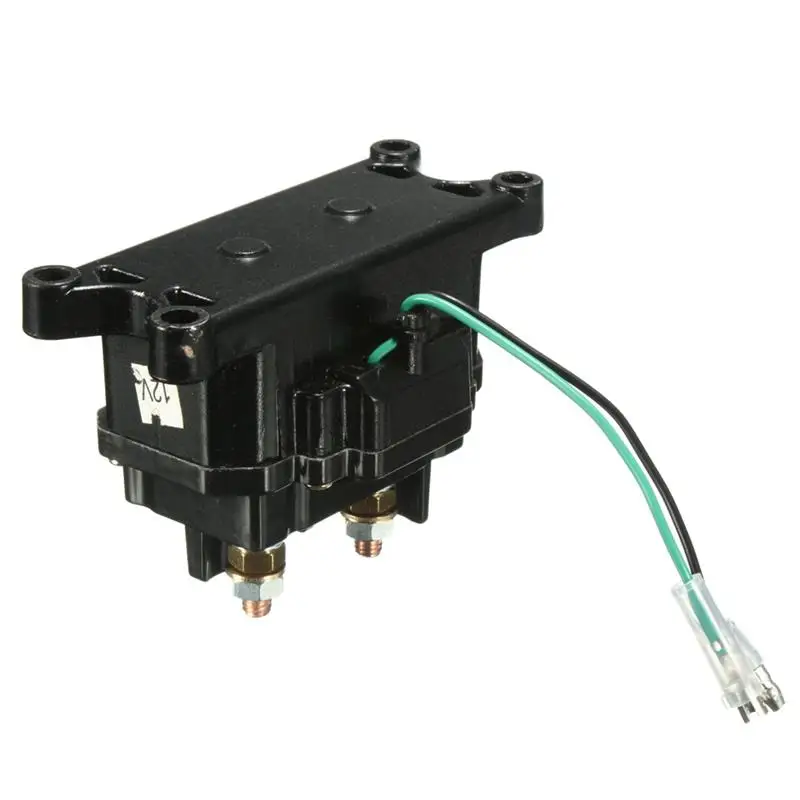 The principle of their operation does not differ from push-button ones, but at the same time you can immediately see in what position the switch is.
There are two-position (on / off) and three-position (on / off / on II) devices, the use of one or another type of switch is determined by the requirement for controlling the operation of electrical equipment or an automation and monitoring circuit. The body of the switches and the control link are made of high quality dielectric material, which is resistant to significant mechanical loads in a given temperature range.
| Series | Key features | Material | Mechanical | PDF | |
|---|---|---|---|---|---|
|
|
| Rocker switches of the KH series, designed for operation in adverse environmental conditions, are protected from accidental activation by a protective cap Available with or without illumination Various body color options Many engraving options | Housing: PA 6-6 Backstage: ABS Rim: PA 6-6 | Working temperature: Degree of protection: IP69K Panel thickness: 0.
| |
|
S-SR |
| Rocker switch in single pole and double pole configuration Possibility of panel installation UL approved Electrostatic discharge (ESD) protection - optional Terminal outlet on the side or bottom Max. current/voltage with resistive load:
| Housing and cover: UL94-VO, glass-filled polyamide Drawstring: polyamide Contacts and terminals:
| Working temperature: Storage temperature: Humidity test: | |
|
AS |
| Rocker switch in single pole configuration Black body, various backstage colors to choose from Connection with a soldering lug or directly to the PCB via terminals double insulation UL and CSA approved Max.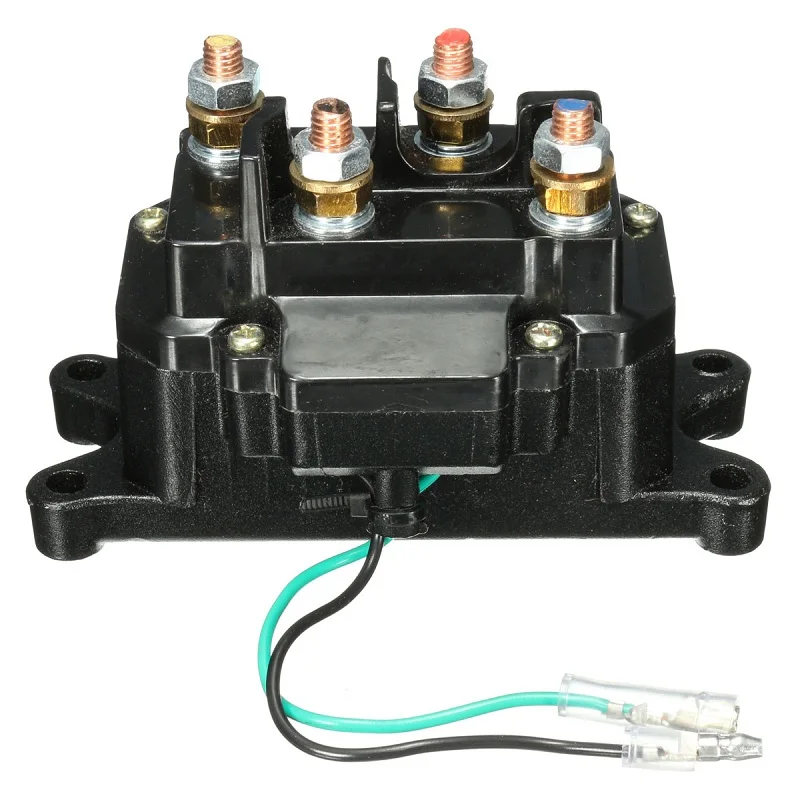 current/voltage with resistive load: current/voltage with resistive load:
| Body: PES Drawstring: polyamide Contacts and terminals:
| Working temperature: Service life: | |
|
MT |
| Rocker switch 1 pole 2 position
Possible degree of protection: IP68
Possibility of installation in PCB via terminals | Drawstring: Nylon 6/6 "soft touch" Finish: matt black or bright chrome
Sleeve: chrome-plated brass | Working temperature: Service life: | |
|
7000 |
| Rocker switch in single pole and double pole configuration Numerous designs for panel or PCB mounting Approvals: VDE, UL and CSA Max.
| Housing: diallyl phthalate or high temperature thermoplastic Drawstring: polyamide | Working temperature: Service life: | |
|
57000 |
| Subminiature rocker switch in single pole and double pole configuration Approved: VDE and CSA Connection with a soldering lug or directly to the PCB via terminals Terminal outlet on the side or bottom Various shapes and colors of curtains Possibility of installation in PCB via terminals Class I Current / voltage with resistive load: 3 A 250 V AC - 6 A 125 V AC | Housing: diallyl phthalate Drawstring: polyamide Contacts: silver Finish: stainless steel or tinned steel | Working temperature: Service life: | |
|
FM |
| Rocker switch in single pole configuration with or without illumination Possibility of connection with a soldering lug, directly to the PCB via terminals or "Quick connect" technology class II Approved: VDE and UL Humidity protection double housing | Body, yoke and frame: PA6/6 Contacts: silver Terminals: silver plated | Working temperature: Life time: 10,000 cycles | |
|
S |
| Rocker switch 2 or 3 positions in single pole and double pole configuration Approved: UL Terminal outlet on the side or bottom Possibility of panel installation Lots of backstage options Max.
| Enclosure and Coating: UL94-VO, glass filled polyamide or PES Drawstring: polyamide Contacts:
| Working temperature: Storage temperature: Humidity test:
| |
|
TR |
| Subminiature rocker switch in single pole and double pole configuration Large variety of contact materials Same wiring diagram on PCB as TL, TP and TG miniature switches Wave soldering Max.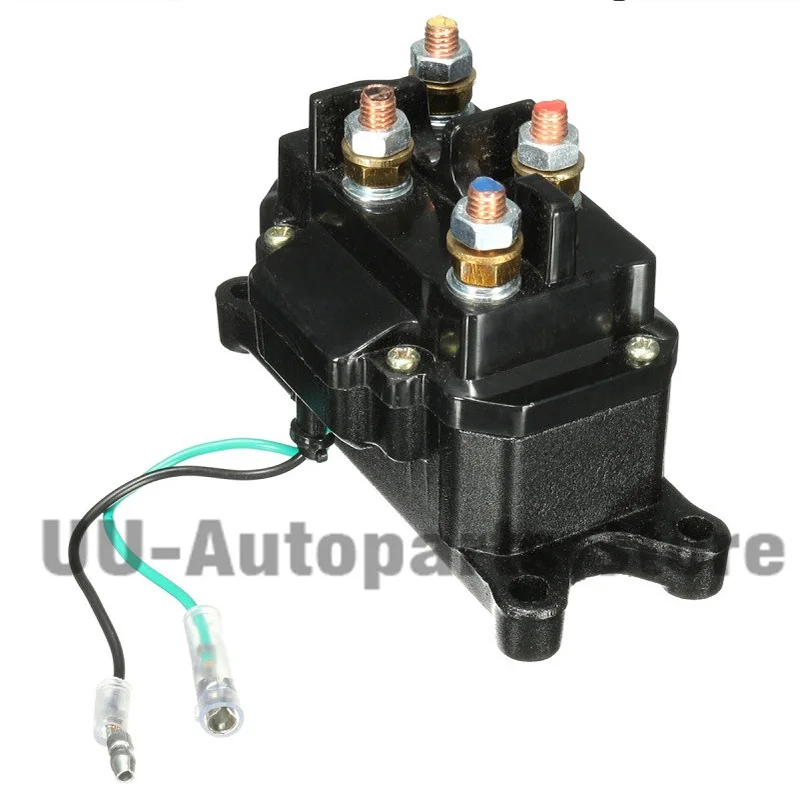 current/voltage with resistive load: current/voltage with resistive load:
| Housing and cover: UL94-VO, glass-filled polyamide Drawstring: polyamide Contacts and terminals:
| Working temperature: Humidity test: 21 days at 95% RH (NFC 20-603 - IEC 68-2-3) | |
|
SMT TR |
| Miniature rocker switch in single pole configuration Wave soldering Max. current / voltage with resistive load: 0.4 A 20 V AC or DC Protected against electrostatic discharge (ESD) up to 10 kV | Housing: 4/6UL94-V0, high temperature thermoplastic Backstage: high temperature thermoplastic Contacts: gold-plated brass Terminals: Tin plated brass over nickel layer | Working temperature: Humidity test: EC 512-4 Service life at full load for:
50g (IEC 512-4) | |
|
2600 |
| 3 backstage shapes Protective rim (Model 2600LP) Approvals: UL, CSA, NF-VDE (EN 61058-1) With backlight or without Various colors of backstage Possibility of connection with a soldering lug, directly to the PCB via terminals or "Quick connect" technology | Housing: melamine / polyester Rim: polyamide Drawstring: polyamide Contacts: silver or silver-plated copper | Panel thickness: 0. Service life at full load: 10,000 cycles Operating temperature (silver contacts): -20º C to 85º C Operating temperature (silver plated contacts): -10º C to 55º C | |
|
KR |
| rocker KR series switches Protected against accidental activation Available with or without illumination Various body color options Many engraving options | Housing: PA 6-6 Backstage: ABS Rim: PA 6-6 | Working temperature: Degree of protection: up to IP69K Panel thickness: 0.8 to 4.6 mm Life time:
| |
|
KL |
| Two- and three-position rocker KL series switches Protected against accidental activation Available with or without illumination Various body color options Many engraving options | Housing: PA 6-6 Link: ABS or elastomer membrane Rim: PA 6-6 | Working temperature: Degree of protection: up to IP69K Panel thickness: 0.
| |
|
KI |
| rocker switches series KI Long service life Various body color options Lots of engraving options 3 types of terminals Illumination: 8 colors to choose from | Body and rim: ABS Terminals: silver plated brass | Working temperature: Degree of protection: up to IP68 Panel thickness: 0.8 to 4.6 mm | |
|
KG |
| Two- and three-position rocker switches series KI Approved: VDE (EN 61058-1) With backlight or without Protected against accidental activation | Housing: thermoplastic, UL94-VO Terminals: silver plated brass Contacts: silver grain | Degree of protection: up to IP65 Panel thickness: 0.  | |
 8 to 4.6 mm
 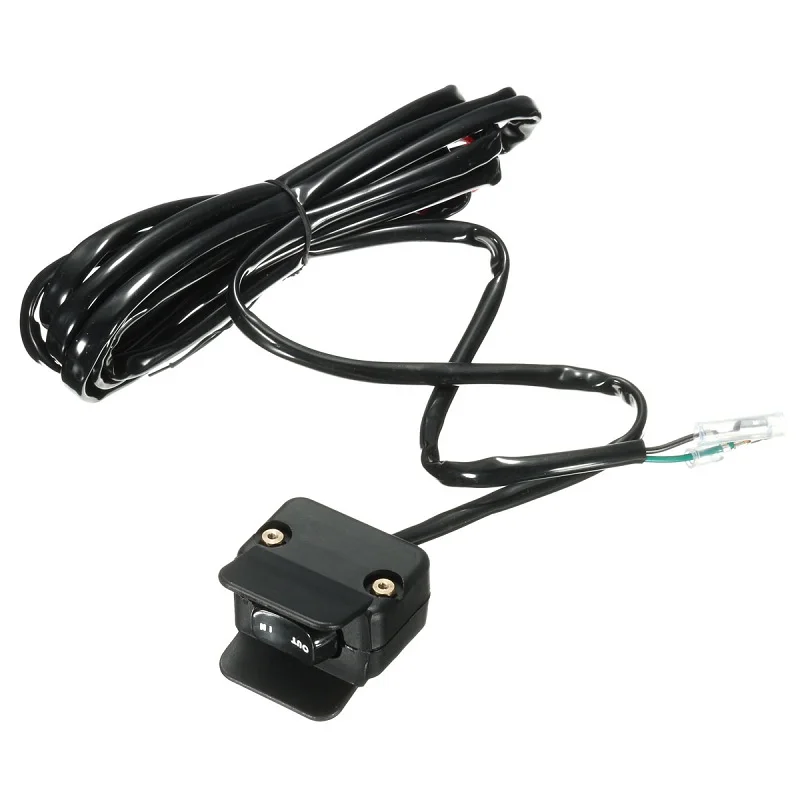 current / voltage with resistive load:
  current / voltage with resistive load:
 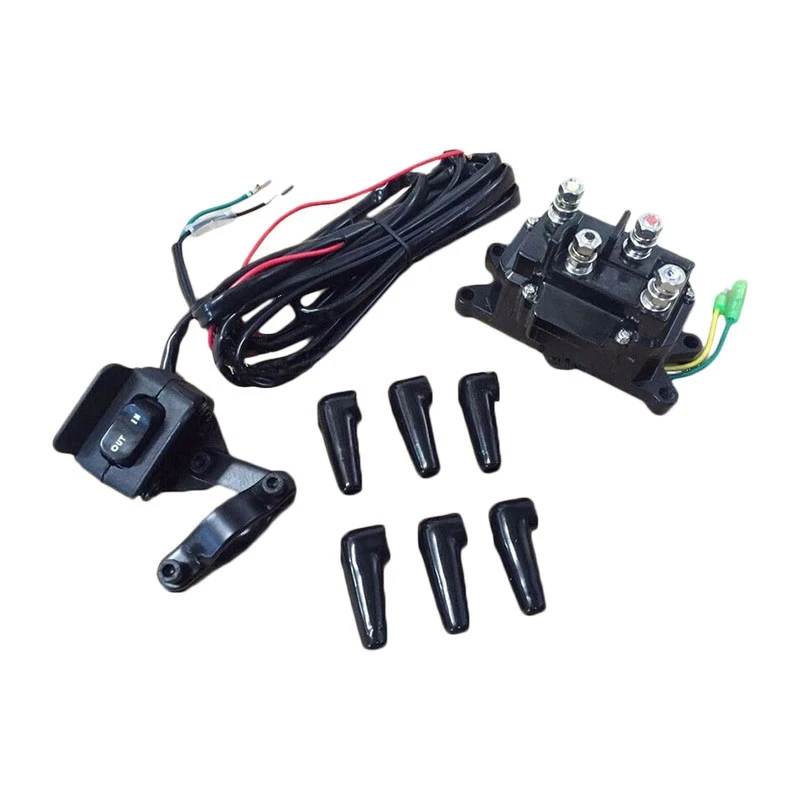 8 to 4 mm
 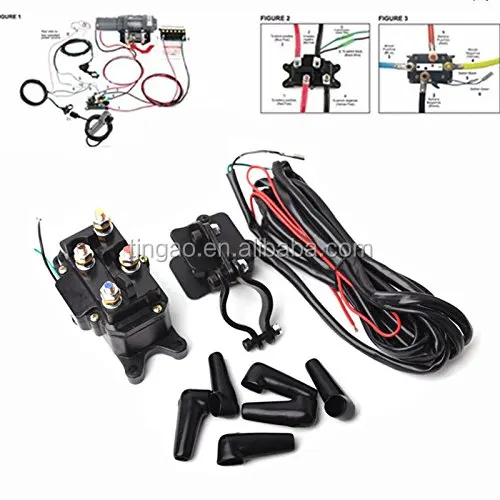 8 to 4.6 mm