All bike tires slowly leak air every day. Even if you’re an occasional rider, and you only take your bike down from the bike rack once a week, the tire pressure will still decrease. Before you ride, you should always check your tires’ PSI and, if needed, inflate them with a floor bike pump or a handheld pump.
On the sidewalls of your tires, you’ll see the manufacturer’s recommended pressure range for PSI (pounds per square inch). Different bike tires have different ranges, and narrow tires need more pressure than wide tires. The recommended PSI for different tires are:
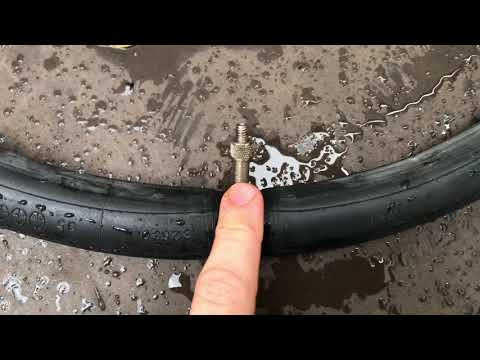
Experienced cyclists can often estimate whether their tires need to be pumped by pinching the tire between their thumb and forefinger. The more accurate way of knowing when your tire should be pumped is by measuring its pressure with a pressure gauge; if the air pressure is measured below the recommended PSI, it’s time to pump.
First pump your bike tire to the middle of the range for the recommended PSI. You also need to take your body weight into account. Tires that bear a heavier rider need more PSI. Weather conditions and terrain also affect how a bike rides, so you’ll need to experiment with different PSIs to feel what’s most comfortable to you.
A Schrader valve is the type of valve you’ll find on car tires, older bike tires and mountain bikes. It consists of a metal pin in the center of a threaded valve, and a rubber cap that’s screwed onto the valve. Most bike pumps like those we reviewed have a dual head to accommodate both Schrader and Presta valves or a single head with an adapter.
A Presta valve is found on road bikes and some mountain bikes. It’s a slender valve with a nut at the top that is loosened and tightened before and after inflation. Almost all new bike pumps have a head with openings for both Schrader and Presta valves, or they have an adapter for switching from Schrader to Presta, like one of our top picks, the Topeak – Road Morph G.
If you’re out riding and your tires need air, you could give them a quick inflate with a CO2 injector, like the one we reviewed. But if you don’t have a CO2 injector in your bag, and you forgot your mini pump, then you can pull into a gas station and inflate your tires there.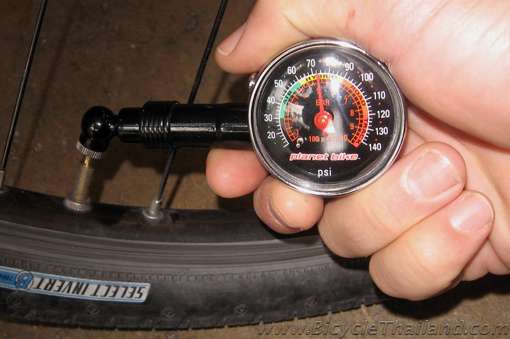
If you don’t have a pressure gauge, ask the station attendant for one. Inflate your tires to optimal pressure in short bursts; a gas-station air pump has very high pressure, and you run the risk of popping your tire.
A gas-station air pump will only fit a Schrader valve. But if your tires have Presta valves and you don’t have a Presta valve adapter, there’s still a way to inflate them.
Share this Review
Gene Gerrard, Writer
Gene has written about a wide variety of topics for too many years to count.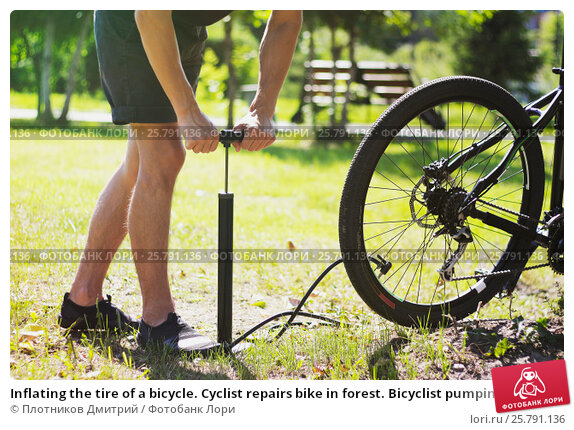 He's been a professional chef, cooking-appliance demonstrator, playwright, director, editor of accountancy and bank-rating books, Houdini expert and dog lover (still is). When he's not writing for Your Best Digs, he's performing as a magician at the Magic Castle in Hollywood.
by Mike Anderson
themikeanderson
6th July 2015While the majority of you will almost certainly know how to inflate the tyres on your bike, it’s another of those simple tasks, like changing an inner tube or using clipless pedals, that can seem pretty confusing to a beginner.
There are plenty of different types of pumps, inflators, valves, tubes and tyres – and all that can be a real nightmare if you’re coming to it for the first time.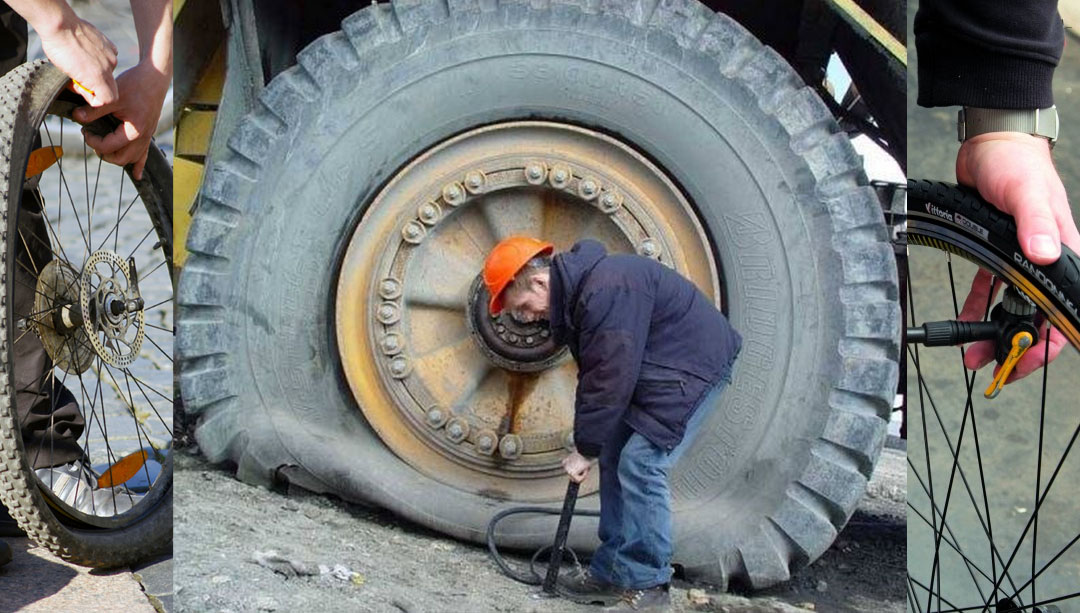
So here’s a handy guide to all things tyre inflation that’ll help to clear up any ambiguity surrounding the subject and have you fully inflated and ready to ride in no time…
The best place to start is what type of valves your inner tube (or tyres, if you’re running tubulars) have. There are two basic types of valves that you’ll find on bikes: Presta and Schrader. For the most part, inner tubes and tubulars on road bikes will use Presta valves, and mountain bikes will use Schrader valves.
The visual differences between the two are obvious, with the Presta (pictured above) being slimmer, lighter and having a lock nut to close that you can see on the top. Schrader valves are wider, more robust and have a spring mechanism on the inside to keep the valve closed, rather than a screwable top section.
Because the widths (or diameters if you prefer, seeing as they’re both cylindrical) are different, they’re not easily interchangeable in wheels that are designed to accept one type.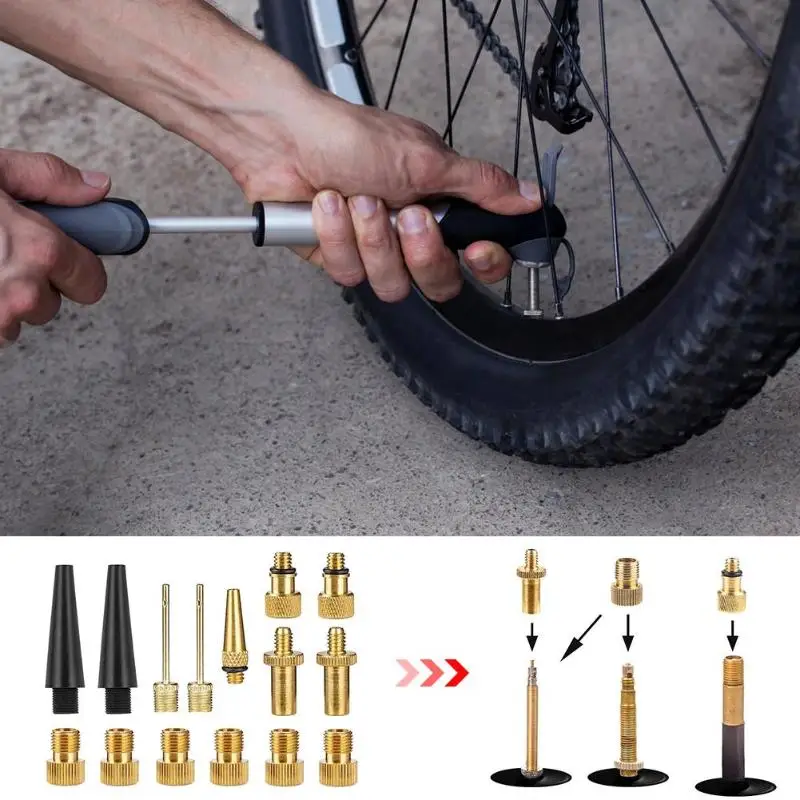
Schrader valves are too thick to fit through the tube hole in a road rim, and Presta valves will need adapters or shims (or an awful lot of electrical tape) to fit on an MTB rim. Plus, in really narrow road tyres, there might not even be space for the large Schrader valve to fit between the beads.
As they have no spring in the valve, Presta valves are easier to pump up than Schrader, especially so with small capacity hand pumps, and it also means small pumps don’t need an in-built device to depress the spring in a Schrader valve.
One of the smart parts of Presta valve design is that even when the top section is open, it won’t leak air unless it’s pressed down. That means even if you forget to rescrew after you’ve pumped the tyre up, you shouldn’t find yourself with a flat again 500 metres down the road.
Because the two valve types are different, they require two different types of head on a pump – or, as is often the case, an interchangeable head.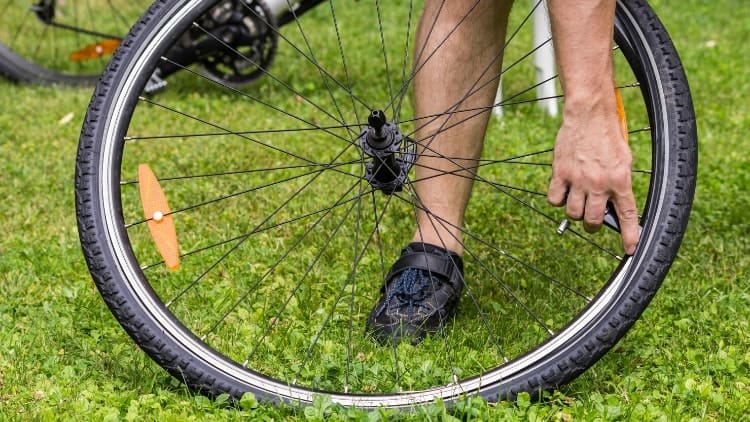
In other words, you can’t use a Schrader-headed pump to inflate a Presta valve tube without an adapter, and the opposite operation won’t work at all.
Fortunately, most modern floor pumps have a very simple answer for this: a pump head with dual attachments. And that’s even better if you ride both road and mountain bikes, because it means you only need the one pump for both jobs.
The Birzman pump (left) is set up for Presta valves in the picture, but to inflate a Schrader valve you have to unscrew and remove the gold section. But on the PRO pump (right) it’s much easier as there’s a dual head with an ‘s’ at on one side and ‘p’ on the otherSome are very obvious (like the PRO pump on the right of the picture) as there are literally two different attachments on the end of the hose but others (like the Birzman pump pictured left) require you to unscrew the end to reveal the Schrader adapter, or in some cases even flip the valve end over.
It’s still a simple operation but one that can seem completely confusing if you’re just standing there with the valve hose in your hands trying to figure it out.
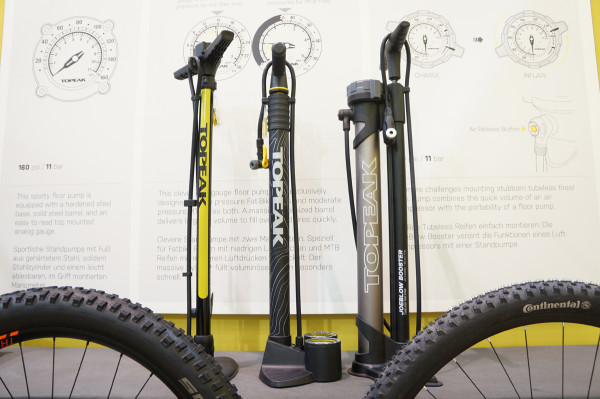
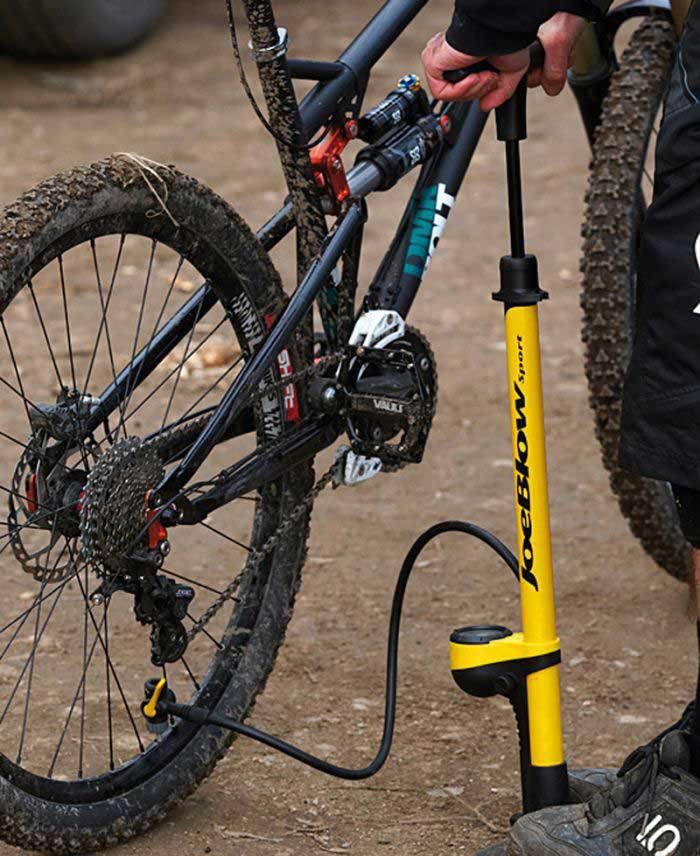
When it comes to actually pumping up your tyres, there are a few different types of pump/ways to do it. The first and most common of these is the track pump. Track pumps are one of those essentials that every cyclist should own.
They’re usually around two feet high, have a fairly large capacity and are capable of inflating tyres to high pressures – usually much higher than required. For example, my track pump can inflate to 160psi which is far higher than I’d ever want my tyres.
Track pumps are quite large and generally kept in the garage (or wherever you keep your bike in the house) to pump up tyres before you ride.
The main bonus is that because of their high capacity, they make inflating tyres to high pressure comparatively easy – you can inflate a tyre all the way up to 100psi in 10-15 strokes easily (depending on pump capacity).
Track pumps are quite large, comparatively, but they’re the best and easiest option to pump your tyres up before a rideThen there’s the mini pump. Mini pumps are ideal to stick in your jersey pocket in case of a mid-ride puncture. Most are capable of inflating tyres to a reasonably high pressure (though not as high as a track pump), but it’s a longer and occasionally more frustrating experience.
However, no matter how frustrating it’s vastly preferable to being stuck 40 miles from home with a flat and no way of pumping it up.
Mini pumps come in various varieties – some more ‘mini’ than others – and most will have a tube that extends and packs back into the end of the pump in order to add a bit of flexibility without which it would be very easy to snap off the end of a Presta valve. You may laugh, but it can happen.
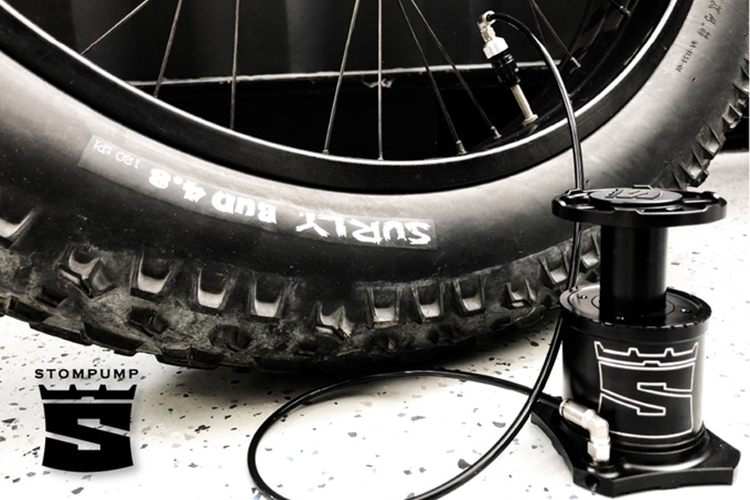
Mini pumps are ideal for mid-ride puctures. Most have a rubber tube that you can pull out of the pump to add some flexibility and make it easier to inflate tyres on the goThe third common option isn’t strictly a pump, it’s a mini inflator. These use a small valve ending and inflate using disposable CO2 canisters.
The bonus of these is that they inflate incredibly quickly and, depending on the capacity of the canister, can pump a tyre all the way up to around 200psi – not that you’d need to go that high.
The down side is that each canister is single use only, so it’s only as good for as many as you’re prepared to take with you. The SKS Airboy CO2 combines a mini pump and CO2 inflator in one handy unit, which solves that problem.
Mini inflators are a great option for mid-ride punctures. They’re made of two parts – the gas cylinder (on the left) and the head unit (right). But each cylinder is single use only, so you’ll need to carry multiple if you want to be able to inflate more than one tube or tyreThere is one final option, and that’s an air compressor. However, they’re pretty expensive and almost exclusively used by pro team mechanics.
They do make the process an awful lot simpler, and they can also make it easier to hit a desired psi if you have a strong preference. It also saves the pro mechanics from having to pump up 18 individual tyres on the bikes and all the spares every morning at a big race like the Tour de France.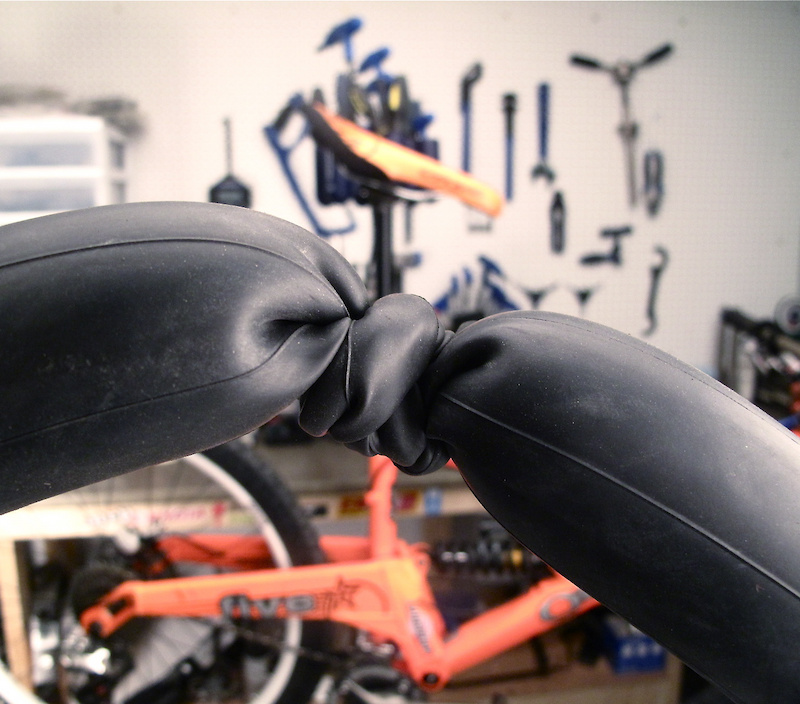
The first step is unscrewing the Presta valve head. It unscrews anti-clockwise and you’ll be able to see it moving upwards along the small central spindle. Make sure it’s open all the way.
Next, attach the pump end to the valve head. As I mentioned earlier, make sure you’re using the Presta attachment on the pump, not the Schrader as otherwise you’ll get precisely nowhere.
Also, you need to ensure the pump head is securely fastened onto the valve otherwise the air won’t go into the tube properly. It needs to be a sealed system to be most effective. How you create that seal depends on the pump. A lot will have a lever you flick up to secure the pump head, some will have a chuck to screw on.
Keep an eye on your track pump’s pressure gauge while you inflate your tyres. If you go over the recommended maximum pressure the results can be drastic, explosive and expensiveAfter that simply pump up the tyre, keeping an eye on the pump’s pressure gauge, and make sure you don’t over-inflate the tyre (most tyres will have written on the side the suggested pressure range).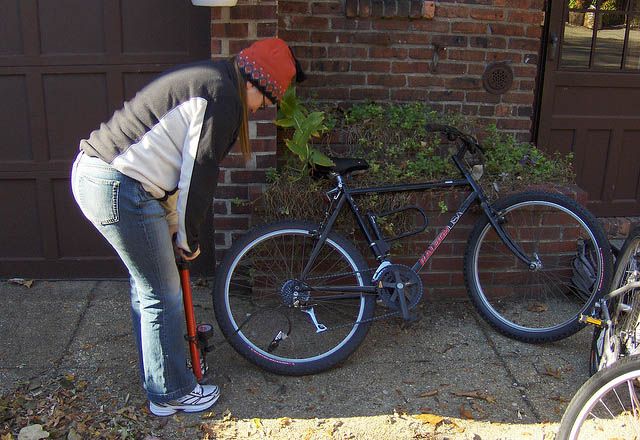
While you might fancy going a little under the bottom number to cushion the ride or add a little more grip, going over the top one could cause the tyre to explode off the rim, potentially writing off the tyre, tube and rim.
Generally you can find a happy medium between the two through experimentation, and depending on your weight, where you ride, and how much cushioning you want the tyre to provide.
And that’s that. Now you’re ready to roll. Simple, right?
Please enter your email so we can keep you updated with news, features and the latest offers. If you are not interested you can unsubscribe at any time. We will never sell your data and you'll only get messages from us and our partners whose products and services we think you'll enjoy.
Read our full Privacy Policy as well as Terms & Conditions.
Cookies help us deliver our services. By using this website, you agree to our use of cookies. Learn More
Accept
production
 Changing the nipple on a bicycle
 The nipple, in essence, is a nut, the essence of which boils down to the ability to inflate the wheels. And, oddly enough, it is he who is the undeniable link between the cyclist and the motorist. Why? The roots of this story go back to the 19th century.
Initially, all vehicles had wooden wheels. And only at the end of the 19th century, a certain John Dunlop came up with the idea that inflatable rubber wheels are much more practical and convenient. Therefore, he developed special protectors for his son's bicycle, inside of which there was air. Periodically, the wheels required pumping, for which the nipple was invented. Thus, a new word appeared in the history of transport development.
These parts began to be used not only for bicycle, but also for automobile wheels. Over time, varieties of these miracle nuts appeared. We will talk about them.
Bicycle nipple is also referred to as spool valve in some information sources.
However, these are slightly different concepts. The spool is that part of the nipple that directly supplies air to the tires, moving in a straight line. But for convenience, in this article we will identify these concepts.
| Automotive | A.k.a. Schrader nipple. As the name suggests, this spool valve can be used on both bicycle and car wheels. Moreover, the automobile spool greatly facilitates the task of pumping up the wheels - the auto pump tube fits perfectly into the cap. The diameter of the spool in the standard is 8 mm. It is put mainly on mountain bikes and downhills. |
| Bicycle nipple | Also called Presta. The most popular among his fellows. Such a spool valve keeps the pressure in the tires better, better designed. However, it is almost impossible to use a car pump with it, you must have either a special nozzle or a pump designed for bicycles. Yes, and this type must be handled with the utmost care: the Presta bicycle valve is equipped with a very fragile valve that is easy to break even when pumping the chambers. Therefore, manufacturers often make it screw-in. Diameter - 6 mm. Therefore, manufacturers often make it screw-in. Diameter - 6 mm. |
| Dunlop | A cross between the other two types of spool valve. Outdated model. It is installed only on children's bicycles and on retro bikes. The hole diameter, like that of an automobile counterpart, is 8 mm. |
In everyday life, a cyclist pays attention to bicycle nipples only when the wheels need to be pumped up. Therefore, the topic of correct handling of the spool valve and the pump should be given special attention.
If this piece of technical thought is installed on your iron horse, then inflating a tire will not be difficult either in the garage or on the road (if required). The fact is that the valve on such a device is universal and any pump that is at hand can be used for it.
What are we doing. The autonipple is equipped with a special cap that keeps the pressure in the tires. It must be unscrewed and put in a conspicuous place. Now we install the pump head and fix it with a clip (the clip is parallel to the nipple). Now gently blow air into the tire. The wheel rim always indicates what pressure is acceptable for a given bike. Try not to go beyond these designations, watch the pressure gauge on the pump. Ready! We release the clamp, remove the pump and twist the cap into place. Everyone, you can move on.
Presta
This spool is fitted to all sport bikes. It is slightly smaller in diameter than the autonipple, but its length is much longer - from 42 to 80 mm versus 40. The main feature of Presta is that the valve stem is outside, not inside. And a special nut is also attached to the cap, which additionally traps air in the tires. You should be aware that you will need either a bicycle pump or a car pump with a special hole to pump air. The standard entry is no longer suitable.
How to inflate a wheel. We start, as always, by unscrewing the cap and putting it in the tactile zone (so as not to lose it). Now you need to unscrew the lock nut. And here you need to make a reservation: there is no need to completely remove it from the rod. It is enough just to achieve the release of the rod. It's easy to check - press the valve with your finger and if at the same time air comes out of the wheel, then the job is done. Well, then the process is absolutely similar to the previous, automobile nipple: we install the pump, fix the clamp and in portions, following the monometer, we supply air to the tire. Made!
Dunlop
Surprisingly, this type of valve is very similar in appearance to an auto-nipple, but functionally - to Presta. Dunlops are almost non-existent on modern bikes, but if you're the lucky owner of a retro bike, you should follow the instructions for the Presta valve to inflate the wheel.
What are nipples on bicycle tubes.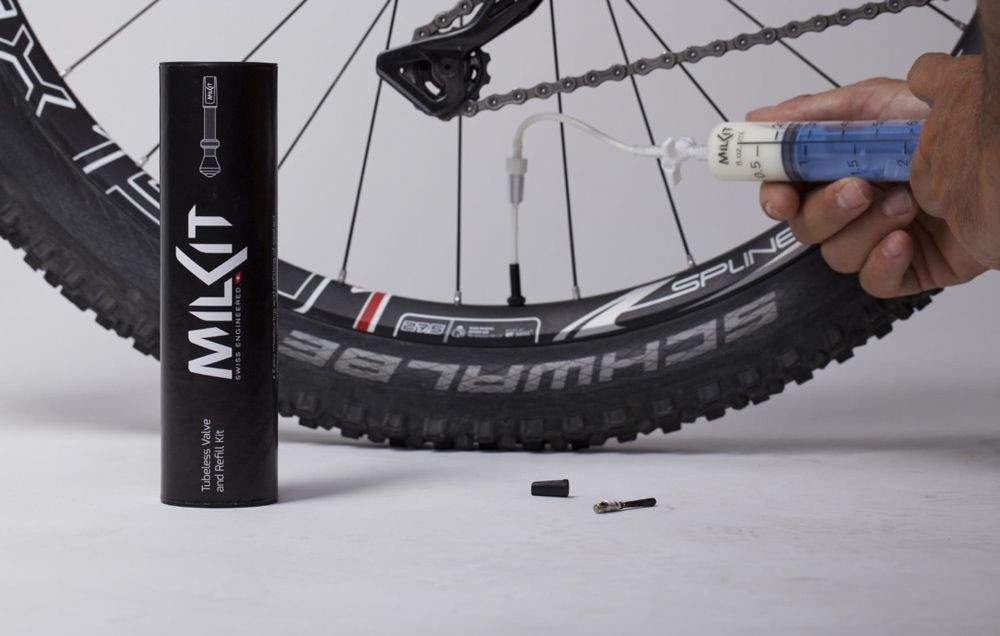
Denoted as SV, made for a hole in rims with a diameter of 6 mm. Available in various lengths. Sizes6 42, 60 and 80 mm (for aero rims). Used on cyclocross, road, mountain racing and hybrid bikes. They are used in tubeless tires, and can also be used in narrow and lightweight rims. With a special extension nozzle they can be used in solid wheels where a very long nipple is needed.
Too much haste or a poor quality pump can break the valve in the Presta nipple. good expensive ones usually use a replaceable screw-in valve.
Designated as AV, made for a hole in rims with a diameter of 8-8.5 mm. The standard length is 40 mm, but they are available in lengths of 60 mm. They are used on hybrids and mountain bikes of the lower and middle levels, as well as on bicycles for extreme cycling. Also used in rear shock absorbers and bicycle forks.
Old type nipple for hole in rims 8 mm. Used on Soviet bicycles. Now cameras with such nipples are practically not found. Dunlop nipple chambers can be pumped with a Presta nipple pump.
Made of metal with a thread for expensive cameras of good quality (Continental, Schwalbe, Nokian and others). To prevent the nipple from shifting or sinking during inflation, a locking nut is screwed onto the thread.
Rubber-coated in inexpensive cameras that are less comfortable and reliable than metal. the nipple can be damaged by the edge of the hole in the rim or torn off during inflation.
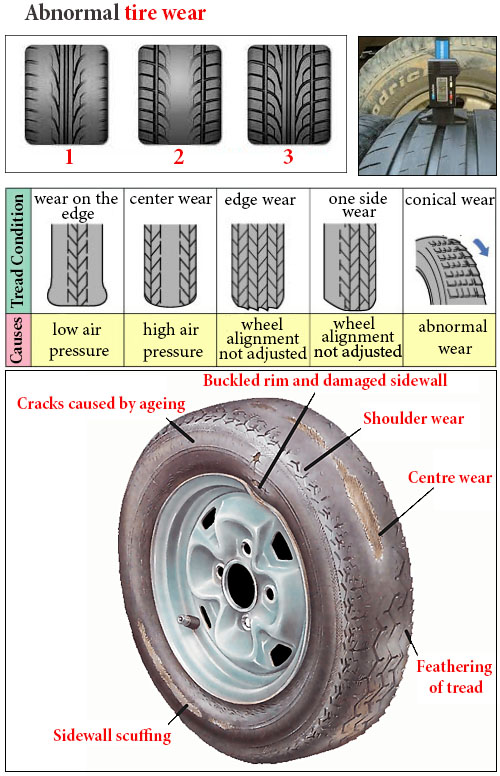
Bicycle tire wear is a rather complex process. It is generally accepted that the main wear of the tire falls on the place where it touches the ground. But, wear also occurs where the tire contacts the wheel rim, especially when riding...
When driving on a flat paved road, the tires must be inflated to the maximum allowable pressure. When driving on a bad rough road, on the contrary, the pressure is reduced, but not too much. The cyclist gains experience over time in choosing the optimal pressure ...
If you run a dry finger over the surface of the rubber with strong pressure and a noticeable dark mark remains on it, then there is too much filler in the rubber and such rubber will not last long.
When a wheel rolls on the ground, both the ground and the tire deform. Because of this, the rolling resistance force increases and, accordingly, wasted work is added during the formation of the rut. Its depth directly affects the rolling resistance...
When choosing a tire for a bicycle, several factors are taken into account: - type of bicycle; - condition of the road surface; - weather; - time of year ...
Nipple, or spool valve - a tubular device that is responsible for holding the air mass inside the chamber, with its help air is pumped in and released. The valve is tight due to the movable valve and the spool on the spring. The part is placed inside a rubber housing, which is fastened to the walls of the chamber or mounted on a washer, made of metal or rubber.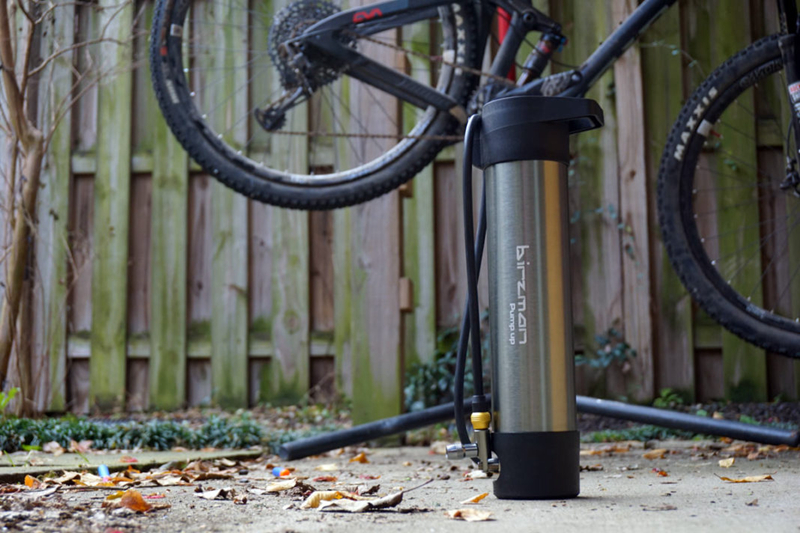
In the event of any damage to the nipple, air is released from the chamber and, as a result, movement is blocked. The easiest way to eliminate this trouble is to buy and install a new bike chamber. But if you can set aside a little time, then you will save a lot, because repairing a bicycle nipple or replacing this part is quite feasible.
Dunlop spool valve
 Used for tubeless tyres. The feature to pay attention to is the fragile valve. But, given this feature, the nipple is made in such a way that you can immediately return.
 Pay attention to the tire pressure every time you use your bike. If you see that it is weakening, this may be a signal of a nipple malfunction. Unlike tire punctures, the pressure does not decrease immediately, but gradually, therefore, it requires attention on your part.
Damage to the nipple can be caused by dirt, broken valve, mechanical damage or wear. As a rule, repair by itself involves the replacement of this part. But sometimes individual elements of a part, for example, a cap or a spring, can be completely repaired.
The rubberized nipple valve is the part that keeps the air inside the tire. From operation, it can be erased and this will reduce the density of its mating with a metal tube. With heavy wear, the valve and spool can hold the air weaker and release it, even if the cap is closed.
A failure can be determined in one of the following ways:
If you break the stem on Prestas, you will need a complete replacement of the part, because the sealing washer is deformed with the Presta. Such a malfunction may be caused by incorrect tire pressure. For example, pumping wheels will lead to a stem failure from a strong air flow. Under-inflated wheels deform the hub mount. Therefore, in order to avoid problems with both punctures and broken nipples, it is important to maintain the optimal pressure in the tires of your bike.
It is impractical to repair old or broken parts, because the cost of nipples is acceptable, they can be freely bought at every car shop. Bicycle nipple repair can be done independently and free of charge. The valve replacement algorithm is suitable for all types - the damaged part is removed and a new one is installed instead. There is a slight difference in the repair of Schrader models. The part is placed in an elastic band, which is tightly fixed on the walls of the cycle chamber. Care is important here so as not to harm the rubber lining of the bushing.
The overall procedure is as follows:

Camera is ready to use, install it in the rim.
Let's start with the main thing. If you are planning a long trip and do not want to spoil your walk, prepare for it in advance. It is advisable to have something with you that will help in emergency situations: an additional camera, patches and spare nipples. And also take a set of appropriate tools.
For example, if the Presta tubes have a lot of pressure, then the stem can simply break out to the hole through which your tires will leave the air very quickly. An unexpected failure of an internal valve in an automobile nipple can again lead to a chamber descent.
Suppose you still have a long drive ahead of you and the wheel is not working.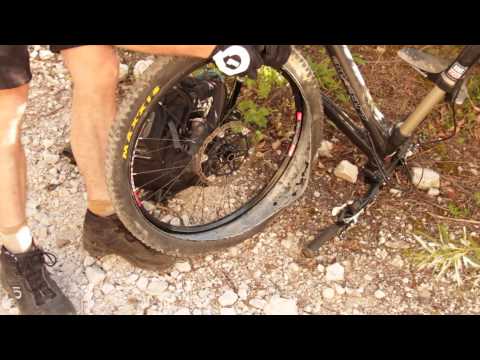 But you prudently took patches in reserve. They will provide indispensable assistance in the event of a breakdown of the Schrader valve or if the nipple cap suddenly fell off.
With this emergency bicycle nipple repair, you can safely reach the end point. But be careful, keep the average speed, so as not to increase the pressure inside the chamber and the cap is not pushed up by air.
So, if the nipple is out of order, it is not necessary to change the chamber. The cost of a new part is low, and now you can remove it from a damaged camera yourself and for free. However, after replacing, pay attention to how well the nipple holds air. If the camera periodically lowers, it may be necessary to do without a new camera.
In this article we will talk about what nipples for a bicycle camera are, what they are and how to choose the right device for yourself, at first glance, a simple device.
A nipple is a specially shaped nut for attaching spokes to a bicycle wheel rim. The temporary connection nipple is usually equipped with a one-way valve and is used in all kinds of pneumatic (inflatable) devices, in particular, bicycle tires.
There are three types of bicycle nipples:
Presta bicycle
Presta (denoted as FV - French Valve, French or Sports, or SV - Sclaverand Valve) nipple - is becoming more and more popular. Recently, such nipples have been used not only on cyclocross, road, mountain racing and hybrid bikes, but also on mid-level models. Available in various lengths: 42, 60 and 80 mm. They are used in tubeless tires, and can also be used in narrow and lightweight rims. With a special extension nozzle they can be used in solid wheels where a very long nipple is needed. With a width of only 6mm, the nipple is the thinnest bicycle nipple. Its weight is 4-5 grams less than the Shrader type nipple. The problem of incompatibility of nipples was solved by pump manufacturers.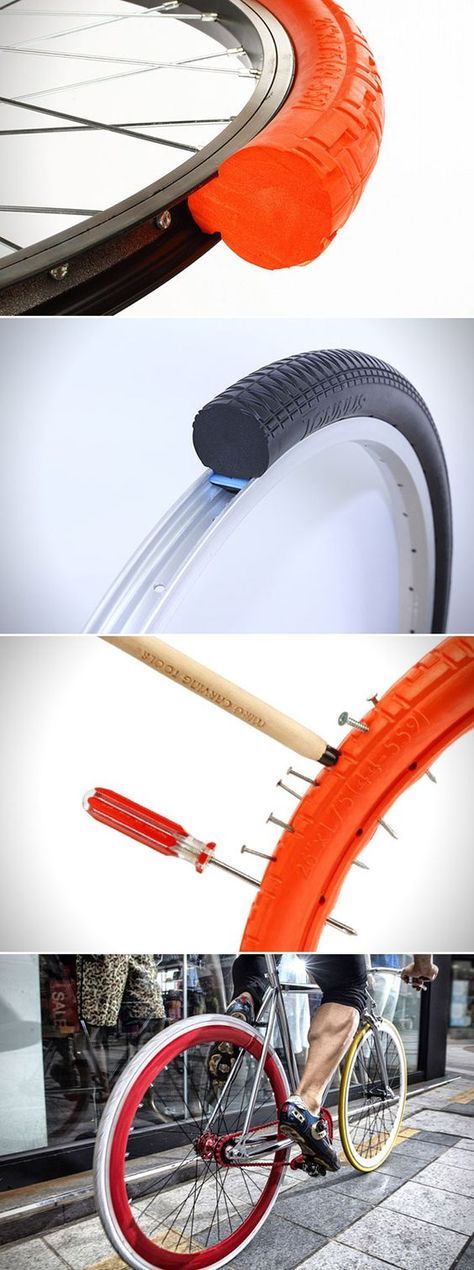 95% of these devices on the cycling market are universal. In order to inflate the Presta chamber, you need to unscrew the pump nut and turn the rubber bushing over. Presta/Shrader adapters are also available, thanks to which you can use a regular car pump.
Too much haste or a bad quality pump can break the valve in the Presta nipple. Good expensive cameras usually use a replaceable screw-in valve.
Rim for Presta nipple with internal width from 17mm can be reamed with 8mm Schrader drill bit and then finished with hole edges - this is considered to have little effect on strength, however the warranty on the rim will certainly be lost.
Schrader automobile
Schrader (AV - Auto Valve or automotive) - the most common type of nipple. It has the form of a threaded cylinder with a diameter of 8-8.5 mm. The standard length is 40 mm, but they are available in lengths of 60 mm. The advantage of such a nipple is the prevalence. In the absence of a pump, you can always pump up the wheels at a car gas station, tire fitting, or by agreement with the driver. They are used on hybrids and mountain bikes of the lower and middle levels, as well as on bicycles for extreme cycling. Also used in rear shock absorbers and bicycle forks.
Contents
 Presta valve
 In an article on the correct assembly of a tubeless bicycle wheel, I mentioned that there are 9 nipples0269 Presta (FV, French) and Schrader (AV, regular car). Below is an image of these nipples for clarity.
After this article, several people asked me by mail and telegram the question: “How to inflate a wheel with a Presta nipple (FV, French), if there is a pump only for a car nipple?”
Don't despair, there are options and very affordable .
First let's talk about modern pump . Usually they are adapted for both types of nipples, but not everyone knows about it. Check if you can unscrew the cap on the valve holder , remove the sealing rubber and unfold the plastic adapter, which means that both FV and AV nipples can be pumped with this pump.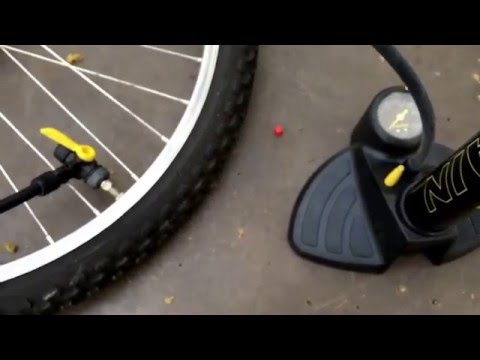 Below I took a photo for clarity, what needs to be unscrewed and turned over.
i.e. on most modern pumps it is necessary to unscrew the cap on the valve , turn the adapter and unscrew sealing rubber . Screw the valve back on. Slightly unscrew the valve on the wheel nipple so that you can press it, put on the pump holder and pump. I draw your attention to that you need to unfold not only the plastic adapter, but also the sealing rubber, otherwise it will not fit into place.
If the pump is old and only for automobile nipple , then in general it is still easier. Remove the valve-holder from the hoses, and put the hose itself on the nipple . At the same time, do not forget to unscrew the nipple slightly so that you can press on it. And most likely you will need a small clamp so that air does not pass through.
You can also buy a adapter from Presta to Schrader (from French to automobile / from FV to AV) for a pump that pumps only through car nipples. The adapter is simple, cheap, available in almost all bike shops. Therefore, you should not immediately buy a modern pump, you can buy just an adapter.
The adapter is screwed onto the French nipple on one side, the valve holder of the car pump is put on the other side. Also don't forget to unscrew the nipple a little...
I hope now you can pump up the wheels with Presta nipples 🙂 Share the article on VK, Facebook and other social networks. networks.
Source
Bicycles today are full-fledged vehicles, these are high-tech products, in the design of which there are many elements that fully show the imagination and engineering talent of a person. Bicycle nipples are the details from which the automotive history actually began. For the first time, rubber wheels were used specifically for bicycles. In order not to make a mistake when choosing a camera, you should familiarize yourself with the types of nipples.
Presta, French (SV, FV)
The most modern and elite nipple, mainly for tubeless tires. Tires with Presta valves are often used on narrow rim cyclists found on expensive road, racing or hybrid bikes. The hole in the rim of this type of wheel is 6 mm, and this helps to avoid a critical weakening of strength. For this reason, they are not adapted for chamber wheels with an autovalve. This is technically possible, but for this you need to increase the diameter of the hole to 8 mm.
Presta is distinguished from the American Schrader autovalve by the locknut that secures the spool. There is no spring that closes the valve. In order to pump in air, you need to unscrew the protective cap a little and press on the top of the valve. It is not necessary to unscrew the middle working body, like with an auto-nipple. The valve closes due to the air pressure from the tire. It makes it very easy to inflate the tire with airflow, even with a small displacement hand pump.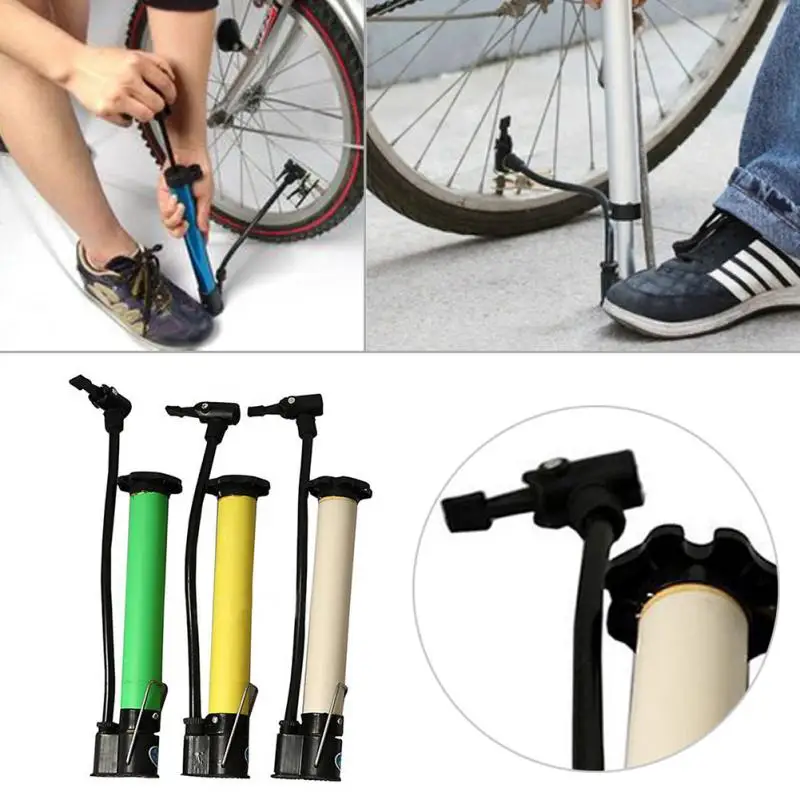
Attention! Presta has been around for a while and is designed specifically for bikes. However, auto pumps will not inflate this type of nipple. In this case, you need to have an adapter from Presta to autonipple. The spare part is very small and light, so it is not difficult to carry the adapter with you in a bike bag with other tools.
Schrader, Automotive (AV)
The most common and practical type. It was invented by American August Schroeder. A patent for the device was received in 1893 years in America. For this reason, this valve is called American, but more often it is simply called automobile. Most of the wheels of modern cars and motorcycles are equipped with this device. Fits also on wide tubes, kids bikes, hardtails or touring bikes.
The nipple is also used for air conditioners and refrigerators, where refrigerant refilling is required, and for other systems as special units for bleeding excess air pressure. The main advantage of the device is its great practicality, the disadvantages include quite a lot of weight.
The design includes a tube into which the working unit is screwed - the core, which is a poppet valve that closes the air outlet from the chambers under the influence of spring force. If you adjust the height of the protruding spool, you can control the air pressure in the tires. The spool is screwed in with a special tool, a protective cap - a metal cap with a plastic seal. An innovation in the system is the built-in pressure control sensor.
Dunlop (DV, EV)
An outdated look used in Soviet times. The entrance in the rim, at the location where this old-style valve is connected to the bike chamber, has a diameter of 8 mm. It is a metal tube with an external thread and a diameter slightly smaller than the hole in the rim, in which there is a spool with two holes, called a metal fitting. At the top is an inlet that allows air to pass through. It is protected from dirt by a cap located on the thread. Another hole in the fitting, the original one, located on the side, is closed with a thin rubber tube - this is the nipple, which acts as a one-way valve. The fitting is fixed on the inlet tube with a round nut.
The main disadvantages of this valve are that it has an extremely unreliable design, and is also very sensitive to dirt. Any small pebble or sand that has clogged under the rubber of the valve can block the air.
For inflation, you need an adapter for a bicycle nipple with an initial diameter of 3 mm. This can also be done using a standard retro-hose screwed onto the spool. Modern pumps with Presta nipple adapters will also work.
Important! Most of the bicycle pumps currently being manufactured are designed in such a way that they can inflate tubes with any type of nipple. However, some pumps are not designed to inflate tires with Dunlop (Woods) nipples. When choosing a pumping unit, consider this.
Therefore, today the cyclist is advised to choose between two valve options - Schrader and Presta. With the help of these special mechanisms, preparing two bicycle wheels for a trip is very simple, it does not take much time and special care and effort.
Source
Imagine the situation: you take a bike, start riding and realize that the bike accelerates poorly, it has become somehow soft and it behaves differently in turns. Before you realize that you have lost all your cycling skills overnight, check the tire pressure - it may be time to pump up not only the wheel, but also your hands!
A common mistake cyclists make before inflating their tires is choosing the wrong nipple nozzle. They try to put a nozzle on the machine nipple under the presta and vice versa - they try to put on the nipple for the machine nipple on the presta.
In the production of bicycle inner tubes, 2 types of nipples are used - wide and flat at the end " Schrader" , which is also used in automotive inner tubes, and a thin high nipple " presta" with a lock nut. It often happens that even at a tire shop they cannot help with pumping the wheels through the presta nipple - this requires a special adapter, which the tire shop may not have.
Modern bicycle pumps are designed in such a way that they have a design that allows you to change the type of nozzle for the nipple in half a minute. Both portable pumps and large floor pumps with a hose have this design.
This information is located on the side of the tire itself. The required pressure is indicated in the system PSI (pounds-per-square-inch) . The average recommendations look like this:
However, each cyclist can inflate the wheels to the pressure that he likes best, based on road conditions and the weight of the cyclist.
Install the hose head on the nipple. There is a special latch on the hose heads that holds it in place so that at high pressure it will not be torn off the nipple.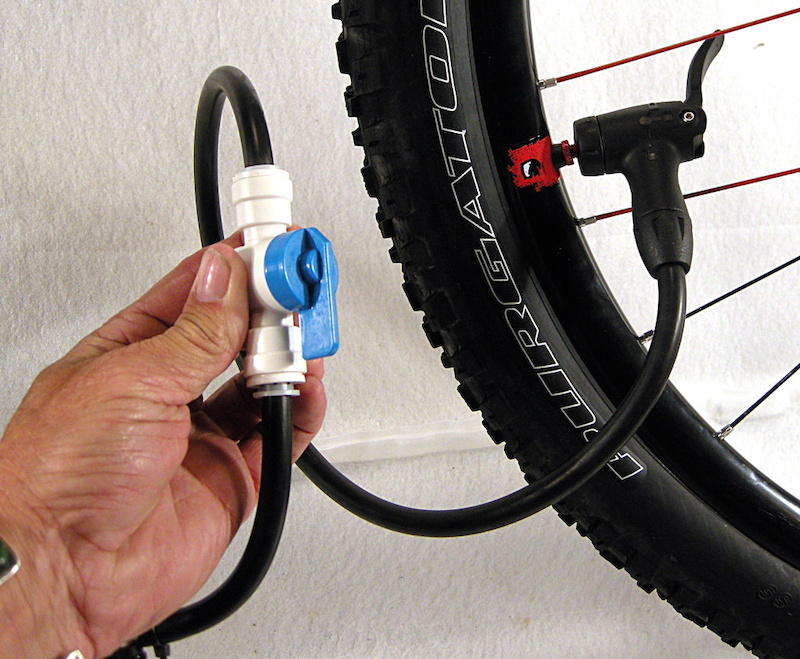 Depending on the manufacturer, the head snaps either up or down. If you notice that the air does not enter the wheel, but exits somewhere halfway, repeat the operation again.
Inflating wheels, especially road wheels where high pressure is required, requires some physical effort from you. You can connect both arms and legs - squats on straight arms can even be used as a small warm-up! But remember - you are pumping wheels, not muscles, so keep an eye on the pressure on the pressure gauge.
After inflating the wheel, remove the hose head from the nipple, tighten the nut and screw on the protective cap. Your tires are pumped up and you're ready to go! If road conditions require lowering the wheels, unscrew the cap, nut and push on the stem, controlling the pressure in the tire with your other hand to the touch. Don't get carried away if you don't have a small pump with you - you can release too much pressure, which increases the chance of blowing a wheel. And, of course, check the tire pressure before every ride!
Source
wikiHow is a wiki, which means many of our articles are written by multiple authors. When creating this article, 25 people worked on editing and improving it, including anonymously.
Español: inflar las llantas de una bicicleta, Italiano: Gonfiare le Gomme della Bicicleta, Português: Calibrar o Pneu da Bicicleta, Deutsch: Fahrradreifen aufpumpen, Bahasa Indonesia: Memompa Ban Sepeda, Français: gonfler des pneuderenlands de vélo,ets oppompen
This page has been viewed 115,115 times.
Was this article helpful?
Here are some tables to help you navigate in difficult situations, namely:
 86-3.06
 Pressure should usually be much higher between 6 and -5 9 atmospheres (up to 130 Psi), up to the maximum specified by the manufacturer.
Seasonal adjustments are quite serious, mainly for mountain bikes. In the summer, you should slightly underestimate the pumping and not rest on the maximum. Hot asphalt also heats the air inside the chamber, which increases the volume and, consequently, the pressure. Also, the pumped tire wears out very quickly.
In winter, sometimes you should exceed the maximum a little in order to achieve maximum tread work, especially if the rubber is chosen with studs.
For heavy riders or heavily loaded bikes, adding pressure is very important, as more weight will compress the bike's wheel and problems with under-inflated tubes can come out much sooner. The recommended pressure to add on weight is +1% for every kilogram of rider weight over 50
The recommended pressure to add on weight is +1% for every kilogram of rider weight over 50.
You can also give advice on how to inflate tires with different tires.
For slicks and semi-slicks, the use of pressure below the maximum is allowed only in hot weather - a quarter shortage already negates the entire effect of such rubber, because it is "sharpened" for the maximum diameter and lack of resistance.
Classic cross-country treads 2-2.3 inches wide inflate up to 3-4 BAR, depending on the track and habit, a lower value will make riding a strength training, and higher values are simply not allowed by manufacturers, as they lead to a real "explosion" » at peak load.
Extreme tires, be it downhill 2.3+ wide compound treads or trick BMX models, should be inflated medium between max and min to have enough traction and then subtly varied for each trick or descent.
A variety of nipples can be installed on bicycles, not all of which will fit conventional hand bicycle pumps. The most common are automotive nipples and Dunlop. Thin wheels are often fitted with Presta valved elements. When working with such a valve, care must be taken and cleanliness must be observed. Such specimens are often found on road bikes and hybrids. Here it will be possible to bring the air pressure back to normal with the help of a special pump, which is designed for a small volume. The use of a conventional pump will be possible due to a special adapter.
Cycling with flat tires is not permitted. It is not even worth thinking about such an option here. So that you do not have to drive your two-wheeled friend to the nearest place for pumping wheels, you must always have a pump at hand and know how to use it.
Pay attention to the pressure you need. If you are pushing off your real wheel, look at the side of the tire, it always indicates the minimum and maximum pressures possible for this tire
Rim pressure restrictions are less common, some are not rated for more than three atmospheres.
Cylinder volume. The larger the diameter of the cylinder and piston of the pump, the faster the pumping will be done. On the other hand, too large a diameter means more physical effort is needed. If the diameter is too small, it will be easier to move, but longer.
Pressure gauge. The absence of a pressure gauge has a positive effect on the cost of the product. On the other hand, the desire to control the pressure will require the purchase of a separate pressure gauge. The third side shows that individual pressure gauges show pressure much more accurately.
The most accurate are modern electronic pressure gauges.
Size. Home pump can afford to be big. For the race - ultra-compact allows you to take other important things with you.
For other cases, the compact pump is ideal, which makes it relatively easy to deal with a flat tire.
Serviceability. Very handy if the pump can be dismantled and serviced. Maintenance by itself means replacing the rubber bands or lubricating them, which significantly increases the life of the structural components.
The secret of the right choice is very simple: just look at the tire being inflated. Next to the information about the tire size, there will also be information about the allowable pressure range in the chamber.
Why is this information not printed on the camera itself? Because in it the only point that is subjected to real load is the nipple, and its mechanism is very reliable. Otherwise, the normal pressure, which increases by an order of magnitude with fast skating, is taken by the tire, and how much it will be squeezed is the main limitation.
Chamber marked with restrictions in Psi
So, if the pressure is too low, the tire will break closer to the rim, bite the chamber, leading to breakdown, and at high pressure, it may simply burst on one of the bumps or when driving on hot asphalt. Psi In English sources, it is usually simplified to “pound”, or pound, that is, when they say that the pressure is 2 pounds, they mean exactly Psi. This unit of measure is obsolete, used only in the USA, but, as they say, "more alive than all living things."
Data from an intelligent pressure sensor on the screen of a smartphone European. This unit of measurement is actively used, as it echoes the “atmosphere”, which is quite convenient for measurements.
The pascal is the only metrically correct unit on the list, but is rarely used in bicycle designations.
The ratio between all units is as follows: 1 Bar = 100,000 Pa = 14.504 Psi.
What do they write on tires? For example, (2.38-4.0) is clearly atmospheres, or BAR, and (95-135) is Psi. If the number has more than 3 digits or the prefix "k" (kilo), we are talking about metric Pascal. Most often, the desired value is located under the size designation and is duplicated in BAR and Psi as a range, clearly indicating to what pressure you can pump.
Actually, the manufacturer indicates the range within which the tire can function, then the freedom of the cyclist.
In general, a bicycle pump is a must for every cyclist. With the help of this simple device, it will be possible to inflate the wheels on your own, and not roll your bike to a service or gas station.
Hand pumps are divided into two types: simple and with a recording device (pressure gauge). It is recommended to purchase the second option, however, if a separate pressure gauge was lying around in the cabinet, you can buy a cheaper pump.
Universal hand pump with dial gauge
For ease of pumping with a conventional hand pump, you can immediately count the number of air inlets until the optimum pressure is reached and then pump exactly like this, even without additional use of a pressure gauge.
How to correctly pump air into the chambers:
By the way, the latter will not be superfluous to do with a pressure gauge, since the pressure inside the pump may increase during pumping, but air does not enter the chamber (the valve is not completely closed) or exit through a hole in her.
Common bicycle nipples are automotive and Dunlop. For thin wheels, a Presta nipple with a valve is used. It requires cleanliness and accuracy in handling.
Presta thin nipple tubes fitted to road bikes and some hybrid models
Fitted with a special low volume pump. A regular bike pump may not fit or you may need to use an adapter.
1. Connect the bottle to the pump adapter.2. Screw/put the pump tip onto the nipple.3. Press the trigger (if with a valve) or press against the nipple.4. Monitor tire inflation. It should be well-boarded, and the tube should not be biting anywhere between the tire bead and the rim, otherwise you will have a sudden and very unpleasant surprise in the form of a strong BANG!
P.S. By the way, some manufacturers recommend not to drive for a long time on carbon dioxide.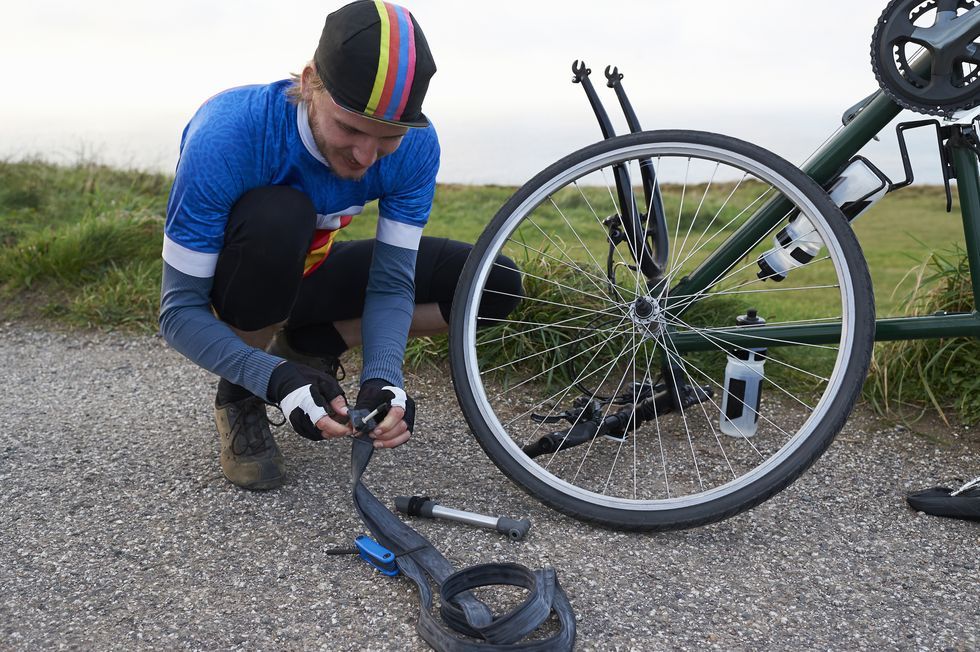 It passes through the rubber faster and escapes from the chamber. The option is to lower it and pump air.
The pump is very important for long-distance cycling trips, and cyclists have learned from their own bitter experience that they are even indispensable! Who will help if a wheel puncture occurs on a bike trip or just far from home? And in general, what to do in this case?
Experienced cyclists or cyclists who are not used to circling around the house will give you the following tips if you ask them:
1. Take self-adhesive patches with you.2. Take a spare wheel tube with you if you go on a bike tour for several days, with an overnight stay.
3. Take the pump with you. But here some problems appear. The first is that, as a rule, powerful bicycle pumps, although not very large compared to car foot pumps, are nevertheless not very convenient for transportation.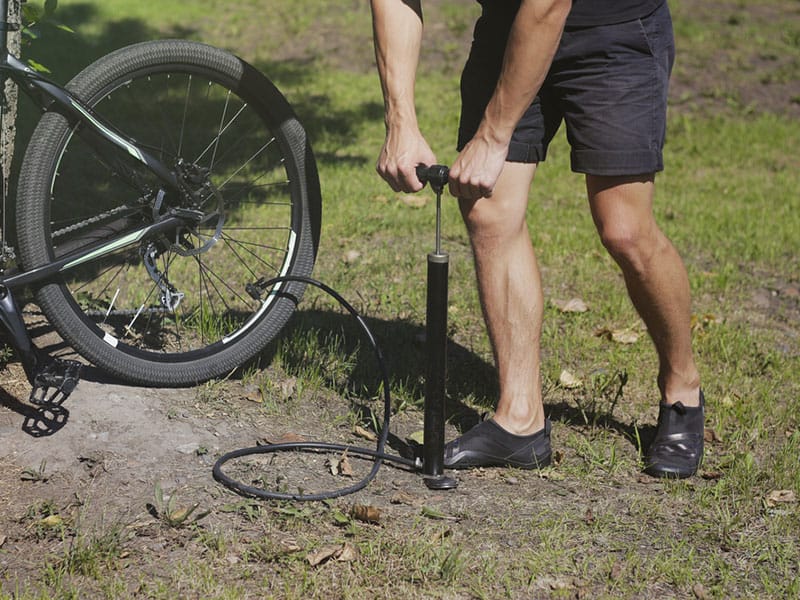
Especially considering that you will have to use them at best twice a season, the rest of the time the device will be lying around like ballast in a backpack or hanging on the frame of your bike, and this is excess weight, the competent distribution of which on long exhausting trips literally worth its weight in gold.
The second problem is diametrically opposed. Compact hand bicycle pumps are really small in size and weigh a little. But you will curse everything in the world while you pump a tire blown to zero with such a pump. You may catch up with the atmosphere, but then everything will be very, very difficult. It's just a hell of a job - to inflate a tire with such a pump. Those who have tried will understand. In general, a half-measure and in some cases will not be suitable for full use.
As a general rule, all motorists keep a pump in the trunk. But there are times when the pressure in the tire has dropped, but for some reason there is no pump. If this happened on a highway where the flow of cars is significant and you can always stop a passing car to provide assistance, or there is a service station in the immediate vicinity, then this is not as scary as getting stuck in a forest where there is not a soul, and there are dozens of kilometers.
But there is no limit to human imagination, so the craftsmen came up with a way to inflate tires using a conventional car carbon dioxide fire extinguisher. But this idea is not the easiest and not the safest. To do this, you must have a special hose that will serve as an adapter between the fire extinguisher and the nipple. The hose can be disconnected from a failed compressor by providing it with a threaded sleeve so that it can be screwed into the fire extinguisher fitting.
As a rule, carrying an OU-2 fire extinguisher is a mandatory fire safety requirement. Its pressure is about 5 megapascals, the volume is up to 2 liters of extinguishing agent. If you press the trigger guard, then the substance from the fire extinguisher will quickly rush outward, turning into a gas. This method will help inflate the wheel in a matter of minutes. But such actions cannot be called safe, so it is not recommended to use it. As soon as carbon dioxide passes from a liquid to a gaseous state, a strong cooling of both the fire extinguisher itself and the hose is obtained. Therefore, after such inflation, it is necessary first of all to get to a gas station or to a tire fitting shop, bleed carbon dioxide from the wheel and pump in the usual air.
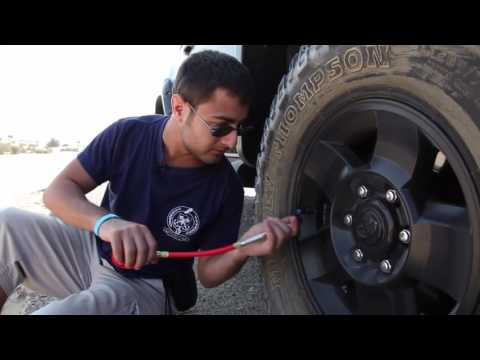
For more information about this method of tire inflation, see the video:
1. The French valve (Presta) or the name Sclaverand is commonly found on high performance road bikes. Compared to a Schrader valve, this one is longer and narrower in diameter, and has an outer stem that is capped instead of being surrounded by a core.
2. Valve opening. To open the Presta valve, unscrew the dust cap. Then you need to loosen the brass cap on the valve stem a little, it will not be able to come out completely, and you will have to lift it up a little. If you want to check if the cap is loose, you just need to press on the valve stem, and if you hear that the air comes out in sharp gusts, then this is a sign that you can stop.
3. Calculate the recommended tire pressure for the bike. This is usually a relief mark, which is located on the sidewall of the tire. Most often, these readings are written in bars or PSI. Do not let the pressure go to the bottom line, and also to the highest, which exceeds the maximum.
4. Pump installation. You can use the pumps of any gas station stations or borrow from friends. And as an option - buy in the store "everything for bicycles".
If you have a bike pump with two ports, the smaller one is for the Presta valve.
Universal pumps with one orifice automatically adjust to the Presta valve.
Such a pump may need to turn back the internal rubber stop to accommodate the French valve.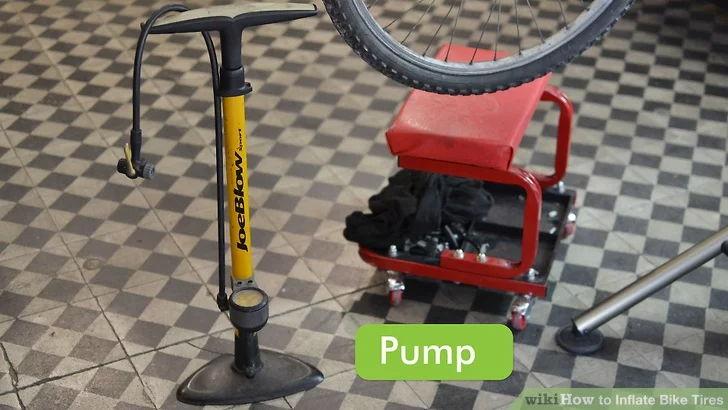 Locate the rubber stop by unscrewing the outer cap of this type of valve.
5. Inflate tires. Open the Presta valve by unscrewing the dust cap and loosening the smaller brass cap.
6. To deflate a tire with a Presta valve, open the brass cap and press the springy valve stem until all air is expelled.
When inflating tires, use the values shown above. The manufacturer writes a range on the tire so that you can choose the right value for the road surface. It is considered that the maximum indicated value is for a hard asphalt road. It is better to leave the minimum value if you ride on a country road or in a forest.
If you ride with minimal pressure on asphalt, you will lose speed and have to work harder with your feet. On a dirt road, additional cushioning is needed, which gives light pressure. It also improves traction, which is an added benefit.
There are different types of tires and bicycles. For each type, recommended values \u200b\u200bare developed, which have been tested by the experience of many cyclists.
For mountain tires designed for extreme sports, the pressure must be chosen experimentally. It is individual for each cyclist.
Cross country tires are universal, they are usually pumped up to 3-4 bar. They can be ridden in the countryside and on tough city roads.
Semi-slick tires are produced especially for asphalt roads. Therefore, they must always be pumped up to the maximum value. If you inflate too lightly, the contact patch with the road will increase and it will be difficult to gain high speed.
Pressure table in the tires of the bicycle for the highway:
| Tire diameter0019 | 35 | |
| 16 | 2.4 | 35 |
| 18 | 35 | 35 35 35 35 35 35 35 35 35 35 35 35 35 35 35 35 35 35 35 35 35 35 35 35 35 35 35 35 35 35 35 35 35 35 35 35 35 35 35 35 35 35 35 35 35 35 35 35 35 35 35 35 35 35 35 35 35 35 35 35 35 35 35 35 35 35 35 35 35 35EAL 5 | 35-65 |
| 26 | 4. 5 5 | 35-65 |
| 4.5 | 35-65 |
is not the most important thing-not the most important thing is the most important exceed them so that the tire does not burst. It is best to keep the tire pressure of road bikes a few tenths of a bar below the maximum.
The most comfortable pressure should be in the tires of a mountain bike. It depends on the weight of the cyclist and on the degree of roughness of the terrain. You also need to consider the width of the tires. The larger it is, the higher the pressure should be.
The best way to find the best value for yourself in practice, riding through the mountains with a pressure gauge.
Recommended bicycle tire pressure according to weight:
| Rider weight in kg | Pressure in Bar |
| 50-60 | 2.4-2.9 |
| 60-70 | 2.9-3.2 |
| 70-85 | 3.2- 3.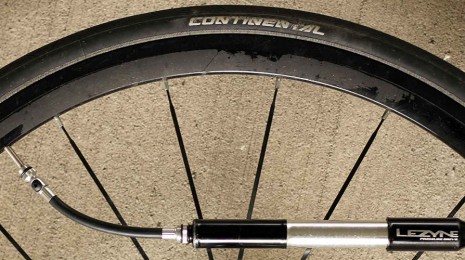  |