It’s a fine sunny day of the spring season, and you are busy with some work in your garden. You use your trusted lawnmower that has not failed you. But suddenly, you feel that the lawnmower is not running as smoothly as it should. It feels like it’s being dragged on the ground forcefully. So, you turn off the lawnmower engine and get off your riding lawnmower. But what you see now is not pleasant at all. Your lawnmower has a flat tire, and you know you need to fix it with a new tire or tube.
As the lawnmower tire gets old, it is more likely that a nail can easily pinch into the tire and make it flat. A hard bump to the lawnmower can also cause this issue. This article shall be a step-by-step guide on removing a lawnmower tire, fitting a new tube or tire, and putting the tire back on the rim.
How to put a lawnmower tire back on the rim, step by step:
Contents
 4 ● Step 4. Install the tire on the rim:
The detailed procedure of removing and replacing your lawnmower tire has been broken down into several small steps.
The first step to fix the flat tire or replace it with a new one is to remove the old tire and the rim from the lawnmower. You shall follow the following steps to complete this procedure:
There is a plastic boot (or a cap) at the center of the tire’s rim. Grab it using a pair of pliers and remove it from the rim. Try not to break it as it holds some grease and is a little brittle because of that.
Behind the plastic boot lies a c-clip. Grab the tab of the c-clip using a pair of pliers and pull it out of the rim.
Once you have removed the c-clip, you shall see a washer. Draw this washer out of the rim.
After you’re done with the steps mentioned above, you can now pull out the rim along with the tire from the lawnmower.
As you have removed the rim and the tire from the lawnmower, it’s time to remove the tire from the rim.
To remove the old tube’s nozzle (if your tire has a tube), you first need to peel the tire off from at least one side of the rim.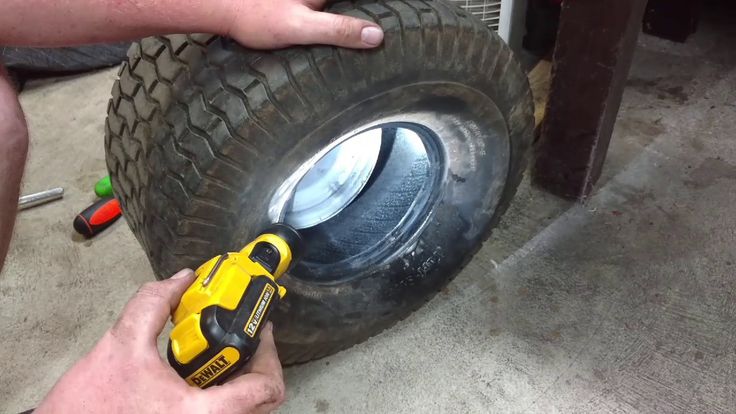
To do that, hammer a flat head screwdriver at the junction of the tire and the tube. Once the screwdriver gets inside this junction, please give it a push and try peeling the tire off the tube. Repeat the same step on the opposite side of the tire as well.
Every tire and tube has a nozzle that is fitted into the tire’s rim. It would be best if you pulled out this nozzle from the rim to proceed further.

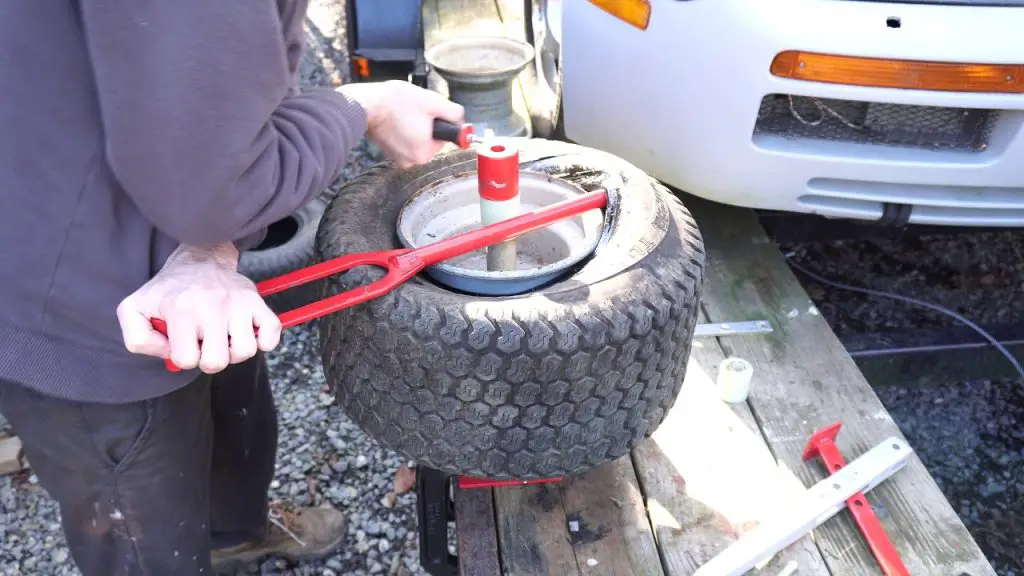
This is where things get exciting and is the most technical step of the entire process. You may need a couple of screwdrivers for this step. Although there are special tools to take the tire off the rim, we shall use screwdrivers to save some bucks.
Insert screwdrivers at different positions: Insert a screwdriver inside the junction of the tire and the rim, and pull the screwdriver upwards so that the tire starts coming up off the rim.
Do the same step using another screwdriver, which shall be inserted at some distance from the first one. Keep working around the tire doing the same step.
Remove the tire off the rim: The tire is now completely free from the rim’s grip. Remove this tire off the rim.
Grab a torchlight and check if there are any nails or a sharp object pinched into the tire’s inside or on the outside surface. If you find any, remove it from the tire’s surface using pliers.
Phew, that must have been a tiring job. You are now halfway there, and all you need to do now is install the new tire back on the rim.
Some tires might be tubeless, while some may have a tube. You need to install a new tube if the previous one had completely weathered or has had various punctures.
Please insert the new tube inside the tire and stuff it in. The tube’s fill valve must be in line with the fill valve hole inside the rim, where it is to be fitted in. Insert the fill valve into the fill valve hole located on the rim.
If you are installing a new tire or putting the old tire back on the rim, this step is applicable for both of these cases. Screwdrivers and some hand force are all you need for this step.
 This step is done to make the edges softer so that they may easily fit onto the rim. Oil can also be used to serve this purpose in case transmission fluid is not available.
Once the tire has been put back on the rim, it shall now be installed back on the lawnmower.
Place the tire back on the lawnmower’s axil, just like the way you pulled it out earlier.
 2. Re-install the washers:
Insert the washers back into the tire’s rim.
Re-install the c clip back into the rim with the aid of pliers.
Re-install the plastic boot back on the tire’s rim.
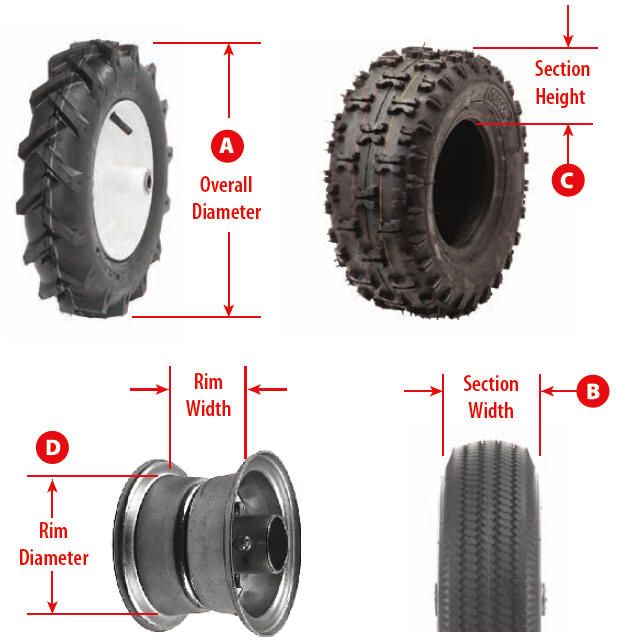
Related Questions:1. What size of lawnmower tires should I get?Like other tires, a lawnmower tire has a series of numbers imprinted on one of its sides. These numbers indicate certain specific details about the tire. Only two parameters are enough to indicate the tire’s full size, i.e., the tire width and the rim diameter. There are two different systems for tire’s sizing:
Two-number sizing:
Most of the lawnmower tires use a two-number sizing system to indicate the tire size. For example, in two number sizing, numbers are displayed as 5-9. This number indicates that the tire width is 5 inches and the rim diameter is 9 inches. These two numbers are all that you need to get a fresh piece of a lawnmower tire.
Three-number sizing:
This sizing system indicates the tire’s size with the help of three digits. For example, if the number 15×6.00-6 is imprinted on your tire, the number before ‘x’ indicates the tire’s diameter when it is fully inflated. The tire width is indicated by the number between the ‘x’ and ‘- ‘. The last number indicates the rim’s width.
2. How much air pressure should I maintain in lawnmower tires?Like other lawnmower parts such as the engine, fuel, and filters, they must be maintained for the lawnmower’s ideal performance. Similarly, maintaining an adequate and specific amount of air pressure in the tires is equally essential.

A flat lawnmower tire can ruin a garden lover’s mood. But removing and replacing a tire is not very complicated and can be done easily by most. Do not forget to take some precautionary measures before you start. Wear safety glasses and protective gloves to protect yourself from unnecessary injuries. And when you finish fixing your tire, also think about other maintenance tasks like the carburetor, air and fuel filters, and do not let gas get too old. This will prolong your lawnmower’s life, and you can continue to maintain your lovely garden!
By Keith Dooley Updated March 07, 2022
Riding mowers are a matter of convenience for some homeowners and a necessity for others when cutting large areas of grass. The tires on a riding mower are designed to be durable, but due to normal use, there may be times when a tire loses air pressure. When this happens, the tire may separate from the rim. Sealing a mower tire to the rim requires a few basic steps and can be accomplished at home.
Park the riding mower on a flat and level area, leave the transmission in gear and set the parking brake. Put on gloves to protect your hands while working.
Pull the plastic cap off the axle with the flat tire. Remove the snap ring with snap ring pliers, and then pull the ring and washer off the axle. Place a tire jack under the front of the mower. Home Depot points out that the jack must be under the frame and not the motor. Raise the mower so the flat tire is off the ground and pull the wheel and tire off the axle.
Inspect the tire for damage such as a slit or puncture that could prevent proper inflation. Remove a damaged tire from the rim by prying the tire over the rim with blade screwdrivers. Obtain a suitable replacement tire if necessary from a mower repair shop or hardware store.
Install the replacement tire onto the wheel by working the tire over the rim with the blade screwdrivers. Apply tire seal along the edge of the rim where the tire will seat.
Place a ratchet strap around the tire and pull down until snug, instructs Random Knowledge Guy. Apply enough pressure to the tire with the strap to force the sides of the tire down firmly against the wheel. Use a tire pump to inflate the tire partially and force the sides of the tire to seat against the rim.
Loosen the ratchet strap a little and add more air. Continue to loosen the strap and add air until you are sure the tire is securely seated on the wheel. Remove the strap, and then fill the tire completely with air. Use a tire pressure gauge to check the pressure.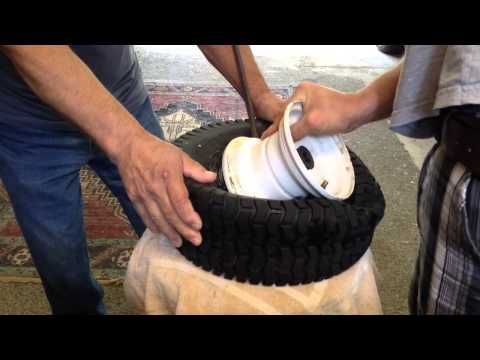 Refer to the manufacturer's recommended tire pressure; it is usually listed on the side of the tire.
Place the wheel and tire assembly back on the mower axle. Install the washer and snap ring, and then replace the plastic cap on the axle. Lower the mower with the jack to use the mower.
Gloves
Tire jack
Snap ring pliers
Blade screwdrivers
Replacement tire
Tire seal
Ratchet strap
Air pump
References
Writer Bio
Keith Dooley has done work in the field of landscaping and design for more than 10 years. He has implemented his own designs, as well as pulled from techniques learned through studies, creating many landscapes for others to enjoy.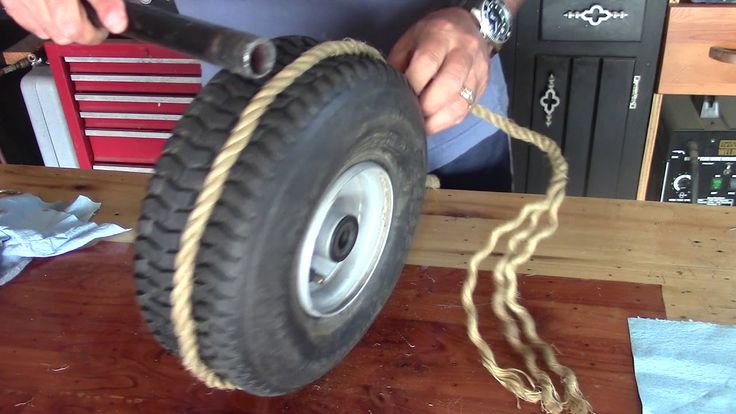 He has also maintained lawns, athletic fields, town parks, large gardens and game fields.
You can change a lawn mower tire.
Welcomia
Troy-Bilt ride-on lawn mowers are known for their high quality workmanship. They cut well and are easy to use, all at a lower price than other brands of lawn mowers. If you have one, you'll want to learn about removing and replacing Troy-Bilt tires because, like any other ride-on mower, they have tires that need to be changed from time to time.
For information regarding the disassembly of your power equipment, it is best to go directly to the source. Fortunately, on the Troy-Bilt website you will find the instructions you need to follow to make this work. Replacing the front wheels of a Troy-Bilt Pony is essentially the same as removing tires from its other models. Before starting, make sure the mower is off and cool. It is also recommended to wear protective gloves.
To remove the front tire of the Troy-Bilt Pony Water Heater, first raise and support the windrower with a hydraulic jack and blocks. Disassemble the cotter pin and washer, and you can easily remove the tire and its rim from the axle. If the tire has a hubcap, you will also need to remove it.
Take a flat-blade tool such as a screwdriver and pry off the outer edge of the cap. Do this slowly and carefully as these caps are held in place with molded internal profiles. They fit over large round flat washers. If you are too aggressive, this internal extrusion can be damaged. If you are dealing with a rear wheel, it can be removed in the same way.
You can look online for the type of replacement tires you need to buy for your lawn mower. You can then order them online or pick them up from your local dealer. Troy-Bilt tires are typically 15 by 6 inches, but they are not necessarily universal.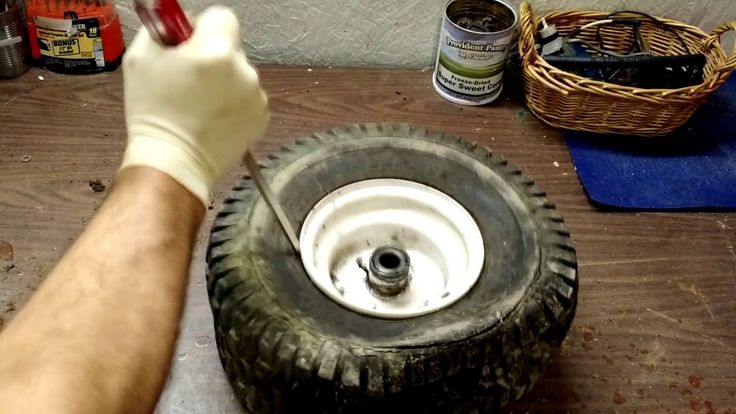 If you like, write down the mower model number and take it to your dealer. He can point you in the right direction.
When you have a new tire, put it on the axle. Now you can tighten it with a wrench. Be sure to check carefully to make sure it is in order and secure before attempting to use the lawn mower again.
Driving a lawn mower is not cheap, but it is cheaper than paying for a lawn mower if you spread the cost over time. It can take a while to get used to a riding lawnmower, but once you get the hang of it, it's pretty easy. Beginners should take it slow and keep the mower in low gear for better control. It also makes it easier to maneuver around trees and other obstacles.
The lawnmower's steering wheel is used in the same way as if you were driving a car. To stop the mower, the clutch and brake must be engaged at the same time. There will be a blade enable button to lower the blades and once you do that you can start rolling and mowing. Keep your lawn mower clean and in good condition and you'll be fine.
When a lawnmower tire has a lot of tread left but has a puncture or leak, it may be cheaper to insert an inner tube into the tire to prolong tire life. To purchase an inner tube for your lawn mower tire, dial the numbers on the side of the tire and call your local tire shops for pricing and availability. Check for glass, nails, or other debris and remove before inserting the inner tube into the tire.
Contents
Place a jack, stand, concrete block, or other stable wedge under the mower to support the mower.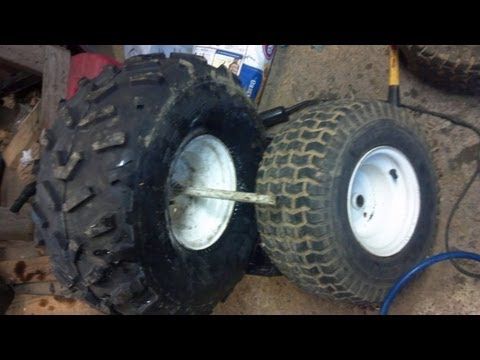
Remove tire and rim from mower. Lay the wheel on a hard surface.
Wedge with crowbar and hammer between rim and tire. Hit the crowbar with the hammer to push the tire off the rim to break the bead. Go around the rim with a crowbar and hammer to push the tire completely away from the rim. Be careful not to damage the edge of the tire or rim.
Push the tire down where the valve stem protrudes through the rim. Use a pair of sharp scissors to cut off the valve stem and remove it.
Use a crowbar as a wedge to carefully slide the tire one small section past the rim so that the rim is under the edge of the tire.
Sprinkle corn starch into the tire. This will help the inner tube move freely in the tire and make it easier to maneuver on the spot.
Lay the inner tube on top and position it so that the valve stem on the inner tube is in the same position as the valve stem hole on the rim.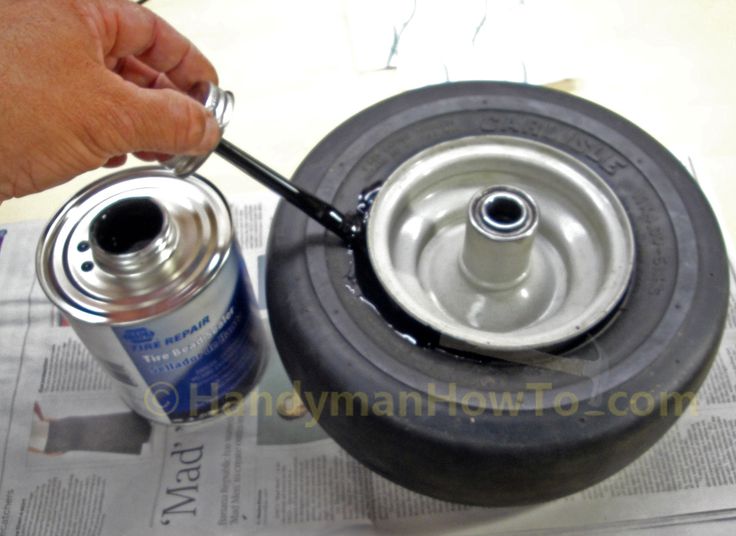 Insert the inner tube into the tire and push the valve stem through the hole in the rim. Use a pair of vise to clamp the valve stem to the outside of the rim.
Slide the inner tube onto the rim with your hands and move it into place in the tire. Make sure the inner tube is not twisted in the tire.
Wash the edge of the tire and the inside edge of the rim with hot soapy water. Don't saturate. Bead guidance is easier when both tire and rim are clean.
Lay the crowbar horizontally across the rim so that the hooked end can be inserted between the tire and rim. Attach the end of the crowbar to the rim under the edge of the tire that was removed from the rim. Be careful not to pinch the inner tube. Raise the end of the crowbar to bring the tire back into position on the inside of the rim. Repeat this procedure on the entire rim in small increments until the entire tire is returned to position on the rim.
Remove the vise from the valve stem and inflate the inner tube until the tire presses against the rim. As the tire presses against the rim, pour liquid dish soap between the edge of the tire and the rim. Wrap heavy rope around the center of the tire perimeter and tighten it. You can also use a garment belt for this. The purpose of this is to press the edge of the tire as close as possible to the edge of the rim with an even distribution around the entire circumference. Pour more dishwashing liquid around the entire rim between the tire and the inner tube.
Continue to inflate the inner tube until the tire is fully seated on the rim and there is no space left between the edge of the tire and the rim. Deflate the inner tube and apply pressure to the tire where it meets the rim. If it kicks off the rim, re-inflate the inner tube. Repeat this process until the tire can move away from the rim when pressed.
Release the inner tube until it is inflated to the manufacturer's recommended pressure.