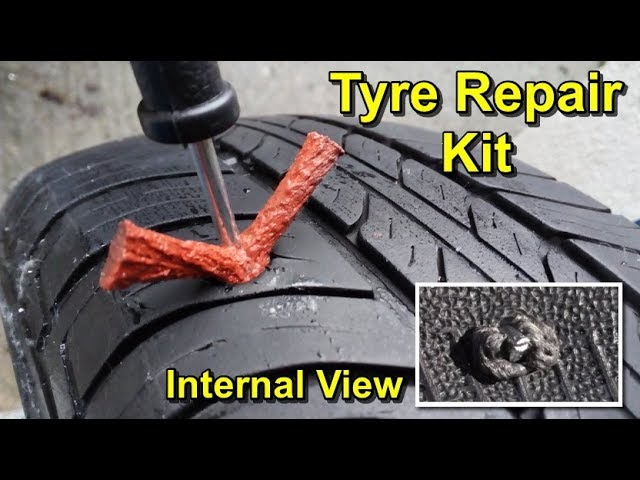
The chain and sprocket on your ATV will no doubt wear out over time. The teeth on the sprocket get worn down and dull, and the chain will tend to stretch over time. Other than buying high quality parts, there’s not much you can do about it either, it’s just normal wear and tear.
Maybe you don’t have worn out parts, but you want to change out your sprocket to adjust your gear ratio. This is a popular upgrade for many riders to get more power out of their quads. I will show the steps for changing both sprockets on an ATV, but for gear ratio purposes, you may only need to change one sprocket out. Check out my Complete Gear Ratio Guide if you need help with your gear ratio.
If you are changing a sprocket out for gearing reasons, I suggest changing the rear sprocket only if you can. If you are changing the sprocket due to wear and tear, I would suggest changing the chain out with it. It’s best for the chain and sprockets to wear together.
Luckily, changing a sprocket on an ATV is an easy job you can do at home. There are some specialty tools that can make the job easier, but I’ve been able to do this with regular everyday tools in my garage. Lets get started.
As always wear safety glasses and gloves when doing any type of maintenance on your machine. I find it helpful to spray the bolts and parts to remove with WD-40 or penetrating oil to make removal easier.
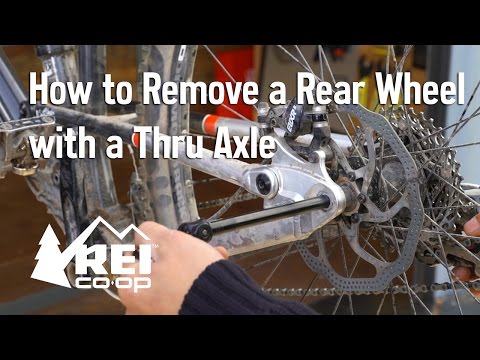
The first step is to jack up the quad and remove the rear tire to make access to the rear sprocket easier. If you can put the ATV on jack stands or something more stable after you jack it up.
Now is a good time to loosen the nuts holding on the front and rear sprockets, if you’re changing them both out. I like to at least loosen them before I remove the chain because it makes it easier to take them off later. To keep the sprocket from rotating I stick a screw driver into one of the holes on the brake caliper.
If you don’t like the idea of using a screw driver through your brake caliper, they do make a Rotor And Sprocket Holder Tool found here on Amazon.
That keeps everything solid while you loosen the sprocket nuts. Also with the chain still on, the front sprocket won’t rotate either, making it easier to loosen those nuts as well. You could always have someone hold the rear brake down for you if you have a helping hand.
If you’ve already loosed the nuts holding on the rear sprocket, this part will be easy. Just remove the nuts and you should be able to pull the rear sprocket right off. If it has gotten rusted on or is sticking, you may need to use a rubber mallet to persuade it loose.
Some people like to remove the chain before attempting to remove the rear sprocket, and that’s fine. I never have any problems removing the sprocket first, so that’s just how I’ve always done it. If you want to remove the chain first, scroll down to step , remove the chain, and then come back up here to continue.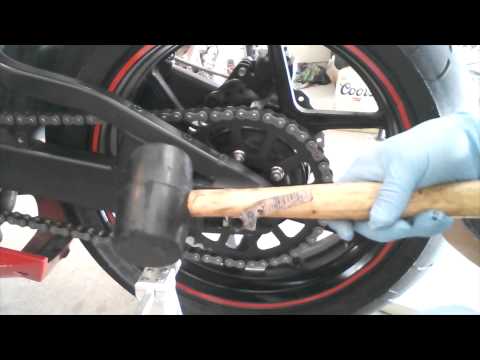
If you’ve already remove the rear sprocket, it should be easy to take the chain off the front sprocket. You don’t need to remove the chain from the machine just yet. But freeing it from the front sprocket makes this step a lot easier.
If you’ve already loosened the bolts on the front sprocket, than this will be easy. Just remove the bolts holding the front sprocket on and remove the sprocket. Some ATVs will have a washer, security plate, or even a spring washer holding the sprocket in place.
If your new sprocket doesn’t come with washers or spring clips, take extra care with those parts because you will need to reuse the ones you have.
If you look carefully along your chain, you will notice one of the links has a clip on the side. That’s the master link. You need to remove that clip before you can remove the master link. Once you have done that, the chain can be taken apart and taken off the machine.
You can remove the master link with a pair of needle nose pliers, a screw driver and hammer, or any other inventive way you can think. The usually pop right off pretty nicely. Sometimes they can be a bit stubborn, but they come off.
If your chain doesn’t have a master link, you will most likely want to get a Chain Breaker Kit Like This One from Amazon. You could use a rotary tool, a punch and a hammer, but I suggest just getting the kit. It’ll cost around 20 bucks and save you a world of headaches. You’ll need it if your new chain is too long anyway.
Now that you’ve got both sprockets and the chain off the machine, it’s a good time to look at the chain slide and rollers to see if they need replacing. Usually these last a pretty long time, but can start to wear down. They help keep your chain under tension and are important for the operation of the ATV, so if they’re worn out, replace them.
They aren’t too expensive, so if you want to replace them, now’s the time to do it with everything apart.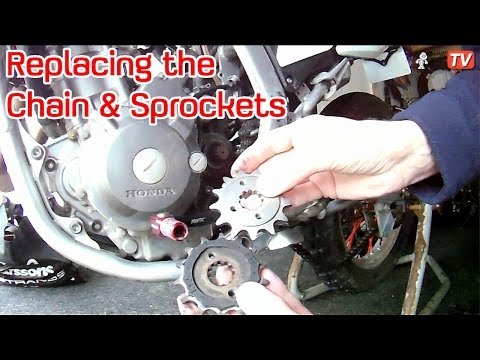 Here is a good set of Chain Roller Tensioner Wheel Guides from Amazon for a good price. They’re easy to remove and install, usually only one bolt to take off.
Usually when you order a new front sprocket, it comes with any security plates or washers and bolts that you need. If not, hopefully you saved your old ones. The install is pretty straight forward, just install the sprocket and then the security plate the same way you removed them.
Make sure you put the sprocket on the right way. Usually the side with numbers stamped on it (ex: 13T) will face outwards. That number indicates how many teeth the sprocket has.
I would also recommend putting thread lock on the bolts to make sure the sprocket doesn’t come loose while you’re riding. Medium strength thread lock should be fine. Anything stronger than that and you’ll have a rough time if you ever need to replace the sprocket again.
You will have a tough time getting the bolts tightened all the way down without a Rotor And Sprocket Holder Tool.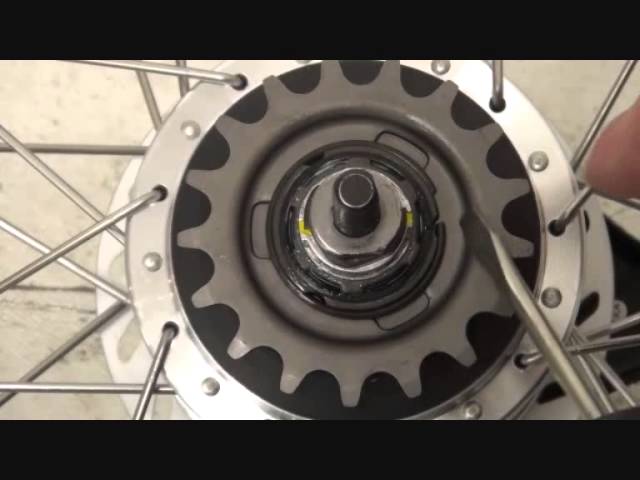 If you don’t have that tool, just get them as tight as you can (hand tight) and you can finish tightening them down when you get the chain on.
To install the rear sprocket, you’ll want to follow the same steps as you did with the front sprocket. Make sure the numbers are facing out, use thread lock, and tighten the bolts to hold it in place.
To tighten the bolts on the rear sprocket, you can put the screw driver in the caliper again. But this time in the top part to prevent the sprocket from rotating back when tightening, like you can see in the picture. It’s best to tighten the bolts in a criss cross pattern.
If you’re looking for a new chain to replace your old one you’re going to need to know how many links you’ll need your chain to have. If you don’t feel like going out and counting all the links of your old chain, you could always just get the longest chain and cut it down for your quad.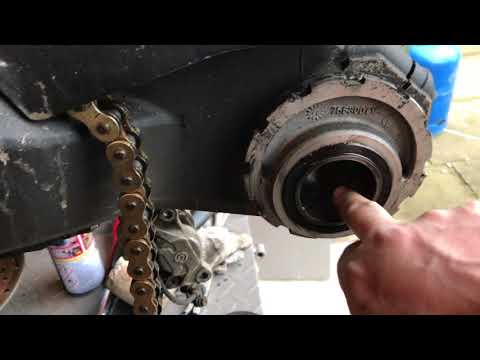
Most chains come with 76, 90, or 110 links, so you’ll probably have to take some links out of whatever chain you get to fit your machine anyway. If you get a chain that is too short, you’ll have to add links with a rivet machine and it becomes a big headache.
Here’s a link to a Niche 520 ATV O-Ring Drive Chain from Amazon to help you start your search. I like the chains with the o-rings on every link, they seem to last longer and be better quality.
Once you have the new chain you can use the old one to size it up, like in this picture. I would still count the links to make sure you get the same size chain exactly. But laying the new chain next to the old one makes it easier to count.
There’s a number of ways to cut the chain to the right length, once you know which link you need to open. I’ve seen people use a rotary tool like a dremel to grind down the rivet on the link and pop it out with a punch tool.
But I suggest just getting a Chain Breaker Kit Like This One from Amazon.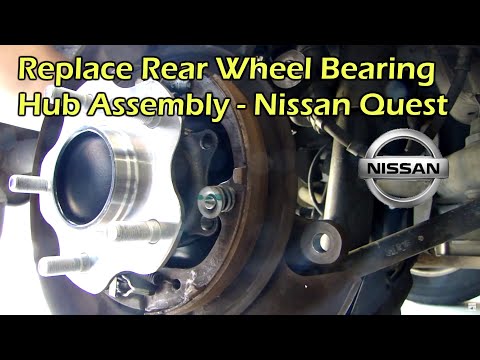 It just makes the job so much easier, mine has come in handy plenty of times now. And I no longer have nightmares about cutting chains with Fleetwood Mac ‘The Chain’ playing in the background.
Now you have your chain to the right length, it’s time to install on the ATV. I would suggest starting the chain on the front sprocket and winding it through that way. It makes it easier to install the master link when the chain opening is near the rear sprocket.
Now insert the master link where the chain opening is, put the plate on, and put on the security clip holding the master link in place. You could use a pair of needle nose pliers or a screw driver to get the clip in place.
Don’t forget to tighten the front sprocket bolts down now if you haven’t already done so. Now with chain on and the back sprocket locked up, you should be able to tighten the front sprocket bolts all the way down tight.
The new sprockets are on, the chain is on, now you have to adjust the slack in the chain. You don’t want the chain to be too tight, it may break under the tension while you’re out riding. You don’t want too much slack in the chain either though.
The best way is to push down on the back of the quad and adjust the tension there, leaving about 1/4″ to 1/2″ slack in the chain. This way if you’re suspension bottoms out, it won’t break the chain because you have enough play to allow it.
I found a good method is to make sure you have 1/4″ to 1/2″ slack both up and down while you’re sitting on the ATV. That may cause you to be getting on and off the machine to make adjustments, but it’s always worked for me.
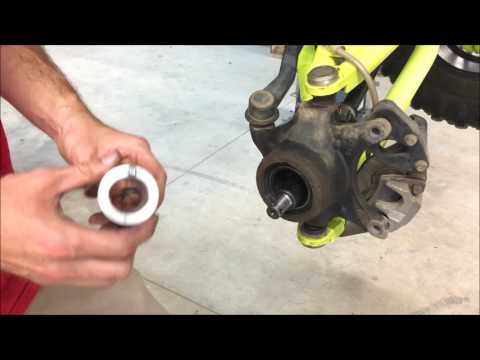
To adjust the slack in the chain, you’re going to have to loosen the bolts holding the rear axle and sprocket into place, as shown in the picture. Once those are loose, you should be able to adjust the tension bolts below them.
You will be able to tighten or loosen the tension bolts which will pull the back end of the ATV in or out. That’s how you adjust the tension in the chain.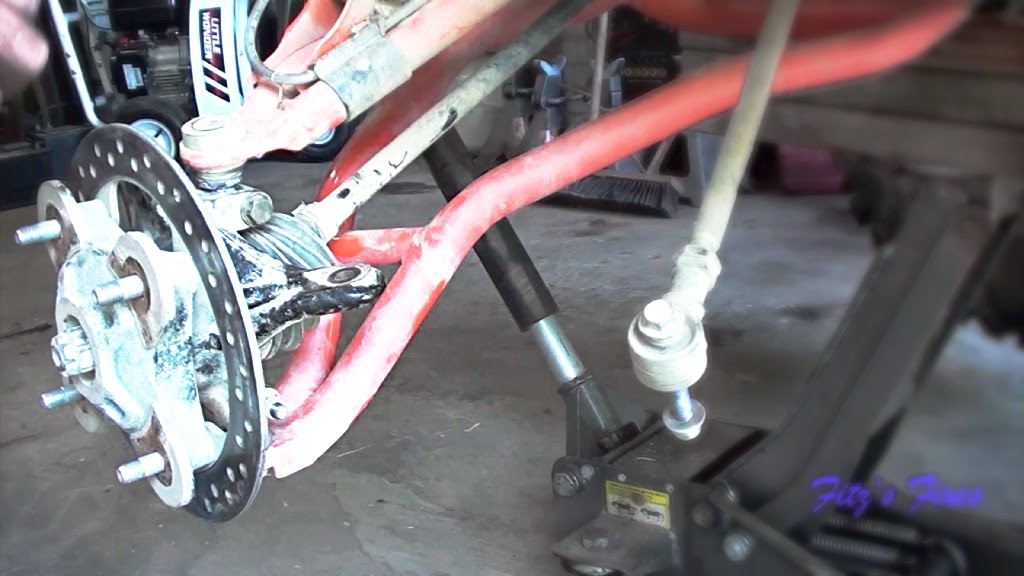 Make sure you keep an eye on the rear sprocket and chain and keep them in as straight a line as possible. I always try to adjust both left and right tension bolts the same amount to keep the sprocket from being crooked.
Once you have the chain to the tension you like, tighten the second nut on the tension bolt to keep it from moving, and tighten the bolts holding the rear end in place back down.
There you have it, new chain and sprockets. Now just get your tire back on and try it out. I would take it slow at first to make sure everything’s working ok.
Sharing is caring!
ATVs marry the rugged, trail-climbing capabilities of an off-road truck with the compact and lightweight form of a motorcycle. As such, ATVs incorporate a hybrid of car/truck and motorcycle engineering. The first ATVs were built from motorcycles and share many components such as engines, brakes, and suspensions.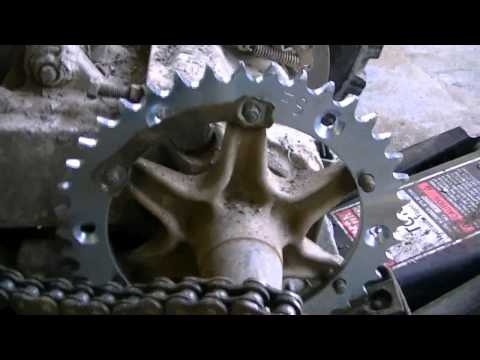 Some ATVs feature a driveshaft and an enclosed rear differential like what’s on pickup truck or a large SUV, but most continue to use a motorcycle-style chain-driven rear sprocket to turn the axle gears that transmit power to the rear wheels. The chain and sprocket is more efficient than a driveshaft with less power loss between the rear wheels and the engine, but it is noisier and generally requires more maintenance than a driveshaft and differential.
Unlike an enclosed differential where the rear gears are protected by the differential housing and bathed in oil, the rear sprocket and drive chain is left open and exposed to the elements during riding and even in storage. That’s why it is unwise to leave a motorcycle or ATV outdoors without at least a protective cover when not in use. Drive chains need to be periodically adjusted for rear tension and properly lubricated in order to eliminate snags. If left untreated, corrosion can form on the chain and cause it to stick, thus increasing wear and tear on the rear sprocket, the chain itself, and even the engine and transmission.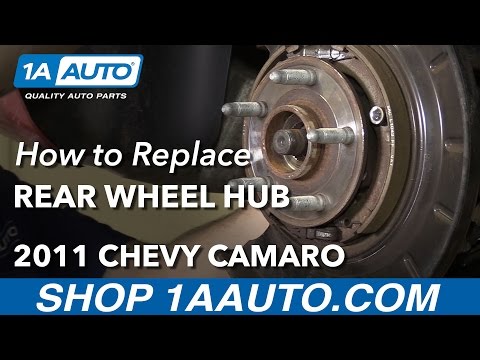
This quick step-by-step guide is for first-time owners or those who wish to save money by learning how to do this essential piece of ATV maintenance all by themselves. The job itself is quite involved, but it isn’t physically-demanding. Follow the procedures outlined here and you’ll do just fine.
Yes, there’s a lot of stuff here in this list but all of it is necessary to do the job. Race Driven sells brand new, aftermarket ATV and motorcycle chains and sprockets as well as an assortment of important tools and accessories such as chain alignment tools, chain breakers, and master links.
With your ATV lifted and properly secured by a stand or lift and the rear wheel removed (this is typically the left rear wheel), use your master link pliers to remove the retaining clip from the master link in the chain. Remove the chain.
Use your snap ring pliers to remove the retaining clip. Remove the countershaft sprocket.
Clean the countershaft area and install the new sprocket.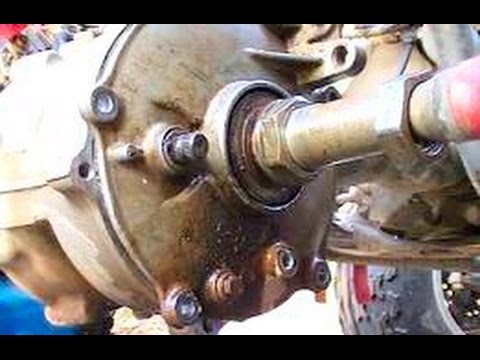 Reinstall the retaining clip and be sure that it is seated all the way into the groove.
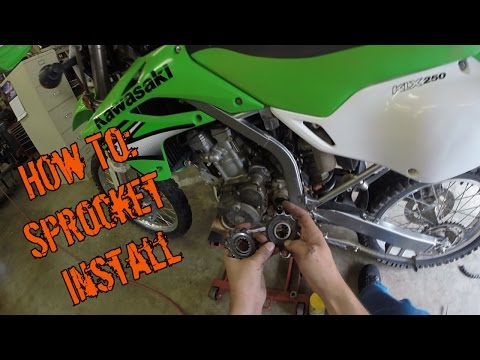
Remove the sprocket bolts and nuts with an Allen head T-handle wrench and an open ended wrench. Spray some degreaser to clean the hub and wipe it down. Don’t allow the degreaser/melted grease to sit and dry; all you’ll be doing is redistributing the mess as opposed to cleaning it. Place the new sprocket onto the hub and secure it with the sprocket bolts and nuts.

Inspect the chain slider and chain rollers. If they are cracked, worn, or in overall poor shape, you will need to replace these.
Attach your new chain onto the sprocket. Thread the chain through and around the front sprocket and then slide it through the chain guide and back around the rear sprocket.
 Use the chain breaker to cut off the excess. Reinstall the new chain to check fitment.
Install the master link onto the chain.
Install the master link clip facing opposite of the rotational direction. Use the master link pliers to finish installing the link clip.
A chain that is too tight or too loose can have a negative impact on performance and driveability. This can also lead to increased and excessive wear on not just the fresh new chain and sprocket you’ve just installed, but also on the engine and other drivetrain components.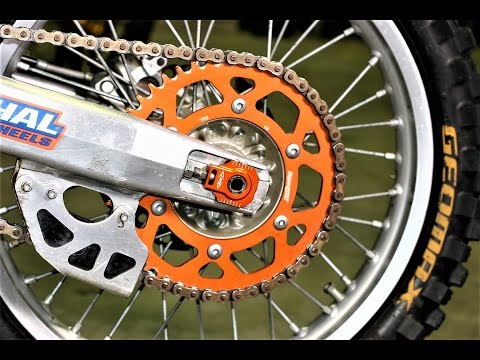 Measure the amount of slack in the chain and adjust according the specifications in your service manual. Use the chain adjusters to change the distance from the swingarm. Be sure that it is equal on both sides.
Reinstall the wheel and tire. Torque down to the proper specifications per your service manual.
Congratulations! You’ve changed out the sprocket and chain on your ATV all by yourself!
Podolsk,
15 km Simferopol highway To contacts
#service #ATV #stars
7 years ago
Replacing the chain and sprockets on an ATV from a motorcycle is fundamentally no different.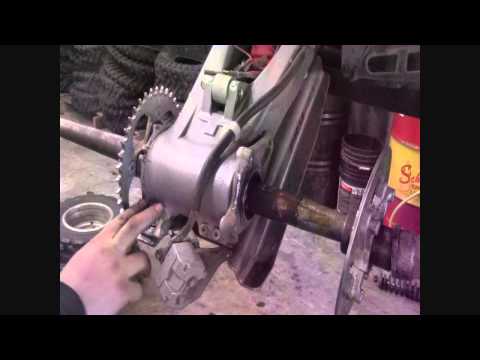 If you follow the correct sequence of actions, then this can be done quickly and easily. In the video, we showed the process using the Yamaha Raprot 700 ATV as an example. The article shows the main points that you should pay attention to.
It happens that the nut of the front sprocket sticks and is hard to unscrew, the rear brake may not be enough to block. In this case, it is necessary to spray it with penetrating grease, additionally block the axle with a rod through the eccentric, and use a wrench with a long lever to unscrew it.
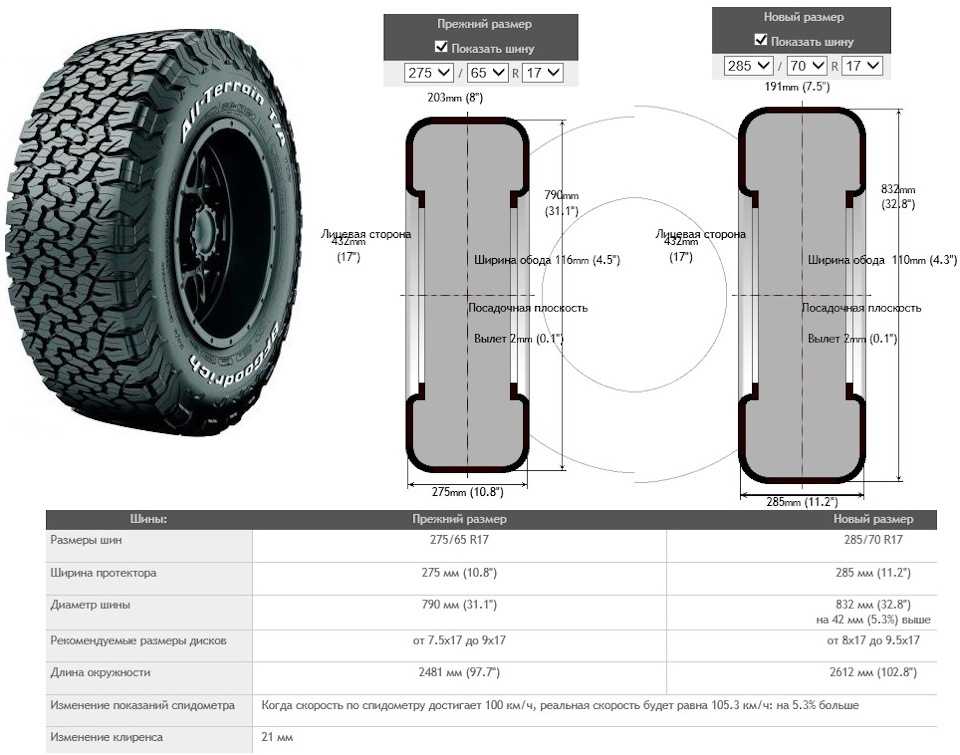
If a standard set of sprockets is installed, the chain length is determined by the manual. If Non-standard, then it is better to determine the length in place with minimal tension. If the chain is closed on different plates (external and internal), you have to add another link to install the lock. It is desirable to increase or decrease the rear sprocket by an even number of teeth, and not change the front one.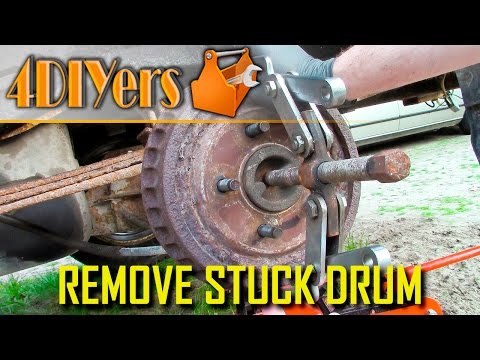 Stock on yamaha raptor 700 chain 98 links, sprockets 14 and 38 teeth. One sprocket tooth corresponds to half of the chain link, so it is better to increase (decrease) the sprocket by an even number of teeth.
the new chain stretches a little. Chain free play is measured with no load when the ATV is on a level surface with four wheels.
The axle fixing bolts are tightened in a certain sequence with a certain force gradually.
When tightening all bolts and nuts, it is advisable to observe the torques specified in the manual. This is necessary so as not to disrupt anything and securely fix it. The wheel and star nuts are tightened gradually according to the principle "each next opposite the previous one". If the thread is clogged, it must be cleaned! If a torque wrench is not available, it can be tightened by hand with short lever wrenches (with a long lever wrench, the threads can be stripped unnoticed). The front sprocket nut cannot be stripped if the wheel is blocked by the rear brake. With a lot of effort, the brake will turn.
In the video we showed all the main points, we hope it will be useful!
Replacement Sprockets Yamaha Raptor 700
465 079
2 465
0
Recommend
Studded Rubber Magazine Training Motocross Enduro - Video School Magazine F4i ZX6R R6 CBR GSXR stunt bike review French Stunt Romain Jeandrot
To keep the ATV running like clockwork, the rider needs regular maintenance. And one of the main elements of the maintenance of the device is checking the chain on the children's ATV. Ignoring this procedure can lead to a number of problems. After prolonged use, the chain may begin to fly off, sag and even break, damaging the crankcase or axle. Therefore, if you decide to buy an ATV for your child, it is important to understand the maintenance technology of this unit.
Many ATV owners are faced with the fact that the chain falls off the machines. Typically, this problem occurs during the active operation of the ATV (after passing 500-1000 km). The cause of the problem can be:
Tensioning and lubricating the chain will solve the problem. And in case of severe wear, the element will need to be replaced. Also, the rider needs to inspect the sprocket and make sure that the chain has not “eaten” its teeth.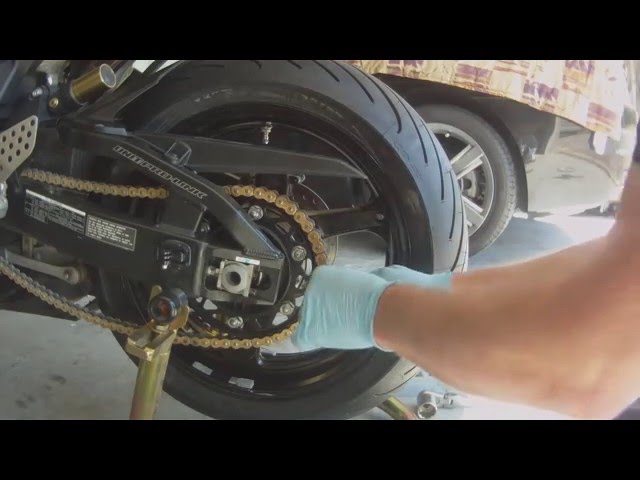
So, we figured out why the chain on the children's ATV flies. But what if maintenance, stretching or replacing the element did not help? In this case, you need to pay attention to the roller, it may be very worn out. If so, then it needs to be replaced.
But what to do if there is no video, but the problem with the flight could not be solved? Then you can show your imagination and install the chain tensioner yourself. To do this, you need to make a plate with a mount for the roller, and install this design under the chain. In addition, this "miracle" can be supplemented with a spring, which will improve the tension.
Ideally, chain tensioning on a children's ATV should be done 2-3 times a season. Although there are other reasons for service, among which:
Finding the problem is quite simple, the rider needs to visually inspect the knot. If any deviations from the norm are noticeable (star wear or chain sagging), it is necessary to carry out maintenance.
Experienced riders recommend maintenance 2-3 times a season or after every 250-400 km. This will prevent the chain on the children's ATV from flying off or breaking the component, as well as increasing its operational life.
The first thing to do is clean the assembly (chain and sprocket) of dirt. This can be done with a soft cloth, a household brush and everyone's favorite WD-40. It is highly undesirable to use sandpaper, metal brushes, aggressive products and any solvents for cleaning. The use of such products is almost 100% likely to damage the rubber elements.
After that, you can start lubricating the unit. Almost all (even cheap) products marked “off-road” are suitable for this.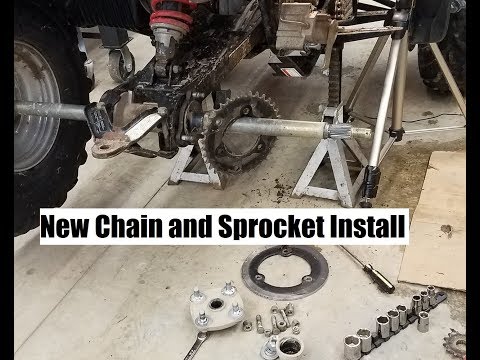 Special oils not only protect components from dust and dirt, but also minimize their wear.
Note: It is recommended to “warm up” the chain before processing. And to remove excess oil, you should use a soft rag.
First, you need to make sure that the ATV chain is really slack. To do this, grab the link near the sprocket and pull the chain towards you. If you manage to pull more than 4 links, you need to carry out maintenance.
The rider should read the documentation before tensioning the chain. The fact is that some children's ATVs are equipped with tension bolts that simplify maintenance. With their help, you can tighten or "release" the chain.
But on powerful teenage devices (125-200 cubic meters), the procedures look a little different. Owner needs:


.jpg)