Tires are just as crucial as the engine when it comes to maintaining your car’s safety and performance. At some point, however, tires wear out and this compromises the car’s efficiency, especially in traction and braking ability which can potentially lead to fatal road accidents.
If any of your tires exhibit a pattern of excessive wear, it’s about time you change them. Changing tires involves taking off the rubber tread that is tucked inside the wheel’s rim, a grunt work that many would rather pass and hand to a mechanic.
But what if we tell you, popping the bead out of the rim is not too much of a mundane job if you are armed with the in-depth information on how to do so. Doing your own tires will save you a lot of money from costly repairs that should be otherwise spent wisely spent on other car-related maintenance.
With few hand tools and tricks, you can remove the bead off the rim yourself. But the easiest and quickest way to do it is by using a tire-changing machine. This article will cover both of these methods.
Prying the tire loose from the rim might sound intimidating especially if you are a novice or new to tire maintenance. But you don’t really have to be an auto mechanic or expert to do the task. All you need is the right tools, basic mechanic skills, and know-how. The following is an easy guide to carry out the goal.
What you will need:
● Lubricant (Alternative: liquid dish soap or oil)
● Crowbar, Prybar, Tire Levers, Tire iron (any of these)
● Presta or Schnader or any Valve Core Removal Tool (Alternative: Pliers)
● Screwdriver
● To break the bead manually, you need either one of these things: a Jack, a Knife or any other sharp cutting tool, a vehicle
● Optional: Tire Bead Breaker, Tape
The Procedure:
 The air cap or valve core is a small pressure sealing device made of either rubber or metal cylinder located on the core which is where the tire is inflated from. You will need a Schrader or Presta valve tool to extract the air cap from the rim.
Thread the tool inside the valve stem and twist it in a counterclockwise direction. This should loosen and remove the cap off the tire. Then release and allow the air to exhaust.
A valve core removal tool is a small metal that resembles a small screwdriver. It is a handy tool that is relatively inexpensive and often available in a set for different valve sizes like that of the Awpeye 4 Pack Valve Core Remover Tool.
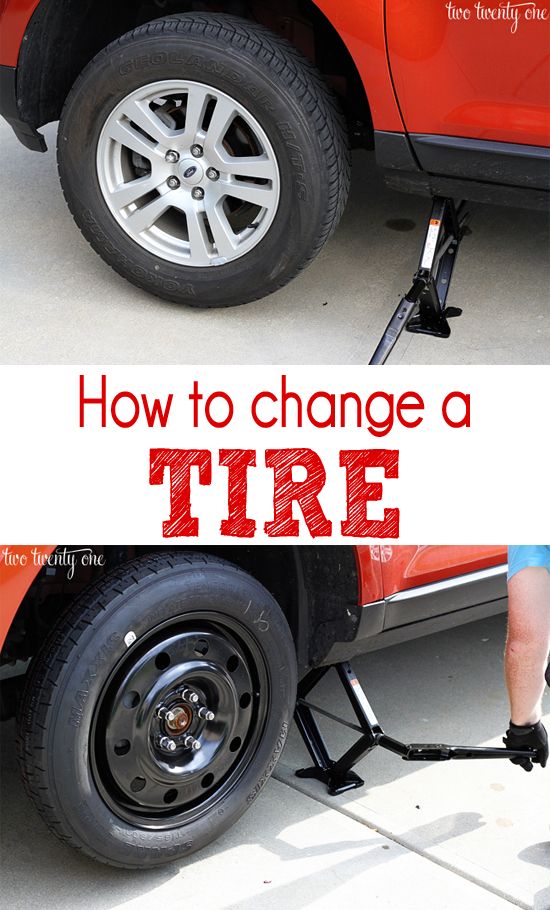 There are three methods and tricks you can use to break the bead bundle between the bead and the rim.
● Drive and run over the tire you are working on. The aim is to force the rubber down so its easier for the bead to pop out. Hence when driving your vehicle over the tire, make sure that it is the rubber part you are driving onto and not the metal rim. You may need to run the car over it a few times to break the rubber part.
● Put the whole weight of the vehicle on the tire via suspension. The method involves raising the vehicle using a jack and partially lowering it. Once the vehicle is lifted, place the tire underneath the jack. Adjust the jack and lower the vehicle onto the bead part of the tire. Warning: Do not attempt this method if you are new to the process of car suspension unless there is an expert or professional supervision. The procedure requires lifting a car and working underneath it which is can be really dangerous to you and to your vehicle especially if you don’t know what you are doing.
● Cut the bead off the rim. You can cut through with it using a saw blade or a drywall knife. To cut it, follow the seam running alongside the bead, carefully not touching the metal rim. Be cautious as you cut because you don’t want to damage the metal rim To avoid the blade veering towards the tread, insert a wooden towel in the sections that are already cut.
If you are really having a hard time with the bead, you can easily get away with a bead breaker tool. A tire bead breaker is a handy tool designed to dismount the innermost diameter of the tire interfacing the wheel. The operation is so fast and easy it’s basically like opening a canned good! It’s also the safest way to de-bead without damaging the rim. To make the most of your purchase, invest in a well-designed bead breaker like that of BeadBuster XB-450. To date, this is the most affordable and efficient bead breaker.
 Once you have managed to break the bead, grease the edge around the rim as well as the bead by applying the lubricant. This will prep the area when prying the tire later on. You will find it easier to pop the bead off the lip of the rim easily once everything is lubricated. Use as much as a lubricant as necessary. To avoid accidentally scratching the metal easily while prying, you can also tape the edge of the rim prior to lubrication.
  At this point, it is only the bottom half that is loosened, you still have to work on the other half of the tire. So to do this, flip the wheel over on the other side and pry in the wheel off in the same fashion as you were prying in step 4. Use as many pry and screwdriver alongside lubricant as necessary.
If you find taking a tire off a rim by hands too much of a task, time to pull out the big weapon. A tire changing machine skips most of the lengthy process of manually separating the tire from the rim.
Note that the tire changing machine we are referring to differs from that of the actual heavy-duty tire changing equipment technicians used in the shop. The manual tire changing machine is a rather portable and handy tool that requires no power hookups to operate. While the machine will mostly do the job, you will still need the help of a few hand tools.
What you will need:
● Plywood Board (Alternative: any strong wood surface that is at least ¾ inches thick)
● Manual Tire Changing Machine
● Tire Changing Rod (Alternative: any metal rod or tube with a pointed tip)
● Screwdriver
● Bolts (preferably 5 inches long and ½ inch wide)
● Presta or Schnader or any Valve Core Removal Tool (Alternative: Pliers)
● Marker or Pencil
● Lubricant (Alternative: liquid dish soap or oil)
● Optional: rug or paper
The Procedure:
 Using a marker, trace the machine’s base on the platform. Do put a mark on the holes or the location of the bolt as well.
Some prefer a block of concrete as a base because they are sturdier and stable. Others drill the machine directly on the floor. But note that you will need a mason drill to engage the bolts into hard cement. Nonetheless, the bolting process is the same as with the wood material.

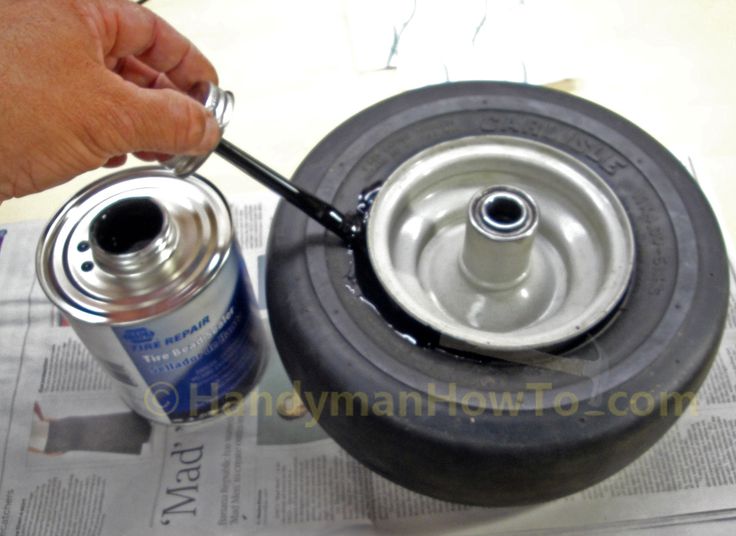 You will use it to expose the rim of the tire. Start the process by sticking the rod’s pointed end into the rim-tire joint. Using your hand or your foot, apply pressure on the wedge by pushing it down. This will gradually exposed the rim.
 To avoid scratches on the rim while inserting the rim, you can wrap a rug or any cloth (a paper may do) around the spoke.
 Apply generous amount lubrication as necessary.
You may not be able to pry a certain section in one shot and that is fine. If this happens, simply go back by lifting the foot pedal using your foot to turn the rod counterclockwise.
Related video:

This article has thoroughly discussed the process of disengaging the tire from the rim and now it’s your turn to take the wheel. Sure, the entire process of changing your own tire– from removing the wheel of the vehicle to fitting new tires might seem lengthy and complicated but hey at least we have taken down one of its processes, namely removing the tire off the wheel. Doing your own tires will save you money and soon enough, you will be reaping the satisfying feeling of your hard work.
The tire is the part that any driver needs to pay attention to. Using a worn or poor-quality one not only reduces performance but also affects your safety on the road.
Removing tires from rims doesn’t look easy, and most people don’t even think about making it at home. That’s why they spend a lot of money to pay for mechanics every year.
In this article, we’ll provide you with a detailed guideline that will significantly support you to do this task and save a few hundred dollars per year. If you’re ready, let’s get started!
Table of Contents
How To Remove Tire From Rim By Hand What You Need To PrepareYou need to repair the tool to remove the tire from the rim. Make sure that you’ll repair all of the implements before starting to avoid affecting your working process:
After having all the necessary tools, you can learn how to remove a tire from a rim now. Below are detailed steps that you should read carefully and follow slowly to carry out this task in the easiest way.
Remove tire from rim by handStep 1: Find A Good PlaceSee more: What Is Tire Stretching?
If your tires suddenly fail on the way, pay attention to steer your vehicle to the curb or somewhere safe. Repairing your car directly on the road is extremely dangerous for both you and other vehicles.
If you fix your car at home or in the garage, there’s nothing to worry about. However, it’s advisable to choose a place that is wide enough and well-lit to facilitate manipulation.
Step 2: Jack Your Car UpThe next step you have to do if you want to remove tires from rims is jack your car up. This step isn’t too difficult when you already have a car jack. Here’s how you do it:

Use a wrench to loosen all the screws on the wheel. Remember to store them carefully because if you lose them, you can’t put the wheels back as they were.
After that, place your wheel on a flat surface. It would be better if that space is large enough for you to move and act comfortably.
Step 4: Deflate The TireWithout deflating the wheel, you can’t take tire off rim. Therefore, find the valve and start this step.
Air valves are usually made from metal or rubber that you can easily find right on it. Just use the valve core removal tool to turn it counterclockwise, and you can open it.
Step 5: Break The Car Tire’s BeadTo ensure safety on the road, the tire and rim are attached very tightly together and are barely separated. Glue is used to connect them, and you need to break this adhesive to remove the tire.
There are two main ways to break the car’s bead when you remove tires from rims. The first one is to do it manually or with a dedicated machine, and the second is driving again and again.
Break the bead manually: You need to prepare sharp tools such as a knife or a pry bar in this step. Thread in and cut along the border of the rim. Pay attention to the direction of the knife or tool to avoid damage to this metal frame.
This is a common and fairly easy way to do it. However, there is a major disadvantage that it will be completely damaged and can’t be reused.
If you have a bead breaker tool, you’ll save a lot of effort. It helps you finish this work faster in a few minutes only.
Break the bead by driving the car many times: You just need to put the tire on the ground, then drive your car again and again. Observe it until the bead breaks out of the rim, and you can stop.
Step 6: Lubricate The Rim And TireOnce the beads have been cut, lubricate the tire and rim. Apply lubricant carefully to the border and the contact points between these two parts.
Many people wonder why they have to lubricate at this step. However, this is an extremely effective tip because this will make it more straightforward to remove the tire from the rim.
Step 7: Take Tire Off RimThis is near the end, and you are almost done with your task. However, in this step, you will have to use a lot of strength and make more effort.
A small tip for you is to put a cloth under the wheel before doing this step. It will prevent your wheel from slipping, and at the same time, limit scratching the metal rim.
It would be better if you pin both sides of the wheel with your legs. Then use force to separate the tire along with the rim frame.
Step 8: Lubricate The Rim AgainAnd you did it. Your task is done, now you just need to lubricate the rim again. This layer of oil or lubricant will protect the metal frame and prevent set rust. Plus, it will also make it easier for you to get a new one on.
How To Remove Tire From Rim With MachineView more: How To Remove Plasti Dip From Rims at home
How to get a tire off a rim at home when you already have a machine? This tool will support you a lot as you don’t have to make as much effort as removing by hand.
What You Need To PrepareSimilar to processing by hand, you’ll have to prepare some necessary tools to complete this job in the most convenient way:
Compared to the former method, this one is easier and quicker, especially for beginners. Some steps, such as jacking the car up or taking the wheel off, are similar to what we have explained above in the manual section above. Yet, some next steps are the differences that you should pay attention to.
This machine needs a firm surface to stand on. That’s why you need to prepare the plyboard. Put the machine on this board and then mark its position.
After that, based on these marks, use bolts and screws to attach them to the board. Some people will use concrete blocks instead of wooden boards, but the process of attaching is similar.
Step 2: Deflate The WheelSimilar to deflating manually, find the air valve first. Then use the core removal tool to turn it counterclockwise to release the valve lock and release the internal air.
Step 3: Place The Tire On The MachineIf you see the small triangle part on the base of the machine, it’s the nub. You should place the wheel on with the front of the needle facing up.
After that, hook the changer arm on top of the rubber. It would help if you also fixed it in this position with a clamp to avoid slipping when processing.
Insert one rod’s end into the joint between rim and tire. Then, hold another end and make an effort to push it down. With this operation, the tire will be separated from the rim.
Once done on one side, you need to flip the wheel and repeat on the other side. Separate it follow the rim line, and you will be able to remove the it soon.
Step 5Last but not least, an essential step is lubricating your rim with a lubricant or oil.
ConclusionThese step-by-step guidelines will provide you with easy-to-understand information. Expectedly, you’ll find it supportive to you to complete this task.
Even when you have a dedicated machine or not, removing the tire isn’t as hard as you think. Read the guideline carefully, and you’ll know the best way to do it.
Finally, pay attention to not damage the rim. You’ll have to continue using it, so it’s advisable to lubricate it after removing the tire to maintain the quality.
The availability of tire shops has allowed the vast majority of drivers to do without the knowledge and skills of self-beading car tires. But for some, this skill can help in a number of situations. Not everywhere there are tire shops, not all wheels allow movement after a puncture, and someone can get into a difficult financial situation when the opportunity to save money on visiting a workshop would be useful. 9Ol000
The procedure itself, with experience and some physical capabilities, will not be difficult.
Theoretically, all tires are divided into tube and tubeless. In the first type, a chamber is also embedded in the tire, which actually ensures tightness.
With high-quality and precise manufacturing of tires and rims from modern materials and proven technologies, the need for a chamber is eliminated, and with it the extra mass of the wheel assembly, which is unsprung, that is, especially harmful to the properties of the car.
Read: Why do drivers put tubes in tubeless tires and how to do it
Accordingly, any car owner will have to deal exclusively with tubeless tires. There are exceptions when the tire, due to age and minor damage, as well as due to corrosion of the disk, ceases to hold air.
Sealants do not always help, so in order not to throw away a tire with a still deep tread and preserved sidewalls, a tube is put into the wheel. This is rare, but it still happens.
Wheels for tube and tubeless tires are also different. They differ in the size of the hole for the valve, as well as in the presence of a special annular protrusion on the rim shelf - khampa in the case of a tubeless version.
It prevents the wheel from breaking apart on the move if there is some loss of pressure. No hump will help from complete depressurization, the tire will be torn off the disk.
The suddenness of a puncture event, and the scarcity of repair shops along the roads in the old days, led to the emergence of many popular methods for dismantling a tire in order to replace the tube or apply a patch to it.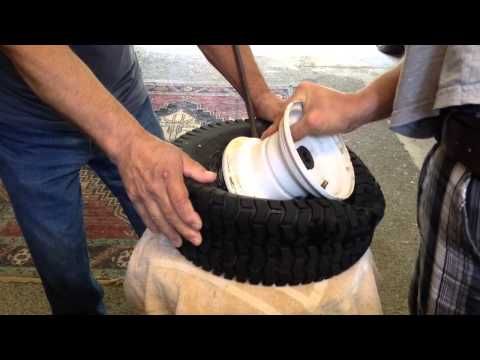
Tubeless tires are also puncture-repairable, for which there are appropriate first aid kits. There are also those in which there is no need for disassembly. But for a reliable repair, the tire is still better to remove.
Continuation: How to repair a tubeless tire yourself (harness set and repair kit)
There are two problems with dismantling. The first is to tear the edge of the tire off the rim shelf. There is a recess in the center, so the edge fits freely into it, and it sits on the shelf with a significant interference.
Especially on a wheel that looked like a lot, where metal corrosion and rubber degradation caused the tire to stick to the rim. The situation in the case of a tubeless tire is aggravated by the presence of a hump, the outer diameter of which exceeds the landing size of the tire, the bead will have to be dragged through it with force.
Second - move the edge of the tire over the edge of the disc. It is not easy enough, but in the presence of lubrication it is carried out with a pair of mounting blades. Or a roller fixture of an assembly machine.
The first problem is solved in various ways, differing in the nature of the application of the pull-off force.
When hitting, a lot of force is developed, but the situation is complicated by the elastic resistance of the tire. They hit the edge of the tire through a spacer in the form of a corner or other object that excludes rubber breaks.
The method is dangerous and not recommended for use. But many succeed in a hopeless situation.
The force is applied through the lever of one of the devices or a significant mass in the direction perpendicular to the plane of the wheel:
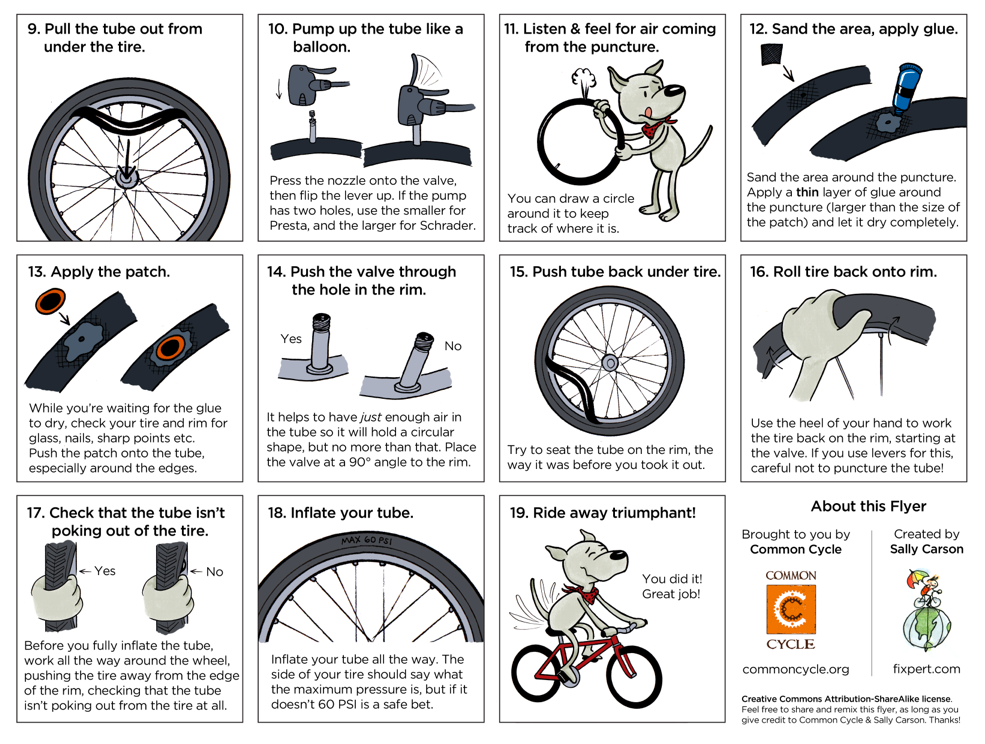
It is easiest and safest to have a dismantling tool in advance.
To make the job as easy as possible, you will need:
Even if the tire is completely flat, you must unscrew the spool from the valve, and a little pressure will still interfere.
Gap between rim and tire is wetted with penetrating lubricant. Then a device is applied to the wheel and a gradual separation of the edge of the tire is made with its shift inward.
Don't do it in one motion, you could damage the tyre.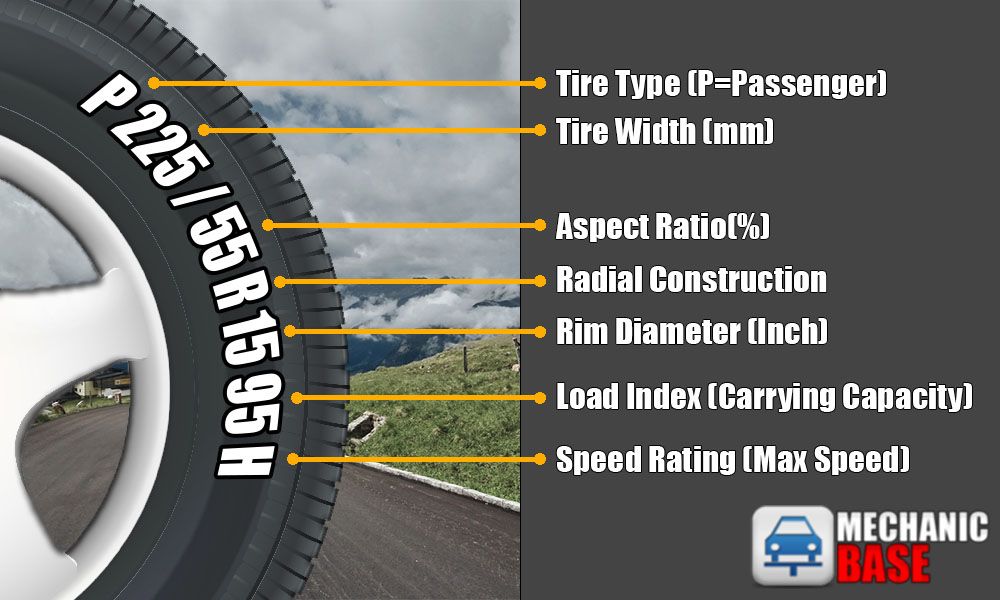 Start on the opposite side of the valve.
After completely tearing off the edge and dragging it over the hump, everything is repeated from the opposite side of the wheel. The tire beads move to the middle of the disc, it is lubricated again.
Starting from the valve, the tire is dragged over the flange of the disc with two pry bars. The second edge is dragged in the same direction, it is necessary to act from the side of the disk.
Due to the lack of a hump, the process is easier. You just need to make sure that the camera does not get between the mount and the disk.
If it is not necessary to completely remove the tire, it is enough to remove the inner tube for repair after tearing off both beads and dragging the outer one.
If you don't use lubricant or soapy water, it is very difficult to drag the bead over the disc. The friction of dry rubber on metal will not allow this to be done, the risk of damaging the rubber increases.
In the impact method, the rubber with its elasticity sends a heavy hammer back with great energy, this is dangerous.
Read: How to unscrew the lock on the wheel if you lost the key
Even with a quality tool, trying to tear off the bead in one motion will damage the inner cord of the tire. It is necessary to act in several steps around the circle.
Be especially careful with the edges of the cast alloy wheel. They break easily and are expensive to repair. Even damaged stamped steel will have to be rolled and repainted.
Contents
On the way home, many motorists encounter unexpected situations, such as a punctured tire. You can solve the problem by simply replacing it. Doing tire fitting yourself is better than going to specialized service stations for this help. The work of specialists in this topic will sometimes cost a lot of money. And if you change tires according to the season, you can run into huge queues for tire fitting.
The first signs of a punctured wheel: reduced driving speed, extraneous noise, sudden pull to the side. If the problem is not detected in time, this situation can lead to serious consequences, such as damage to rubber, damage to the disk, and sometimes even more deplorable situations. In this case, it is necessary: to stop moving, to stop on the side of the road.
When the car is stopped, put on the handbrake, set the emergency stop sign and turn on the alarm. Let's move on to changing the wheel. Under it we put recoil shoes. Jack up the side of the punctured wheel. Remove it and replace it with a spare. We're going home.
It can be taken to a service station and repaired there, or made at home.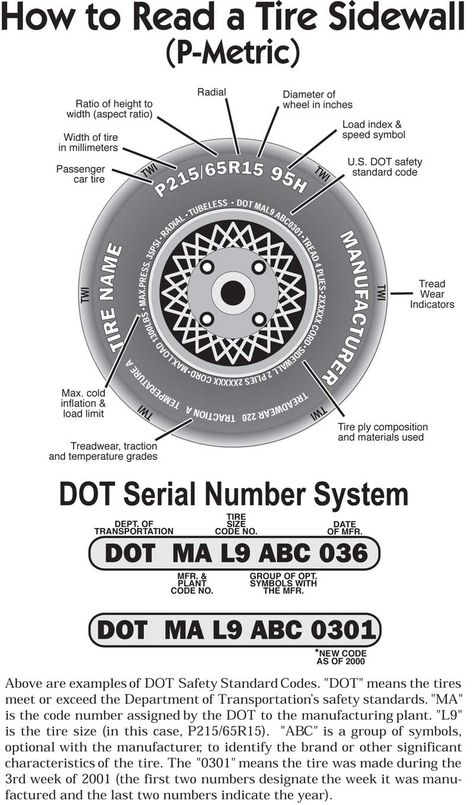 Home tire fitting is done in a car garage. To disassemble and assemble the wheel, you need a specialized mounting tool (chisels). You can’t make a larger tool, as you can damage the rubber.
It is good to use a homemade tire changer. Tire fitting starts with stripping the wheel. One of the rubber beads is removed from the rim of the disk. The side of the tire is pryed off with a pry bar and supported by a small shaft (screwdriver) to prevent the rubber from sliding back, after which one side is pulled out of the rim.
To facilitate the process of removing rubber from the rim, it is necessary to lubricate with soapy water. Approximately at a distance of 15-20 cm, the second mount is inserted and moves to the side until it is completely removed from the board. The second part of the tire is removed in the same manner. The installation of new rubber is carried out in the following order. One of the sides of the tire bead is put on behind the rim of the disk.
A mounting blade is installed between the disc and the tire, with the help of which a part of the bead is installed beyond the edge of the disc.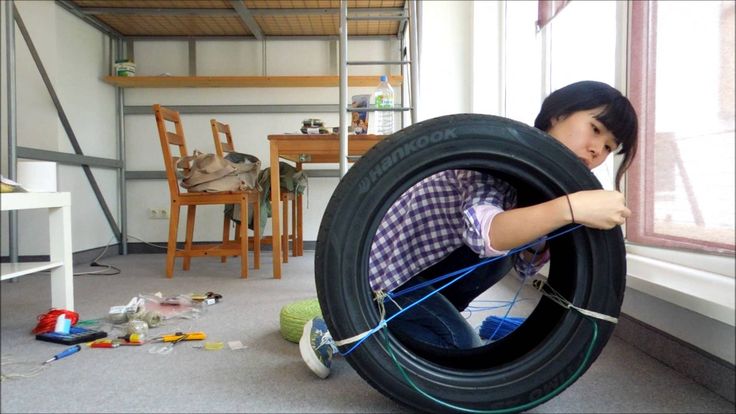 In the interval of 15-20 cm, the edge of the next section of the tire is set with another blade. The other side of the rubber is installed in the rim in the same way. After installing the rubber on the disk, it must be pumped up.
Home tire fitting is allowed with the assistance of a special tool, it is sold in auto shops. And you can also make the necessary tool yourself.
On the Internet there are many different schemes and drawings on this topic. The tire fitting machine is a structure of two handles. One of the handles is movable with a lock, and the other is fixed.
The pressure on the lever forces and facilitates the process of removing the tire from the rim. With the help of a disk with a gear, rubber is removed. When moving with a key, you can remove the tire thrown over the disk.
Putting on the tire is done in reverse order. This process does not take long. Next, let's look at how to repair damaged rubber at home. To do this, you need to have a special repair kit on hand. You can buy them at any auto shop.
Before repair, it is necessary to deflate the wheel, remove the foreign object from the puncture site. We take the awl from the kit and grease it with glue (from the same kit). We introduce the awl in a circular motion into the puncture on the tire. We continue to rotate so that the glue gets on all the walls of the hole. Next, we take the tourniquet and remove from its protective film on the dyne, which is necessary.
Remove the awl from the hole and, leaning the tourniquet, insert it back. The harness must be installed correctly (two ends of the harness on the outside, and the center inside). We sharply remove the awl from the puncture site and evaluate the tightness of the rubber by pumping it up. If everything is fine, cut off the ends of the bundle, leaving 2 mm above the tread. One of the criteria for a good wheel is its balancing. After all, an unbalanced wheel leads to damage to the chassis and rapid wear of the rubber itself.
There are two types of wheel imbalance - static and dynamic.
Static imbalance - vertical imbalance, the difference in weight can affect the banal nipple.
The weight on the nipple side is greater and when touching this side of the road, there will be a shock, and at high speed there will be vibration.
Dynamic unbalance is a weight difference shifted in or out of the wheel which also results in vibration. To balance the wheel, you will need a jack and a set of weights (you can buy them at car dealerships). Let's start balancing. Jack up the side of the car and spin the wheel. If the brake pad interferes with you, then you should remove it from the brake, and also remove it from the transmission. We spin the wheel.
When stopping, mark the lower part of the wheel with chalk. We turn further. If it stops again with the mark down, it means that this part has more weight than the upper part. Install the weight on the top of the wheel. And scroll until the wheels stop in an arbitrary position.
Tire pressure is an important factor that affects handling, stopping distance, tire wear, fuel consumption and comfort. It would be best to look at the manual for your car and pump up the wheel according to these recommendations.
Information on tire pressure can be found on the driver's door pillar, if not, look on the glove compartment lid or on the gas filler flap.
However, in fact there are times when you want to reduce the pressure a little. Of course, if you are driving on ideal surfaces, there is no point in reducing the pressure. But you yourself understand that the problem with the roads still remains, and the size of the pits is sometimes just scary. This is where you have to adapt to the situation.
For example: for a Daewoo Lanos (Chevrolet Lanos) car, the following figures are indicated in the instruction manual for wheel dimensions 175/70 R13 or 185/60 R14, the optimum tire pressure on the front and rear wheels is 220 kPa (2, 1 bar). And you know, it gets harsh, especially when there is only one person in the car. In this case, try lowering the tire pressure to 1.9-2.0 bar.
It will be much more comfortable to move around the city, the tires will work out bumps better, less work for the suspension, let the tire absorb shocks. When the car is fully loaded or when leaving the highway (high speed mode) if there is a long road ahead, then return the pressure declared by the manufacturer.
Naturally, experiment without fanaticism, greatly reduced pressure is also harmful, find a compromise, everything should be within reason. We are not saying that you need to do it this way, just try to reduce the pressure by 5-7% under certain conditions, feel the difference and decide for yourself whether it is worth doing this or not.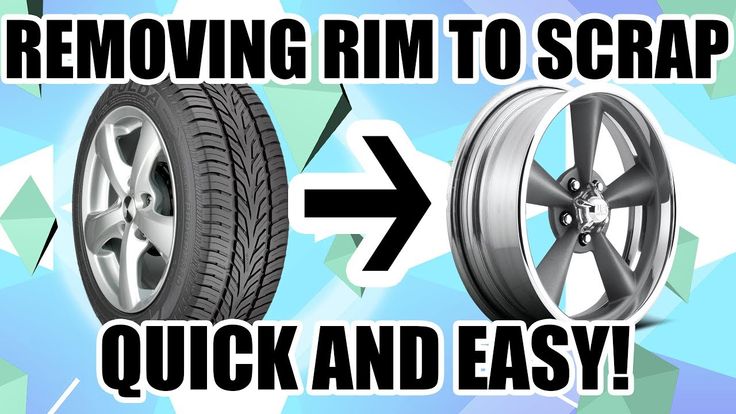
Low tire pressure will give you a more comfortable ride and less bumps in the road. The tire becomes softer, the braking distance decreases. However, there is a caveat:
Many people do this for the sake of fuel consumption. Indeed, the consumption will decrease (not much, of course), the car will roll easier, but there are more disadvantages than advantages, namely:
Check the pressure before driving when the tires are cold, as the readings on warm tires will be distorted.
The most common unit of pressure is Bar (bar).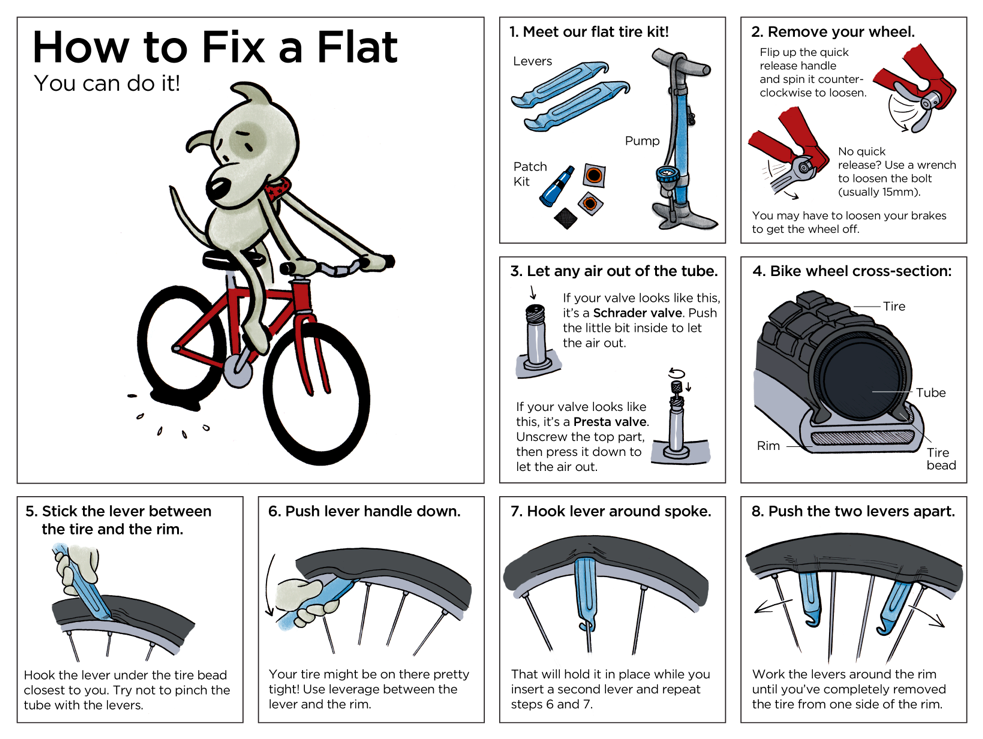 Approximately equal to one atmosphere. Another common standard is PSI and kPa, below is the calculation, for example, if or kPa is indicated, you need to convert to Bar.
Tire pressure is measured with a pressure gauge, they are of various types. Common dial gauges are simple and inexpensive. Pretty accurate, but they can not be dropped, the spring in the middle of the device may deteriorate and the readings will not be accurate.
Such pressure gauges are recommended for constant verification, especially if they work in high loads. Electronic pressure gauges have a display, convenient and most accurate.
Pump the pressure correctly, (no need by eye) follow the recommendations of the car manufacturer, since the tire itself does not say what pressure to pump.
Modern services are increasingly offering the service of tire inflation with nitrogen. This innovation came to Russia from Western countries. Tire inflation with nitrogen was first used in Formula 1 racing.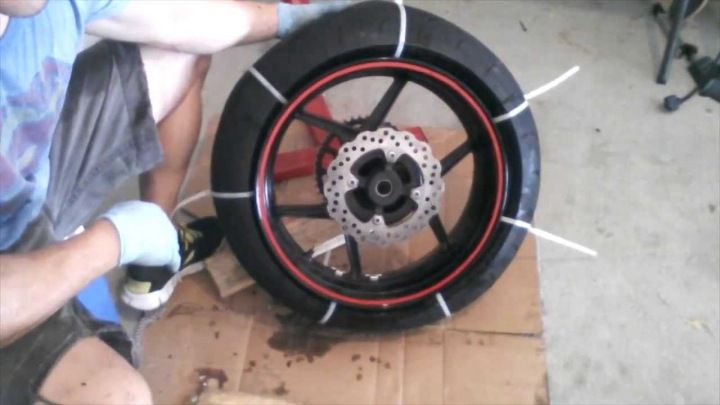
Air mixed with nitrogen was blown into the tires under high pressure. According to the rules, such an act was prohibited, but still there were craftsmen for whom "the rules are not written."
Atmospheric air mainly consists of nitrogen. There is little oxygen in it. Nitrogen molecules are much larger than oxygen molecules, so tire pressure deflates much more slowly when inflated with nitrogen.
Oxygen rushing out along the tire wall oxidizes the cord and disc. Thus, the rubber loses its strength, and it becomes unsafe to move on it.
When it comes to compressed air, the pressure releases after some time. This figure is approximately equal to 0.09 atmospheres per month. Oxygen molecules are small, so they leave the tire easily. It is impossible to stop this process, because it will continue until the same pressure is created. There is only one point: you can pump up the tire with pure oxygen. Due to this, the pressure will equalize, and the tire will stop flattening.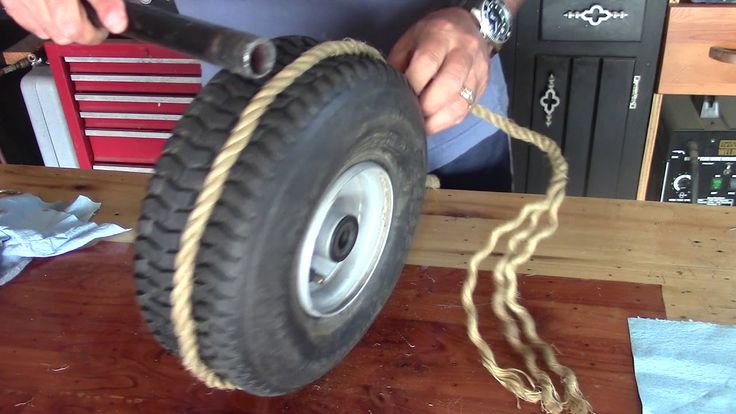
The most important plus, which is emphasized by service station workers, is the safety of a tire filled with nitrogen.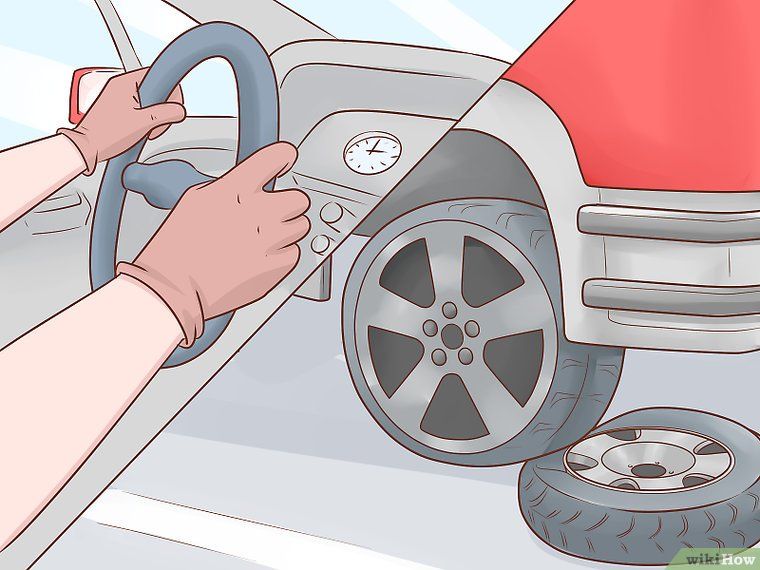
Inflate tires with nitrogen using nitrogen generators. They are a special installation that rotates the air mixture. But, before the air enters the tire, it is processed.
The generator is supplied with compressed air at a pressure of about 8 atmospheres. Further, the air is filtered at several levels.
At each level, the air is cleaned of dust, moisture, oil, and other impurities. Further, the filtered air is deprived of nitrogen molecules.
The whole procedure takes a long time. But all this is justified, because in the end you can get pure (95%) nitrogen. The remaining 5 percent is oxygen. It is this ratio of gases that is ideal for inflating car tires.
Inflation process: a nitrogen generator is connected to the tire valve and pressurizes the resulting mixture inside. If you inflate the wheels like this, then they will not let in oxygen or moisture. The disc will not rust, so it will last longer and will not “tear” the tire cord.
There are people who deny the usefulness of this procedure.
If you carefully read the positive aspects, then it is clear that the tires are inflated with nitrogen in order to protect themselves and make driving more comfortable. But there is a group of people who argue the opposite, referring to another marketing ploy:
