posted on: May 15, 2020 07:15 am
You need to have a practiced touch to accurately mount and dismount your tires if you hope to avoid damage. It takes more than sheer force to replace tires safely, and Bauer Built Tire & Service has you covered.
Dismounting Your TiresNever dismount tires while they’re inflated and avoid tools that will damage the sidewalls or tire beads. Lubricate the rim flange and tire beads to assist the removal process.
Lubricate Tire And Wheel ComponentsThere are plenty of moving parts during mounting and dismounting, and all that motion can take a toll on your tire and wheel components. Lubricating facilitates mounting, dismounting, and adjustments, so you won’t have to worry about punctures or tears.
Before fitting a new or existing tire back onto the wheel, lubricate:
Avoid any lubricant that will damage the tire like silicon or hydrocarbon-based products.
Inspect the wheel and rim for damage, cracks or corrosion. Clean with a wire brush to remove flaked or excess paint, rust, and debris. Any irregularities will prevent the tire from laying flush once the clamping force is applied.
Pay attention to the studs. If you replace a single damaged stud, you’ll need to replace the two studs adjacent to it as well. Two or more damaged studs require replacing all ten.
Position the wheel on the ground with the drop center facing upward. With the valve hole at the bottom of the wheel, line up the first bead is at the rim’s edge. Place the tire on the wheel with the proper tools, do not force it on with your knee or foot, and use a rocking motion to fit it properly.
Inflating Mounted TiresInflate the tire to 5 psi and check that the beads are positioned correctly. Your service technician should verify the correct inflation pressure with the tire manufacturer’s load. Tires must be placed in a cage during inflation as a safety measure. The tire will have to be deflated, removed, lubricated, and replaced if the beads do not sit correctly.
Inflate commercial truck tires to 20 psi to inspect that sidewall cords are good. Upon completing this inspection, over-inflate by 20 psi the manufacturer’s standard psi to confirm that there are no cracks in the sidewall cords. Then achieve the final manufacturer’s psi by deflating the air pressure until the correct psi is reached while not exceeding the air pressure recommendations of the wheel.
Bauer Built also offers a wheel reconditioning program to correct surface corrosion and rust found during our inspections and mounting and dismounting of tires for our commercial accounts. Contact us to learn more.
Categories: News, Tire Care Tips
Tire changing machines for motorcycles and cars are an indispensable device in today's auto-motorcycle repair shops. However, to buy products of excellent quality and with competitive prices, customers need to find reputable addresses and are trusted by many craft workers.
In companies or reputable workshops, there will be professional technical teams that guide the installation and use of tire removal machines according to the manufacturer's procedures. The following article will guide you on how to remove tire from rim with a car tire changing machine and by hand.
In the car there is always a place to store the above items, always have these tools ready in the car before going anywhere, because trouble can happen at any time. You should be proactive in every possible situation.
Removing tires is a matter for the professional. Because if you do not do it right, you can seriously damage tires and rims and endanger your safety. If you have a lot of manual skills and are an accomplished screwdriver, you can lift the tire from the rim by hand with an assembly iron (better with two).
Removing a tire can be annoying. So, it is dangerous to do it in the middle of the road. It is because you may get stuck in the middle of the road while riding. Hence, please move to a spacious position to remove the tires.
On the tire, there will be a piece of rubber that is the air valve. In this step, screw the valve cap in the counterclockwise direction. Using the valve remove tool will deflate the tire. After performing the above operations, place the tire on the ground to remove the tire.
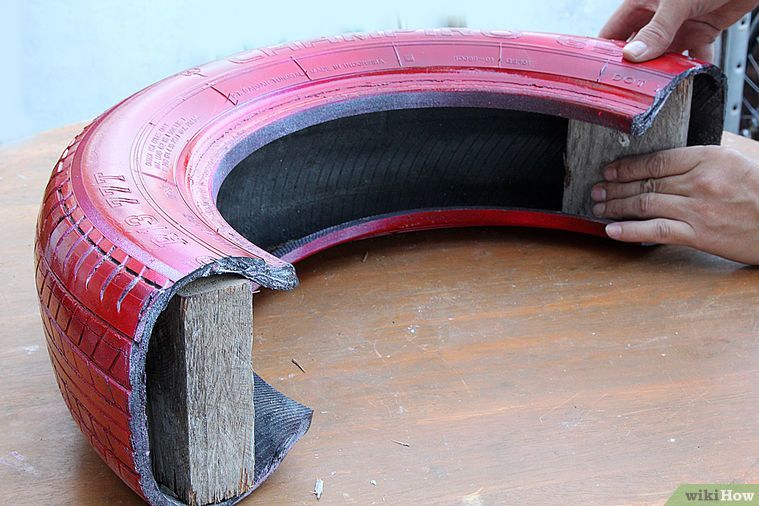
Tires and rims are always fastened together with special glue. Use strong glue and seal so that they do not fall off. When you want to remove a tire, break the glue and stick the tire to the rim firmly. To break the grain of the wheel, you have two ways: manual tools as use a large flat-tip screwdriver or use your strength.
When making the removal of tires that are prone to slippage, place a mat under the tire. Use foot force on both sides of the tire to reduce the chance of scratches and increase leverage. While removing the tire from the place, you may need to apply some hard grease to the surface.
After removing the tire from the rim, you will install a new tire. So you need to use oil to apply the inside of the tire to avoid scratching the rims. If there is no oil, you can replace it with another liquid such as soap.
You may now want to put new tires on the rims so you can continue to use them. You can use specialized tools if you do not have time. Inflate your tires and use them right away.
If you want to reuse the tire, we should place a pressure piece with rounded corners between the other vice jaw and the tire rubber. Otherwise, the sharp edges will damage the flanks. The pressure point of the vice should be very close to the rim shoulder.
It requires the mentioned mounting iron to pull it off. First, you press the tire on one side with both hands firmly into the low bed and then push it to the opposite side. There you put the tire iron on and lever the rubber over the rim flange with little effort.
Car tires fit so tightly to the wheel that the human force can not remove them. Especially for large trucks, it becomes even more difficult. It is the reason people need specialized tire entry and exit devices called tire entry machines. Here are the reasons to use this device.
Use the tire changing machine in the following sequence to achieve the best effect but no less quickly. Before getting into work:

Step by step guide:
First, you need to use a tire jack to lift the wheel that you need to change the tire on. Then use a wrench to unscrew all the bolts. Next, deflate the tire that needs to be replaced.
Tires and rims are bonded together with glue so that the tire does not come apart when moving. So, to remove the tire from the rim, you need to remove this glue. To separate the tire and rim, you need to use a tire bead breaker.
Place the tire between the presser surface and the rubber pad, paying attention to the pressure plate with the wheel wall in balance.
Once you have removed the seal between the tire and the rim, for easy separation of the tire, you need to apply lubricant to the gaps between the tire and the rim and use a tire iron to create a gap between the rim and the tire. The use of lubricants both helps to prevent the rims from being scratched and the tires to easily separate from the rims.
After one side of the tire has been separated from the rim, simply repeat the above steps with the other side of the tire, the process of removing the tire from the rim will be complete.
In the maintenance of cars and heavy-duty vehicles, people need to use specialized tire entry and exit equipment. It is a tire machine. It makes the tire removal process quick and convenient. The above is a manual on how to remove tire from rim and how to use the tire machine. We hope you can remove tires from the rim effectively.
Flat tire on the road, no one around, tire shop far away. Here's what you need to do to put a spare on your own, even if you've never done it before.
Turn on emergency lights.
SourcePlace warning triangle on the road. Usually it is in the trunk.
The sign must be installed behind the car at a distance of 15 m in built-up areas: this is approximately 22 steps for a person of average height. If the wheel needs to be changed on the track, a distance of 30 m is required - approximately 45 steps. This is especially important in the evening or at night when visibility is much worse. In the dark, you also need to wear a reflective vest.
Put the car on handbrake . Mechanics - handbrake and first gear. A car with an automatic transmission - on the handbrake and in the parking mode.
To ensure that the machine does not start moving, additional wheel chocks or stops can be fitted.
This is what wheel chocks look like under a car wheelNo shoes - stones or bricks of the right size will do.
Install the wheel chocks on the opposite side. For example, you need to replace the rear wheel - the stops are placed under the front wheels.
You will need a jack, a wheel wrench and a spare wheel.
Jack and wheel wrench usually look like this The wheel is in a niche under the boot. In some cars, for example, "Niva" or "Oka" - under the hood.
The jack must be installed exactly under the jacks that are in the car . If the jack support is misaligned, the vehicle may roll over onto its side.
If the ground is loose or wet, the jack will fall through, so you need to put something solid under it. Suitable floor mats, boards, bricks or branches.
Correctly installed jackRaise the car a little : no more than 1 cm.
SourceRemove the punctured wheel . Use the wheel wrench to loosen the wheel bolts. If you can’t do it with your hands, you can stand on the key with your feet.
Raise the vehicle with a jack until the wheels are off the ground . It is necessary to finally unscrew the bolts - with your fingers or a wrench - and remove the wheel.
Place the removed bolts in such a way that dirt does not get on the threaded part, otherwise the threads will be damaged.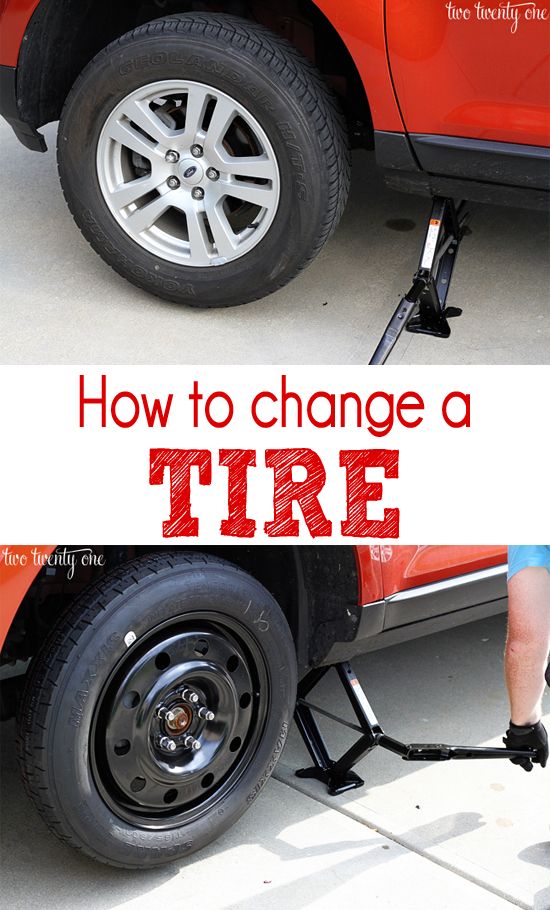 With a faulty thread, the wheel will not be firmly attached to the car.
Install the spare wheel:
Check that the wheel is correct:
April 22, 2017 Likbez Do it yourself
The ability to change wheels will never be superfluous. Moreover, the process itself takes 10–15 minutes, and everything you need is usually in the trunk of any car.
A punctured wheel is usually indicated by extraneous noise from the outside, as well as loss of speed and deterioration in handling. If the car pulls to the side, and in order to keep it on the road, you have to make an effort, then most likely a puncture on one of the front wheels. If the back of the car starts to skid, then the problem is there.
When that happens, you'll know exactly what's going on. Don't panic by any means. Align the car and, gradually reducing speed, pull over to the side of the road.
You can't drive on with a flat tire, but it's also not a good idea to stop in the middle of the road. Therefore, do not be afraid to drive a couple of tens of meters and choose a flat, dry place on the side of the road.
It is best to stay away from moving traffic so as not to cause an accident and risk your life.
Drivers of vehicles with a manual transmission must always engage first gear, and owners of automatic transmissions must shift the lever to the park (P) position.
And in any case, you need to put the car on the handbrake.
After parking the car in a safe place, do not forget to turn on the hazard warning lights and install the warning triangle located in the trunk. In settlements, it is placed 20 meters behind the car, and on the highway - 40 meters.
In the same place, in the trunk, find the spare tire and the jack with the wheel wrench. Usually the manufacturer places all this in a special niche under the floor, which can be reached by lifting the bottom panel.
It's good to have a pump and pressure gauge with you, as well as wheel chocks. And, of course, gloves will not interfere, since you still have to get your hands a little dirty.
After removing all the tools and spare tire, place them next to the punctured tire and ask all passengers to get out of the car. Even if it's freezing cold or pouring rain outside, safety comes first.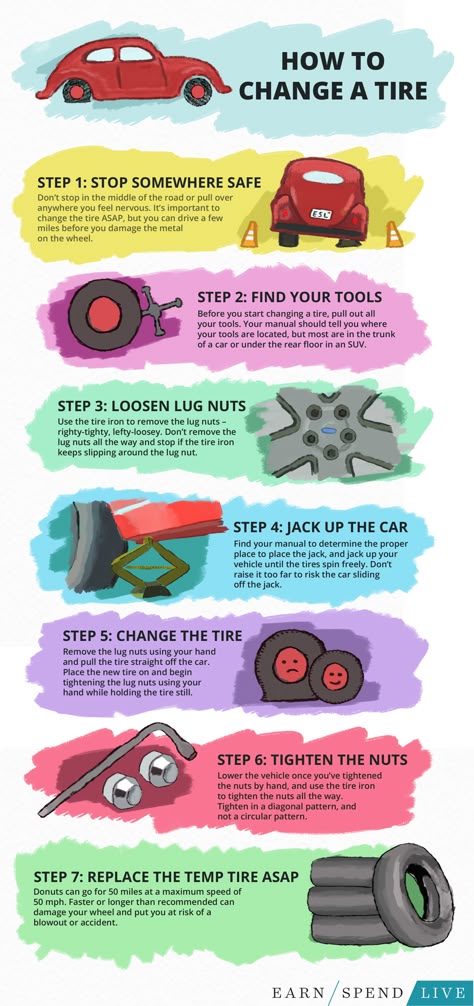
Despite the handbrake and the gear engaged, before installing the jack, you must additionally fix the wheels with stops. For them, however, any stones or pieces of brick will do.
If the rear wheel needs to be replaced, the chocks are placed on both sides of the front wheels and vice versa.
You are now ready to remove the wheel. First, remove the disc from the plastic cap and use the wheelbrace to loosen the bolts. To move them from their place, you will need a lot of effort, which can be provided by the weight of your body by simply pressing on the key with your foot. It is not necessary to completely unscrew the bolts: it is enough to unscrew them one turn.
The machine must then be jacked up. In no case should you install it anywhere. Especially for these purposes, there are small reinforced places on the bottom, which are usually located behind the front wheel or immediately in front of the rear. The manufacturer designates them using triangles or cutouts at the bottom of the thresholds. If the weld is covered with plastic pads, they will break at the jacking points.
Place the jack under the bottom and start turning the handle clockwise. Be sure to make sure that the jack rises evenly, does not heel.
If under the weight of the machine the bottom leg of the jack sinks into the ground, you need to put something like a piece of board or brick under it.
Do not raise the wheel too much. It is enough to stop 5 cm from the ground. After that, you can completely unscrew the bolts and remove the punctured wheel from the hub. It is better to slide it under the car as insurance, and put the bolts somewhere on a rag so that they are not lost.
It remains to replace the punctured wheel with a spare. To do this, align the holes on the disc with the holes in the hub, put the wheel on and screw on the bolts, completely wrapping them by hand.
It is important to install the nuts that fasten the wheels to the hub with the semicircular side towards the rim, and not out.
Remove the punctured wheel from under the machine, lower the jack and finally tighten the bolts. You need to do it right. On wheels with four or six holes, opposite bolts are tightened in pairs. If there are five holes, then you need to pull in this order, as if you are drawing a five-pointed star.
It remains to assemble the tool, remove the jack and stops, and also check the pressure in the installed wheel and, if necessary, pump it up. If the pump is not at hand, you can ask for help from passing drivers.
If you use a small spare tire, the so-called dokatka, then do not forget to be careful: it can usually be driven at a speed of no more than 80 km / h and for a distance of a maximum of 100 kilometers.
And, of course, try to repair a punctured wheel as soon as possible in a specialized tire shop, so as not to tempt fate and not drive without a spare tire.