Autos & Vehicles
WOW! How Much Money Do YouTubers REALLY Make? (March 2021)
Updated
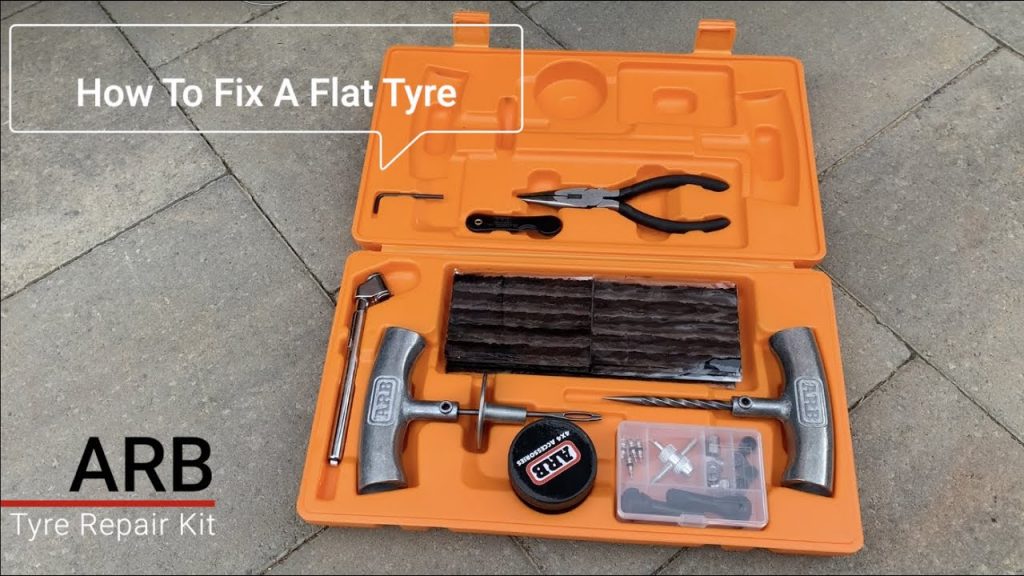
ZIP TIES N BIAS PLIES is a popular Autos & Vehicles channel on YouTube. It has attracted 328 thousand subscribers. The YouTube channel ZIP TIES N BIAS PLIES was founded in 2011 and is located in Canada.
So, you may be asking: What is ZIP TIES N BIAS PLIES's net worth? And how much does ZIP TIES N BIAS PLIES earn? Only ZIP TIES N BIAS PLIES actually knows, but we can make some excellent estimates using data from YouTube.
Table of Contents
Net Worth Spot's data points to ZIP TIES N BIAS PLIES's net worth to be about $100 thousand. While ZIP TIES N BIAS PLIES's real net worth is not known. Net Worth Spot's expertise estimates ZIP TIES N BIAS PLIES's net worth at $100 thousand, however ZIP TIES N BIAS PLIES's real net worth is not known.
The $100 thousand prediction is only based on YouTube advertising revenue. Realistically, ZIP TIES N BIAS PLIES's net worth may truly be higher. In fact, when thinking through separate revenue sources for a YouTuber, some sources place ZIP TIES N BIAS PLIES's net worth as high as $250 thousand.
report this ad
There’s one question that every ZIP TIES N BIAS PLIES fan out there just can’t seem to get their head around: How much does ZIP TIES N BIAS PLIES earn?
When we look at the past 30 days, ZIP TIES N BIAS PLIES's channel gets 300. 73 thousand views each month and about 10.02 thousand views each day.
Monetized YouTube channels generate income by serving ads for every one thousand video views. YouTube channels may earn anywhere between $3 to $7 per one thousand video views. With this data, we predict the ZIP TIES N BIAS PLIES YouTube channel generates $1.2 thousand in ad revenue a month and $18.04 thousand a year.
Net Worth Spot may be using under-reporting ZIP TIES N BIAS PLIES's revenue though. If ZIP TIES N BIAS PLIES earns on the top end, ads could earn ZIP TIES N BIAS PLIES as high as $32.48 thousand a year.
ZIP TIES N BIAS PLIES likely has additional revenue sources. Influencers may promote their own products, accept sponsorships, or earn money through affiliate commissions.
What could ZIP TIES N BIAS PLIES buy with $100 thousand?
Autos & Vehicles
Auto Hub Net Worth
Autos & Vehicles
TheHDAviation Net Worth
Autos & Vehicles
SERGEI DRATCHEV HEAVY HAUL Net Worth
Autos & Vehicles
Kia Canada Net Worth
Autos & Vehicles
fans buses gaming Net Worth
More Autos & Vehicles channels: How much money does mediaAUTO 미디어오토 have, Autocosmos México net worth, How much money does Car Acceleration TV make, pavelkubes1 income, How much money does Точка Б make, How much is MustangTown's Muscle Car Time Machine worth, How does RegularCars make money, Lexi Hensler birthday, when is SirKazzio's birthday?, pokeaimmd
Autos & Vehicles
RCSparks Studio Net Worth
Autos & Vehicles
DailyDrivenExotics Net Worth
Autos & Vehicles
The Detail Geek Net Worth
Autos & Vehicles
TheStraightPipes Net Worth
Autos & Vehicles
FortNine Net Worth
Autos & Vehicles
AvE Net Worth
Autos & Vehicles
Machinery Trucks Net Worth
Autos & Vehicles
snowcat Net Worth
Autos & Vehicles
ostacruiser Net Worth
Autos & Vehicles
AutoMotoTube Net Worth
Back to topCopyright © 2020 - 2023 Net Worth Spot.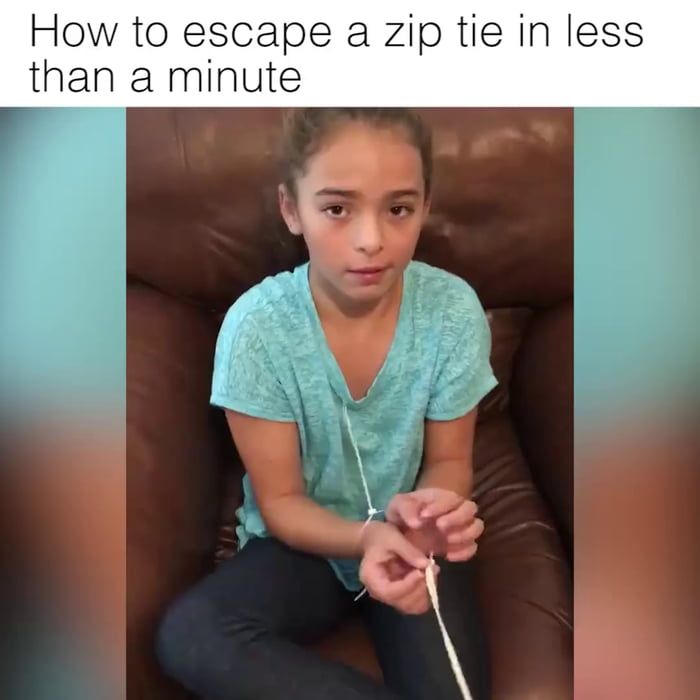 Net Worth Spot is not associated with YouTube.
Privacy Policy Contact Us Submit a Correction
Email:
Address:
Phone:
Email:
Address:
Phone:
Email:
Address:
Phone:
We promote concerts on a monthly basis, and use Bookingagentinfo.com to have quick access to the booking agents for different artists. Bookingagentinfo.com has saved us time and money.— Martin Tinnell, Las Vegas Concert Promoter
I signed up for Booking Agent Info because I was having a hard time finding management and publicist info for artists that I wanted to interview for the publication that I write for. At first I was really skeptical about things, I didn't know if the site was trustworthy.— Chelsea Smith, Music Editor, SWGRUSBut I'm really glad I signed up! Rather than taking the time to dig through the internet, I can just go to Booking Agent Info and its all there for me. The site is very straightforward and any information I need is easy to search for.
With Bookingagentinfo.com I have been able to reach the managers of various celebrities and influencers that I wasn't able to reach before for product endorsements and placements. It has also saved me time by providing me with the right person to talk to.— Shane Fairbrother, CEO, Medtainer
I've been able to get in contact with representation for celebrities and am finding it much easier to get interviews for our podcast thanks to Booking Agent Info.— Matthew Ardill, Comedy Album Book Club Podcast
Birthplace
Canada
Occupation
YouTuber
Zip Ties N Bias Plies is an art page on Instagram. The website is famous for the lube tube films it hosts, in addition to other content. The page's website sells a variety of merchandise, including t-shirts, stickers, and other mementos, which may be purchased by the page's followers. One can get their hands on some embroidered hats, sweatshirts, mugs, tank tops, and towels on their website. They also have a shop with their range of organic tote bags on their website. They have been available on YouTube since 2011. Moreover, their internet presence extends to the Patreon website.
You can book Zip Ties N Bias Plies for your event by contacting Zip Ties N Bias Plies's agent. Zip Ties N Bias Plies agent will be able to provide you everything you need to hire Zip Ties N Bias Plies including availability and pricing. You can get the contact info for Zip Ties N Bias Plies's agent in our database.
The contact details for Zip Ties N Bias Plies management can be found here at Booking Agent Info. You can get access to all of Zip Ties N Bias Plies contacts by signing up and becoming a member.
You will want to contact Zip Ties N Bias Plies's publicist. Zip Ties N Bias Plies's press and management team handles all inquiries involving: interviews, press, and all things media related. You can get the contact info for Zip Ties N Bias Plies publicist at Booking Agent Info.
The Zip Ties N Bias Plies booking fee depends on different factors like the date, location, and market activity.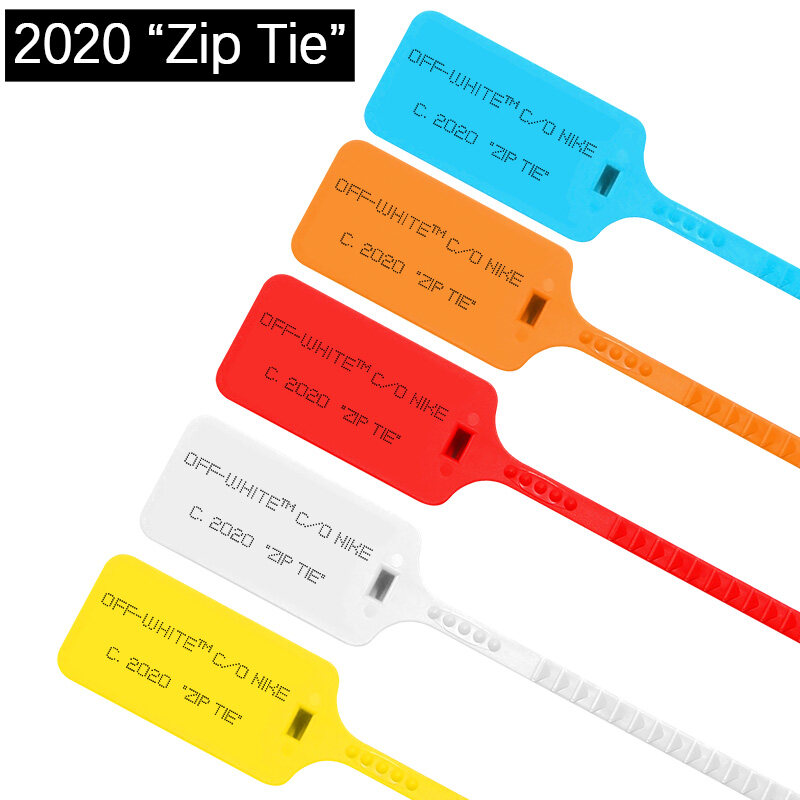 Booking Agent Info provides price estimates for booking Zip Ties N Bias Plies, and you would need to contact Zip Ties N Bias Plies's agent to get the official pricing.
..with the contact information for Zip Ties N Bias Plies agent, manager, and publicist.
Our site is meant to assist you in finding how much does it cost to book Zip Ties N Bias Plies for an event, and how to book Zip Ties N Bias Plies. Our database can be used to assist you in getting Zip Ties N Bias Plies endorsements, interviewing Zip Ties N Bias Plies, or to hire Zip Ties N Bias Plies for an event.
Sign Up Now
Similar Celebrities
Trending Celebrities
Hello!
We continue to get acquainted with hand seams. Today we have “under the microscope” manual stitches with oblique stitches.
Bias stitches differ from straight stitches in their placement on the fabric. If straight stitches are laid in a straight line without deviations from it, then oblique stitches are laid at an angle to the stitch line.
I use hand stitches with bias stitches when I need a 100% guarantee that the connected parts of the cut or layers of fabric will not move relative to each other. Because, due to the peculiarities of their execution, oblique stitches practically exclude further shifts, distortions of cut details. And since hand-stitching with bias stitches is also much more elastic than hand-stitching with straight stitches, it will not interfere with the stretch of the fabric and at the same time secure its fit more firmly.
Skew stitches are used for both temporary and permanent hand stitches. Temporary hand stitches with oblique stitches include basting (basting) and basting.
Hand stitches.
Hand stitch with straight stitches.

Manual bias stitch.
Hand stitch buttonholes.
Hand stitching with loop stitches. Seam "back needle", manual machine seam.
Cross stitch by hand. Seam "goat". Seam "Christmas tree".
Bartacks for hand stitching.
Basting stitches with bias stitches.
When making basting (basting) lines with oblique stitches, they are laid from left to right, stitches parallel to each other, with a length Lst from 0.7 mm to 20 mm.
The needle is withdrawn from the material - at a small distance from the edge of the parts, through all layers, from bottom to top. The stitch (on the top layer of the cut details) is laid - piercing all layers of the material, from top to bottom, away from the cut, at an angle to the stitch line. The next needle puncture (on the lower layer of cut details) is done through all layers of the material, from bottom to top, along a line perpendicular to the fabric cut, along the line of the previous needle puncture (needle entry into the material).
Basting (basting) stitches with bias stitches are used, for example, when basting a collar, collar, etc.
Basting stitches with bias stitches.
According to the marked lines on the details of the cut, with the basting (basting) stitch laid on the same details with straight or oblique stitches (described above) stitches, the needle of the sewing machine must go through and sew. You will remove the basting (basting) seam with straight or oblique stitches and turn the product on the front side. That's when all this happens, you can use a basting stitch with oblique stitches to secure the edge seams already located inside the parts.
The technique for sewing basting stitches with bias stitches is the same as for basting (basting) bias stitches. The stitch length in this case Lst is from 0.5 mm to 10 mm. But the distance from the edge at which such a line will be laid depends on the width of the seam allowances, which are now located inside the sewn parts.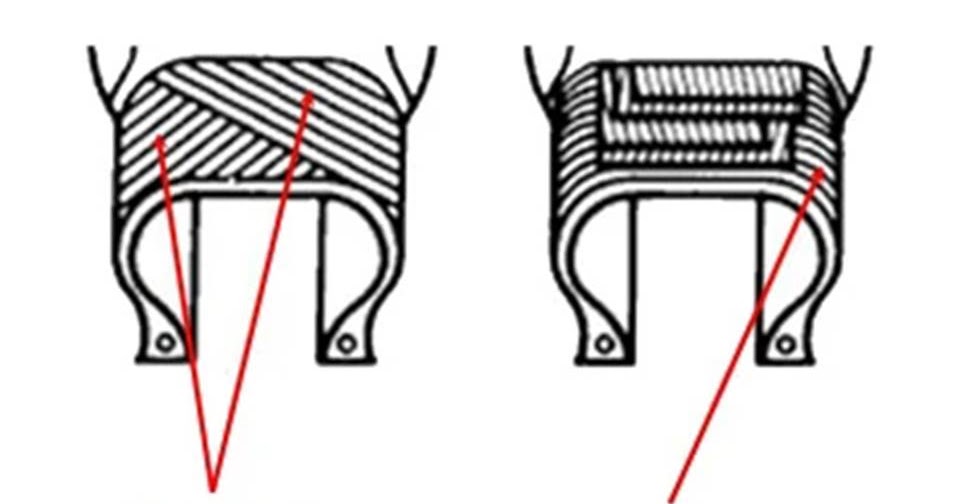
This hand stitch with bias stitches is used to baste, for example, the edges of lined patch pockets, the edges of sides, collars, etc.
However, temporary basting (basting) and basting bias stitches are limited. When basting cut details from thin fabrics and fabrics in a cage or strip, do not use hand stitches with oblique stitches. Because in the first case, the structure of the fabric may be disturbed, and in the second case, during the WTO (wet-heat treatment), the patterns of cells and stripes on the fabric may be distorted.
Permanent diagonal hand stitches.
I remind you that permanent hand stitches remain on the finished product forever. Therefore, all permanent stitches are made with threads in the color of the base material. And the threads at the same time should be thin, but strong. Sometimes they even pull the thread out of the fabric to lay permanent stitches on the product from the same fabric. Then no one will notice the thread for sure.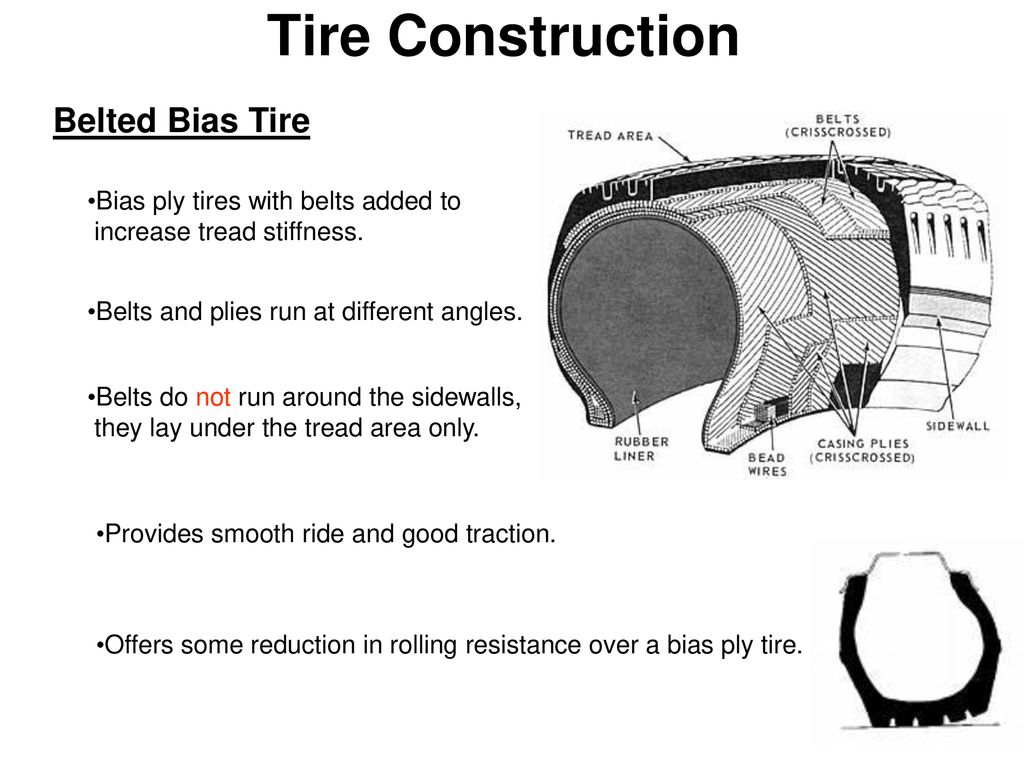
For clarity, permanent stitches with bias stitches in photographs and pictures are shown with contrasting threads (colors). You don't have to do that!
Overlock stitch with bias stitches.
Bias Overlock Stitch is used when you want to protect the fabric edge from fraying. This line is done like this.
The needle must be inserted into the tissue perpendicular to the cut,
at a distance of 0.3 - 0.5 cm from the tissue cut, from bottom to top, from right to left. Stitch frequency 3 - 4 pcs. by 1 cm, stitch length Lst = 0.5 - 0.7 cm. To make it look beautiful, you need to place the stitches at the same distance from the cut and from each other, and the stitch thread should not be too tightened.
Bias hem stitch.
The Bias Hem Stitch is used when you need to hem a folded, tuck-free cut of medium to thick fabrics. For example, the bottom of the sleeves, the inner edges of the collar, etc.
To sew a hem stitch, insert the needle into the fabric, in the direction from the main fabric (pierce half the thickness of the main fabric with the needle)
to the folded section (pierce the entire thickness of the folded section).
The distance from the edge of the folded section to the exit of the needle (puncture on the folded section) is from 0.3 to 0.5 cm. The line is sewn from right to left. Stitch length Lst = 0.3 - 0.5 cm. Stitch frequency 2 - 3 pcs. 1 cm. The next stitch must be done by reintroducing the needle into the main part, opposite the exit of the thread from the folded edge or 2 - 3 mm to the left.
Bias stitch blind hem. View from the inside.
And as you can see, nothing is visible from the front side.
Bias stitch quilting.
Bias quilting is used to give stability and elasticity to certain sections of sewn products. For example, when connecting cut parts from the main fabric with parts from cushioning materials.
In such cases, the quilting stitch is laid, as well as the basting stitch, with oblique stitches (see above), but with one difference, the upper part of the lining fabric is pierced completely, and the lower part (from the main fabric) is captured by one or two threads. The quilting line is performed in parallel rows from top to bottom, and then from bottom to top and vice versa.
On the finished product, this stitch will remain inside between the hem pieces (top and bottom layers). It should not be visible from the bottom part. Therefore, it must be done carefully, the stitches cannot be pulled together.
Stitch length Lst = 0.5 - 0.7 cm.
Bias Stitch Stitch . In fact, this stitch is most often used when repairing clothes made of thick fabrics with no fraying cuts. When as a result of an "accident" there were tears, tissue cuts. And it is required to imperceptibly connect the sides of these gaps, cuts. Then this line is indispensable. And since it is done by hand, with oblique stitches, then, as they say: "Our client!" and we'll take a look at it.
Sections of the gap, the section is placed close to each other. We fix at the beginning of the cut (gap), make a backtack. With a needle, from right to left, the material inside the fabric layer is pierced (sewn) with oblique stitches, but not for the entire thickness of the fabric layer, but so that the stitches are not visible from the front side. And from the outside, straight, parallel stitches are obtained, which tighten the sides of the cut (gap).
After the stucco stitch, you can try to cover up the stitched area by spreading the pile with the needle.
Next article loop stitches. Until then, bye everyone! Sincerely, Milla Sidelnikova!
Embroidery is a very beautiful type of needlework, its basis is a variety of types of seams. Their combination creates unique styles and embroidery techniques. In this article, we will analyze the main types of stitches that are used in embroidery and are available even to beginner needlewomen.
Cross stitch has been a popular form of art for many years. Manufacturers offer a wide variety of patterns for embroidery and even whole sets, which already have everything you need to create a picture or decor element. Cross-stitch is based on the stitch of the same name and its modifications (half-cross, 3/4 cross).
The traditional seam "cross" or "Russian cross" consists of two oblique stitches intersecting with each other. It is most convenient to embroider on a special canvas, on which the stitches are neat and of the same size. It is important to ensure that the intersection of the stitches is carried out strictly in the center, otherwise the pattern looks messy.
On specialized forums, there are heated discussions about the stitch technique itself. However, in fact, the differences in them are very small, and we recommend choosing the one that is most convenient for you.
Cross-stitch patterns often use a "half-cross" and 3/4 cross. These seams create the contours of the image and smooth out the corners. A half-cross can be used to separate the pattern from the background, in which case it is necessary to ensure that the direction of the stitches of the half-cross seam does not coincide with the direction of the upper thread of a regular cross. Note that the semi-cross is used on a thin basis. In the event that the base has a normal thickness, the seam is made with woolen or acrylic threads, which will completely cover the entire cage.
The tapestry stitch is used in the embroidery technique of the same name. This seam is almost impossible to distinguish from a half-cross seam: finished products will look identical. There are minor differences in the technique of making both seams, but they do not affect the final result. For example, a tapestry seam is performed from left to right, another execution in the classic version of the seam is not allowed. In order to distinguish two seams, you need to look at the wrong side of the canvas. The seam "half-cross" on the wrong side is characterized by horizontal or vertical stitches, while the tapestry seam does not have them.
Thus, mastering the seams "cross" and "semi-cross" is enough to create magnificent embroidered interior items: paintings, panels, pillows, tablecloths and napkins. You can read more about cross stitch for beginners here. The main thing to remember is that every person is a creator in his essence and you will definitely succeed!
View ready-made cross stitch kits
In addition to cross-stitch, satin stitch embroidery is a very popular technique. At first glance, it takes a lot of time and effort to master it. However, this opinion is erroneous - it is enough to master just a few basic stitches, and you will already be able to embroider your first work in this technique. For inspiration and confidence, we advise you to read this article.
The simplest decorative stitch in its execution is the “forward needle” seam. To many of us, it is not even known as a decorative one, but as a popular connecting seam.
When embroidering with satin stitch, they perform the contours of the pattern; similarly, it can also be used in cross stitch. A seam is made along the outlined lines of the pattern, the needle moves forward all the time. It is a mistake to think that only straight lines can be embroidered with a “forward needle” seam; it is used for any lines: wavy, rounded or complex patterns.
The “back needle” stitch is already performed from right to left, outwardly resembling a line made by a sewing machine. When sewing both types of seams, it is important to ensure that the length of the stitches is the same. It is not difficult to achieve accuracy in stitching: at the first stage, you really have to carefully monitor the length of the stitch, but with the accumulation of practical experience, the need for constant concentration of attention will disappear.
Despite the ease of making seams, they can be used to create very effective patterns, especially if you use a thread in two strands: this way we will add additional volume and texture to the image.
The very name of the seam speaks of its purpose - they are embroidered with stems on canvases with floral motifs. The main contour seam in satin stitch embroidery. The seam is formed by oblique stitches, tightly pressed against each other. There is no single rule for making a seam: it can be embroidered in any direction. With the help of this seam, complex motifs and irregularly shaped details are filled.
The stalk stitch is widely used in embroidery with ribbons and beads. With its help, magnificent textured elements are obtained.
The stem stitch is often used for embroidering capital letters in inscriptions and initials. We recommend that you hone the technique of making a stem stitch by embroidering plant stems on simple patterns.
The tambour stitch is a chain of loops that sequentially emerge from one another. It looks like a crocheted chain. The seam is universal. Using this technique, you can perform both the contour of the picture and completely fill the space. With a chain stitch, you can sew an applique to clothes, make an inconspicuous hem of the edge of the product. It is most in demand for satin stitch embroidery, where more than a dozen of its varieties are used.
One of the most popular decorative seams, it has a great appearance. The name of the seam was based on its appearance: three straight stitches very much resemble a fern branch. With the help of a fern seam, beautiful patterned lines are created. Most often, they embroider various plant elements: tree branches, leaves, marine vegetation.
There are several types of stitches: attached, flat surface, shadow, surface with flooring, artistic. Products made by any of the listed seams have a special charm.
Stitch stitch is used to fill large areas of the pattern with threads of the same color or similar shades. Performs an auxiliary function: it is most often used when the pattern is already embroidered with flat stitch.
The surface with flooring is carried out on a previously applied flooring, which is made with a thicker thread. Thus, we get a more textured pattern.
Various plant elements are embroidered with a flat satin stitch; flooring, accordingly, is not used. The flat surface is universal - it is used for embroidery of both wide and narrow elements.
To design color transitions, experienced craftswomen use artistic smoothness. It is carried out with threads of different shades of the same color. Artistic satin stitch is one row of stitches of varying length, partially covered with rows of longer stitches.
View ready-made satin stitch kits
Another name is a split seam. In the technique of volumetric embroidery, it denotes the contours of the image. To make a seam, a two-fold thread must be used. Having made a stitch similar to the “needle forward” seam, it is necessary to return the needle to the front side at the end of the stitch between the two threads. Using this technique, we "split" the stitch into two parallel lines.
Experienced embroiderers affectionately call this technique "French", it is used exclusively for decorative purposes.
Due to the attractive appearance, they are decorated with embroidery, giving it volume and relief. The seam is used in satin stitch embroidery (for example, to create the effect of voluminous flower centers).
There is nothing complicated in the technique of making “fruselks” (another name for a seam in a creative environment): the needle is removed from the wrong side, then on the front side it is wrapped twice with thread. The next step is to insert the needle into the fabric, holding the turns. We pull the thread until the resulting knot is fixed. An interesting effect can be obtained if thick woolen threads are used to create a knot - they will add additional volume.
Flowers embroidered with satin ribbons using a French knot stitch look incredibly beautiful.
This stitch can be used to decorate an already finished cross-stitch to give accents to the elements of the image.
Works made using beads are simply fantastic.