ATV Riders Forum > ATV Riders Mechanical Section > ATV Steering & Suspension > plastic welding???
PDA
View Full Version : plastic welding???
spyder
03-07-2004, 01:39 PM
After a recent run in with one of darn trees at the last race i realized i broke the plastic mounts on my front fenders. my boss told me to have welded with plastic does any body have a clue how to do that or is he pulling my leg. Thanks:huh
jonc623
03-07-2004, 02:42 PM
he is not pulling your leg try a auto body shop some of them use a plastic welding machine i just use a drill and zip ties to fix plastic it may work for you
Out_Sider
03-07-2004, 02:44 PM
u can buy stuff like JB weld..its suppose to weld plastic
T.Hopp
03-07-2004, 07:03 PM
Plastic welding exists but its costly. My #1 hobby is white water kayaking. I see alot of cracked plastic. One of my boats suffered a 4" long crack on the bottom from a rock much bigger than I. I checked a couple places to have it welded and the cheapest place wanted $75 minimum to weld it. Also, Some plastics can't be welded because it is a mixture of different recycled plastics. It is due to the impurities in the remanufacturing process. Just passing on some info.
beak7707
03-07-2004, 07:09 PM
My friend just bought a plastic welder for 30 bucks. I dont remember the website where he got it at, but I'll ask him and get it for you. I thought it was going to be a joke but it works good. It looks like a sodering iron, and you just burn a v-shape along the crack, then fill it with the clear plastic rod. After we welded the plastic I was bending and pushing on it pretty hard and it didn't break. For 30 bucks you cant beat this thing, I'll get you some pics and the website.
Texan32
03-07-2004, 07:12 PM
perhaps he was refering to "fusing" the plastic. If one was so inclined, you could try to heat the plastic up enough to just start melting it. Then push the two sides together. It would fuse (weld) the plastic back into 1 piece.
Personally, when i cracked my front fender, i drilled a handfull of tiny holes on both sides of the crack. Then, i used picture frame wire and "sewed it up". So, it looks like my finders have been stiched up by an ATV doctor:blah:
4wheelboy
03-07-2004, 08:27 PM
i just use a sodering iron and run it along the plastics till they get soft an put them togther :(
James Parent
03-07-2004, 08:50 PM
JB weld is 4 bucks, i cracked my seat nearly in half..
From the right side front to the left side almost to where the seat lock is (400ex) about a 2 foot crack.
i got some JB weld, cleaned the area really well, sanded it off (make it rough so it holds better) and applied the JB weld. I was supprised because it smoothed out by itself, and was hard in about 15 minutes ( theres two types.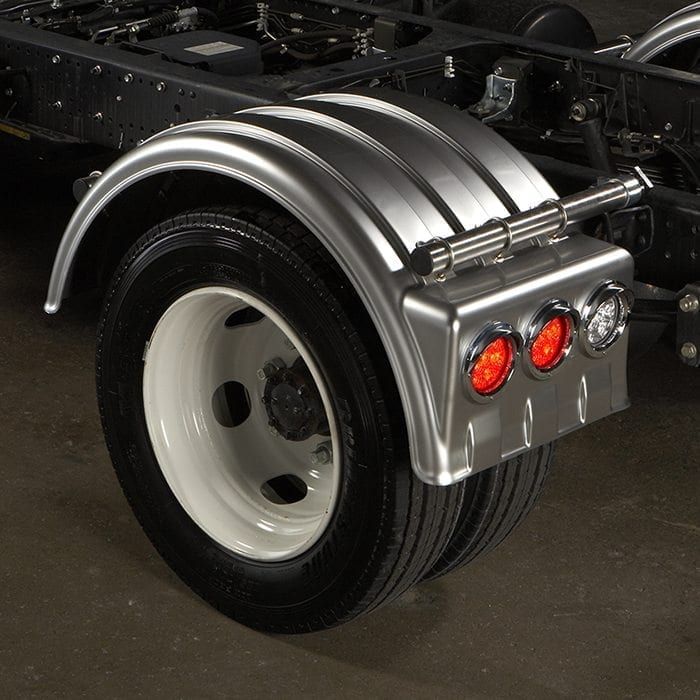 . 4 day and a 4 hour.. I recommend the 4 hour) its worth it...
after that i applied some Plastic renew.. you can't even tell, its perfectly new
James Parent
RideRedEX
03-08-2004, 06:38 AM
the website that beak7707 was talking about is www.urethanesupply.com just do a search for plastic welder they sale a special kit called atv fender welder. it works great
lil400exman
03-08-2004, 01:02 PM
is the 4 day a stronger bond james?
beak7707
03-08-2004, 09:07 PM
I've used both, and I think the fast drying holds up just as well.
brandonpeake
03-09-2004, 08:45 AM
yeah i used to put in natural gas lines and i fused the plastic pipe together with what looked like a spatula and it got 600 degrees F on each side and made lips on the pipe and u stick it together with another machine, so i can be done and work well
i think
harbourfreight.com sells them for cheap
WKY400EX
03-09-2004, 10:43 AM
Like brandonpeake said, check out Harbor Freight. Here's a link to the plastic welder. (http://www.harborfreight.com/cpi/ctaf/Displayitem.taf?itemnumber=41592)
James Parent
03-09-2004, 07:27 PM
i just recommended JB weld because its only 3.99$
I think the slow and quick dry are the same strenth..
the quick is better though.. especially if you need to do something upside down or don't feel like holding the two peices together for a long time.. just let the stuff harden for about 2 minutes and then its really sticky... on the JB Weld tubes it says you don't need any clamps or anything for the 4 hour.
james
You can pick this up at Pepboys or that new auto store Auto zone?
Black400
03-09-2004, 10:30 PM
eastwood.com has plastic welders.
the_hulkamaniac
03-10-2004, 09:21 PM
Yeah go with the plastic welder. I've done my 250r a few times, and some friend's quads. Once when the fender was 80% cracked off.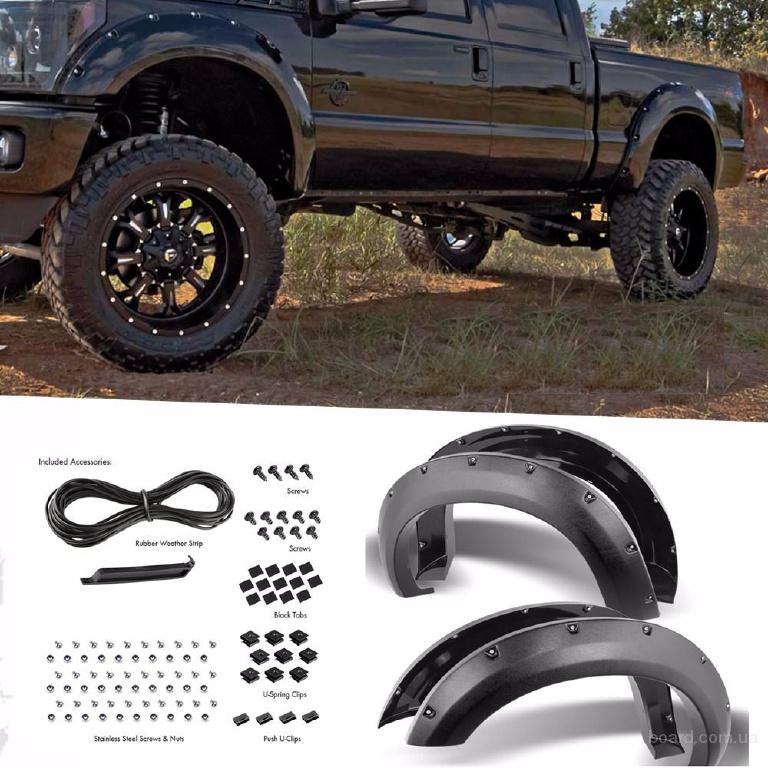
Fuse welding is ok but you will still need some material to go back in the crack. You do have to "V" the crack either with the element, utility knife, or a dremmel. 1/16 to 1/8 is all you will need. Most of the polymers they will give you "WILL NOT" stick! Either shave off a 1/4" from the outer edge of a fender, or find a friend with broken fenders and cut strips off it.
Then work in sections, aprox 3-4" long, also stagger the sections, on big cracks. This is to keep the plastic warm, and ready to accept the weld. First lightly fuse weld it. Then go over it again this time melting some of the cut plastic directly into the weld. Work slowly so it can melt completly through. Go to long and it will drip on the other side. You can make a second pass on the opposite side of the first weld to ensure it's good. Oh yeah 1/2" wide weld is good enough.
Either side will do. If you can't stand the look of it get a plastic renew kit sand and buff the weld. She'll be good as new.
Again my 250r has held up well for over a year now. I used red plastic to weld my factory white. Looks kinda cool.
Good luck
p.s. Do it some where ventlated/outdoors. The fumes can make you sick.
Powered by vBulletin® Version 4.2.1 Copyright © 2022 vBulletin Solutions, Inc. All rights reserved.
One of the most annoying things about owning an ATV or Dirt Bike is dealing with fading or cracked plastics. No matter how great it runs, if the plastics look bad it will be the only thing you notice. In this article we cover a few easy ways to refinish your plastics without breaking the bank.
Want to jump to the repair techniques? Choose your problem below:
It’s pretty obvious what causes a crack, but what causes your ATV and Dirt Bike plastic to fade is a bit more difficult to explain.
Plastic is made primarily from refined crude oil. When it sits in the sun for extended periods, the surface level oils can evaporate and cause the plastic to dry out. Dried plastic loses its sheen and fades. Extremely dried plastics can even crack, making it very difficult to fix.
Plastic fade can appear differently depending on the color. Darker colors will develop a white layer on top of the plastic. It can be scraped off with a razor blade but leaves behind a dull color underneath. Lighter colors can yellow from sun exposure as the plastic dries out.
To refinish plastic fade, you have the unique challenge of adding back oils into the surface of your ATV or Dirt Bike. As difficult as it sounds, it actually is much easier using any of the four techniques we discuss below.
There are a litany of products online that claim to refinish plastics, but what ones actually work? Here are the three we’ve tried and their results.
CarGuys Plastic Restorer
This was the third plastic restorer we tried to bring back the original green color on our Yamaha Bruin 350. The first three did the job, but the CarGuys Plastic Restorer did it the best, and with the longest shine. It is easy to apply with the foam pad applicator included with the bottle. And if you don’t like how it looks, CarGuys offers a zero risk purchase. You can return the bottle for a refund, no questions asked. Something you don’t see that often these days.
TriNova Plastic Restorer
This was the first plastic restorer we tried, and really liked the shine it produced. It took a bit longer to dry but left a long term shine on the plastics. You need to keep it clear while drying because it will trap dirt and bugs in the finish. I would also suggest letting it sit in the sun for 12+ hours after application and wiping off the excess multiple times to reduce any streaking when it gets wet.
The easiest of the refinishing techniques uses focused heat to bring the oils inside the plastic to the surface.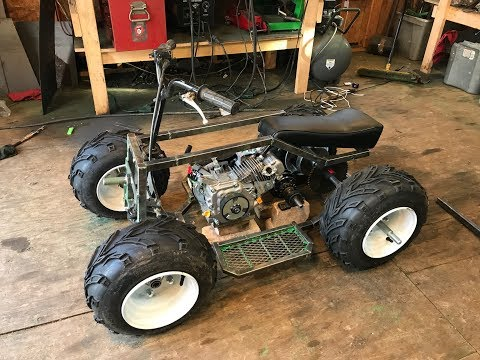 It is most commonly performed with a heat gun to ensure there is no direct contact between flame and the plastic. It also works best when applied in smaller areas, as it can be tough to get a uniform sheen with this method.
1. Test this method on the under side of a fender or somewhere with low visibility. It takes technique to know when to stop applying heat.
2. If you heat gun has multiple settings, start with the lowest heat first. Apply heat at a longer distance of 1 foot to gently warm the area.
3. Slowly move in toward the plastics with the heat gun, focusing on an area about the size of the heat gun. Let the plastic heat until you see it start to become shiny and smooth (almost looks like the plastic is melting.
4. Quickly remove heat and allow that area to cool.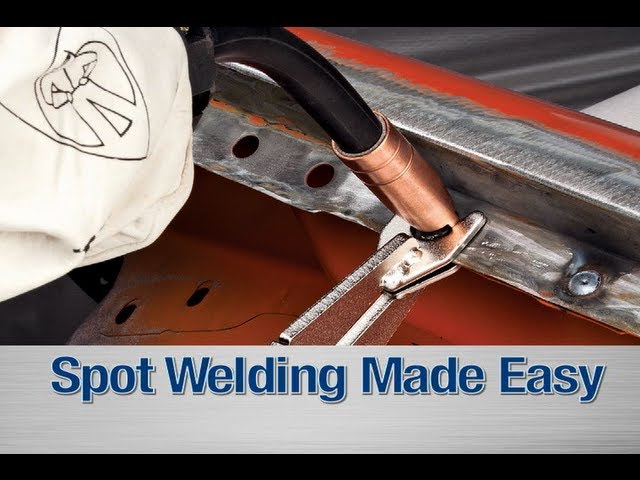 Check back to ensure the shine remains in that spot. If it becomes dull, it may 1 or 2 more applications to become more permanent.
5. Don’t try to over heat the plastics. It won’t expedite the process. You will likely melt the plastic and no matter how much heat you apply, you can’t fix that.
This is a method that has been floating around the forums forever and we can attest that it does work. Using a simple mixture of these two items, you can renew the shine of your plastics.
1. Pre-mix in a container or spray bottle 3 parts boiled linseed oil to 2 parts paint thinner.
2. Pour some of the mixture onto your plastics or on a rag, and wipe along the surface. It will be a bit runny so make sure you keep the rag moving. The secret here is to apply a thin layer to the entire surface area.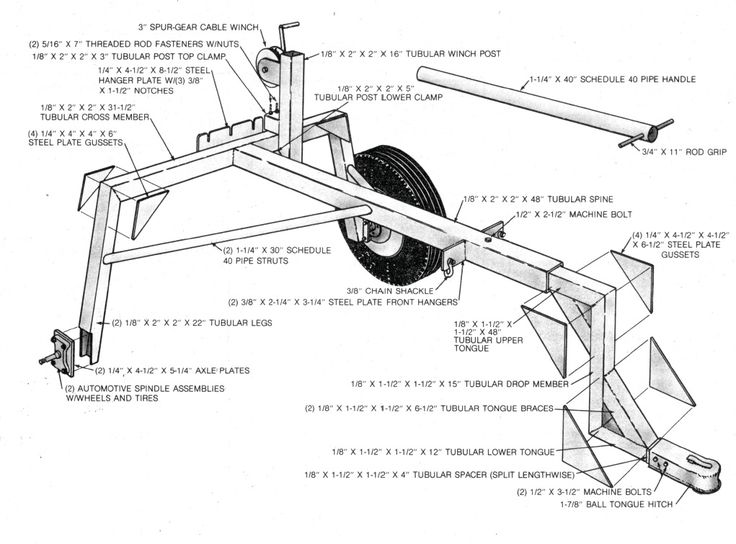
3. Let the mixture sit for about 20-30 minutes in the sun. The heat will open up the pores of the plastic, letting more of the mixture set in.
4. Wipe the plastics with a clean rag, removing the excess mixture. Let it sit in the sun for another 30 minutes to dry to the touch.
In our experience it is not permanent, but when applied a few times each year you can really make your plastics look new. The only downside to this method is i can be tacky after application, so dirt or grim can stick if you don’t wash down the vehicle first.
The most permanent but also the most time intensive option for refinishing your plastics is to sand and buff them. Sanding the plastics removes the dry faded area, exposing the underlying oils. Buffing then ensures a smooth finish, like it came from the factory floor.
1. Depending on the how bad the plastics are faded will determine which starting sand paper you want to use. Typically you will want to start with a 400 grit however if you are having trouble getting through the haze you can move down to a 220 grit. Anything lower and you will remove too much plastic, potentially sanding through the part all together.
2. All sanding should be done with wet sand paper, as well as continuous water on the plastics. This will ensure that the sand paper doesn’t gum up, and will create a smoother finish. I keep a bucket of water on hand and dip the sand paper in every 20 seconds or so. In this phase you want to remove the majority of the hazing.
3. After the area has been thoroughly sanded. Switch to 800 grit sand paper and repeat the process. This will remove the remaining haze.
4. Next finish with a 1200 grit sand paper to smooth out any minor scratches in the plastic.
5. Lastly you want to buff the area with a buffing compound to remove all scratches and create a mirror like shine in the plastics.
You should also consider how to remove any existing stickers on the vehicle. If the stickers have any clear sections, the faded plastic behind will show through unless you remove the sticker and sand behind it.
In the event that you crack a plastic or worse, break it, the first thing that crosses your mind is the cost of replacing the whole panel. That can set you back $100 to $500 if you find a used set. New plastics can be twice that much.
Welding plastic isn’t a perfect fix. It will close up any gaps, add rigidity and make the parts look good from a far. But when you get close, you will see the seam.
I set these expectations because some people will get upset when the plastic repair is done, and it doesn’t look brand new. If you need a good quality fix and don’t want to spend the money on a new part, then keep reading.
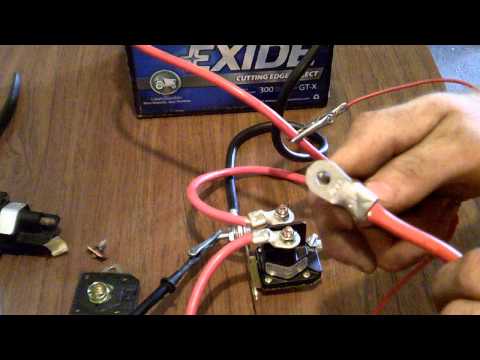
Plastic welding uses direct heat to melt the two ends of plastic so they can be pressed together and dried. Often the weld is not strong enough by itself to hold up against moderate use, so a metal mesh is introduced to the weld to strengthen the bond.
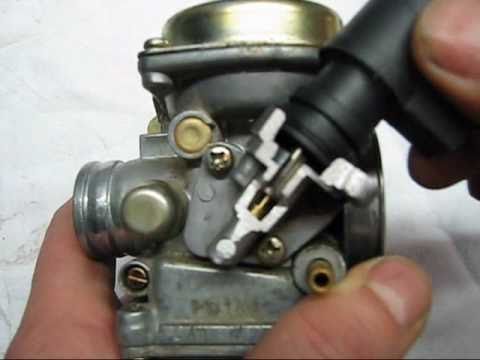
In this video the speaker is using a heat gun instead of a plastic welder. As you can see, it works just as effectively but may require some additional time to get the plastic to melt.
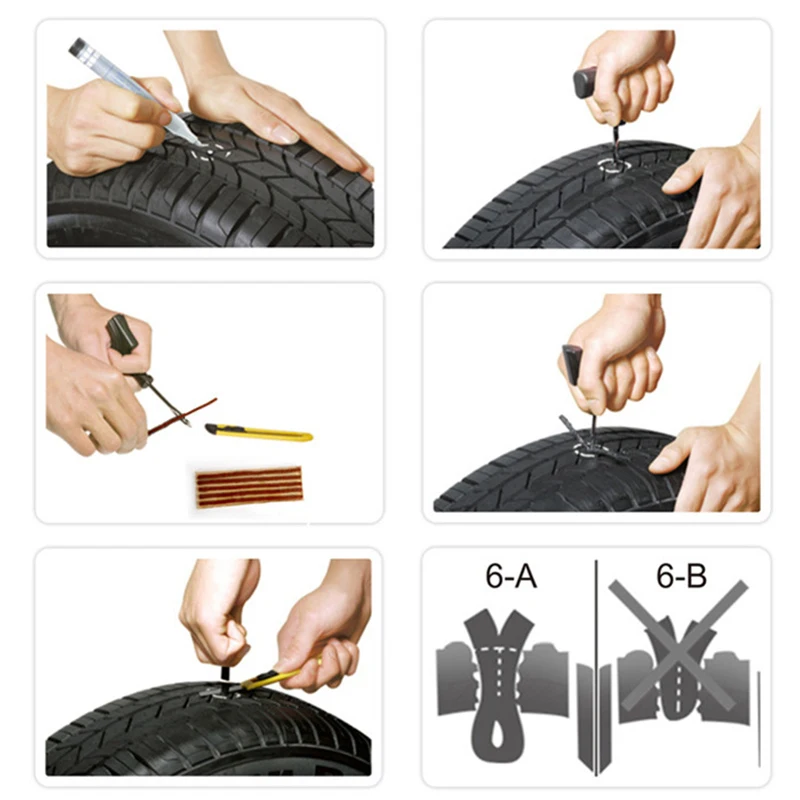
1. Clean and sand each edge of the plastic you are bonding to create a good bonding surface.
2. Prepare your tools by plugging in the welder, and having the mesh on hand for easy use.
3. Slowly heat up the inside edges of both pieces, favoring the side of the plastic which is less visible normally. You don’t want to over melt any area as it will create bumps when pressed together, or worse it will create gaps.
4. Push the two pieces of plastic back together to create a bond that we can go back and strengthen. If you are not using mesh, use the welder to melt the plastic on the bottom side of the plastic, creating more surface area for the parts to bond.
5. Place a small piece of mesh over the entire length of the seam, overlapping about a half inch to an inch on each side. Use the plastic welder to push down on the mesh and melt it into the plastic. You don’t need to over do it, just enough that it holds firmly.
6. Complete this process across the entire mesh to strengthen the weld. If you are repainting the plastic you can use some bondo or high build primer to hide the weld on either side.
There were a lot of ideas in my head, but not a lot of finances, and therefore I decided to limit myself to building a rear-wheel drive ATV, and not an all-wheel drive one. I also thought over the main technical requirements for the future design: among them - the presence of a reverse gear, the absence of a chain drive - after all, I intended to use the ATV not on asphalt, but mostly on country roads, as well as decent power and maintainability. And, of course, a low price. nine0003
I didn’t find a more suitable “donor” than the Ural motorcycle, with reverse gear and a mileage of 12,000 km assemble an ATV with your own hands.
At first, the lack of experience with motorcycle technology affected and things did not go as smoothly as we would like. But experience is a thing.
It is clear that the engine, or rather the power unit (in a block with a gearbox and clutch), together with the frame used Ural. nine0003
Frame of the future ATV in the rear part has changed slightly - only the tubes of the seatpost (vertical) posts are shifted 40 mm back, to which the same Ural pendulum is attached, only now with a welded Zhiguli bridge.
Lower fork (duplex frame arms) just behind the seatpost tubes, together with the C-pillars, has been cut off. I made a pair of struts from the tubes of the racks, which I welded to the seat posts next to the pendulum suspension bushings and the feathers of the upper seat fork (in front of the shock absorber mounting brackets). In addition, the resulting triangles were later closed on both sides of the frame with scarves made of 2 mm steel plates. At the joints of the beams and racks, I welded more consoles (from a water pipe with a diameter of 20 mm) - steps for the passenger. nine0003
But at the front, a whole structure made of steel thin-walled pipes with a diameter of 30 mm is welded to the frame - an additional subframe for attaching the front suspension. Looking ahead, I note that from the same pipes I welded both the front curly bumper and the rear trunk (the front one was made from a pipe with a diameter of 20 mm).
Rear axle - from the good old "penny" (VAZ-2101), only shortened. This had to be done to ensure compactness and narrowing of the track in order to reduce the turning radius and, as a result, increase maneuverability. To shorten the bridge, I cut it off, separated the spring support cup and the bracket from it, and pulled the end flange (bearing seat) out of the "stocking".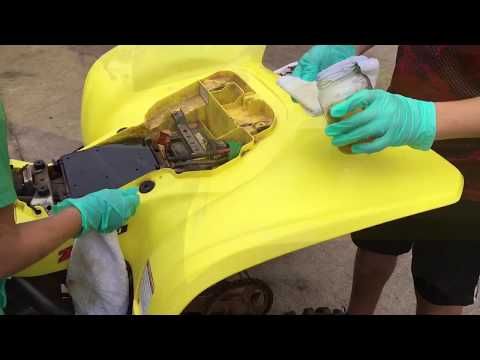 nine0003
Then I shortened the “stocking”, re-inserted the flange into it and fastened the parts by welding plate linings to them. To the appropriate length (about 185 mm) shortened the axle shaft. I also cut off the wheel flange from it (immediately behind the locking ring) and drilled a through axial hole in it. Under this hole, I also machined the end of the axle shaft. Having inserted the rod into the flange, he drilled a blind hole on their connecting circle so that there were half holes in each of the parts, and “hammered” a wire key into it. After that, I also welded the joint “in a circle”. nine0003
The native Ural cardan shaft did not fit the main gear of the drive axle, and the Zhiguli one did not fit the motorcycle transmission. In addition, the angles between these transmission units turned out to be quite significant. Therefore, the shaft was made with his own hands from the pop-axes of the Oka car using a CV joint.
Front suspension - self-made, on double cross A-arms from square pipes with a section of 25x25 mm and a wall thickness of 2 mm.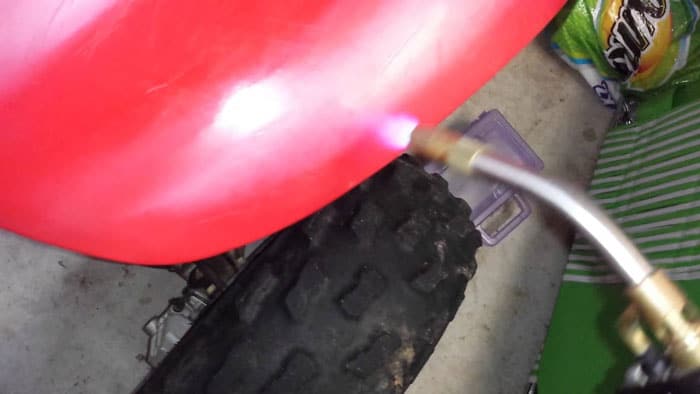 Steering knuckles - from the "classic" (rear-wheel drive) "Zhiguli". The upper ends of the levers are fixed in the lugs on the subframe, and the lower ends are attached to the corresponding ball joints of the steering knuckles. nine0003
Front shock absorbers - from VAZ-2101 are arranged with a spring from "Ural". The relatives of the Urals remained behind, in order to subsequently determine which is better: motorcycle or automobile.
Brake system is used from Zhiguli, only without vacuum booster and parking brake. The drive to the main brake cylinder is carried out from the usual motorcycle pedal.
Engine cylinders are equipped with forced air cooling from the stove fan of the VAZ-2108 car. It turns on with a toggle switch as needed in conditions of reduced heat transfer from the motor. nine0006 The wheels and tires of the ATV are also Zhiguli, only the front tires have a road tread pattern, and the rear drive wheels have an all-terrain (more “toothy”) tread pattern.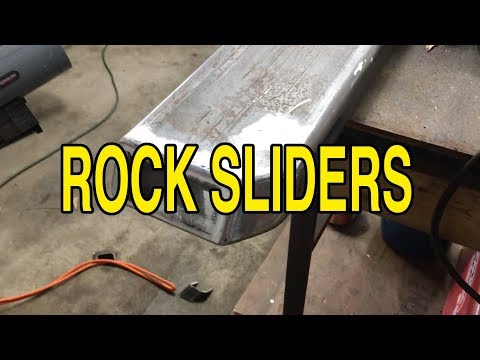
Steering - mixed type: car-motorcycle.
The steering wheel itself is from the Ural motorcycle, lever. But then - everything automotive (from the VAZ-2105): column, bipod, thrust to the levers of the wheel fists and the fists themselves.
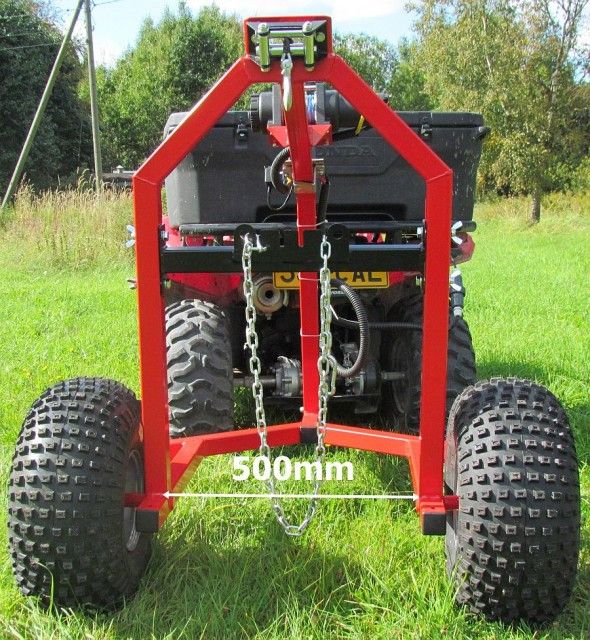
DIY ATV equipped with two racks: front and rear. Their configuration is the fruit of the author's imagination, and the manufacture does not cause difficulties - it's like a warm-up for an athlete. nine0003
On-board electrical network of the ATV, like the base motorcycle, is 12 volts. Of the electrical equipment while installed headlights and rear brake light. I plan to mount and direction indicators.
After the first sea trials of the homemade ATV, it became clear that he needed large wings with mudguards. I made the wings with my own hands from sheet duralumin 1.5 mm thick, and mudguards - from 5 mm rubber. The consoles for fastening the wings, made of segments of a steel thin-walled pipe with a diameter of 16 mm, were welded to the frame “in place”.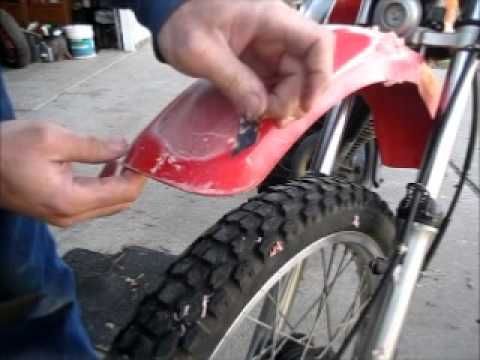 The wings were attached to them with self-tapping screws. nine0003
The technical characteristics of the ATV from the Ural motorcycle are approximately the same as those of the basic Ural motorcycle. The speed due to the smaller diameter of the wheels decreased slightly, but the traction increased noticeably. Improved and stability, especially felt in the corners and slopes.
The quad bike fulfills its purpose completely with its own hands. But in fairness, it should be noted that the rear dependent pendulum suspension has a number of disadvantages: such as rigidity, large torsion loads on the assembly. But on the other hand, it is easy to manufacture, and on a slope it better keeps it from stalling on its side, which is important with a small track. And its inelasticity is compensated by a soft front suspension. Automotive shock absorbers are undeniably better than motorcycle shock absorbers. And yet - to control the machine still requires male power. nine0003
In general, with a relatively modest investment in this project, I am satisfied with the result.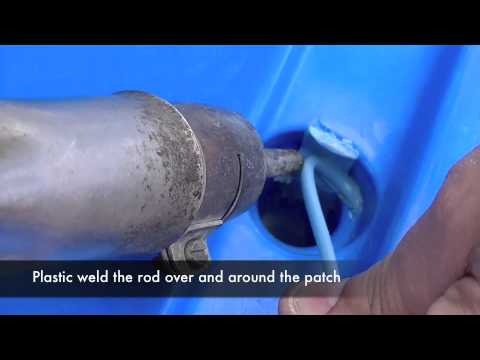
S. Paletnev,
ATVs, Summary
90,000 extensors for ATVs and their varieties - ATVARMORArticles 9000
27 Feb
ATV fender flares became widespread almost immediately after the introduction of the technique. This is due to a number of advantages that their use provides. They are also widely used due to the opportunity not only to buy original expanders, but also to use universal ones, or made by yourself.
Original factory fender flares for all-terrain vehicles are made for specific vehicle models. This makes their installation simple and affordable for any ATV owner.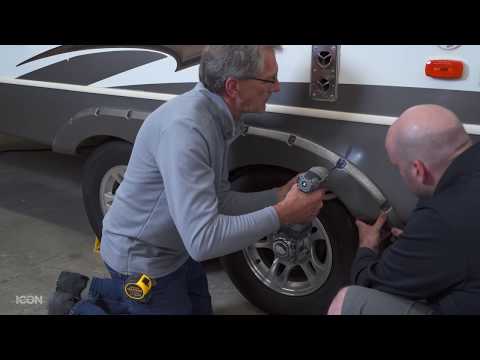 Due to the fact that the manufacturer takes into account all the shapes and outlines of the body of a particular model in the manufacture of original extensions, they fit perfectly on the wings of an ATV and do not spoil its appearance. Such details, on the contrary, emphasize the lines of the body, give it a more sporty look.
The original extensions have specially provided fixing holes that allow them to be mounted on the fenders of an ATV without any modifications or modifications. Such parts are fastened mainly with rivets, or self-tapping screws. Bolted fasteners are often used. All fasteners are included with extensions and are painted black to make them invisible on the ATV. nine0003
In addition to the original ones, universal wheel arch extensions for ATVs are widely used. They are great for most models of both utility and sport ATVs. They are quite easy to attach to the fenders of an ATV. To do this, the kit includes all the necessary mounting materials.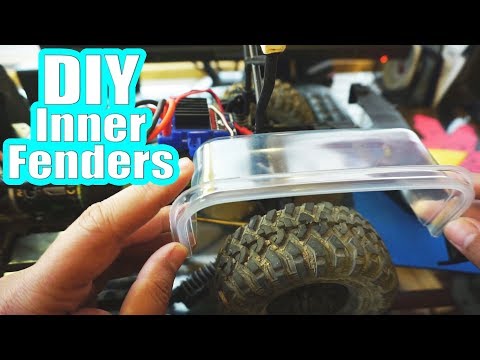
Universal flares easily fit the specific wing shape of almost any ATV model. They are quite strong, easily withstand the blows of stones flying out from under the wheels, or light touches to obstacles. Also, universal expanders are designed for use in a fairly wide temperature range, which allows them to be used in various climatic conditions. nine0003
In addition, the universal arch extensions have channels for reinforcing wire to help keep their shape. Reinforcement also makes them stronger and more resistant to external physical influences.
For those who want to install extensions on their equipment, but do not have the opportunity to do so, there is an option to make this accessory yourself. This is a fairly simple process, requiring a little skill with tools and some easy-to-shop parts. nine0003
For the manufacture of homemade expanders, a special conveyor belt is used, which is freely sold in an automobile or hardware store, and has a low price per linear meter.