Item #: MarkStikB
(No reviews yet) Write a Review
Rating Required Select Rating1 star (worst)2 stars3 stars (average)4 stars5 stars (best)
Name Required
Review Subject Required
Comments Required
List Price
$1. 65
Our Price $1.48
You save $0.17 (10%)
Availability: In Stock Usually ships the same business day
| 1 - 35 |
$1. 48 48
|
| 36 - 143 | $1.36 |
| 144 + | $1.28 |
Current Stock:
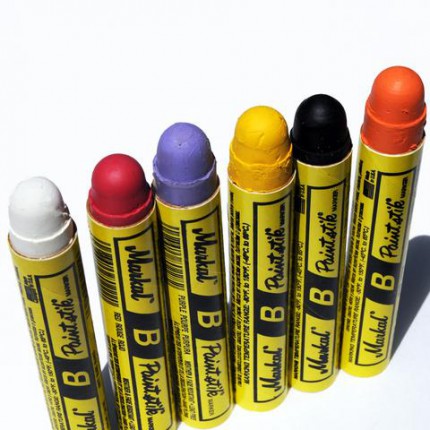
Orange
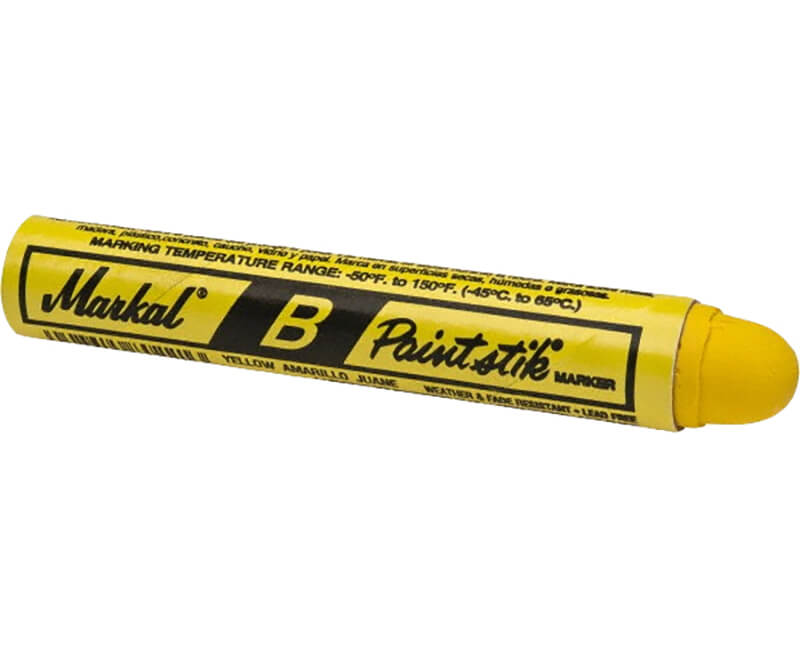
Yellow
As Markal's most versatile and economic marker, the original B Paintstik solid paint marker combines the durability of paint in the convenience of a crayon.
The real paint formula has superior marking performance on oily, icy, wet, dry or cold surfaces and is weather- and UV-resistant. This Paintstik works on rough, rusty, smooth, or dirty surfaces.
| Colour | 1+ | Quantity Qty | ||
|---|---|---|---|---|
| £2.75 £2.29 | |||
| £2.75 £2.29 | |||
| £2.75 £2.29 | |||
| £2.75 £2.29 | |||
| £2.75 £2.29 | |||
| £2.75 £2.29 | Coming Soon | Email me when available | ||
| £2.75 £2.29 | |||
| £2.75 £2.29 | |||
| £2.75 £2.29 | |||
| £2.75 £2.29 | |||
| £2.75 £2.29 | |||
| £2.75 £2.29 |
Rust-oleum Chalkboard Brush On Clear is a one-component, durable coating for creating a school chalkboard finish in any color on virtually any smooth, non-porous surface. Colorless transparent slate coating, allows you to draw, leave messages with chalk anywhere without changing or spoiling the original appearance of the surface, after erasing there are no scratches or chips.
Key features of Rust-oleum Chalkboard Brush On Clear:
- One-component coating, ready to use;
- Easy to apply (roller or brush), no special skills required;
- Ultra hard and abrasion resistant;
- Virtually odorless;
- Does not require an additional protective layer;
- For interior use.
Possible uses: allows you to turn walls, doors, toy boxes, picture frames, flower pots and many other surfaces in children's rooms, in the kitchen, into the study into a chalk surface. An excellent solution for decorating separate info-walls in the hallway or in the office. Also great for updating ping pong table tops.
Restrictions: is not recommended for floors or outdoor surfaces.
Visual effect: transparent matt finish.
Base: acrylic water. VOC: less than 250g/litre.
Packaging: can of 0.857 liters.
Weight: 1.29kg/1 liter
Consumption: depends on the type of surface as well as the quality of its preparation. For a well-prepared (primed) surface 10.8 m2 in one layer. It is recommended to apply in 2 layers.
Tools: Use a good quality synthetic brush or a dense foam roller to apply slate effect paint.
Careful preparation of the surface before painting is a guarantee of a long service life of the coating!
The surface must be:
• Rigid and firm - no peeling, no chalking, no denting;
• smooth, no peeling paint;
• free from waxes and oils;
• thoroughly dried;
• There must be no white dust left on the palm after being touched.
Fresh concrete or plaster must be cured for at least 30 days before painting.
Surface preparation:
Cover surrounding objects to protect them from paint. Remove old, peeling paint and rust with a wire brush.
Lightly matt glossy surfaces with sandpaper. Wash with soap and water and let dry. For better adhesion to wood, plastic or glass surfaces, pre-prepare the surface with specially adapted acrylic primers.
Application:
Apply outdoors or in a well-ventilated area at temperatures above 10˚C to 32˚C and humidity below 85% to dry completely. Stir the paint thoroughly with a stick before applying.
DO NOT BREED! Do not leave the compound in direct sunlight. Gently roll the paint over the surface without applying too much pressure to the roller (to avoid thinning of the paint layer and fading). Start your wall painting job by carefully applying paint in the corners and along the baseboard, around the perimeter of the room. It is recommended to carefully coat the seams, joints, mounting and mounting holes with paint. It is more important to fill all the irregularities than to cover the surface with the first layer! Sequentially work on sections of 1mX1m and so on until the entire surface is completely painted. For maximum wear resistance, it is recommended to apply 2 coats. The subsequent layer, 4 hours after the first, will completely and evenly distribute the paint over the surface until it is completely covered.
Additional protective layers of varnish and other compounds are not required. 3 days after applying the last coat of paint, the chalkboard effect surface is ready for use.
Before use, prepare the surface by rubbing chalk flat over the entire area. Wipe off the chalk and the surface is ready to use.
For long lasting painted surfaces, it is recommended to use calcium carbonate chalk and a felt cloth (to remove marks). Other types of chalk may scratch the surface.
After drying, the coating is non-toxic. Safe for children.
Drying time: depends on temperature conditions and paint thickness.
Air temperature 21˚C and humidity 50%:
- tack free 30 minutes;
- repaint after 4 hours;
Fully cured ink film after 3 days.
Cleaning the instrument: Immediately after finishing the staining process, wash the instrument under running water using soap.
Beware! In case of contact, flush eyes with plenty of water for at least 15 minutes. Do not take internally. If swallowed, seek medical advice. Ensure good ventilation during application and drying. If you experience difficulty in breathing, watery eyes, headache, increase the flow of fresh air. Wash your hands thoroughly after work. Keep the paint container tightly closed when storing.
Recommendations:
— Two coats of paint are recommended to obtain the best quality and most durable coating,
— - Before using chalk markers on the surface, we recommend checking that they are suitable for slate surfaces. To do this, you need to make a mark with a marker in the corner, preferably on an inconspicuous area of \u200b\u200bthe coating, wait a minute, and then try to erase the mark with a damp sponge. Each color of markers, even from the same manufacturer, must be tested separately.
IdeasMarket recommends using UNI chalk markers for drawing on slates.
Shelf life: 7 years. Date of manufacture on the package.
Made in U.S.A. Made in USA.
The paint is supplied in two components:
- Basecoat (BaseCoat) 1.4 l;
- Finishing coat (TopCoat) 0.9l;
- Contrast booster for BaseCoat (ContrastBooster) 0.1 l;
- Brightness booster for TopCoat (BrightnessBooster) 0.1 l;
- Magnetic layer (MagneCoat) 0.4 l;
- Magnetic strip for magnetic frame (MagneBorder) 10 m;
- Consumables for applying paint (painting tape, paint mixing sticks, rollers, roller handle, paint tray).
1. Thoroughly mix the contents of the MagneCoat can with a wooden stick.
2. The screen is already stripped off with masking tape, so you should be able to see the edges of the painting.
3. Pour the contents of the can into the paint tray and start application with a small roller (12 cm).
4. Apply a layer of magnetic paint inside the yellow frame. The strip should be 10-12 cm wide. The magnetic layer strip should cover not only 4.5 cm of the wall behind the yellow tape, but also a small part of the projection screen (Figure a). Apply the paint evenly spreading it towards the edges (picture b).
5. Let the paint dry for at least 45 minutes before applying another coat.
6. Let the paint dry for 45-60 minutes. Rinse the tools and paint tray thoroughly.
7. Once dry, carefully remove the masking tape and sand the inside and outside edges of the magnetic frame.
1. BaseCoat is applied first with the addition of ContrastBooster. TopCoat is applied second with an added BrightnessBooster.
2. Before application, use the Add-ons page in of instruction to determine the amount of contrast and brightness enhancers required.
3. Separate the screen area with masking tape at a distance of 0.5 cm from the edge of the magnetic frame.
4. After adding the required amount of contrast enhancer to the base coat, mix the paint thoroughly and proceed with application.
5. Apply paint as shown, starting with horizontal strokes (approximately 50 cm long) and continuing vertically. Apply paint smoothly and evenly without lifting the roller from the screen surface. Apply wet paint. Paint over the entire area of the screen with the base layer. Leave the paint to dry for 60 minutes, then apply a second coat in the same way. Let the second coat dry for 120 minutes.
6. Rinse the tools and paint tray.
7. After adding the luminosity booster to the topcoat paint, proceed with the top coat. Apply the paint in the same way as the base coat.