Posted by Blair Lampe Know How
Your tires might not be the most complex part of your vehicle, but they’re arguably among the most indispensable. Keeping your tires in good condition is integral to both safety and performance, so when they suffer damage, it’s important to take care of it immediately. You’re likely familiar with patching tires, but are there limits to this practice? For instance, can you patch the sidewall of a tire?
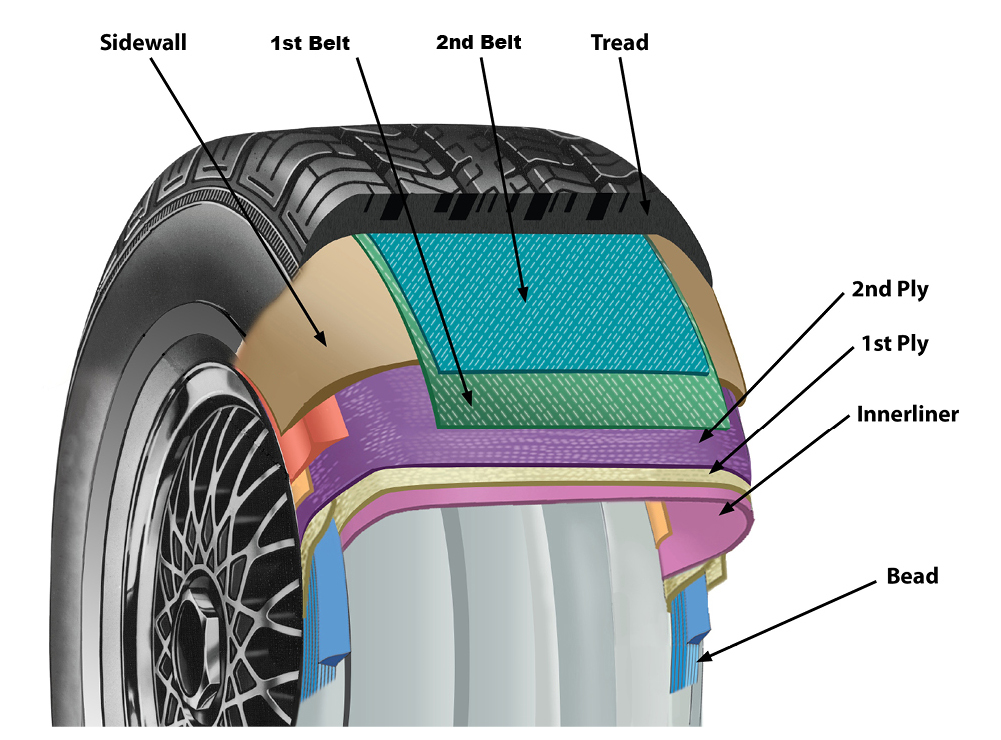
Where the Rubber Meets the RoadTires have more going on than meets the eye. Over the years, tire technology has evolved to make them stronger, longer-lasting and safer in various driving conditions. There are many parts of a tire, but the two main external parts are the tread and the sidewall.
The tread is what contacts the road. It’s very thick, it wears down over time, and it’s the part you pay special attention to when you’re watching out for alignment issues. It is meant to wear down, but evenly.
The sidewall is thinner because it is not designed to contact the road and wear down. It protects the inner plies of the tire, which are structural, and it flexes as the tire rotates and bears the weight of the vehicle.
Patching Your TiresMany people keep tire plug kits in their vehicles for emergency roadside repairs, but patches are a little more in-depth. In order to properly install a patch, the tire must be safely removed from the vehicle and the rim. The hole or tear area must be cleaned up and covered with vulcanized cement so that the patch can be installed from the inside and sealed before the tire is reinstalled on the vehicle.
The patch adheres to the tire’s material around the damage, and the added pressure of inflation actually works to press the patch outward further plugging the hole. If done correctly, this creates a seal that can last the rest of the tire’s life. Patches are viable for repairing small holes or tears, generally, those that are 1/4 inch or less.
If you have a leak, hole or tear in your sidewall as opposed to your tread, you should not repair it with a patch. The thinness of the sidewall gives little material for a patch to adhere to, and the damage to the sidewall leaves the tire structurally compromised. As mentioned before, the sidewall tends to flex, putting extra stress on the repair and increasing the likelihood of patch failure, which is more likely to occur at higher speeds and pressures.
Patching the sidewall is simply not a good idea, as a leak or blowout while the vehicle is underway could result in loss of control with catastrophic consequences. So if you end up with a damaged tread, you can plug and patch away, but if the damage is to your sidewall, you’re going to have to replace the tire, which usually means replacing the fronts or rears in pairs.
So can you patch the sidewall of a tire? The answer is a solid no. Luckily, sidewall damage is far less common than damage to the tread, and you can minimize it by paying attention to road conditions, not overloading your vehicle, staying away from the curb when you’re parallel parking, and keeping your tires properly inflated, rotated and maintained.
Check out all the tires, wheels and accessories available on NAPA Online, or trust one of our 17,000 NAPA AutoCare locations for routine maintenance and repairs. For more information on patching tires, chat with a knowledgeable expert at your local NAPA AUTO PARTS store.
Photos courtesy of Blair Lampe.
Blair Lampe is a New York-based professional mechanic, blogger, theater technician, and speechwriter. In her downtime she enjoys backpacking wherever her boots will carry her, rock climbing, experimental theatre, a crisp rosé , and showering love on her 2001 Sierra truck.
One of the problems you can encounter when traveling by car is a punctured tire. Using a patch is a fairly common option to work around this issue.
Yet, if the hole is in a position like a tire wall, the problem becomes much more complicated because it is likely that the defensive position will not be patched.
So, how close to the sidewall can a tire be patched? A distance of 6 mm or more from the tire shoulder is required to fit a patch. In other words, if a crack is closer than 6mm, there’s almost nothing you can do about it!
Tire Sidewall OverviewFirst, let’s learn about sidewalls and how to identify them on your tires.
The wall is the rubber part from the outer edge of the rim to the road surface. This part also has the largest area, is the most flexible, and continuously deforms under loads when moving.
How Close To Sidewall Can A Tire Be Patched?As you know, the car’s wall is in a particular location, so it is pretty challenging to troubleshoot the hole here.
Manufacturers also recommend that you not choose the patch option if the spot is on the side of the vehicle or too close to this position.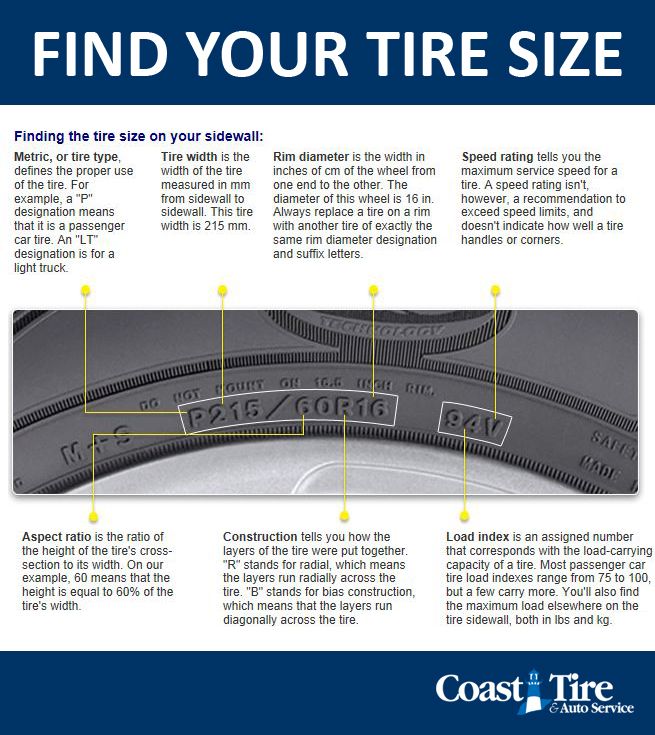 Then, how close to the sidewall can a tire be patched.
You cannot use the patch if the hole is close to the wheel with a gap of less than 6mm. In addition, you should note that if the hole is more significant than ¼ inch, the patch should not be used. In this case, if the patch is small, it cannot cover the hole, causing the wheel to deflate still when moving.
On the contrary, using a large patch can make the wheel more bulky, difficult to move, and unsafe.
Fix Sidewall DamageOther Related QuestionsTo better understand the problems that occur with the tires and how to overcome them effectively, you can refer to the following information.
We’ve put together some frequently asked questions that may help answer your questions on this topic.
People are often concerned about whether it is safe to plug or patch a flat tire.
These two options are pretty standard in repairing or overcoming the problem of flat tires caused by rolling nails or other sharp objects.
The manufacturer still recommends that you better replace the tire with a new one when there is a problem because repairing with a plug or patch when a flat one is not a safe solution.
Yet, the cost of new tires is not cheap, and if you have this problem often, it is a big problem. So, many drivers use a plug or patch when a wheel is punctured.
There is a limit to the number of nails or patches on a product. You can use this option to temporarily fix the problem if you find a few small holes. If the wheel has many large holes or previous patches, it is best to replace it with a new one.
For a detailed guide, check out this video:
How close can a tire patch be to another patch?The gap between patches is also a topic that people are very interested in. When traveling on the road, you may encounter a flat one many times.
As you know, when the tires have had previous patches or punctures in close locations, it is better to replace them. In case
Can you patch a tire on the side of the road?In the case of a puncture on the tire side, the use of stickers is unlikely to have as much effect as you think.
The reason is that its wall adhesion is so thin that relatively few materials can adhere. More specifically, damage to the sidewall will seriously damage the structure of a wheel.
The solution to this problem is to insert an extra tube inside the wheel to ensure that you can still turn the whole thing.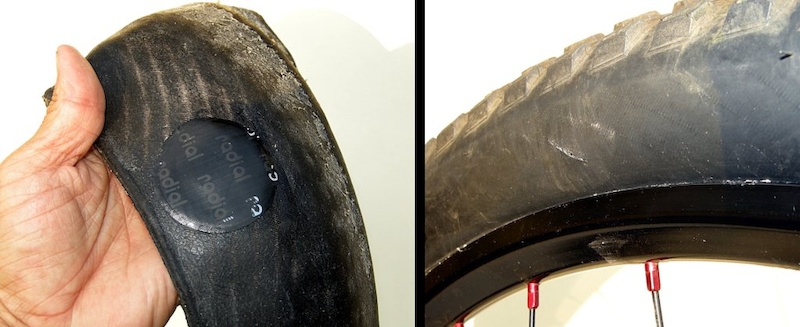
A patched one will not achieve the same speed and performance as it once was. Therefore, the optimal level you can expect from such a version will not be more than 85 mph. Of course, this is just the limit that many manufacturers recommend, but you should not overdo this limit.
Can you patch a tire with 2 nails in it?The answer is yes! It’s just that the gap between the two punctures is at least 16 inches, and you might seal them with two large patches.
According to many manufacturers, the maximum number of times performed is two times. If more than that, it’s time to get a new one.
ConclusionAs such, a puncture in the side of the vehicle is a unique location where patching is not an optimal solution in this case. It would help if you changed to a new tire to ensure safety when traveling.
Thank you for following this post!
This post was last updated on Paying attention to the hardness and softness of the tire rubber when choosing a tire, do not forget that the wheel can have a hard and soft sidewall, which will affect certain properties tires. Let's see what are the pros and cons of a soft sidewall, and also what good summer tires with a hard sidewall are, and what are its disadvantages.
Even if the tire tread rubber is soft, the side of the tire can be quite hard, in some cases specially reinforced - summer tires with reinforced sidewall.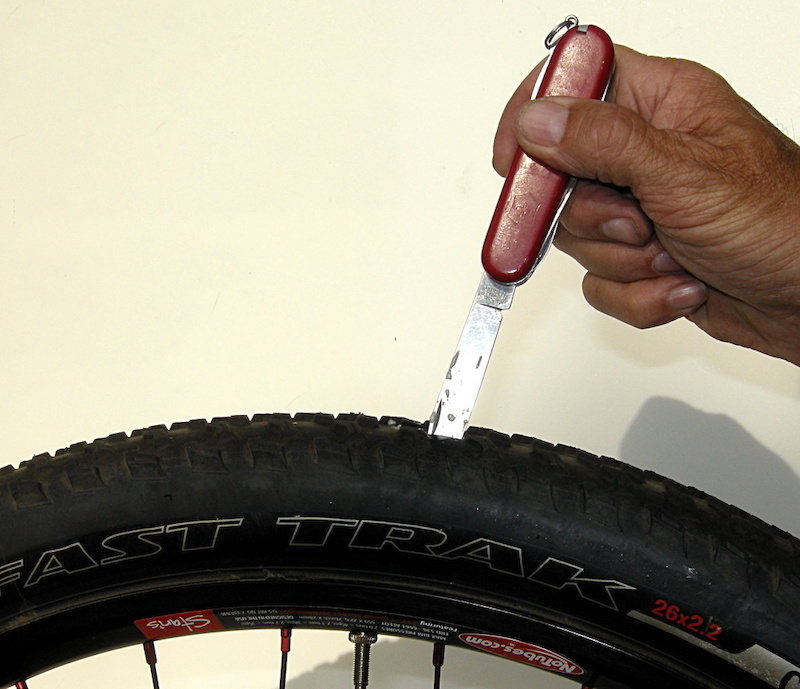 The stores offer tire models of various thicknesses and sidewall stiffness, so it is better to feel each tire with your hands in order to buy exactly what you need. Tire manufacturers strive to create the sidewall of their wheels in such a way that with a minimum thickness of the sidewall, they have maximum strength and comfortable stiffness. Summer tires with a rigid sidewall have their own advantages and disadvantages.
Soft sidewall tires are found in tire shops in various price ranges. The soft sidewall on tires can be either on a tire with a soft or a hard rubber compound. What does the soft sidewall of the tire give and what threatens its use? Despite its softness, the tire sidewall can be strong enough for operation not only in urban conditions, but also in highway conditions, where special reliability is required from the tire. It must be remembered that if you choose low-profile tires, then it is better not to consider them with a soft sidewall, otherwise the rubber can quickly fail, tearing the side of the tire against the wheel disk on asphalt breaks. For the track, it is better to choose tires with a sidewall of medium softness, you will get reliable operation with virtually no loss of comfort. As with anything, there are pros and cons to soft sidewall tires.
Car owners are recommended:

Lord, after reading the forum, I came to the idea of the urgency of assembling CarPC music. But since this is not an instantaneous thing, but I want to have the opportunity to listen to an mp3 collection today, I unwound the head of the HU-603 and attached an AUX input instead of cassettes.
I wanted to do it with minimal damage to the device, so that, if necessary, everything could be returned to its original state. As an option, it was possible to cut the tracks from the AM radio, but firstly, this is not so quickly recoverable; and secondly, I did not want to abandon AM, because Only here you can listen to something in English. and German. languages. But the cassette recorder was never used.
The "head" was dismantled to the last bones, in order to comprehensively examine the connections on the board; the disassembly process, unfortunately, was not fixed, but there were no particular problems: just unscrew all the screws. At the same time, there is no need to remove the lower board from the metal base - it is enough to remove the CD, cassette tape, sidewalls and the amplifier board (on the back wall with connectors). But, for ease of installation, I can advise you to remove the front panel, which is fastened with two bolts on the sides + a plurality of latches to the front metal panel. Under the front panel are two bolts that secure the front metal panel with tone and balance encoders. Accordingly, before removing the plastic panel, it is necessary to remove the plastic handles from the axes of these encoders.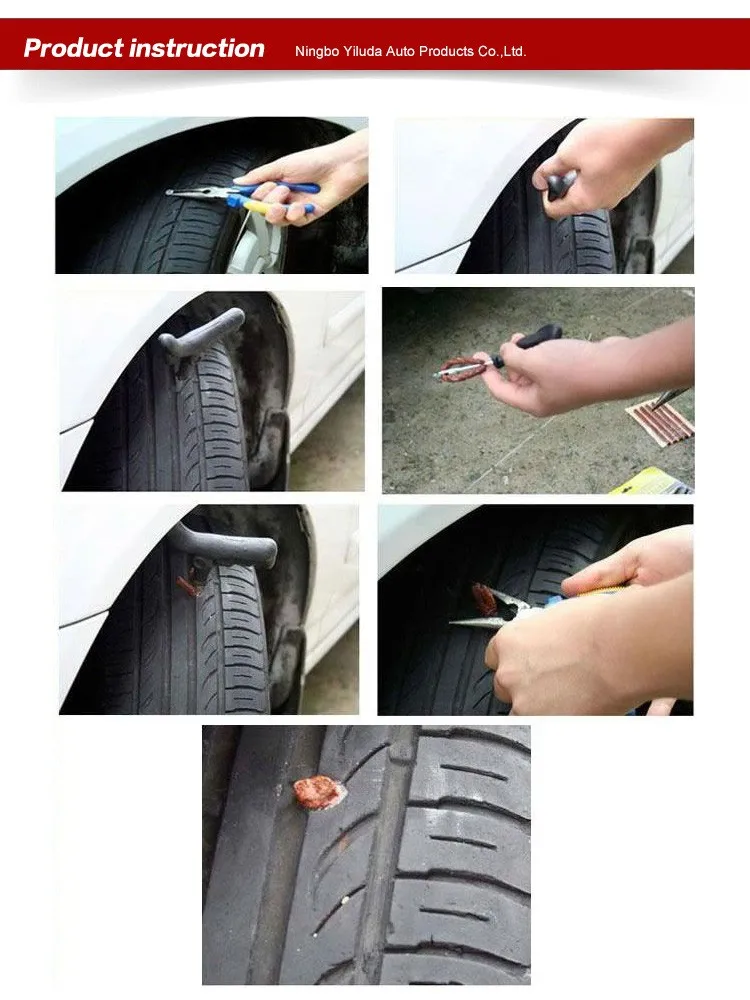 The remaining knobs (Volume, source and 1-20) do not need to be removed - their encoders are mounted on the removed panel itself. The encoder cables are removed from the sockets in the encoder board, it is better to remove the LPM cable from the LPM too, the CD cable - from the amplifier board.
Unused space for aux. connector (J331, see Fig. 1), pins 14,15 (common) and 16 of which are switched to the input of the preamplifier of the cassette tape recorder (only in TAPE mode).
In order not to "jewelry", I did not use pin 15, I soldered only the signal wiring of the left and right channels to sites 16 and 14, and twisted the common wire into a "braid" and soldered it to the pre-stripped section of the common wire on the UMZCH board .
Passed the wire under the board, carefully wrapped the pigtail with electrical tape. When assembling, the wire passed through one of the ventilation holes. I didn’t put decoupling capacitors inside the device so that they wouldn’t hang there, but mounted it outside the device, and I already soldered a wire with a mini-jack to them, brought out into a box next to the “head”, where my phone is attached during trips..jpg)
To reduce the noise from the magnetic head, I pulled out the cable connecting the head to the LPM board (J702). As a result, only the amplifier's own noises remain (quite noisy in the HU-603).
While the LPM was in my hands, I examined how it reacts to the inserted cassette. It turned out to be very simple: the upper part of the cassette shifts to the side the hook - the “mikrik” pusher, similar to that used in conventional tape recorders to protect the cassette from recording, and located approximately in the same place, to the left along the course from the stuffing side, a couple of centimeters from the receiver window cassette.
It remains to carefully assemble everything (I have an extra bolt left). Photos of the semi-assembled device:
CD drive not yet installed.
By the way, about the CD-drive: during its operation, the audio signal is taken from its only cable in analog form, not in digital form. Thus, assuming that the CD drive is a standard OEM machine with standard controls, it is theoretically possible to replace it with another drive that reads mp3, understands the same control signals, and outputs a ready-made analog signal.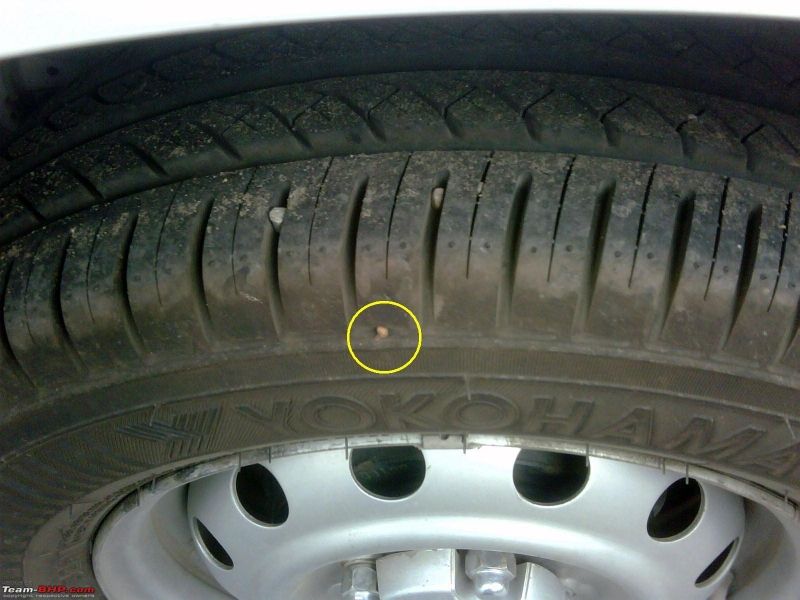 But this is all just a theory...
And now the tar:
When the TAPE source is selected, the signal from the minijack is not perceived by the device until a cassette is inserted. There are two options left: to make a cassette with a looped tape (the LPM is not deceived by a dummy), or, using sleight of hand, after selecting TAPE, press your finger on the same hook - the cassette feed mechanism will go down - and immediately after it "leaves", spin the feed roller a little cassettes from left to right, simulating a tape pulling it. Without this, the LPM will spit out the "supposedly cassette" back.
But the advantage of this approach is the absence of a rubbing cassette, and the LPM itself works quietly enough so that its noise is not noticeable. The most pleasant thing about this method of "deception" is that from the first such fraud, the device will think that it has a normal cassette, until the battery is disconnected (or the green connector from the "head" at the back) or the "cassette eject" button is manually pressed , regardless of turning the ignition on/off or selecting another sound source, because LPM constantly stands in the "duty room", and does not check the "correctness" of the cassette once again.
I did not install lowering resistors at the input, because the signal level at the headphone output at full volume does not lead to distortion in the path, the sound level turned out to be even a little quieter than FM radio.
Isolation from the source
In order to exclude the influence of the signal source on the "head" circuit, a pair of capacitors must be included in the input signal circuit, according to the diagram: Theoretically, it’s better than 50 microfarads, but in practice I didn’t notice a difference (there is no subwoofer and never will be), just as I didn’t notice a difference using a 1.8 kOhm resistor in the input circuit. But here, the quality of the sound source + the quality of the amplifier built into the HU-603 is probably to blame. I tried to listen to all this on B&W 301 home acoustics, but the listening time is still short (I just soldered it today), I'll go for a week - I'll unsubscribe. Subjectively, the quality seems to be higher than that of the built-in CD, due to the use of an equalizer in the player.