Have you ever wondered how your ATV’s suspension works? Do you need to adjust or lower your ATV suspension but do not know how? Knowing how your ATV suspension works and how to adjust it is important, as it will allow you to enjoy better quality rides.
ATV suspension works by helping the quad stay stable on tough terrain. Shocks and springs help resist rapid compression and unstable bouncing. You can adjust the preload, rebound, and compression of your shocks to make your rider softer or stiffer and raise your ride height.
In this article, you will learn how your ATV suspension works. I will also show you how to adjust, lower, and soften it. Let us get started.
An ATV suspension helps your ATV vehicle get over rough terrain. Unlike a regular car’s suspension designed for pavement and flat roads, an ATV suspension is designed to help you drive off-road.
When driving off-road, you will encounter ruts, bumps, rocks, ditches, logs, branches, and various other obstacles that you just won’t find on-road. The suspension ensures that your ATV vehicle can drive over these obstacles and not get damaged.
A suspension, in simple terms, smoothes out your ride. If you are driving on smooth pavement, the suspension does not have to do that much. However, if you drive off-road, it takes a lot more work to smooth out the ride. That is why ATV suspensions are more complex.
The suspension is responsible for other things as well. It makes sure that your vehicle is stable, even when driving on rough terrain. It consists of various parts that help it do its job, including springs and shocks.
I will go over what these components do in the next section, explaining exactly how your ATV suspension works.
As mentioned before, your ATV’s suspension has several parts that do several things to ensure your vehicle can drive smoothly, even on less than smooth ground.
I will go over several of these parts in this section. Although there is always a lot more to learn about how suspensions work, this section should give you a pretty good understanding of what your suspension does.
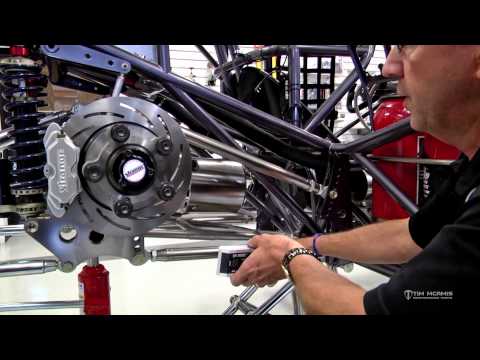
The two top things to know about are the springs and shocks. These shocks help absorb the force acting on your vehicle.
For example, when you drive over a rock, the shock absorbers help absorb the shock that your vehicle would receive. If they do their job well and absorb the shock, you will not feel it as much.
ATV shocks usually have oil in them. This oil helps prevent the suspension from compressing. There are various designs available. You might get a shock with an oil reservoir within the shock.
This oil works against the compression that comes with normal bumps and helps keep your vehicle stable.
Also, the springs help prevent compression. The springs’ job is to get your vehicle to “spring” back into its original position instead of being compressed when it goes over a bump or rut. If the springs are strong, your vehicle will not compress as much.
It will not bounce back and forth as much, as the springs will hold it back from that. You will not feel the bumps so much in your body as a consequence. Also, you will have additional ground clearance.
If your springs are old and weak, they will not do as good a job in resisting compression. Your ATV will compress more with every bump and rut. You will feel them more in your body, and you will have less ground clearance.
What you might not know is that there are several types of shocks on the market. Depending on which type of shock you have, you may be able to make certain adjustments. Some shocks do not allow you to make certain adjustments.
Here’s a helpful video to give a visual:
There are many types of shocks available.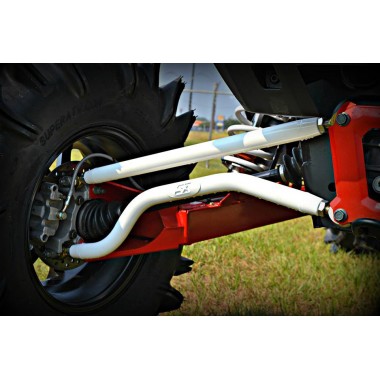 Right now, I will focus on two main types.
This type of shock has an oil reservoir built into the shock itself. The problem with this kind of shock is that as the shock moves back and forth when you go over bumps on the road, the oil can heat up. The reason it can heat up is due to the friction of the shock’s movement.
A monotube shock is the most common type of shock on ATV vehicles. If you have a standard ATV vehicle, you probably have a monotube shock. What is the disadvantage of this kind of shock?
When the oil heats up due to the friction of the shock’s movement, foam can form. This foam reduces the effectiveness of the oil and its capability of resisting compression.
However, some shocks have separate reservoirs. A remote reservoir is connected to the shocks by a tube. You can put a remote reservoir anywhere on your vehicle.
A piggyback reservoir is not located in the shock but right by it. It is normally attached to the shock; hence the term piggyback.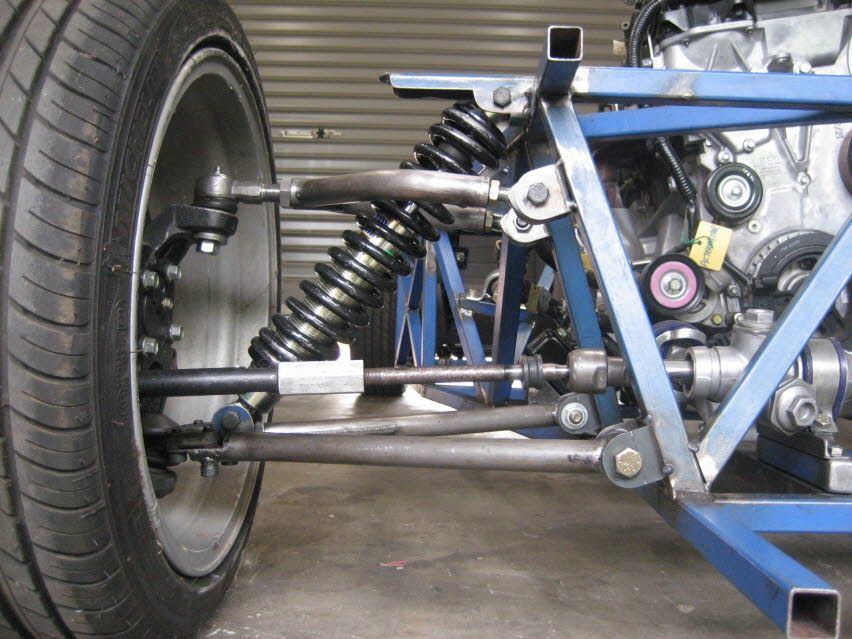 However, since it is not inside the shock, it will not heat and foam up like regular monotube shocks.
I mentioned that some types of shocks have different adjustability options. Let me go over that in the next section.
Generally, you can adjust the preload, compression, and rebound of the shocks. However, not all shocks allow you to adjust them in the same ways. I will explain what each of these adjustments is.
The first thing I will discuss is adjusting the preload of your shocks. The preload refers to how much pressure is put on the shocks by default. You will be able to adjust the preload on most shocks, even basic shocks.
Usually, there will be a collar on the shock, which will allow you to adjust the preload. However, not all shocks will have the same type of collar.
Some shocks will have a collar and locking ring that gives you more flexibility in how much preload you can put on your shocks. Other collars might only have five levels of adjustment.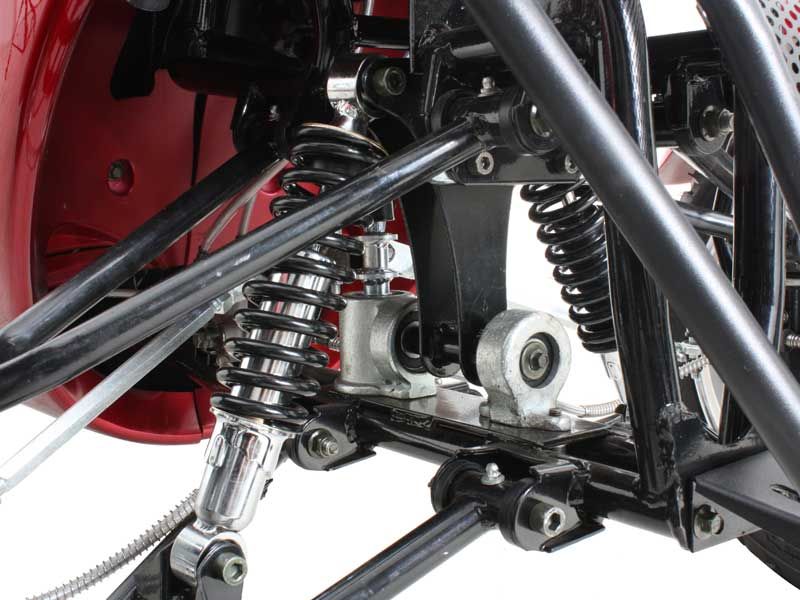
This adjustment is up to you. However, keep in mind that the softer the ride and the less preload, the more likely it is for your suspension to bottom out.
I would recommend that you raise your wheels and entire vehicle off the ground while adjusting the preload. It is simply easier to turn the collar that way.
Adjusting the preload might be the only way to adjust the compression – as I mentioned before, most shocks, even basic shocks, at least allow you to adjust the preload.
Some shocks will have double locker rings. To adjust the preload:
The next type of adjustment is compression. The compression helps prevent your suspension from bottoming out. It is the damping, and it controls the speed of the movement of the shock’s shaft into the body of the shock.
Adjusting the compression allows you to control the speed of the flow of fluid. If the fluid flows too fast, the shock might be too stiff. If it is too slow, the shocks can compress and move rather quickly, which can cause them to bottom out.
So, how do you adjust the compression damping? Usually, there will be an adjustment knob on the body of the shock. It might also be located on the shock reservoir.

There might be several adjustment settings. Usually, the shocks will have a needle valve system and not orifices. When adjusting a shock with a needle valve, you adjust the oil flow, which affects the compression.
I will say that for most shocks, even aftermarket shocks, there is no high-speed compression adjustment. As such, the adjustments you make to the compression damping will matter for small bumps and ruts, not large bumps.
What kind of adjustment is better? I would recommend keeping the oil flow nice and not too slow. Otherwise, the shock can bottom out. The tires will stay connected to the ground.
It will be easier to brake. You do not want to make it too soft. You also do not want to make it too swift. You can adjust the compression based on the track or trailing you are driving on.
Finally, I will discuss adjusting the rebound. Remember, the point of the springs is to make sure your shocks rebound back into their original positions after compressing when hitting bumps or ruts. They can rebound quickly, or they can rebound slowly. That is what this adjustment is for.
If the shocks do not rebound quickly enough, and you keep hitting more bumps and ruts, they will have to compress again. However, to ensure that your suspension is working properly, it needs to compress and rebound after reaching a bump.
If it is not doing that, it will have lost all of its compression travel. It will not work properly, and you may feel your ATV moving quickly from side to side. That is not a lot of fun.
Either way, look for it on the rear shocks of your ATV. Your stock front shocks will probably not have this adjustment possibility, but if it is a second hand ATV with aftermarket front shocks installed, you may very well find this adjustment option on the front shocks.
I know that what I wrote here might seem confusing if you do not know much about suspensions and ATV mechanics.
That is why I am linking the following video, which should help you understand the basics of ATV suspension tuning:
Here is a video that explains the preload very well:
The best way to lower your ATV’s suspension is to buy custom shocks. However, you can adjust the ride height of your shocks as well by adjusting the preload. As mentioned earlier, if you raise the preload and have stiffer shocks, you will have a slightly higher ride height. If you want to lower your ATV suspension, lower the preload pressure.
As for softening the ATV suspension, that is also done by lowering the preload.
Before I close out this article, I will cover some of the most common ATV suspension terms you should know about. Once you know these terms, you will figure out how to work your ATV suspension.
The ride height refers to how high the seat of the ATV is.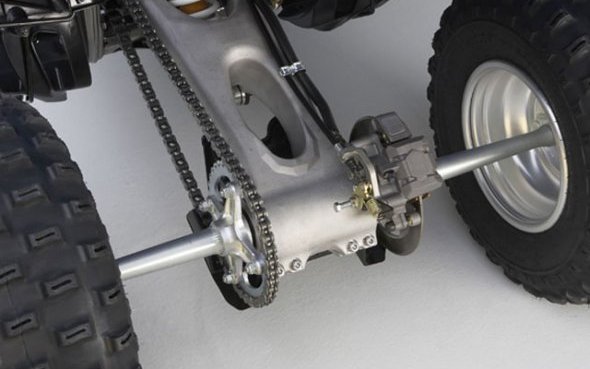 This height is measured at the time the rider is on the vehicle. That is why it is referred to as ride height.
Camber refers to the tilt of your tires. If they are tilted in at the top and tilted out at the bottom, they have negative camber. If they are tilted out at the top and in and the bottom, they have positive camber. There are different levels of positive and negative camber. Why would you want a negative camber?
Tilting them out at the bottom will help increase traction when going through corners. More of the contact patch will have contact with the ground. If they have a positive camber and are tilted in at the bottom, you will lose traction on corners.
Free sag refers to how much travel the suspension has, considering only its weight and not the rider’s weight. That is how much the suspension sags under its weight. The weight of the ATV will lead to some level of compression and sag. Keep in mind that the front wheels’ free sag might not be the same as the back shocks’ free sag.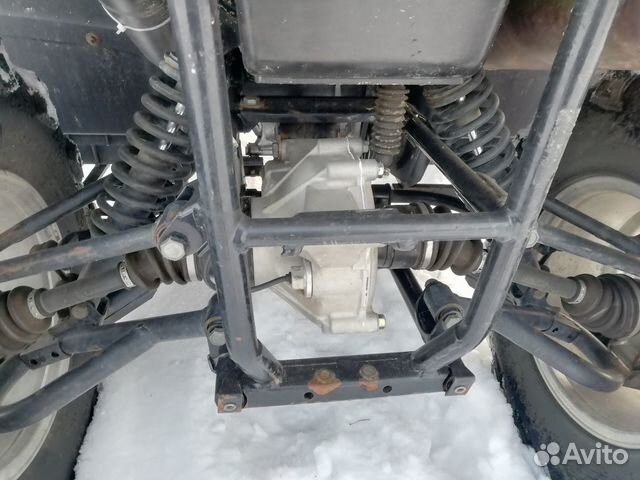
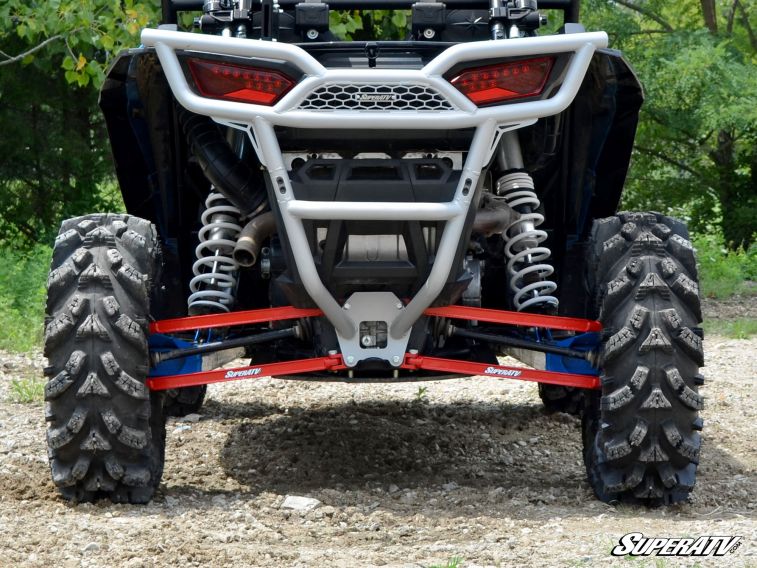
The front shocks are located on the front wheels and help them resist compression.
On the other hand, the rear shocks work on the back wheels and help them resist compression.
As opposed to free sag, rider sag refers to the amount of suspension travel used when the rider is sitting in the driver’s seat. Remember, this is not the total suspension travel that the shocks are capable of. Usually, it will be around a third or less of the total possible travel. The suspension will sag under the weight of the rider. It means that there is less travel that can be used when driving over bumps and rocks.
I mentioned bottoming out a few times. You want to avoid bottoming out when possible. Bottoming out refers to when the shock is completely compressed. When this happens, your body can feel it rather harshly, and you can get pain. By adjusting the compression to make it move slower, you can prevent the shocks from compressing completely and bottoming out.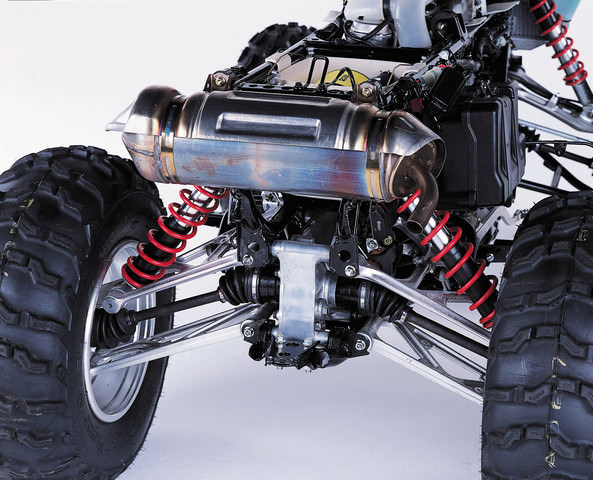
I mentioned that you could adjust the rebound. If it rebounds too quickly and jumps up and down, it is bucking. In other words, the shocks are going up and down quickly to the point of being out of control.
At this point, I hope you understand a little more about what the shocks do and what their main components do. You should also have at least some understanding of the main kinds of adjustments you can make and why you might want to do them. The main adjustments to make are the preload and rebound adjustments.
Sharing is caring!
Learning how to adjust your ATV shocks might be the single most important way to improve your ride. After all, properly adjusted shocks can make every bump feel smoother, give you more traction, and give you better control.
The best part, though, is that the way to tweak and test your shocks is by going for a ride! Adjustments take no time at all, and you’ll feel the difference immediately. Talk about instant gratification.
But before we get into the nuts and bolts of making adjustments, we’ll break down exactly what it is that shocks do and how they do it. Knowing why you’re turning this knob or tightening that collar will help you make more sense of what you’re doing and ultimately make you a better shock adjuster.
So let’s dive in.
How Shocks WorkShocks are made up of two key parts:
These two parts work together, or rather against each other, to make sure you have a perfectly smooth suspension.
Springs are designed to keep your wheels on the ground. Hit a bump that sends your tires up and the springs compress so you don’t feel it. Then, they send your tires right back down so you maintain traction, acceleration, and control.
However, if you only had springs in your suspension, your ATV would constantly wobble and bounce like you were riding on a giant water bed.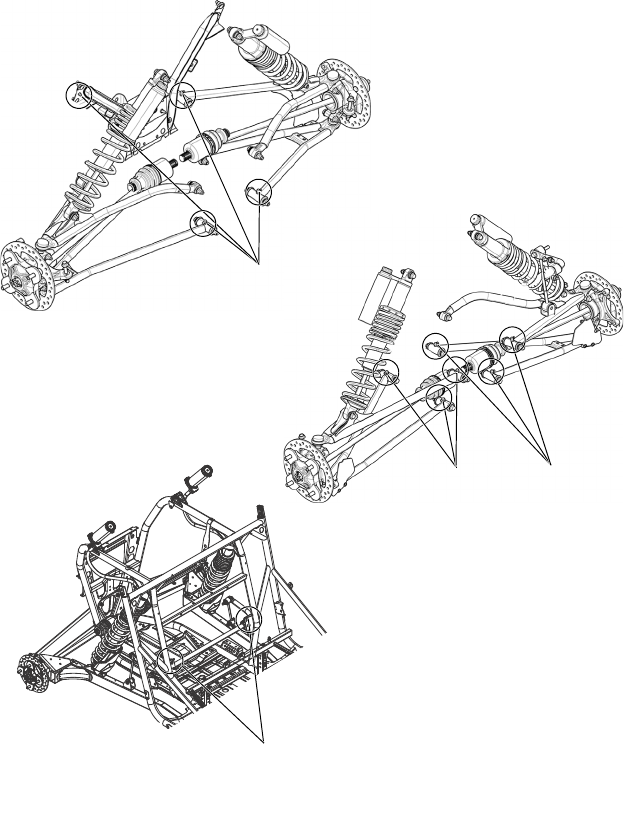 In practical terms, it would buck you like a bronco until you roll over or barf—whichever comes first.
That’s where shock absorbers come in. They’re the center part of your shock and consist of an oil-filled tube with a piston inside. There are valves in the tube that control how fast or slow the oil can move through the piston. The result is that it stops your spring and ATV from wobbling all over the place like a bobble head every time you hit a bump. Instead, it causes your springs to compress and decompress in a controlled way.
When they’re working together, you get all the benefits of a spring without any of the drawbacks. They keep your tires gripping the ground and make bumps smooth.
When they’re not working together… that’s when you have to adjust your ATV shocks.
Shocks use a spring paired with an oil-filled dampener to keep your ride cushy. The dampener keeps the spring from oscillating back and forth so that your quad is more stable. Setting the compression and rebound of the dampener can make or break the feel of your suspension.
When it comes to actually adjusting your ATV shocks, there are a few tools at your disposal that are built into many shocks. The most prominent one is the clicker. This is the little knob, nut, or set screw that’s built into the top of the shock.
Clickers affect the flow rate of the oil through the valve inside the shock. When you adjust the clicker, you’re adjusting your shock’s compression (more on that in a bit). They adjust in small increments and make an audible click when you turn them, hence “clicker.”
Different kinds of shocks have different clickers, too. Most just have a single adjuster that affects the overall compression of your ATV shock. Others have a high- and low-speed compression adjuster. The high speed adjuster will affect big suspension hits like landing a jump, while the low speed adjuster affects much smaller hits, like going through whoops or rocky terrain. Some shocks even have a mid-speed adjuster, but those are few and far between.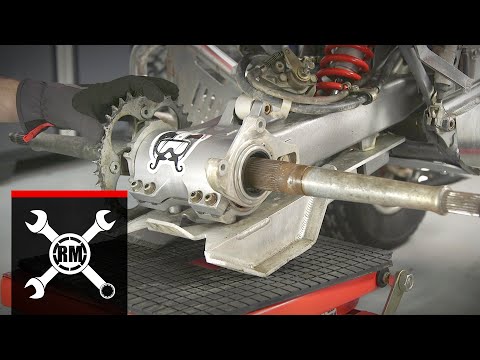
Most new ATVs have shocks that come with a single clicker on each shock. Factory shocks on older ATVs might have no clickers at all and can only be adjusted using the threaded collar on the shock.
Clickers like this one control the rate that oil can travel through your shock, which changes how fast it compresses. Getting your clicker adjusted to the right spot for you and your ATV is key to a good ride.So now that you know all the different kinds of clickers you could have, it’s time for you to get a handle on what compression actually is.
Compression, as the name suggests, has to do with how your shock compresses when you hit a bump or land a jump. This is different than rebound, which refers to the way your shocks act after they’re compressed.
When you’re trying to get your suspension to feel good, you’re mostly just trying to get the compression right. If you make your compression too loose, you’ll get that bouncy motion caused by your springs and you’ll end up bottoming out too often. That’s no good for your ATV or your back.
If you make your ATV shock’s compression too stiff, then you’ll start feeling every bump and rock on the trail—also bad for your back. And having it set too far either way will result in less overall control of your vehicle.
The best compression rate for most is one that will allow your ATV to almost bottom out on a hard hit, but not quite.
Hand in hand with compression is rebound. It’s the rate that your shock decompresses. Not every shock has a rebound adjuster, but if it does, the rebound set screw is located at the base of the shock.
This has consequences when set too low or too high as well. If your rebound is set so stiff that it rebounds slowly, your tires won’t make it back to the ground between whoops. They’ll compress once, then just stay compressed. As you travel through whoops, you’ll be nearly bottomed out the entire time, and you’ll lose speed due to lack of traction.
This is bad, obviously, since your suspension doesn’t really act like suspension at this point.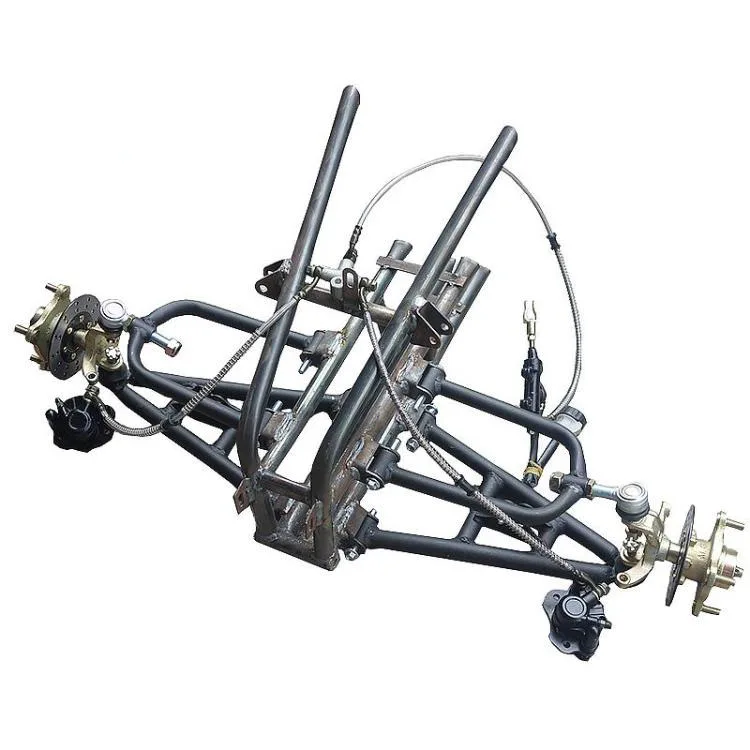
On the flip side, if you set your rebound too loose, you’ll get that bucking action that can send you ass over tea kettle whenever you hit a bump. Plus, your ATV will tend to bounce up and down even after a single bump as it tries to get back to its resting position. That’s no good.
The perfect position lets your shock rebound quickly without overshooting the equilibrium so that your suspension doesn’t bounce up and down before it settles.
Let’s talk about how to dial it all in.
Adjusting the Shocks on Your ATVNow we’ll go through the steps to adjust your ATV shocks to your heart’s content. Tweaking is best done when you have quick access to a trail or ride area to test out your results. It might sound like a tedious process at first, but trust us—once you get started, you won’t want to stop.
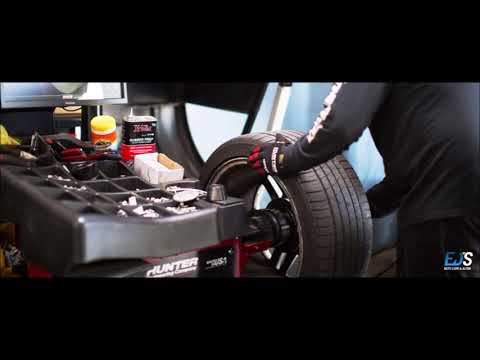
You need to make sure your tires are aired up to the proper pressure before you do anything else.
If your tires aren’t right, you simply won’t be able to adjust your ATV’s shocks properly. They’re the foundation of your suspension, and if they feel bad, no amount of tweaking your shocks will fix it.
The first thing you need to do to your shocks is set your ride height. This is done using the threaded collar or snail cam on your shocks.
First, if your shocks have a threaded collar, check your owner’s manual for the typical that you want to stay within when adjusting. Unless you want your front to be lower than your rear for some reason, you should try to keep the adjustments the same in all four corners.
Then, with your machine lifted, loosen the locking collar on the top and thread the adjustment collar up or down. Tightening it down will increase ride height and give you a stiffer ride. Loosening it will lower ride height, giving you a softer ride. We usually recommend going with the lowest ride height that you’re comfortable with to start.
If you have a snail cam on the bottom of your shock, you will use that to set your preload.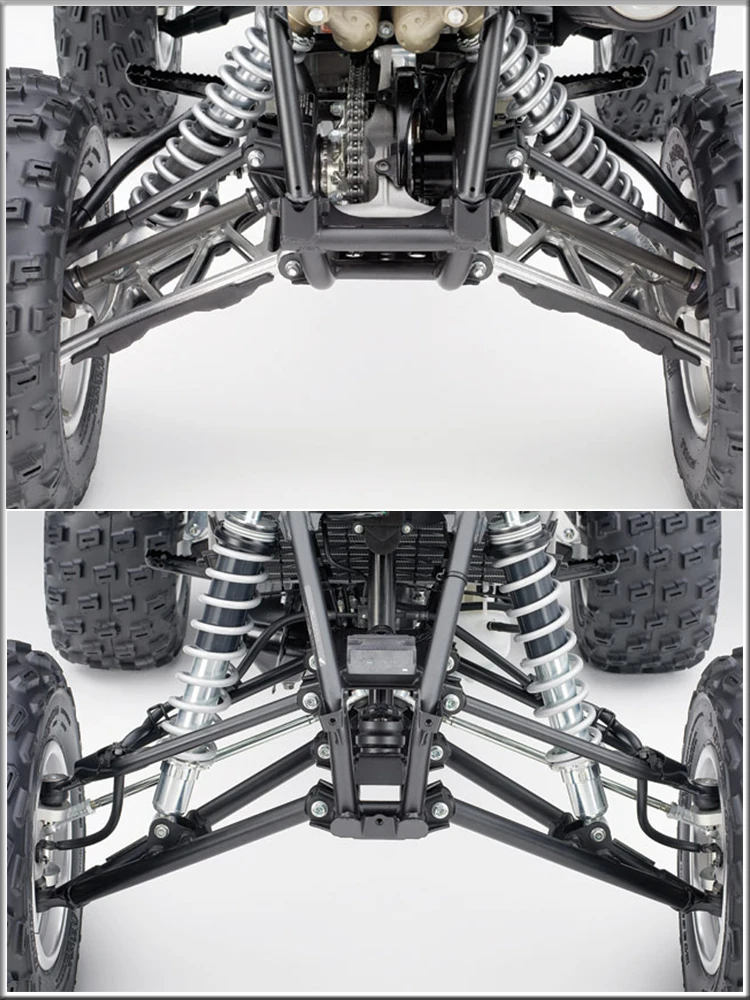 With a snail cam, the adjustments are opposite. So adjusting it higher will stiffen suspension and raise your ride height. Adjusting it lower will soften the suspension and lower your ride height. Again, we recommend the lowest height that you’re comfortable with.
Once you have your collars set and tightened up, it’s time to start adjusting your clickers.
You can use the double collars at the top of the shock to set the preload. Refer to your owners manual to make sure you don’t get it too out of spec.Adjusting clickers is where things start to get really fun. If you have high- and low-speed adjusters on your shocks, you should start with the high speed adjuster. This is the one that affects compression with big hits, like landing a jump. If you only have one clicker, you will adjust it just like the high speed adjuster.
First, you need to find something that hits your suspension hard when you ride on it. Try to find something that you think is comparable to a typical hard hit on your average ride.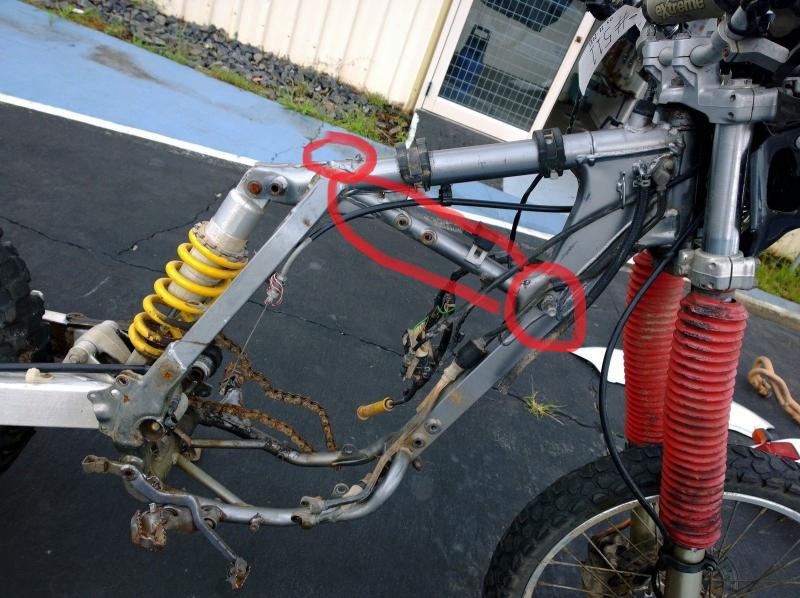 We usually use a small jump.
Hit the jump. If your suspension doesn’t bottom out, turn your clickers two clicks counterclockwise. Remember: righty tighty, lefty loosey applies to your compression stiffness too.
Then, hit the jump again. Repeat the process of loosening your compression a couple clicks and testing it on a jump until your suspension does bottom out. Next, all you have to do is turn the clickers two or three clicks clockwise and you’re good to go. You’ll have nice, plush compression that doesn’t wreck your shocks.
If you have a low speed clicker, adjusting it will take a little more finesse. You’ll need to find a section of bumps or whoops first, and take a run at it at a decent speed.
You need to pay close attention to how it feels. If you feel like you’re rolling forward and backward or left and right while you ride, that indicates that your low speed clicker is set too soft. If every single bump and rock makes your teeth chatter, then the clicker is set too stiff.
In these instances, you’ll need to set your clicker two clicks softer or stiffer and ride it again. Keep making those incremental changes and keep testing it until your ATV glides over the whoops without swaying too much or vibrating you to death.
Your rebound adjuster is located at the bottom of the shock. Like we mentioned earlier, it affects the rate at which your shock extends after it’s compressed.
The best way to test your rebound is to use a small jump, regardless of your ride style. When you land the jump, pay attention to how your suspension settles. If your ATV bounces up and down before it settles, your rebound is too loose. If it feels like your suspension stays compressed too long, it’s too tight.
It’s easier to adjust it properly if you start with it too loose—that is, with your rebound set screw or dial turned counterclockwise.
Hit the jump and feel your ATV bounce up and down. Turn your rebound screw clockwise a bit (sorry, no satisfying clicks on this one) and repeat.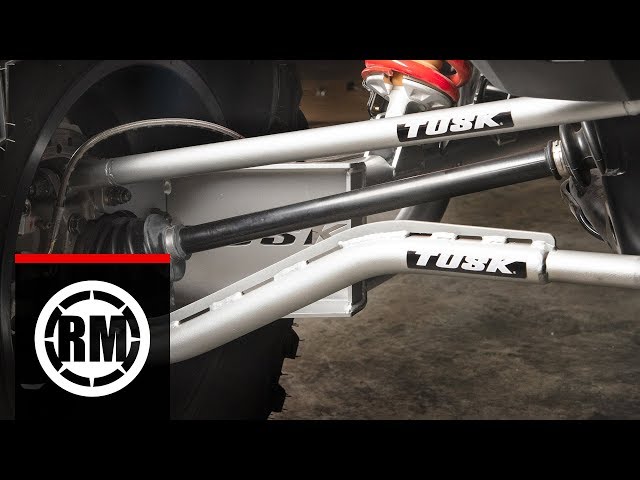 When you’ve adjusted it enough and your suspension pops up quickly without bouncing up and down, you’ve got it dialed in.
This is the baseline setting. You can go stiffer or softer depending on your unique riding style. You might want a stiffer rebound if you’re doing anything that’s slow and technical to make sure your suspension conforms to the terrain and doesn’t push you off a boulder too quickly. If you have a specific style that you enjoy, be sure to mess with rebound even more.
The rebound adjuster near the bottom of the shock affects how quickly your shocks extend after they’re compressed. If the rebound is too fast, your suspension will feel bouncy. If it’s too slow, your suspension will feel sticky.That’s all there is to it! With all your ATV shock adjustments made, you have the perfect combination of plush and performance. You’ll have excellent control and traction. And when you’ve put in all the work tweaking and tuning, you’ve really earned it.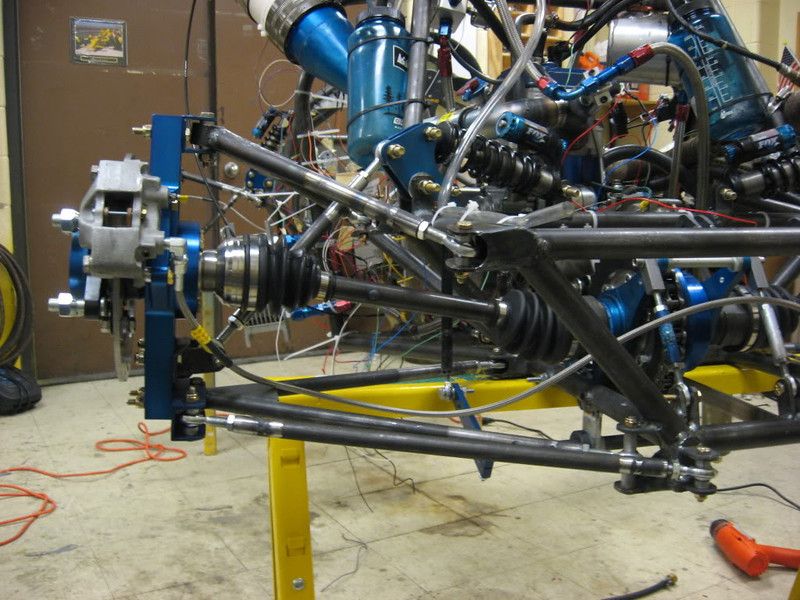 And it was fun, right? All you’ve got to do is ride and turn some knobs. Not bad at all.
RELATED CONTENT: shocks5
Share
84
The suspension is considered to be one of the most important functional components of motorcycle equipment, since it is it that is responsible for the rider's comfort in the process of movement, and also provides a soft passage through problem areas of the terrain. The sale of ATVs implies a special attitude to this unit and detailed advice on the procedure for its adjustment and maintenance.
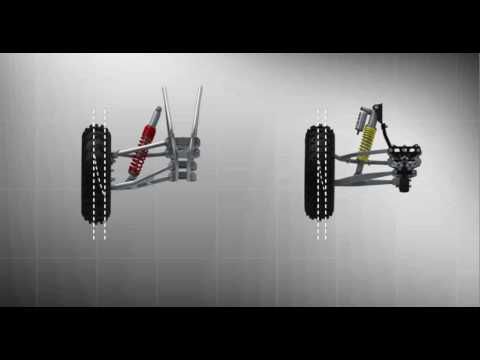
There are dependent and independent types of suspension. The second type is most often found among modern ATV models. Each motorist can adjust it in accordance with his own preferences, as well as operating conditions.
Among the advantages of ATV dependent suspension it is worth noting:

Such attractive performance of this suspension is due to the extreme simplicity of its design.
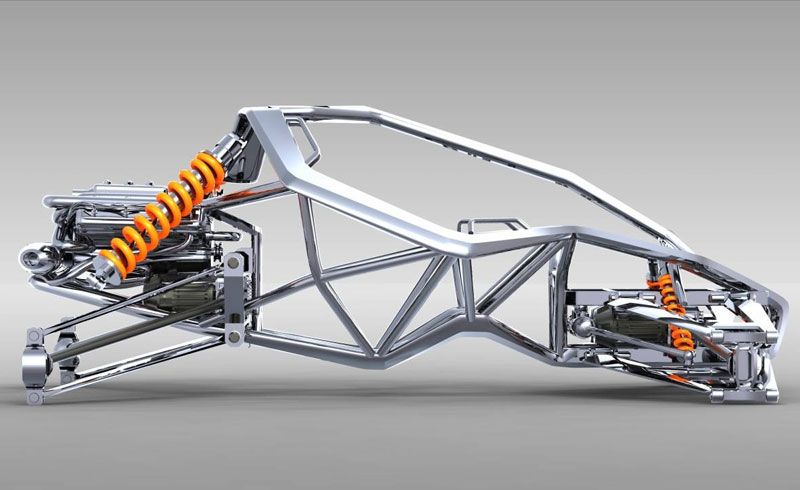
Regardless of the type of ATV suspension, there are some regularities in its structure. There are front and rear suspension types. In order for 125cc ATVs to boast a high level of ride comfort, the front suspension is usually made independent. Often it is supplemented with elements such as a pair of wishbones and telescopic shock absorbers. As for the rear suspension, it can be dependent, independent or semi-independent, and can also be equipped with pendulums and shock absorption devices.
Suspension of any ATV is a set of spare parts, assemblies and assemblies located between the motor vehicle body and the track. It consists of the following components:
ATV suspension also performs many important functions, namely:
Based on this, the suspension, despite the relative simplicity of its device, plays a significant role in the design of any vehicle.
If your vehicle's suspension is not working properly or has failed, you may need to replace some of its components with new ones.
The following ATV suspension components most often fail:
To repair the suspension of an ATV without outside help, it will be enough just to find the failed elements of motorcycle equipment and replace them.
By adjusting the ATV's suspension for yourself, the rider will be able to get maximum pleasure and comfort in the process of driving. It is especially important to correctly configure this aspect in sports models of motorcycles. The fact that it is time to adjust the ATV suspension is indicated primarily by uneven tire wear, as well as the presence of problems and discomfort when driving a motorbike.
Adjust the suspension of a motor vehicle as follows:
 It is better to reduce compression in the case when slippage is observed.
 Before starting to adjust the ATV's suspension, it is recommended to write down all the initial values so that if you do not like the result, you can easily return the motorcycle to its previous state.
In the absence of experience in the repair and maintenance of motorcycles, it is strongly recommended that if you find any problems with the suspension, contact the specialists at the service center. The sooner you decide to repair an ATV, the better, because driving it with a broken suspension is not only inconvenient, but also quite dangerous.
05/29/2021 1616
Design complexity 9The 0089 ATV Suspension is defined by tough operating conditions, and at the same time the need to adapt it to a variety of conditions of use.
For some, high cross-country ability and large suspension travels are important, for some, the ability to tow a trailer is important, for some, the possibility of high-speed movement over rough terrain is at the forefront of requirements, and for some, the ability to ride in nature is important, and when this does not shake yourself beloved on the bumps.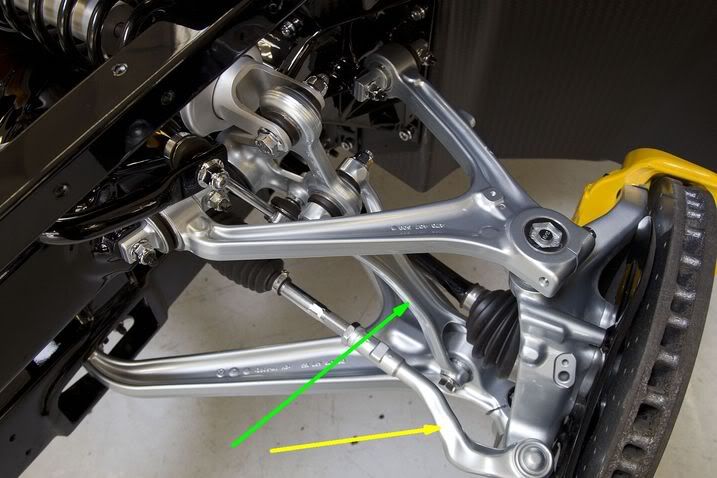
The SS20 module uses reinforced shock absorbers. When setting up the suspension, special attention was paid to maintaining comfort when traveling over rough terrain and at the same time increasing handling on all types of surfaces.
Sport settings prioritize high energy efficiency, improved handling and safety in extreme driving conditions.
For each ATV, we select the optimal settings for the front and rear springs. This allows you to avoid sharp shocks and "goats" when driving over bumps in the road, which significantly increases handling and driving comfort. When calculating the characteristics of the springs, we take into account the weight distribution of an empty and fully loaded ATV, and be sure to take into account the possible increase in weight during tuning (bumpers, saddlebags, additional protection and other elements).
SS20 suspension modules for ATVs have two shock settings - "Comfort" and "Sport": became more "collected";
The damper performance is well balanced with the spring rate, with the damper setting focusing on off-road suspension performance, and the ATV's performance on paved roads.
SS20 ATV Shock Design Features:
 The shock absorber has higher strength characteristics of body parts.
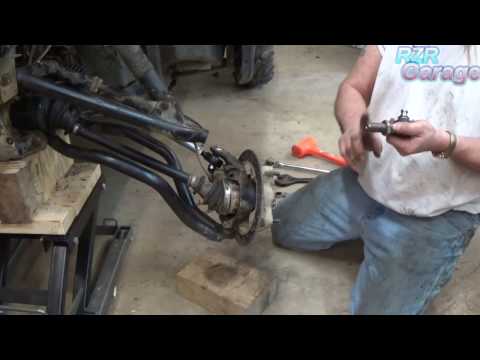
Stiffer springs, in combination with dampers with modified settings, eliminate suspension breakdowns at maximum loads and reduce rolls and dives when driving. To ensure stable operation of the shock absorbers, they are made with gas pressure.
Suspension modules SS20 for STELS ATV 650/800/850 Guepard ATVs are available in two versions, for 16 or 17 mm loop mounts.