Delivery options and delivery speeds may vary for different locations
Sign In
or enter a zip code
Email * Password *
REPAIR & HOW TO
MAINTENANCE
TROUBLESHOOTING
GUIDES
TIPS & TRICKS
ALL ARTICLES WATCH VIDEOS ABOUT US SHOP PARTS CONTACT US
Whether it's a motorcycle, an ATV, or a UTV, it probably has some kind of starter relay or solenoid.
Your solenoid might differ from others and have more connections, but there are two basic tests you can do to evaluate your solenoid's health.
A starter solenoid is basically a switch that creates a contact point between the battery and the starter. When the starter button is pressed, it energizes the coil, which pushes a contactor to complete the circuit. This transfers DC current from the battery to the starter.
In the first diagram below, the starter button has not been pressed, so the circuit is not complete.
In the next diagram, the starter button has been pressed, and the coil in the solenoid has been energized. This pushes the contactor up and completes the connection from the battery to the starter motor.
Knowing how to test the solenoid on your offroad vehicle is an important step to troubleshooting starting problems on your machine. Here are some tests you can do to check the health of your motorcycle's starter relay.
Tools Needed - Motorcycle Starter Relay TestDepending on your unit, the tools you'll need to access the starter solenoid may vary.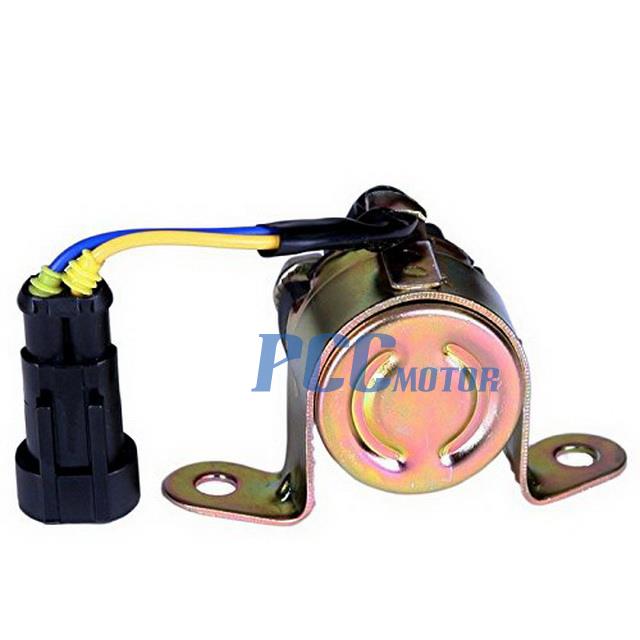 But these tools will help you regardless of what kind of unit you're working with.
This first test is designed just to see if the contactor is pushing up and completing the connection in the solenoid.
Step 1. The solenoid has two wires that normally connect to the starter button. There is no polarity on the solenoid, so it doesn't matter which side is which. You're just running current through it. Using back probes, connect directly from the battery to one of these wires. Complete the connection to the negative side of the battery first.
Step 2. Connect a second back probe to the solenoid. Then, connect it to the positive side of the battery. You should hear an audible "click" as the connector is pushed up to complete the circuit. If you don't hear it, the solenoid has gone bad. And if you do, move on to the next test.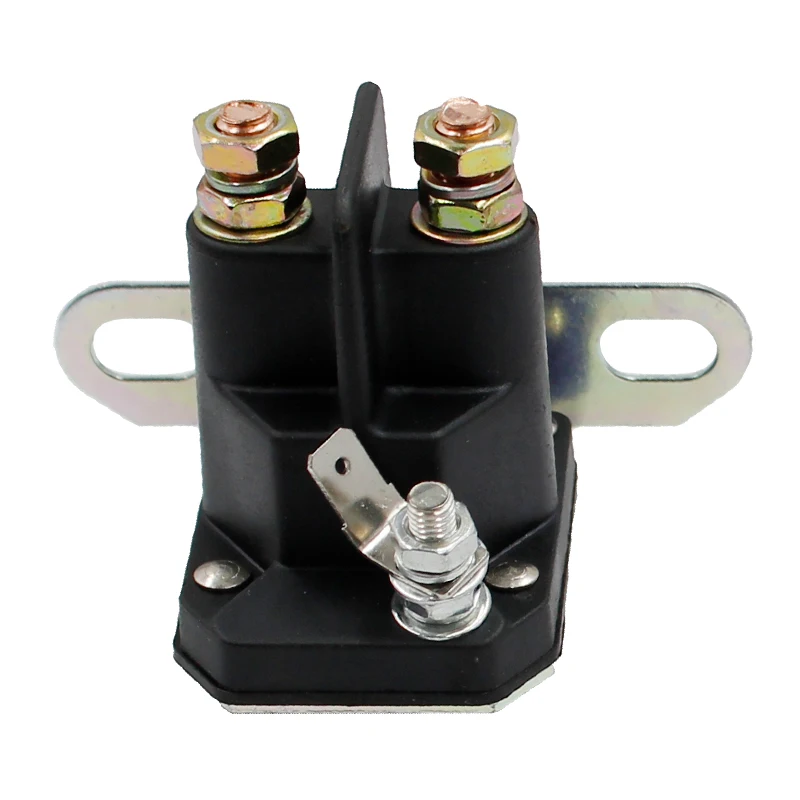
In some cases, even when the connector engages, the unit still will not start. That can happen when there's corrosion on the connectors inside the solenoid. This next test can help you diagnose this problem.
Starter Relay Test 2Step 1. Keep your connections in place from the first test, and simply disconnect the back probe from the positive terminal on the battery.
Step 2. Connect your multimeter to the main connectors on the solenoid and set your multimeter to a resistance test. Again, polarity isn't important. Just connect one clip of your multimeter to each side of the solenoid.
Step 3. Once connected, you should see "OL," indicating an open circuit.
Step 4. Connect the positive side of the battery using the back probe connection from Step 1. This will energize the solenoid and push the connector into position, completing the circuit.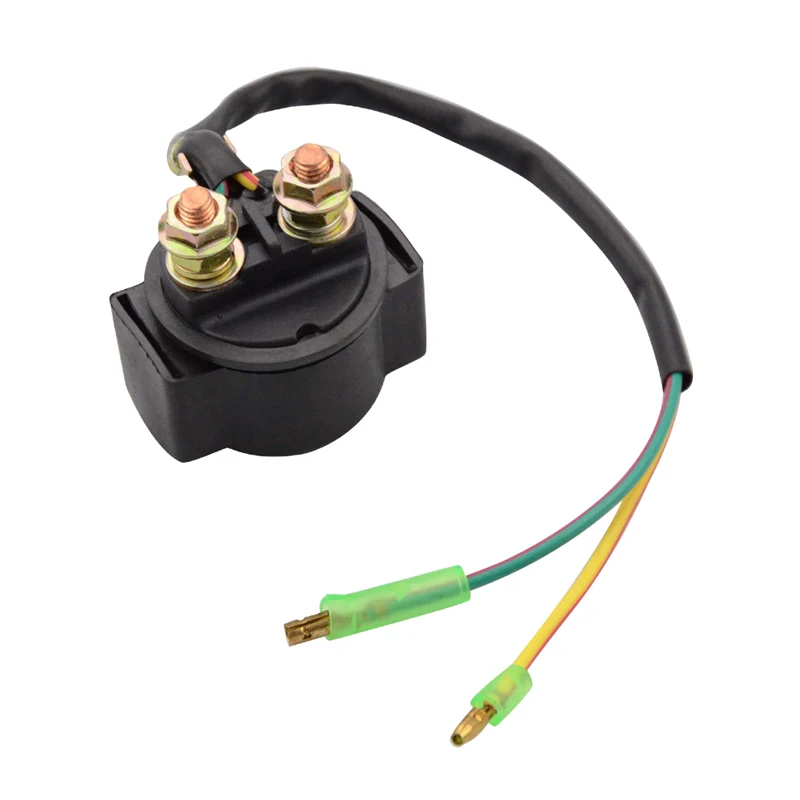
These two simple solenoid tests show you the basics of how to diagnose issues with your relay. First, check to make sure the connector is engaging and completing the circuit to the starter. Then, make sure the circuit to the starter is connected when the connector is engaged.
The starter relay is just one of many starting problems that can affect your motorcycle. Watch the video below to see how to diagnose multiple starter problems on a Honda CBR 600 motorcycle.
body
I think it’s safe to say that at one point or another, we’ve all had problems with an ATV starter. If you haven’t yet, you will. I have had starter issues with just about everything I have owned. You go to start your ATV and all you hear is, "CLICK". No engine crank.So you try it again and "CLICK". Nothing. You know the battery is good, you have the clutch pulled (if it has one), the ATV is in neutral, and the light is on but still…
nothing. The first thing you should do in this situation is to check the battery and connections.
I have had starter issues with just about everything I have owned. You go to start your ATV and all you hear is, "CLICK". No engine crank.So you try it again and "CLICK". Nothing. You know the battery is good, you have the clutch pulled (if it has one), the ATV is in neutral, and the light is on but still…
nothing. The first thing you should do in this situation is to check the battery and connections.
If you haven't read our post on multimeters yet, now's a good time to check it out.
More than likely, you already know that the battery is good, but we’ve all been in a hurry. I've mentioned before that it seems like it can be easy to overlook something small because we’re so used to taking care of it.
Kind of like when you call tech support for a computer issue and the first thing they ask is, “Is it plugged in?” I know I am guilty of doing a quick run through and noticing later on that the battery terminals were loose or that the battery was low.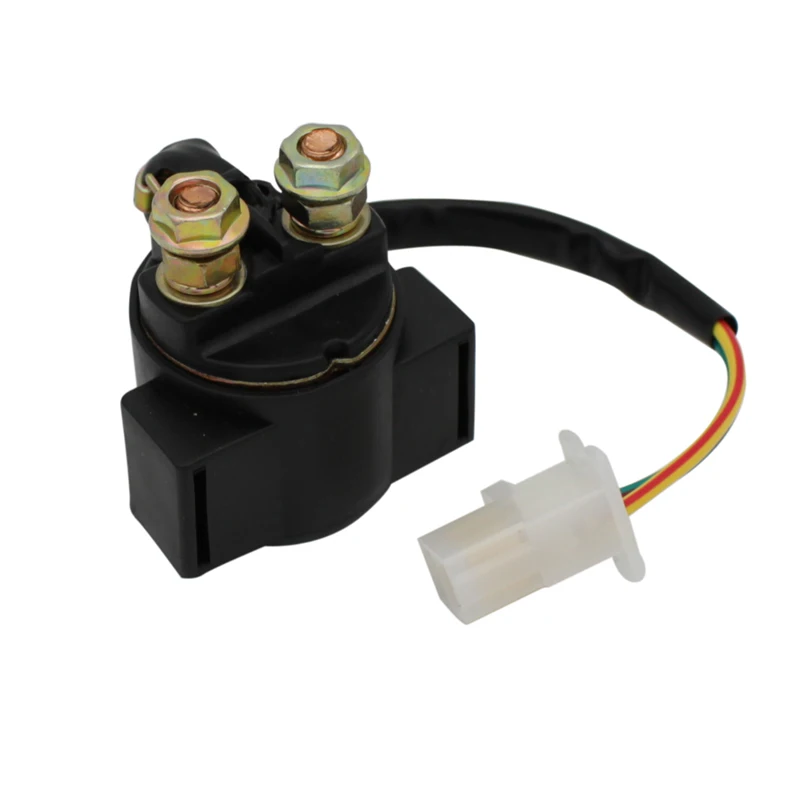 Once you have verified that the battery is NOT your problem, the next thing you should look at is the starter solenoid.
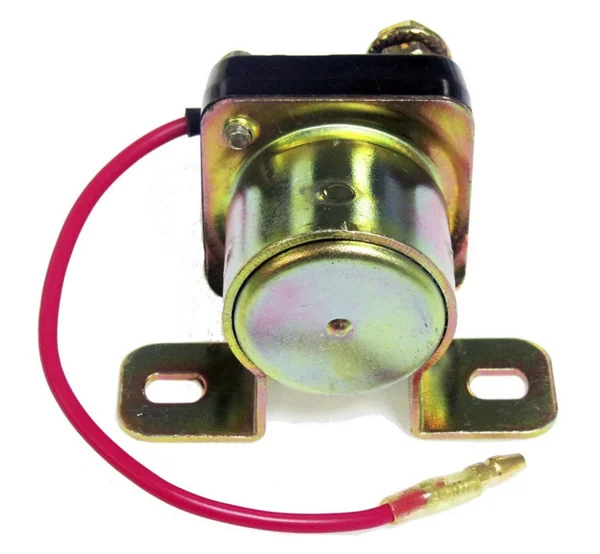
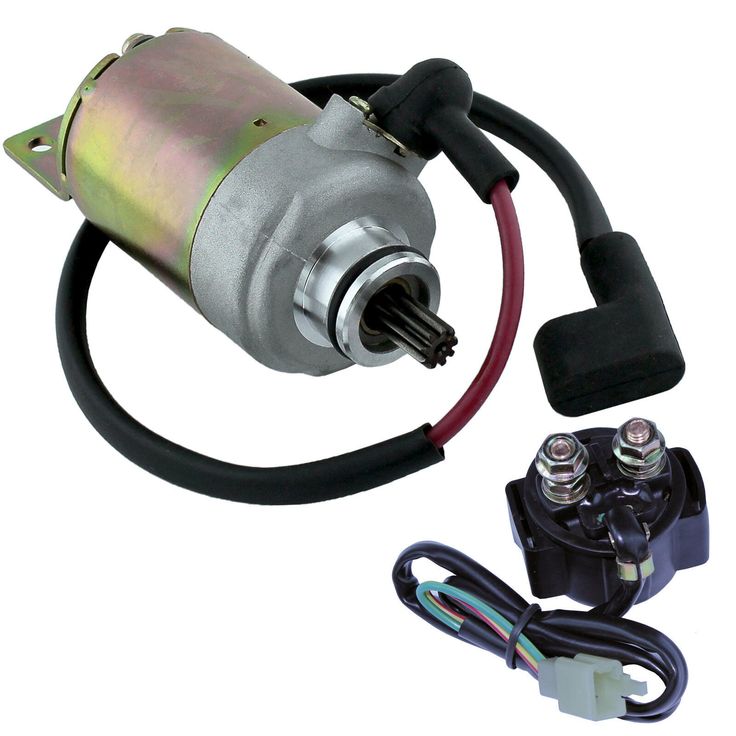
An ATV starter solenoid can normally be found on the frame. It is usually located on the outside of the plastic right next to or under the battery and near the wiring harness.
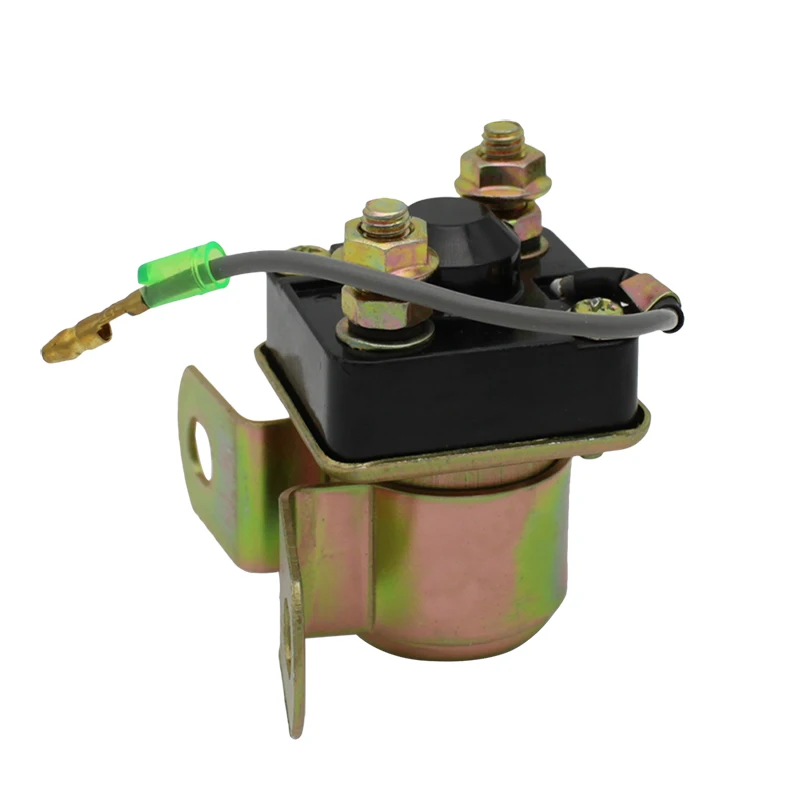
A starter solenoid is a switch that controls a high amp load with a low amp. Starter solenoids come in all different shapes and sizes, but normally they have a round or square body with two larger and two smaller wires. The larger wires are for the high amp load and the smaller wires are for the low amp switch. If yours only has one smaller wire, the ground is coming from the frame where it is mounted. It may be sitting in a plastic or rubber cover, but it's not uncommon for it to be on the outside.
Of the two larger wires, one of them will be coming from the battery (red) and the other will go to the starter (black).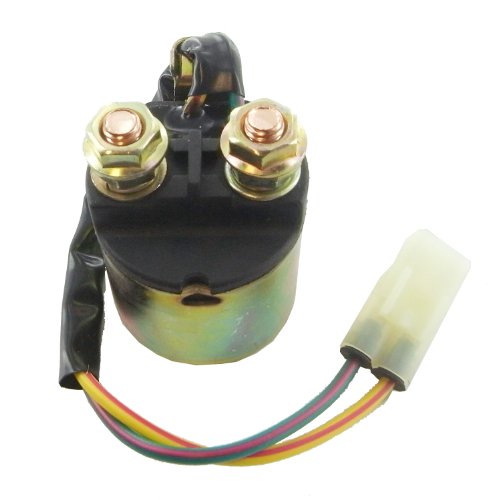 You should be able to get a voltage reading from the red wire coming from the battery. Do this by using the voltage setting on your multimeter, with the red lead on the post and the black lead on a frame ground or negative battery terminal.
If you do not have voltage at the post on the solenoid that connects to the battery, check your connection at the battery and then trace the cable from the battery to the solenoid checking for any breaks or a loose connection.
The other wire should not have a voltage reading.
Of the two smaller wires, one is a negative, or a ground, and the other is positive. I have found that the easiest way for me to test these is to unplug the connector and put both test leads into the ATV wiring harness side connector; the reading here should also be zero.
Now turn the key and get the bike ready to start (do not actually start the bike, just take the usual steps you would before starting; i.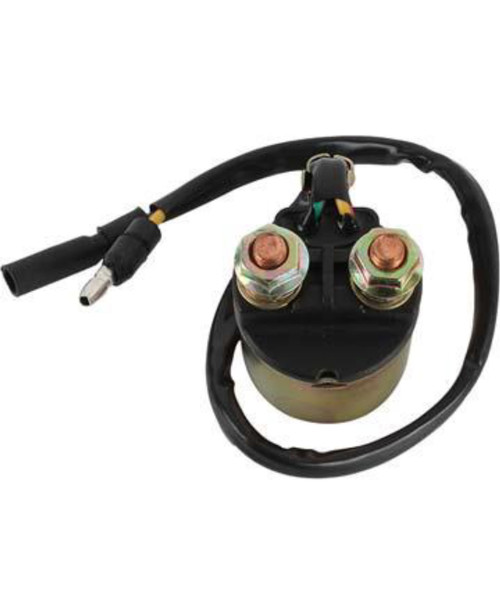 e., turn the key, make sure the bike is in neutral, etc.) This step can get kind of tricky if you've only got one set of hands. I definitely recommend using test leads with alligator clips on the ends. You can pick up the clips for around 50 cents a piece and make your own or buy a pre-made set for a couple of bucks.
When you push the start button, you should get a reading of 12V.
This battery in this photo is our test battery, so we expect the voltage to be a little low. We use this guy whenever we've bought a used ATV without a battery or for demonstration purposes. Along with our multimeter, he's made appearances here, here, and here. As long as you have a reading that is close to 12V, we'll move on.
If not, you may want to run this test a few more times to make sure you have done all of the normal stuff you would do when you start your ATV (like making sure it is in neutral, all of your wires are connected, etc).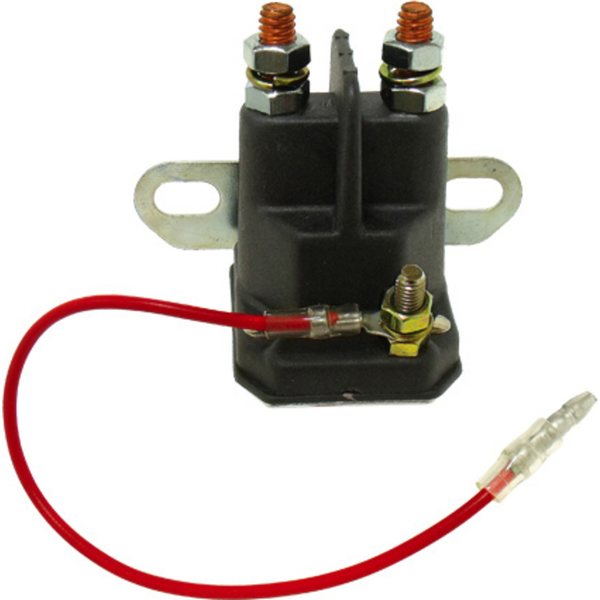 I know it is redundant but you would not believe the amount of times I have been called out to a HMMWV (that would be a Hummer in civilian speak) that would not start, only to find it was left in gear.
If you still are unable to get a voltage reading, more than likely there is an issue with a safety switch or a kill switch. Due to the vast differences between ATV models, you will want to refer to the service manual for your specific model of ATV. If you are stuck on this step, feel free to contact us and I will see what I can dig up for you. If you've gotten a voltage reading close to 12V, you can confirm that thepush button is working and giving the solenoid the signal to close.
The last thing to check now is the starter. To test the connection between the solenoid and the starter, plug the connector back into the wiring harness and test for voltage on the starter side (big terminal) while pushing the start button.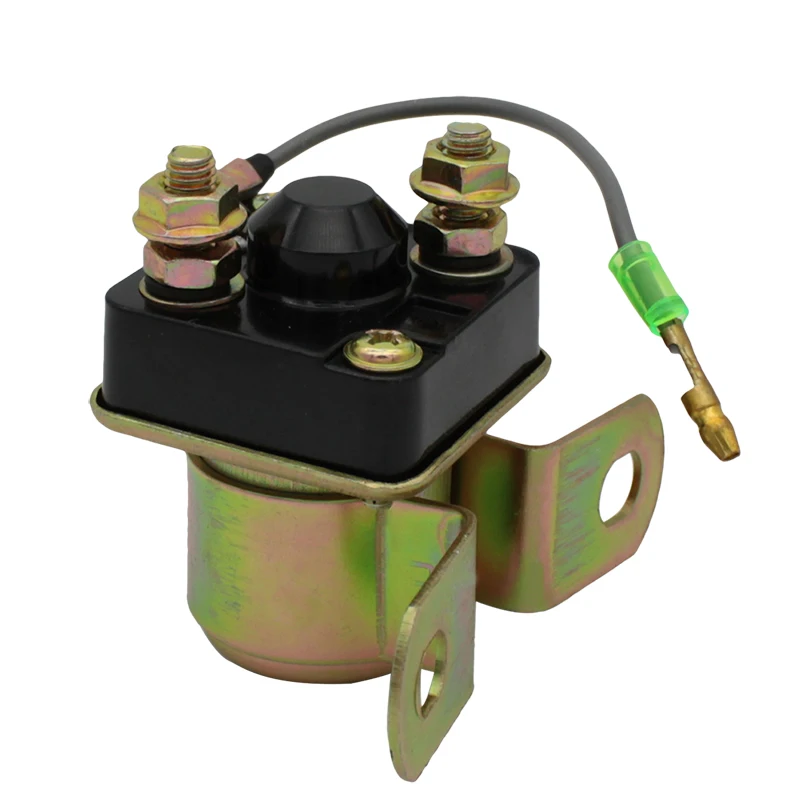
If you've gotten a voltage reading close to 12V, you can confirm that the push button is working and giving the solenoid the signal to close. The last thing to check now is the starter. To test the connection between the solenoid and the starter, plug the connector back into the wiring harness and test for voltage on the starter side (big terminal) while pushing the start button.
If you do not have voltage reading, then your solenoid is bad and will need to be replaced. If you do get a voltage reading, trace the large wire from the solenoid to the starter and make sure it has no cuts or breaks and that it is tightly connected to the starter. If there are no issues with the wire or connection, then your issue is with the starter and it will more than likely need to be replaced.
It seems like a lot of steps to get to this point, but if you don’t conduct all of the above tests in the correct order, you could be misdiagnosing the problem.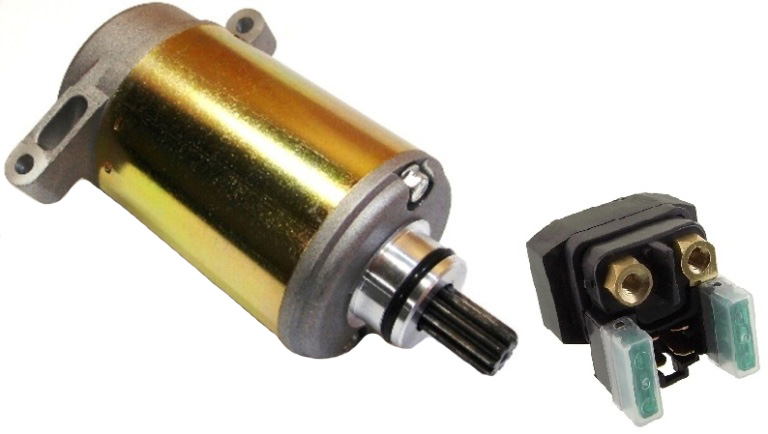 What may appear to be a bad solenoid, may really be something as simple as the kill switch being turned off or the bike being in gear (Don’t ask me how I know. Ok, ask). We'll be back in the next few weeks with some more troubleshooting posts, but in the meantime, let us know what you think.
Have you ever spent a couple of hours troubleshooting your starter only to find that your bike was in gear or the kill switch was off? Tell us about it. We want to hear everything. Good experiences, bad experiences, requests, whatever you've got. Let us know in the comments below or give us a shout on Facebook.
11/22/2017 #Relay retractor # Starter
Retractor relay: starter control Electric car starter is controlled by a special device located on its body - a retractor (or traction) relay.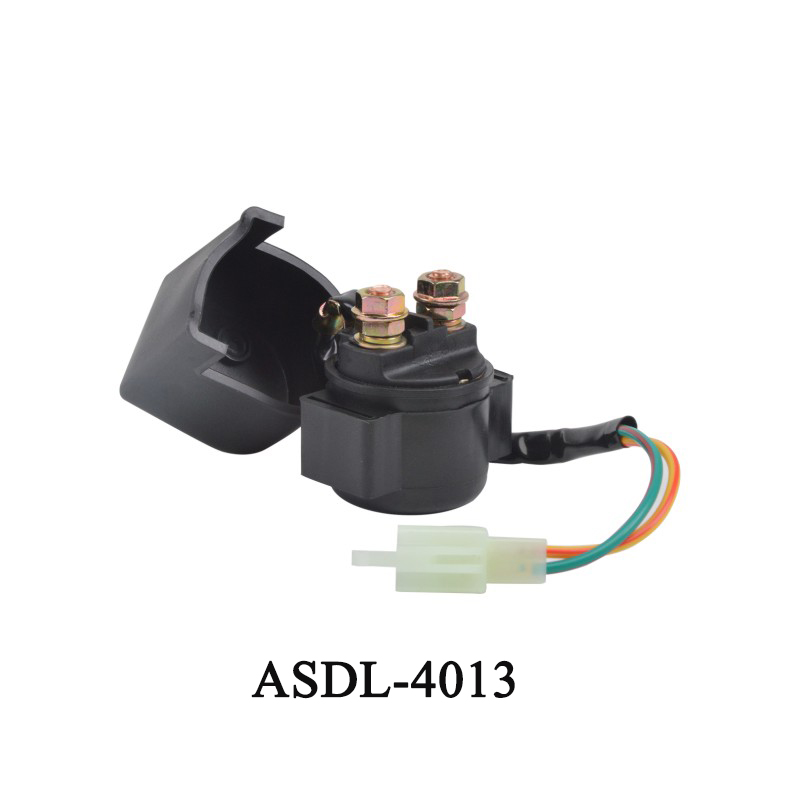 All about solenoid relays, their design, types and principle of operation, as well as the correct selection and replacement of the relay in the event of a breakdown - read in this article.
Starter solenoid relay (traction relay) - automotive electric starter assembly; a solenoid combined with a contact group that connects the starter motor to the battery and mechanically connects the starter to the flywheel crown when starting the engine.
The solenoid relay is included in the mechanical and electrical parts of the starter, controlling their joint work. This node has several functions:
The traction relay, although it works as part of the starter, is a separate unit that plays an important role in the operation of the engine starting system.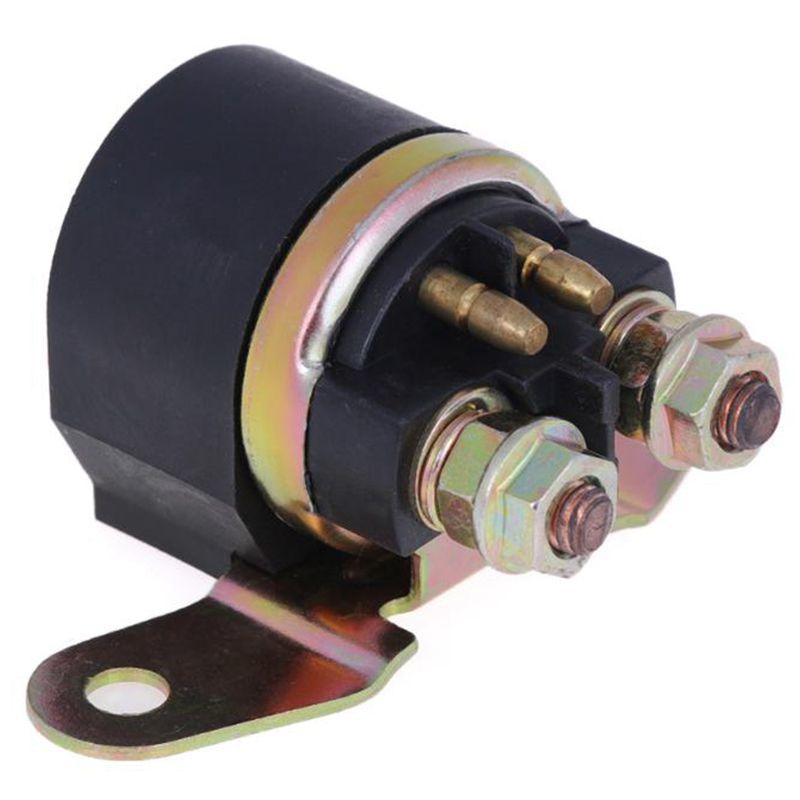 Any malfunction of this unit will make starting the engine much more difficult or impossible, so repair or replacement must be carried out as soon as possible. But before buying a new relay, you should understand its types, features and principle of operation.
Starter solenoid assembly
Electric starters currently use identical solenoid relays in design and operation. This assembly contains two interconnected devices - a power relay and a solenoid with a movable armature that turns it on (and at the same time brings the bendix to the flywheel).
The design is based on a cylindrical solenoid with two windings - a large retractor and a retainer wound on top of it. On the back of the solenoid is a relay housing made of a durable dielectric material. On the end wall of the relay there are contact bolts - these are high-section terminals through which the starter is connected to the battery.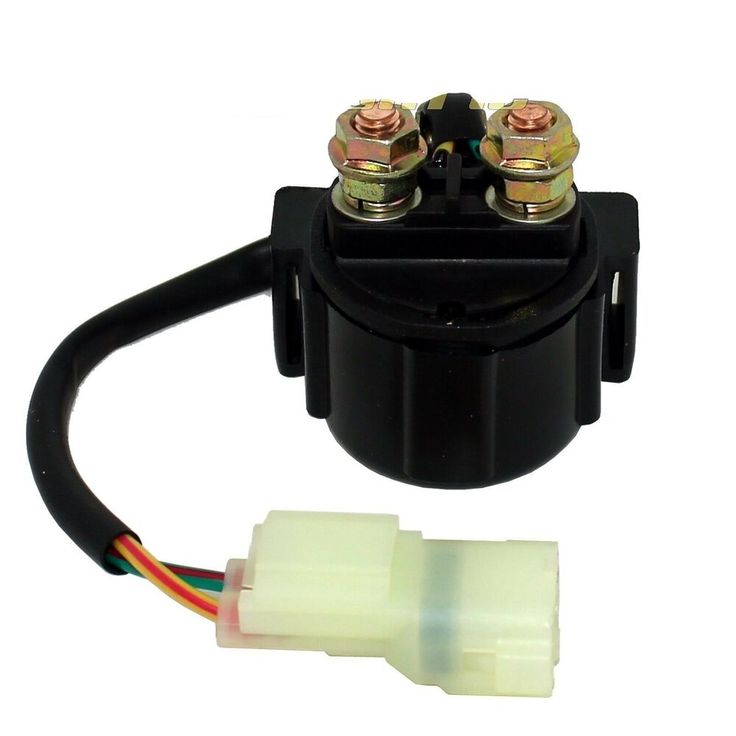 The bolts can be steel, copper or brass, the use of such contacts is due to high currents in the starter circuit when starting the engine - they reach 400-800 A or more, and simple terminals would simply melt at such a current.
Inside the solenoid is a movable rod, which on the relay side carries a contact disk - a circle of brass or other alloy. The rod is withdrawn from the contact bolts by a spring, therefore, in the non-working position, the circuit is open. Also, a massive anchor is located inside the solenoid, however, this part does not have a rigid fixation and, if necessary, can be easily removed. The armature is a metal (steel) rod of circular cross section, it is spring-loaded and protrudes from the solenoid in the non-working position. At the rear end of the armature there is a recess for resting against the relay rod. On the outer part of the anchor, a groove, hole, brackets or other devices are made for connection with the starter drive plug.
This whole structure is placed in a metal case (separable or non-separable), on the dielectric case of the relay there are terminals for connecting the assembly to the appropriate electrical circuits - the power circuit, the ignition switch circuit and, if provided, to the ignition coil circuit. The relay is rigidly mounted on the starter housing.
Traction relays, having a fundamentally identical design, are divided into two types according to their functionality (and the number of contacts on the relay side):
The first type of relay has the construction described above, while the second type relay has an additional terminal with a spring contact, which is closed by a contact disk. In the relay of the first type there are only four terminals - two power and two low-current (for connecting the retracting and holding windings), and in the relay of the second type there are already five terminals - two power, two low-current and one additional.
Connection diagram for solenoid relay with auxiliary contact and auxiliary starter relay
Solenoid relays of all types have the same principle of operation.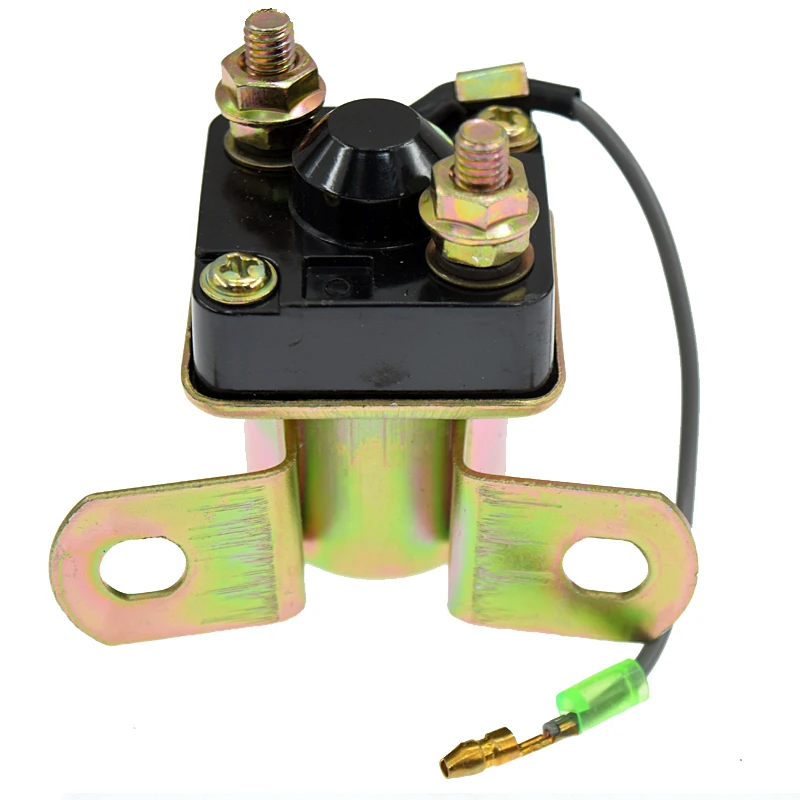 There are three processes running in parallel at this node.
When the ignition key is turned to the starter position, current from the battery is supplied to both coils of the solenoid - retracting and holding. A magnetic field arises in the solenoid, which draws in the armature - it overcomes the resistance of the spring and enters the inside of the solenoid until it stops. Moving, the armature pulls the fork, which, acting as a lever, brings the starter drive with the drive gear fixed to it to the flywheel ring gear - the starter is mechanically connected to the engine.
Also during movement, the anchor pushes the rod with its back side. The contact disk fixed on the rod rests against the contact bolts and closes the starter power supply circuit - the starter armature starts to rotate, the torque from it through the bendix goes to the flywheel and crankshaft, the engine starts. If the relay has an auxiliary contact, then when it is closed, current is supplied to the ignition coil or any auxiliary equipment necessary to start the engine.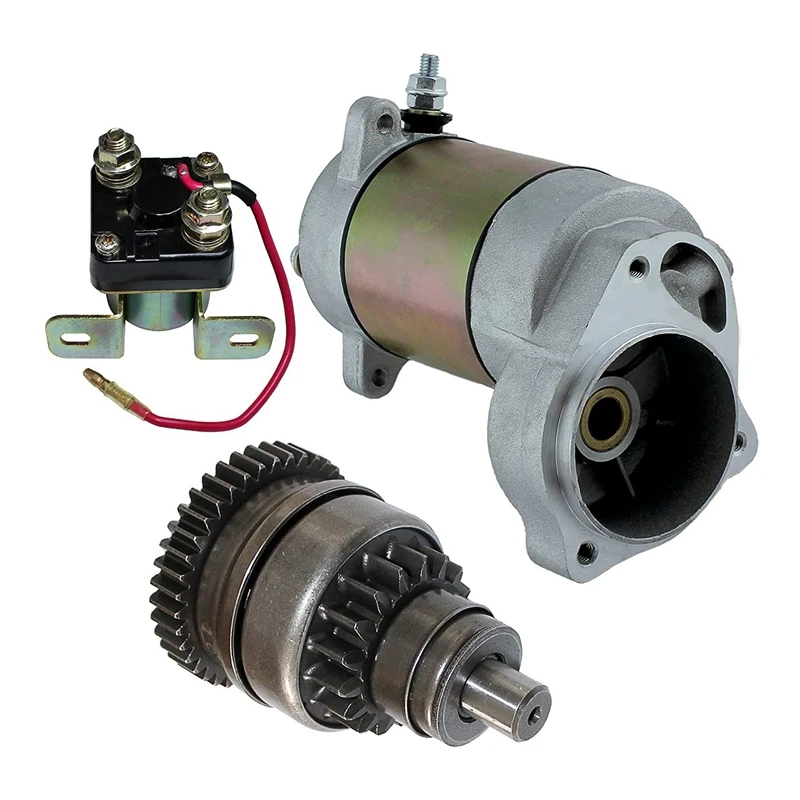
When the contact bolts are closed, the retracting winding is short-circuited (its terminals are closed to each other), so it stops working. However, the holding winding is still connected to the battery, and the magnetic field it creates is sufficient to hold the armature securely inside the solenoid.
After a successful start of the engine, the ignition key returns to its original position, as a result of which the holding winding circuit breaks - in this magnetic field around the solenoid disappears and the armature is pushed out of the solenoid by the action of the spring, and the rod is retracted from the contact bolts. The starter drive is retracted from the flywheel crown, and the starter is disengaged. The traction relay and the entire starter are transferred to the position of readiness for a new engine start.
The general arrangement of the electric starter and the location of the solenoid relay in it
The traction relay is subjected to significant electrical and mechanical stress, so there is a high probability of its failure even with careful operation.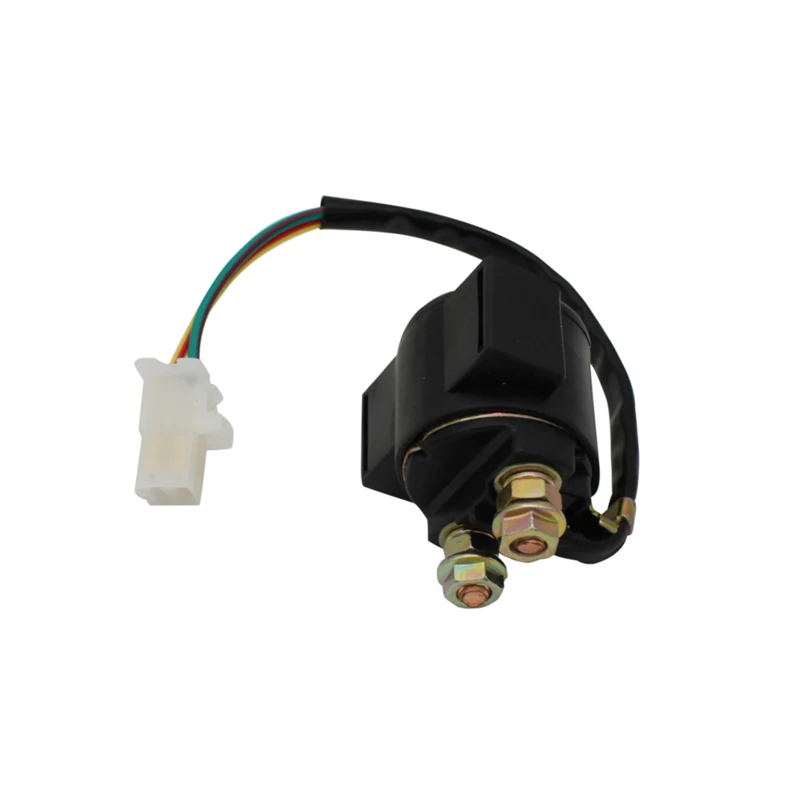 Various signs indicate a malfunction of this unit - the absence of a characteristic knock of the starter drive supply when the ignition is turned on, weak rotation of the starter with a charged battery, starter "silence" when the drive supply is running, and others. Also, malfunctions are detected when the relay rings - usually there are breaks in the windings, an increase in resistance in the power circuit due to burning and contamination of the contacts, etc. Diagnostic algorithms, usually given in the vehicle manual, help determine the malfunction. Often, it is difficult or impossible to eliminate the identified problems (for example, a break in the retracting or holding windings, breakage of the contact bolt, and some others), so the relay is easier and cheaper to completely replace.
Only those types and models of solenoid relays specified by the vehicle manufacturer should be selected for replacement. The purchase must be made by catalog numbers - this is the only way you can confidently change the unit and make the starter work in normal mode.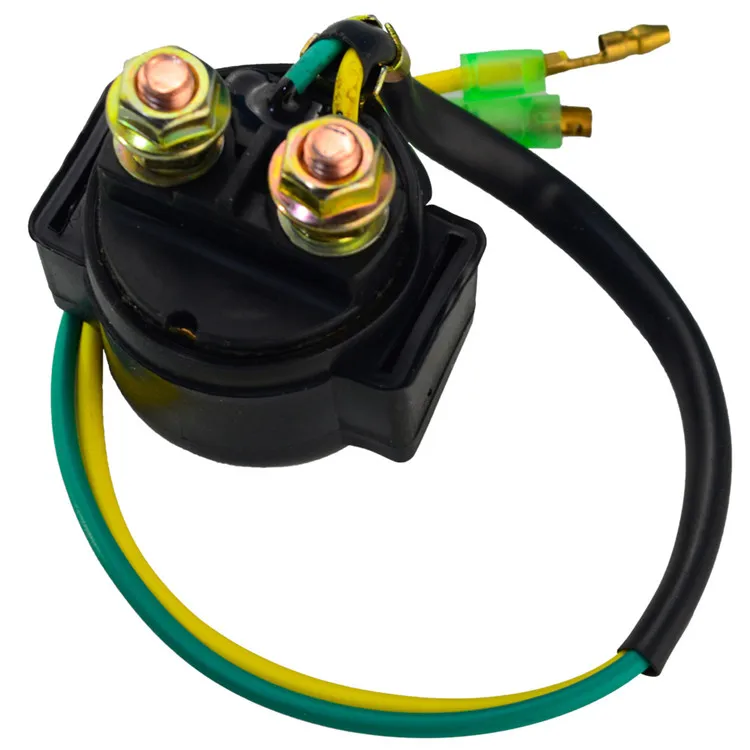 It is difficult or impossible in principle to install a relay of another type (due to unequal dimensions), and if this can be done, then the starter may not work correctly or not perform its main function at all.
To replace the relay, the electric starter must be removed from the engine and disassembled, often with a special tool. When installing a new relay, it is necessary to carefully make electrical connections - the wires are pre-stripped and twisted, when fixing them on the terminals, it is necessary to ensure reliability by preventing sparking and heating. All operations are best performed in accordance with the recommendations prescribed by the automaker in the instructions for the repair and maintenance of the vehicle.
In the future, the traction relay, like the starter itself, requires only periodic inspection and testing in accordance with the maintenance regulations. When properly selected and replaced, this assembly will operate reliably and efficiently, providing reliable engine starting.
#Compressor adapter
Compressor adapter: reliable pneumatic connections
31.08.2022 | Articles on spare parts
Even a simple pneumatic system contains several connecting parts - fittings, or adapters for the compressor. About what an adapter for a compressor is, what types it is, why it is necessary and how it works, as well as the correct selection of fittings for a particular system - read the article.
#Nissan Stabilizer Bar
Nissan Stabilizer Bar: The Basis for Japanese Roll Bars
06/22/2022 | Spare Parts Articles
The chassis of many Japanese Nissan vehicles is equipped with a split type anti-roll bar connected to the suspension parts by two separate struts (rods). All about Nissan stabilizer struts, their types and design, as well as selection and repair - read in this article.
# V-belt
V-belt: reliable drive of aggregates and equipment
06/15/2022 | Articles about spare parts
Gears based on rubber V-belts are widely used to drive engine units and in transmissions of various equipment. All about drive V-belts, their existing types, design features and characteristics, as well as the correct choice and replacement of belts - read the article.
Brake drum GAS: controllability and safety of Gorky cars
06/08/2022 | Articles about spare parts
The brake systems of most early and current models of GAZ vehicles are equipped with drum-type wheel mechanisms. All about GAZ brake drums, their existing types, design features and characteristics, as well as the selection, replacement and maintenance of these parts - read the article.
Back to the list of articles
Contents
Starter problems occur unexpectedly and for several reasons. When you find terminal corrosion, a bad connection, a bad, worn, or damaged system component, it needs to be replaced or cleaned. Your car's engine becomes more difficult to start or simply refuses to start if your starter has any performance problems.
Unfortunately, you won't see the source of the problem when the system suddenly crashes. And turning the ignition key repeatedly in the hope that the engine will eventually start when it refuses to start doesn't always help. More often than not, this creates more problems.
Fortunately, common launch system problems happen in predictable places. And you have more than one strategy at your disposal to help you test the system in your car. Whether it's a lack of power, a bad electrical connection, or a bad starter component, use these five troubleshooting tips to get your engine started again.
Start with one of the most common sources of starting problems.
You should know if you have enough current to operate your starter by measuring the voltage in your battery with a voltmeter.
If reading 12.4 volts or less on a three to four year old battery, it's a good idea to test it with a hydrometer. The oreometer is a simple tool that allows you to know the state of charge and the condition of your battery. Thus, you will know if one or more cells (jars) are out of order.
Possible causes of a non-working starter:
Corrosion around battery terminals prevents electrical flow. This is a common problem in the battery or starter system and does not receive much attention. If you notice a layer of corrosion around one or both battery terminals, clean them with a solution of baking soda and warm water.
 The electrolyte must reach the top of the filler rings. If necessary, add distilled water to bring the electrolyte to the correct level.
Check the connections at the starter solenoid (switch) (small cylinder on top of the starter) or starter relay. Most Ford vehicles use a remote relay instead of a solenoid. The positive (red) battery cable is connected directly to the electromagnetic relay.
Can't find the relay? Refer to the vehicle repair manual for your specific vehicle make and model.
If solenoid or relay fails, vehicle will not start:
 This will prevent accidental starting of the engine when checking the electromagnetic relay.
Depending on your vehicle model, you may need to lift the front of the vehicle or remove the intake manifold or some other component. If necessary, refer to the vehicle repair manual for the specific model.
If you need to raise the vehicle, jack it up securely, apply the parking brake, and block the wheels to prevent the vehicle from rolling.
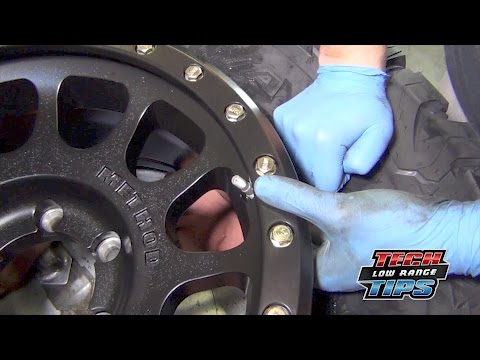
 Check the condition of the gear teeth. Worn or damaged gear teeth will also prevent you from starting your engine.
Be sure to watch the following video to get a visual idea of the trouble spots you want to address.
If you have removed the starter for inspection, this is also a good chance to check the flywheel. The flywheel is the large, heavy wheel between the engine and transmission. This is the wheel that engages the starter gear to start the engine.
 This pulley turns the drive or serpentine belt to run the alternator, steering pump, and other components. Depending on your vehicle model, you may need to remove the wheel to gain access to the pulley center bolt.
If you suspect the starter motor, take it to an auto parts store or workshop for a bench test. Many auto parts stores and service stations will test your starter motor for a small fee. It may have worn brushes, a shaft, or a burnt field winding that can cause unusual noises, excessive current draw, slow rotation, or no rotation at all.
If previous checks haven't shown anything wrong with the starting system, you still have other easy troubleshooting steps to further test the starter.
When you encounter problems with your car's starter (it's still a fairly rare problem that the starter turns constantly), remember that the lack of proper battery maintenance, faulty electrical connections and components will not allow your starting system to work properly.