While carburetors are no longer present in modern vehicles, ATVs, smaller motorcycles and certain equipment like lawn mowers still use them.
The carburetor in your ATV mixes air and fuel in the right proportions, so that the engine always has the right amount of power. For instance, when you press the throttle to speed up, the carburetor lets in more air and fuel, allowing the engine to produce more power.
Keeping your carburetor in good condition is essential for keeping your ATV running properly. A bad carburetor can reduce engine performance, prevent the engine from starting, and result on black smoke from the exhaust or unusual engine noises.
Cleaning the carburetor can usually get it working properly again. Once you open it up for cleaning, it’s also an opportunity to replace any worn out parts such as gaskets and O-rings.
In this quick guide, we explain how to remove and clean the carburetor on your ATV. For a step by step video guide, see the video below.
What You'll Learn Today
https://youtu.be/dvcKuNAtPDoVideo can’t be loaded because JavaScript is disabled: How to Clean an ATV Carburetor (https://youtu.be/dvcKuNAtPDo)
Gather these tools before you get started.
Don’t forget to flip through your ATV’s service manual. Carburetors have slightly different designs and placement of components, and you need to understand your ATV’s carburettor. The service manual will be especially helpful when disassembling and assembling the carburetor.
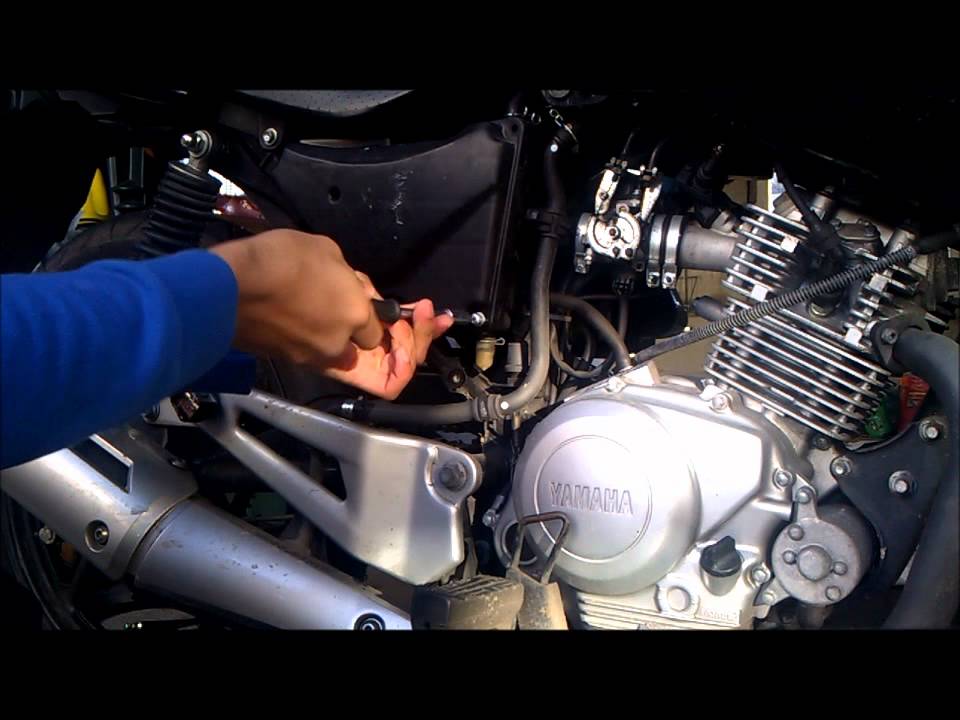
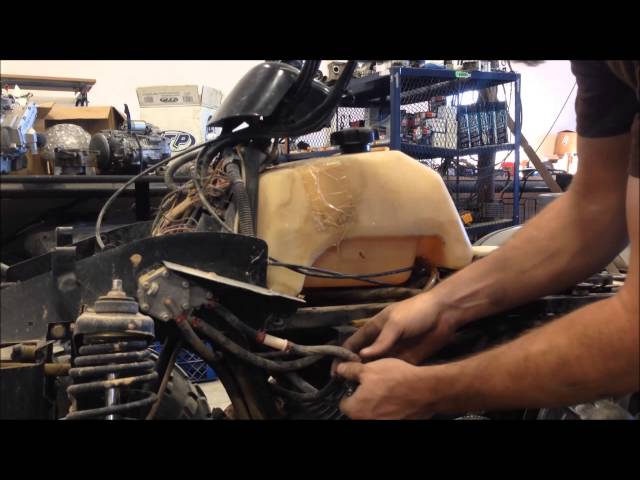
The next step is locating the carburetor and removing it from the ATV for disassembly and cleaning.
Your service manual should indicate where the carburetor is located. In most ATVs, you have to lift up the seat and remove the air box to access the carburetor.
Before you go any further, you need to shut down fuel supply to the carburetor. Follow the fuel line from the carb until you locate the fuel valve shutoff. Turn it to the off position (check manual, but in most ATVs you turn it to the side).
Now you can remove the carburetor. Loosen the hose clamp holding the carb in place with a screwdriver then wiggle and pull it out.
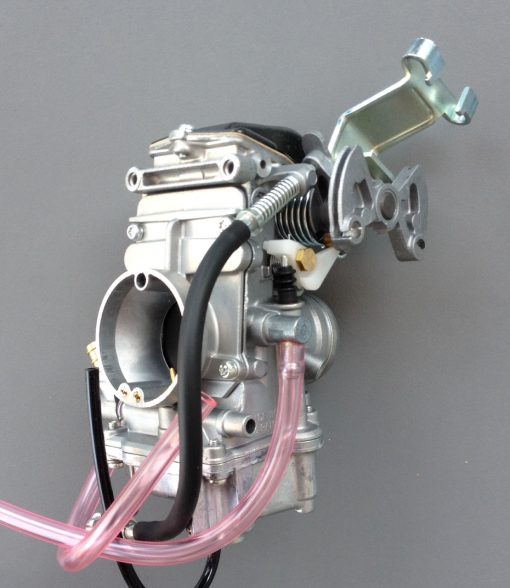
The carburetor is still attached to the ATV via the throttle cable. To detach it, unscrew the top cap. This will remove the throttle cable and slide. Now the carb is completely free and you can move it to a proper work surface.
Look for a surface with lots of light and where you can safely place small parts without loosing them.
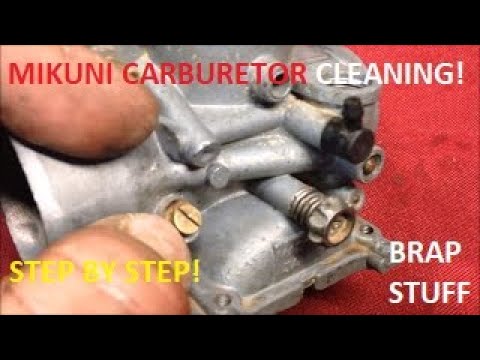
The next step is taking the carburetor apart and cleaning it. I prefer cleaning each component as I take it out. That way, I don’t miss any of them and when I get to the last one, I’m ready to put everything back together.
Before you open it up, take the carb cleaner and spray the outside. Then use a toothbrush to brush away any dirt and grime. This ensures that no dirt from the outside gets into the internal components when you open the carburetor.
With that done, you are ready to take it apart. As you remove various parts, arrange them in the order you’ve removed them. This makes it easier to reassemble the carb.
 To do this, turn it right to tighten it while counting the number of turns you make. Then you can remove it. When returning this screw, turn it fully closed then turn it left the number of times you turned it right.
 And that’s it. Put everything back together the way it was and mount the carb back onto the ATV. If any O-rings or parts look worn out or damaged, replace them with new ones.
Unless you only want to wipe the outside, which isn’t much help for your carb or ATV, you need to remove the carburettor and disassemble it to clean it properly.
Yes, you can. Look for WD-40 Specialist Carb/Throttle Body & Parts Cleaner.
That’s all! For more ATV DiY guides, check this article about restoring faded plastic on your vehicle.
Over time, car carburetors can collect a lot of dust, dirt, debris, grime, and grease. This can cause blockages or clogs that prevent the needed combo of fuel and air from reaching the engine, which, in turn, halts the car.
Less severe symptoms are sluggish performance and acceleration, reduced mileage, as well as overheating. If you drive with diesel, you may also encounter black smoke from the exhaust pipe.
All of these are situations that you want to avoid as a car owner, and to do that, it is necessary to know how to clean a carburetor without removing it. Even though seeking professional service is an option, it is not necessarily the most cost-effective and time-saving solution.
So, it is best if you can learn to clean the carburetor without removing it on your own at home. Understanding this, we have put together an article with all the necessary materials and steps that you have to be aware of.
Briefly, the procedure to clean carb without removing it is as follows:
Keep reading for the details!
Table of Contents
 Then, wait for it to settle and work its magic
Before you begin to clean a car carburetor without removing it, you need to gather the following materials:
Although most of the materials on this list are not tricky to choose, you must be extra attentive when purchasing the carburetor cleaner.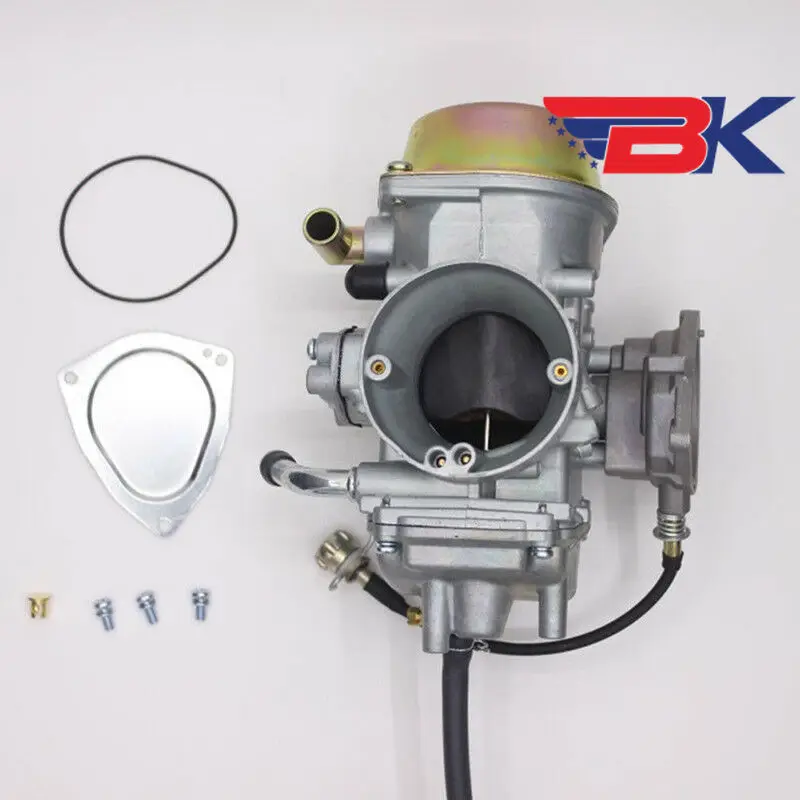 This is sometimes also referred to as a carburetor and choke cleaner. It is best to weigh in many factors before you decide to buy a particular product, including but not limited to: formula, compatibility, ease of use, brand, and price. Your product of choice should excellently converge all these criteria.
Reliable ones that you can consider if you are not yet sure where to start: Gumout 800002231 Carb and Choke Cleaner, CRC Carb and Choke Cleaner, Johnsen’s 4641NC Non-VOC Compliant Carburetor Cleaner Spray, and B-12 CHEMTOOL Carburetor/Choke Cleaner.
Once you have everything and are good to go, dive straight into the next section, listing and elaborating the necessary steps.
The Best Way to Clean a Carburetor (8 Simple Steps)Step 1: Put on protective gear, switch off the engine, and remove the air filter’s housing along with any hoses and linkages and the bottom bowlFirst things first, put on a pair of safety gloves and goggles.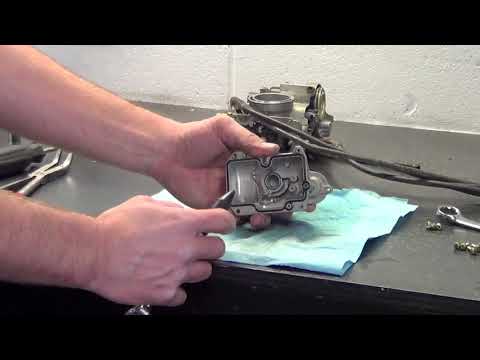 Wear a face mask, then switch off the engine. Check that the spark plug is safely disconnected. Next, locate the air filter and its housing. Remove it to gain access into the carburetor.
You may have to remove all the surrounding hoses and linkages as well. Use hand tools if you need to loosen any bolts and nuts. There is a bowl at the bottom of the carburetor; take it off too.
Top Tip: At this point, it is very important to ensure that the petcock is closed. Otherwise, gas will leak.
Lay out a few napkins or paper towels around the base of the carburetor to collect any gas drips. Wipe any excess. You can move onto the next step after getting a clear passageway to the dirty car carburetor.
Step 2: Vacuum away any loose dirt, dust, debris, grime, and great on the surface with a handheld and cordless vacuumUse a small, handheld and cordless vacuum to get rid of any surface-level filth. Set the vacuum to a low or moderate setting and run it across the compartment carefully.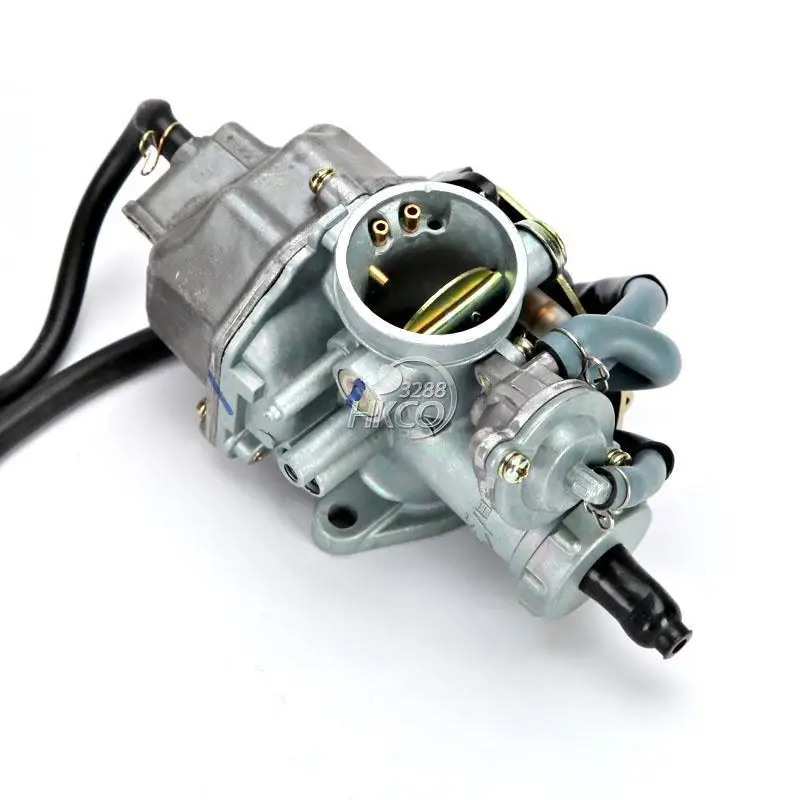 Take your time and do a thorough job. The better you complete this step, the less work you have later.
Replace the layer of napkins with a layer of slightly thicker rags or cloths. This will catch any runoffs and prevent them from hurting surfaces, especially ones coated with paint.
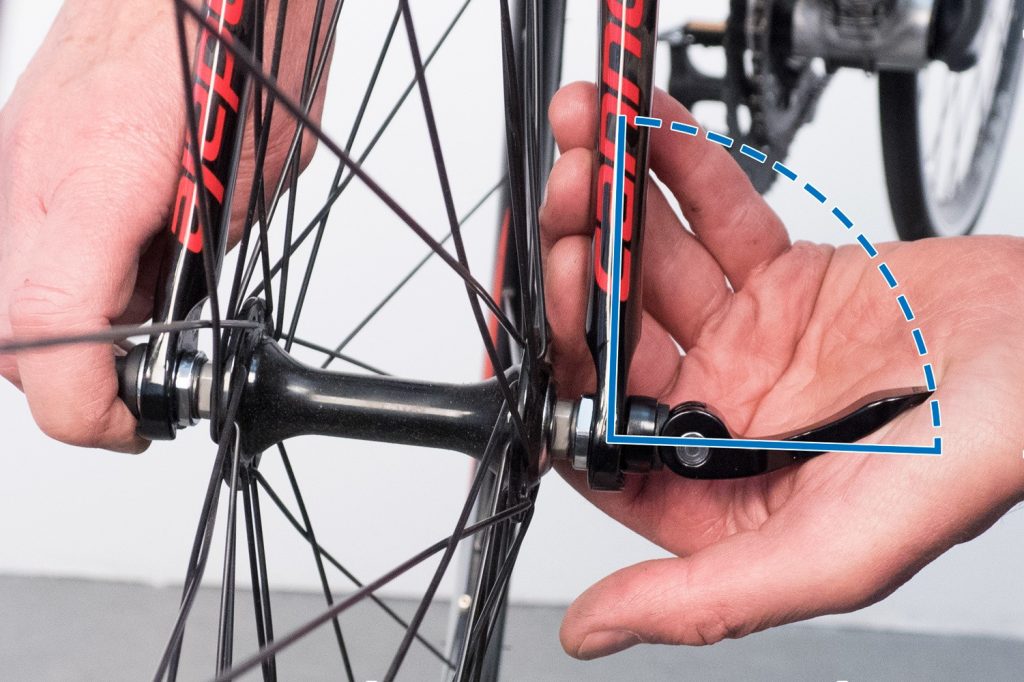
Step 4: Apply the carburetor and choke cleaner in thin, even coats. Then, wait for it to settle and work its magicThen, prepare your carburetor and choke cleaner. Grip it properly and hold it at about half a palm’s length from the outershield to clean the outboard carburetor without removing it. Give it a good shake, and position your finger on the nozzle, ready to press down to spritz.
Make a thin and even coat; do not miss the secondary moving points and connections, particularly the linkage of the throttle area. Now, wait for the cleaning solution to work its magic.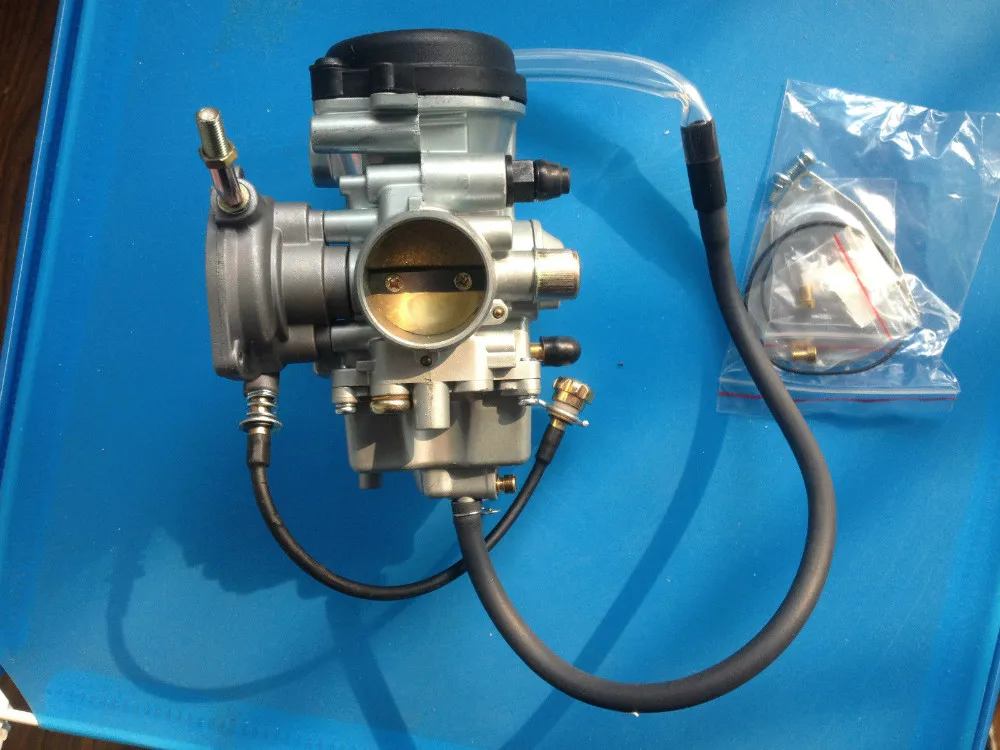 Be patient! It will take at least a few minutes.
Use a fresh microfiber towel to wipe the filth away along with the cleaning solution. If there are solid buildups or sludges, use a stiff-bristle brush to work it out. Alternatively, you can use a wire brush. Apply more of the carburetor cleaner as needed.
Note: It is completely normal to repeat steps three and four several times. Continue to do so until the carburetor is clearly clean. Be attentive and check all of the openings closely.
Step 6: Wipe the carburetor down with a fresh, dry towel and double-check that it is dried completelyNow, give the carburetor another wipe-down with another dry towel. Make sure that there is no excess moisture left. Leave it for an hour or two to dry completely. To verify, the criterion is that it is not damp-to-touch.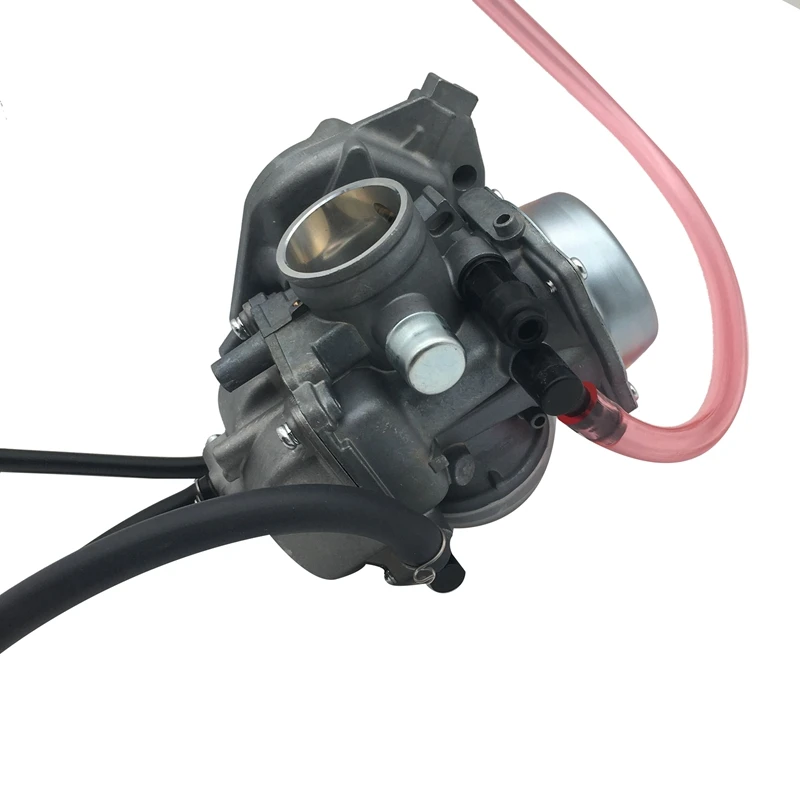
Remove the rags and cloths you have laid out at the base of the carburetor, as well as any other hand tools you were using. Then, start the engine to test its performance. If the results are better compared to before you started to clean, you are good to go!
Otherwise, you can repeat the procedure. In case your engine is still not as you wanted, consider cleaning the carburetor by actually removing it. It is quite a tedious task, especially when you have to rebuild it in the end, but unfortunately, it may be your only solution.
Check out this site to learn how to clean a car carburetor without removing it.
Step 8: Return the air filter housing, bottom bowl, as well as hoses and linkages to their original setupTo complete, put the air filter housing back in and return everything that you have disconnected temporarily on the first step.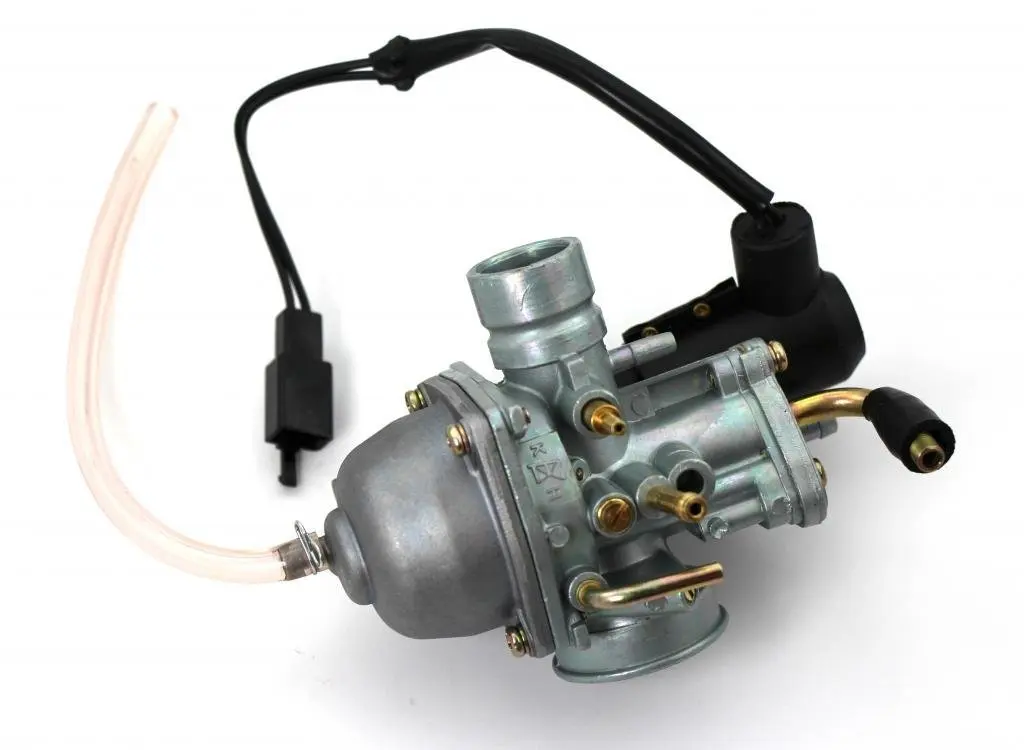
Bravo! You now know everything there is to know to clean a carburetor without taking it apart. Remember, it is important to clean your carburetor once in a while. You do not have to wait until it is showing symptoms to actually go ahead and clean it. It is always better to be proactive when it comes to car care and maintenance!
ConclusionLearning how to clean a carburetor without removing it is difficult but not impossible as long as you prepare the appropriate materials and take the right steps.
Now that you have read through everything you need to know about cleaning carburetors, just apply accordingly and say goodbye to costly professional services!
Afterward, please do not forget to return and share your experience with us as well as other readers in the comments.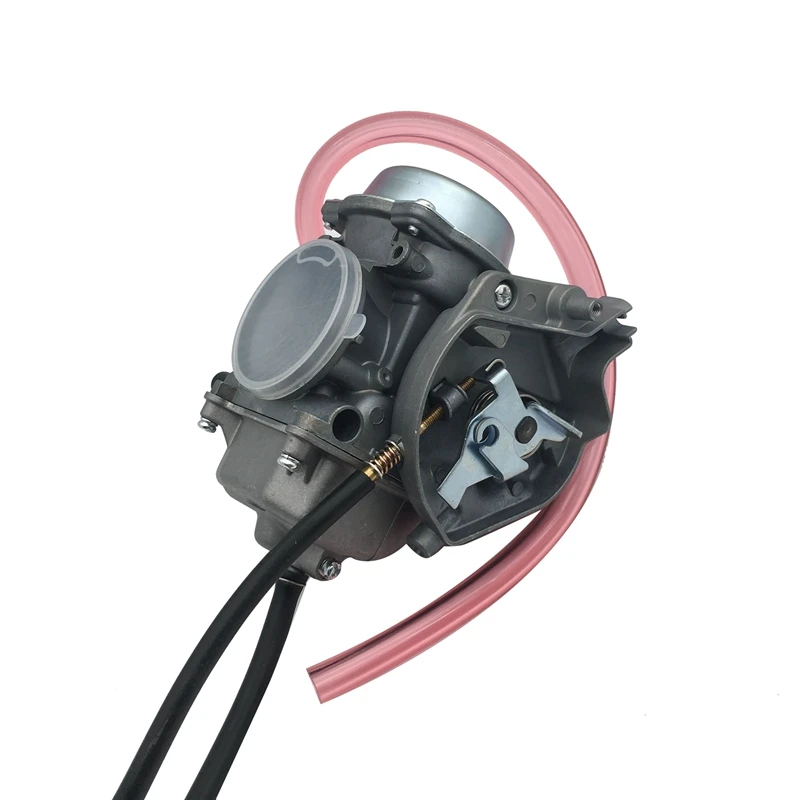 This is especially important if you have gotten insights that can further our article’s content. You are welcome to share the article with anyone you think will benefit from or appreciate the content as well!
By Milena Anderson Reading 3 min. Views 14
Short Answer
How to clean the carburetor on an ATV without removing it?
If the carburettor can be accessed from above, use a can of carburettor cleaner and a stiff brush. If the carburetor is not accessible from above, remove the air filter and blow out the carburetor with a compressor or air hose.
How long does it take to clean the carburetor on an ATV?
Cleaning the ATV carburetor can take anywhere from a few minutes to an hour or more. Features vary depending on the type of carburetor and its condition. However, cleaning typically involves removing all fuel and air from the carburetor and then cleaning it with soap and water.
What do you soak ATV carburetors in?
Carburetor cleaner, petrol or diesel.
What is the easiest way to clean a carburetor?
Carburetor can be cleaned with carburetor cleaner.
What are the symptoms of a dirty carburetor?
A dirty carburetor does not save fuel well, makes it difficult to start the engine, and can produce an unpleasant odor.
How do I clean a thickened carburetor?
There are several ways to clean a thickened carburetor. One is to use gasoline and a toothbrush to clean the inside of the carburetor. Another way is to soak the carburetor in a solution of water and vinegar for several hours.
Will sea foam clean the carburetor?
Seafoam does not clean up carbs.
Can wd40 be used to clean a carburetor?
WD40 is not a carburetor cleaner and will not work well with carburetors. Carburetor cleaners are specially designed for cleaning carburetors and are available at most auto parts stores.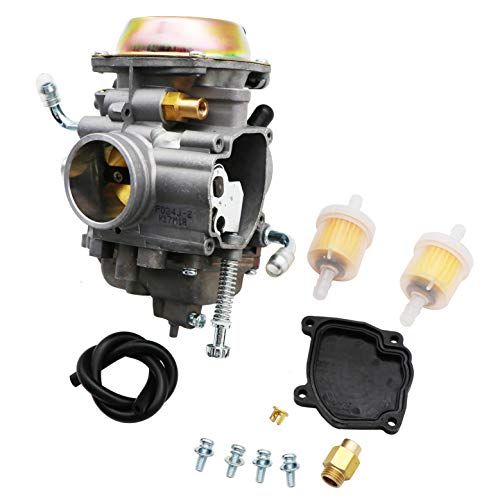
How to clean the carburetor without carburetor cleaner?
There are several ways to clean the carburetor without carburetor cleaner. One way is to use a piston. Place the carburetor in the sink and fill with water. Place the piston on top of the carburetor and push and pull the piston until the carburetor is clean. Another way is to use a can of compressed air. Blow out the carburetor and clean it with a brush.
How do I clean a clogged carburetor?
There are several ways to clear a clogged carburetor. One of them is to use a piston. Place the piston on the carburetor and push and pull the carburetor until the obstruction is cleared. Another way is to use a vacuum cleaner with a crevice tool. Make sure the crevice tool is wide enough to fit around the circumference of the carburetor. Set the vacuum cleaner to maximum power and turn it on.
How to clean a thickened carburetor in a small engine?
The carburetors can be cleaned with a carburetor cleaner such as kerosene or petrol. Use a rag to apply the cleaner to the carburetor and then use another rag to clean the carburetor. Be sure to rinse the carburetor thoroughly with water afterwards.
Can carburetor cleaner be sprayed into the air intake?
No, the carburetor cleaner is not a safe air intake cleaner. This could result in engine damage and serious injury.
Can carburetor cleaner be sprayed into the spark plug hole?
There is no guarantee that the carburetor cleaner will do the job of cleaning the spark plug hole, as it may not be effective against the dirt and debris that may accumulate in this area. Also, using carburetor cleaner in this way can damage the engine or other components.
How often should carburetors be cleaned?
Carburetors should be cleaned regularly, usually every 3-6 months.
What can be added to the fuel to clean the carburetor?
There is no one-size-fits-all answer to this question, as the best way to clean a carburetor depends on the specific carburetor and fuel being used. However, some general tips for cleaning carburetors include using a fuel additive designed specifically for carburetors, using a carburetor cleaner, or boiling water and pouring it into the carburetor.
In order for the ATV to work like a clock, the rider needs to regularly carry out a complete maintenance of the equipment. And a key element of maintenance is ATV carburetor adjustment. Over time, the system starts to work incorrectly, which increases fuel consumption, worsens dynamics and other problems appear. So how do you adjust an ATV carburetor?
The operation and life of the engine directly depends on the quality of the fuel mixture. The carburetor is responsible for the preparation of the composition, but after prolonged use of the equipment, the settings “go astray”. This results in:
Many riders who decide to buy an inexpensive ATV simply do not spare the technique and ignore this procedure. But even if you plan to change your device in 1.5-2 years, adjustment is needed. The reason for this is increased fuel consumption. A quad with an untuned carburetor "eats" 30-40% more gasoline, and these are tangible costs.
So how do you adjust the carburetor on a Chinese ATV? For this you need:
However, it is important to remember that all adjustments are made only with a "clean" carburettor. This means that the rider needs to remove all the dirt from the node and flush the system to remove condensation and sediment from it.
Note: Just before adjusting, the engine must be warmed up to operating temperature.
To set the carburetor idle speed, the float chamber must first be cleared of fuel. To do this, start the ATV, close the fuel cock and wait until the machine stalls (5-10 minutes). To speed up the process, you can take a little ride on the quadric. Of course, gasoline can be drained, but in any case you will have to warm up the device, so the first method of "removing" gasoline is more effective.
Then:
 Focus on sound. The engine should run smoothly, without strain.
 Read the manual before adjusting the carburetor on a 125cc ATV to be sure. Remember that the location of the bolts is different in different devices, so read the documentation in advance.
To evaluate the quality of the fuel composition, make a test run. After that, unscrew the candle, and evaluate its condition. If it is:
Also look for these "symptoms": damaged tip (electrode failure), oil deposits (damage to rings and caps), chips and inclusions (sign of motor failure).
To adjust the mixture you need to twist the needle cover and pull it out. To get the needle, pull out the cable. After that, move the ring in the required direction (lower - more air, but less fuel and vice versa). Then start the engine and make sure it doesn't stall.
The final step in adjusting the 125cc ATV carburetor is adjusting the gasoline level. To do this, you need: