Whether you’re going on a road trip or making a quick stop at the community center, it’s crucial that your car has a functional spare tire at all times.
It’s equally important that you’re able to get the tire down from under the vehicle when you need it. Some cars come with specialized tools to lower the spare tire and quickly make the change.
However, if the tool is unavailable for some reason, you can still bring down the tire and be back on the road in no time. Let’s take a look at how to get a spare tire down without the tool.
Removing a spare tire without the factory tool is easy when you follow these steps:
Removing a spare tire without a tool might appear daunting at first. However, with the right equipment and process, it’s not too difficult a task.
There are two methods to lowering a spare tire on a Ford truck. Each method uses different tools. As such, your choice will depend on the equipment you have to hand.
This method involves pulling out the key from the spare tire drop assembly and using stock spare tire tools to lower the tire.
To make up for the lack of the factory key, you will need some standard tools like joint pliers, small pieces of wood and an optional helping hand.
After you’ve collected the tools, follow the steps below to remove the spare tire.
As you already know, the tire hangs from the truck’s underside toward the vehicle’s rear. As such, you will need to go under to gain access.
Before you get under the truck, remember that safety comes first. Therefore, ensure that you park the vehicle properly, on a surface that’s as flat as possible, with all brakes engaged.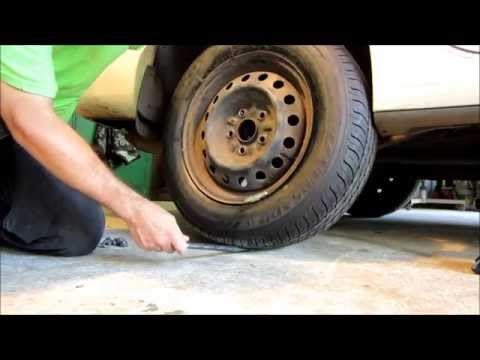 These precautions are to prevent the vehicle from moving while you work under it.
Locate the guide tube under the vehicle. This is a long, black, plastic pipe near the tire. Twist the tube back and forth while pulling it in the direction of the vehicle’s rear to reveal the drop mechanism for the spare tire.
Still under the truck, move to the passenger side and pull down the tire on this side, putting the wood in the gap between the top of the tire and the truck bed frame.
At this point, you may need that optional helping hand to put in the wood while you hold the tire down.
The reason for putting in the wood is to give you easy access to the drop mechanism without having to move the tire away from the truck bed continually.
Put your hand through the space created by the wood and feel for the key to the spare tire drop mechanism.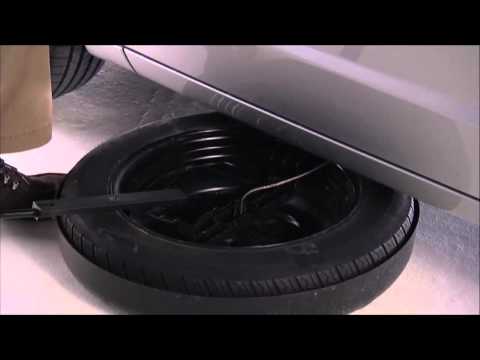 The key roughly resembles a wheel lug nut, and when you find it, pull it out using the jack or working pliers.
Sometimes, just pulling the key may not be enough, and you may need to wriggle the pliers as you pull.
With the key out, the hole left behind is almost identical to the jack crank. Thus you can use the stock tire tools to lower and remove the spare tire. Insert the jack crank into the hole and turn counterclockwise to lower the tire.
The second method differs considerably from the first. Accordingly, you need a different set of tools, including:
With the tools above, you can bring down the spare tire by following the steps below.
Attach the 14mm socket to the extender. You don’t need to use a high-quality socket, as any low-end one will do.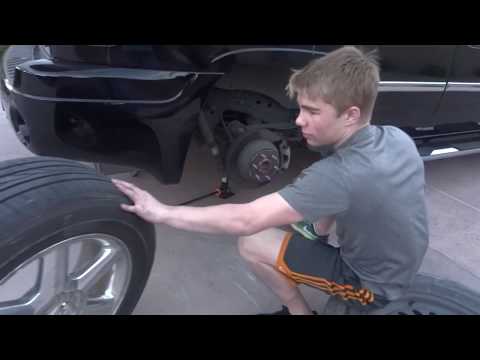 It’s also best to use an extender long enough to reach from the bumper to the spare tire. Aim for an extender that’s around 60–70cm long.
Insert the socket into the hole located on the left (or right, in some trucks) of the license plate. The hole leads directly to the key.
Use a hammer to strike the extender when you feel the socket touching the key. Hitting the extender pushes the socket over the key, providing a better grip.
Four to five blows from the hammer should be enough. Additionally, do not apply too much force to the hammer to prevent damage to the drop assembly. You don’t necessarily have to use a hammer; any object large and tough enough can serve.
With the socket firmly in place, use a wrench to turn the extender counterclockwise. The drop assembly key is similar to the one used on wheel lug nuts. Thus, it will turn as the socket turns.
It may be hard to turn the wrench at first, but it becomes easier as you continue turning, and the tire gets closer to the ground.
By the time the tire hits the ground, the key will be loose and you can remove it. Withdraw the extender from the hole, and use a flathead screwdriver to pry the nut out of the socket.
While the tire is now on the ground, you can’t use it until you detach it from the hoist. To disconnect the tire, reach into the large opening in the middle of the wheel. Next, locate the metal flange connected to the cable and turn it from a horizontal to a vertical position, pulling it out of the rim vertically.
Finally, the hole left behind by the key can fit a jack crank. Put the crank through the opening near the license plate till it gets to the hole vacated by the key. Turn the crank clockwise to raise the hoist back up
While Chevys store spare tires under the truck bed like other trucks, the removal process differs.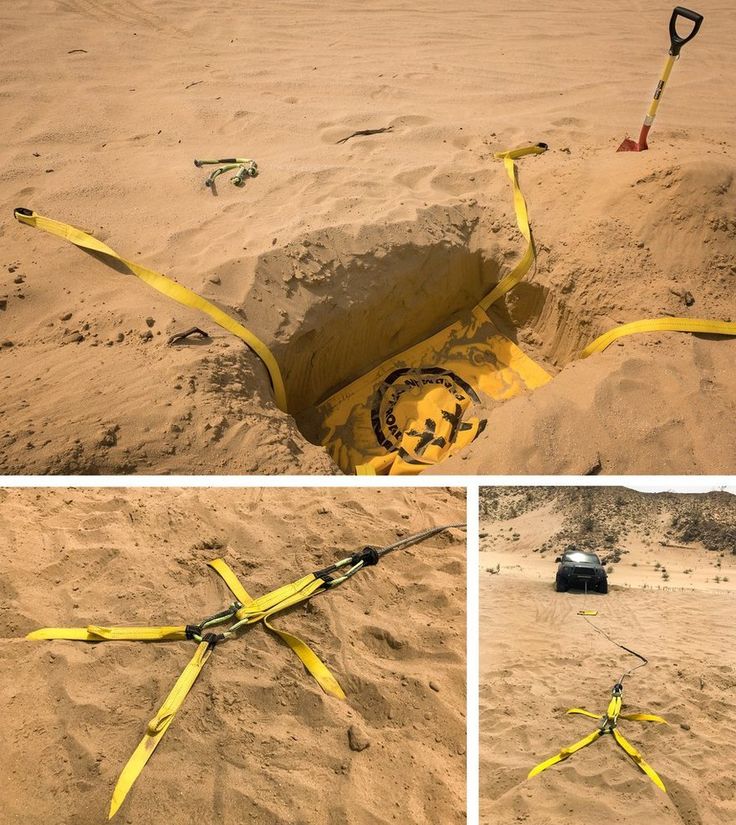 So, if you’re wondering how to lower spare tire on Silverado without tool, follow the steps below.
You will need a couple of tools, including an ignition key and a jack kit to make a chevy spare tire removal tool.
Like other trucks, the access hole is on the rear license plate’s right side and covered with a rectangular shaped plastic.
Newer models may have a lock over the hole as a security measure. In such cases, use the ignition key to remove the lock assembly covering the hole.
Open the jack kit and select the rod with the broader end and flanges on all sides. This rod is the “female” rod and the one you’ll insert into the now open keyhole.
Get another rod from the tool kit, and attach it to the end of the female rod to make it long enough to reach the spare tire from the bumper. Ensure that the press locks enter properly to prevent the rods from disconnecting while you’re turning it.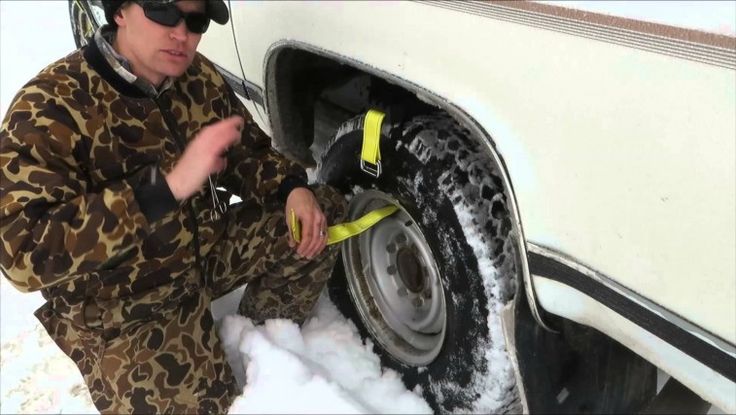
Insert the composite rod into the spare tire hole. Press and turn the rod simultaneously until the end locks into the cable crank.
Put a wrench on the other end of the extension rod and turn counterclockwise. The tire will begin to drop as you turn. Continue turning until the tire touches the ground when you can remove the cable flange from the rim.
Furthermore, you can use the procedure above on different models of Chevrolet trucks. As such, you can follow the steps if you’re wondering how to remove spare tire from Chevy suburban.
It’s always an unpleasant experience when you get a flat tire. It’s even worse when you can’t get the spare down for lack of the specialized factory tool.
However, there are other ways to bring down the spare tire even without the tool. These methods are straightforward and use common tools like extenders, flathead screwdrivers, sockets, ignition keys, chunks of wood, pliers and hammers.
Thus, with or without a factory tool, you can get the spare tire out in minutes and be back on the road quickly.
When you need your spare tire, the last thing you want is to discover that you can’t access it because you don’t know where the key is to release your spare tire hoist. This can be of particular concern if you have a used Ford F-150 whose original owner lost the key or failed to hand it over during the sale.
If you’re trying to take out your spare tire only to discover you lack the key you need, there’s good news. Getting around the spare tire lock is a simple process that requires just a few basic car repair tools. Follow these steps and you’ll have your spare tire free and on your truck before you know it so you can get back on the road.
1. Gather Your ToolsBefore getting started, it’s helpful to gather all the necessary tools together so they’re readily available for access while working on the car. When choosing a socket, opt for an inexpensive variety. The removal process requires the socket to contort around the lock, so choosing a cheaper socket makes it just as easy to achieve and does not damage your best 14 mm socket. To remove your spare tire, you’ll want:
When removing the spare tire, you will need to strike your tools in a manner that can cause the truck to rock. If you do not effectively secure the truck, this can lead to an accident when it rolls. If possible, park on a flat space. Engage your truck’s parking brake to decrease its ability to roll, and consider using blocks on the tires to further secure your truck, particularly if you decide to elevate the truck.
3. Secure the Socket to the LockTo locate the channel to release your spare tire, look for a small hole in the rear fender of your truck to the left of the license plate. This hole leads to a tube that will guide your tools to the locking device. Although the locks used to secure a Ford F-150 spare tire to the body of the truck are not a perfect match for a 14 mm socket, they are close enough that you can make a standard 14 mm socket work. Attach your socket to as many extenders as you need to reach the locking device.
Using a hammer, gently knock on the other end of the extended device in order to drive the socket onto the lock. Because the shape of the lock is nearly the same as a 14 mm socket, by adding the percussive force of the hammer you can force the socket to deform in order to envelop the lock. You should see and feel your extension moving in beyond the point where it initially met resistance.
Securing the socket to the lock should not require extreme force. Start with gentle taps and increase the power of your blows if needed until you feel the socket latch onto the lock.
4. Crank to Release the Spare TireNow that your socket is attached to the locking device, you can use it to release your spare tire. Attach a ratchet to your socket extension and begin cranking. If the socket has adhered to the lock, you’ll see the tire begin to lower down. Continue cranking until you have fully released the spare tire and can remove it from under the truck. As you pull out the extension, you’ll notice that the socket is no longer attached to your extension and will need to be retrieved.
Before moving on to the next step, you may choose to elevate the rear of your truck, as you’ll need to get underneath your truck. If you’re able to fit comfortably and safely under your tailgate without elevating, you can skip this step and move on to clearing the socket.
When elevating the truck, it’s particularly important to double check that your truck is firmly secured, both with a parking brake and blocks or other stabilization devices. Securing your truck before elevating ensures that it will not shake or slip off the jack while you’re underneath, which can be dangerous.
If you’re removing your spare tire, it’s likely that you intend to put it on on your truck right now. If that’s the case, make sure to loosen the lug bolts on the tire being removed prior to lifting your truck in order to make it easier to gain the leverage you need to loosen them.
6. Clear the SocketOnce underneath your truck, look to the area where you inserted the extension. You should see a plastic tube running from the bumper to the spare tire housing. This tubing serves to steer your extension into place when inserted and can be moved out of place by hand without any special tools. Once removed, look for the socket and lock on the spare tire housing. Using your flathead screwdriver, gently pry the socket loose.
7. Raise the Spare HoistWith the lock assembly removed, your vehicle’s crank should now be able to raise and lower the spare without any special tools in the future. If you’re replacing your spare, place it on the spare tire hoist before reversing your crank to raise it safely back up into the housing.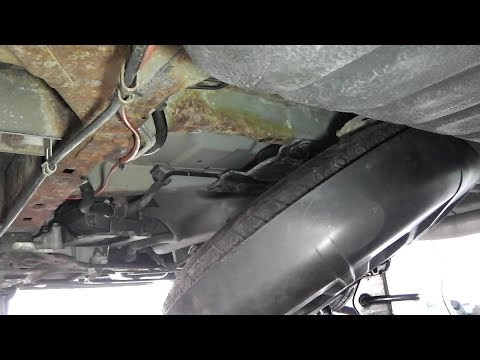 If you have not yet purchased your replacement spare tire, simply raise the assembly with no tire to allow for safe driving.
Wendle Ford is Spokane’s premiere Ford dealership, so we know how much Ford drivers love their trucks. We hope this guide has helped you get the most out of your Ford F-150. If you’re interested in getting a new or used Ford F-150, Wendle Ford is the place to go, so get in touch or come out to see us today and see what we have to offer on our lot.
Posted in Auto Maintenance, Ford Vehicles | Comments Off on How to Remove a Spare Tire From the Ford F-150 Without the Key
Usually, in order to remove a wheel on a car, a motorist simply needs to unscrew the wheel bolts. Basically, drivers have no problems with this, unless there are secret bolts on the wheels (not standard ones that cannot be unscrewed with ordinary keys). In order to remove such a lock from the wheel, you need a special puller, which is usually sold in a kit along with secret bolts. What to do if such a key is lost? Do not worry friends and do not listen to anyone that supposedly complex plumbing work is necessary for this. We, dear motorists, will show and tell you how this can be done without the use of special cutting tools.
In our example, you can see a Toyota Tundra SUV on wheels with secret bolts to protect it from theft. Let's imagine, dear friends, for a moment that we have lost a special key for unscrewing the lock on the wheel (on wheels). Usually, in this particular case, car owners turn to a tire fitting or a technical center for help, where the craftsmen offer them to cut or drill these locks so that they can remove the wheel (s) from the car without any problems.
But this is a laborious and difficult process, naturally associated with the cost of a lot of money on your part. For our part, we offer drivers a fairly simple way that will actually help them, using simple car tools, to remove the lock from the wheel in a short period of time.
It is worth noting here right away that this method we propose works in almost all cases and for most of the secret bolts presented in our time on the automotive market, and it is also suitable for all types of SUVs and cars.
As we noted above, in order to remove the secret when losing a special key, we need a simple set of tools that every car enthusiast usually has. Here are the tools needed for this job:
- Socket (in our case, a 12-Point Socket fit a Toyota car). In your case, dear motorists, select your head size according to the diameter of the lock.
- Socket wrench (handle-lever, preferably a torque wrench).
- Hammer.
- New standard wheel bolt for your wheel.
- Screwdriver.
Checked, in order to remove the lock from the wheel without a special key, on average, it will take from 3 to 5 minutes. Or about 20 - 30 minutes to remove the secret wheel bolts from all 4 wheels.
Friends don't panic if you lose your wheel bolt lock. To begin with, it’s better to think about where you could lose this secret? Is it possible that you put it somewhere and just forgot about that place? Please do not write down and do not be nervous. Look at all the places in the car where you could put the puller you need. Also, do not forget to inspect all possible places in your home. Maybe you just forgot to ask the former owner of the car that you bought from him for this key? Call him and check for yourself if he gave you the secret key.
The task is quite simple. Using a hammer, drive a regular socket onto the lock and use the socket wrench to unscrew the lock bolt. Here's the thing, namely, your secret wheel bolts, however expensive they are, are usually made of soft metal. That is, the metal of these locks is softer than conventional steel wheel fasteners. So you have the hope that they can be unscrewed with a normal car tool.
So rest assured, you can remove the locks yourself in a short time without outside help. To do this, find in your garage or tool kits an socket that fits the diameter of the secret wheel bolt in size. If you do not have such a head, then purchase it at an auto shop. You should not buy expensive socket heads. Cheaper tools are also suitable for this work.
When selecting the right socket size, it is better to use several sizes in order to ideally select the exact socket that can actually fit the secret wheel bolt.
Thanks to the ribbed surface inside the head and the corresponding soft metal of the lock, you can easily and with a hammer change the configuration of the lock to the desired profile that the end head has in the inner diameter.
Now, dear motorists, the fun begins. By gently hitting the end of the head with a hammer, you naturally just miss the soft secret. Ultimately, it specifically begins to acquire (and will acquire) the same form that the inner faces of this end head have.
Attention . You must press the socket in such a way that it fits snugly on the secret bolt (so that it sits tightly on the secret bolt).
The wrench is a special metal rod to which socket wrenches are attached. We advise all motorists to have a similar metal lever. This tool can help you with numerous difficulties on the road. Especially you can be sure of this after using it to remove the lock from the wheel yourself.
How does a torque wrench for socket heads help so much? In fact, elementary fundamental science - physics - helps us to unscrew this secret. In our case, friends, we used a 20 cm long lever. You can use the lever and shorter. But always remember that the longer the lever, the more force from our movement will flow to the end head. According to the laws of physics, the following will happen, by turning the lever, we thereby increase our strength several times and actually turn ourselves into a natural strongman.
Pay your attention to the following, when unscrewing the lock, you must do everything slowly and leisurely. In no case do not turn the lever too sharply, as you risk turning the socket around the soft lock.
Start pressing the lever slowly. If the lock still does not start to unscrew, then without relieving your pressure on the lever, wait a little more and .. You will be surprised how easily the lock starts to give in. In fact, to turn the secret wheel bolt does not require huge efforts, unlike the same standard wheel bolts, which require much more effort.
After watching the video clip and the photo, you may be surprised that on the example of the same Toyota SUV car, everything turned out well.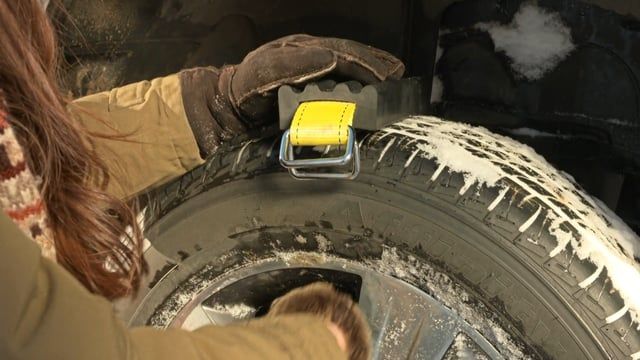 After you have removed the lock, you must replace it with a standard steel wheel bolt in its place. True friends, immediately pay attention to the following, that in certain and some cases you will not be able to tighten the bolt back due to damage to the internal thread. But this is fixable, although not so easy, and in this case, you'd better contact the experts.
But in most cases, after you remove the lock, the threads are not damaged, you can easily and independently screw the new wheel bolt into place.
Has the lock been pressed deep enough into the socket? How to be?
There are several ways to remove a stuck bolt from the socket, namely:
- Try using a large screwdriver or a chisel to knock out the lock from the socket wrench. To do this, you need to install the chisel in a vise. Next, picking up the head, try to knock out the secret from above on the chisel clamped in a vise.
- You can try to knock out the lock with a strong large screwdriver. To do this, you need to take the end head inside which the secret is stuck. Next, you need to install a screwdriver on top, also holding it in your hand. Then, using a hammer, you need to try to knock the secret out of the head. In our example, this method did not help the author of the video clip.
- You can see friends at the very end of this video clip the most reliable method (method) for pulling the lock out of the socket head. Its author himself showed us all a simple and reliable way to remove a secret bolt from the head. To do this, it is necessary to screw the lock, which is tightly pressed into the end head, back into the threaded connection of the wheel.
Attention! The lock must not be re-tightened. You need to fix it with exactly this level of tightening, which will further allow you to unscrew this lock by hand without any problems.
After screwing the lock slightly back on the thread, try to pull out the socket.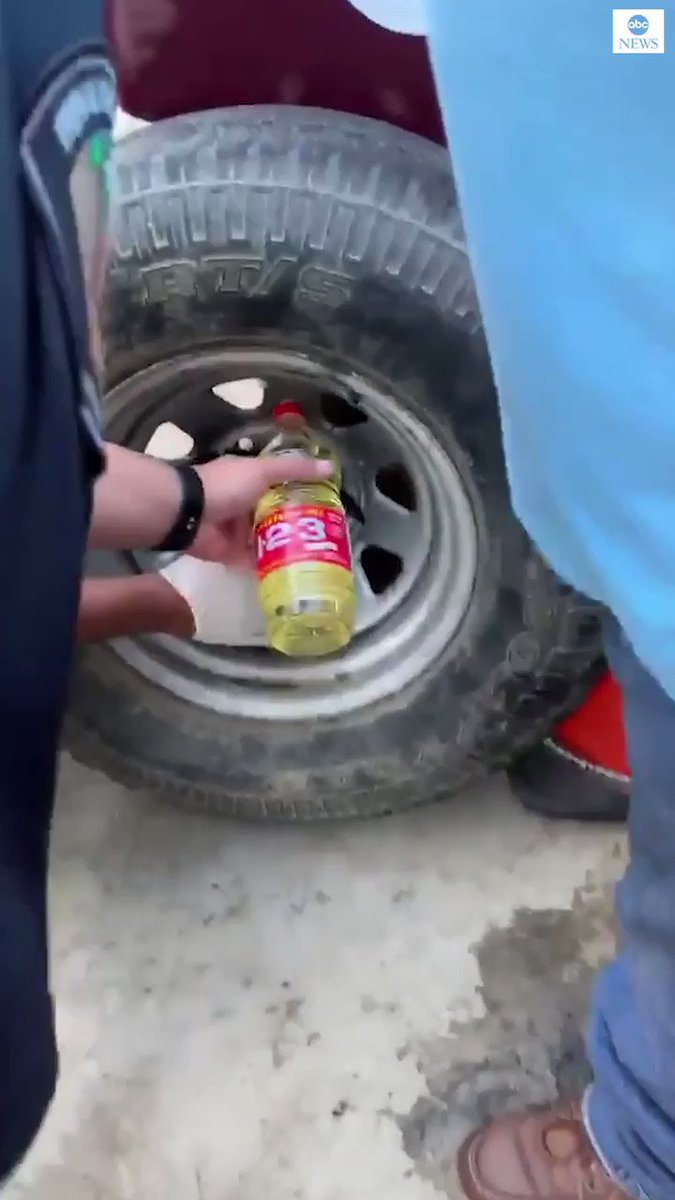 Since the lock will currently be held on the threaded connection, then most likely you will remove the head from the lock without any problems. And then, just as effortlessly, unscrew the lock from the wheel.
Also, as a rule, their serial number, or letter code, is applied to the secret locknuts or bolts themselves. Having established the company manufacturer that produces secret wheel bolts, you can try to contact them to order a new key for your locks installed on the car. But please remember that this will cost you much more in terms of money.
Do not use a wrench to unscrew the lock
We advise all motorists to use a socket wrench or a torque wrench instead of a wrench to control the tightening torque. With the help of a torque wrench, you can see firsthand how much force you use when unscrewing the lock. This will give you the opportunity to control your effort and not damage the lock.
This is much better than a ratchet wrench, which, firstly, will not be able to increase your applied force several times, and secondly, will not be able to give you control over the unscrewing force you apply.
Use any penetrating oil
We advise you friends to treat it with penetrating machine oil (for example, such as "PB Blaster") before trying to unscrew the wheel lock. Pay your attention to the following, that contrary to the widespread and prevailing opinion among motorists, in this type of wheel lock dismantling, WD-40 brand oil, unfortunately, will not work. The penetrating oil will help you remove the rust that has formed inside, which can just prevent the bolt from unscrewing.
Attention! Be extremely careful. This penetrating oil can seriously damage the vehicle's paintwork. So always be careful.
Special tool kits are sold for removing locks
If you want to remove the lock from the wheel if you lose the key, you can purchase a special dismantling kit. But always remember that such a set is not cheap and it will still be easier for you to remove this secret in the way that we described in our article and which was shown in the video clip.
Thus, remember, dear motorists, that the method described above is much simpler, cheaper and more versatile.
Do wheel locks protect against the same thieves?
As you can see, friends, no, they do not protect. Secret wheel fasteners are not really a barrier to criminals. For them, secrets are just an unnecessary inconvenience and that's it.
Thus, please note that we personally do not recommend purchasing such wheel locks, as this is simply a waste of money. After all, those attackers who decide to steal exactly the wheels will come to your car (trust us) prepared in advance and with the necessary tools. And as you have clearly seen, it will not be difficult for them to remove the wheels they need from your car, even if there are secret bolts.
Good luck gentlemen motorists!
Swinging
If your car is slipping in a small hole it has made, it's worth trying to roll out the hole by moving back and forth. The end points of the movement should be strengthened with branches and stones.
Jack
If you cannot get out of the mud captivity by swinging, you can use the jack. Having raised the body from the side of the drive wheels, simply fill the holes under the drive wheels with stones, boards and other hard objects that are at hand. Remember that the jack should be installed on a hard surface, for which you should use boards or bricks.
Shovel
With the help of a shovel, without which, as you know, not a single serious jeep goes off-road, you can clear the road in front of the driving wheels or, alternatively, form a new one. There would be time and desire to dig.
Increasing traction
If you have put your car on your belly in a mud rut or buried in sand, you should increase the grip of the drive wheels with the road surface. Stones, branches, cardboard boxes and any garbage that can be found nearby are suitable for this.
If this is in short supply, use car mats. We throw them under the drive wheels and, smoothly adding gas, we leave the mud trap. If you often practice country trips, then it makes sense to also keep the so-called trucks in the trunk - plastic tracks that look like caterpillars - a very, very effective basis for freeing your car from the mud.
Lowering the tires
Lowering the tire pressure to around 1 bar is a very effective way to deal with difficult terrain. Remember to inflate all four tires regardless of your vehicle's drivetrain.
After this procedure, the rubber contact patch will increase significantly, and the number of lugs that interact with the coating will increase. The driven wheels, in turn, will fail less, which will reduce the resistance to movement. It is clear that to use this method, you should carry a pump with you in the car.
Grousers
Experienced country road riders carry special snow chains with them, which are mounted on wheels to increase traction. However, in the absence of chains, you can find a replacement for them.
As an option, lengths of cable or thick ropes (climbing ropes are best) can be tied across the tire, passing them between the spokes of the rim. Another useful device for such a scenario is special plastic ties - special strong clamps with lugs, which should also be kept ready when leaving for a country road.
Sling and tree
If there is a big tree growing in the immediate vicinity, you are in luck. Again, a towing cable, a strong rope or a sling will come to the rescue. We attach one end of the rope to a tree, wrap the other end around the drive wheel (working option if your car is front- or all-wheel drive) and smoothly press on the gas. The sling will begin to wind around the wheel, and the car will start to move.
There is also an alternative - we wrap the tow rope around the trunk (as an option, around a thick log or scrap driven into the ground), and fasten both ends of the rope to the car's towing loop.