In this guide, we’ll take a high-level look at what bicycle tires a made of and how everything comes together.
While it might seem like a simple rubber hoop, bringing a bike tire into the real world involves high-tech machinery, the latest manufacturing techniques, and labor-intensive craftsmanship.
Here, we’ll walk you through the process step-by-step.
What bicycle tires are made of largely depends on which purposes they’ll be used for.
As such, after modeling its design using 3D software, the manufacturer will create a rubber formula that displays different characteristics. These include:
It’s a balancing act, though. Why? Because improving one trait typically reduces another’s performance. To illustrate this, increasing rubber hardness boosts a tire’s longevity and reduces rolling resistance, but also decreases its wet weather adhesion, while also delivering a harsher ride.
Although the specific designs and rubber mixes used by manufacturers are closely guarded secrets, Bicycling.com explains the mix of ingredients is generally the same:
When it comes to what bicycle tires are made of, there are four main types of rubber used.
The tread and sidewalls are typically constructed from natural rubber, which is derived from the bark of the Hevea Brasiliensis tree. Synthetic rubber versions, such as butyl rubber and halogenated butyl rubber, are usually extracted from crude oil and used in the tire’s casing.
Carbon black helps to reinforce and strengthen modern bike tires, as well as improve their abrasion resistance, maximize traction, and provide their dark color. In years past, sulfur provided many of these same benefits.
Silica (silicon dioxide), on the other hand, determines traits like flexibility and wet weather performance.
Bicycle tires aren’t made from just one type of carbon black or silica, though. Different versions are used depending on the section of the tire being constructed, along with the manufacturer’s specific performance requirements.
Sulfur also acts as a softener during the process, along with other industrially refined ingredients like:
As a tire is used, these waxes and the beneficial components they contain naturally migrate to its surface, thereby providing protection from exposure to ozone (antiozonants), oxidation (antioxidants), and heat.
To give you an idea of commonly used ingredient ratios, Schwalbe tells us their tires typically contain 40% to 60% rubber and 15% to 30% filler, with 20% to 35% remaining ingredients.
These ingredients meet inside industrial machinery known as an internal mixer. (The Maxxis website references a specific model, known as a Banbury mixer.)
Here, bales of rubber are kneaded inside a large chamber by two rotors, which move at variable rotations per minute. They’re simultaneously heated to temperatures as high as 338°F (170°C), while other ingredients are added as needed to achieve desired traits like elasticity, durability, surface adhesion, dampening, and so forth.
Depending on the size of the mixer, manufacturers can combine between 40 kg and 400+ kg of rubber and other ingredients per session, and in less than five minutes. They draw multiple samples during this relatively short process to ensure the desired properties are present.
Once mixing is complete, doughy rubber exits the machine through a discharge hatch at the bottom and is sheeted out like a pastry into a thick, continuous layer by powerful rollers.
At this point, Maxxis tells us it’s referred to as a ‘slap.’
During the first phase of the manufacturing process, an internal mixer is commonly used to blend natural and synthetic rubber bales with other ingredients. This creates compounds that exhibit specific characteristics, depending on the tire’s intended use. Credit: Alibaba.comSlap slated for sidewalls is covered with plastic sheeting and rolled further. Tread slap (the part that comes into direct contact with the ground) is cut into long, narrow strips.
These strips are then fed into an extruder and heated again. Once the rubber becomes doughy, a revolving screw applies shear force and sends it through a die, forming a profile that’s thicker in the center and thinner on the sides. Together, this helps improve resistance to wear.
To cool and set its shape, tread rubber is subsequently submerged in water. It’s also dipped in an anti-tack compound like metallic stearate or stearic acid, powdered mica, talc, or different water-based formulas, to prevent sticking. Then, it’s wound onto spools with a fabric separator between each layer to further prevent unwanted adhesion.
Sidewall slap is also wound around a spool, separated by fabric and then dried, stacked in cases called ‘books,’ and stored for later use. If needed, it’s immediately transferred to the next step in the process.
An example of butyl rubber being forced through a die, which it forms into a specific shape. When it comes to bike tire tread, this involves a curved design that’s thicker in the center and thinner on the sides. Credit: Goodyear RubberAs we explain in How Bike Tires Work, the carcass (otherwise known as the casing) is perhaps the most critical section of a bike tire, since it acts as the underlying framework and determines its shape. It also defines how the tire conforms to surface irregularities, along with its rolling resistance.
Due to its importance, we’ll split this part of the process into two different stages.
First, a third-party manufacturer twists nylon textile yarn together, treats it with chemicals that promote bonding with rubber, and forms it into a grid pattern.
Nylon mesh that features a grid-like pattern is calendered and molecularly bonded with tread rubber at a 45-degree angle. This provides a bike tire with strength and flexibility. © TreadBikelyUpon arriving at the tire manufacturer, this yarn is stored, and its temperature and humidity levels are carefully monitored since both of these factors can impact its tensile levels.
When the time comes, webbing is passed through very hot rollers at a 45-degree angle. This permanently bonds it with the tire’s casing rubber through a process known as calendering. This is what’s ultimately responsible for defining the tire’s shape and providing it with a great deal of support.
The density of this webbing yarn is measured in threads per inch (TPI), which references the number of threads contained in one square inch of the casing. Why does it matter?
Casing mesh with fewer TPI (< 80) typically features larger gauge threads and more rubber, resulting in tires that are heavier and more rigid. Higher TPI casing mesh (> 100), on the other hand, features finer threads and less rubber, resulting in greater strength, lighter weight, better flexibility, and improved suppleness. It also results in a higher price.
In addition to rubber compound and mixing process, Continental further explains that the yarn’s makeup can have an impact on a tire’s performance: “Very fine [casing] material makes the tire smoother and protects the carcass from punctures,” while “coarse fabric is more cut-resistant and makes the tire more robust,” they say.
Bottom line: Much like rubber formulation, “the choice of fabric,” they point out, “depends on the purpose of the tire. ”
”
After calendering, casing rubber enters a cutting station where blades slice it into premeasured strips. In most instances, it will take multiple pieces to construct a single tire.
Similar to the tread section, after being assembled by hand, these casing strips are wound onto spools with fabric backing that prevent sticking. They can be used immediately or stored for later assembly.
If used immediately, raw tread rubber is added to the carcass by wrapping a layer around the drum and firmly sticking it down. Continental points out that tread thickness is also a significant contributor to a tire’s ride quality characteristics.
While everything above is happening, a specialized wrapping machine takes steel or aramid (Kevlar) fibers, twists them together, and forms them into rings.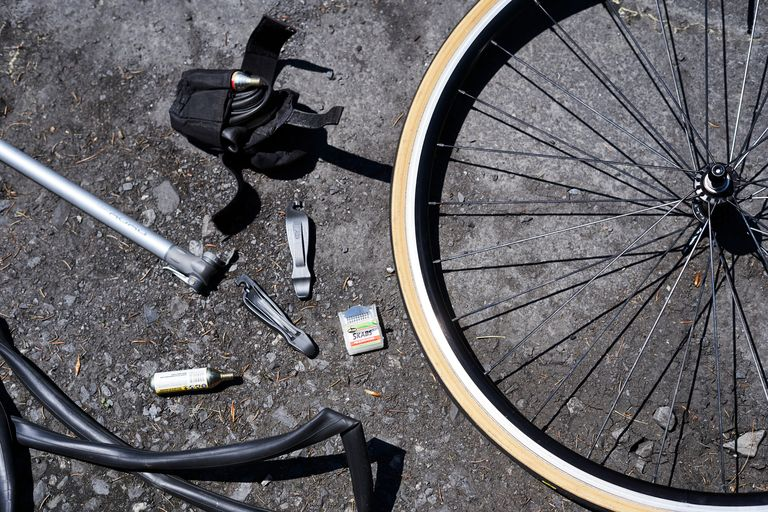 These rings, formally known as the tire’s beads, are then covered with a thin layer of protective rubber.
With the casing already wound around a metal spool, Schwalbe tells us that a specially trained employee inserts beads on each side by hand. Once inflated, the strength they provide will help hold the tire onto the rim after it’s inflated with air.
Related: How to Buy a Bike Pump
Next, a mechanical apparatus simultaneously folds the casing’s rubber over both beads. If additional puncture protection is needed, a Kevlar strip is forced into the rubber as well.
Here, we can see the casing rubber installed on the tire building drum, with each bead’s wire in place. Next, arms on the sides will fold the rubber over each bead to form a single unit. Tip: Look closely, and you’ll see the casing’s nylon mesh calendered at a 45-degree angle into the rubber. Credit: Kenda TireThe extruded rubber for the tire’s sidewalls is now glued into place, and the tread is applied to the center. With all of the layers set, the bike tire is removed from the building machine. At this point, it’s known as a ‘green’ tire.
From here, a specialist loads the tire into a branding station, where hot metal plates quickly bond labels to its sidewalls.
It’s then placed inside a clamshell-like mold over a tubular bladder. The shell is sealed, steam is pumped into the bladder like a balloon, and the interior heats up to 180°C for between three and six minutes. Overall, this accomplishes two goals:
 This can improve traction, but also increase rolling resistance. Credit: Alibaba
Similar to many other components involved during the manufacturing process, such as rubber formulation and threads-per-inch, time spent ‘cooking’ depends on a tire’s desired traits. For example, the general rule of thumb is that the longer it spends vulcanizing, the harder—and less elastic—a tire will be.
An example of a manufacturer’s clamshell-like chamber, which houses the tread mold referenced above. After placing the green tire inside and heating it to high temperatures, a chemical process called vulcanization improves the rubber’s elasticity, strength, viscosity, and wear and weather resistance. Credit: Global Mountain Bike NetworkFinally, the tire is removed from the mold to cool. Eventually, it’s sent to a warehouse for distribution.
After cooling, each tire is inspected for flaws (e.g., bubbles, voids, etc.), whether by a specially trained employee or by bombarding it with x-rays and visualizing the results on a screen.
In most instances, one tire from each batch also undergoes in-depth quality control testing. This might involve one or more of the following:
 Credit: Triwood1973
It’s easy to overlook the substantial technology and manufacturing prowess involved in the development and production of every tire that graces your bicycle.
The next time you go for a spin, though, take a brief moment to marvel the many decades of progress associated with its rubber compound, additional ingredients, mixing process, mesh formation and calendering, and quality testing—all of which combine to make sure you have the smoothest, most enjoyable ride possible.
Keep rolling: Common Bike Tire-Related Words & Phrases
guidesmanufacturingreferenceRubber compoundtire guidestires
Bicycle tires are tough and are designed to be just that. But it is often overlooked how much work and technology have been put into their production for them to be this good. Just how are bike tires made?
Bicycle tires are made by processing rubber and producing components with varying qualities. These parts are then assembled. Let’s take a detailed look at the process of how they are manufactured in a production facility.
Table of Contents
There are many bicycle tire types, and all possess qualities that make them well-suited for specific biking conditions.
Mountain bike wheels need to be durable for off-road tracks, and road bike wheels are designed for better aerodynamics that allows for faster speeds. However, bicycles in the past did not have such specifications.
While rubber bicycle tires are now the norm, early bicycle wheels were made of wood and metal with the tires made of iron. We can only imagine how uncomfortable riding a bicycle with such wheels would be.
Thankfully, numerous technological innovations in manufacturing led to the use of rubber that helps make cycling more comfortable.
But the sort of technology that goes into producing modern bicycle parts is not easy to imagine — at least it wasn’t for me. Seeing a detailed explanation of the manufacturing process lent a higher appreciation of bike tires that many people take for granted.
Below is a step-by-step look at how modern bicycle tires are made.
How Bicycle Tires Are Made1. Mixing processEverything begins with gathering materials; this often dictates where production facilities are located.
Many leading tire brands are not made in USA because it is more practical to have the factories in places where the rubber may be sourced locally.
The first step is to mix the base rubber ingredients, these are natural rubber and synthetic rubber. Certain additives are also used, but these materials vary depending on the recipe.
A different recipe may be used depending on the product type being produced, and bike tire manufacturers all have unique recipes for every type.
The combined rubber is mixed together with additives and oils and then transferred to a specialized mixer. This machine can thoroughly combine the tire components, resulting in very high temperatures due to the resulting friction.
2. Processed rubber is rolled outThe rubber mixture is brought to a homogenization process, wherein it is ironed out. This ensures that the rubber is free from air pockets, and ends up in a mat-like state.
It then goes through a curing process, where the rubber mat is treated for consistency and stored for cooling for around eight hours.
At this point, samples of the production batch may be subjected to quality testing to determine if the resulting material is up to commercial standards. Not all tire manufacturers do this, but it is an important procedure for leading brands.
Tests include ozone tests, tensile strength tests, and other quality checks to ensure that the desired characteristics for specific tire types are retained by the produced material.
3. ExtrusionThis process is a manufacturing step where specific materials are passed through a machine to create specific products with different recipes, and tires made of rubber use it extensively.
The rubber is then passed through a heated metal die. The die makes the center of the tire thicker.
After extrusion, it is then flattened into a long sheet using rollers.
The resulting rubber is collected into spools.
4. Section constructionBicycle tires are made using several layers of rubber. However, each layer is different from the rest with different strengths and qualities.
Key layers are the nylon casing, the treads, and the sidewall that also has the branding. Another important component is the bead; it is similar to a metal wire in appearance but may also be made of a strong material such as Kevlar.
The nylon casing is not made of rubber and is prepared separately; it is made up of a weblike mesh.
This nylon casing is matched to a layer of rubber casing and merged together. The combination serves as the base of the tire and is also known as the carcass.
The tread usually goes through a longer and more rigorous procedure to ensure that it has the necessary durability for road performance.
5. Tire assemblyOnce all sections of the tire have been prepared, it’s time for assembly. This process is usually done by hand but also makes use of a specialized wheel-like machine, layering the components in order. Glue may be used to keep the components together.
First goes the carcass. Then, the bead is placed on each side, which serves to reinforce the structural integrity of the tire; this is also what dictates the width of the sheet.
The excess length of casing on each side is folded over the beads and covered with sidewall reinforcement then sealed in place with chafers.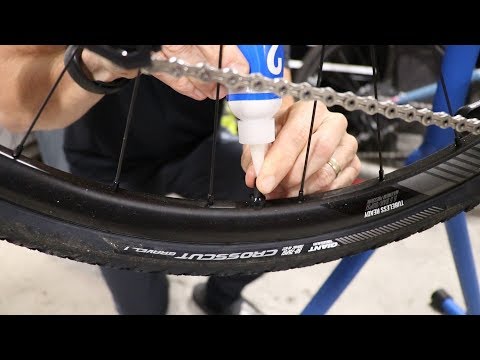
The tread is placed at the center section of the carcass. This is when the brand logo is added as well.
After assembly, the tire is still flat and does not fully resemble the shape we all know.
6. Pressure cookingA specialized curing machine is used for the final step of production. The tire is placed into it and then goes through pressurization.
This involves subjecting the rubber to intense heat, resulting in the layers thoroughly bonding, which results in its material strength.
It is also this process that gives the tire its recognizable shape. The finished product will also be subjected to different types of testing to ensure that safety standards are met.
ConclusionBicycle tires are an impressive product of continuous technological innovation, and every biker will be able to appreciate this more as they ride more.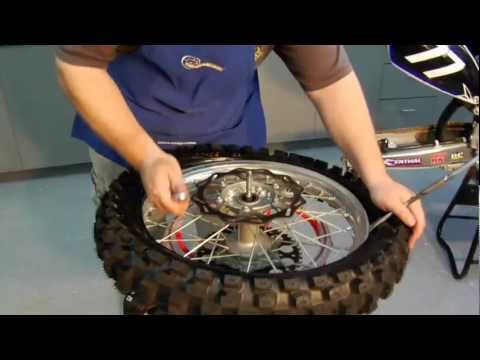
Experienced cyclists may be able to understand tires at a different level, considering how different modern ones are from those made one or two decades ago.
You should have gained a higher appreciation for them after learning about how are bike tires made. If you have any comments or suggestions about this topic, please feel free to leave your message in the section below.
Always ride safely.
Furthermore, there are some tips & tricks about tire maintenance, you can refer guide on inflating, measuring a bike tire, and the best time to replace bike tires.
Gary Johnson
“I ride my bike to work for years, but is that enough? Our carelessness towards our surroundings has taken a toll on the environment. And now, everyone is responsible for changes; even the most minor contribution is counted. With this hope and spirit, I started with my partner to establish Biketoworkday to help more individuals commute to their work sites on their bikes.”
If you want to safely ride a bike in winter (and not only) then you need to take care of good grip of the wheels with snow, mud, sand, ice.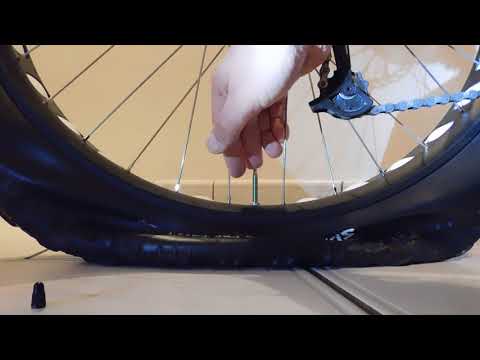 You can buy studded tires, or you can make studded tires on your bike with your own hands.
In this article, let's look at a more affordable and cheaper option for how to do this.
Needed:
1. Purchase a package of self-tapping screws from a hardware store.
2. Take a drill and a 2-3 mm bit. Drill holes in the places where you are going to install the spikes.
3. Try to screw in the self-tapping screw at a perpendicular angle (90 degrees) to the tire, it should not stick out to the side.
4. After these works, glue the inner surface of the tire with reinforced electrical tape (possible in 2 layers). You can also use special anti-puncture tapes in the tire instead of adhesive tape, which are sold at a bike shop. They will help protect the camera from being damaged by the screw heads.
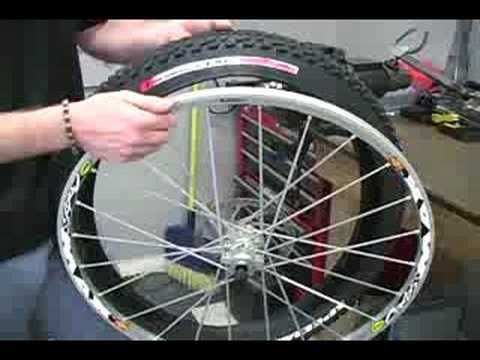
5. Place the tire on the bike rim. Be careful during installation - you can injure your hands.
will be needed:
1. Remove bike wheels, remove tires from wheels.
2. Determine the places in the tire where you can put the bolts (should be screwed between the rubber protection studs, always in the center and preferably at the edges, but not close to the rim).
3. Mark the selected holes with a marker. Drill holes smaller than the thickness of the bolts (they will have to be screwed into the tire, but this way the bolts will not fail).
4. With the thread on the outside, screw the bolts into the tire, then screw the nuts onto the bolts on the outside of the tire. Then the nuts and bolt ends will work as spikes.
5. As in the first option, put anti-puncture tape inside the tire or glue it with reinforced electrical tape in a couple of layers.
6. Fit tires, mount wheels to bike.
You will need:
1. This method is easier, but only suitable for bikes with disc brakes.
2. Purchase the required items.
3. Remove the wheels from the bike, measure the circumference of the rim + tire using a flexible meter.
4. Cut off the chain of the measured length.
5. Attach the cut chains around the rim and tire. This can be done with wire, bolts with nuts, other metal clamps.
6. Mount the wheels. If suddenly the wheels are not put in place - remove the plastic protection.
Recommendations for work
Warnings
We hope the article helped the variant of tire studding for a bicycle. Share in the comments what you did. Also watch a helpful video on this topic.
Table of Table of Contents
Camera Puck
Brake repair
Skipping circuit
“Eight on the wheel
play
You can prevent some malfunctions - for example, using the installation of protection.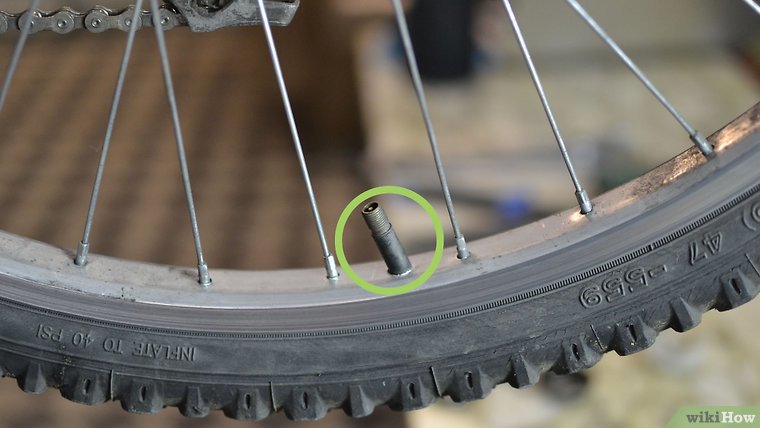 Read more about this in the article "How to choose the protection of the main components of a bicycle." And here - about how the bike works.
The bike needs regular maintenance, especially before the start of the season. Static parts (bolts, bushings and connecting rods) periodically become loose. The undercarriage needs to be cleaned and lubricated, and the tire pressure checked.
Contents
Chamber puncture
Brake repair
Jump chain
"Eight" on the wheel
Play
Play
If the puncture is single, for example, from a nail or a thorn, you can put a patch.
Patches and adhesive are usually included in a standard bicycle repair kit. Read more about this in the article "How to use bicycle repair kits".
To repair a puncture :
The bicycle must be placed on the saddle.
Purge air from chamber.
Pull out the tire with a set of pryers. If they are not available, any flat screwdriver with a blunt end will do.
Determine the location of the damage: pump up an empty chamber, squeeze and listen for where the hiss will come from. Another option is suitable if there is water nearby: lower the inflated chamber into the water and determine the puncture site by air bubbles.
The found place must be marked and cleaned with sandpaper.
Attach self-adhesive patch.
Slightly inflate the bicycle inner tube, place the inner tube in the tire and bead the tire with the kit.
Inflate the inner tube.
Important! Always take a repair kit or spare tire with you on long trips
If this is not at hand, in the field you can do this:
Tire and puncture sealant can be pre-filled. In case of damage, it penetrates the hole, preventing air from escaping. There are different sealants for different tires.
Bicycle tools Cyclotech | Multikey Cyclotech CT-6
Buy
Cyclotech | Scraper Cyclotech
Buy
Dayton | Lubricant Daytona Multispray 6 in 1
Buy
Dayton | Chain lubricant for dry weather with Teflon 100 ml Daytona
Buy
$1. 99
99
$2.99
Stern | Repair kit Stern CT-S2
Buy
$6.99
$7.99
Cyclotech | Multikey Cyclotech CT-10
Buy
Dayton | Wet Weather Chain Lubricant Daytona 100 ml
Buy
Dayton | Lubricant Daytona Multispray 6 in 1
Buy
$35.99
$43.99
Topeak | TOPEAK Multi Key
Buy
Dayton | Daytona chain cleaner
Buy
Dayton | Cycling Shampoo Daytona
Buy
1999 ₽
Cyclotech | Cyclotech chain cleaner
Buy Now
EXPERT TIP
The most annoying type of puncture is the double snakebite type.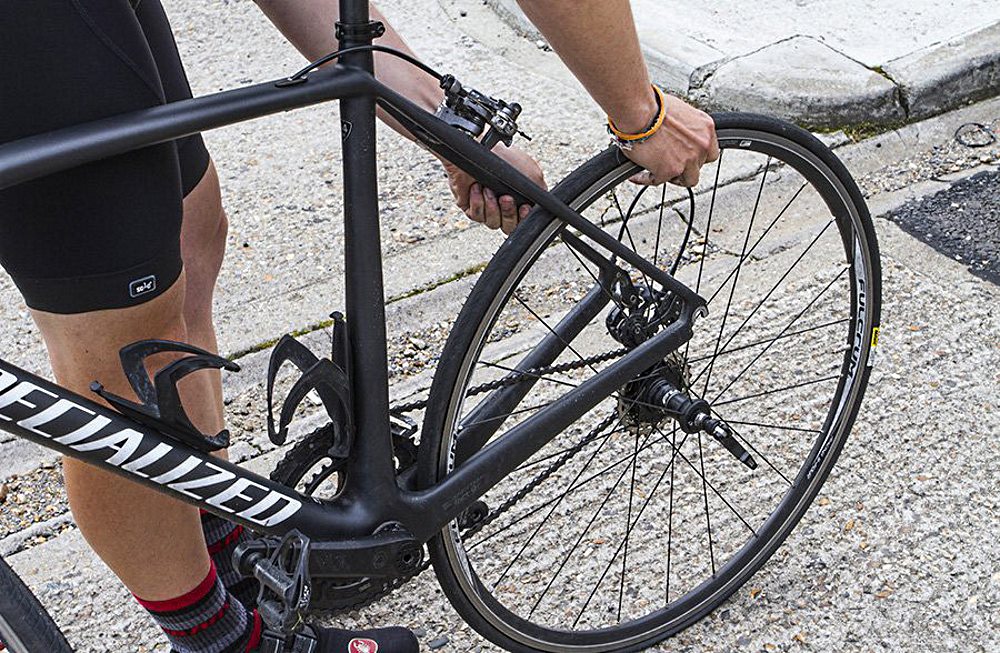 They appear during aggressive riding, hitting a sharp stone or curbs. Self-adhesive patches may not work. It is worth using permanent repair kits
To avoid or reduce the likelihood of such a puncture, it is necessary to maintain working pressure in the chambers
Rim brakes (v-brake) require checking and adjustment at least once a season, after a long period of inactivity or signs of incorrect operation work.
Signs that something is wrong with the brakes:
Manufacturers make special notches on the product to help determine system wear.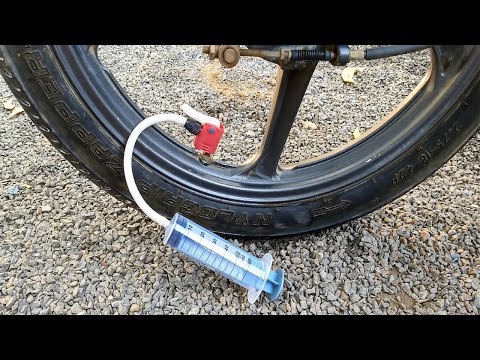
Replacing worn pads with new ones :
Release the brakes and forcefully remove the brake jacket from the holder.
Unscrew the pad fixing screw.
Pry off and remove the old block, install a new one in its place.
Shoe adjustment :
The shoe must be level with the rim and must be parallel to the rim when checked for clearance in both the open and braked positions.
When the wheel is rotated, the pads must be pressed exactly along the rotation vector, without deviating from it.
Tension adjustment :
Fine adjustments are made with a special screw on the brake lever.
If this is not enough, you need to loosen the bolt on the brake foot and stretch or tighten the cable, then tighten the bolt.
After the brake pads, the chain is the second element that most often needs to be replaced. High-quality chains on city bikes wear out after several thousand kilometers.
Why does a bicycle chain slip:
Chain slack can be removed by simply shortening it. To do this, you need to remove several links. Modern chains are easy to dismantle, they are made with special locks.
The chain must be periodically cleaned of old grease, new grease applied, tension adjusted.
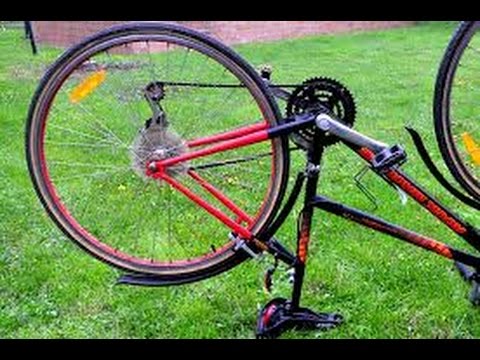
If, while driving, the wheel touches the feathers and pads, it means that the rim has been deformed, the wheel is no longer round.
It is common for cyclists to find a loose wheel after a hard hit or bad ride over an obstacle.
Important! It is difficult to straighten the rim and properly tighten the spokes at home. This will be a temporary measure, subsequently it is necessary to contact a specialized service
The deformation of the wheel, in which it takes an oval shape, is associated with uneven tension of the spokes inside the rim.
To correct defect , the knitting needles are tightened from both sides (bottom and top), starting from the central knitting needle.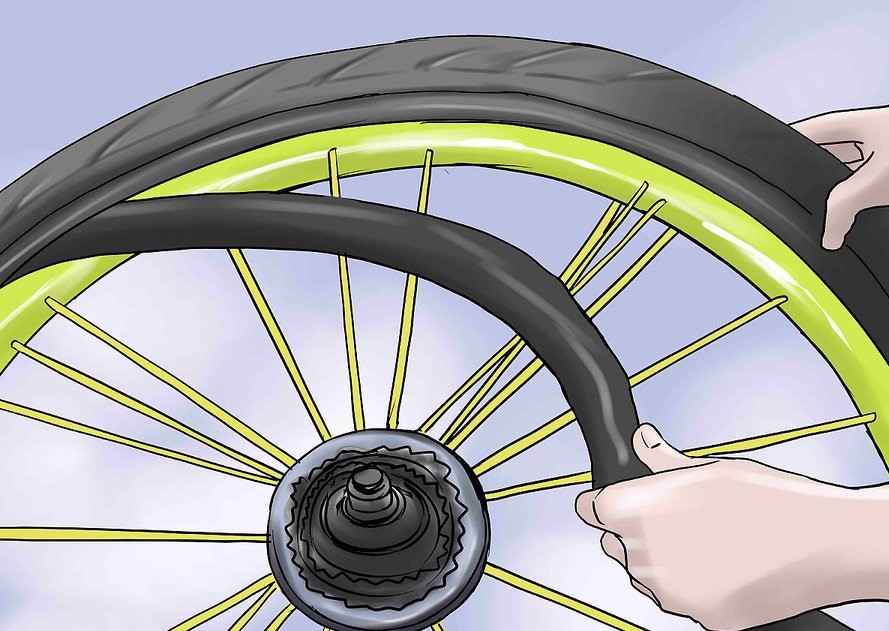 It is necessary to monitor the number of turns of the spoke key so as not to drag the spokes into the "eight" or not to aggravate the already existing "egg"
 Backlash is the space between tightly fitting parts that develops when they begin to loosen. As a result, vibration occurs when driving. There is a backlash of the wheel, carriage or steering wheel.
Causes of backlash:
Removing wheel play:
If there is little play, it is enough to find loose locknuts and tighten them with a suitable wrench.
If, after turning the bike over on the saddle and swinging the wheels, you find that they stagger from side to side, then the play is serious and you need to contact the service center.
To check the bearings you need:
Remove the wheel.
Check the bushing, paying attention to the integrity of the bearings, the condition of the axle and its components.
Important! It is not safe to continue riding with backlash. The hub may fail, which threatens to completely change the spokes in the wheel and deform the rim
Lubricants for bicycles
Dayton | Lubricant Daytona Multispray 6 in 1
Buy
Dayton | Wet Weather Chain Lubricant Daytona 100 ml
Buy
Dayton | Chain lubricant for dry weather with Teflon 100 ml Daytona
Buy
Dayton | Lubricant Daytona Multispray 6 in 1
Buy
Dayton | Daytona chain cleaner
Buy
Dayton | Cycling Shampoo Daytona
Buy now
If, in addition to a loose wheel, you hear a cracking sound while driving, it is most likely a problem with the hub.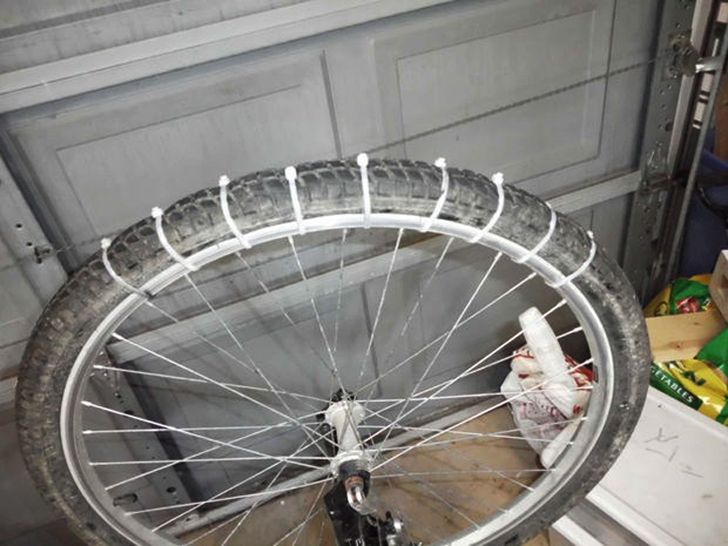 In case of severe damage to this part, it will have to be replaced.
To replace the bushing :
Lower the wheel.
Remove tire, inner tube and rim tape.
Unscrew the nipples from the spokes using a special screwdriver and the appropriate spoke wrench.
Pull out the bushing and replace it with a new one.
Assemble the wheel.
For handlebar play diagnostics apply the brake and move the bike forward then backward. If you find that the handlebar wobbles, you need to:
Using a hex key, loosen the bolts on the handlebar stem that fix it to the fork stem.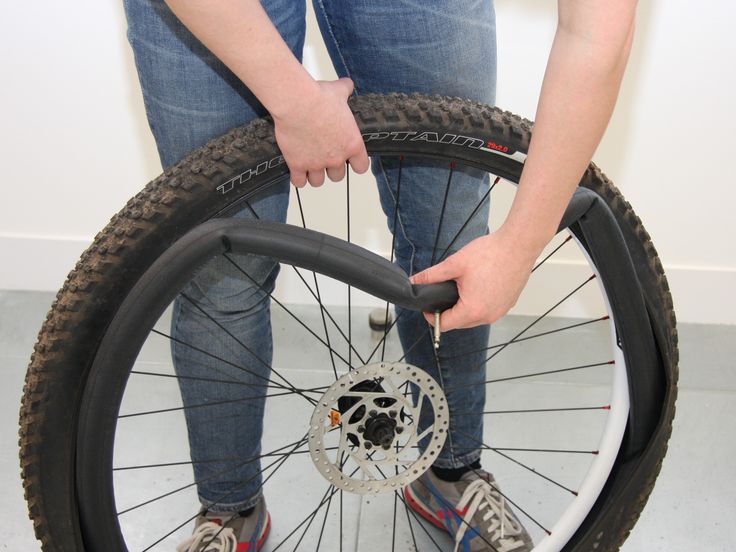
Tighten the hex bolt, which is located on top and tightens the stem-fork-steerer system.
You can combine the process of tightening the bolt with moving the bike back and forth with the front brake pressed. Thus, the backlash is eliminated more completely, and all working parts sit in their places.
Check the stem-fork-steerer system again for play and make sure there is no movement under the fingers.
Align the handlebar so that it is perpendicular to the wheel and tighten the fixing bolts on the stem. The steering wheel must turn freely.
Important! If the minimum play is ignored, threads, bearings and bushings may be damaged.
The bottom bracket of a bicycle is the part that connects the crank arms to the frame and makes the pedals spin. Carriage play may occur after a long drive on rough roads. If it is not eliminated in time, you may encounter a violation of the clarity of gear shifting or damage to bearings and cups.
The play can be eliminated by a simple adjustment:
Remove the left connecting rod.
Clean the carriage tube, cups and carriage shaft from dirt.
Remove the jam nut from the left bottom bracket cup.
Use the special wrench to loosen the left carriage cup.
While swaying the right crank (the crank is mounted on the shaft), smoothly turn the left bottom bracket cup until the play disappears (it becomes impossible to sway the right crank).
After the play on the shaft disappears, tighten the left bottom bracket cup until a slight resistance appears when the bottom bracket shaft (right crank) is rotated by hand.