If your ATV ran when you parked it but refuses to pop when you finally decide to ride it again, chances are the carburetor is a mess. You can blame it on what passes for pump gasoline today—or bad luck, karma or even your annoying little brother—but you are lying to yourself. Face it; you blew it. A carburetor is a device for mixing fuel and air that’s suitable for the feeding of internal combustion engines. The float bowl, and for that matter the fuel tank, is not for permanent and endless fuel storage. Most of the elements in pump gasoline evaporate, and you and your carburetor do not want to experience what is left after the prolonged evaporation. If you have a carbureted ATV, consider this a rule: drain the carburetor, or run it out of fuel before even parking it overnight. If you know or suspect the bike will be parked for any number of weeks, empty the fuel tank.
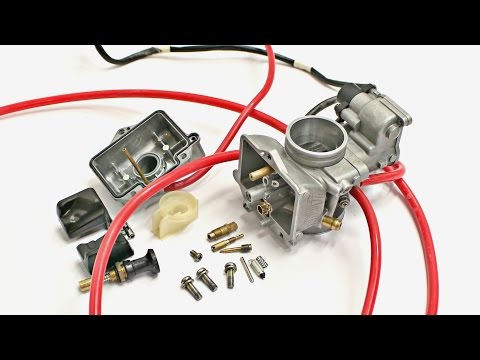
We had an abused Yamaha carburetor typical of those used on entry-level youth quads. This is typical of what a local shop sees—guys ride a few big weekends a year, but they leave the bike parked between those weekends. If the carburetor was left with fuel in it, there’s going to be problems. With a small, EPA-jetted four-stroke, the jets are so small that they plug easily in any case, but with the make-up of current fuels, owners see catastrophic gum-up in very small amounts of time. Here is how to deal with the mess.
2.
You will need to remove the carburetor from the vehicle. Take care with the hoses and boots so you don’t damage anything when removing it. Typically the float bowl is held on with a Phillips screw. When you see a screw with a dimple in the head like this one, it signifies that the screw is manufactured to a Japanese industrial standard, and it does not have the same design as a typical Phillips. Even quality screwdrivers may ground it easily, so use care and a sharp screwdriver.
3.
A screwdriver with a replaceable tip like the one pictured works best.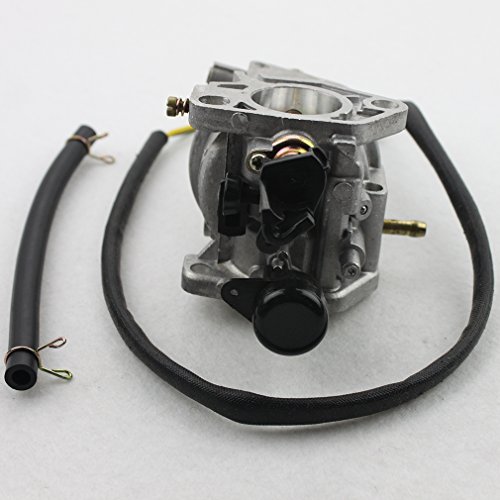 We can only assume that these bits are made in Japan, but they fit snugly. In fact, when you remove the screw, it often fits so well that the screw is almost captive on the bit like it was magnetic.
4.
Pull the carburetor apart and remove any of the parts that are easy to take off. Note that the idle screw is still in the body. It was locked in, and we did not want to risk damaging it. Before you remove any of the carburetor adjustment screws (that includes the idle screw), turn the screw in until it bottoms lightly. Count the number of turns for each, and write them down so you can reset them upon reassembly. When you see a carb this bad, drain the tank and remove the petcock. This petcock needed to be replaced, but fortunately it was not too expensive.
5.
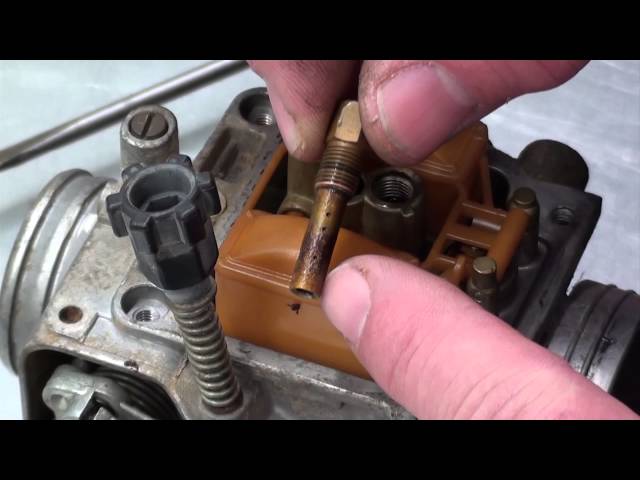
If you haven’t allowed things to get too out of hand, you might get away with a new pilot jet and using contact or carb cleaner to flush out the passages. We find that it is most successful if we simply replace the jets with new ones rather than clean the old ones.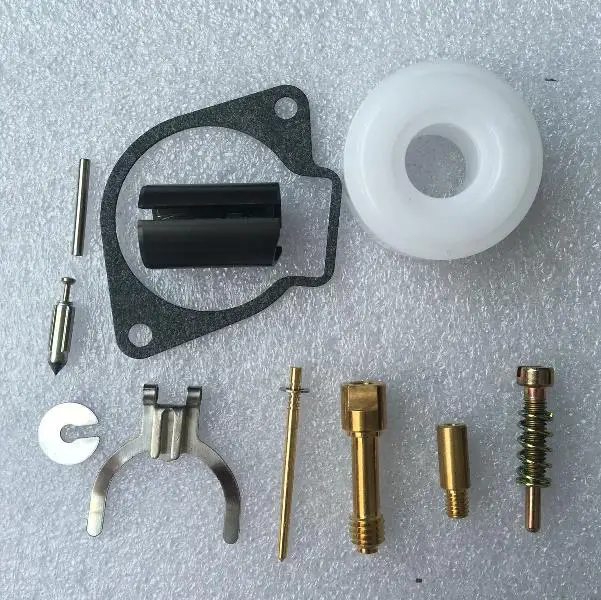 Once they are plugged up, they seem to plug more easily thereafter.
6.
A dip-tank type of carburetor cleaner is one of the options you have for cleaning a gunked-up carburetor. In recent years, government agencies have made chemicals like this hard or impossible to find, or restricted the contents until they no longer work as well as they did in the past. You might need to soak the carb parts in this for several days.
7.
We use a dedicated pan on a small hot plate to heat water to soak the carb in. Do not use a pan from your house or do this in the kitchen! This is a garage-only operation in a well-ventilated area. Our hot plate gets the water steaming pretty well, but it never actually boils it. Leave the carb in the hot water for about an hour. If you have a carb that has electronics on it like a TPS or Powerjet, leave the electrical parts above the water level.
8.
Use pliers to gently remove the hot carb, then use a brush and solvent to clean the body while it is still hot. If you are working at home, get an assortment of small brushes to handle this job efficiently.
9.
Carburetor cleaner is used to clean all of the solvent from the carburetor body. Use the plastic straw to direct cleaner through all of the orifices in the body and especially those in the intake bell of the carb. Most of these holes are restricted, and contact/carb cleaner will blow back, so wear eye protection and watch where the orifice is aimed. If needed, go back with the brush.
10.
This is what the carb looked like after the hot-water bath and a quick cleaning. It still needs some work with smaller brushes, but the improvement is huge.
11.
For the float bowl, we dipped it in the carburetor and parts cleaner for the same hour the body was in the hot water. Afterwards, we used the solvent and brush and blasted it with aerosol cleaner. It is much better, but would no doubt be improved by soaking it for an additional time.
12.
K&L makes a tool with small wires to clean carburetor jets and passages with.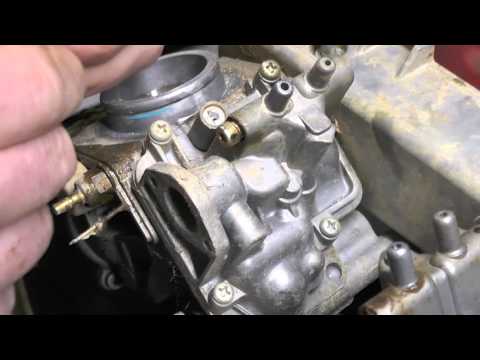 As noted, we do not recommend cleaning the jets, but prefer to replace them with new ones. You can use a more common welding tip cleaner, but many carb passages are too small for the smallest tip cleaner.
13.
After you probe all the openings in the body, use the aerosol cleaner with the plastic straw to blast out all the passages once more.
14.
A few companies sell a complete carb kit, like this one from Moose Racing. It is nice to have all the parts, and with a messed-up unit like we started with, they can be a lifesaver. If the carburetor isn’t so bad, usually a pilot jet and a general cleaning will get you going.
15.
If you have any problems with fuel leaking from the carburetor overflow tubes, don’t even mess with trying to clean the parts. Replace as many parts of the float valve as possible. You will be shocked at the prices of a float-valve kit for some bikes, but it will solve the problem. The Moose kit includes the float-valve parts.
16.
It is rare for the needle and needle jet to wear, but it does happen with bikes that vibrate or ones that have sucked dirt.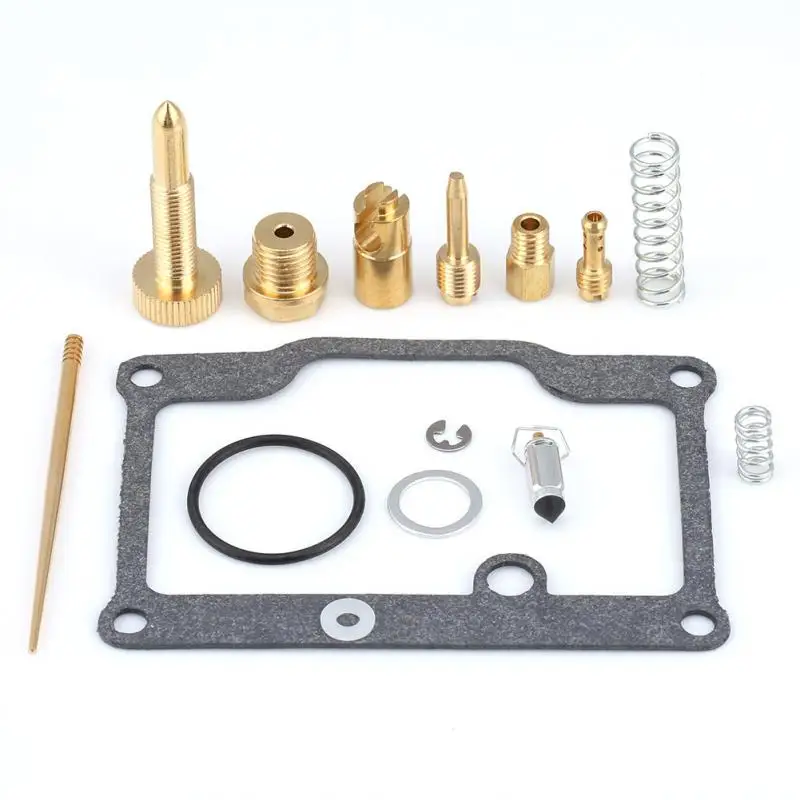 The needle is nearly always available, but the needle jet is part of the carburetor body on some bikes.
17.
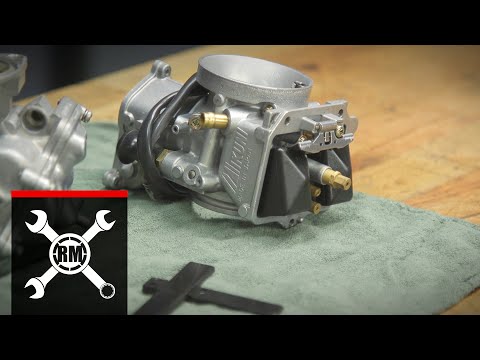
Many ATVs come with carburetors with a CV-type carburetor. They are excellent for emissions, since the throttle cable opens a butterfly valve only. The slide is lifted by a diaphragm attached to the top of the slide. The slide lifts only as fast as the engine requires it to. It doesn’t matter how fast you slam the throttle open, the diaphragm must remain pliable with no leaks to operate correctly. If your machine has a CV carb, inspect the condition of the diaphragm, and replace it if anything looks suspect.
18.
You must also determine if the carburetor has an accelerator pump. If it does, you must also make sure that the pump is squirting when the throttle is opened. If everything is clean and checked out, the carb should be ready for reassembly. Make sure to set the air or fuel screws and the idle adjustment back to where they were. Without installing the carb, connect it to the fuel line.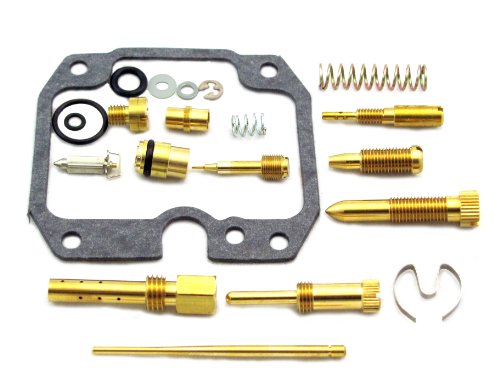 Turn on the fuel, then open the throttle. Watch for a thin stream of fuel to squirt from the front side of the carb. Until you see the squirt, the carb is not clean and ready to be back on the ATV.
19.
Install that carb and see if the vehicle starts and runs well. That will let you know whether you did a good job. In some cases, with small bikes, no amount of cleaning gets the carburetor back to stock performance. In those cases, a new carburetor is required, but that is a rare event.
Delivery options and delivery speeds may vary for different locations
Sign In
or enter a zip code
Email * Password *
REPAIR & HOW TO
MAINTENANCE
TROUBLESHOOTING
GUIDES
TIPS & TRICKS
ALL ARTICLES WATCH VIDEOS ABOUT US SHOP PARTS CONTACT US
Owning an older motorcycle or ATV will eventually lead you to having to decide whether you should clean, rebuild or replace a carburetor.
That’s because no matter how well you look after your bike or quad, over time the carb develops a buildup of gunk left behind by evaporated gasoline and impurities that found their way into the fuel system. Let’s take a look at your options when it comes to carburetor maintenance or repair.
Clean the CarburetorProvided the buildup within the carb isn’t too bad, you should be able to clean it.
Cleaning is by far the most economical method, and for a handful of dollars you can pick up an eco-friendly carburetor cleaner. After dismantling the carburetor, soaking it in carb cleaner should remove much of the buildup that’s been affecting the carb’s performance. The carburetor jets are particularly prone to getting clogged, and you may have to buy a new one or two, but otherwise carburetor cleaner should restore an old carb back to its former glory.
Once caked-on crud inside the carburetor reaches a certain point, it’s difficult to get the smaller parts such as the needles and jets thoroughly clean again.
However, carb rebuild kits include all the precision parts needed to refurbish it. Once again, you’ll need to dismantle and clean the carb, but you can discard the old jets and needles and install the new ones from the kit. Carburetor rebuild kits also include the O-rings and gaskets to restore a carb to like-new condition.
Install a New CarburetorIf the buildup inside the carb resembles baked-on molasses, the whole unit is probably a goner.
The best solution is to buy a brand new carburetor. It’s a more expensive route, but costs about the same as paying to have the old carb ultrasonically cleaned.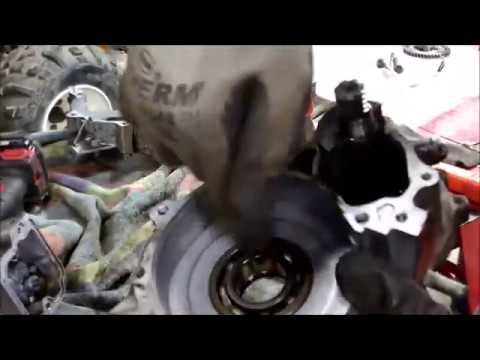 Besides, there’s no guarantee an ultrasonic cleaning will be effective, in which case you’ll have wasted your money.
In fact, a new carburetor may cost less than you think, because many of them were designed for mass production and use across different models. The process of removing the old carburetor and installing a new one typically takes under 15 minutes, which is a lot easier than dismantling and cleaning a carburetor.
Whether you need to clean, rebuild or replace your powersports vehicle’s carburetor, don’t forget that Partzilla has all the fuel and air parts and supplies you need, including carburetors, kits and components to get the job done!
 5
5 body
It often seems like an insurmountable task for beginners to tune and adjust the carburetor of an ATV, but in fact, it is far from being the case. Using our instructions, you can easily set up a carburetor with your own hands.
Due to incorrect carburetor settings, problems such as: acceleration dips, jerks while driving, uncertain start of the engine, poor acceleration dynamics, overheating, loss of power, increased fuel consumption, formation of deposits in the combustion chamber.
So what exactly are we going to tune?
Attention! The adjustment is carried out under the condition of a warm engine and a clean carburetor.
First, make sure there is no condensation in the carburetor. First, you need to drain the gasoline from the float chamber, for this you need to close the fuel cock and partially unscrew the screw No. 1, after the gasoline has drained from the float chamber, tighten the screw No. 1.
Let's look at photos of candles with various deposits and defects.
A 100% indicator of a correctly adjusted combustible mixture is carbon deposits on a candle.
Consider the location of the screws for adjusting the quality of the mixture and idle speed of carburetors of different models.
#1 Float chamber plug; No. 2 Mixture quality screw;
#3 Idle adjustment screw.
1 - quality adjustment screw at idle; 2 - fuel inlet fitting; 3 - fitting through which you can sleep fuel from the float chamber; 4 - screw-plug of the float chamber.
1 - ventilation tube; 2 - idle speed adjustment screw; 3 - screw for adjusting the composition of the air-fuel mixture.
ATV carburetor speed and mixture adjustment.
1. Start and warm up the engine until it reaches operating temperature.
2. Adjust the idle screw to set the idle speed to normal. Completely, until it stops, tighten the fuel mixture screw, the engine should stall. If this does not happen, check the tightness of the air supply system from the air filter.
3. Loosen the fuel mixture screw 1 turn. (Turning the screw clockwise, we enrich the mixture, unscrewing it counterclockwise, we lean).
4. Start the engine and, by adjusting the idle speed screw, set the speed slightly higher than normal
5. Slowly unscrew the fuel mixture screw until the engine reaches maximum speed (we unscrew the screw no more than 2 turns, but depending on engine wear and other malfunctions, the range may vary).
6. Re-adjust the idle screw to set the idle speed to normal.
7. Press the throttle trigger several times, check if the idle speed is stable.
Adjustment of the mixture quality with a needle.
Probably you have heard more than once about adjusting the quality of the mixture on the carburetor by manipulating the needle. I note that these are extreme measures, for the initial adjustment, use the mixture quality screw, and only if you do not get the desired result, unscrew the mount and remove the needle. What does she represent? This is the main element that regulates the amount of gasoline supplied to the combustion chamber. Connected directly to the throttle handle through a cable. When you turn the knob, the needle rises higher, opening up a channel for fuel, thereby delivering more mixture, which increases power, which translates into speed.
You will see 5 grooves on the needle at the attachment point. Initially, the retaining ring fixes it in the central position, this is the best option. But sometimes it is not possible to achieve the required quality of the mixture. Then we will need the remaining grooves, 2 on top and 2 on the bottom, this suggests that we can adjust the dose gradually.
Lifting the retaining ring up and locking it in this position lowers the needle, which, in turn, blocks the channel more than usual. Gasoline enters less than air, and the mixture becomes leaner. Lowering the ring down, we raise the needle, and everything happens exactly the opposite.
Be aware that an excessively lean or rich mixture can lead to serious malfunctions from overheating to loss of power, carbon deposits in the combustion chamber and all the consequences that follow from this. Keep an eye on the condition of the spark plug electrodes, this is the main indicator that will help you determine the quality of the mixture.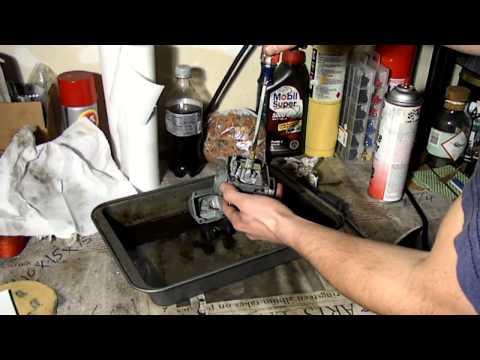
If you have any questions regarding the adjustment and tuning of the carburetor, you can ask them below in the "Comments" column.
ATV drownings happen quite often, and the consequences of these drownings are sometimes very deplorable - from electronic failure to engine water hammer. But all this can be avoided if all measures to restore the ATV after drowning are carried out competently and as soon as possible.
The fate of a drowned person can befall everyone, from a beginner to a professional, and absolutely no one is immune from emergencies. Sometimes a harmless 3x3 puddle can turn out to be up to one and a half meters deep, or the ice on the reservoir turns out to be not the thickness that we expected, situations are different. That's why it's always better to go for a ride, fishing or hunting with a partner, it is he who will help you retrieve the vehicle that has gone under water and tow it home.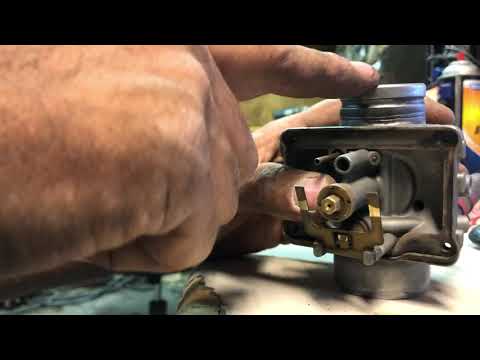 And, of course, it’s not worth taking risks in vain, if there is an opportunity to go around a water obstacle, believe me, it’s better to do it.
So let's get straight to the point.
After the ATV is out of the water, the first step is to disconnect the battery, thereby de-energizing the electrical circuit and protecting expensive electronics from short circuits.
Do not attempt to start the ATV under any circumstances, as this could lead to irreversible damage and costly repairs.
ATV will have to be towed to the garage and the necessary set of measures carried out as soon as possible:
1. Unscrew the air filter cover, drain the water, wipe the housing dry from the inside, dry the filter, soak it with oil and put it back;
2. Thoroughly flush the carburetor with clean gasoline or flushing fluids and blow through the channels;
3. Completely drain the gasoline from the gas tank and rinse with clean gasoline, change the gasoline filter;
4. Unscrew the exhaust pipe, drain the water, clean and dry if necessary;
5. Disconnect all electrical wiring connectors and spill them with silicone grease, it is also necessary to do with the dashboard;
6. Drain the water from the variator, be sure to unscrew the variator cover, you may have to rinse and clean the plates, and also dry the belt;
7. Check the presence of water in the engine. We take out the oil dipstick and evaluate the condition of the oil: when water enters the engine, the oil reacts with water, and the so-called “emulsion” is formed, on the oil dipstick it looks something like this:
8. If an emulsion is detected in the engine, immediately drain the oil and flush the engine, for this you need to stock up on 10 liters of the most common motor mineral water M 8. We unscrew, dry or change the candle, as well as the oil filter;
9. Fill in M 8 oil, connect the battery and turn the starter a couple of times without a spark plug;
10. Next, install the spark plugs and start the engine for 2-3 minutes, then turn off the ATV and drain the oil. The cycle sometimes has to be repeated up to 6-7 times, until the traces of oil completely disappear. As a rule, the first drained oil contains the largest amount of emulsion and looks something like this:
11. As the flush cycles go through, the oil will turn to its normal color, after that, replace the M 8 oil with the one you use constantly, it would be good to temporarily upgrade the oil class to please a flooded engine;
12. Change the oil in the front and rear gearboxes, you may have to change the oil in the gearboxes twice. After the first change, give a small load on the gearboxes, hanging the back and front of the ATV in turn, then change the oil again;
13. Syringe the ATV's suspension and all parts that are equipped with grease fittings;
14. Dry the seat, thoroughly inspect all components of the ATV and eliminate any traces of moisture found.