The suspension on your ATV is crucial to make it ride as pleasantly as possible while still getting the most out of it. When your suspension is working correctly, your machine will be easier to throw around, be more stable, and you’ll be able to ride it faster.
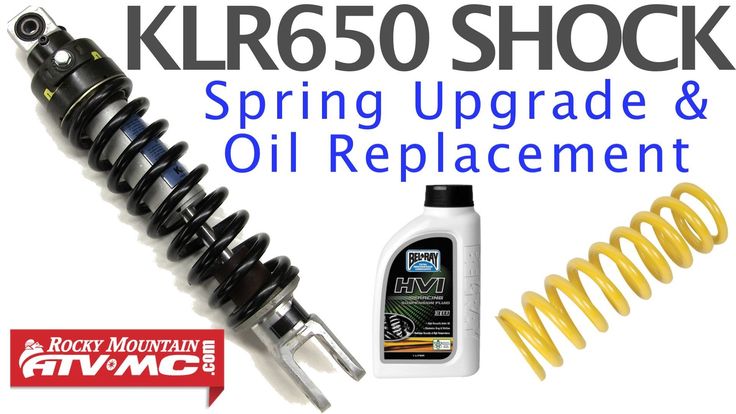
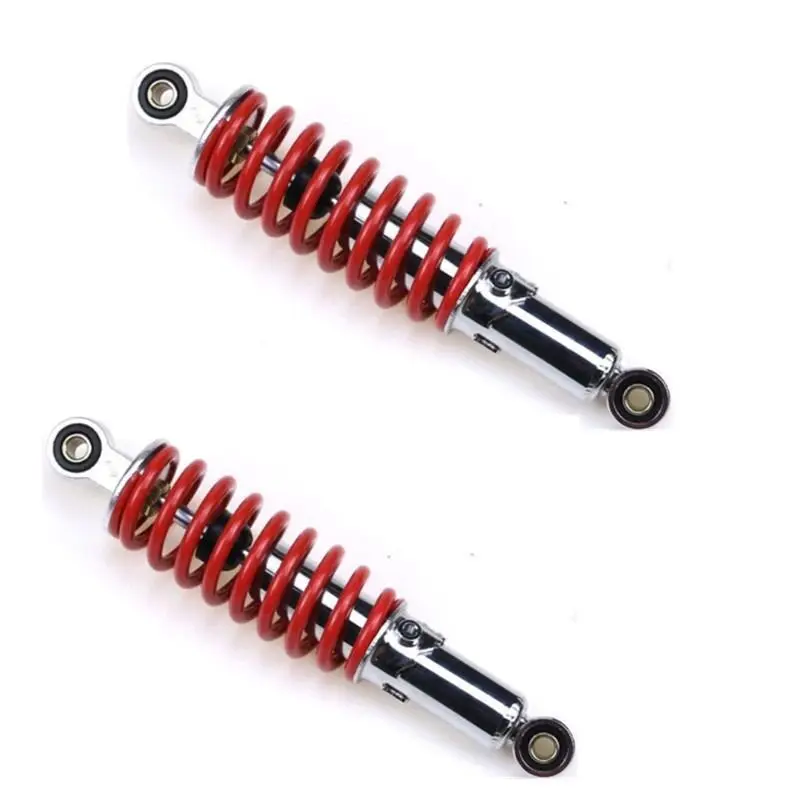
The springs in the shocks are just one of the critical parts. If your shocks are damaged or worn, you can replace the shocks in their entirety. Or, if you only have an issue with the springs, you can often just replace the shock’s springs, saving money.
Standard non-adjustable shocks last around six years or 30,000 miles.
Preload adjustable shocks offer the ability to adjust the spring in the shocks and are more common in UTVs. You’ll get around 8-10 years out of these shocks, or 40,000 miles.
Compression/rebound adjustable shocks have better control over the piston shaft speed. They’ll last up to 13 years or 50,000 miles.
Finally, air shocks don’t have a spring at all and instead use air pressure. They are durable and last about as long as compression/rebound adjustable shocks.
Off-road will keep you dry and safe in water and mud
Find out the best look for you
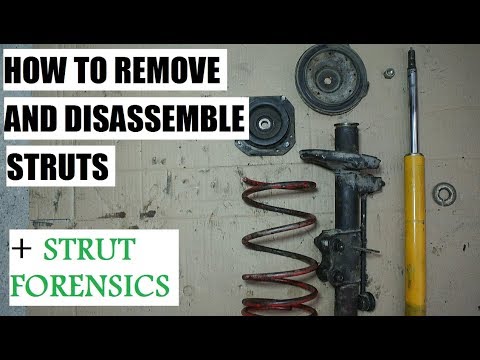
ATV shock springs can become damaged or worn without the rest of the shocks being damaged. Besides the springs, modern shock absorbers have a piston shaft, eyelets, piggyback reservoir, and often a rebound adjuster, preload adjuster, and compression adjuster. You can save money by only replacing your springs.
Sometimes, the stock springs that come with an ATV are too soft or too hard. This is quite common in cheaper mini quad bikes, where the suspension is so hard or soft it’s almost useless. Instead of replacing the entire shock, you can replace the spring with a shorter or longer version, adjusting the hardness of the ride.
As springs wear, they lose their strength.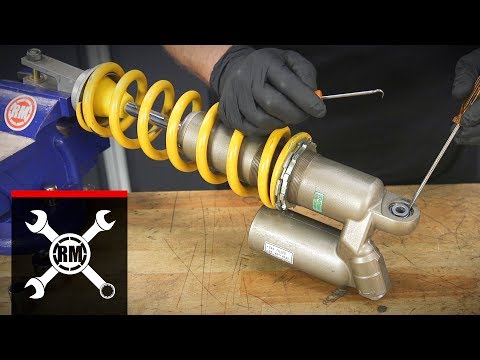 If you find your shocks are beginning to feel mushy, then replacing the spring coils may be the way to go. This mushiness through wear-and-tear is another reason that adjustable shocks tend to last longer. With adjustable preload shocks, you can essentially tighten the spring coil if it feels mushy. Pro adjustable shocks also let you adjust the compression and rebound, so you can perfect how your racing quad feels.
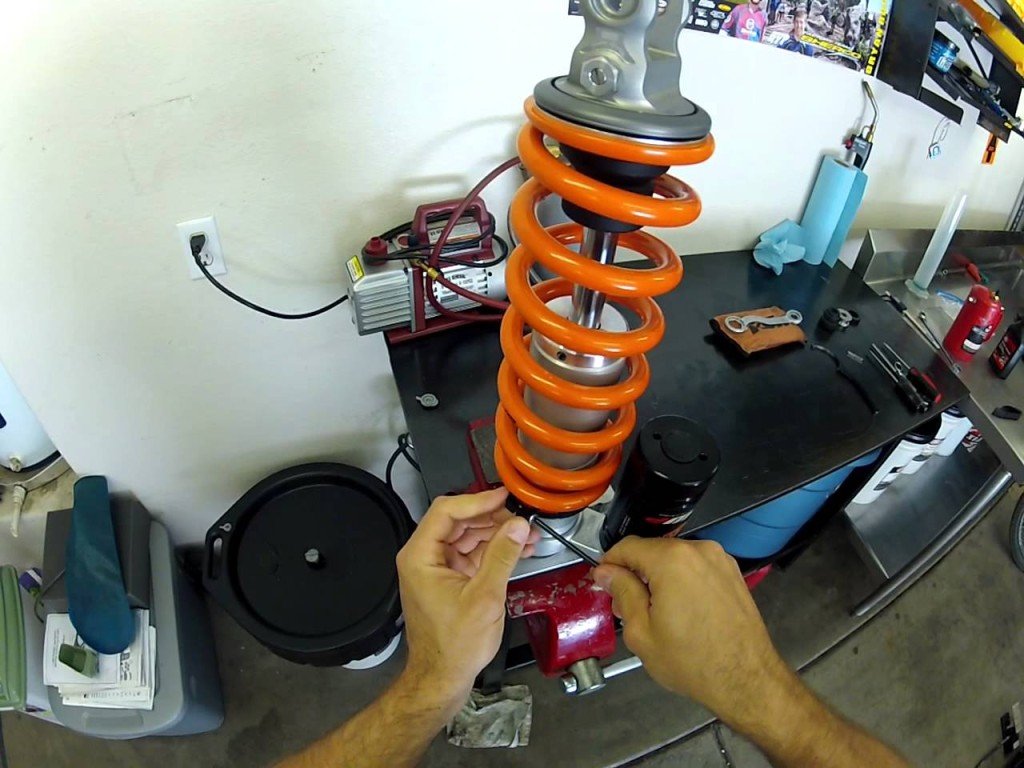
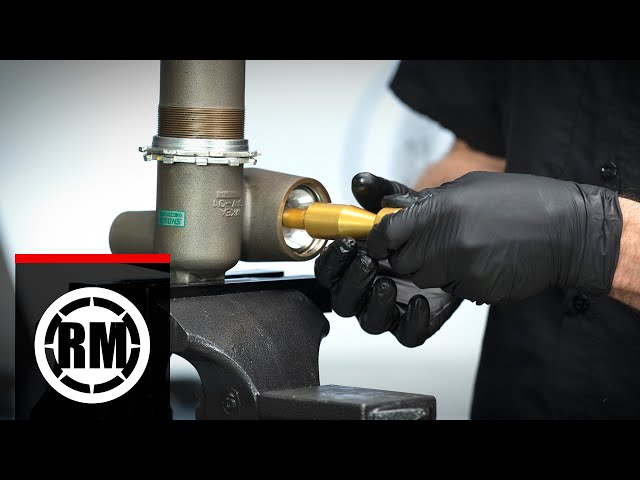
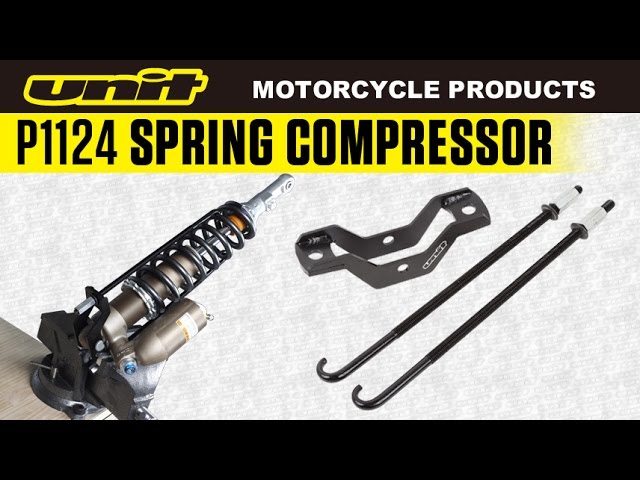
Any difficulty in replacing ATV shock springs comes from compressing the spring. To make things simpler, you can use a shock spring compressor. As it’s a relatively rarely used tool, owners often forego the purchase of a shock spring compressor and use ratchet straps instead.
To replace ATV shocks using this method, you’ll need a strong vice and four ratchet straps.
1. Remove the shock and place it securely in the vice.
2. Straighten your first ratchet strap. Fish it through the top coil of the spring and bring it all the way to the bottom of the spring. Tighten the ratchet strap a little, just enough to hold it in place.
3. Do the same thing for your other three ratchet straps, so there is a loosely-connected ratchet strap evenly all away around the shock.
4. Now all four straps have been connected, begin tightening each belt a little. Adjust straps that are across from each other simultaneously, so all four straps are tightened together at a similar pressure.
5. Keep tightening the ratchet straps until the ring at the top of the spring is loose.
6. Remove the ring, and you’ll be able to remove the spring from the shock altogether. Be careful to handle the spring gently, as the four ratchet straps still compress it.
7. Remove the ratchet straps carefully. Remember, there’s still some pressure in the spring.
8. Follow the same steps to add the four ratchet straps to your new spring.
9. Tighten the four ratchet straps in the same manner until the new spring is short enough to fit into the shock.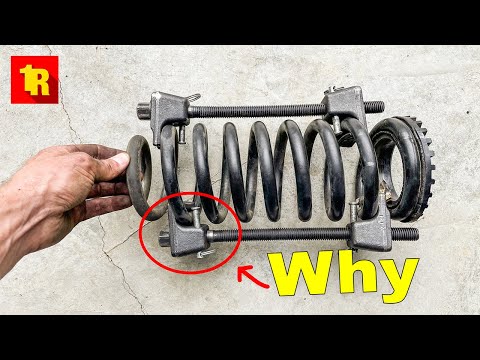
10. Fit the new spring and re-add the ring that holds it in place.
11. Carefully loosen the ratchet straps one by one. The spring will decompress at speed, so keep your fingers away from the ring.
HIT
ENDURO LIGHT Graphite
the most durable
458 EUR
HIT
ENDURO Camogrey
the most durable
657 EUR
ENDURO Graphite
the most durable
279 EUR
HIT
ENDURO Graphite
the most durable
657 EUR
AQUAMASTER-ZIP LIGHT Camogrey
with central zipper
598 EUR
ENDURO LIGHT Camogrey
the most durable
0 EUR
AQUAMASTER LIGHT Red
reliability & comfort
438 EUR
NEODRY Black
NEOPRENE SOCKS
17 EUR
11. 90 EUR
ENDURO Camogrey
the most durable
279 EUR
AQUAMASTER Blue
reliability & comfort
647 EUR
-20%
HIT
AQUAMASTER Red
reliability & comfort
259 EUR
207.20 EUR
-40%
HIT
AQUAMASTER Orange
reliability & comfort
259 EUR
155.40 EUR
AQUAMASTER Red
reliability & comfort
677 EUR
ENDURO BF Camogrey
bootfoot waders
528 EUR
ALL SEASON Black
HIGH-ACTIVITY THERMAL UNDERWEAR
69 EUR
ENDURO BF Camogrey
bootfoot waders
329 EUR
MUDWAY Graphite
RELIABLE JACKET
179 EUR
MUDWAY Camogrey
RELIABLE JACKET
179 EUR
NEOSENSOR Camoarmy
SEMI FINGERLESS GLOVES
12 EUR
8. 40 EUR
MUDWAY Red
RELIABLE JACKET
179 EUR
Explore all
Are you in the market for a UTV? Get 10 Tips Before Making a Purchase:
Name
Please enter your name.
Email Address
Please enter a valid email address.
Get your tips today!
Thanks for subscribing! Please check your email for further instructions.
Something went wrong. Please check your entries and try again.
* All trademarked names are the property of their respective owners and may be registered marks in some countries. No affiliation or endorsement claim, express or implied, is made by their use. All products advertised here are developed by AMSOIL for use in the applications shown.
UTV Services
6596 S 1460 W
Taylorsville, Utah 84123
By Appointment Only
M-F 9 a.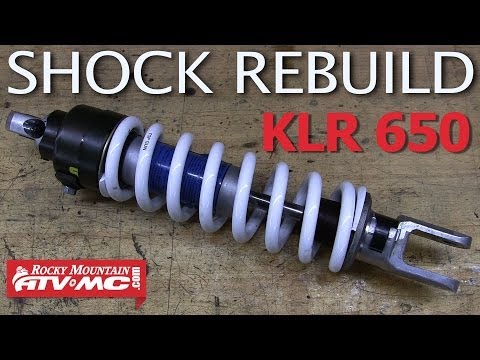 m.- 4 p.m.
Saturday appointment
Sunday Closed
Call:
801-410-0599
Email:
[email protected]
© 2019 UTV ATV Repair. All Rights Reserved. Site by WebCami
 Not only the operation of the ATV suspension, but also the life of the driver depends on the serviceability of the ball joint. Like any suspension part, the ball joint requires proper attention, especially in aggressive driving conditions. The main reason for the failure of the ball joint is the rupture of the anther and the ingress of water and dirt into the joint. Be sure to monitor the condition of the anthers, the integrity of the anther is an increase in the service life of the ball joint. Some craftsmen manage to adapt ball joints from domestic cars, weld cups and, with the help of familiar turners, regrind the liners. Change or repair, it's up to you, but we believe that safety comes first and should not be saved on this. Turning to us for help in choosing ball joints, you may be pleasantly surprised that you can purchase and replace original ball joints on an ATV in our workshop for almost the same money that you would spend on their repair.
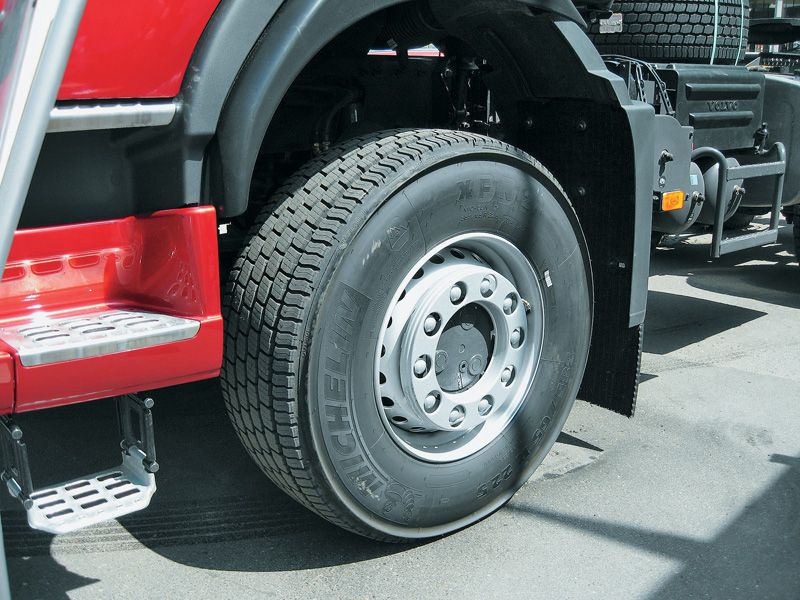
 If you heard that a distinct hum appeared at the place where the wheels were attached, then it's time to change the bearing, and possibly more than one. The price range of bearings is quite wide, it all depends on the manufacturer and the brand, but you need to understand that the brand will not protect you from constant diving into the mud, but can last as long as the Chinese counterpart. An elementary consultation with our specialists will allow you to get complete information on the selection of bearings for an ATV, and, if desired, perform repairs.
 Leave a request for service
 We only welcome such experiments and with pleasure we can suggest a way out in a given situation. American and Japanese manufacturers of spare parts for ATVs, through trial and error, have developed pretty good tie rods and tips, so we still recommend choosing them.
 The main thing is to know the volume and prevent oil overflow, otherwise get ready to replace the gearbox oil seals. What kind of oil to fill? Both gear and ordinary motor oil (preferably synthetic or semi-synthetic) do their job equally well. It is desirable to change more often, and thereby prevent water from entering the gearbox. If someone uses an ATV seasonally, then at the end of the season we recommend that you change the oil. You can get advice or sign up for an oil change by calling the QUADMASTER service.
Almost every car owner is concerned about the same question - when is it necessary to replace the shock absorber and whether it is necessary at all. In this article, we will not only answer it, but also analyze in detail the main signs of a decrease in the performance of a shock absorber. So, let's start:
Experienced motorists distinguish two types of shock absorber failure factors - obvious and behavioral. The first - those changes in the design that can be determined visually, the second - appear when the car is moving, they, as they say, "can be felt for yourself." Let's consider each of them in more detail.
Visual signs of rack failure:
Shock absorber failure behavioral factors:
1. Vehicle pitch.
2. Swing during acceleration.
3. Rigidity, shaking while driving.
4. Deviation from the straight path.
5. Body roll.
6. Suspension breakdowns.
7. Tire wear.
8. Loss of clutch.
You should know that the shock absorber, like all car parts, is prone to wear. Many manufacturers recommend checking this design every 20-30 thousand km.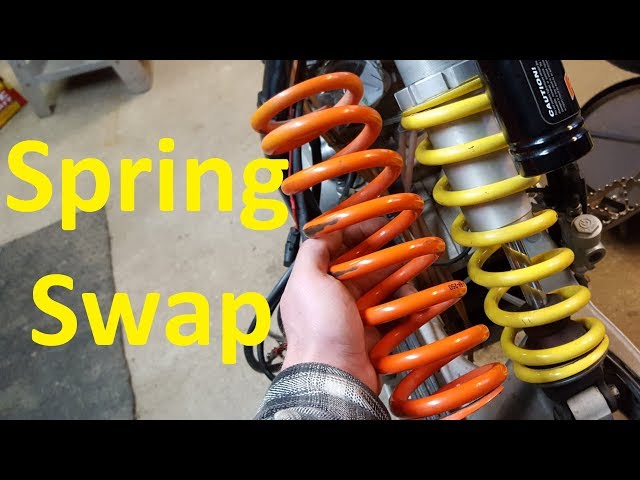 run. As for the replacement, the approximate wear time of the shock absorber is 60-100 thousand km. At this stage, we recommend that you inspect the device more carefully and replace it if necessary.
If you want to maximize the life of the shock absorber, the experts of our online store advise you to follow the following rules:
| Operation | After every use | At the end of the season | Annually |
| Thorough cleaning of the compression buffer area | Yes | Yes | Yes |
| External cleaning | Yes | Yes | Yes |
| Check stem for damage or corrosion | Verification | Check/Replace | Check/Replace |
| Check sealing head for leaks or loose fitting | Verification | Verification | Verification |
| Check all fasteners for looseness | Verification | Verification | Verification |
| Inspection of bearing hinges | Verification | Verification | Verification |
| Oil change, piston, ring, internal maintenance, oil pressure check | Every six months or a year depending on the conditions of use ( carried out by an authorized repair service ) | ||
Buying a new shock absorber does not guarantee efficient vehicle performance.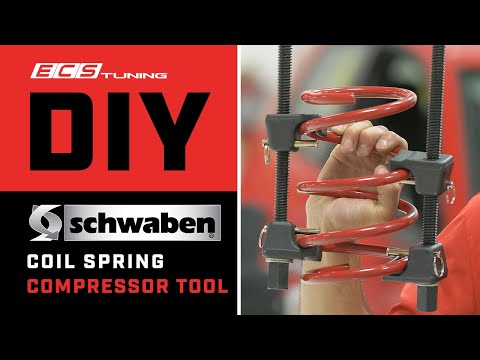 Even the highest quality rack can fail if installed incorrectly. Therefore, if you do not trust the car service workers and decide to replace the shock absorber yourself, we suggest that you follow the following step-by-step instructions:
1. Unscrew the screws securing the air filter cover and slide the clamps.
2. Unscrew the vacuum sensor and disconnect the connector from it.
3 . Disconnect the clamp securing the air supply pipe and, in fact, the pipe itself.
4. Remove the air filter cover and cover the air inlet with a microfiber cloth to keep dust and dirt out of the system.
5. Clean and slightly loosen the suspension strut upper mountings.
6. Raise the front of the vehicle and secure it on stands.
7. Remove the wheel bolts.
8. Clean the mounting of the ABS sensor and the brake hose.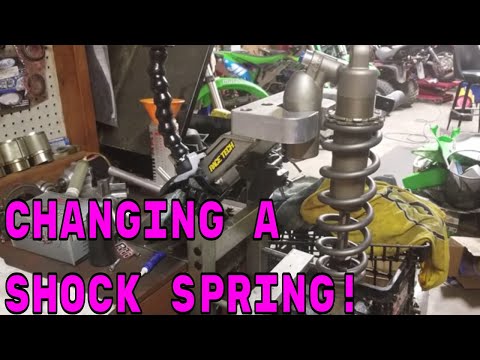
9. Disconnect the electrical wiring and brake hose from the bracket on the suspension strut.
10. Clean the mounting of the stabilizer link to the suspension strut and steering knuckle. Remove the rod from the device.
11. Unscrew the shock absorber strut lower mounting to the steering knuckle and support the steering knuckle with a hydraulic strut.
12. Remove the mounting bolts and disconnect the steering knuckle from the suspension strut.
13. Unscrew the top mount of the rack post.
14. Remove the shock absorber.
15. Install the new damper in the wheel housing.
16. Screw in the upper shock absorber mount. Don't over tighten.
17. Finish the knuckle strut seat and mounting (use a metal brush). Fix the structure.
18.